
Exploring the Inland Sea
| Monsters | HP |
|---|---|
| Man o’ War | ~50 |
| Wizened Wizard | ~55 |
| Coralossus | ~230 |
| Merman | ~102 |
| Drake Slime (Day only) | ~63 |
| Miasma (Night only) | ~80 |
| Squid Kid | ~54 |
| Cyclown | ~67 |
| Brollyminator | ~67 |
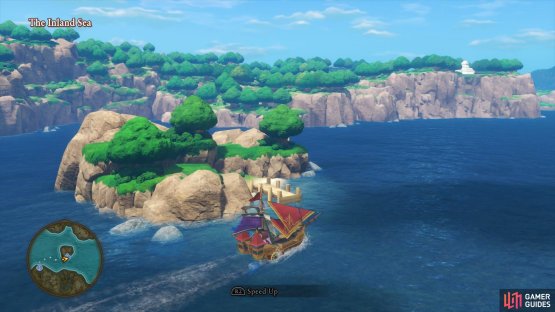
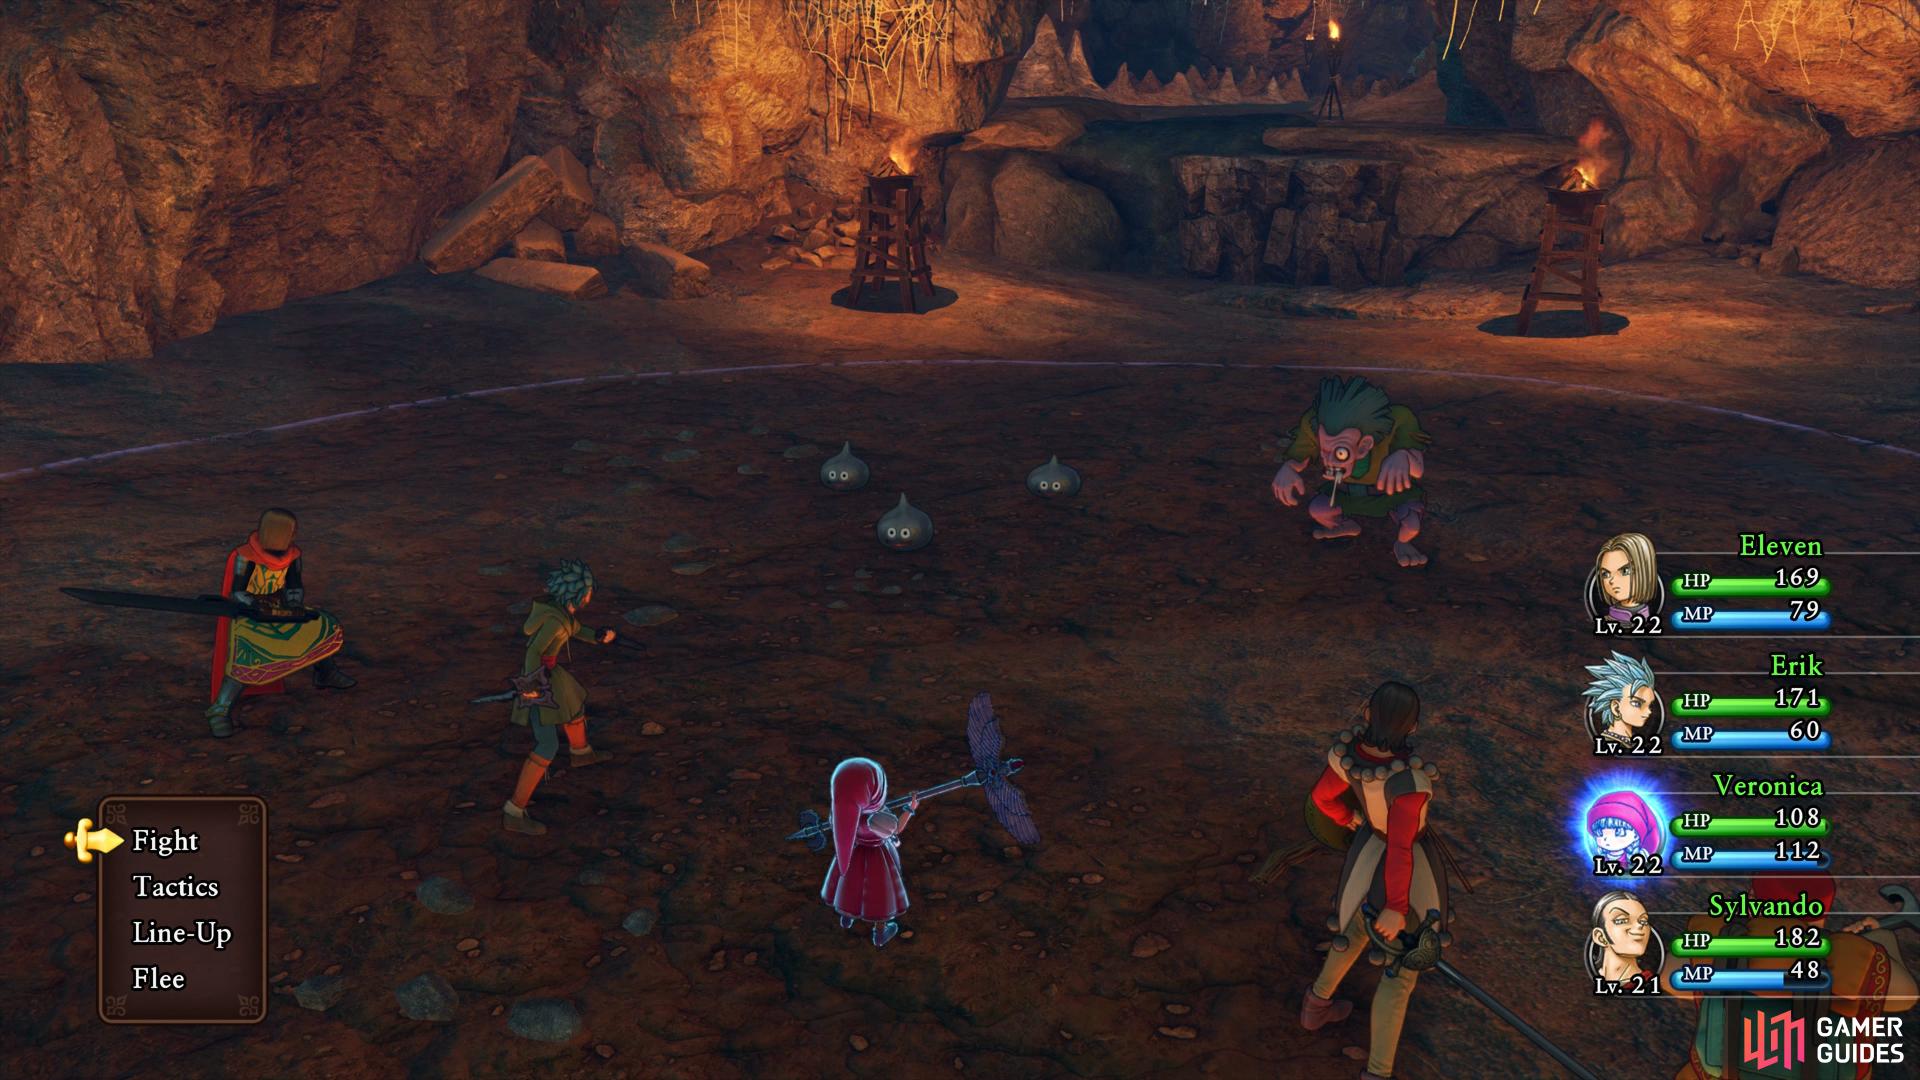
You’ll finally have a ship at your disposal and with it, the ability to travel to other islands. If you open up your map, you’ll see that you can Zoom back to Gondolia (sea) to gain access easier to The Inland Sea. You won’t see monsters while travelling in the ship, instead they’ll be random encounters that you cannot avoid so be sure to keep your HP relatively full at all times.
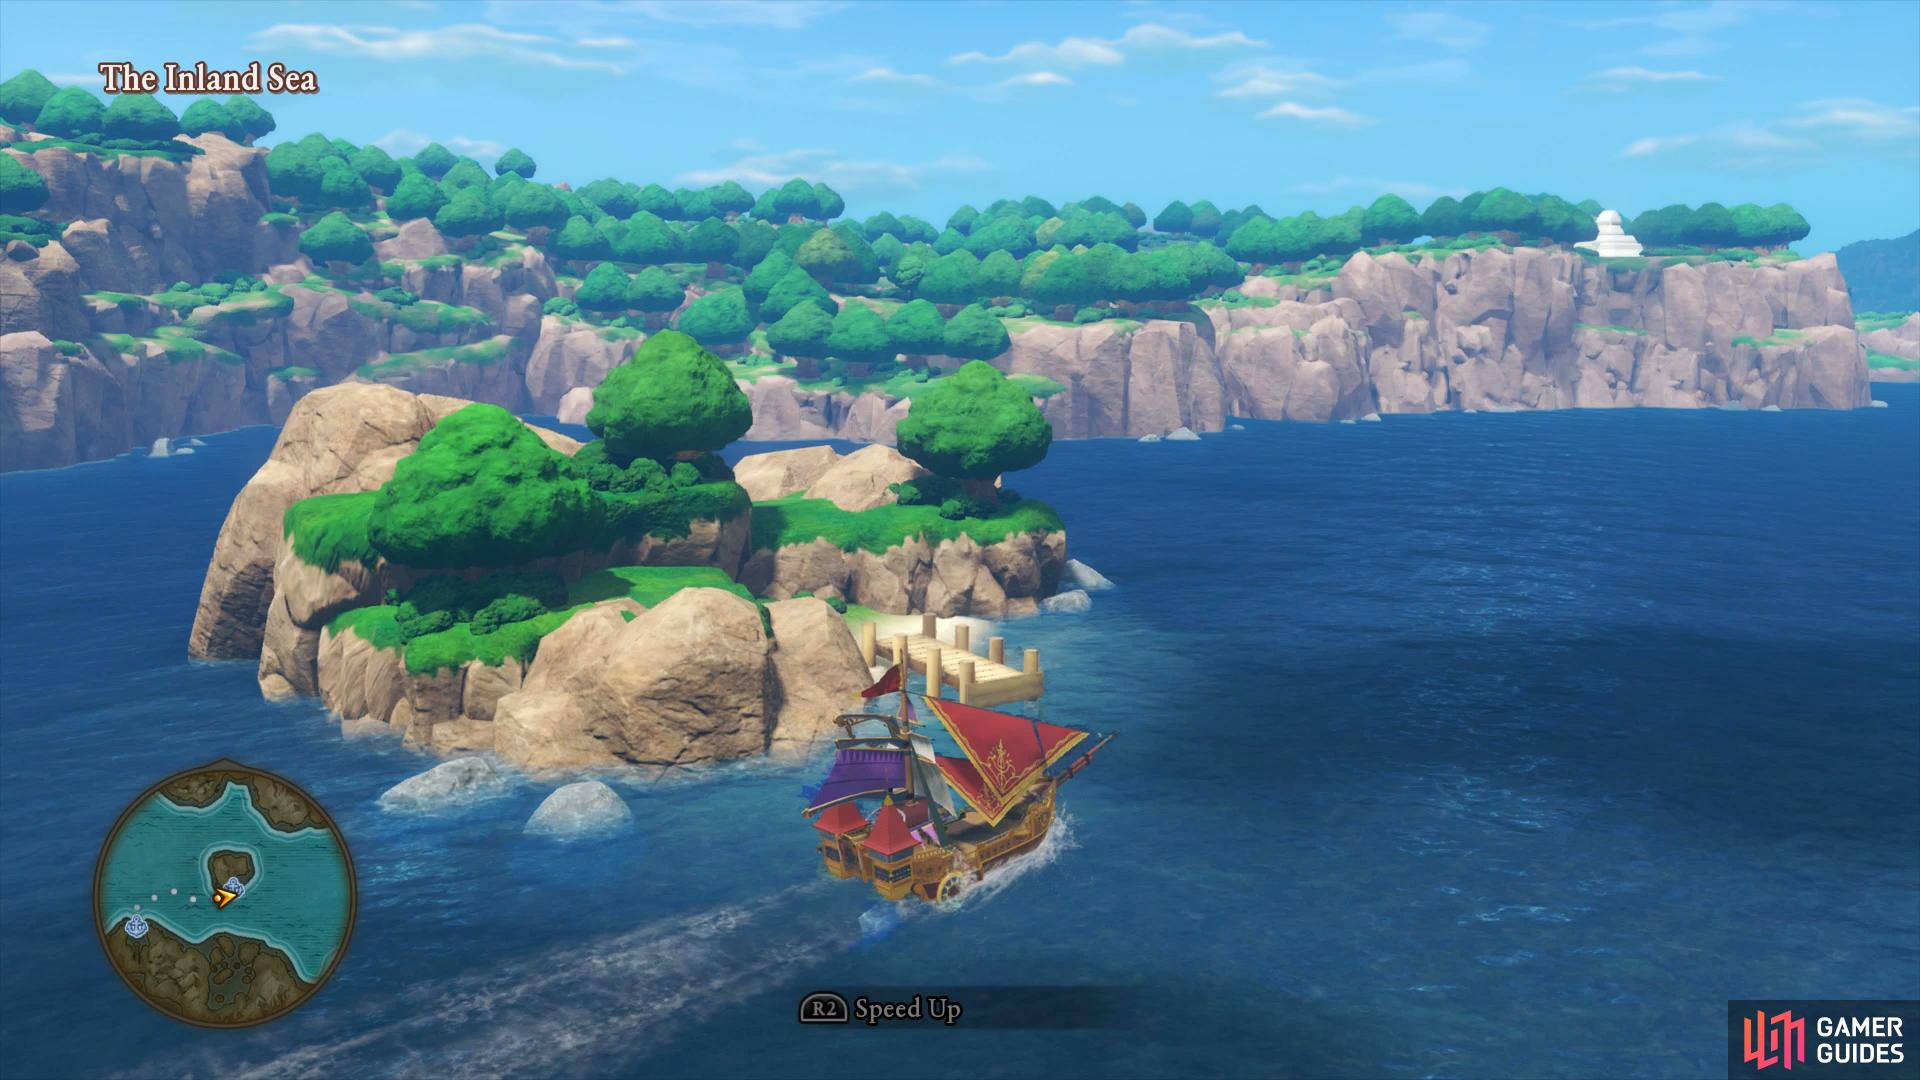
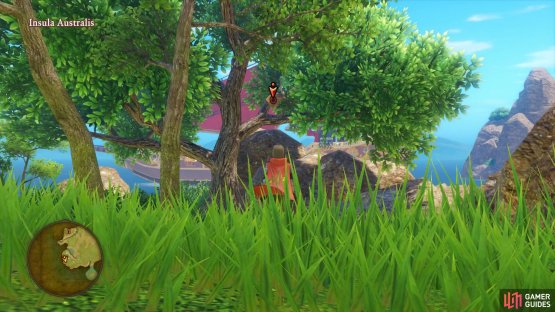
The monsters you can encounter in The Inland Sea are not too difficult however note that the Coralossus that you defeated back at the previous dungeon are now regular monsters here. Beware of the Brollyminators as you approach your destination, these nasty monsters can deal hefty damage with Wind Sickles. Your destination for now is the region of Zwaardsrust located far to the northeast of Gondolia however there’s one short stop on the way. As you begin sailing in the direction of Zwaardsrust you’ll notice a small island you can dock at.
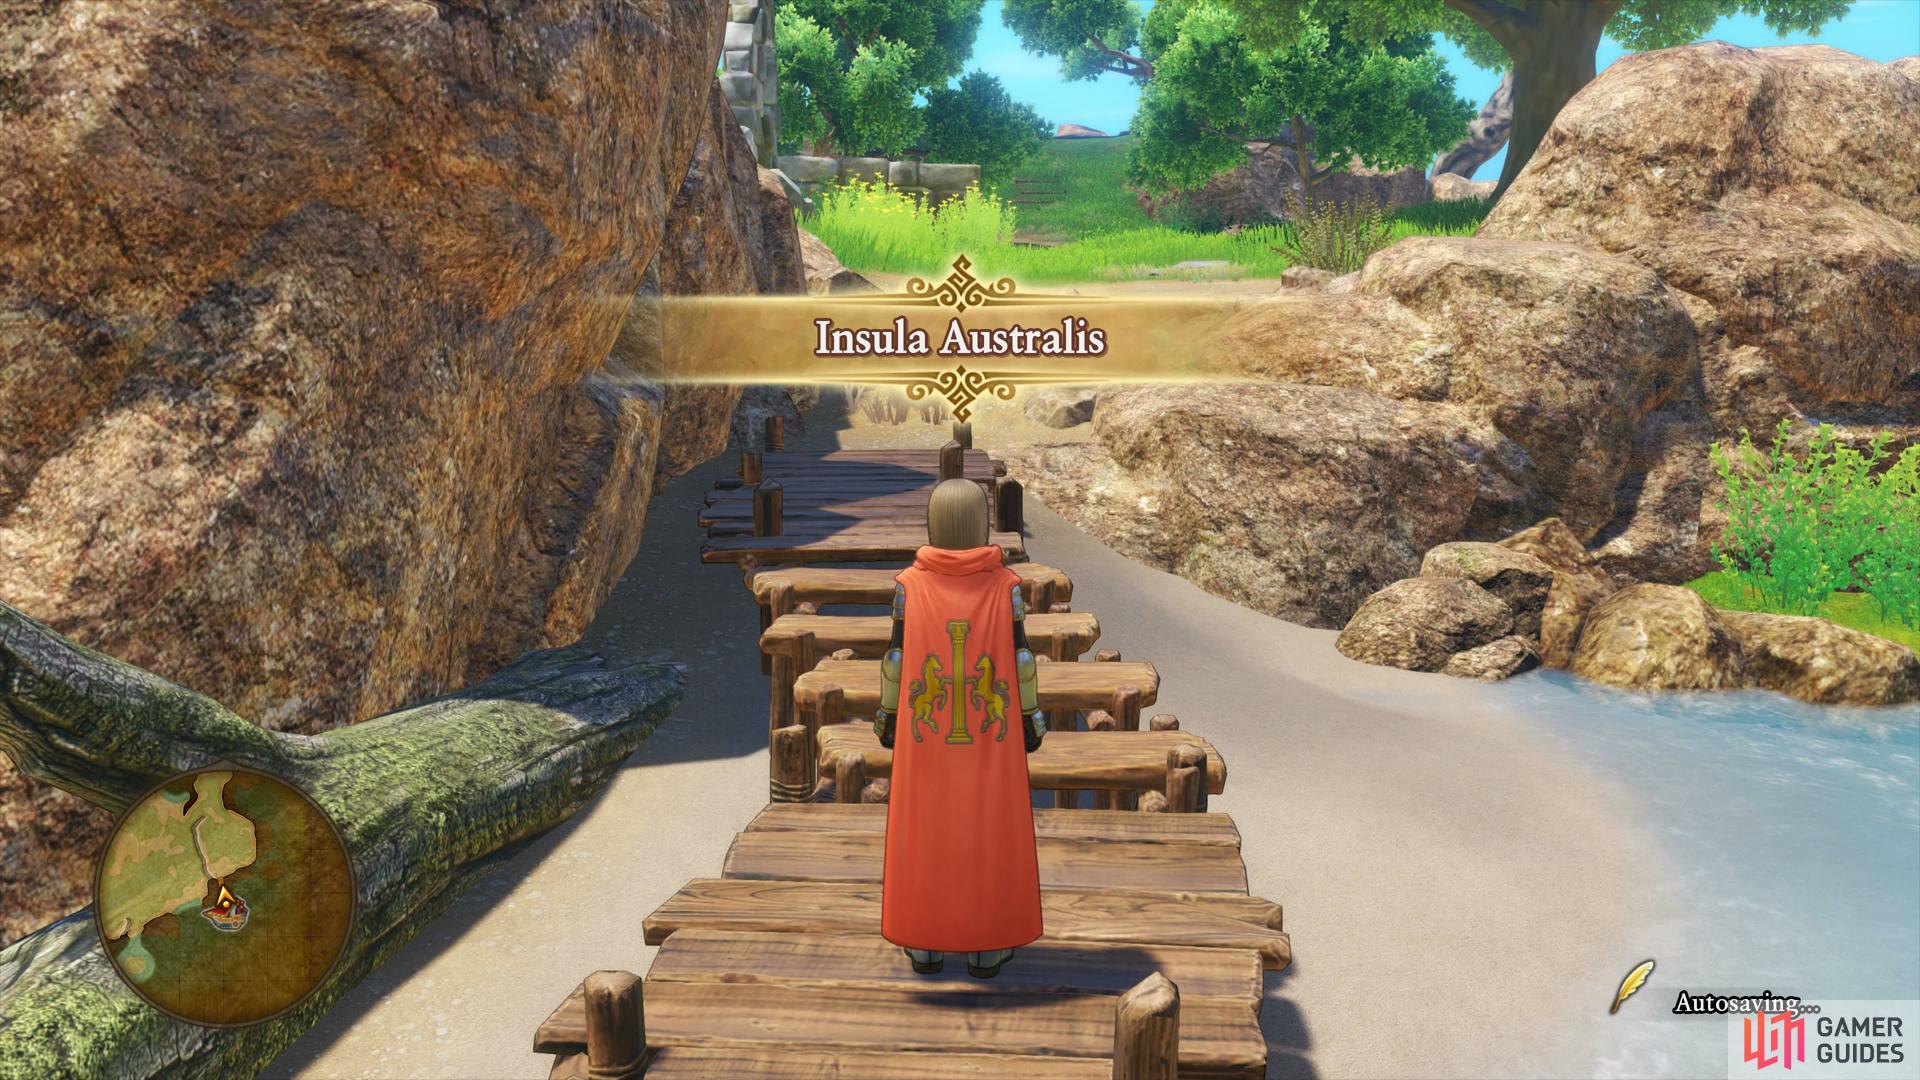
Insula Australis

(1 of 2) You’ll find this island north-east from the Gondolia dock
You’ll find this island north-east from the Gondolia dock (left), there’s a new Recipe to nab here. (right)
| Items | Area |
|---|---|
| Rings Around the World | Southern island, chest |
| Sparkly Spots | Area |
|---|---|
| Glass Frit | Northeast from Dock |
| Royal Soil | North from Dock |
| Waveweed, Faerie Fluff x2 | Flower gathering point |
| Monsters | HP |
|---|---|
| Weartiger | ~90 |
| Wizened Wizard | ~55 |
| Grublin | ~61 |
This is just a small island with a few treasures to snag before you continue your journey. There is only one new monster to encounter here, the Grublin and he’s nothing to worry about aside from being able to call for more allies to join him in battle.
From the dock, head north and search behind the small wall to your right to find a Sparkly Spot containing a Glass Frit. Continue north up the small hill to another Sparkly Spot housing a Royal Soil before heading across the island to the western edge. The door here is locked so you’ll have to return later however drop down from it and leap over the log to the edge of the island where you can locate a Flower gathering point containing a Waveweed and two Faerie Fluffs.

(1 of 2) You can find a chest to the south with a new Recipe Book
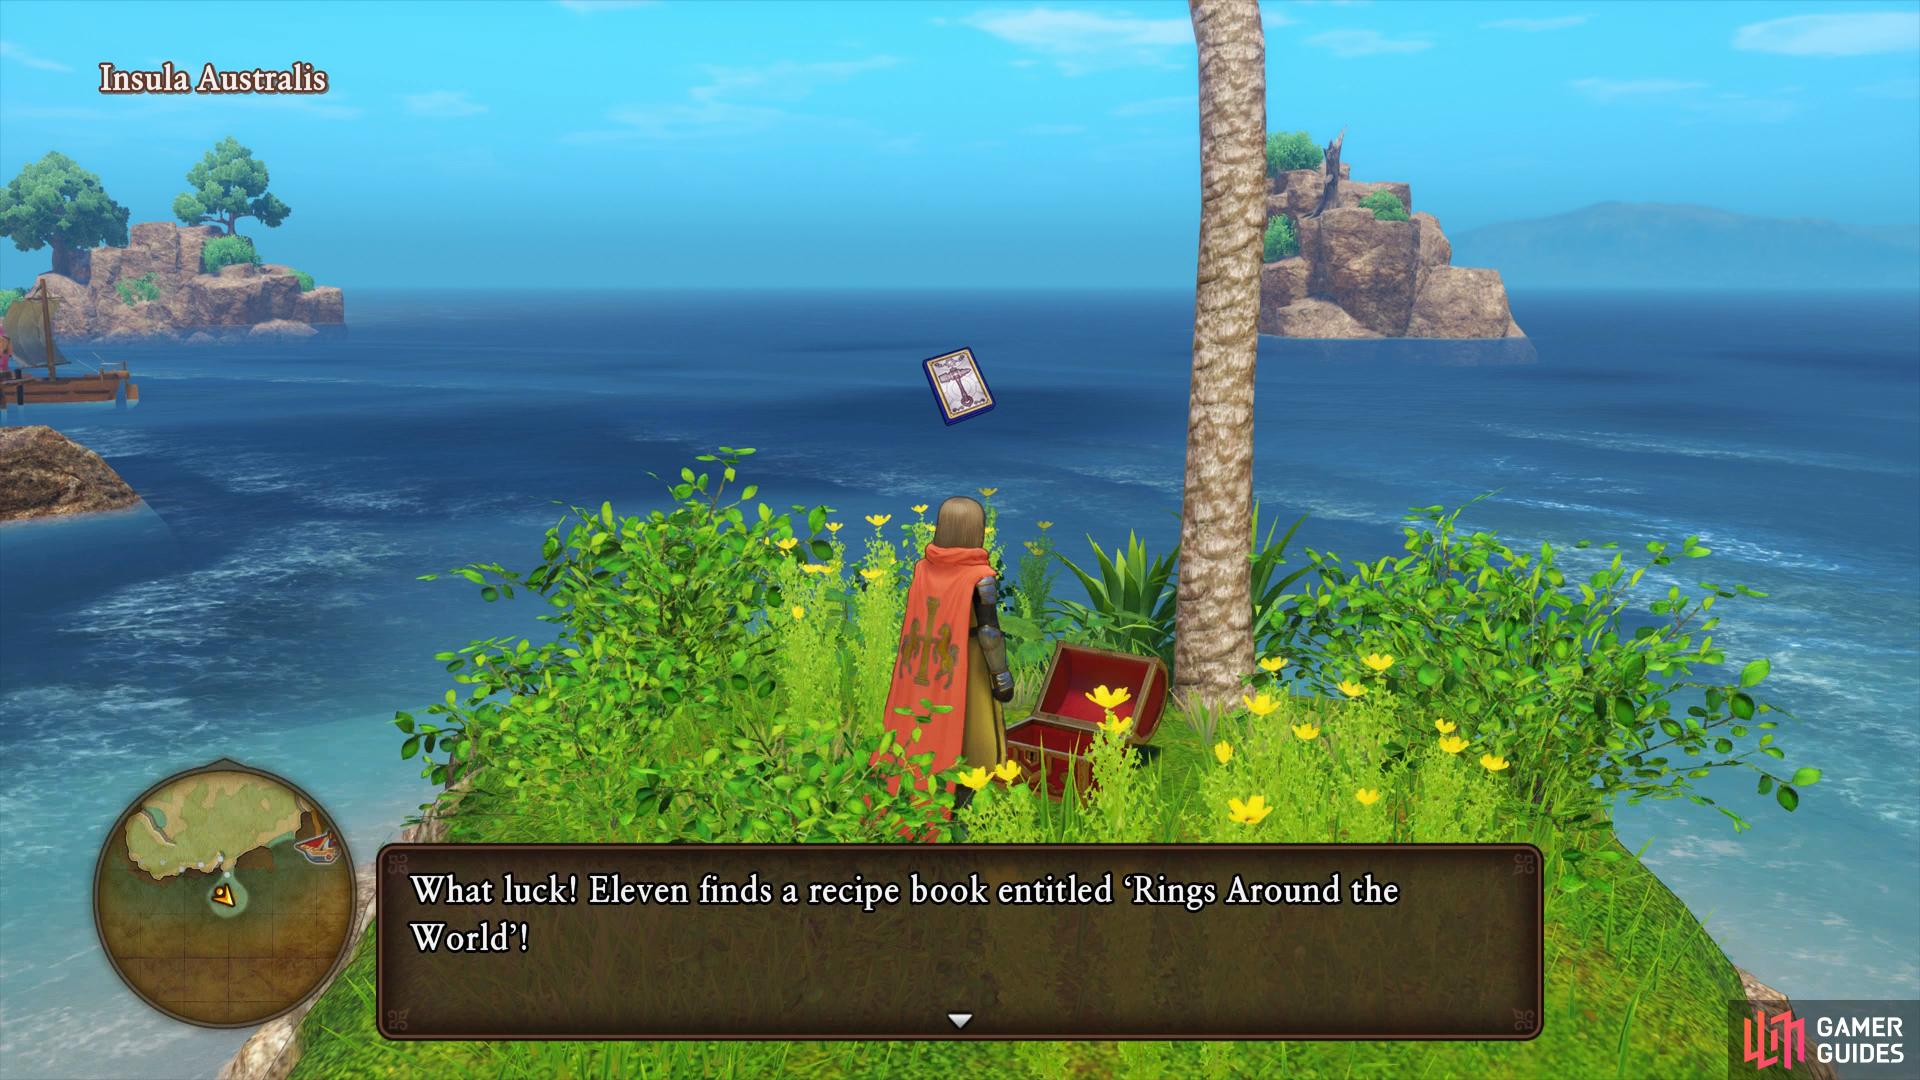

You can find a chest to the south with a new Recipe Book (left), along with your first Crossbow Target for the Insula Isles. (right)
Continue south while hugging the western edge of the island and head up the hill to find the final Sparkly Spot containing another Waveweed. Turn around and look up at the nearby tree here to spot a Crossbow Target and then head southeast from here to a small island just off the southern edge where a chest awaits, open it up to obtain your next Recipe Book, Rings Around the World which will allow you to forge a Strength Ring, Prayer Ring and an Agility Ring.
You’ve looted this island for now so return to the dock and board the Ship once more. Continue to sail to your destination, located far to the northeast. You’ll notice a vortex of light in the sea as you make your way there, you won’t be able to use this for now but it will become important shortly.
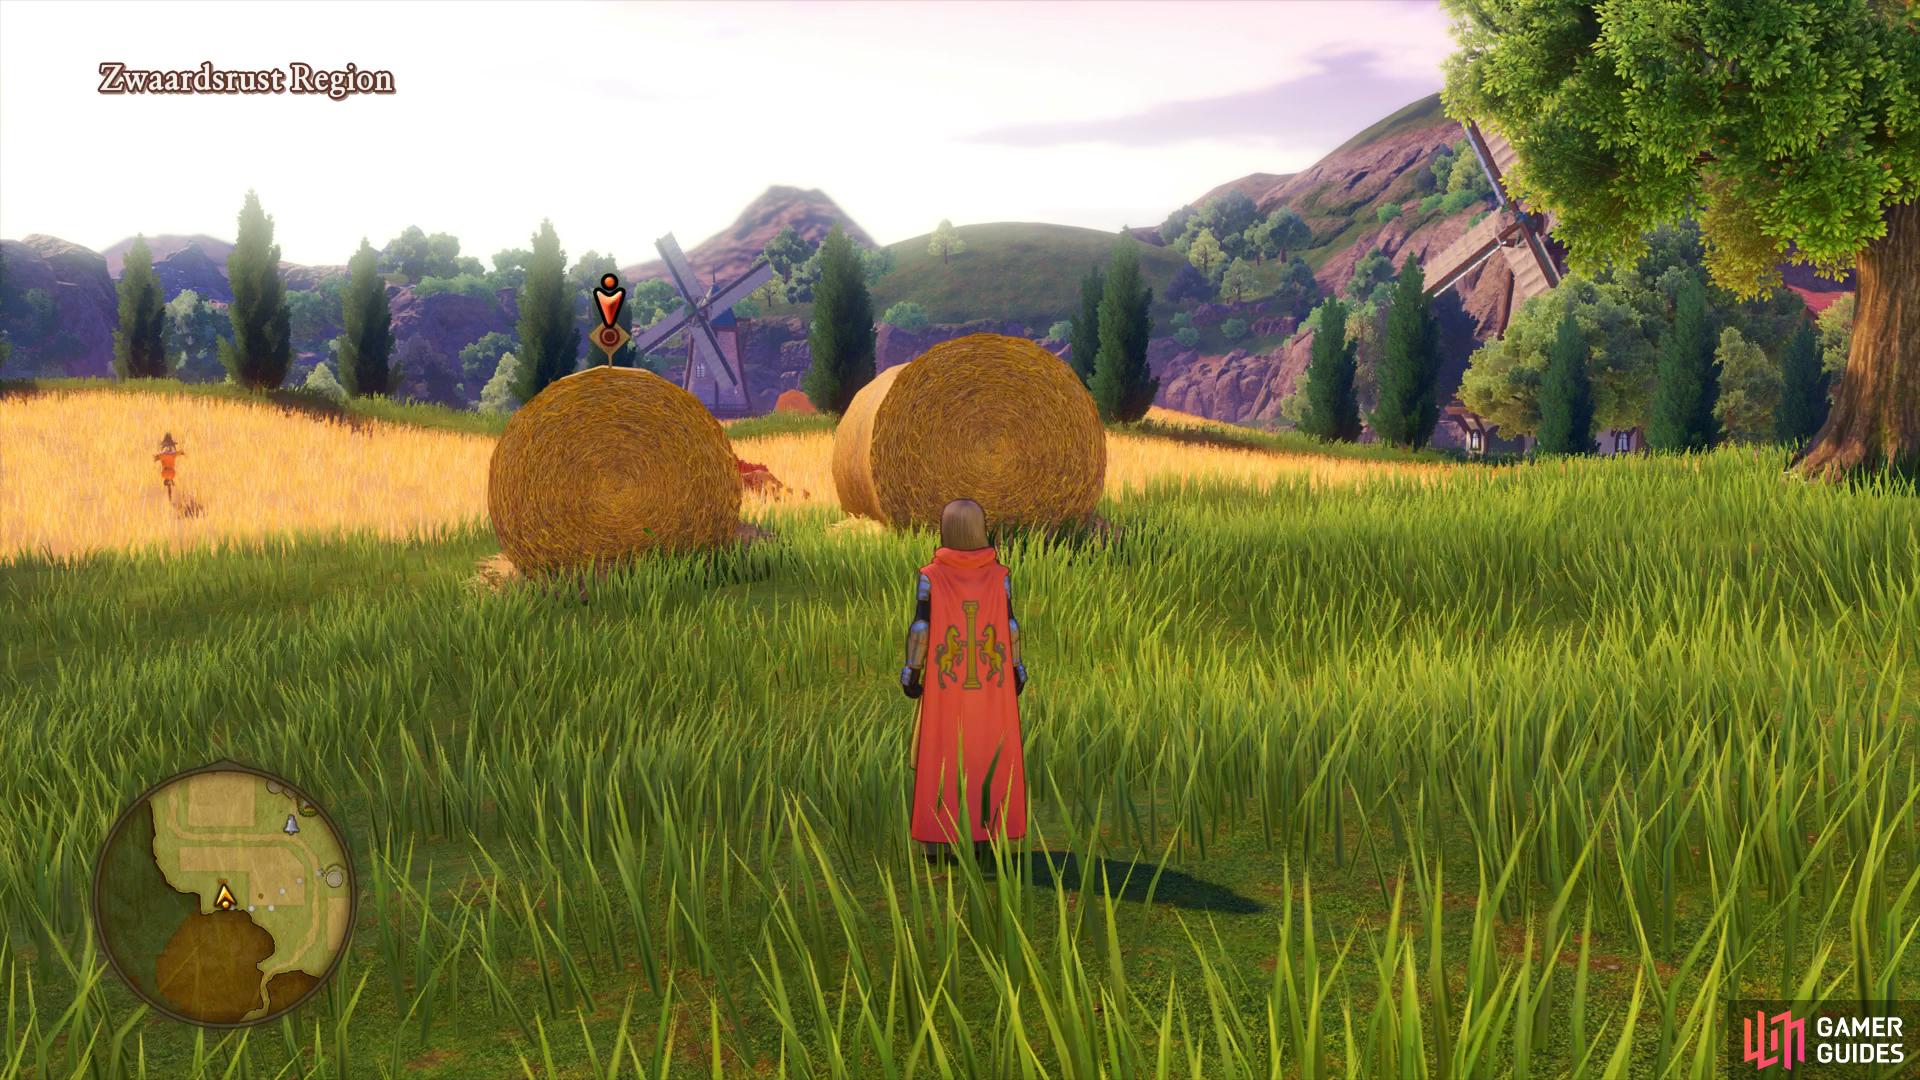
Zwaardsrust Region
| Items | Area |
|---|---|
| 14G | South dock, inside the hut, barrel |
| Magic Water | South dock, inside the hut, wardrobe |
| Belle Cap | Behind windmill, barrel |
| Strong Medicine | Warrior’s Rest Inn, barrel |
| Smithing with Steel | Warrior’s Rest Inn, bookshelf |
| Mini Medal | Warrior’s Rest Inn, chest |
| Faerie Fluff | Warrior’s Rest Inn, pot |
| 30G | Warrior’s Rest Inn, pot |
| Purple Eye | Ruins west of Warrior’s Rest Inn, chest |
| 1500G | Western exit, chest |
| Sparkly Spots | Area |
|---|---|
| Butterfly Wing | Southwest of windmill |
| Butterfly Wing | East of windmill |
| Silver Ore x2, Iron Ore | Ore gathering point, southwest of Warrior’s Rest Inn |
| Mini Medal | Hidden in field of hay west of Warrior’s Rest Inn |
| Dieamend | On balcony of windmill west of Warrior’s Rest Inn |
| Gold Ore | Warrior’s Rest Inn, inside the well |
| Butterfly Wing, Narspicious, Coagulant | Northeast, Tree gathering point |
| Coagulant | Northwest |
| Royal Soil | Ruins west of Warrior’s Rest Inn |
| Royal Soil | Ruins west of Warrior’s Rest Inn |
| Monsters | HP |
|---|---|
| Great Sabrecat | ~76 |
| Grim Gyphon | ~63 |
| Cyclown | ~67 |
| Grublin (Day only) | ~61 |
| Bite Bulb | ~72 |
| Hocus Chimera (Day only) | ~67 |
| Tap Devil | ~61 |
| Stone Golem | ~105 |
| Deadnaut (Night only) | ~102 |
| Hood (Night only) | ~109 |
Zwaardsrust is a large region that connects to another large region, its for that reason that you’ll be seeing a lot of this place. The monsters take a step up here, if you’re not around levels 18-20 by now then consider taking some time to increase your levels. Of particular note is the Tap Devils, these monsters can not only cause your entire party to lose their sense and dance uncontrollably but also Curse the entire party, make these beasts your main priority in battle.
As you depart from the ship, head inside the hut to find 14G in a barrel and a Magic Water from the wardrobe. Leave the hut and begin to head north through the linear path and as it opens up, search near the wall to the left to find a Sparkly Spot containing a Butterfly Wing. Your next Weather Cow is here, be sure to speak to it and then head east to the edge of the cliff and follow it north to the next Sparkly Spot housing another Butterfly Wing.
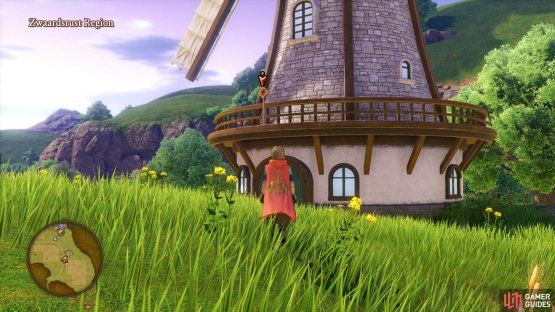
(1 of 2) The first windmill you come to will have a Crossbow Target on

The first windmill you come to will have a Crossbow Target on (left), the second can be found sitting in front of the Ore gathering point to the south-west. (right)
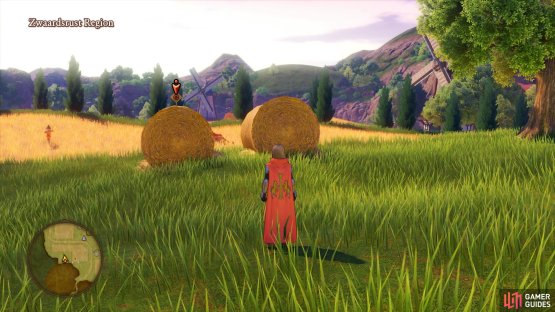
North-west from this last spot is a windmill, head over to it and look just above the door to spot the first Crossbow Target of this region. Head around back now to find a barrel containing a Belle Cap. Make a quick trip to the southwest corner of this area where you’ll see an Ore gathering point, crack it open to obtain two Silver Ores and an Iron Ore. Turn your camera to the north from here and look on top of the nearest hay bale to spot the next Crossbow Target. Make your way over to the field just west of the Inn to the northeast and search very carefully in the center, there’s a hard to see Mini Medal that you can pick up. The best way to find this is at night and by moving slowly southeast from the hay bale in the field. Now make your way over to the Warrior’s Rest Inn to the east of this field.
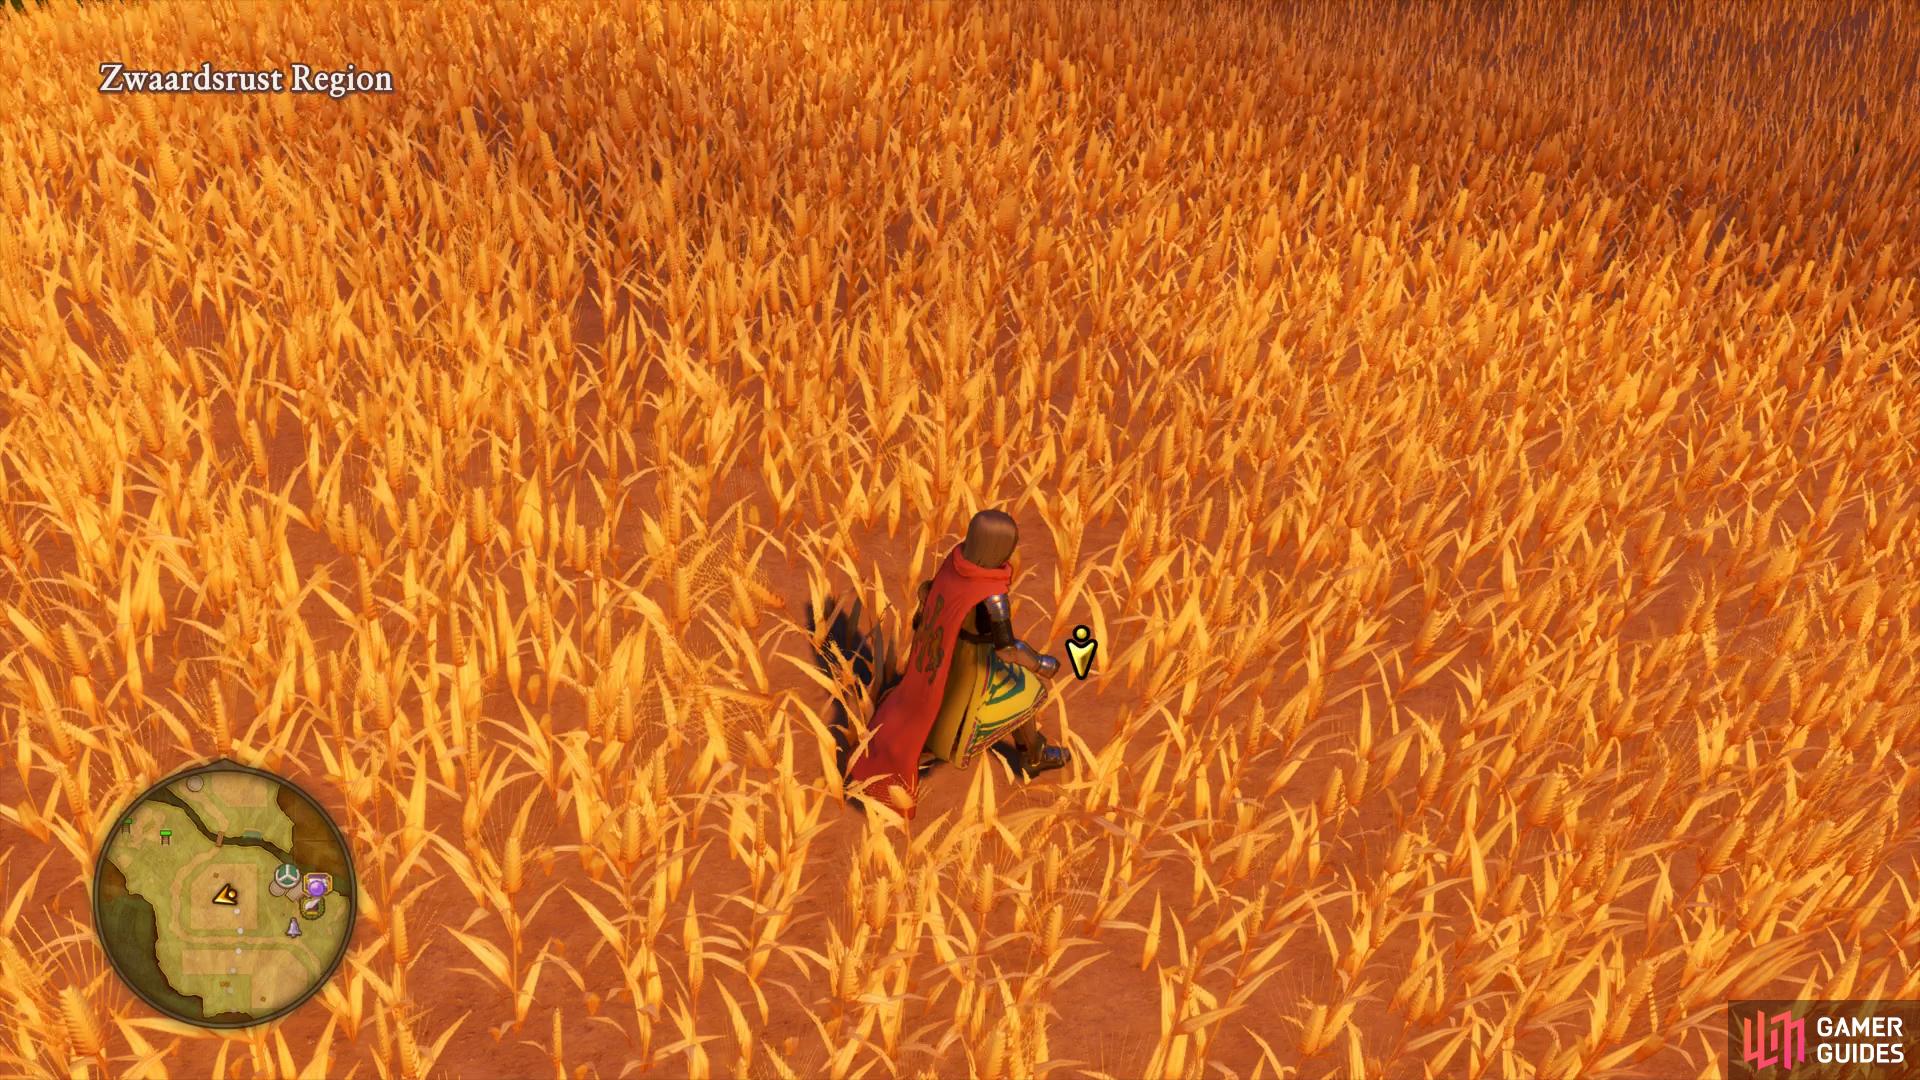
This Mini Medal doesn’t sparkle so you’ll have to look very carefully to find this hidden item.
The Warrior’s Rest Inn
This Inn is actually a Zoom destination and acts as the best way to travel back to this region. Inside the Inn you can rest up and save your game if need before you check the Item shop just outside. The only new item of real note is the new dagger for Erik, it’s low in attack power (in fact its the lowest in the game) but it features a unique property, it can cause instant death at a 4% chance. You can increase this even further to +7% through reworking however it’s still probably not worth the hassle unless you have the ability to equip two Knives on Erik.
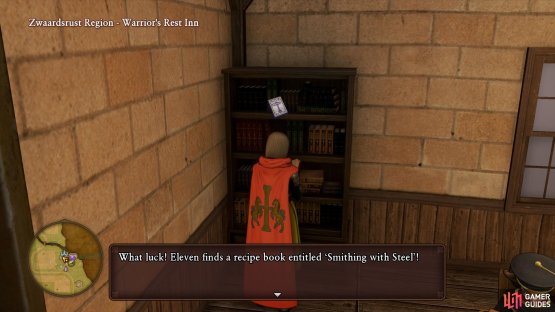
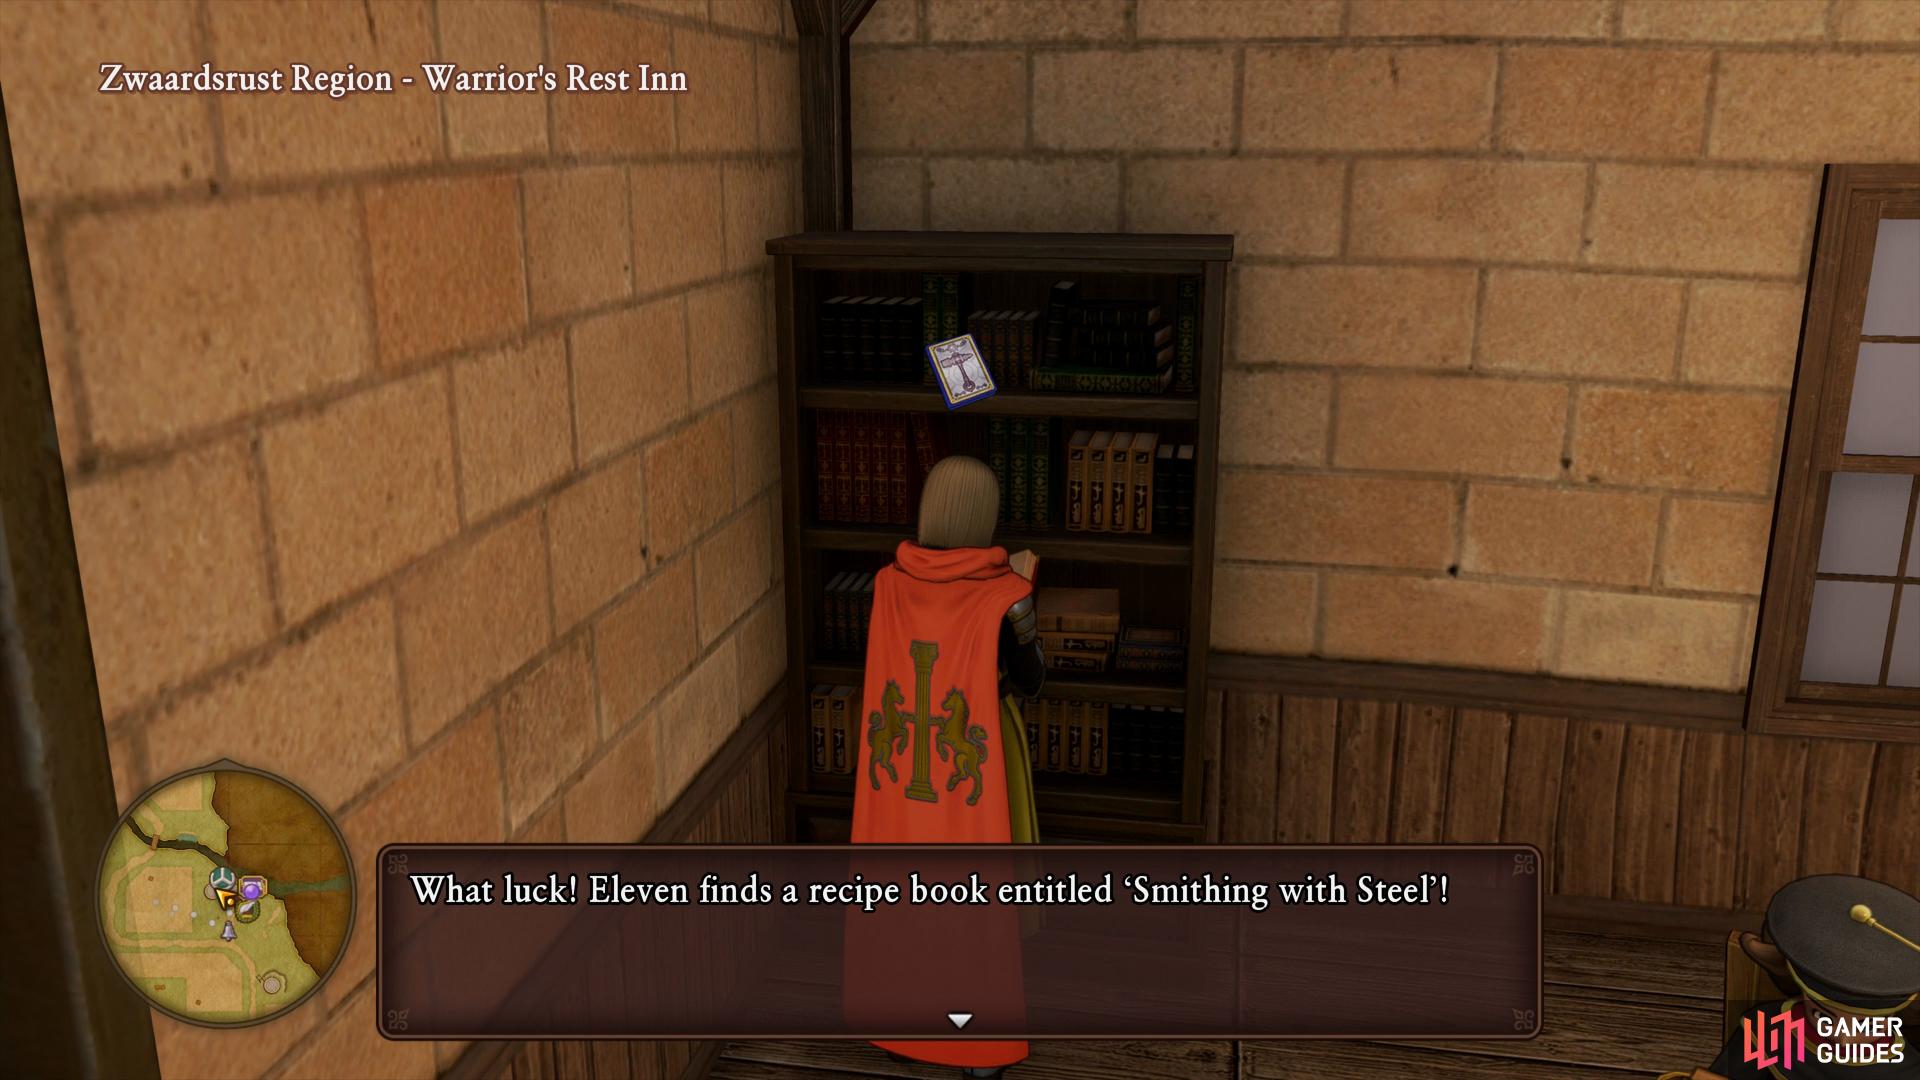
Back inside the Inn, head upstairs to find two barrels at the back, smash them to obtain a Strong Medicine. Check the nearby bookshelf for your next Recipe Book, Smithing with Steel which will allow you to forge an assortment of equipment requiring Silver Ore. Exit the Inn via the door near the bookshelf and go around the corner on the balcony to find a chest containing another Mini Medal. If you look closely from this balcony, you’ll see another Sparkly Spot on the balcony of the nearby windmill, jump on the railing of the inn and over to this to obtain a Dieamend.
(1 of 2) You’ll find a new Recipe Book upstairs in the Warrior’s Rest Inn
You’ll find a new Recipe Book upstairs in the Warrior’s Rest Inn (left), then leap from the balcony outside over to a Sparkly Spot. (right)
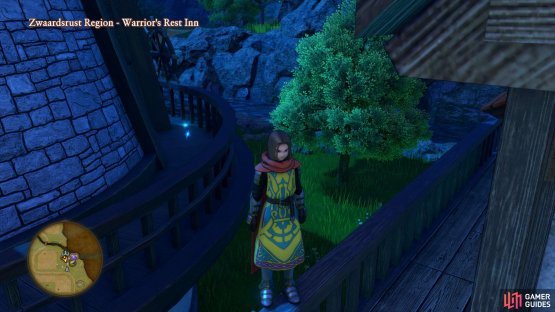
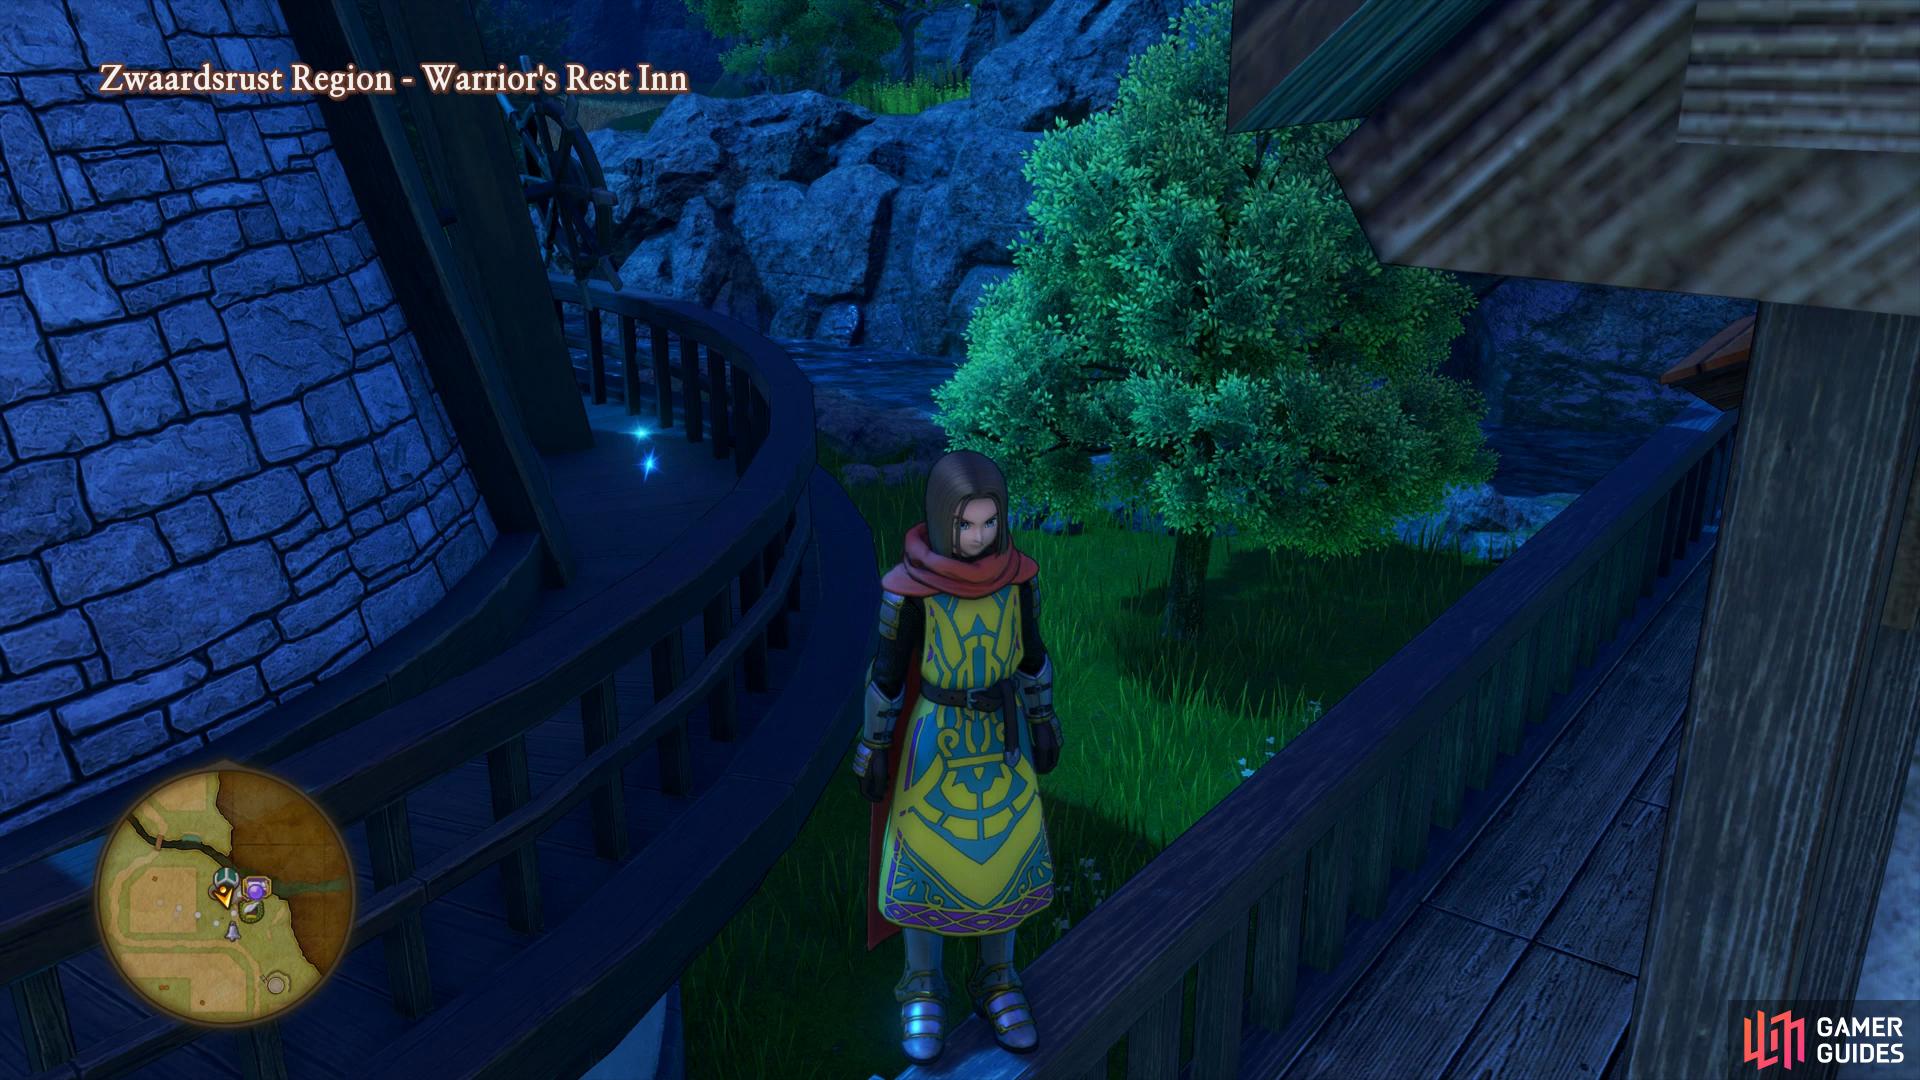
Drop back down to the ground and search around the back of the house to find some pots, smash them to obtain a Faerie Fluff and 30G. There’s a Priest you can speak to here with a quest, he’ll give you some information on the history of the kingdom that once stood here and how monsters destroyed it. The Priest wishes for you to use the Pep Power Care Prayer usable by the Hero and Serena on a Deadnaut, found only at night in the nearby ruins, accept his request to begin Quest 11 - A Path to Paradise. You’ll spot the next Crossbow Target just behind the Priest here, shoot this. Finally, before you’re finished with the Inn for now, climb down the well and pick up the Gold Ore.
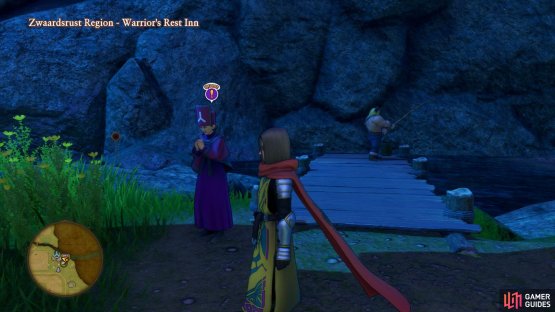

(1 of 2) Speak to the Priest behind the Inn to begin a new quest
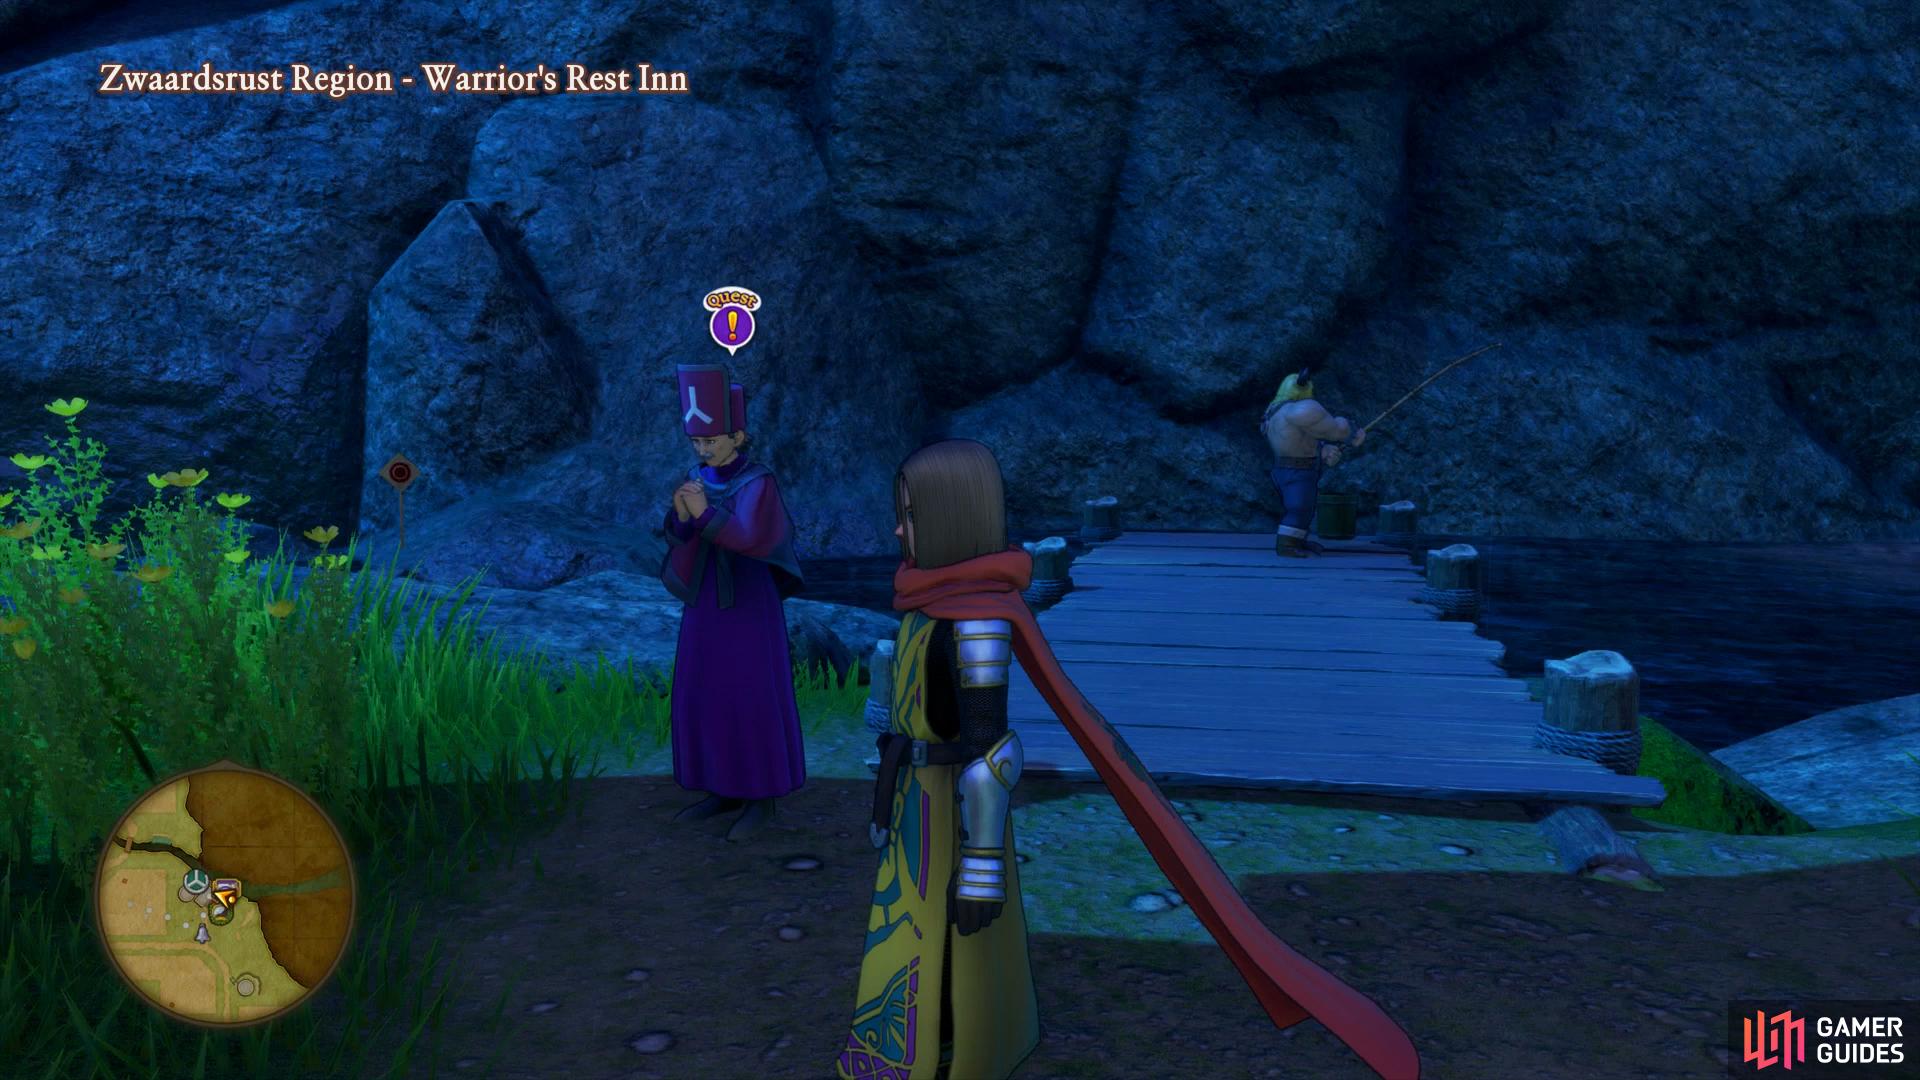
Speak to the Priest behind the Inn to begin a new quest (left), perform Care Prayer on the deadnauts to the west at night to complete it. (right)
Place Serena back into the party and make sure it’s night so that you can attempt to have her and the Hero reach the Pepped up status. If one of them does, take them out of the party until the other person does, that way you can guarantee both characters are Pepped up at the same time. As you travel west from the Warrior’s Rest Inn you’ll come across a bridge leading north.
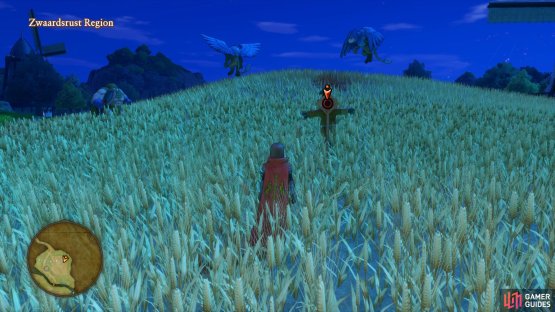
Head east from the bridge to reach a Tree gathering point containing a Butterfly Wing, Narspicious and a Coagulant. Head directly west from here to hit the western wall and then travel north along it to find another Sparkly Spot containing another Coagulant. Head west from the windmill here to the edge and spot a Crossbow Target hanging from the tree. You’ll find the final Crossbow Target in the hay field to the northeast, behind a scarecrow. Zoom back to the Warrior’s Rest Inn and speak to Bodkin Bowyer to receive your reward, four Seeds of Agility.
Make use of the Inn (keep it at night) and save your game again if you wish and then set out once more, this time continuing west past the bridge to the ruins. You’ll find Deadnaughts all over this area, the target for you quest and once you have the Hero and Serena Pepped up, use Care Prayer in battle before defeating them. Return to the Priest to complete the quest and obtain a Robe of Serenity for your troubles. This is a great piece of armor for either Veronica or Serena, give it to whoever you use more.
(1 of 2) Search in the tree to the northwest to find a Crossbow Target

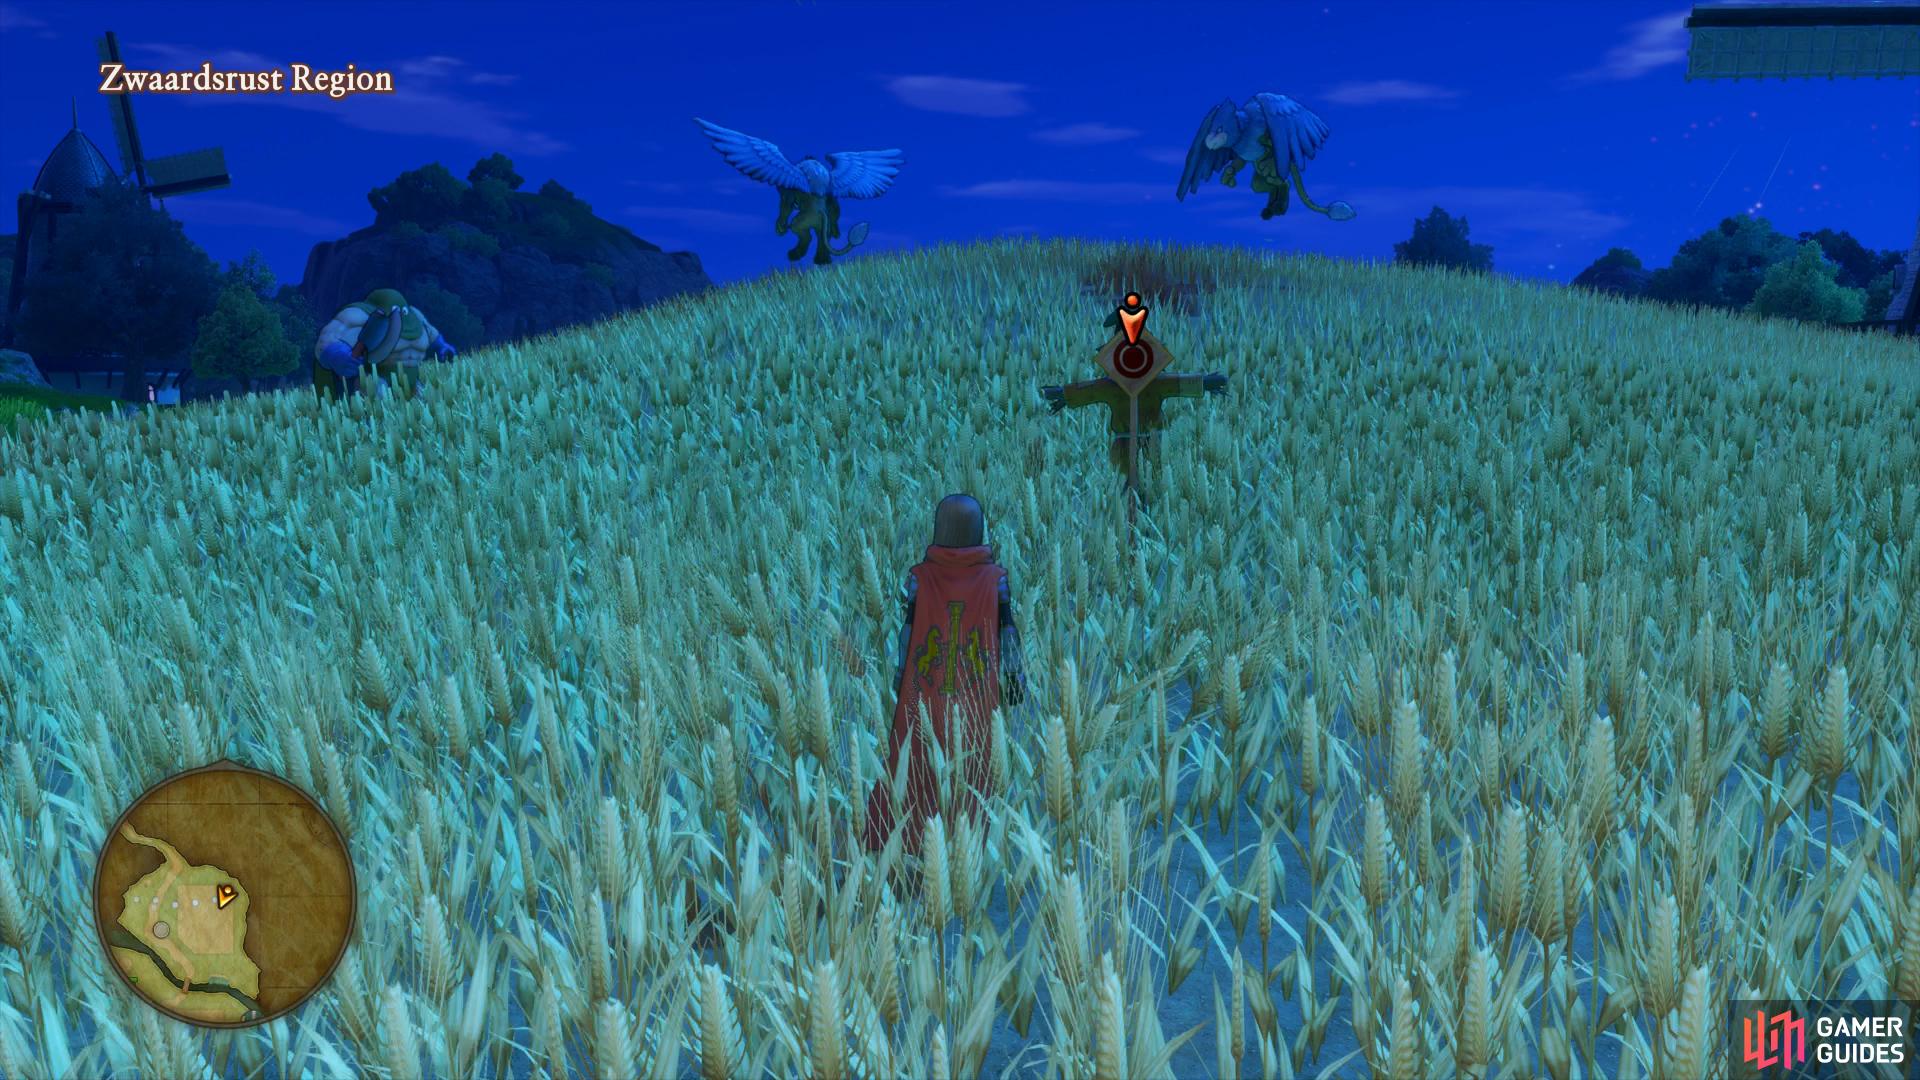
Search in the tree to the northwest to find a Crossbow Target (left), before striking the final target on the back of a scarecrow in the nearby field. (right)
Back in the ruins you’ll spot some stairs leading down, ignore these for now as they lead to a locked door however you’ll find a Sparkly Spot in the poison containing a Royal Soil and a chest just ahead with a Purple Eye inside. You’ll find another Royal Soil in the poison puddle just south of the western most stairs as you make your way west out of the ruins. You’ll stumble upon a chest that you cant miss as you head this way, open it to obtain 1500G. The final Sparkly Spot is out of your reach for now, rocks block the exit so return across the bridge and exit the Zwaardsrust Region to the north.
Dundrasil Region - North
| Items | Area |
|---|---|
| Necklace of Immunity | Southwest island, chest |
| Sparkly Spots | Area |
|---|---|
| Glimmer Grass | Central rock formation |
| Silver Ore | South of Octagonia entrance |
| Monsters | HP |
|---|---|
| Grublin | ~61 |
| Hood | ~109 |
| Jargon | ~122 |
| Drackolyte (Night only) | ~66 |
| Rottontail | ~86 |
| Fandangow | ~92 |
| Horknight (Mount) | ~76 |
You only have access to a small part of the Dundrasil Region for now but if you take a glance at your map, you’ll notice a town is nearby. This is your destination but first there’s a few items to snag and a Crossbow Target to hit along with a few new monsters to add to your growing guide.
The monsters here are not too threatening although beware of the Drackolyte’s ability to use Bang against the group and the Fandangow’s Underpants dance. The Jargon is in fact a Dragon and as such, Dragon Killer will finally have a use if you’re using Swords on the Hero, Erik or Sylvando.


(1 of 2) Shoot the only target available for now just under the arch

Shoot the only target available for now just under the arch (left), mount a Horknight and fly it over the lake to a chest in the south-west. (right)
Follow the linear path until the area opens up and keep to the wall to your right until you reach the archway. Walk over to the nearest tree on the right here, turn to face the east and look up on the rocks to spot the only Crossbow Target you can hit for now. Head southwest into the center of the area to find a rock formation, climb onto them and search in the middle to discover a Sparkly Spot containing a Glimmergrass.
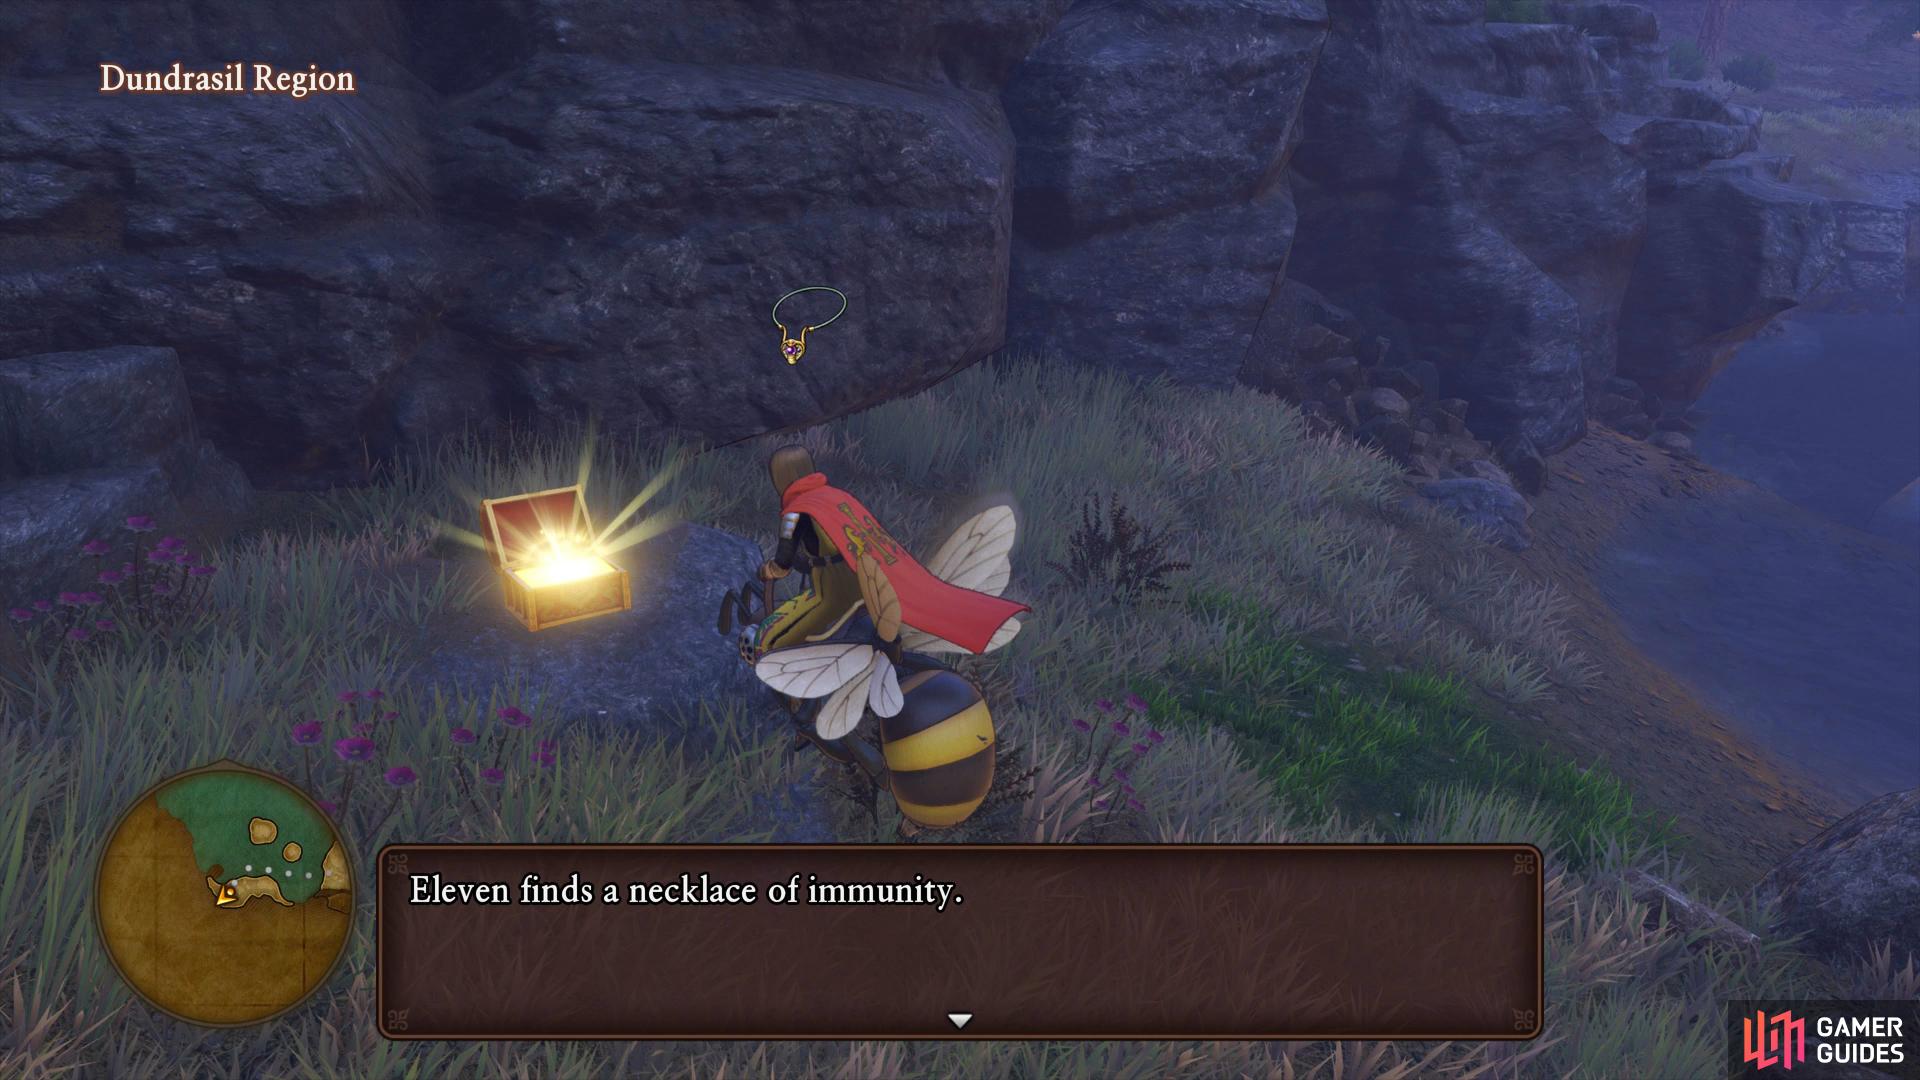
You’ll notice that there is a glittering Horknight that you can find in this area, fight one and defeat it to acquire it as a mount. Climb on top of the bee and you can now fly over the nearby lake, do so and search the south island for a chest containing a Necklace of Immunity, a handy trinket that will protect against Poison based attacks. Return to the main path and follow it north until you reach the next open area near the entrance to town. Search directly west from where you drop down to find a Sparkly Spot in the corner containing a Silver Ore. There’s nothing else to find out here for now so proceed north into the town up ahead.
Octagonia

| Items | Area |
|---|---|
| Feathered Cap | Inn, wardrobe |
| Pretty Betsy | House next to Goddess Statue, pot |
| Magic Beast Hide | House next to Goddess Statue, wardrobe |
| 800G | South of east house, chest |
| 80G | Lower level, east, pot |
| 200G | Lower level, near stairs, pot |
| Garter | Lower level, house, wardrobe |
| Mini Medal | Lower level, alcove under stairs, pot |
| Finessence | Lower level, south wall, pot |
| Drasilian Shilling | Lower level, house northwest of Armor shop, barrel |
| Star of Clarity | Lower level, roof of the Armor Shop, chest |
| 24G | Lower level, western house, pot |
| Narspicious | Lower level, Orphanage, barrel |
| Silver Ore | Lower level, Orphanage, pot |
| Building Butterfly Bric-a-Brac | Lower level, Orphanage, bookshelf |
| Green Eye | Behind the Inn, chest |
| 51G | Upper level, barrel |
| Faerie Fluff | Upper level, barrel |
| Magic Water | Third floor, Inn, barrel |
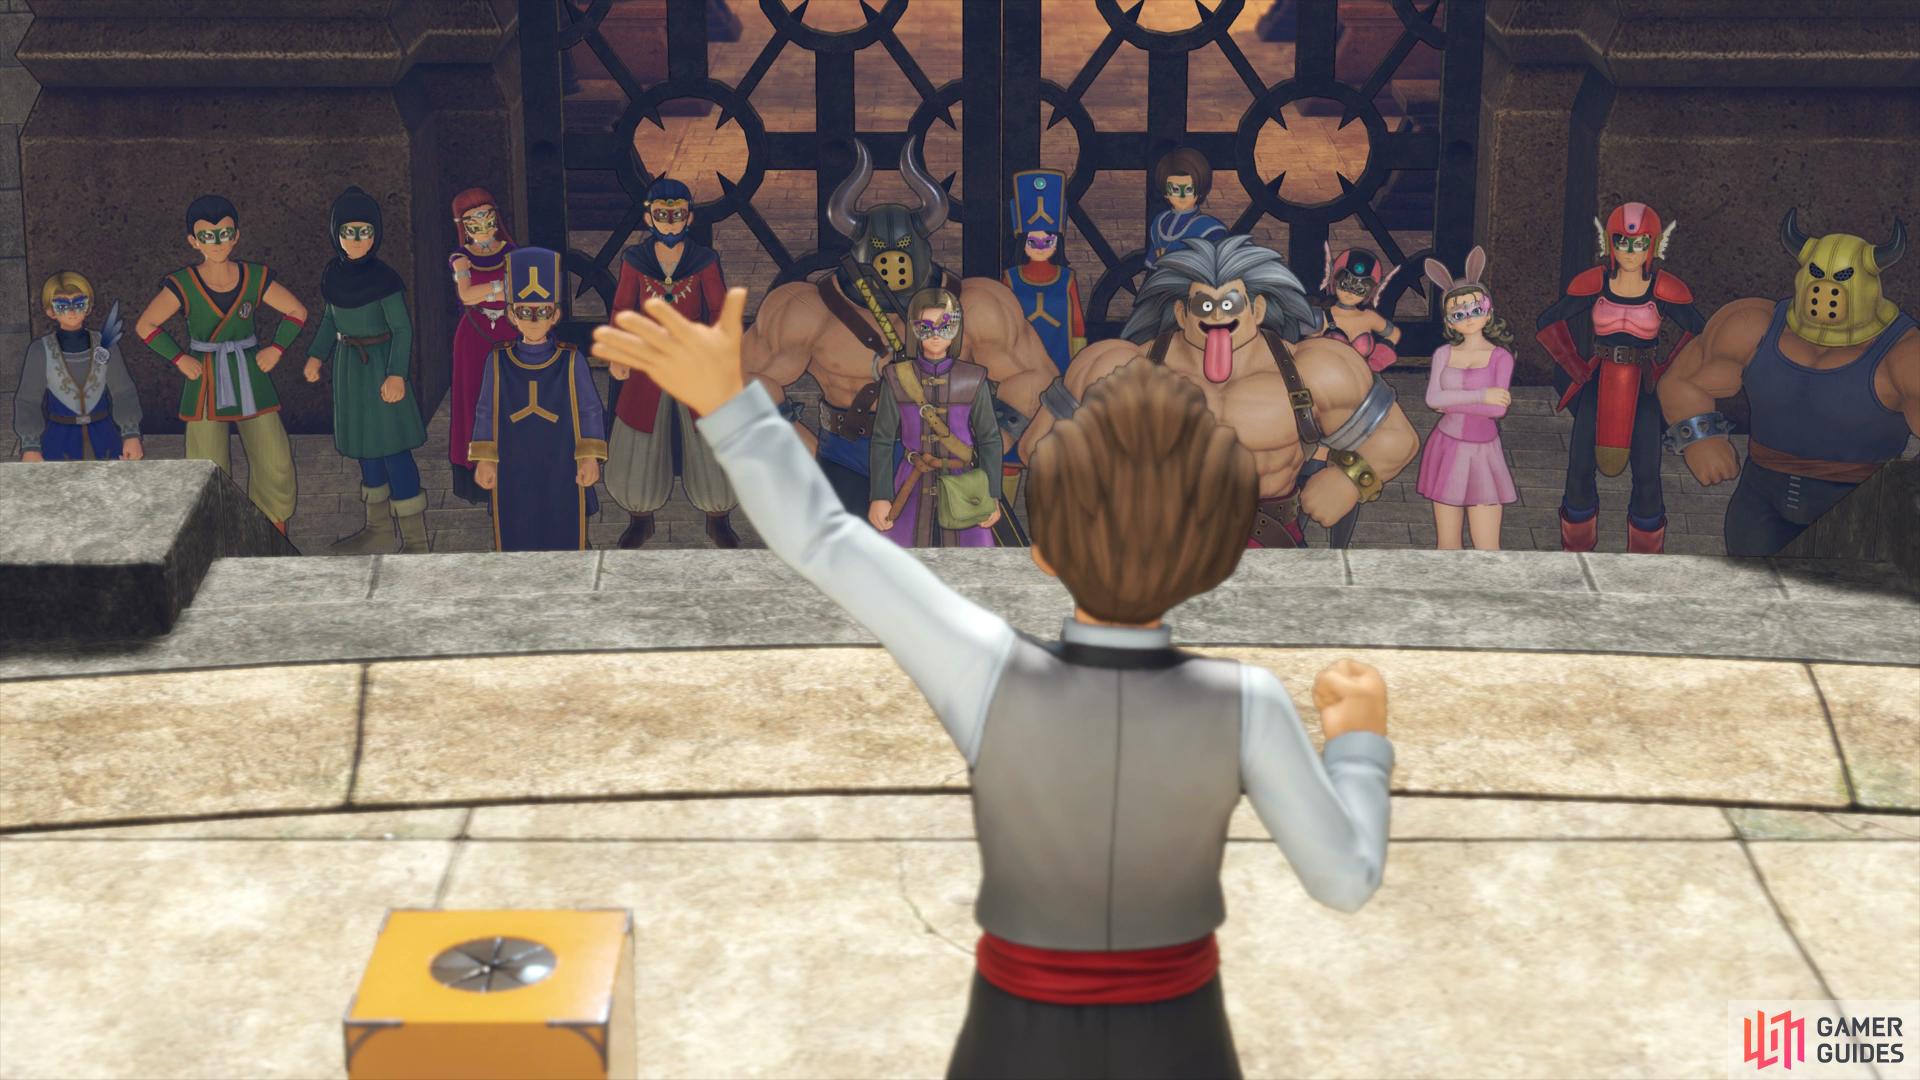
Octagonia is a lush entertainment town with one major attraction, it’s Masked Martial Arts tournament. As the nearby Bunny Girl so kindly points out, the tournament is due to start soon and hands the group a poster detailing it. It’s intriguing enough and piques Sylvando’s interest as well however like all new towns you come to, there’s items to be looted.
Begin by heading north and into the Inn on your left and head down the stairs to find a wardrobe with a Feathered Cap. Return upstairs and search around the back of the Inn on a nearby rooftop to find a chest containing a Green Eye. Head east from the Inn where you can find a Goddess Statue to save your game should you need to. Head inside the nearby house and smash the pots to obtain a Pretty Betsy before taking the stairs down to find a Magic Beast Hide in the wardrobe. Leave the house and look south to see some stairs going down and some going up to your left, take the stairs up and head right to climb on top of a platform. Follow the path to the end here to find a chest with 800G before going back to the previous stairs and taking the next set down.
Immediately check the west alcove to find a pot next to a blocked well, smash it to obtain 80G. Take the next stairs down and check by the side of them to find more pots waiting to be smashed, you’ll obtain 200G from one of them. Take another set of stairs down and enter the house where you’ll find another wardrobe upstairs containing a Garter.
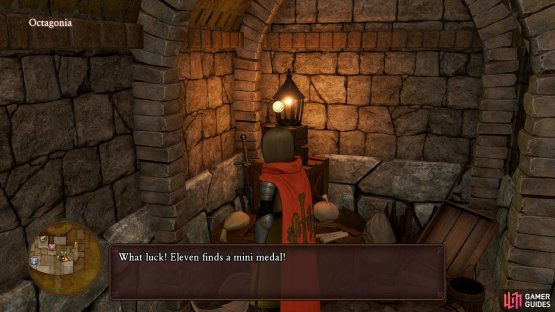
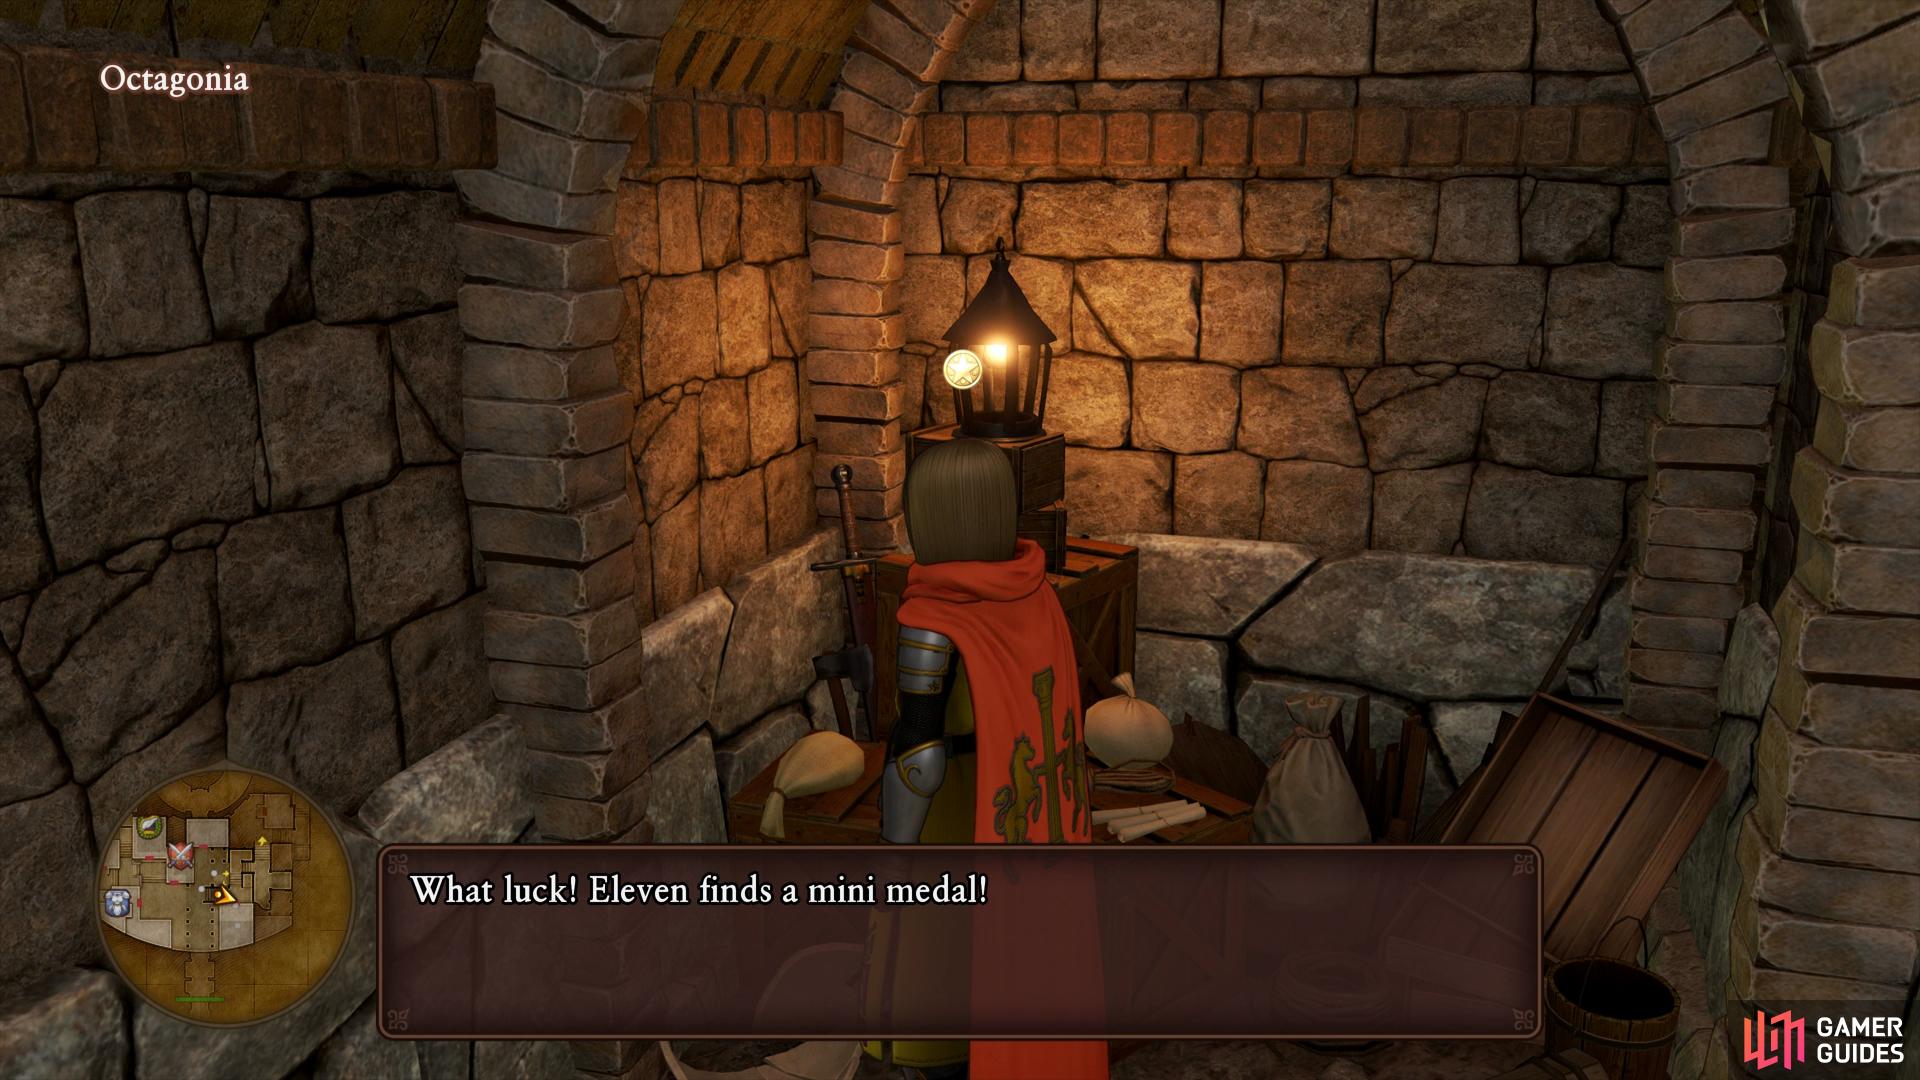
Head down the final set of stairs to reach the bottom of town and take a right to search in a small alcove under the stairs, a pot here contains a Mini Medal. Exit the alcove and search the south wall to find two more pots lined up for you, break them open to obtain a Finessence. Head into the Weapons shop now to check out the equipment on sale. If you’ve been keeping up with your forging then the Black Blade should be weaker although you can raise it higher through reworking (and frankly, its a great looking weapon), the call is yours. The Lolly Stick is slightly better for Serena however and the Rod of Rapidity for Veronica will let her act slightly faster in battle, grab this for sure.
(1 of 2) Look in the alcove at the bottom of Octagonia for a pot with a Mini Medal inside

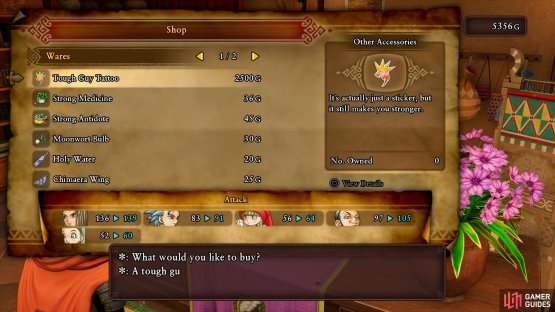
Look in the alcove at the bottom of Octagonia for a pot with a Mini Medal inside (left), be sure to pick up some Tough Guy Tattoos. (right)
Check out the Armor shop next and the Mallebale Masks are improvements to the girls previous headgear however you’ll soon be able to forge them yourself. All of the other equipment here is not worth purchasing as you can forge better at the camp. The final shop here is the Item shop and they’re now selling Tough Guy Tattoos, these are a flat increase to your Strength and you should buy one for the Hero and Erik if possible. These will be even more useful if you increase them to +3 at the forge the next time you’re there.
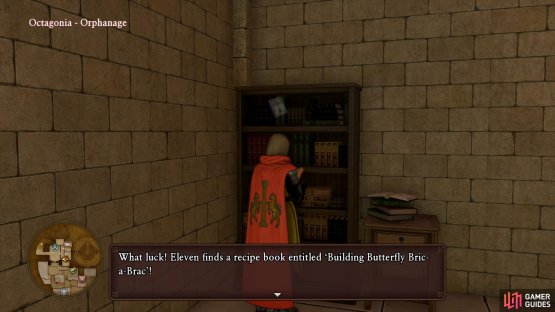
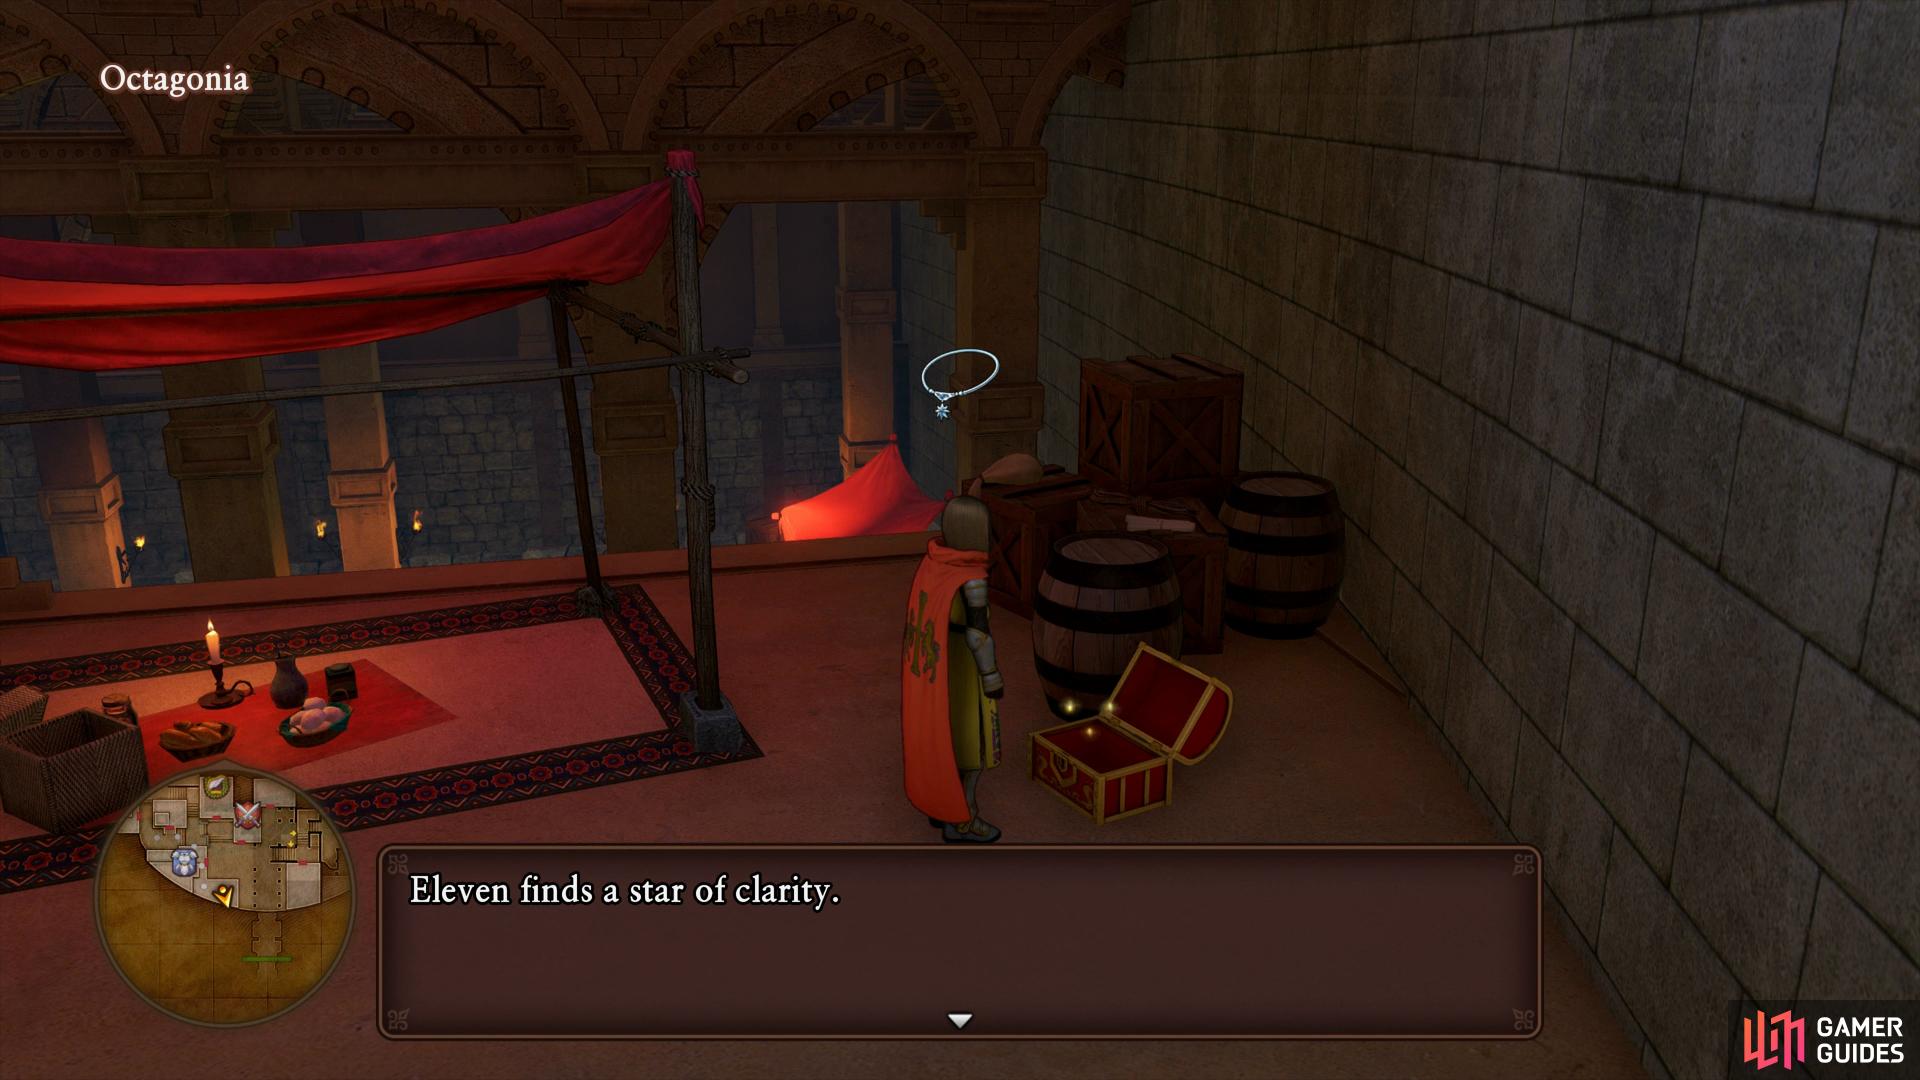
Leave the Item shop heading up two sets of stairs to the west of you before entering the first house on the right, you’ll find a barrel here containing a Drasilian Shilling. Look to the west of the stairs outside now to spot some crates you can leap on and reach a chest on the roof of the Armor Shop containing a Star of Clarity. Enter the next house up the stairs and you’ll find some pots upstairs that you can break containing 24G. Return to the stairs next to the Item shop and take the north stairs up to enter the Orphanage. You can save your game again here if you need to and then head through the western corridor, taking the stairs down to a barrel containing a Narspicious. Return up the stairs and check out the east side of the Orphanage. One room houses some pots for you to smash containing a Silver Ore while the other room has a bookshelf with your next Recipe Book, Building Butterfly Bric-a-Brac which will allow to finally forge a new weapon for Erik.
Return to the entrance and take the northeast stairs up to the Upper Octagonia. You can’t access the central structure here but you can find three barrels scattered around the outter ring, upon smashing them you’ll obtain 51G, and two Faerie Fluffs. You’ll also find the next girl offering a Puff-puff in the south-east corner, take her up on it.

(1 of 2) Use the crates to jump onto the roof the Armor shop to find this chest

Use the crates to jump onto the roof the Armor shop to find this chest (left), the next Recipe Book can be found in the Orphanage. (right)
Head back down and make use of the Inn to rest up and save your game before proceeding down the center where Veronica will notice the Rainbough is being offered up as the prize for winning the tournament. Head to the front desk to get yourself signed up for the tournament where you’ll learn that your partner is chosen at random. You’ll obtain your mask and the #11 for the upcoming partner draw, when you’re ready head around back and take the elevator up to the third floor.
Before you proceed, head into the nearby rest room and break the barrel to obtain a Magic Water. Proceed up to the top now to take part in the drawing of partners. Following the events, the Hero will be drawn with last year’s champion, Vince Vanquish. Return to the elevator where you’ll be advised to rest at the Inn before the first matchup, head down and you’ll bump into Serena. Veronica’s had a run in with one of the fighters however the Hero’s new partner smoothes everything over. With that out of the way, save your game and then head over to the Inn to take a brief rest.
Vince will wake you in the morning and the two of you will go to the arena. You’re not the only participant in the waiting room as the other candidates rally themselves for the battle to come. Head over to Vince to let him know you’re ready for your first battle.
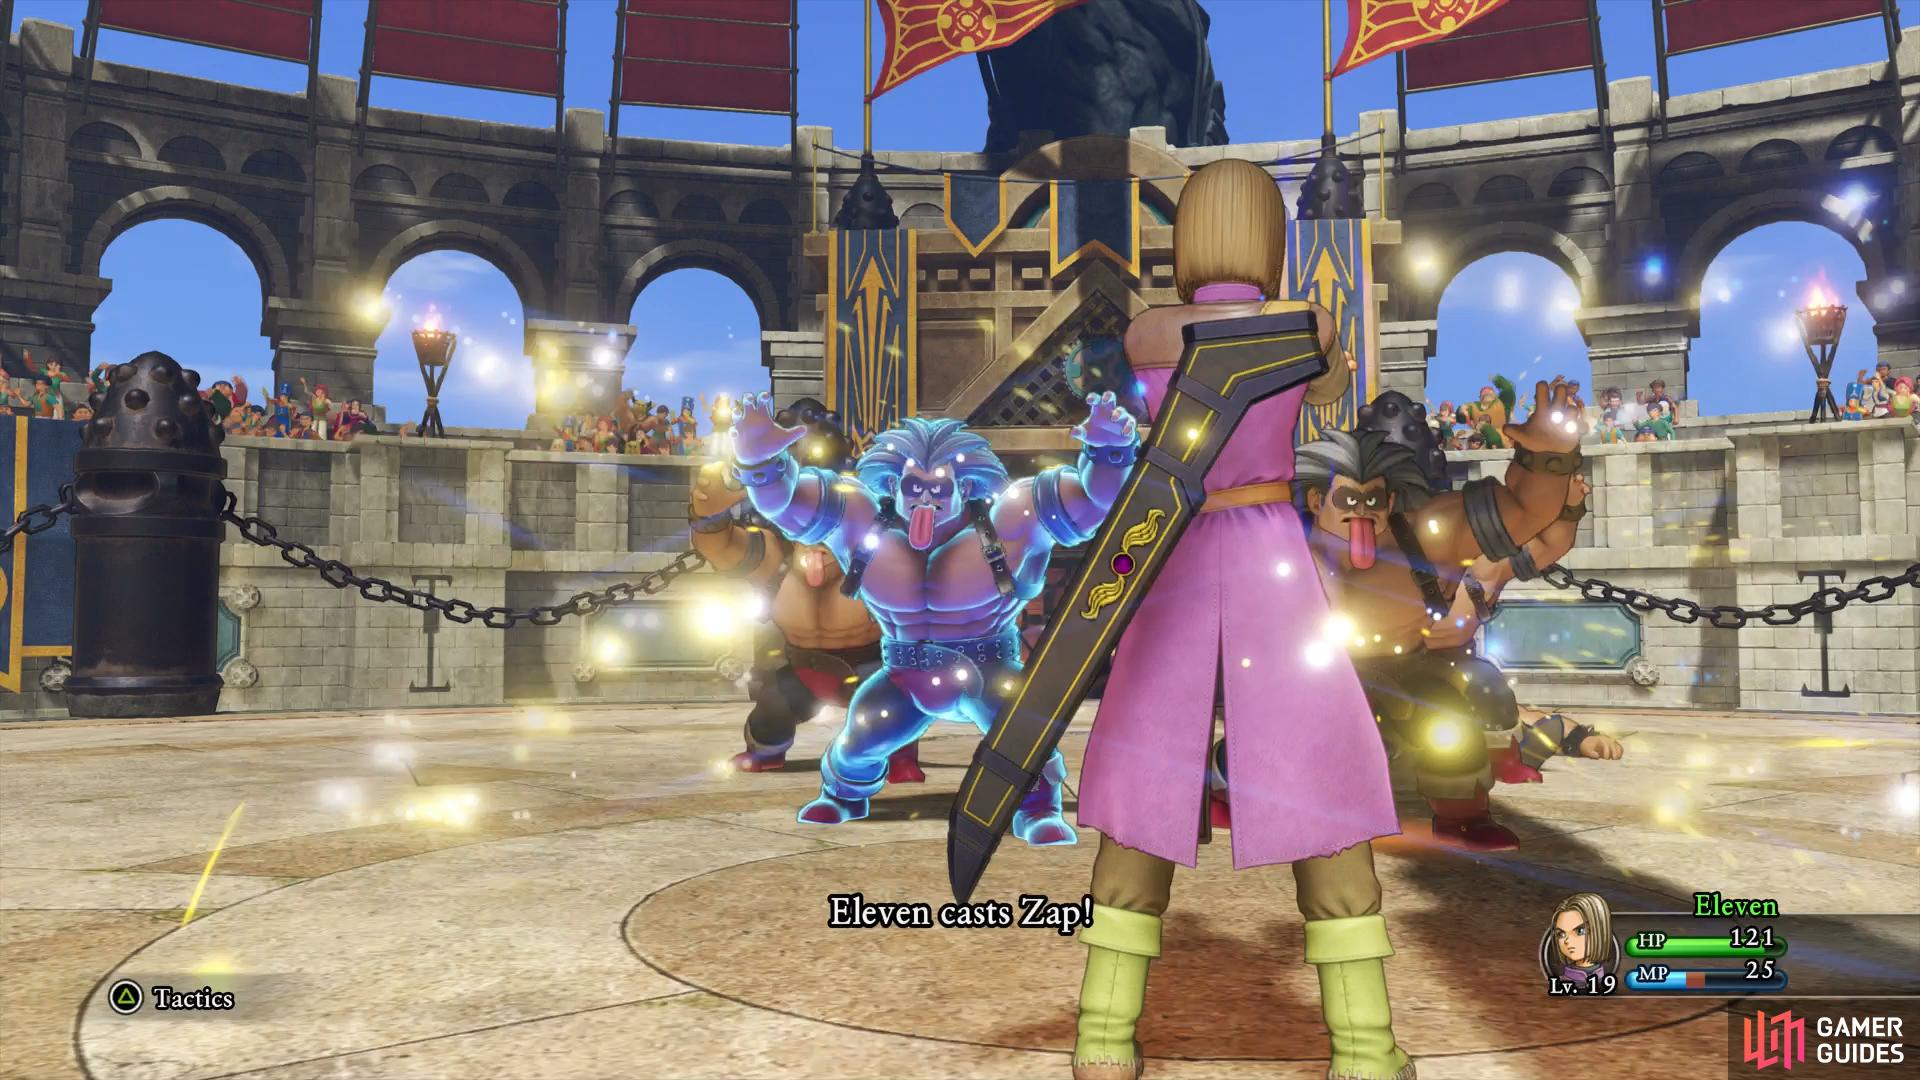
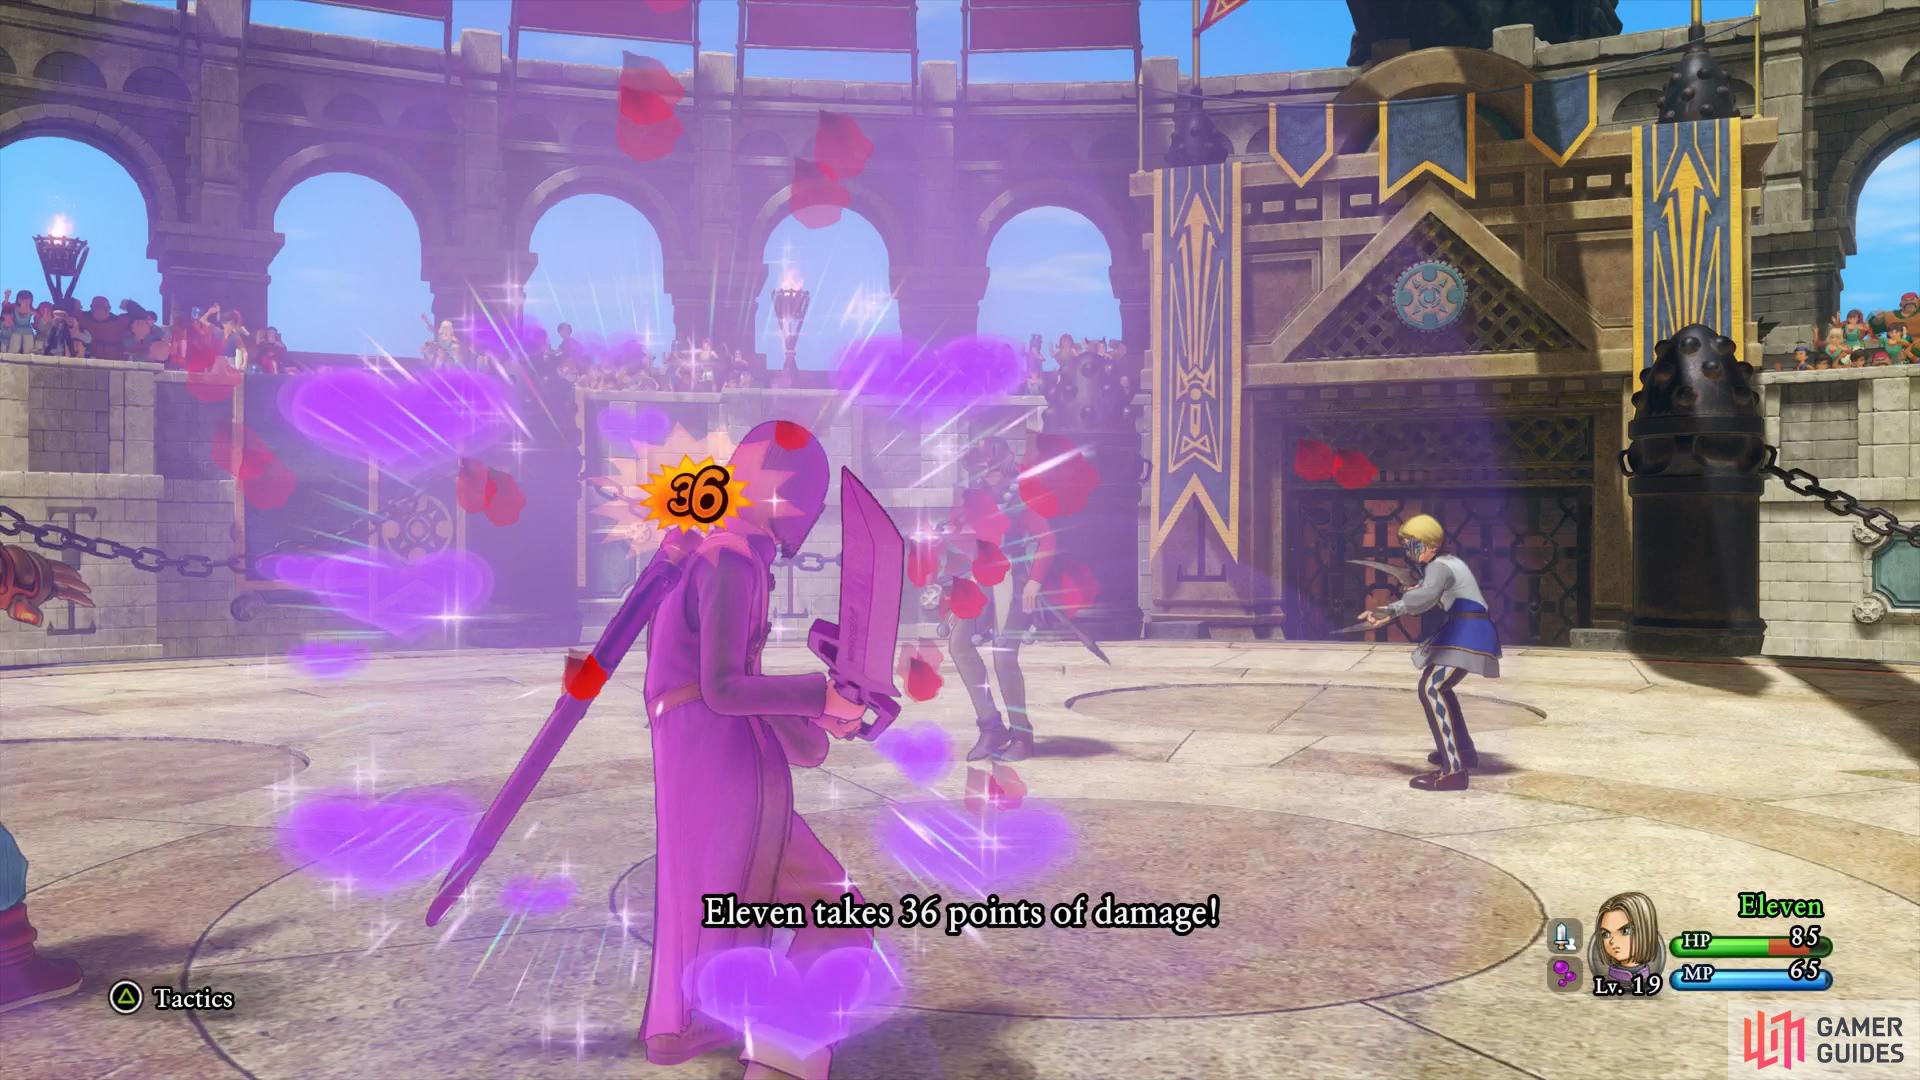
VS Abominable Showman & The Underdigger
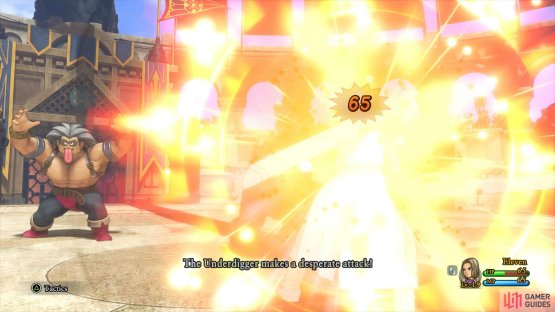
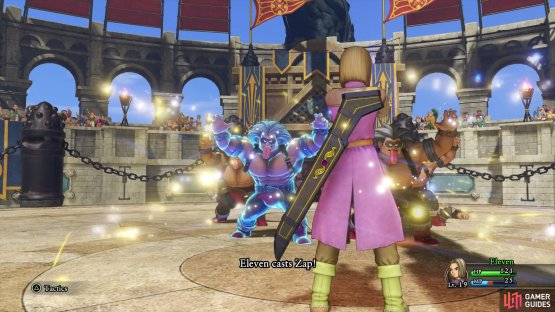
Your first round is up against The Underdigger who Veronica previously had a run in with and the strange fellow with his tongue out, Abominable Showman. Showman has around 251 HP and The Underdigger 292 HP so you’ll need to be on your toes.
(1 of 2) The Underdigger is the most dangerous of the two with his desperate attacks

The Underdigger is the most dangerous of the two with his desperate attacks (left), use Zap on the Showman clones to take them all out at once. (right)
Vince will be of great use in these battles, you don’t control him directly but he cannot be killed and will also toss a Medicinal Herb to heal you but don’t let it drop too low or you risk falling. The Underdigger is the more dangerous of the two so focus your attacks on him first, Cutting Edge is a great ability to use in these battles as is Greatsword Guard (or Sword Stance if you’re using Swords) to parry and block their attacks. Both of your opponents can do regular attacks that deal moderate damage but The Underdigger has a hard hitting attack that will likely cause a Citicial for over 60HP. The Abominable Showman can create clones of himself that will attack you for minor damage and although it doesn’t seem much, suffering four of these a combat round will add up. Finally, the pair can Pep themselves up, if both of them are Pepped up then defend the next round by all means to limit the damage from their combination attack.
Following your victory, the duo will witness the next match between Rab and Jade against Erik and his partner. The speed at which the female warrior attacks is too much for Erik as he’s defeated in the first round. Once you find yourself back in town you’ll say your farewells to Vince for the day and gain control once more. Head toward the Inn to reunite with your party, where you’ll have another brief encounter with Rab and Jade who warns the Hero to look out for Vince, something that prompts Serena to let the party in on the current rumours in town, that warriors have been vanishing from town.
Heed Erik’s advice and make your way towards the Orphanage found at the Church in the lower part of town. As you reach the Orphanage the Hero will talk with Vince for a while about the Orphanage and the recent disappearances before a large crashing sound from the direction of his room interrupts the coversation. Take off after him and enter the south most door in the Orphanage. With all the commotion, Vince will suggest to spend the night here, agree and spend a night at the Orphanage.
The next day you’ll find yourself back at the waiting room at the arena, save your game if needed and then head over to Vince to begin the next round.
VS Sinderella & Whambelina
This attractive duo will try to fool you using their looks to distract you. Both of your opponents have around 300 HP and can pack a punch themselves, as they say, looks can be deceiving. Sinderella is the mage of the duo, she can cast Sizz and Frizzle alongside Midheal and her regular attacks. Whambelina will focus more on her sword and will perform Flame Slash alongside her regular attacks along with blowing a kiss, an attack that can put a character into a trance putting them out of action.


(1 of 2) Whambelina’s kiss can charm the Hero if you’re unfortunate
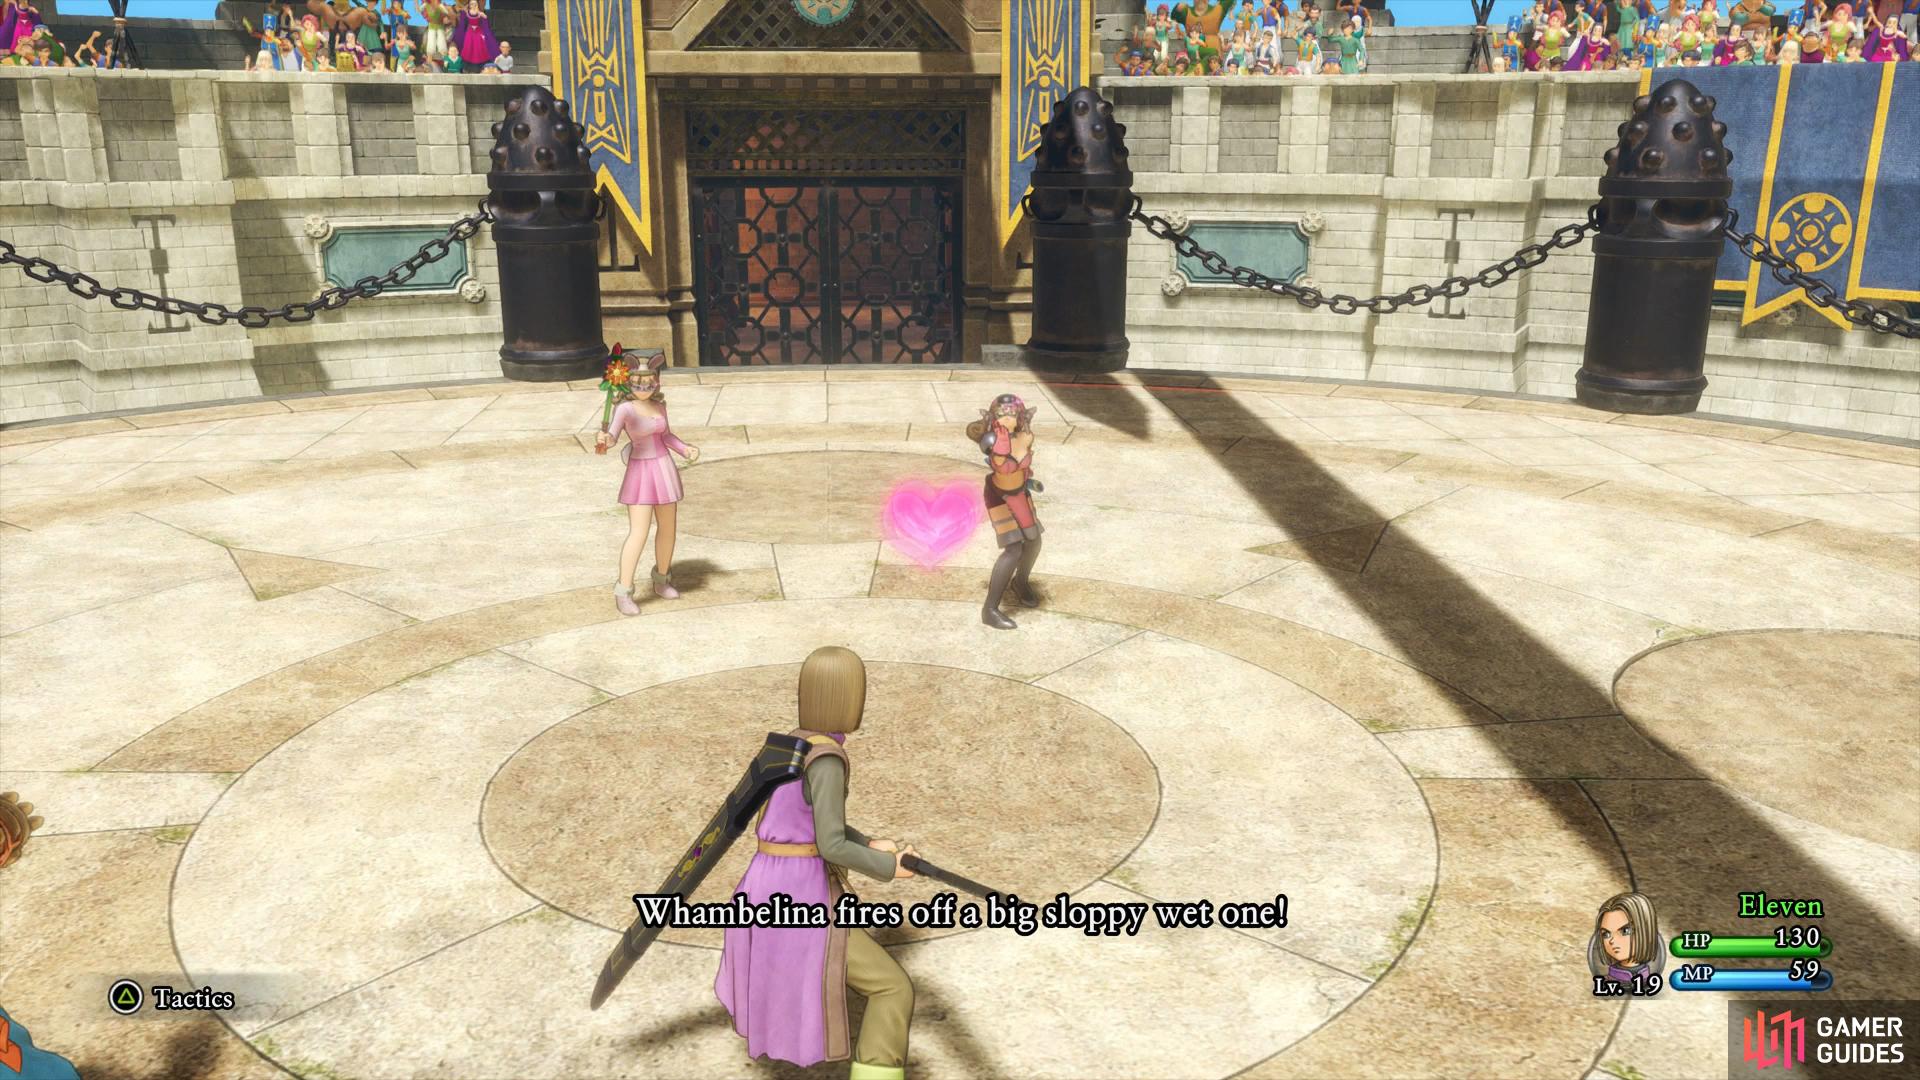
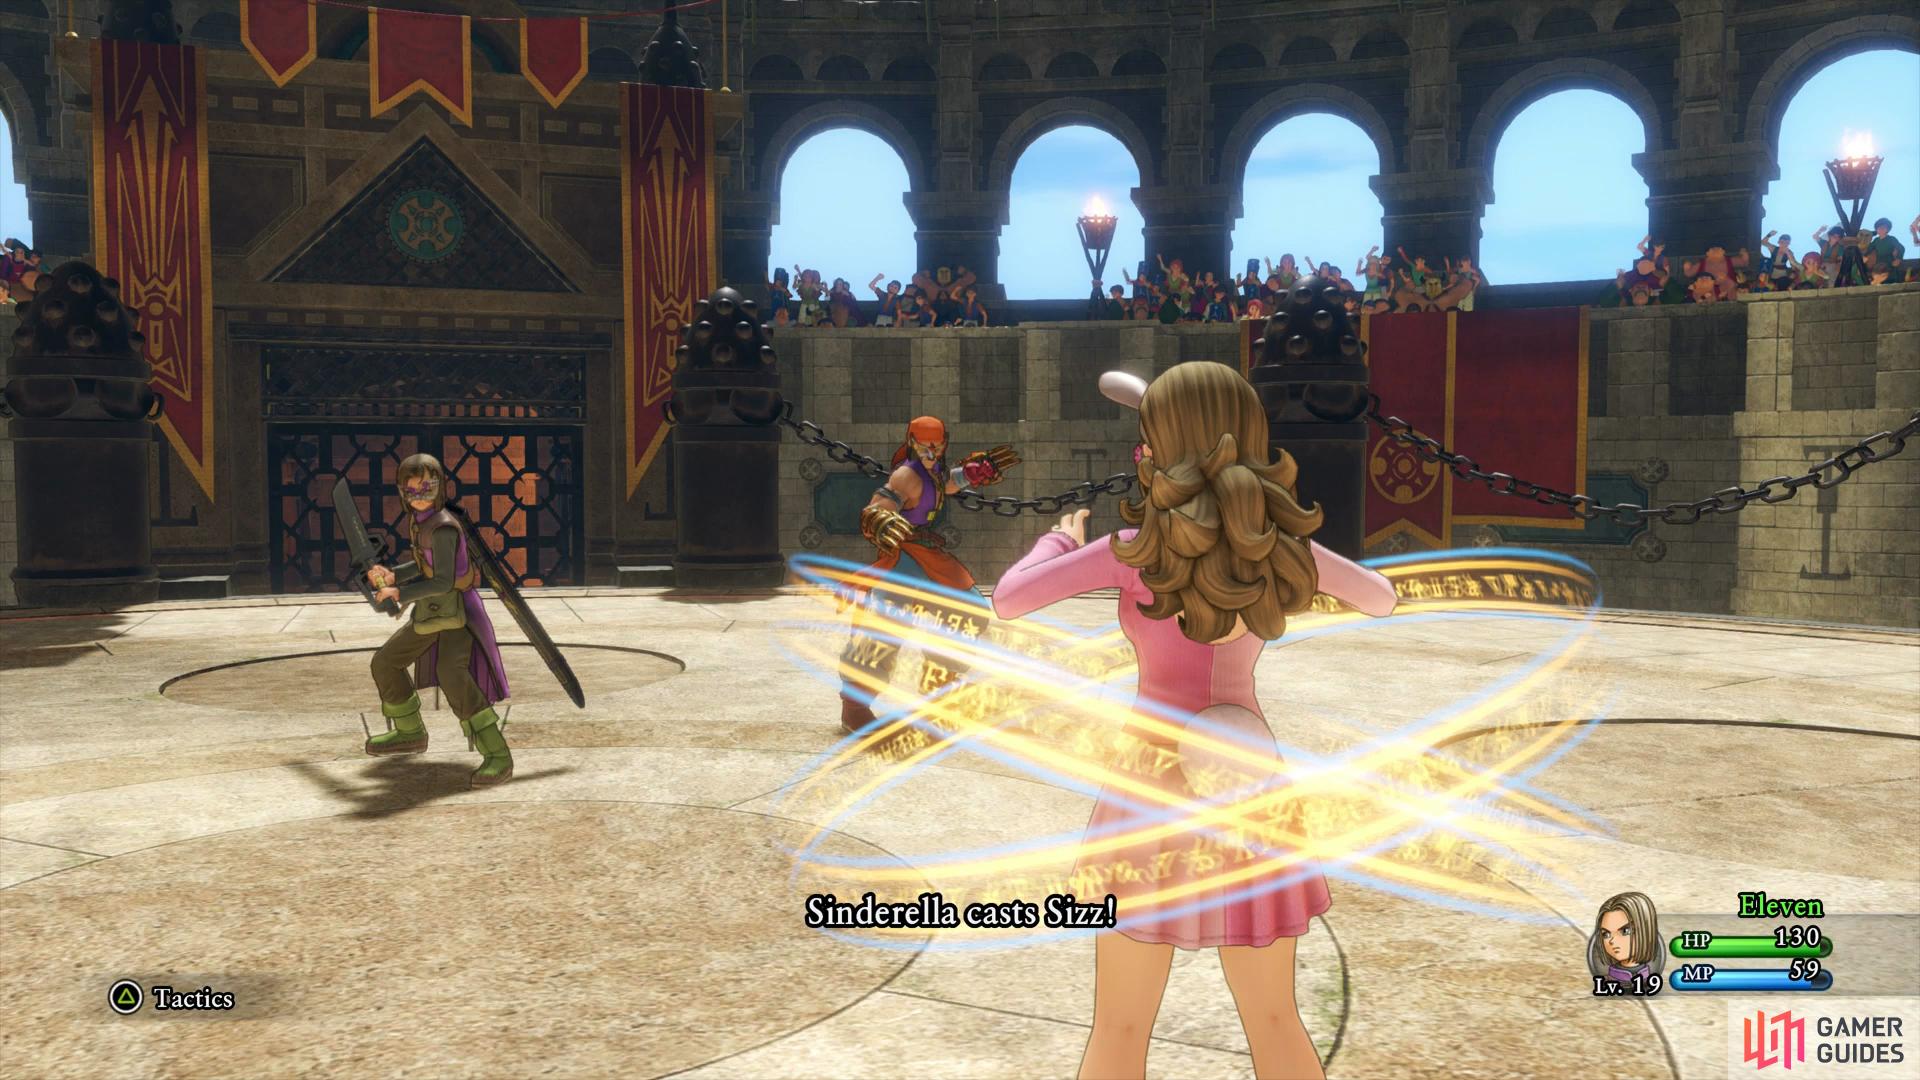
Whambelina’s kiss can charm the Hero if you’re unfortunate (left), while Sinderella will bombard the duo with spells. (right)
Once more, the duo can Pep themselves up too along with using a signature Pep power if they find both of themselves Pepped up. If this occurs, defend the next round to limit the damage it will inflict. Make Sinderella your primary target, her ability to heal can drag the battle out and her magic is more damaging than Whambelina. As always, Cutting Edge is the best ability to go for if you’re using Greatswords otherwise consider using Falcon Slash to take them down. Following your victory you’ll get a short scene before the Semi Finals begin straight away.
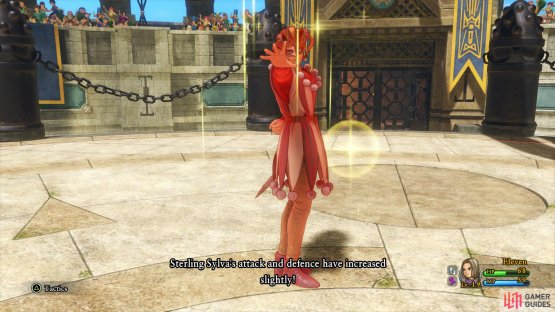
VS Sterling Sylva & Golden Boy
Sylvando, in the guise of Sterling Sylva is your opponent for this round alongside his partner, Golden Boy. Sylvando has around 346 HP and his partner 336 HP, your oppenents health keeps increasing with each passing battle it appears. Sylvando has many tricks at his disposal, he’ll use Hot Lick frequently, a multi hitting Flame attack on one person along with regular attacks for moderate damage. When his health drops low, he can use Miracle Sword to replenish some of it. He can Poison you with his kiss ability, something that you’ll want to remedy immediately and finally he can self buff himself, increasing both his attack and defense.

(1 of 2) Sylva’s Kiss can cause you to become Toxic, remove this with a herb immediately

Sylva’s Kiss can cause you to become Toxic, remove this with a herb immediately (left), be prepared to heal more when Sterling Sylva starts increasing his attack and defense. (right)
Golden Boy can also replenish his own HP with his abilities and will attack twice in a round due to dual wielding. The pair, like all other rounds so far, also have a unique Pep Power too if they’re both Pepped up, like ususal, defend the following round to limit the damage.
As you may assume, Sylvando is the greatest threat here, concentrate your attacks on him at all times. By now you should know that Cutting Edge should be your go to ability when attacking singular enemies. Once again, you’ll get no chance to save your game following your victory as you’ll proceed straight to the final, a match up against the duo from earlier.
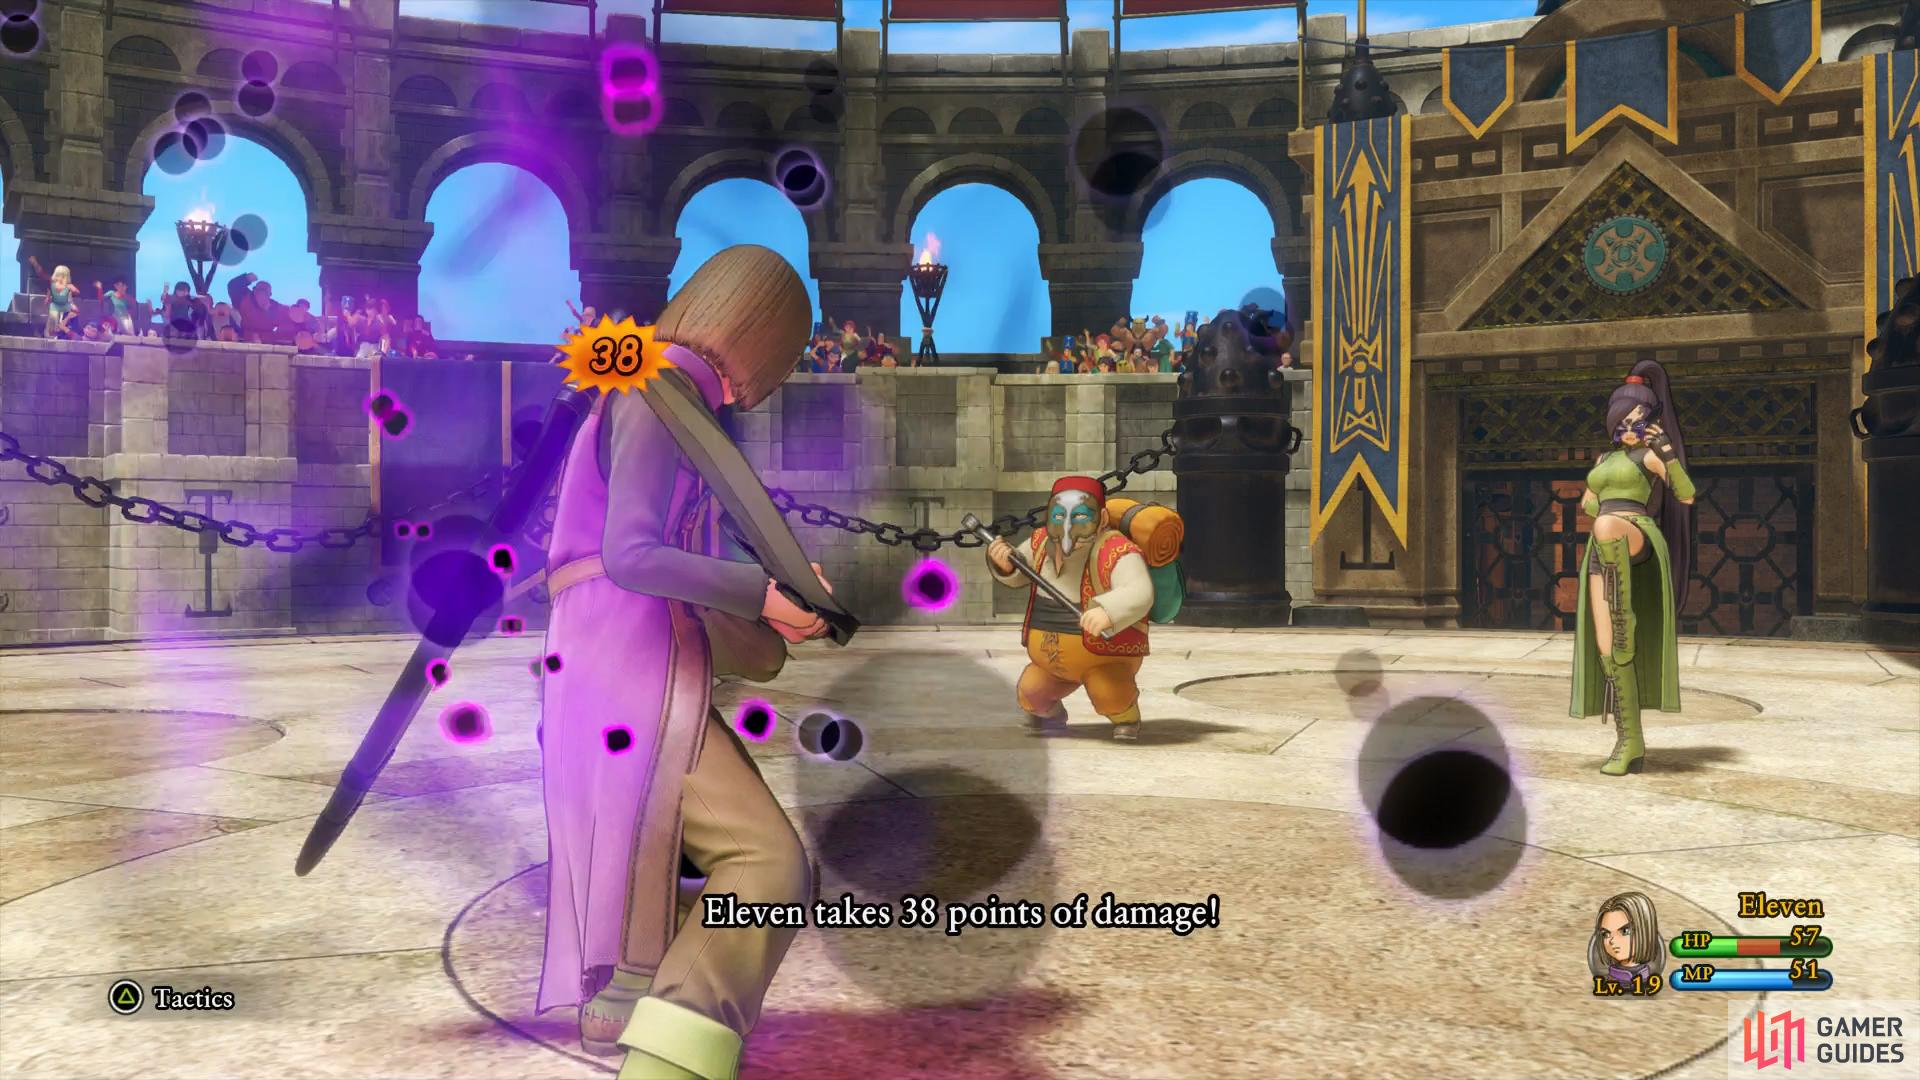
VS Rab and Jade
This will be the most difficult fight yet, as you may expect. Rab and Jade are a fearsome duo and compliment each other well. Rab has around 364 HP and Jade 414 HP. Rab can use Zam to cause Dark damage to a character and Crackle to hit the group for around 40 HP. Rab can also use Snooze to put a character to sleep and heal both himself and Jade with Midheal, making him even more of a pain. Jade on the other hand will use martial arts based attacks, all of which hit quite hard and their Pep power is especially damaging too, be sure to guard that at all costs.


(1 of 2) Vacuum Slash hits hard

Vacuum Slash hits hard (left), Rab will not only heal but hit you for moderate damage with Zam. (right)
You’ll need to pay more attention to your HP here, although Vince will still heal you if it drops low, Jade and Rab hit hard and it may be too late if you let it drop too low. Especially once they Pep themselves up, their regular attacks will hit very hard, be sure to heal yourself if you drop below 80 HP. As for your primary target, Rab should be first up, his ability to put you to sleep is dangerous and healing with Midheal can turn the battle in their favor.
Following your victory, your adversaries take note of the mark of the Luminary on the Hero’s hand, a distraction which causes them to lose the match. Before Vince and the Hero can discuss what to do with the reward, Vince falls to the ground clutching his stomach. Save your game and then head over to the Inn once more to rest up following your exploits at the arena.
You’ll be woken by Rab during the night, Jade has gone missing along with some other warriors from the tournament and request the aid of your party to help him track them down. They were spotted last at the Orphanage so make your way back there. Upon reaching the Orphanage the children will inform you that Vince is nowhere to be seen and that the basement garden has been tampered with. Make your way down there to discover the wall has been broken down, head into gaping hole to continue your search.
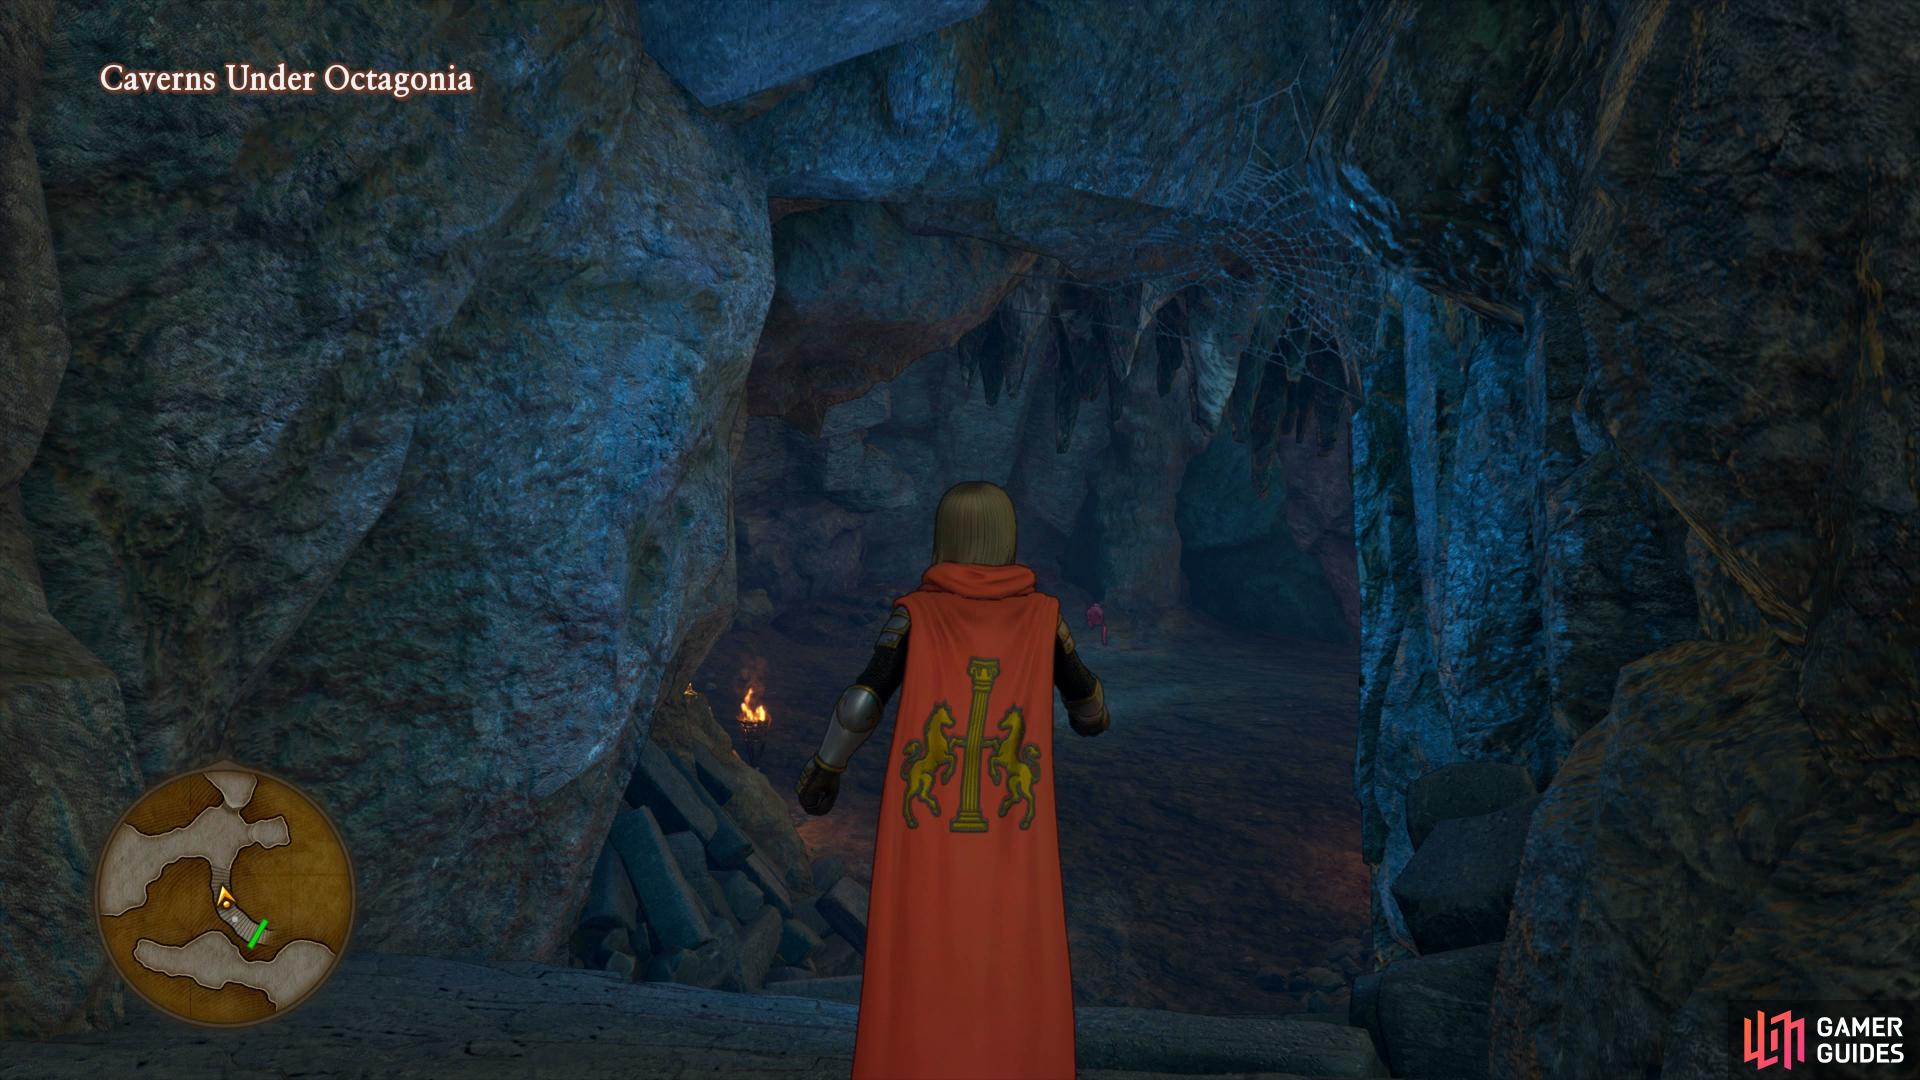
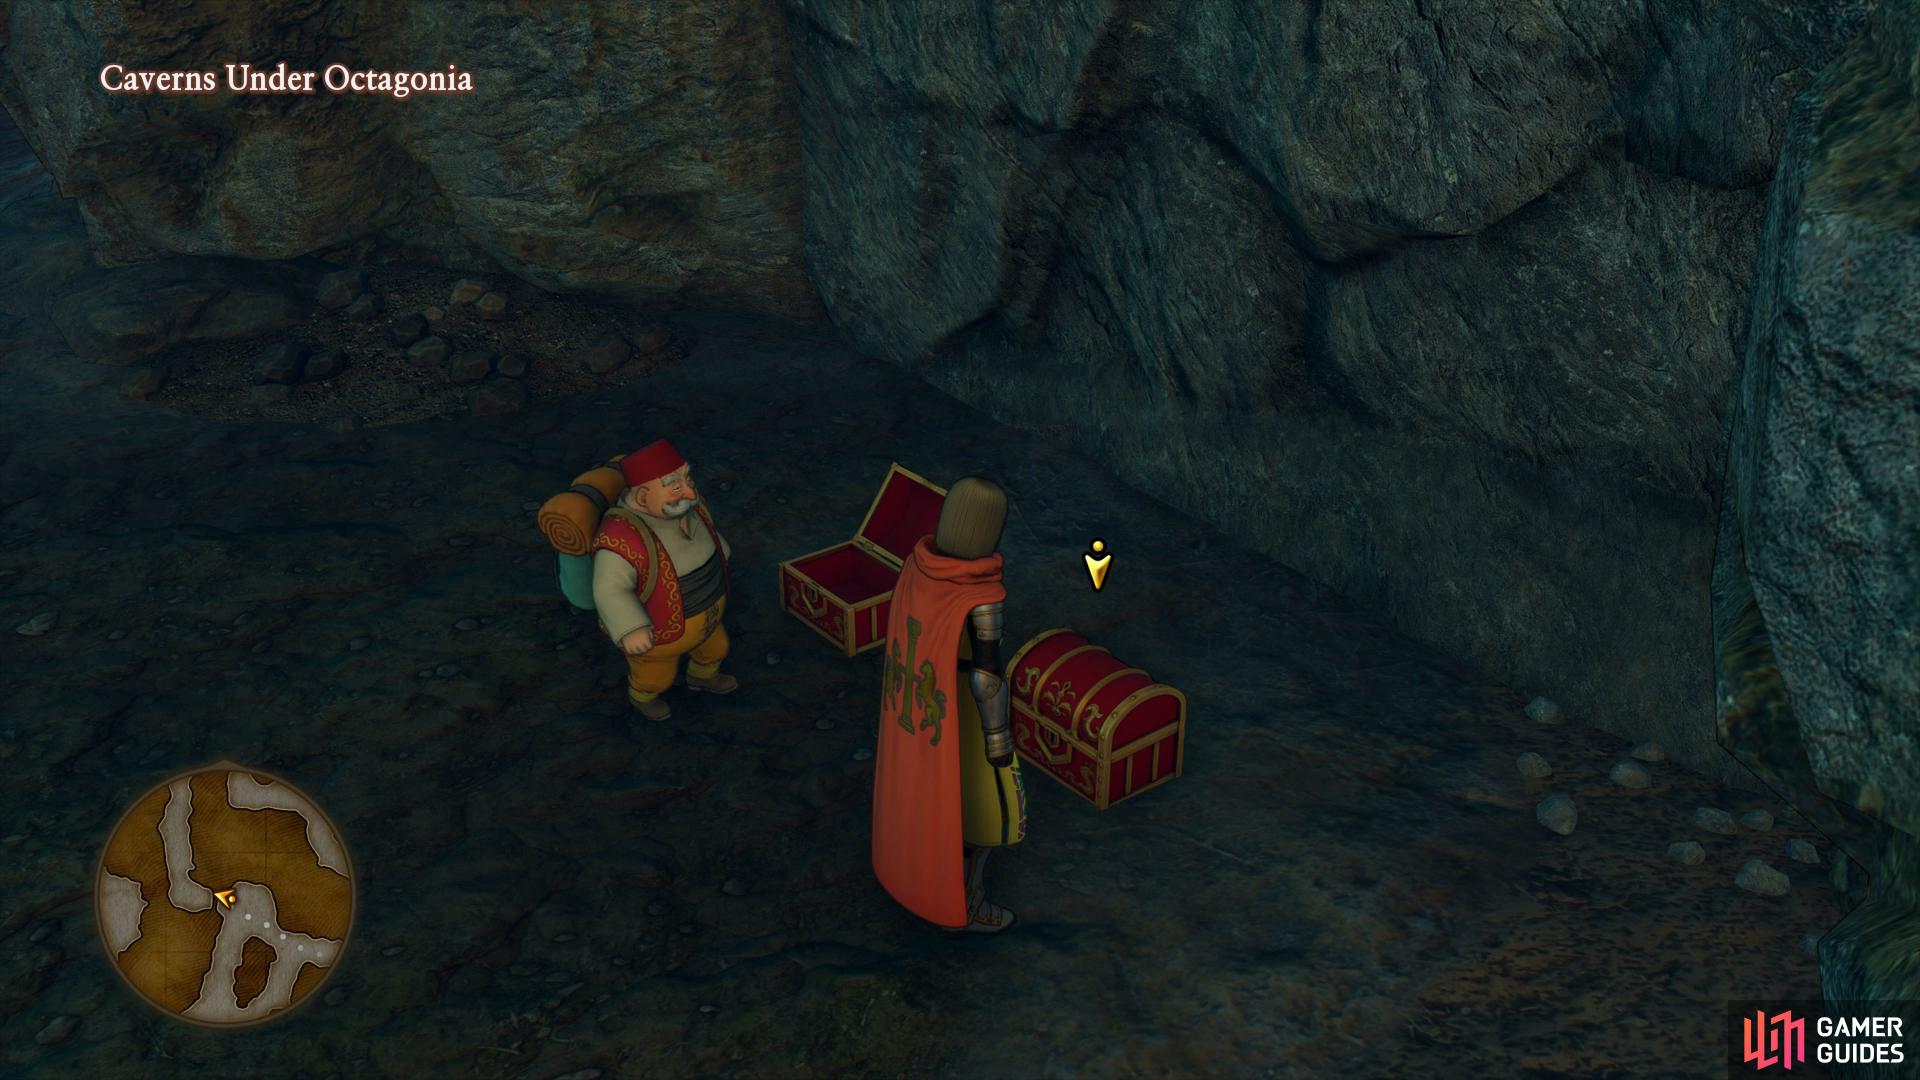
Caverns Under Octagonia
| Items | Area |
|---|---|
| Assassin’s Dagger | West, chest |
| 1000G | Central, chest |
| Mini Medal | East, chest |
| Blue Eye | Central, chest |
| Seed of Skill (Cannibox) | Central, chest |
| Yggdrasil Leaf | Southeast |
| Magic Water | Outside boss door, chest |
| Sparkly Spots | Area |
|---|---|
| Tangleweb | East of the entrance |
| Silver Ore | North of the entrance |
| Silver Ore | Central |
| Gold Ore, Silver Ore x2 | East |
| Iron Ore | Southeast |
| Silver Ore | South |
| Monsters | HP |
|---|---|
| Metal Slime | ~4 |
| Deadnaut | ~102 |
| Drackolyte | ~66 |
| Toxic Zombie | ~102 |
| Clockwork Cuckoo | ~56 |
| Shadow Minister | ~82 |
| Troll | ~513 |
| Cannibox | ~208 |
This deep, murky cavern is hidden below the Orphanage and appears to be where the missing warriors may be. Rab will join as a guest for this dungeon and will heal if your health gets too low. As you can see from the Monsters list, there’s an opportunity to encounter Metal Slimes in this dungeon, be sure to use multi hitting abilities if you encounter one of these to gain tremendous Exp. The only other monster here of huge concern is the Trolls, these mammoth brutes have a whopping 513 HP and take some beating, be sure to use your abilities against them.
From the entrance, head east at the first intersection to find a Sparkly Spot behind the spider webs containing a Tangleweb. Follow the path west and then north until you reach the next intersection, taking a brief detour back to the east to find another Sparkly Spot, this one containing an Silver Ore. Return to the main path heading west and follow it around until you come across the next intersection, you’ll notice some metallic orbs on the ground. These are actually encounters with Clockwork Cuckoos however they have a high chance at including Metal Slimes, whenever you see these, trigger a battle.
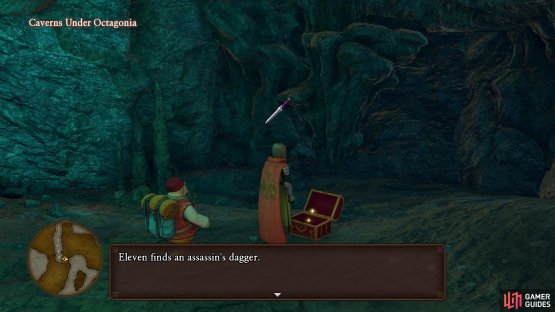

(1 of 2) You’ll find a new Dagger for Erik at long last in a chest here

You’ll find a new Dagger for Erik at long last in a chest here (left), the elusive Metal Slimes can help you gain some levels ahead of the difficult boss here. (right)
Once you’ve finished battling here, take the western path and follow it to the end to find a chest behind two Toxic Zombies, open it to obtain an Assassin’s Dagger, a useful Dagger for Erik that has the possibility of causing instant death (including against Metal Slimes). Return to the previous intersection and continue south to the next and search behind the northern most webs first to find another chest, this one housing a bag of 1000G. Search behind the other webs to the northeast here to find a Sparkly Spot containing another Silver Ore.
Take the southern exit now and follow the linear path to the next intersection, continuing north as you reach another large open room. You’ll encounter a Troll here, a viscious brute with more than 500 HP so be prepared for a lengthy battle, a regular attack from a Troll can do upwards of 70 HP so be careful. After defeating it, check behind the webs to the west to find an Ore gathering point containing Gold Ore and two Silver Ores. Return to the large room and check in the northeast corner for a chest containing a Mini Medal.


(1 of 2) Beware the chest on the right
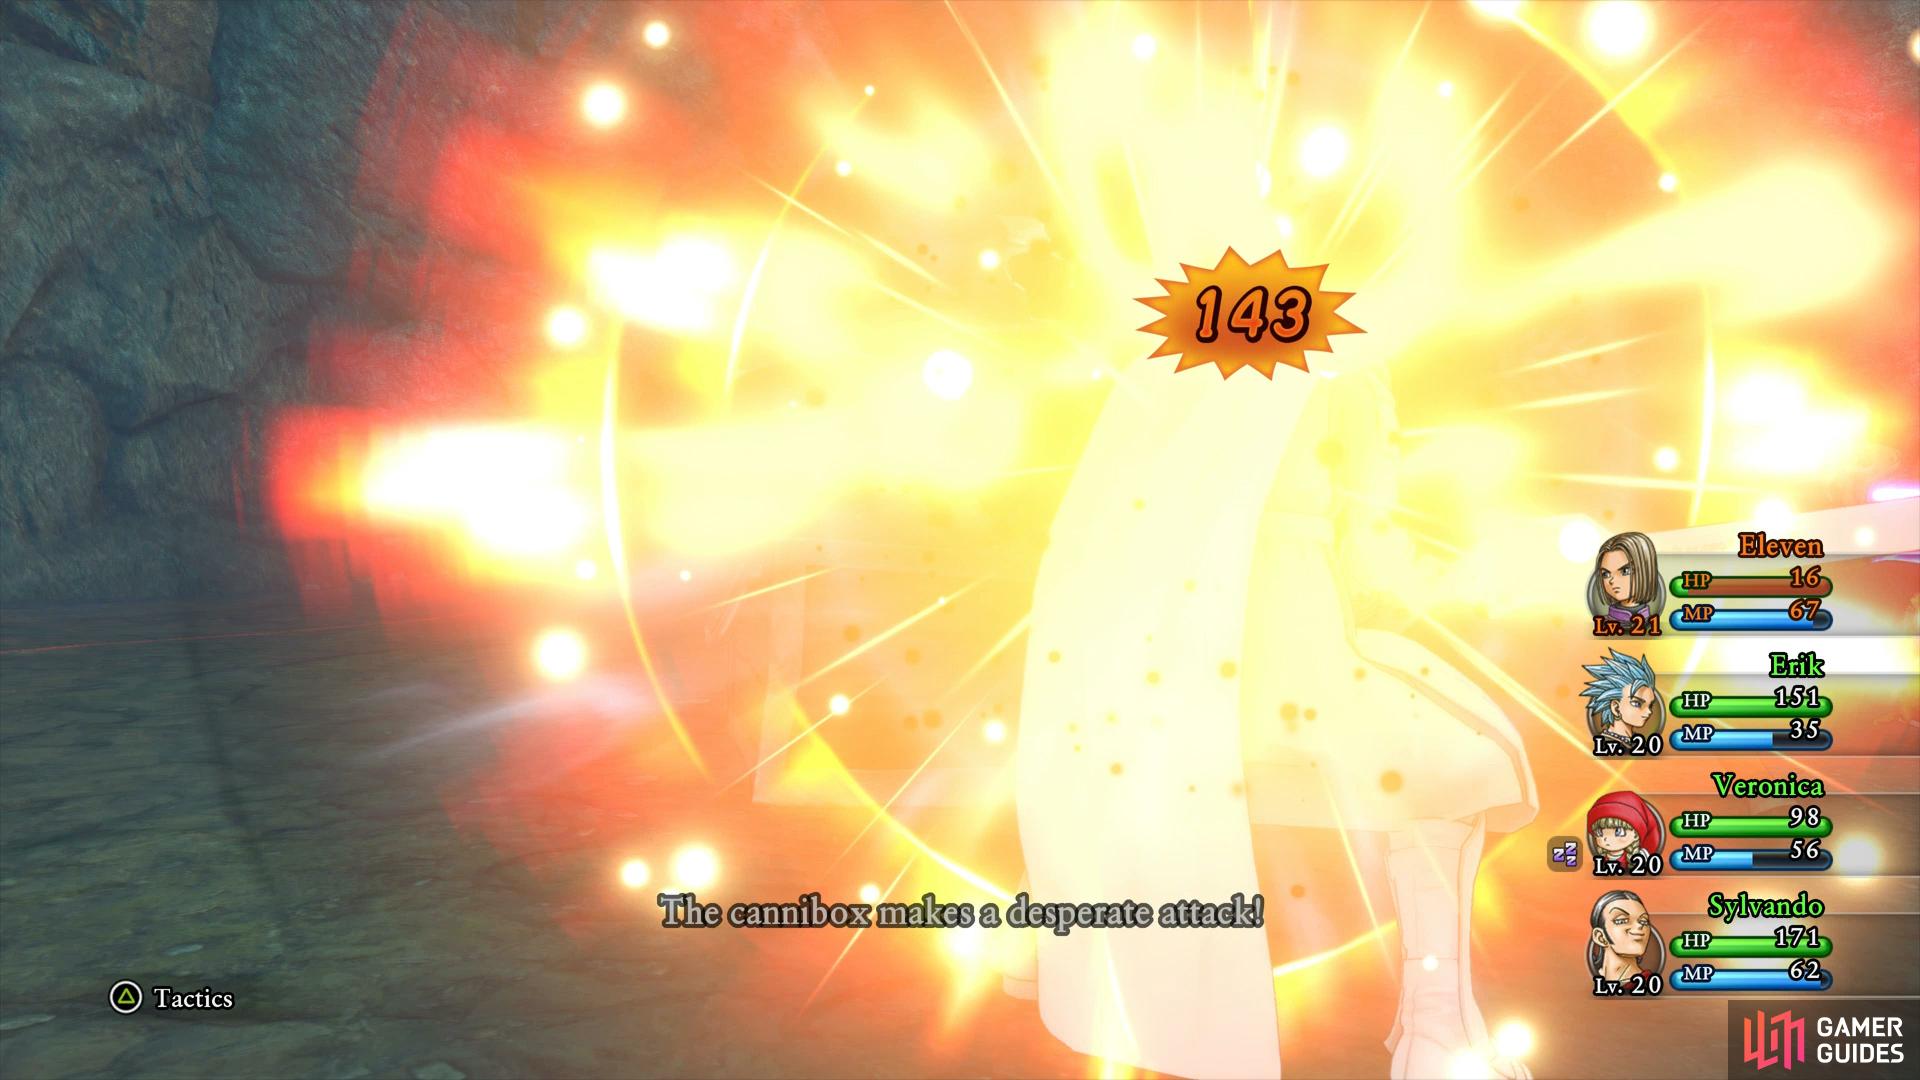
Beware the chest on the right (left), the Cannibox inside can deal devastating damage. (right)
Return south to the previous intersection and take the eastern route this time to the next room where you’ll find a Sparkly Spot containing an Iron Ore. Follow the path south to the next clearing where you’ll find another Sparkly Spot, this time containing a Silver Ore. Continue following the path to the next intersection and head to the northwest corner to find two chests. The left chest contains a Blue Eye but the right chest contains a Cannibox. These Mimics are deadly as they have the ability to cast Thwack, an instant death spell along with performing Desperate Attacks for huge damage. Once you manage to defeat the Cannibox you’ll obtain a Seed of Skill, if Sylvando is not anywhere near learning Hustle Dance then give it to him, otherwise consider giving it to someone else.
Head south from here and then go down to the southeast corner to find another chest, this one containing a Yggdrasil Leaf. Follow the path to the west now where you can find the final chest containing a Magic Water. Take the time to recover your HP and MP and make sure you’re at least Level 22, the possibility of Metal Slimes in this dungeon makes it ideal to grind a few levels out. If you’ve unlocked Hustle Dance for Sylvando then keep him in your party otherwise use Serena over him. Once you’re fully prepared, open the door and step through.
Arachtagon
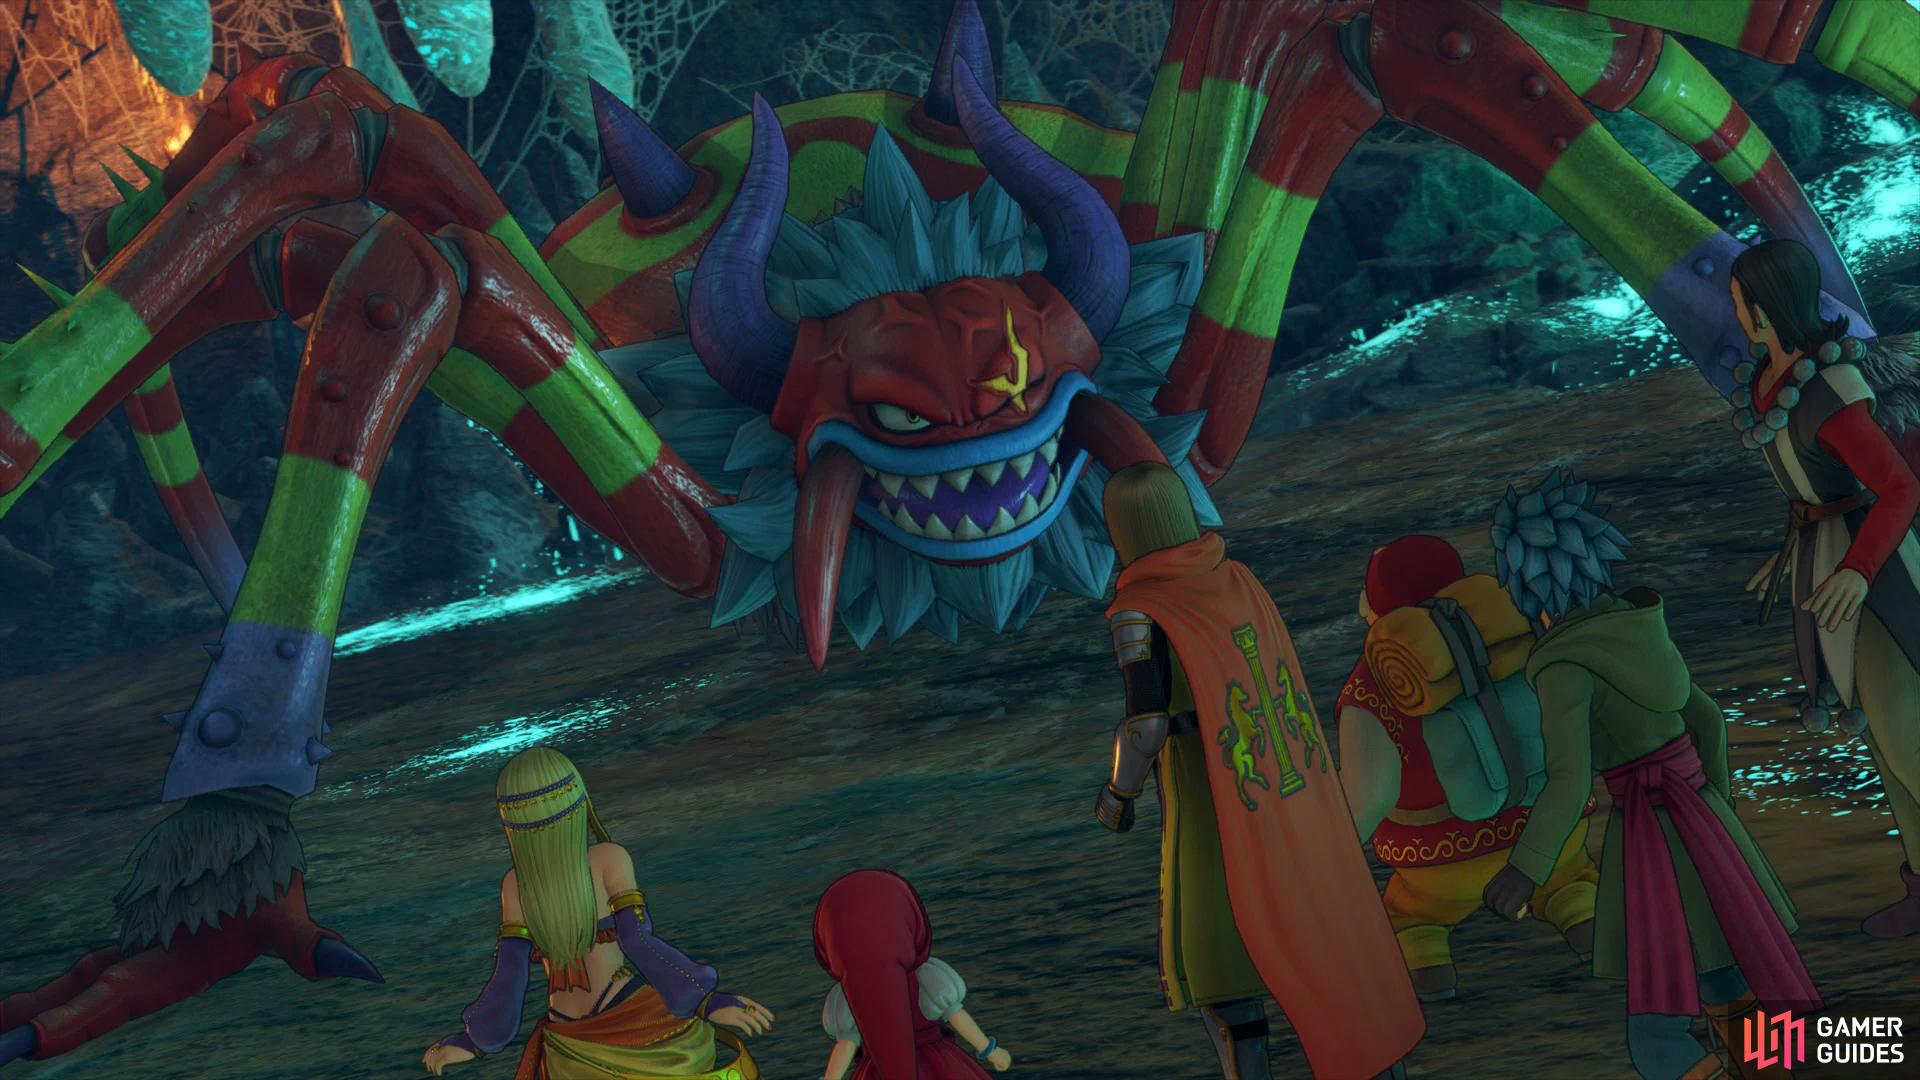
Arachtagon is a very tough encounter and one that you’ll want to make sure Sylvando has mastered Hustle Dance for. Arachtagon has many group wide attacks that you’ll need to recover from a lot. Rab will help a little but Sylvando’s Hustle Dance will recover for around 70HP to the entire party. If you haven’t learnt it yet then go with Serena for Midheal, you’ll need the extra healing.
Arachtagon has around 1270 HP so you’ll need to make sure you buff up and debuff the boss like always. Buff and Sap are givens as is Sylvando’s Oomph, especially on Veronica as the boss is weak to Fire and her Sizzle (or Frizzle if you have it) will deal huge amounts of damage. Arachtagon can cause confusion to the entire party along with poisoning on regular attacks, of which he attacks twice per round. As a result of this, don’t let anyone’s HP drop below 100 and consider using Serena’s Alma Matter on her for even more security. Have the Hero and Erik use their Scorched Earth Pep Power if you have the chance, this will deal great damage to him as well.


(1 of 2) Kafuddle is Arachtagon’s most dangerous attack, you can only heal it with Sobering Slap and Rab’s Defuddle
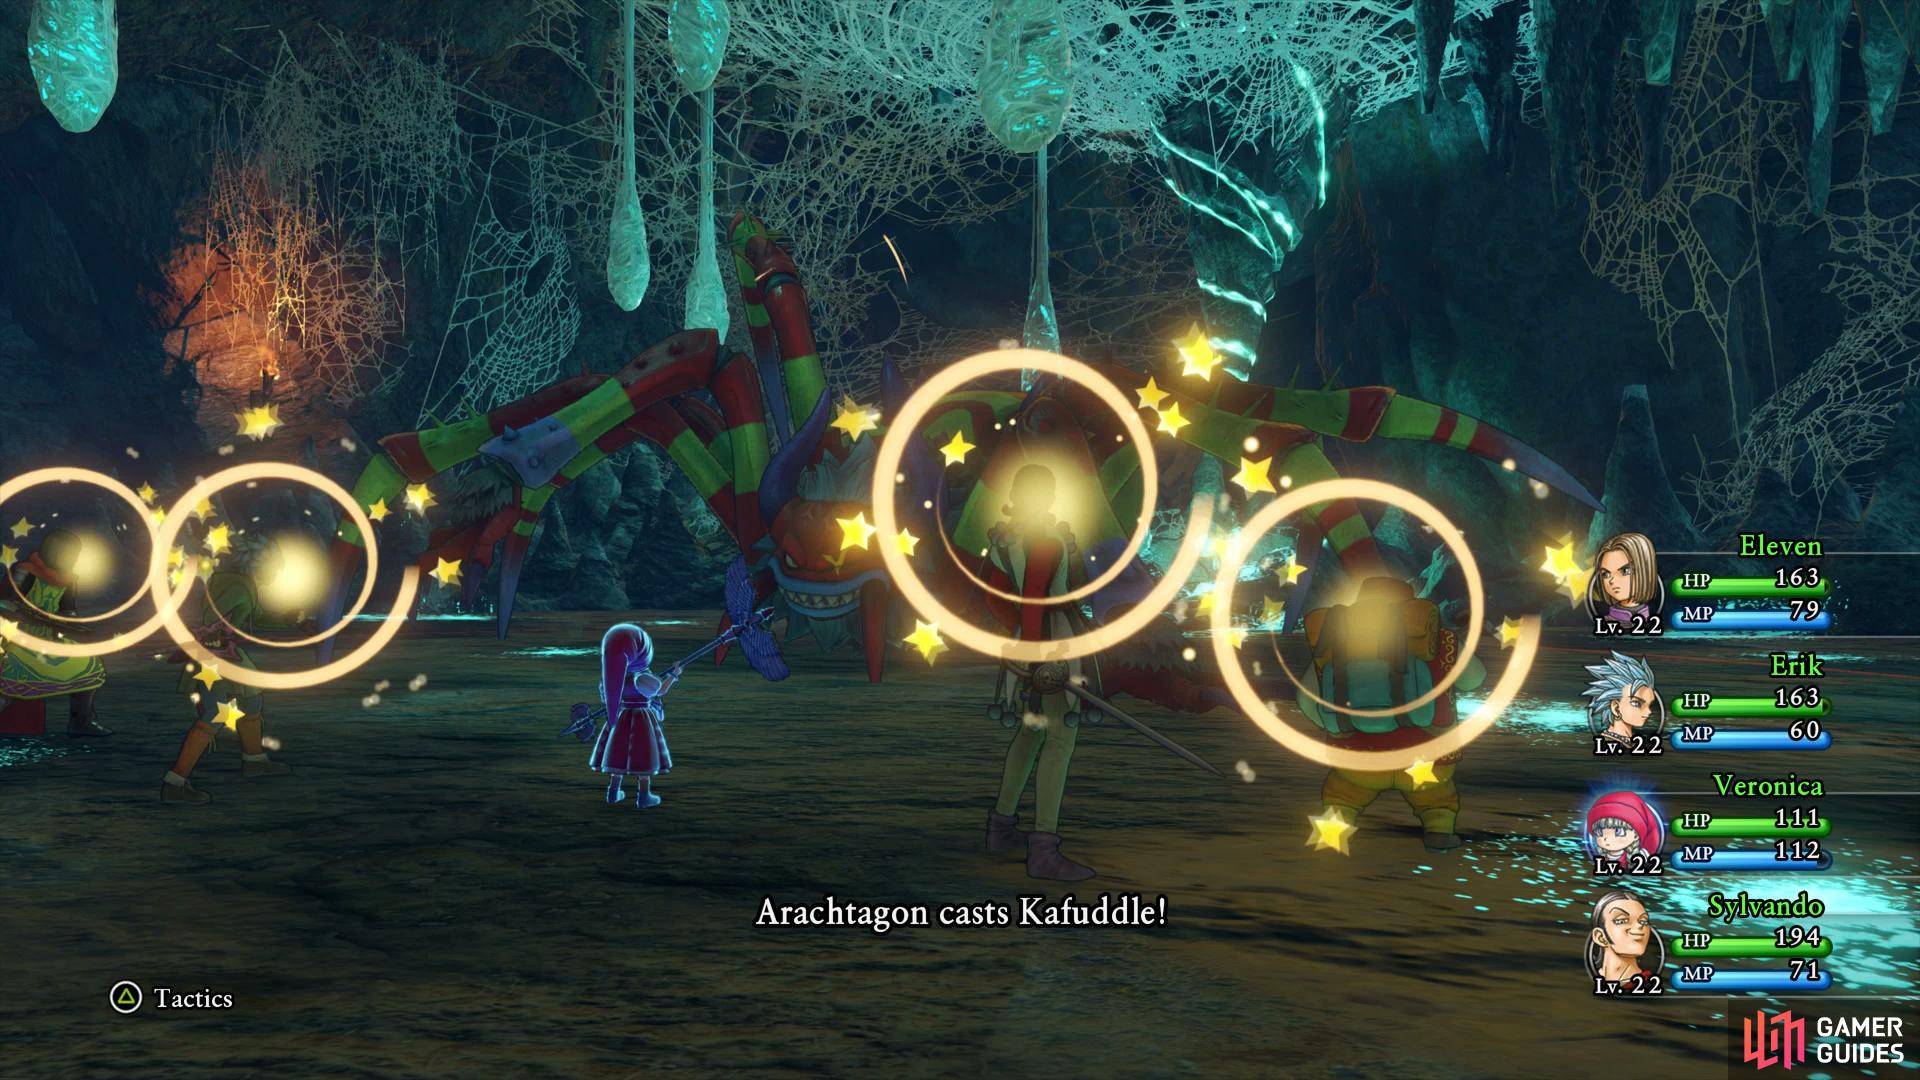

Kafuddle is Arachtagon’s most dangerous attack, you can only heal it with Sobering Slap and Rab’s Defuddle (left), if you get tangled at the same time as Fuddle then you’ll most likely not survive the onslaught that follows. (right)
This is your toughest battle yet, if you let Acceleratle drop then there’s the real possibility that the Arachtagon could attack at the end of one combat round and the beginning of the next giving him four attacks before you can even react. If he decides to do group wide attacks you could end up confused, tangled and near death, be sure to use Hustle Dance straight away in situations like this and hope that Rab will cure the group of any Confusion. Finally, keep some magic water on Sylvando to replenish his MP if needed, Hustle Dance costs 12MP per casting.
Following the death of Arachtagon, the party will learn the reasoning behind Vince’s involvement in the matter. Once things are resolved, the group will wake up the next day in the Inn (or Sylvando will rather unexpectedly wake up the Hero) ready to head to the arena for the rewards ceremony. Head to the front desk and speak to the man there to proceed to the rewards ceremony. As fans of the tournament gather in excitement, the Hero and Vince return to collect their reward. To drum up more excitement however, Vince proposes an exhibition match, something thats tough to turn down.
Fortunately for you, this isn’t even a contest as most of Vince’s attacks will miss and he only has 150 HP. Simply attack a few times to win the bout. As the intentions for the requested fight are made clear, the Hero is finally presented with the Rainbough… or not. The branch has been stolen along with a letter left for the Hero from Rab who requests his presence at the castle ruins of Dundrasil, the place of the Hero’s birth.


Before you leave town, there’s a few more matters to take care of in the name of quests. To the left of the arena counter is a man in the corner, speak to him and listen to his request. He wishes for you to obtain some Mellow Vera from the Dundrasil Region to help improve his skin, somewhere you’ll be visiting shortly so agree to assist him to begin Quest 12 - Skincare for the Fierce and Fabulous.

(1 of 2) Talk to the boy to learn that he’s looking for a particular MMA fighter
Talk to the boy to learn that he’s looking for a particular MMA fighter (left), you’ll find him to the south of the entrance to Upper Octagonia. (right)
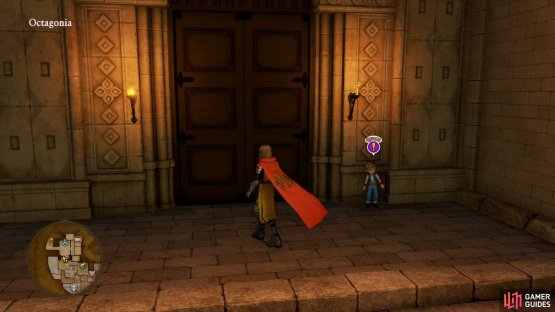
Return now to the Orphanage to find a boy outside, speak to him to discover that he wishes to find Xero the Shadow, ann MMA fighter somewhere in town, agree to assist him to begin Quest 13 - The Shadow. You can solve this task quickly, return to where the Goddess Statue is and take the stairs to the east up and then head south. Climb the platform and follow the path to the end to find Xero in the corner, speak to him to obtain his autograph and return to the boy at the Orphanage. Hand it over to the boy to complete the quest, for your troubles you’ll obtain a Mini Medal. There’s nothing left to accomplish here for now so save your game and leave town to begin the journey to the castle ruins.
No Comments