
Upon finishing Overture of Downfall, you will unlock the Carnage Dimension NPC in your base, allowing you to visit more difficult versions of the story maps you’ve played up to this point. However, you will also unlock a new Quest that will open up a stage in the Carnage version of Blood Parch. This starts the quest line for the Carnage Dimension, with you finishing each quest opening up a new one for the next stage. While they may start relatively tame (in terms of stats), these stages will get tough quickly, with the enemies’ stats reaching into the 10s of millions. That’s why it’s important to follow the steps listed in the What’s Next? section of the guide, as this section will figure that you’ve already done what was outlined there.
Blood Parch Carnage Stage
Your introduction to the Carnage challenge maps isn’t too bad, despite the initial levels impression and mass of Evilities you have to look at. Starting with the boss, he cannot be poisoned or charmed and has 10% more stats whenever his HP is full, as well 5% more damage if he should happen to have less than 10% HP. He gets a minor boost to wind, which one of his skills has, as well as some wind resistance (still only at 0). The two Titania have a 20% increase to the kind of magic they will be using, and will also do 10% damage to your SP from whatever they do to you. The Parthenocissus will make it so any enemy within 3 panels of her is immune to ailments and her unique evility that can heal others around her.
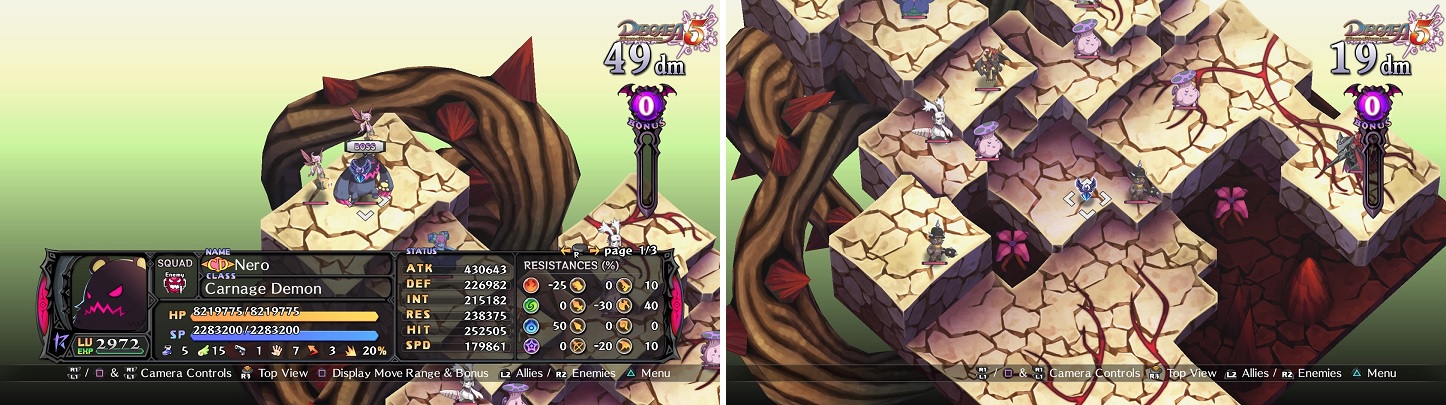
Every Carnage Stage will have a boss on it (left). As your first map, this one isn’t too bad, as the enemies aren’t too challenging (right).
The Azazel doesn’t have much working for it, besides some of its skills being able to inflict Weaken, which is not good for any of the battles in the CD. The only problem with the Rabbits is Hidden Valley, which might boost their speed by a lot, depending on where they are standing. It’s best to save the Eryndoms for later, as when you kill them, they will fill the Revenge Gauge of any remaining enemies by 20% and since there’s three of them, that’s 60%. The Orcs and Odin get a boost from each other being on the map (as well as from the Imp), so it might be best to go after them first.
Spirit Interment Carnage Stage
While the Diamond Knight is annoying, she doesn’t have the Evility that gives it more defense when she is defending. However, if there are enemies standing next to her while she’s defending, they do take less damage. The two enemies you want to keep an eye on at the beginning of the fight, especially if you don’t have resistance to poison, are the Zombies and Black Puddings. The latter are still weak to elemental magic, so mages are ideal here, especially considering the Zombies are weak to fire. The bad thing about the Zombies is that they have Regeneration, meaning 30% of the damage you inflict on them is returned as healing. However, if you have a very strong healer, you can use a healing spell on them, since Undead reverses the effects of healing.
The fewer characters you use, the less trouble you’ll have from the Battle Masters. The Orcs are only troublesome because of their Goddess of Orc skill, which can inflict Charm. You’ll want to save the Ra as one of the last enemies you defeat, due to Grief Shout lowering your defense by 30% for three turns. The Mage and the Skull both know up to Omega Star, as well as up to Omega in another element (Mage is Wind and Skill is Ice). The Saint will likely just sit back and buff the other enemies, as well as heal anyone that is hurt. As for the boss, despite having an extra 25% resistance in the three elements, it is still weak to fire.
Poisondise Carnage Stage
As soon as you get a level in the Bonus Gauge, you should summon your Netherworld to get rid of the Netherworld Effect, allowing your characters to stand on the purple water without fear of being poisoned. The two Shadow Masters know a lot of ailment skills, so they should be gotten rid of first, followed by the two Behemoths, due to their resistance-reducing Evilities. On the enemy’s first turn, the Lord Cat God will Magichange with the Archer, making the Archer more resilient to attacks from your humanoid characters. The two Desperados have Poison Vaccine, so they won’t be affected by the Nether Effect should you decide to keep it.
The wondrous and spectacular Diamond Knights have returned, who will sit there and be annoying with their defensive abilities. Also, the Liliths can be quite troublesome enemies, since they have access to Charm, meaning that your own characters will be fighting one another, which can prove fatal if they are extremely powerful. The Space Knights have access up to the Giga-tier for the three elementals, and have Evilities that increase their elemental damage. As for the boss, she has Star/Mega Star, as well as a boost to Star damage. Also, make sure you don’t attack her from behind, since Fluffy Barrier reduces damage from behind by 50%.
Demunshroom Carnage Stage
The biggest problem with this stage is that it’s set up in such a way that the enemies can hit you with attacks from the upper platforms. If your strongest character(s) are mages, then you can alleviate this problem by hitting them with spells, which have good height requirements. The first part of the stage will likely be you trying to battle the ailments that the Unknown, Imp, Zombie, Shrooms and Black Pudding can inflict on your characters. The biggest problem is definitely Poison, so if you have Poison Vaccine, equip it to cut off that damage source. That leaves Weaken (the Black Pudding can inflict it on your characters if they attack while next to it), Paralysis, Sleep and Amnesia; none of these are as bad as Poison, but Weaken can be a pain if you have stat-appropriate characters for this map.
Once you’re past those enemies, you have to contend with the Maid and Gunner pegging you from above (again, not a problem if you can hit them with spells, should you have mages or anyone with spells). While the Mother Brain has access to a few Star spells, she will most likely use her turns to buff the other enemies around her. Nixxing the Partenocissus early can help, since they can power up ATK, DEF and RES for three turns for enemies that stand next to her. One of the Titanias has Mind Break, which inflicts 10% of the damage it deals to your SP, which can be a little bit of a pain. As for the boss, Punishment will inflict more damage to your characters if they are Weakened, so you want to heal that before getting to the top. Also, she gets a pretty good boost to magical (and Star) spells thanks to her Evilities.
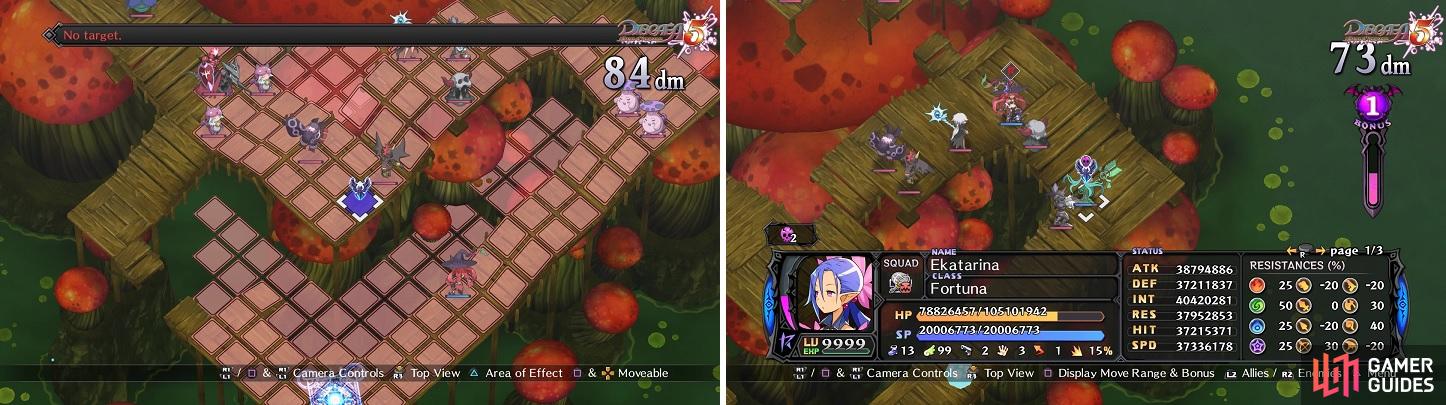
If you have a mage, you can hit the enemies from below (left). There is a high chance you will get afflicted with an ailment on this stage (right).
Icic-Hell Carnage Stage
On the enemy’s first turn, the Rabbits will Magichange with the Iron Maidens, giving them their Unique Evility…which doesn’t matter, as they are on flat ground. That being said, they still have Physical Boost, which increases their physical skills. Two of the Battle Masters have Super Guts, meaning that they will have defense increased by 50% if they are still standing after 50% of their HP has been depleted. The middle Battle Master will likely enter Revenge Mode first before anyone else, if left alive that is.
The big problem at the beginning of this map will come from the Ninja and Skull, who are perched on the raised platform behind the previously mentioned enemies. With a 50% decrease in water resistance thanks to the Netherworld Effect, the Skull will put a hurting on your characters, so you want to summon your Netherworld to get rid of the effect. The Ninja will pretty much use his status ailment skills on you.
Past that, you will find some Behemoths, who despite having very low water resistance, nullifies it thanks to Water Management. The Anti-Messiah will pretty much use his turns to buff up the other enemies, so if you don’t want that happening, then quickly take him out. The Chimera has Day of Calamity, meaning that if you have ailments on your characters, then it will get a 10% deathblow chance for each ailment, which spells trouble with the Ninja on this map, since they have access to a wide range of those with their skills. The Unknown contribute to this problem, as well, since their unique Evility makes it so you’re more susceptible to ailments. The boss is a Horseman and doesn’t have much, but he does get a 30% stat increase from Power of Bowls (6 empty Evility slots x 5% for each one).
Dragon Fang Carnage Stage
This map is split into two, pretty much, similar to the one during the main story. On the enemy’s first turn, the Titania at the front will Magichange with the Space Knight, making it so she can recover 10% of her max SP at the end of each turn, which doesn’t really matter much in the long run. However, the Space Knight will have pretty high elemental resistances, which translates to power in her spells, so you definitely want to take her out quick. The two Chimera near them are the usual ones, but you want to be careful of the one with Calamity Shield, which blocks all damage from characters that have ailments. The Bastet can counterattack before your own attack goes off, provided you’re not next to them, so ranged attacks work wonders.
The only Orcs you want to watch out for are the ones with Mass Psyche, since that will boost their stats by a good 60-70% by the time you are likely to get to them. The Lord Cat Gods do have one potential worrisome Evility, which is Cat Step, putting their evasion at 50% from attacks at a lower elevation, something that could happen a lot during this battle due to the terrain. The White Foxes have access to all four elements and a 20% increase to them all with their Evilities.
The Boulevard Fighters have the potential to be really devastating, especially if you have a character with a lot of counters, as they have 8 themselves and their Unique Evility increases their attack power by 25% by the number of counters. As for the boss, it is a Twin Dragon and will get to attack twice if it doesn’t move. This could prove damaging when combined with Double Attack and Physical Boost, so try to use ranged attacks to get it to move.
No Comments