
The Like A Dragon series has been loaded with minigames and Like A Dragon Gaiden contains a lot of them. One of the minigames you can partake in is billiards, with you finding it at the Kiss Shot Billiards and Bar building. This is located in the southwestern corner of the map, but if you get lost, use the Search function on the map itself. You have the option to play different variations of billiards here, but this page will concern itself with the 1-Shot Challenge mode.

There are four difficulties for the 1-Shot Challenge.
The goal of this mode is to hit a red ball into the designated pocket while avoiding any obstacles on the table. Note that if you hit any of the 8-balls on the table, even if you sink the red ball, then that counts as a failed attempt. Likewise, if you get the cue ball into a pocket, that also counts as a failure. Later shots will have yellow balls on the table, which are safe to hit, as long as they don’t connect with any of the 8-balls. There are four different difficulties, which are Easy, Normal, Hard, and Legend. You only need to complete the Easy and Normal for the Surgical Precision trophy/achievement, with the other two being completely optional.
Easy 1-Shot Challenge
Easy is definitely living up to its name, as the three shots here are quite simple. The other difficulties are locked from the start, so you will have to do the previous one in order to unlock them.
Easy 1
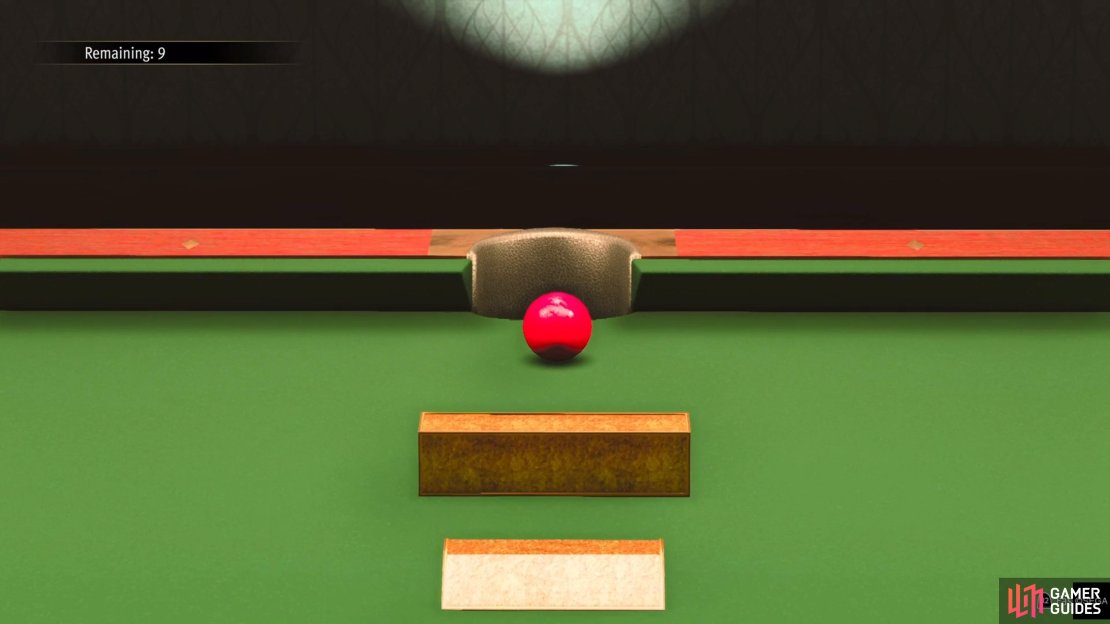
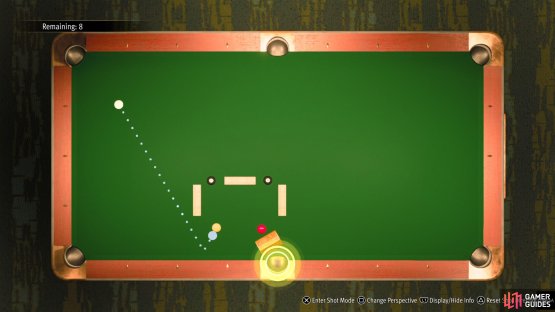
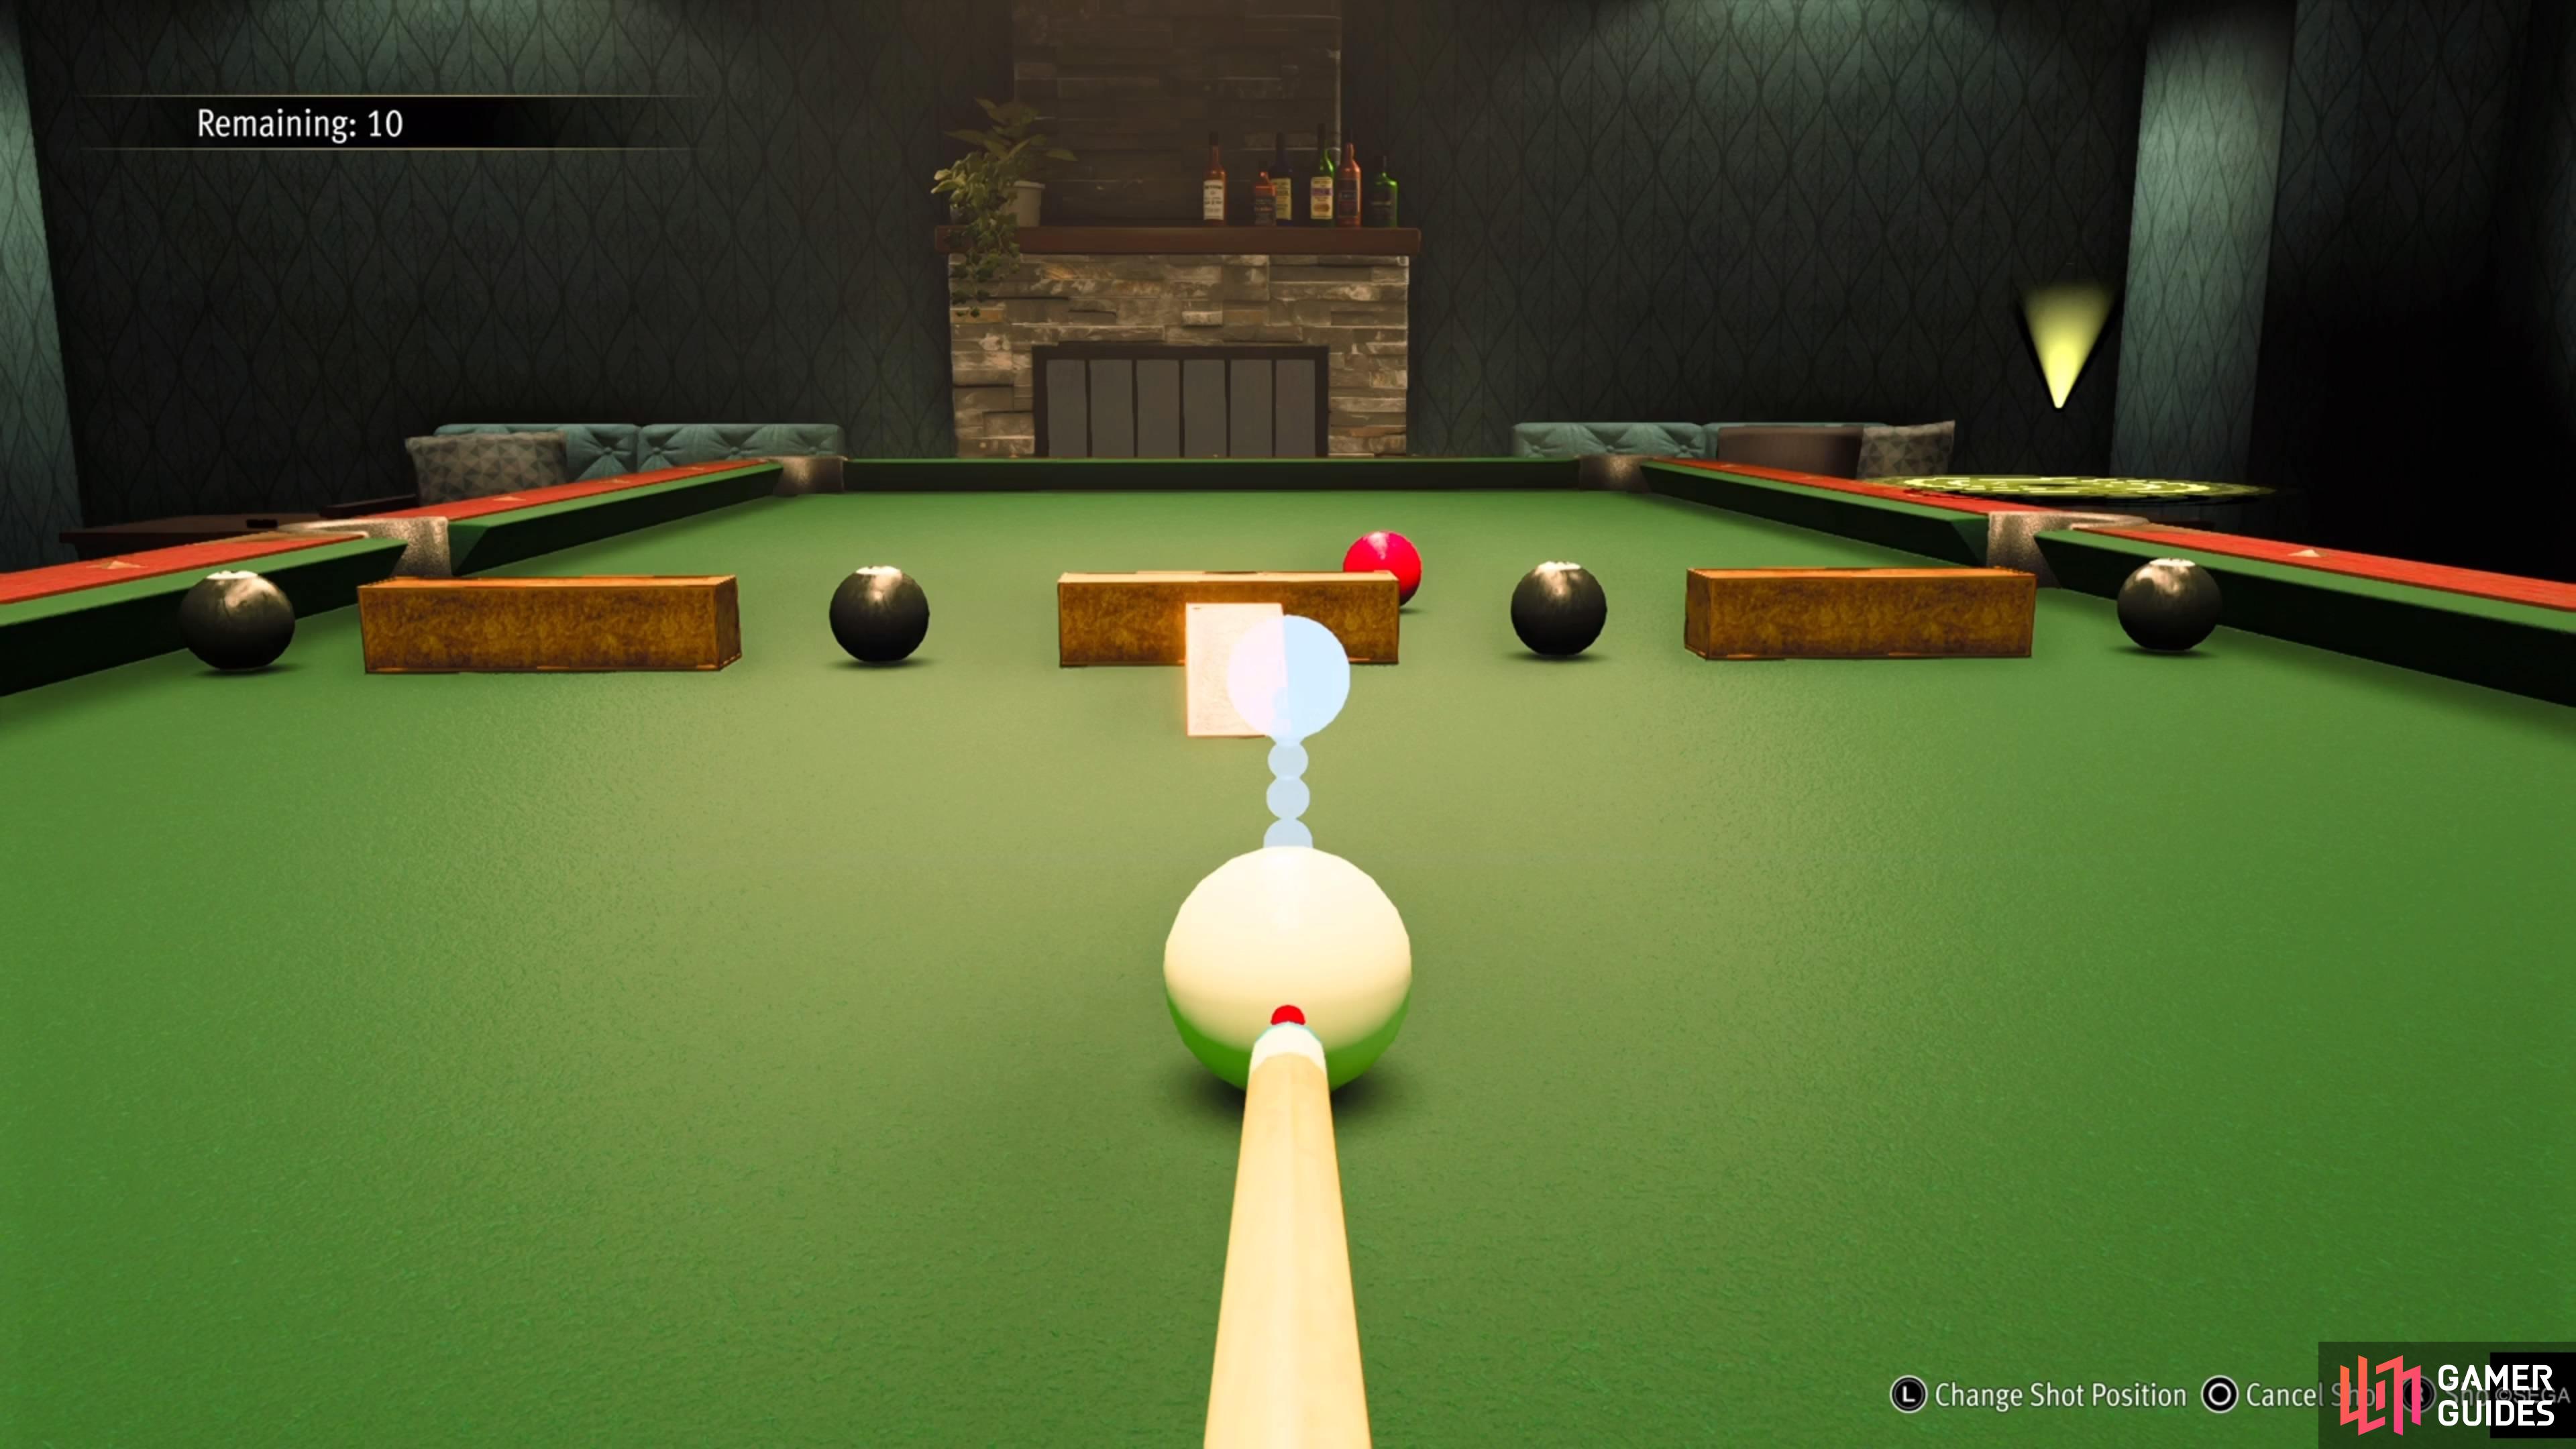
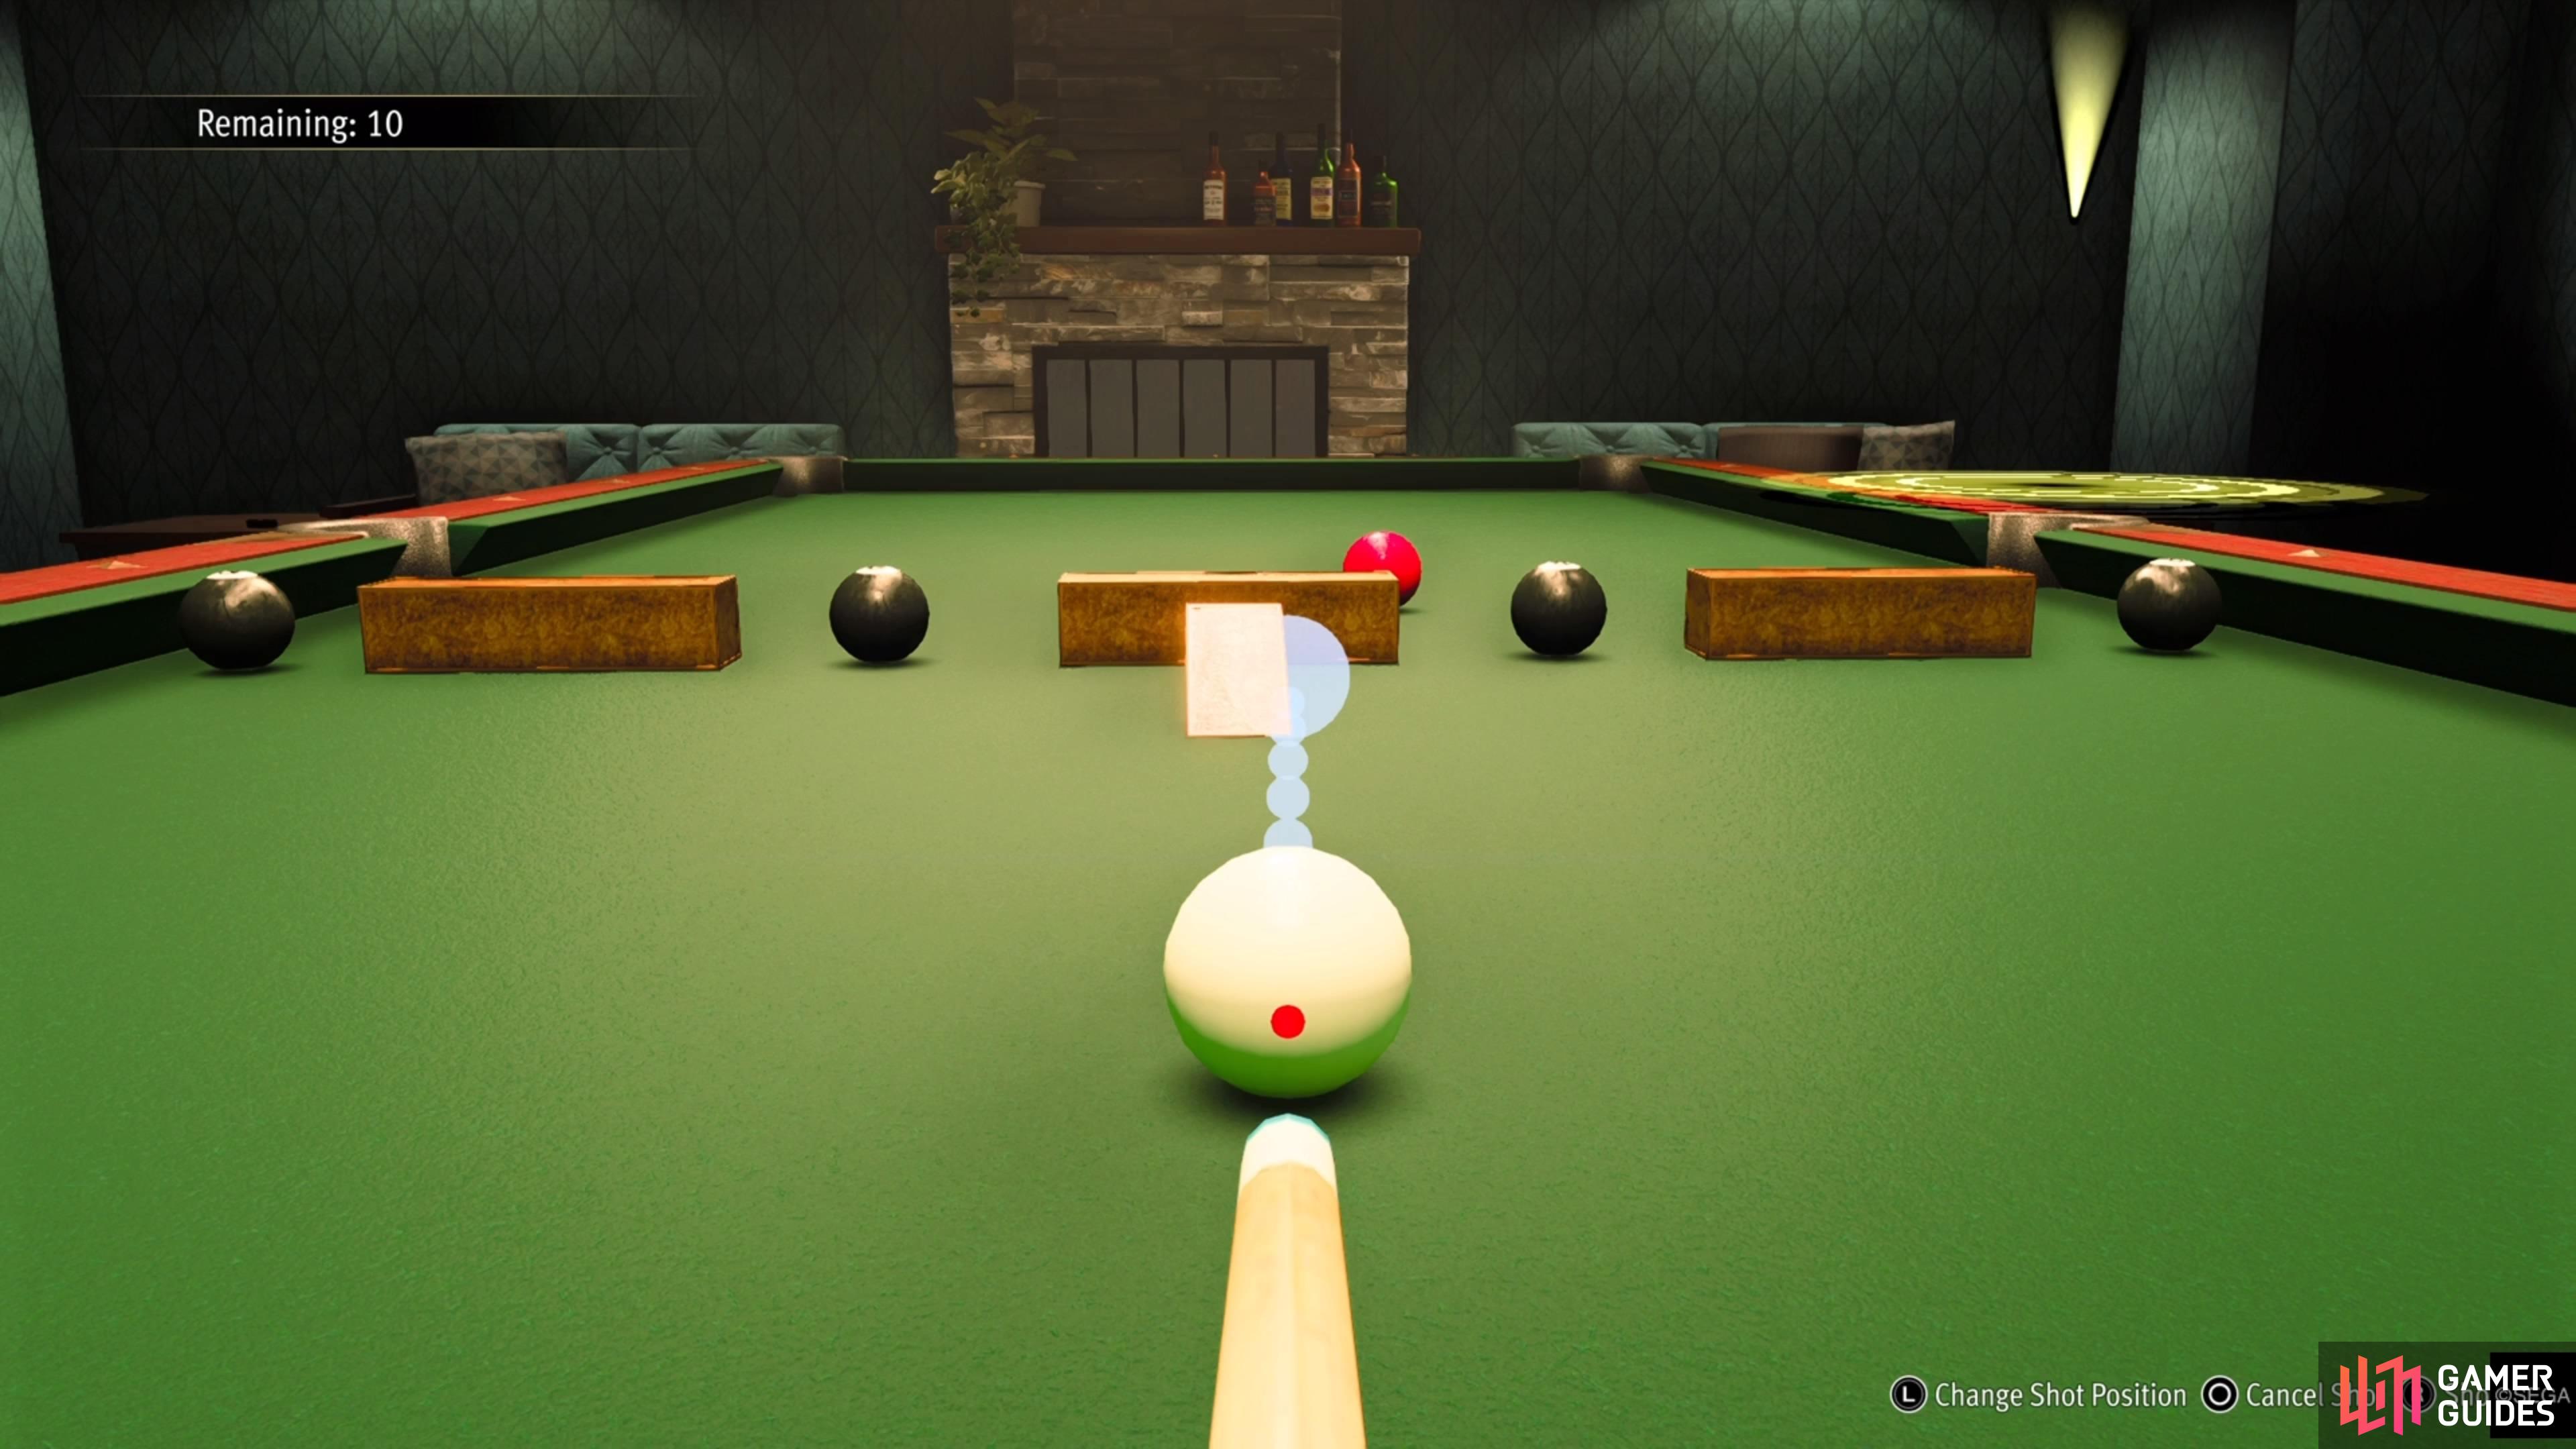
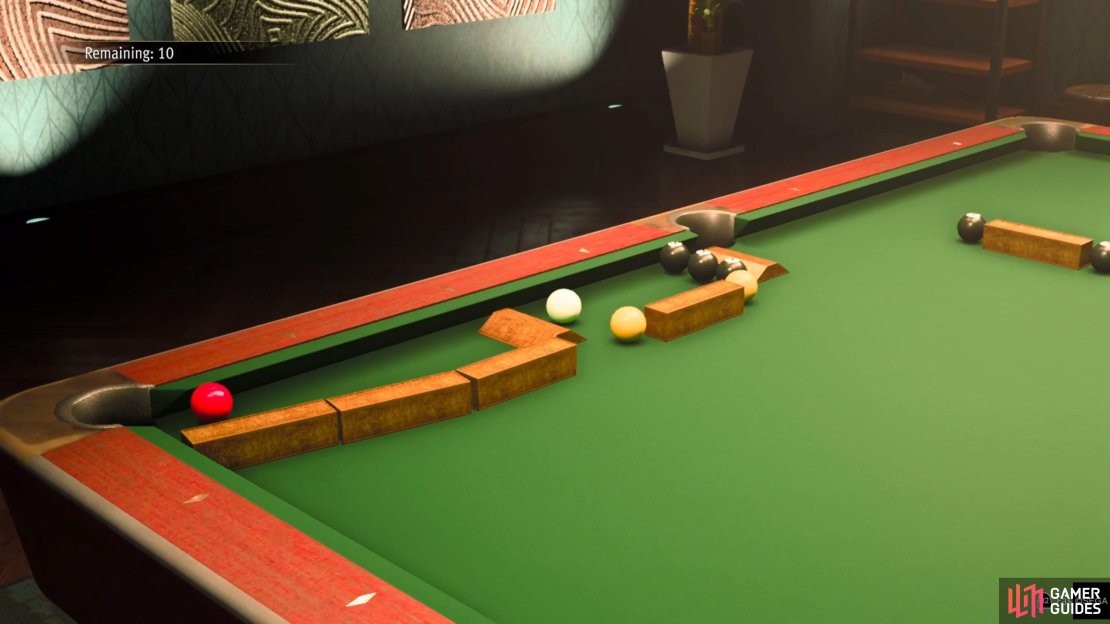
The first shot is the easiest out of the whole bunch, as there are two 8-balls right next to a wooden obstacle. The red ball is near the one corner pocket, but you won’t be able to do a straight shot, because of the one 8-ball. For this, you will want to bank the shot off the top side of the table and hit the red ball squarely in the middle. This should be more than enough to send the ball into the pocket. Note that from here on, you do want to be careful with how hard you hit the cue ball, as you don’t want to send it flying into any pockets or 8-balls.
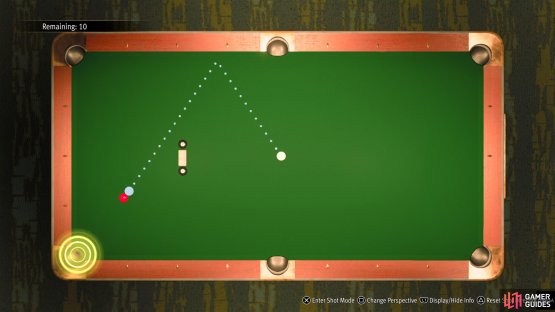

(1 of 2) You will want to set up the shot like this for the first Easy challenge.

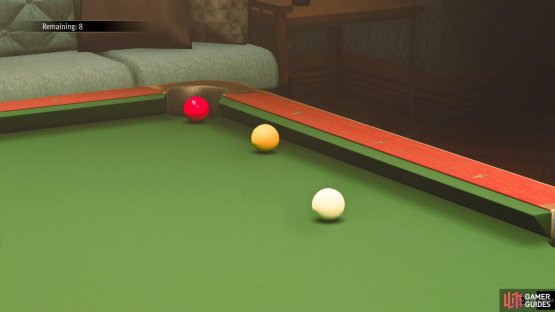
You will want to set up the shot like this for the first Easy challenge. (left), Be careful not to hit the ball too hard for the second Easy challenge. (right)
Easy 2
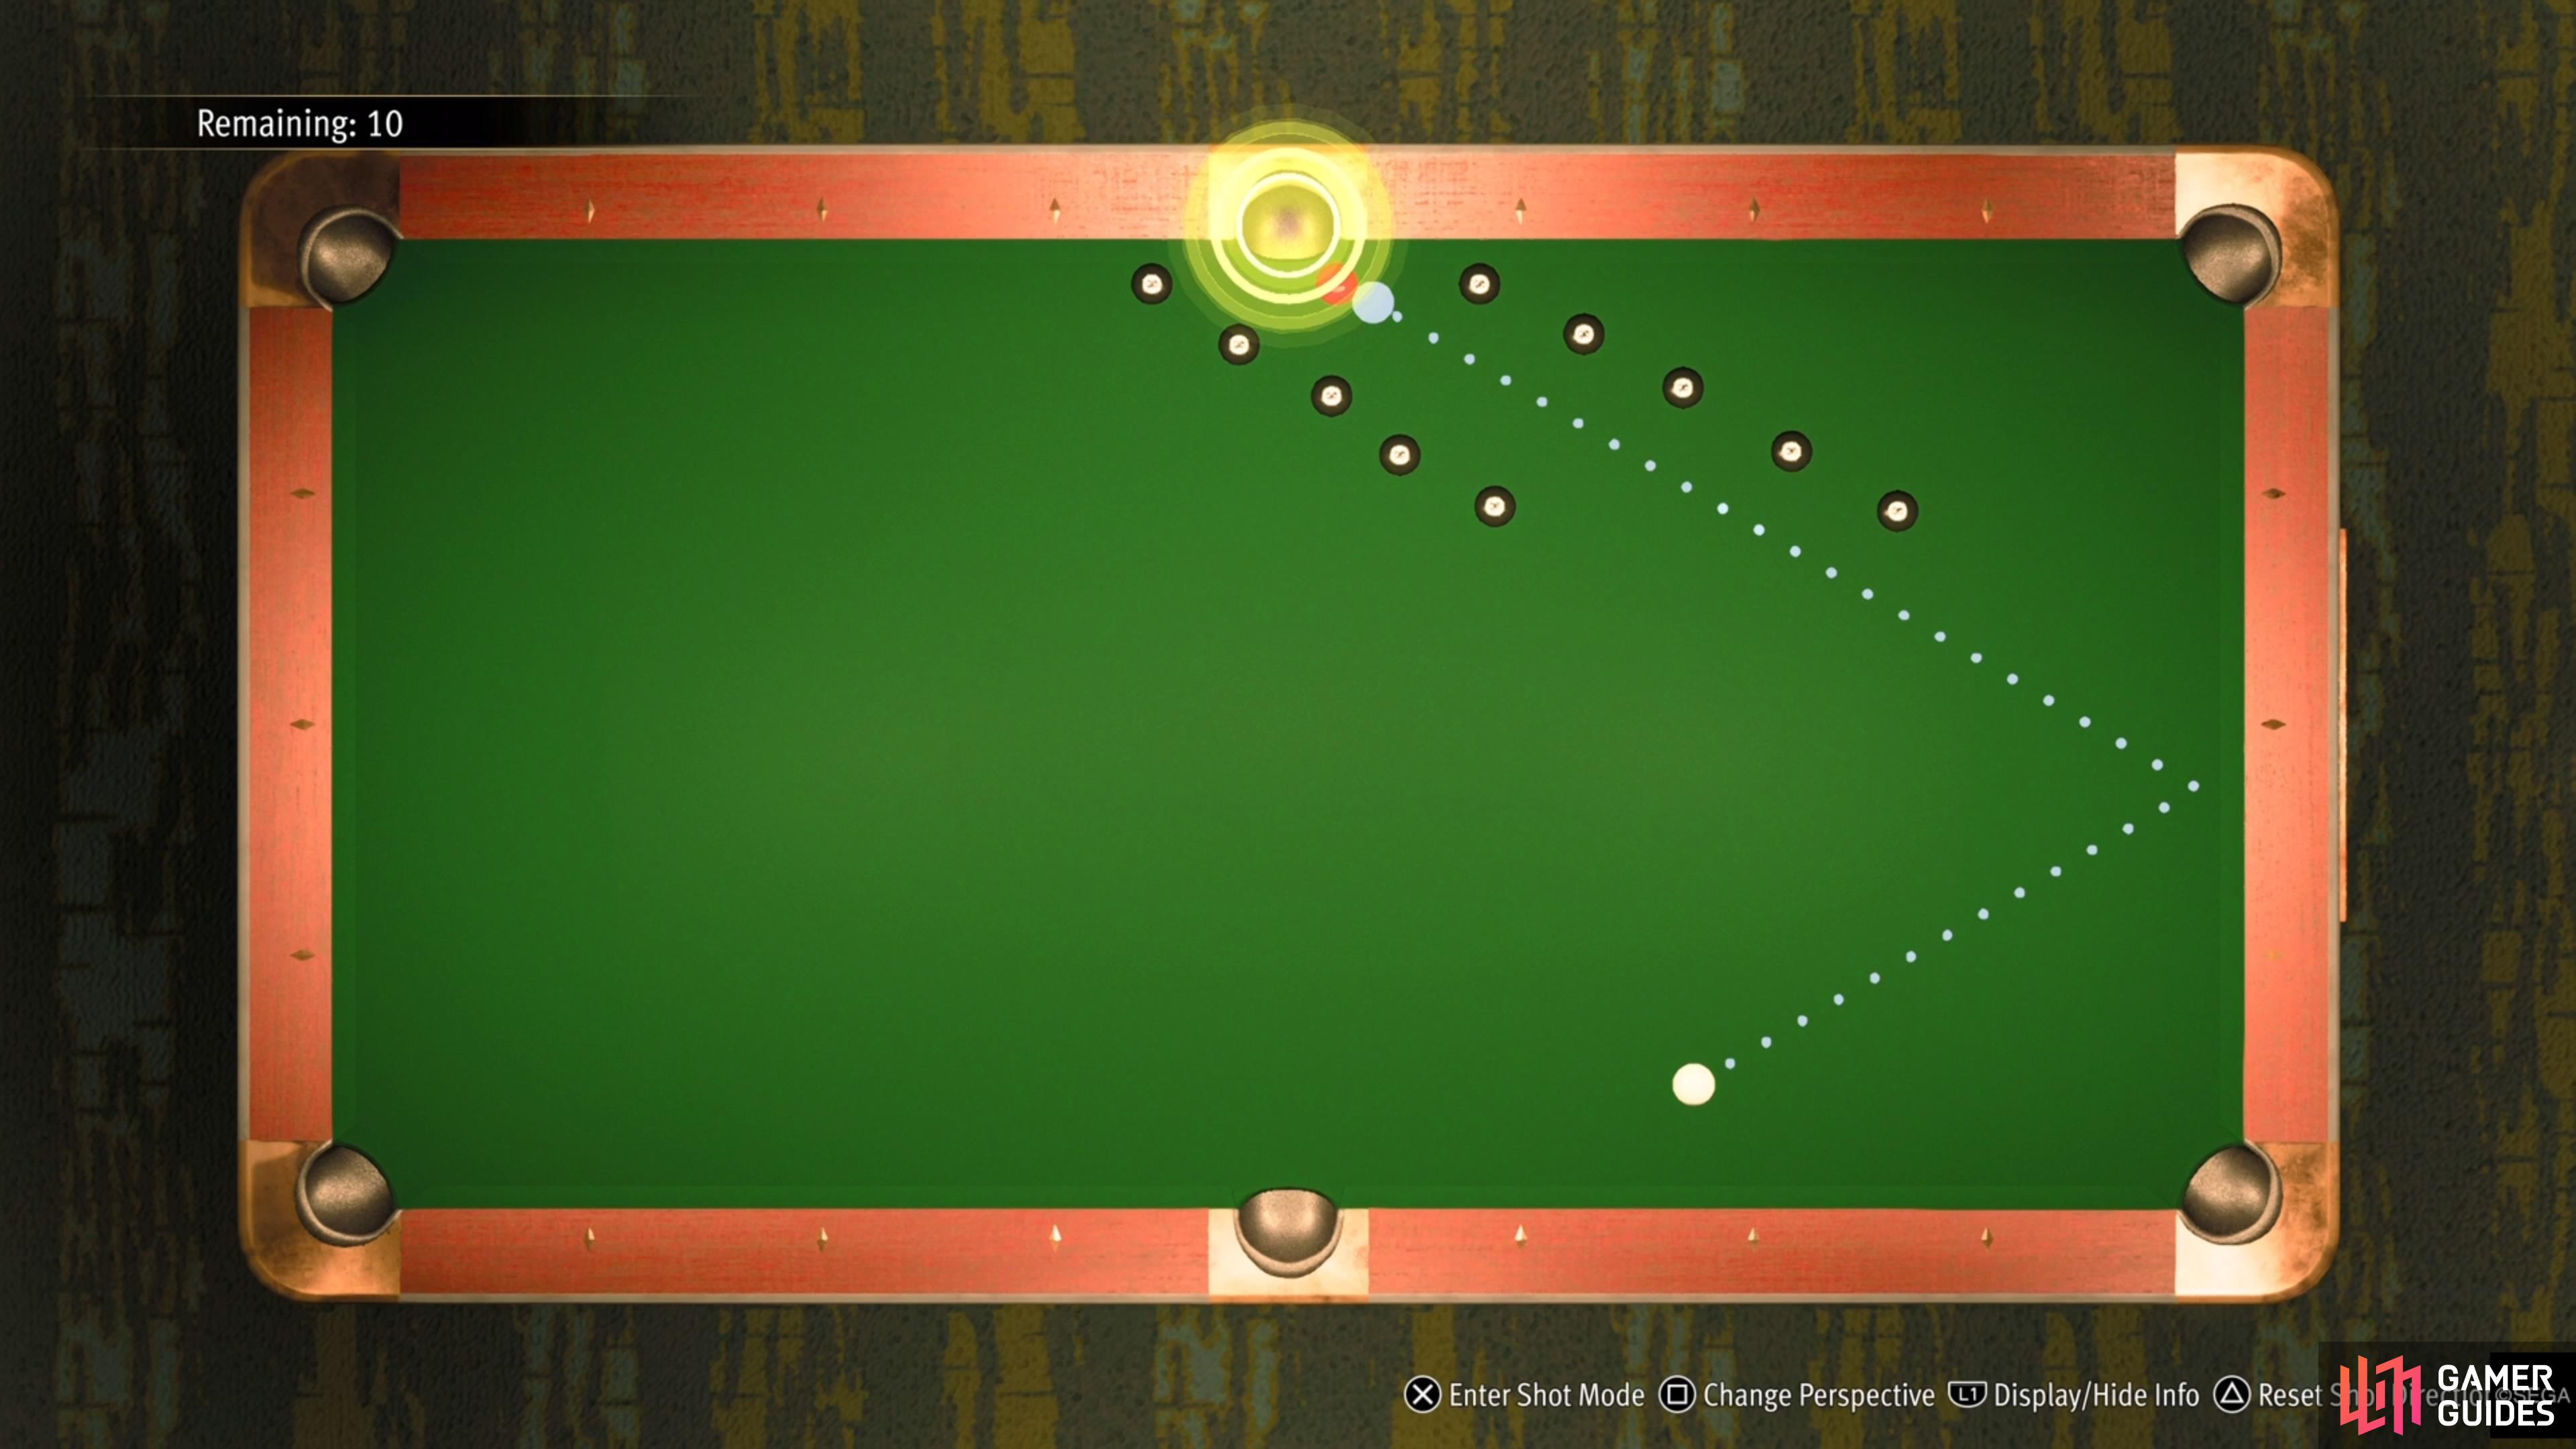
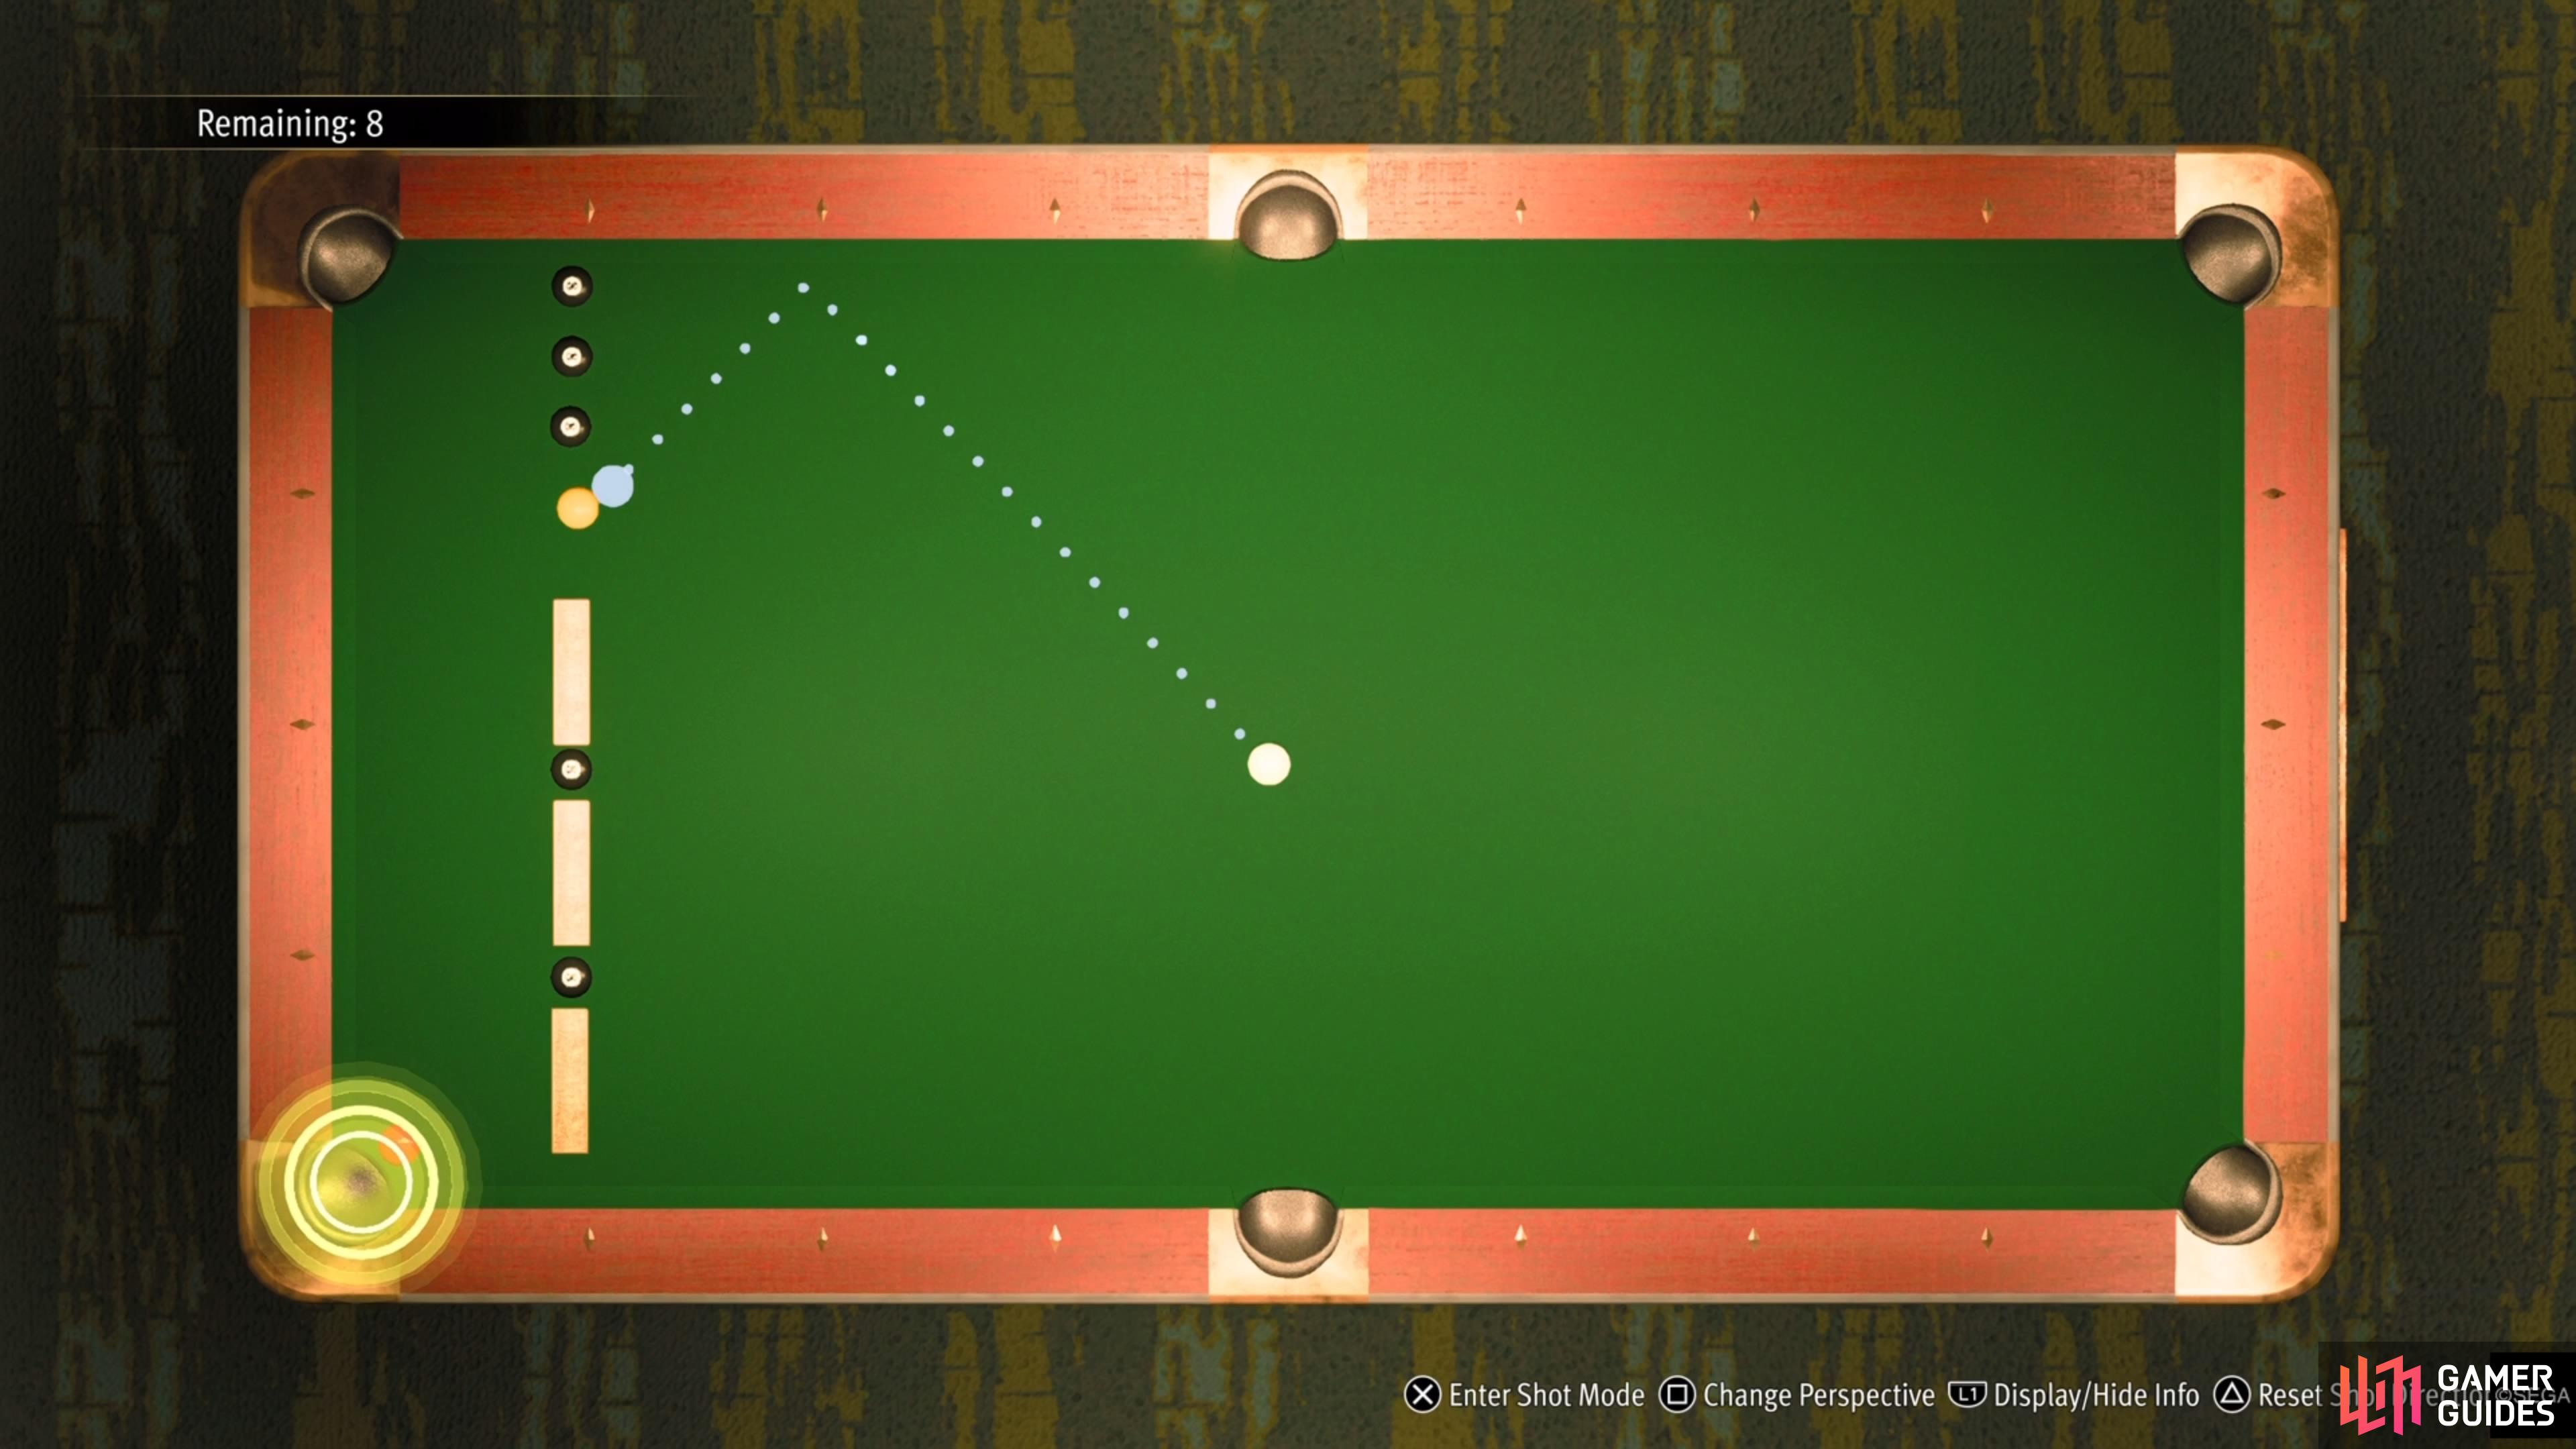
For the second shot, you have two rows of 8-balls lined up, with the red ball at the end, right next to the side pocket. Aim the cue on the right side of the table, banking it to hit the red ball. As mentioned above, this is one of those shots where you need to be careful to not hit it too hard. While you’re ready to shoot, you can use the left analog stick to aim where you want to hit the cue ball. Hitting the cue ball a little lower than the default will cause it to backspin after it makes contact with the red ball, which should stop it from moving, provided you don’t hit it too hard.
Easy 3
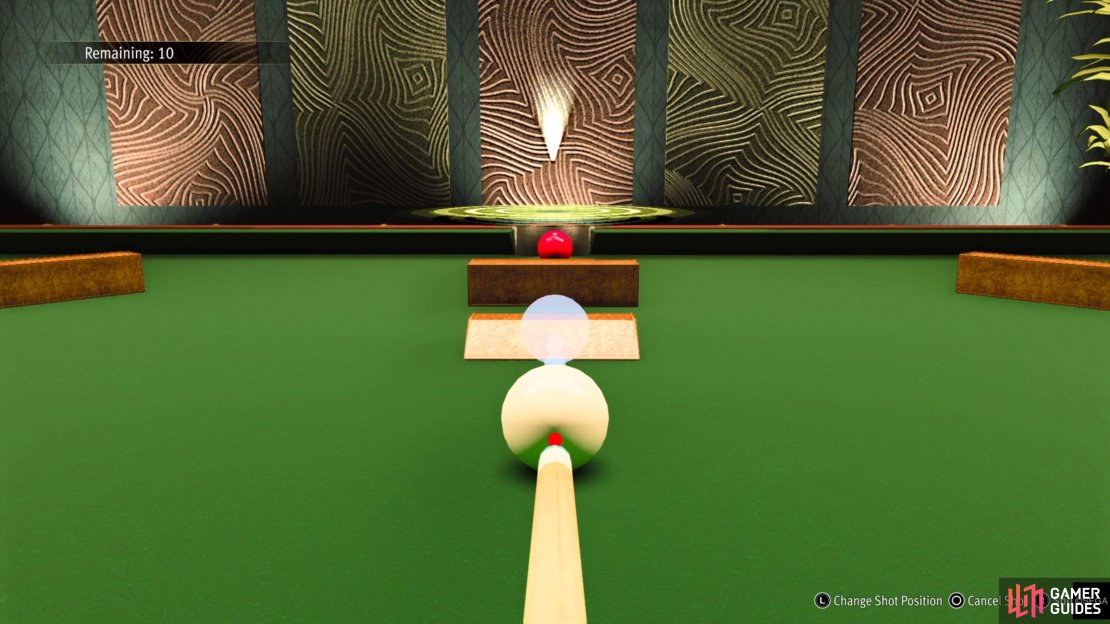
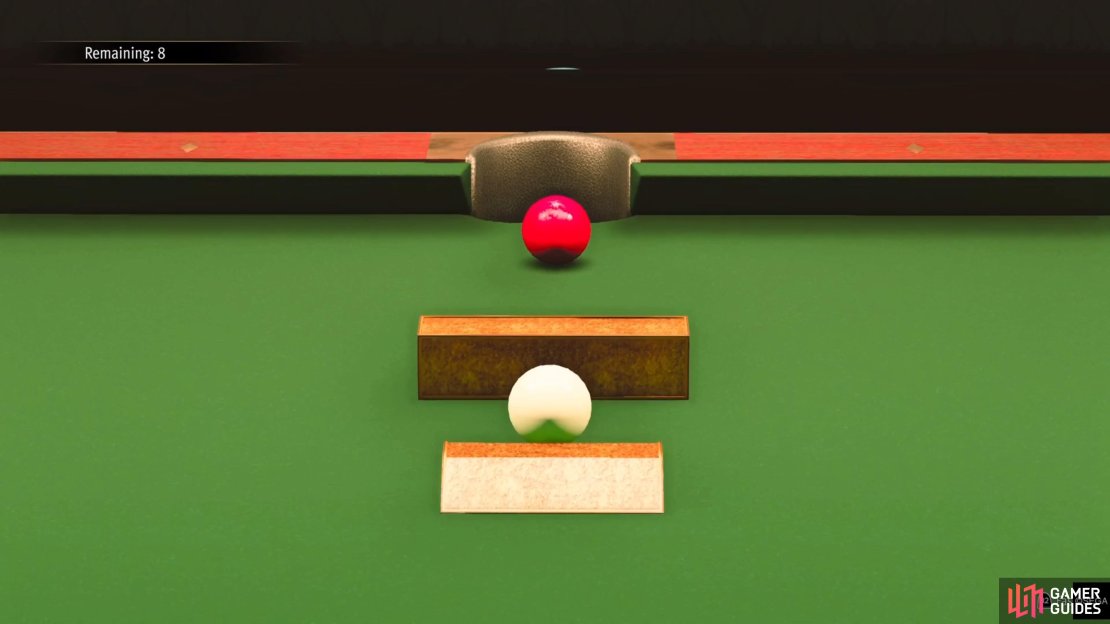
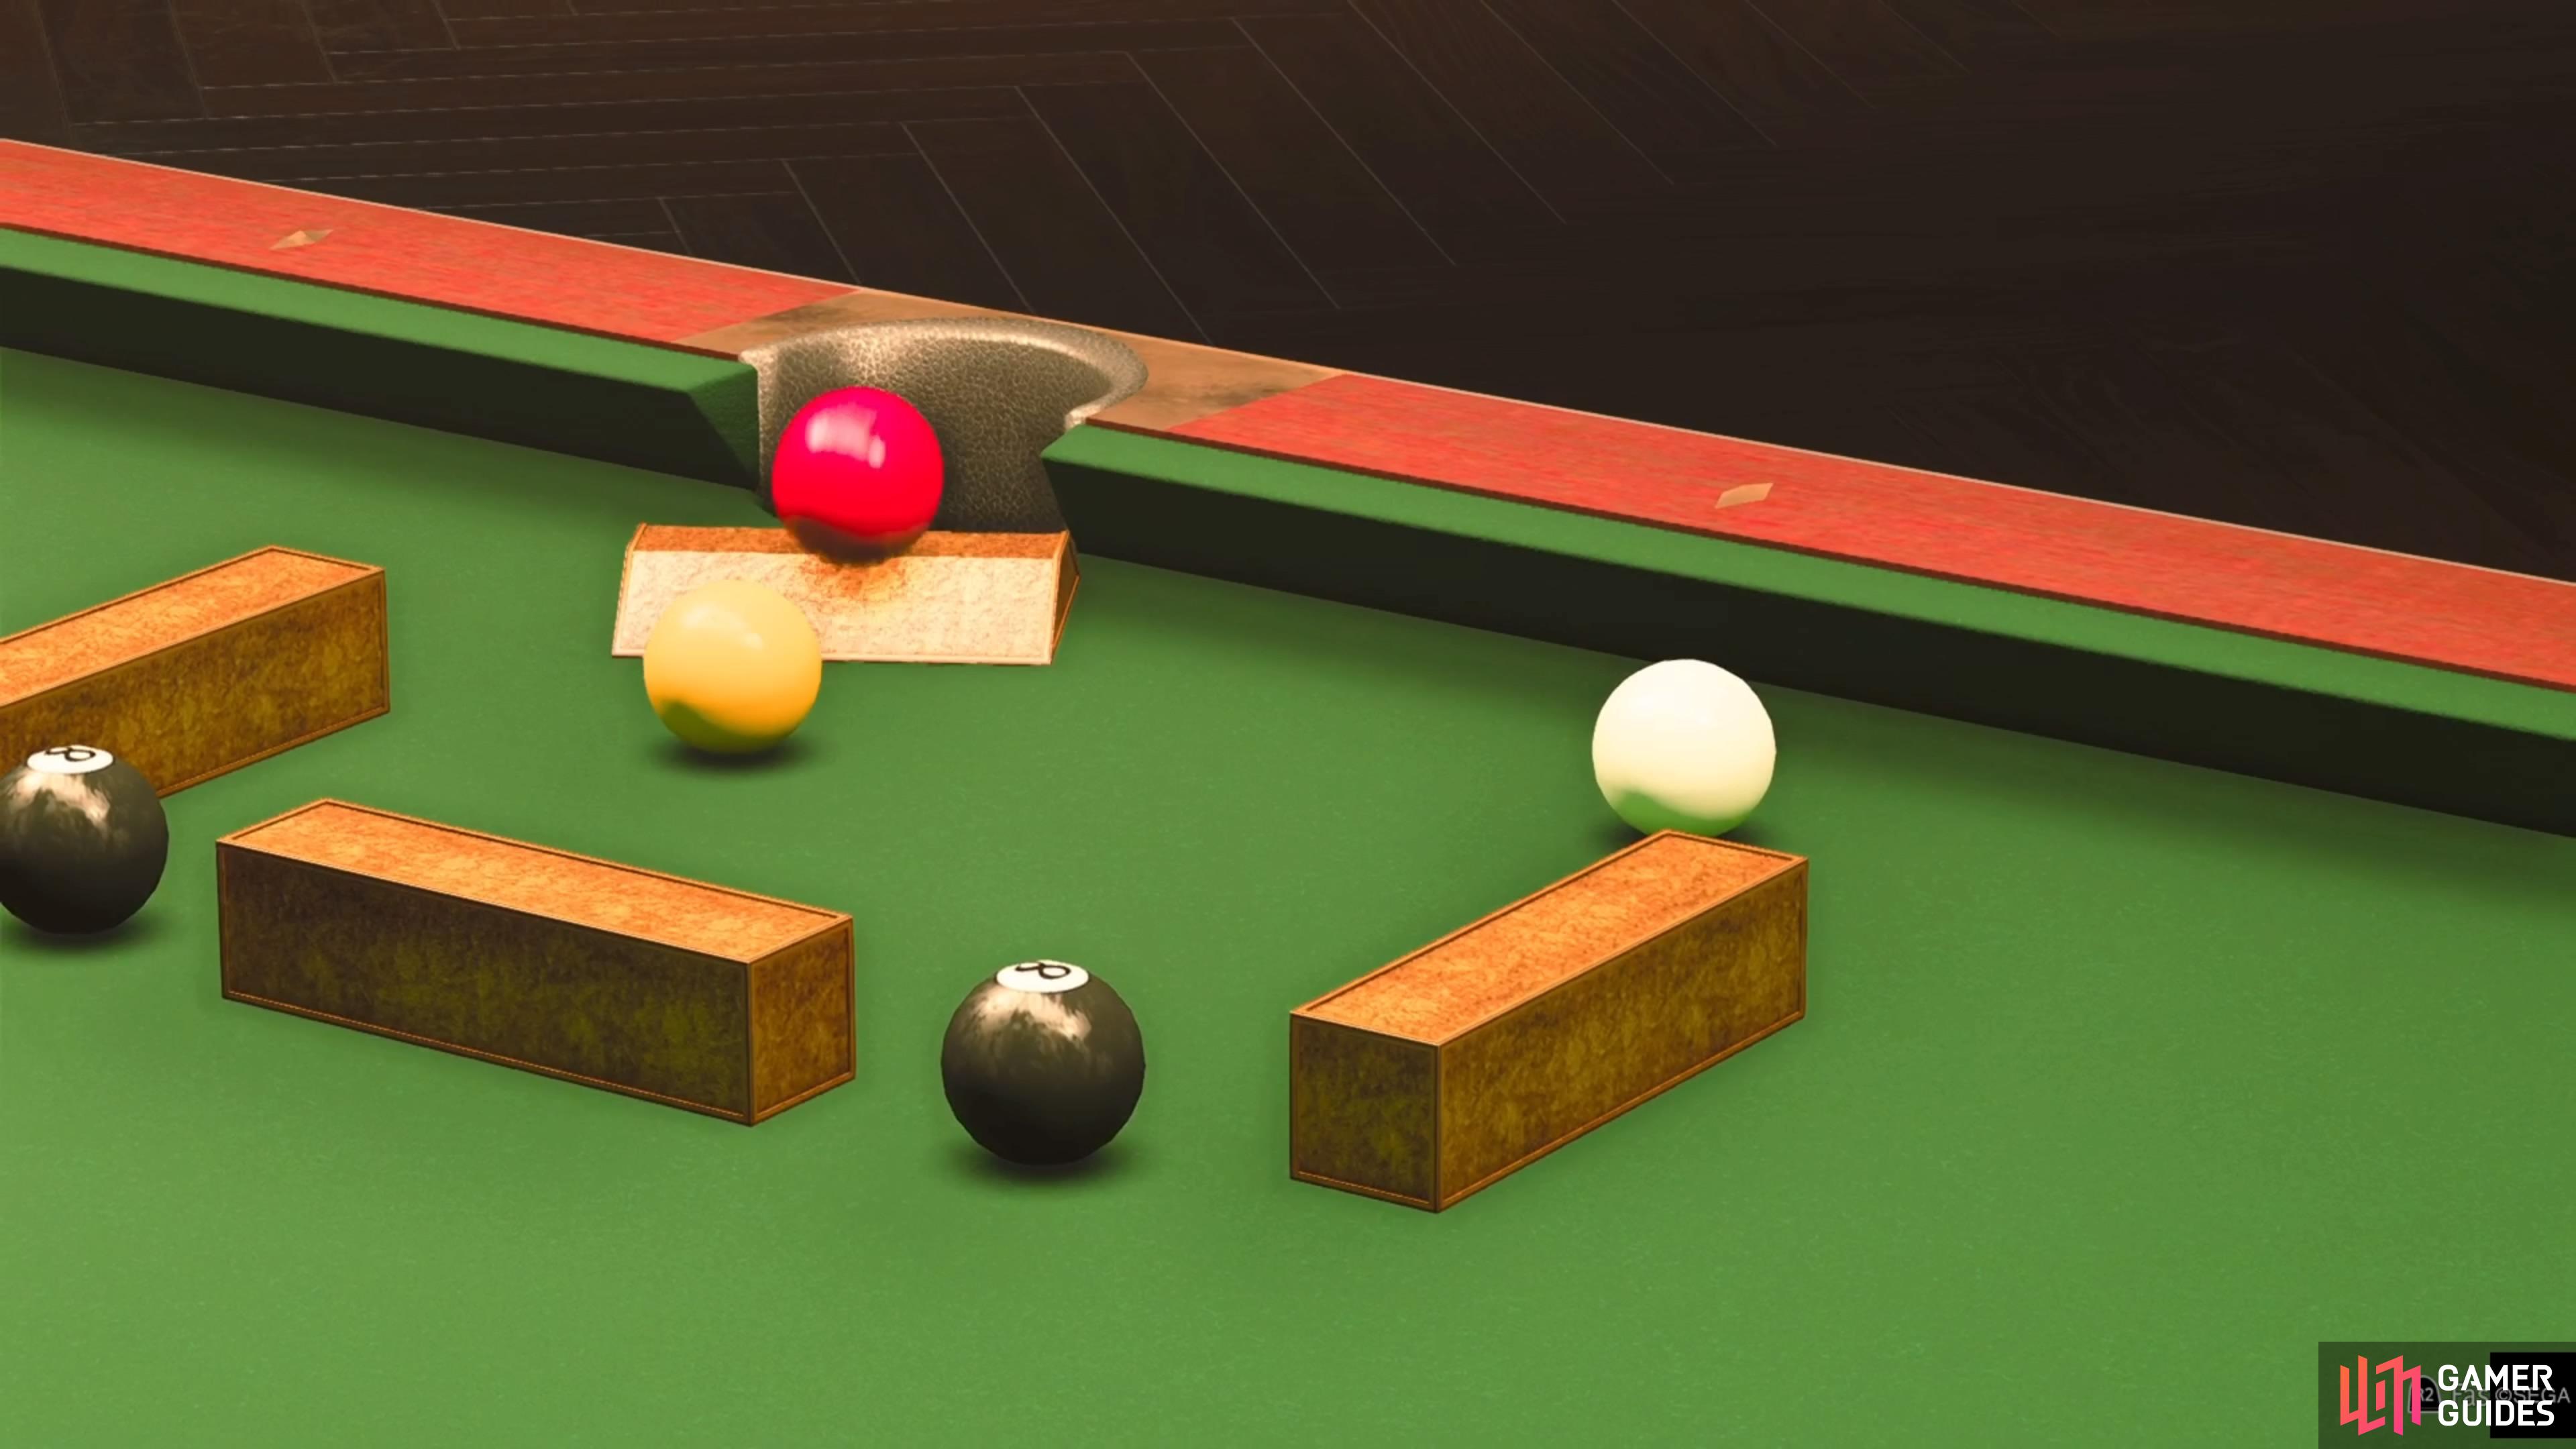
(1 of 3) The third Easy challenge introduces ramps.
The third shot will introduce ramps, which will become commonplace in other trick shots past this one. There will be a ramp right in front of you, with the red ball just beyond it and the target pocket also in front of you. The goal here is to hit the ball hard enough to go over the ramp and another obstacle, but not too hard to send the cue ball flying. You don’t even have to move your aim here since it’s perfectly lined up right from the beginning. Around 3/4 strength should be more than enough to sink the red ball.
Normal 1-Shot Challenge
The Normal set of challenges will introduce the yellow balls, which can be hit and are sometimes necessary to sink the red ball. Things will definitely become a little more challenging here, but none of the shots are too difficult. The third shot is probably the only one that might be annoying, due to there being some RNG involved in how the cue ball moves.
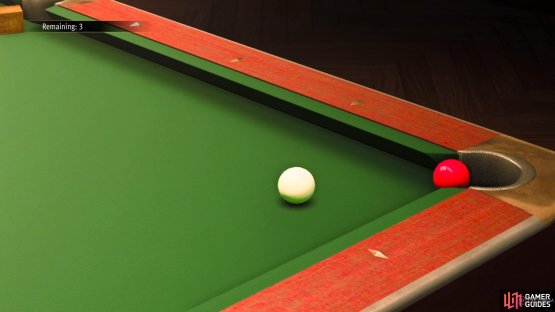
Normal 1

(1 of 2) You will want to line up the first Normal challenge shot just left of the center of the ramp.
You will want to line up the first Normal challenge shot just left of the center of the ramp. (left), It will take some adjustments, but you want the yellow ball to go straight down the side of the table. (right)
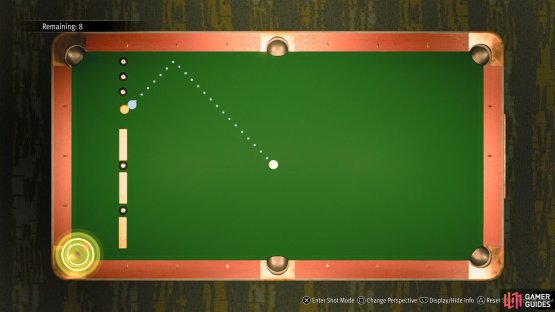
You will need to shoot the cue ball over a ramp and hit the yellow ball, so you go down the side and connect with the red ball. This might be the first time that a shot will give you a lot of trouble, as you need to hit the yellow ball just right to send it down the length of the table. Aiming slightly left of the center of the ramp is where you want to be here. Also, you don’t want to hit the cue ball too hard, either. Hit it with around half power or so and make adjustments as needed.
Normal 2

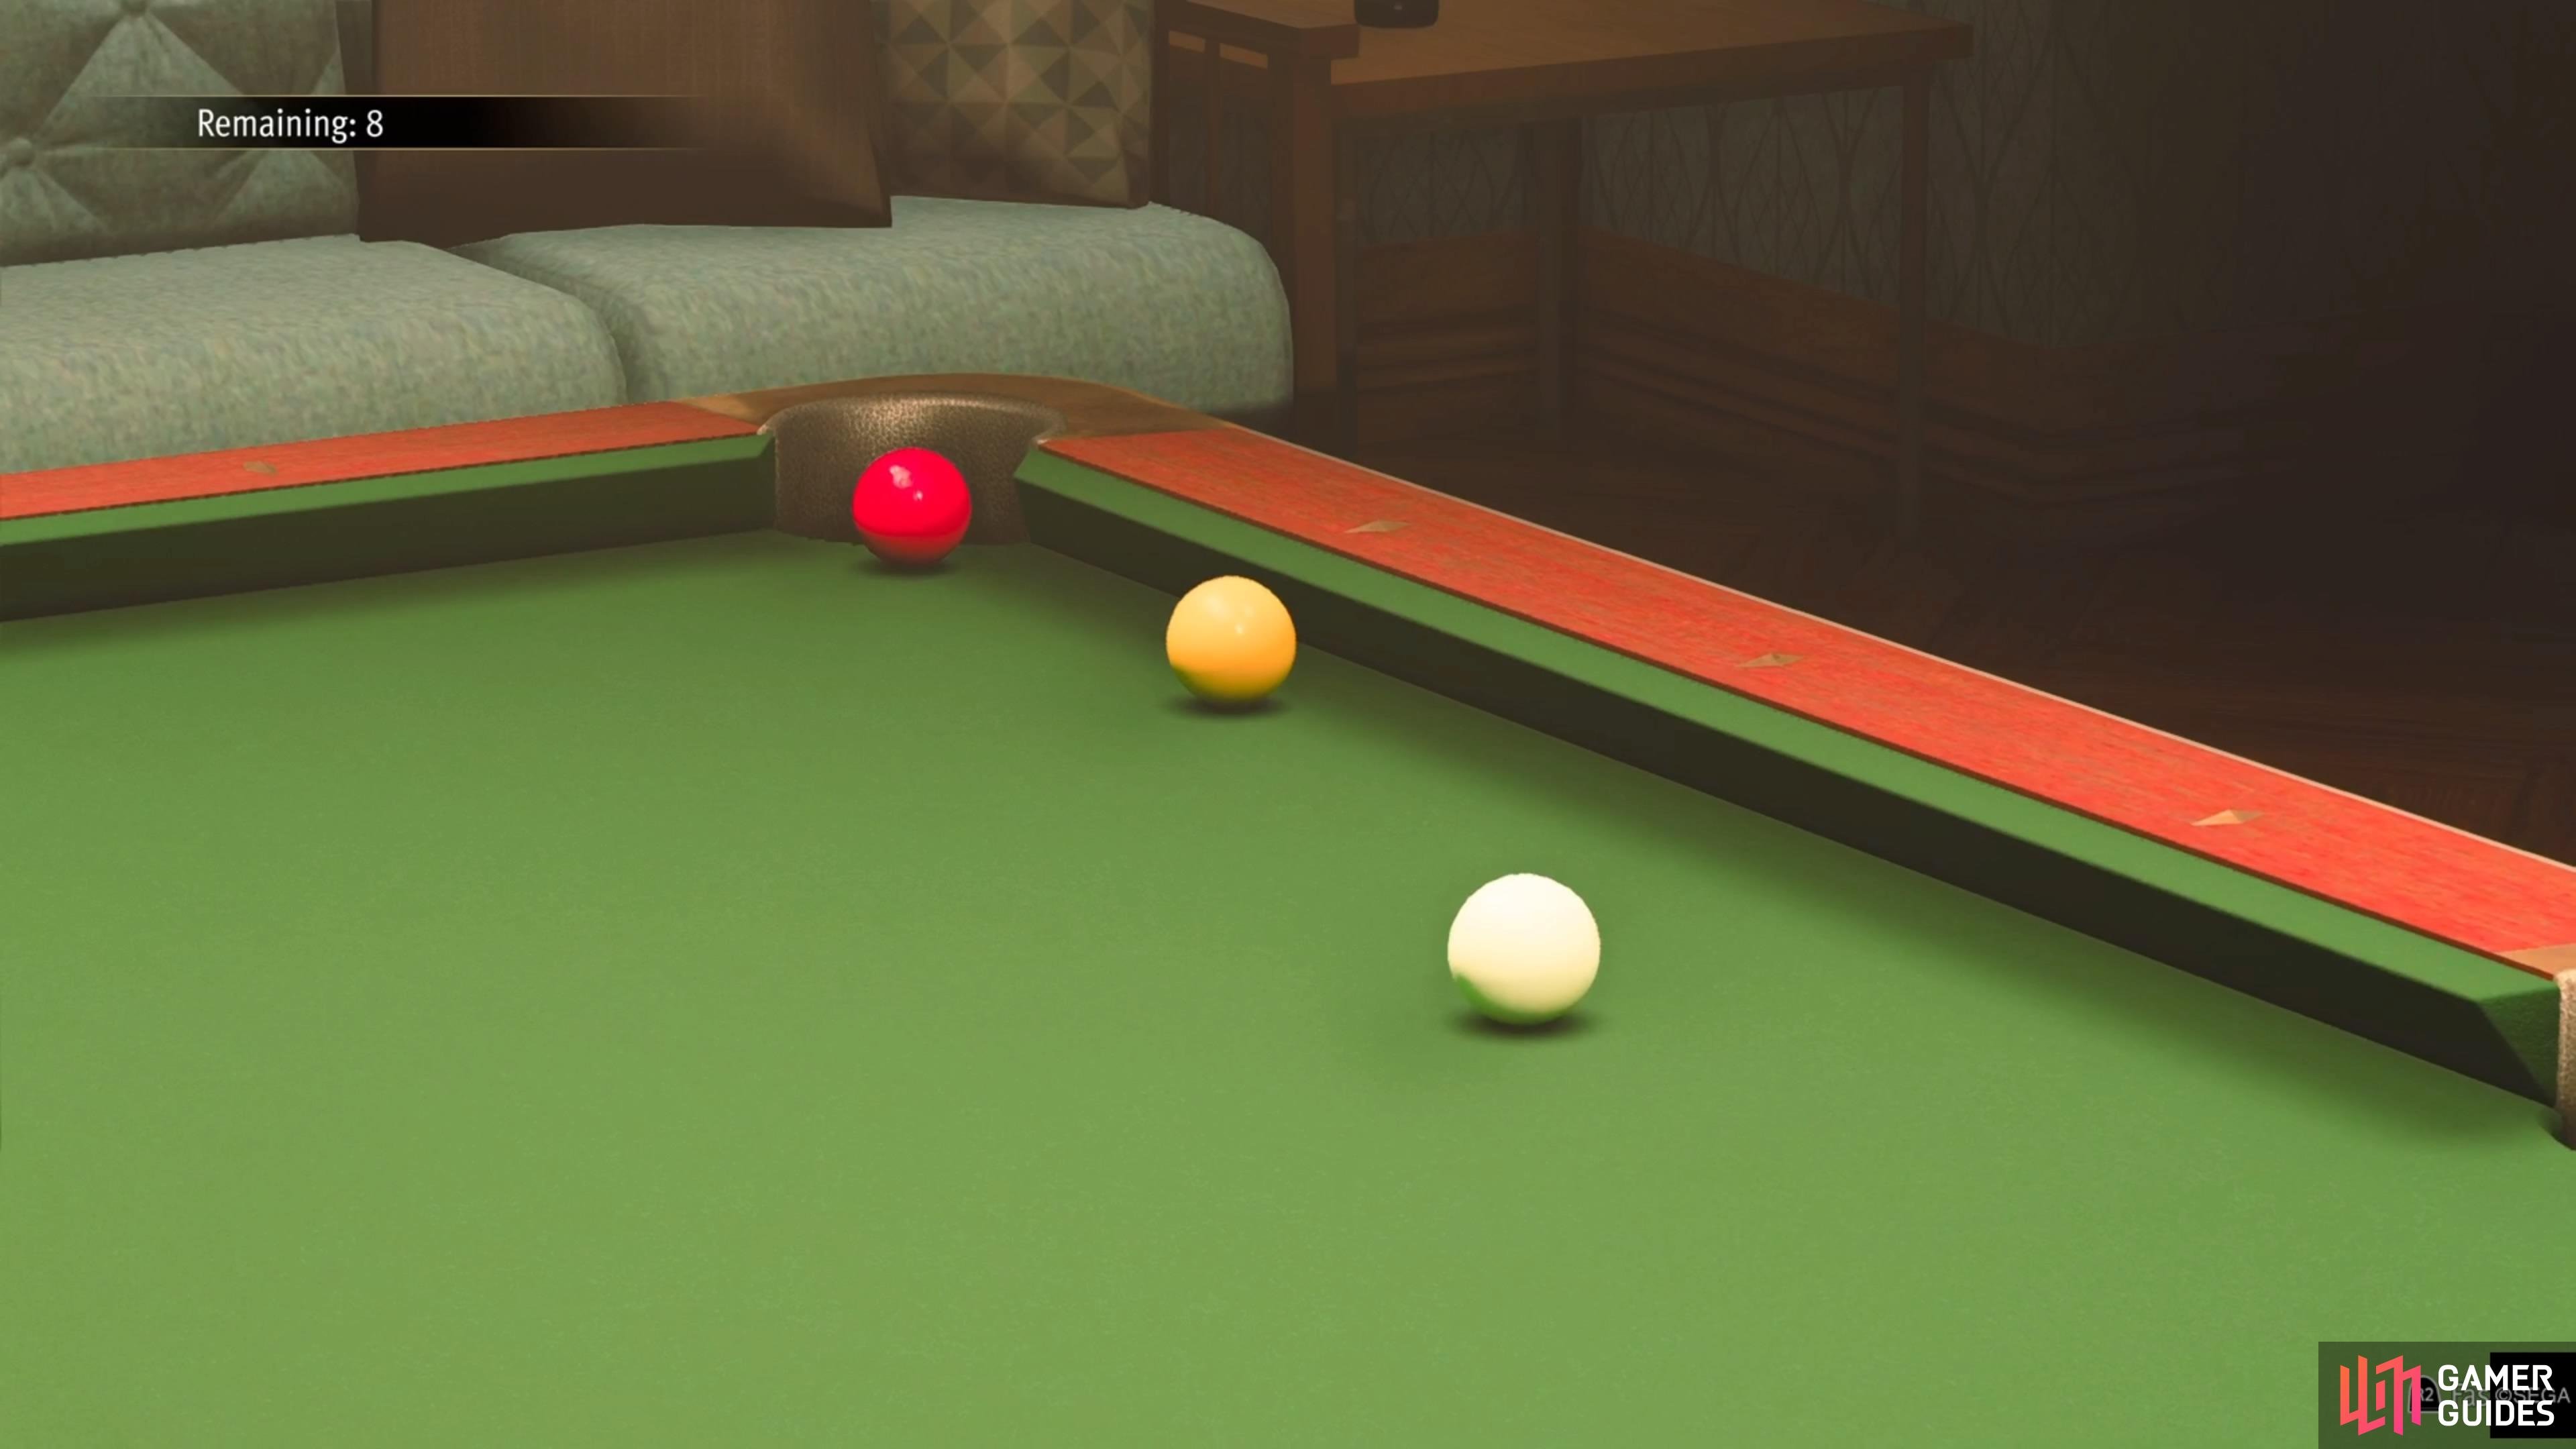
(1 of 2) Line up the second Normal challenge shot like this.

Line up the second Normal challenge shot like this. (left), If done with enough power, the yellow ball will knock the red one over the ramp and into the pocket. (right)
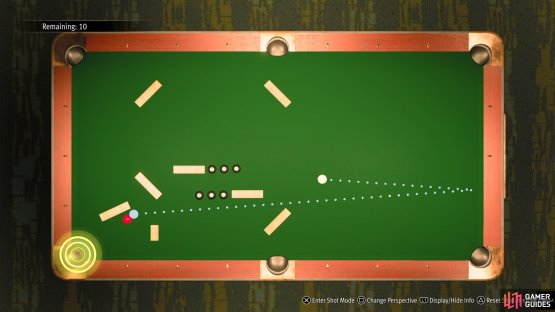
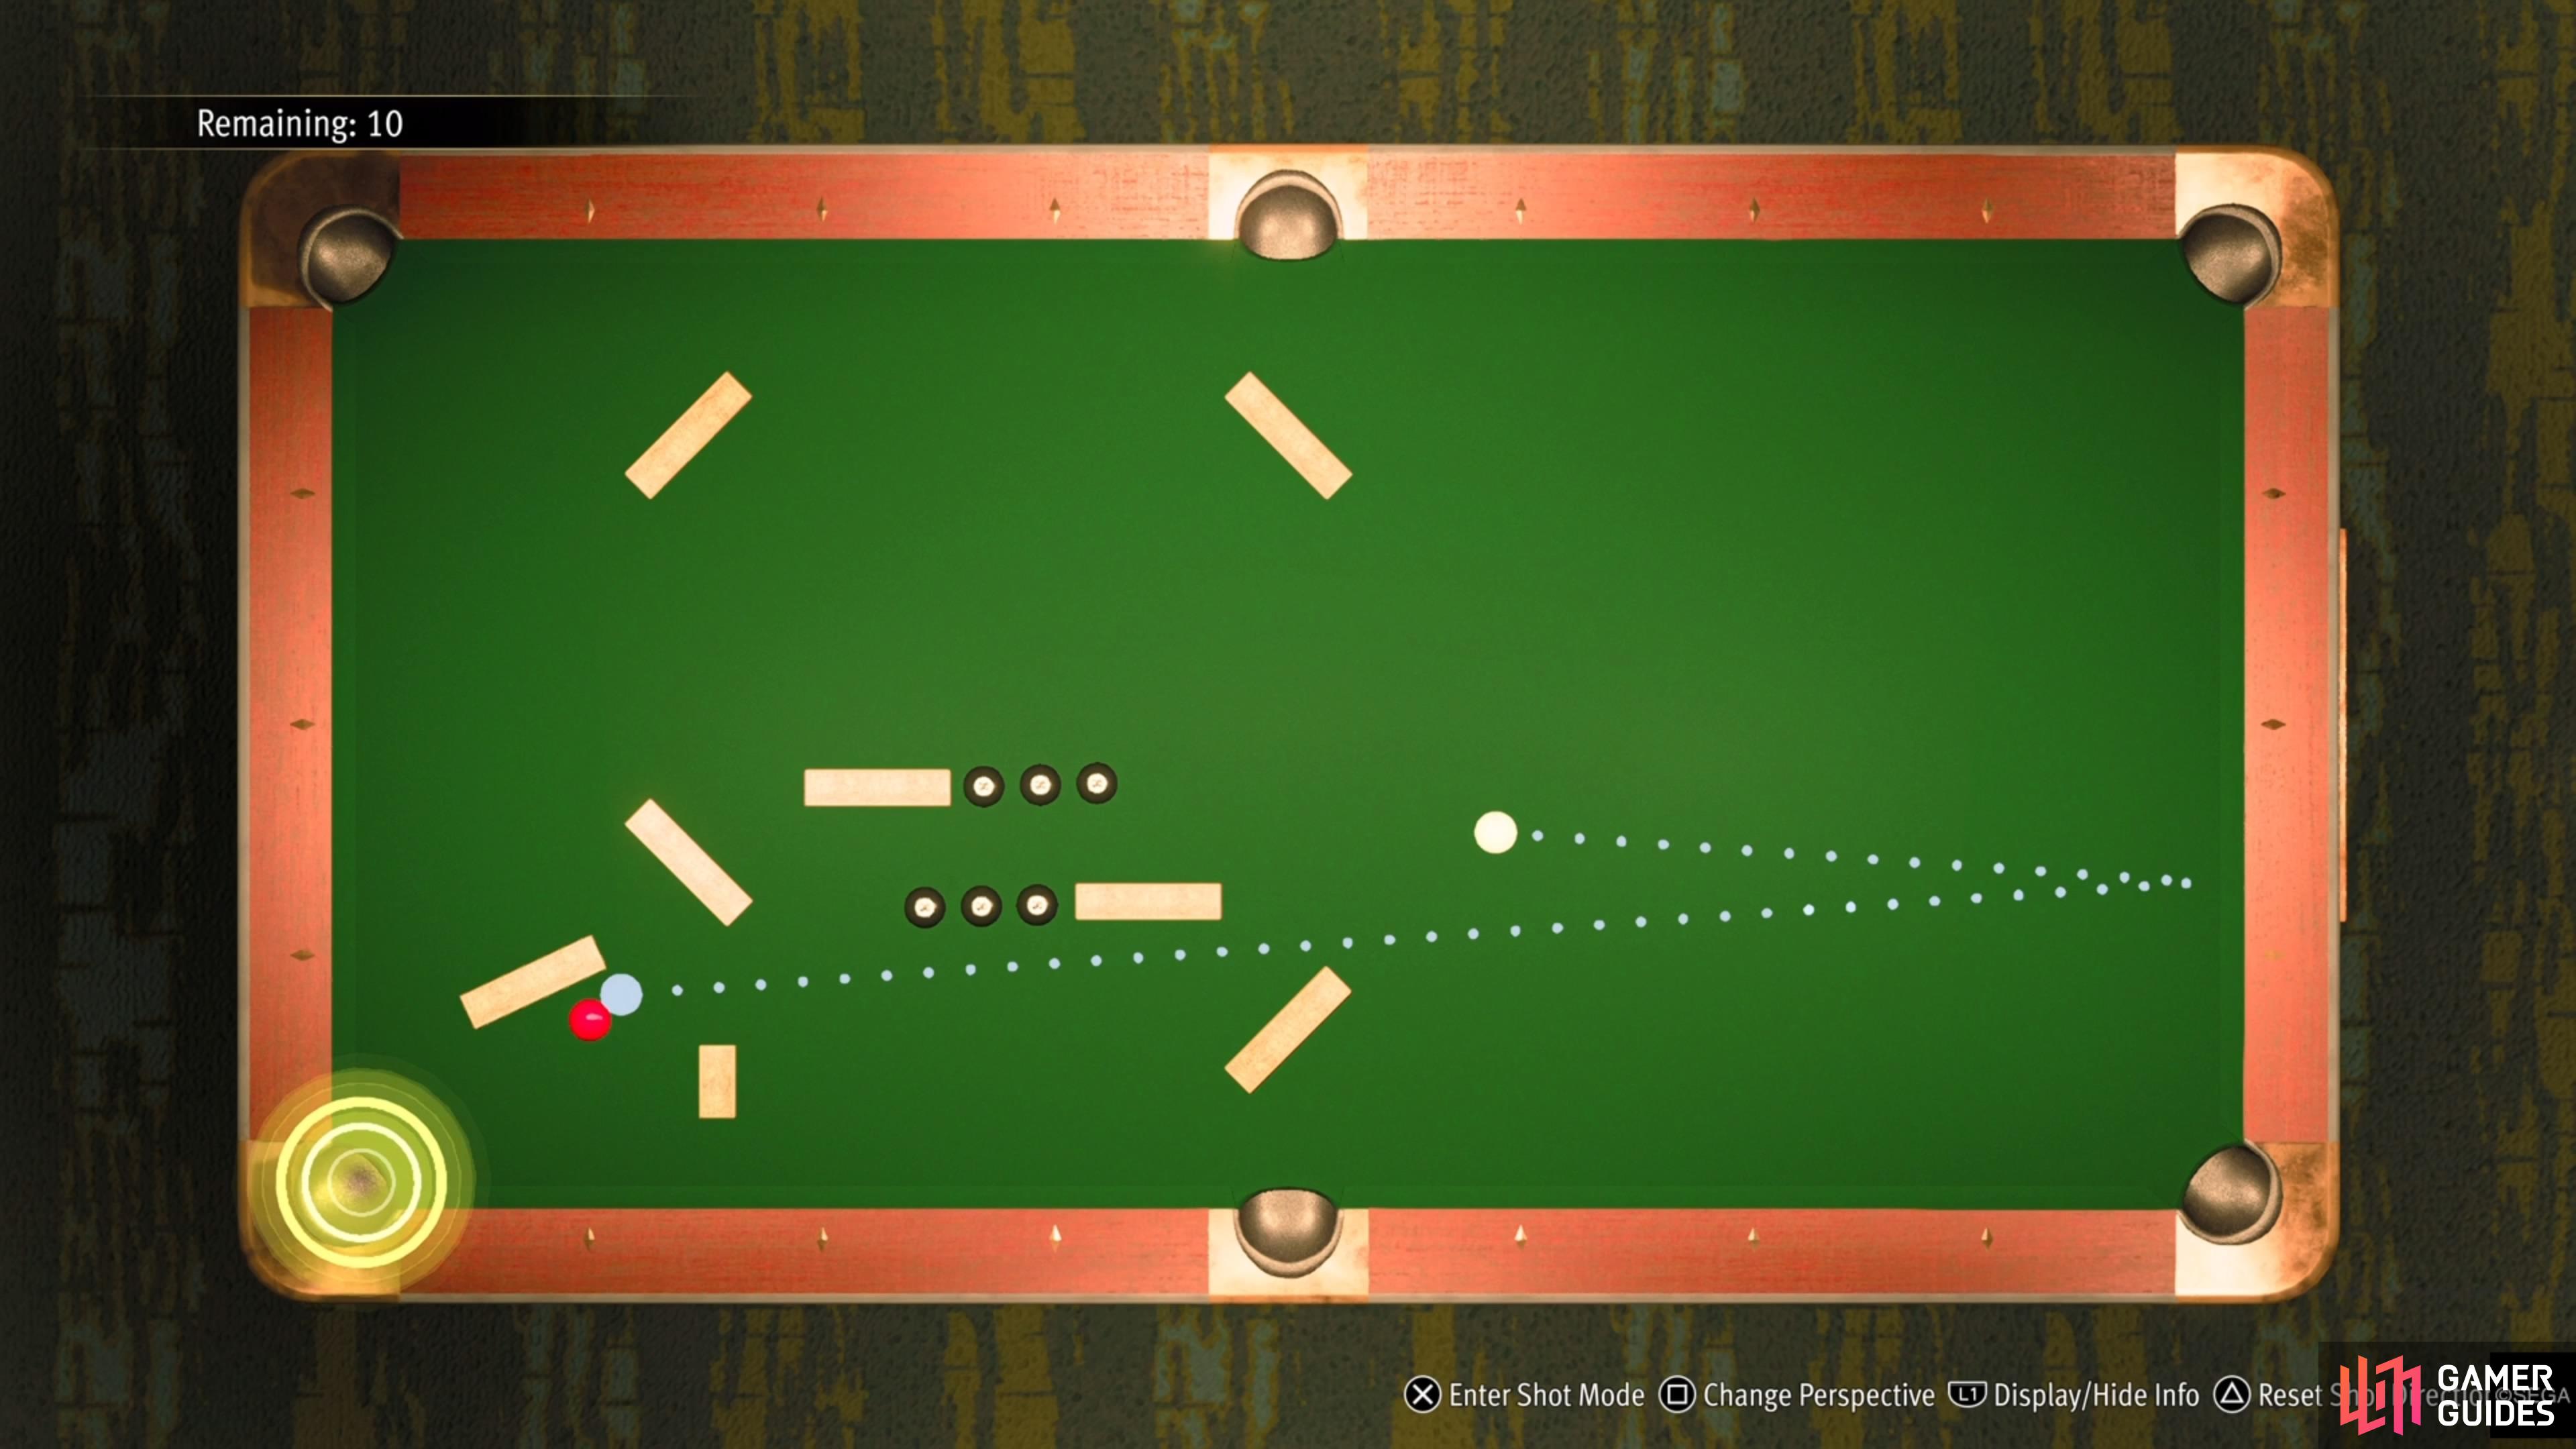
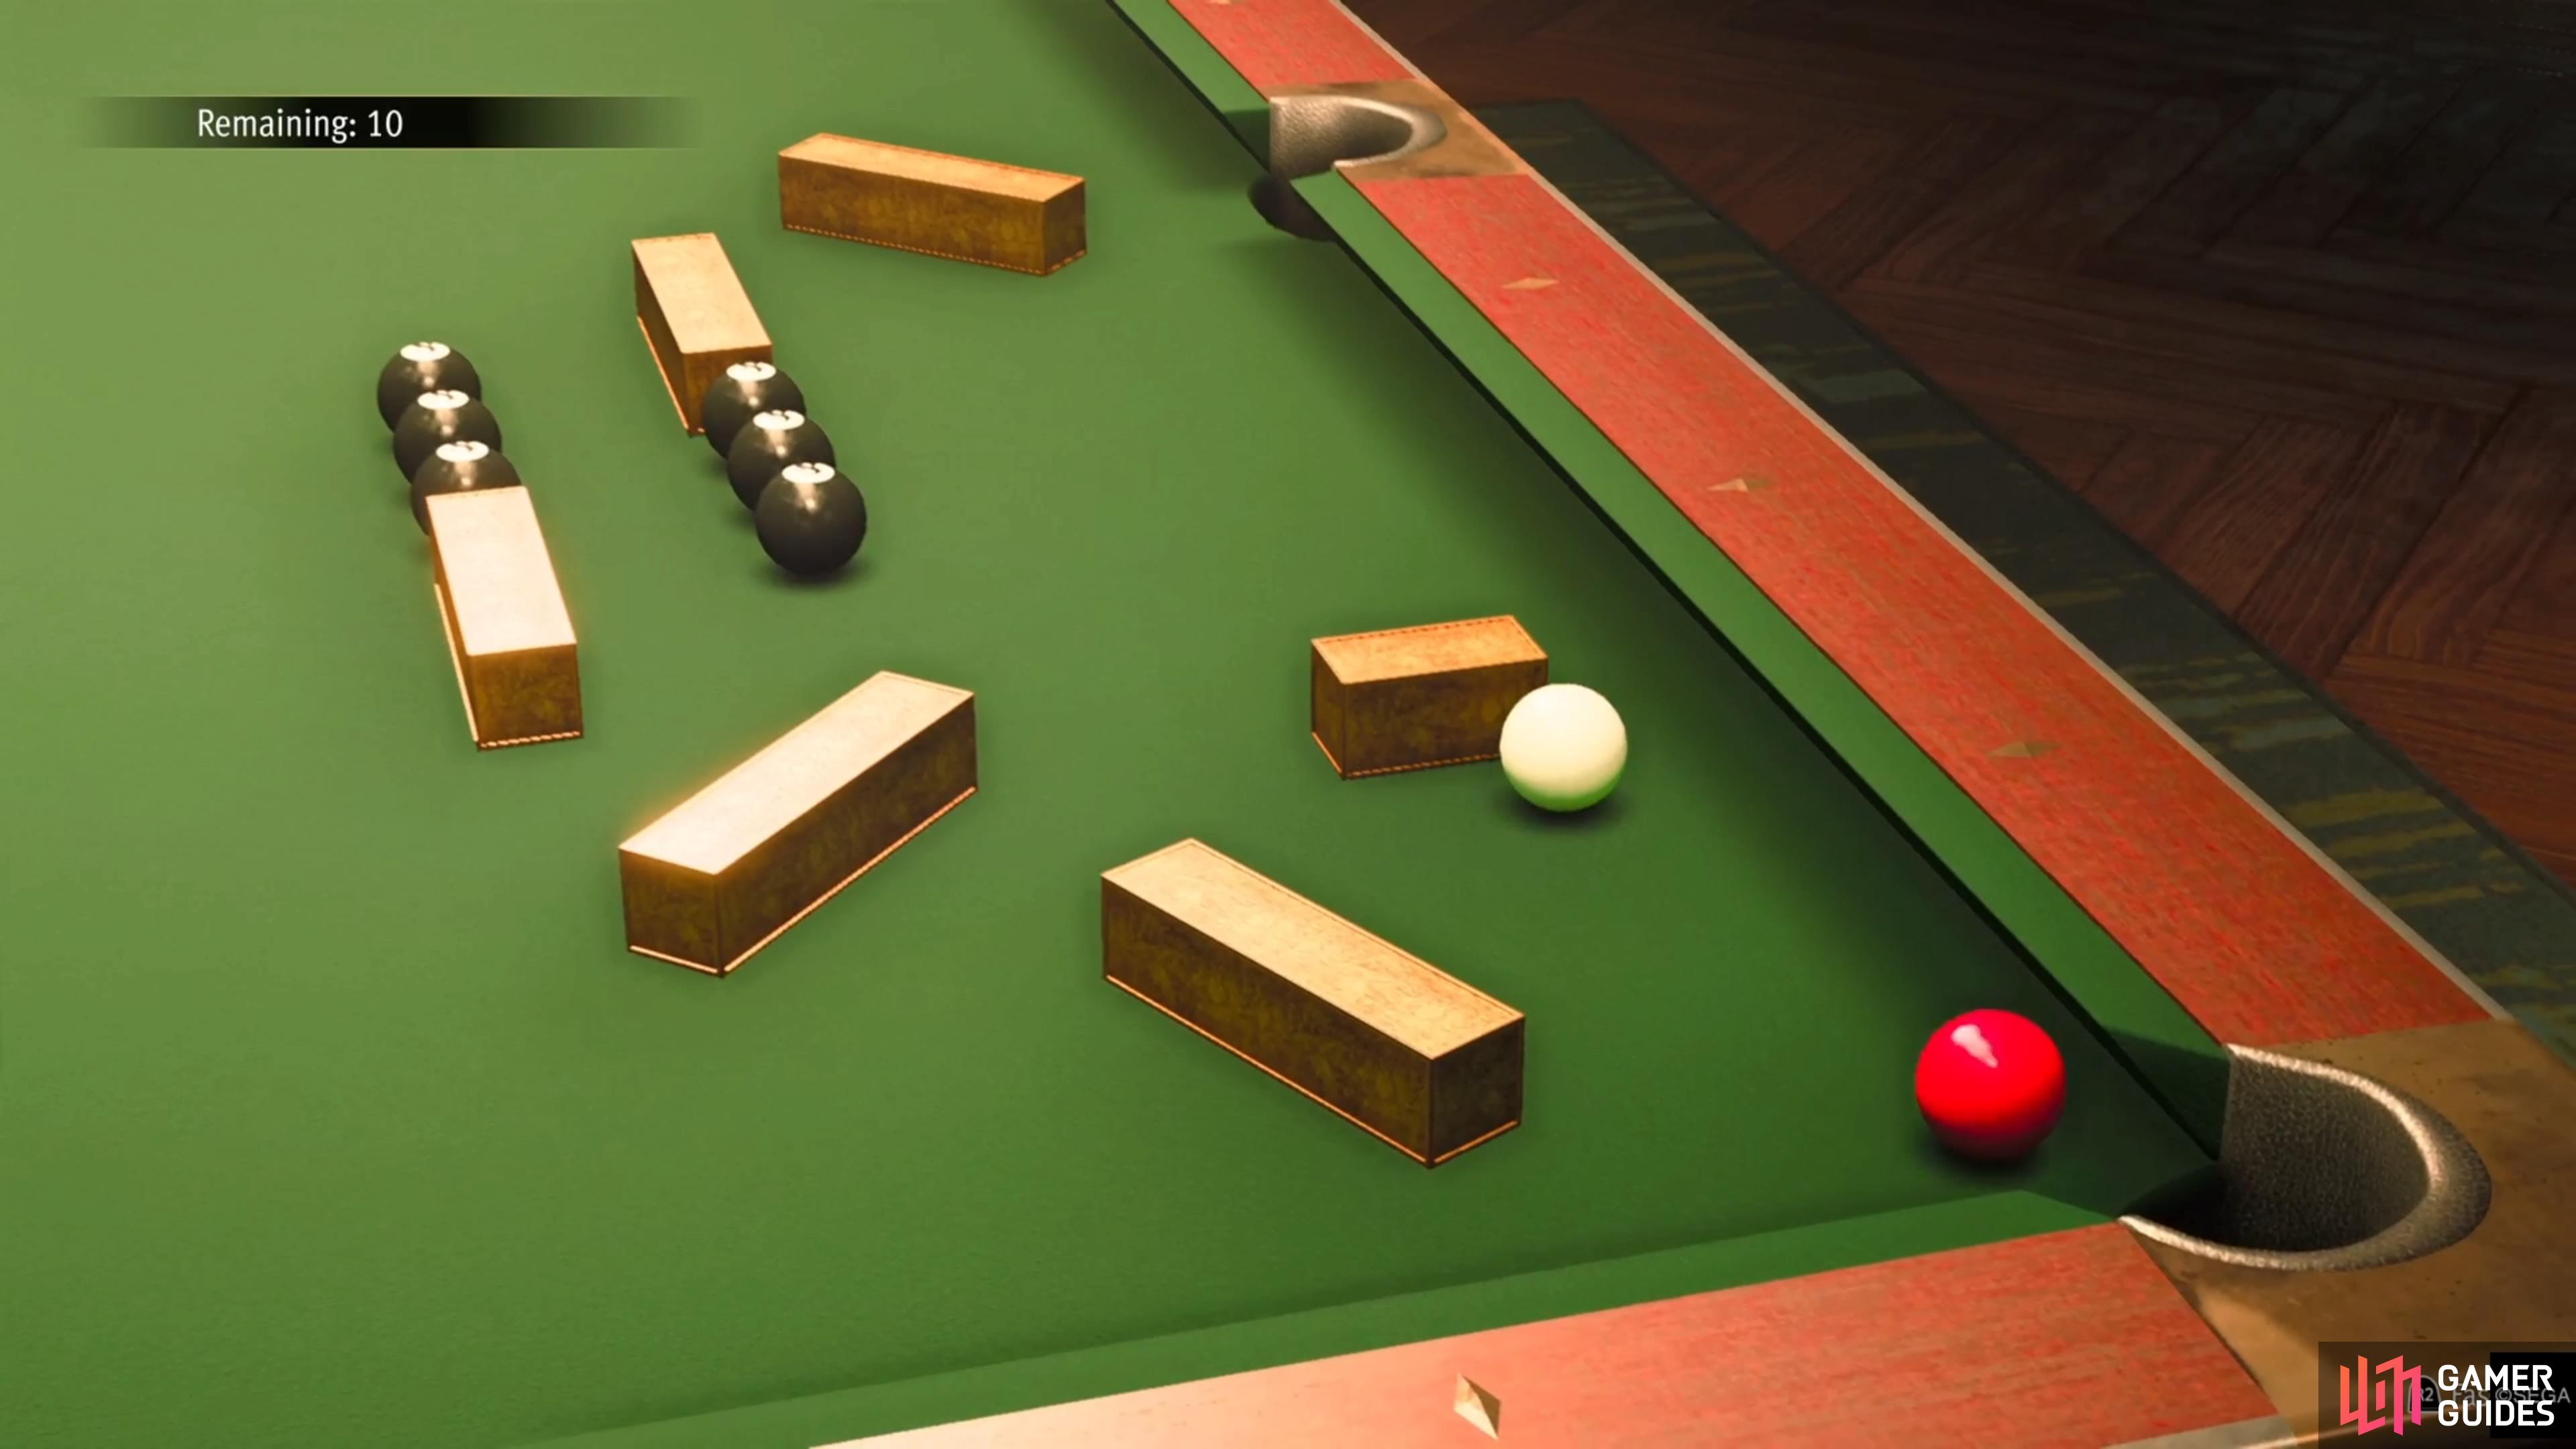
The red ball, as well as the yellow one, is towards the bottom of the table, surrounded by some wooden walls and 8-balls. The red ball is sitting in front of a ramp, too, so it will need to clear that to go into the pocket. Note that hitting the cue ball too hard here will send the red ball flying, so adjust your power to not do that. You won’t be able to get a straight shot at either one, so banking it is about the only thing you can do here. Aim at the bottom of the table and hit the yellow ball head-on. You probably only want to use around half power or so here, as you don’t need the red ball to fly off the table.
If done right, the yellow ball will bounce off of the upper wooden wall, and then hit the red ball, sending it over the ramp and into the pocket. You shouldn’t really have to worry about the yellow ball hitting either of the 8-balls here.
Normal 3

(1 of 2) Go full power right in the middle of the first ramp for the third Normal challenge shot.
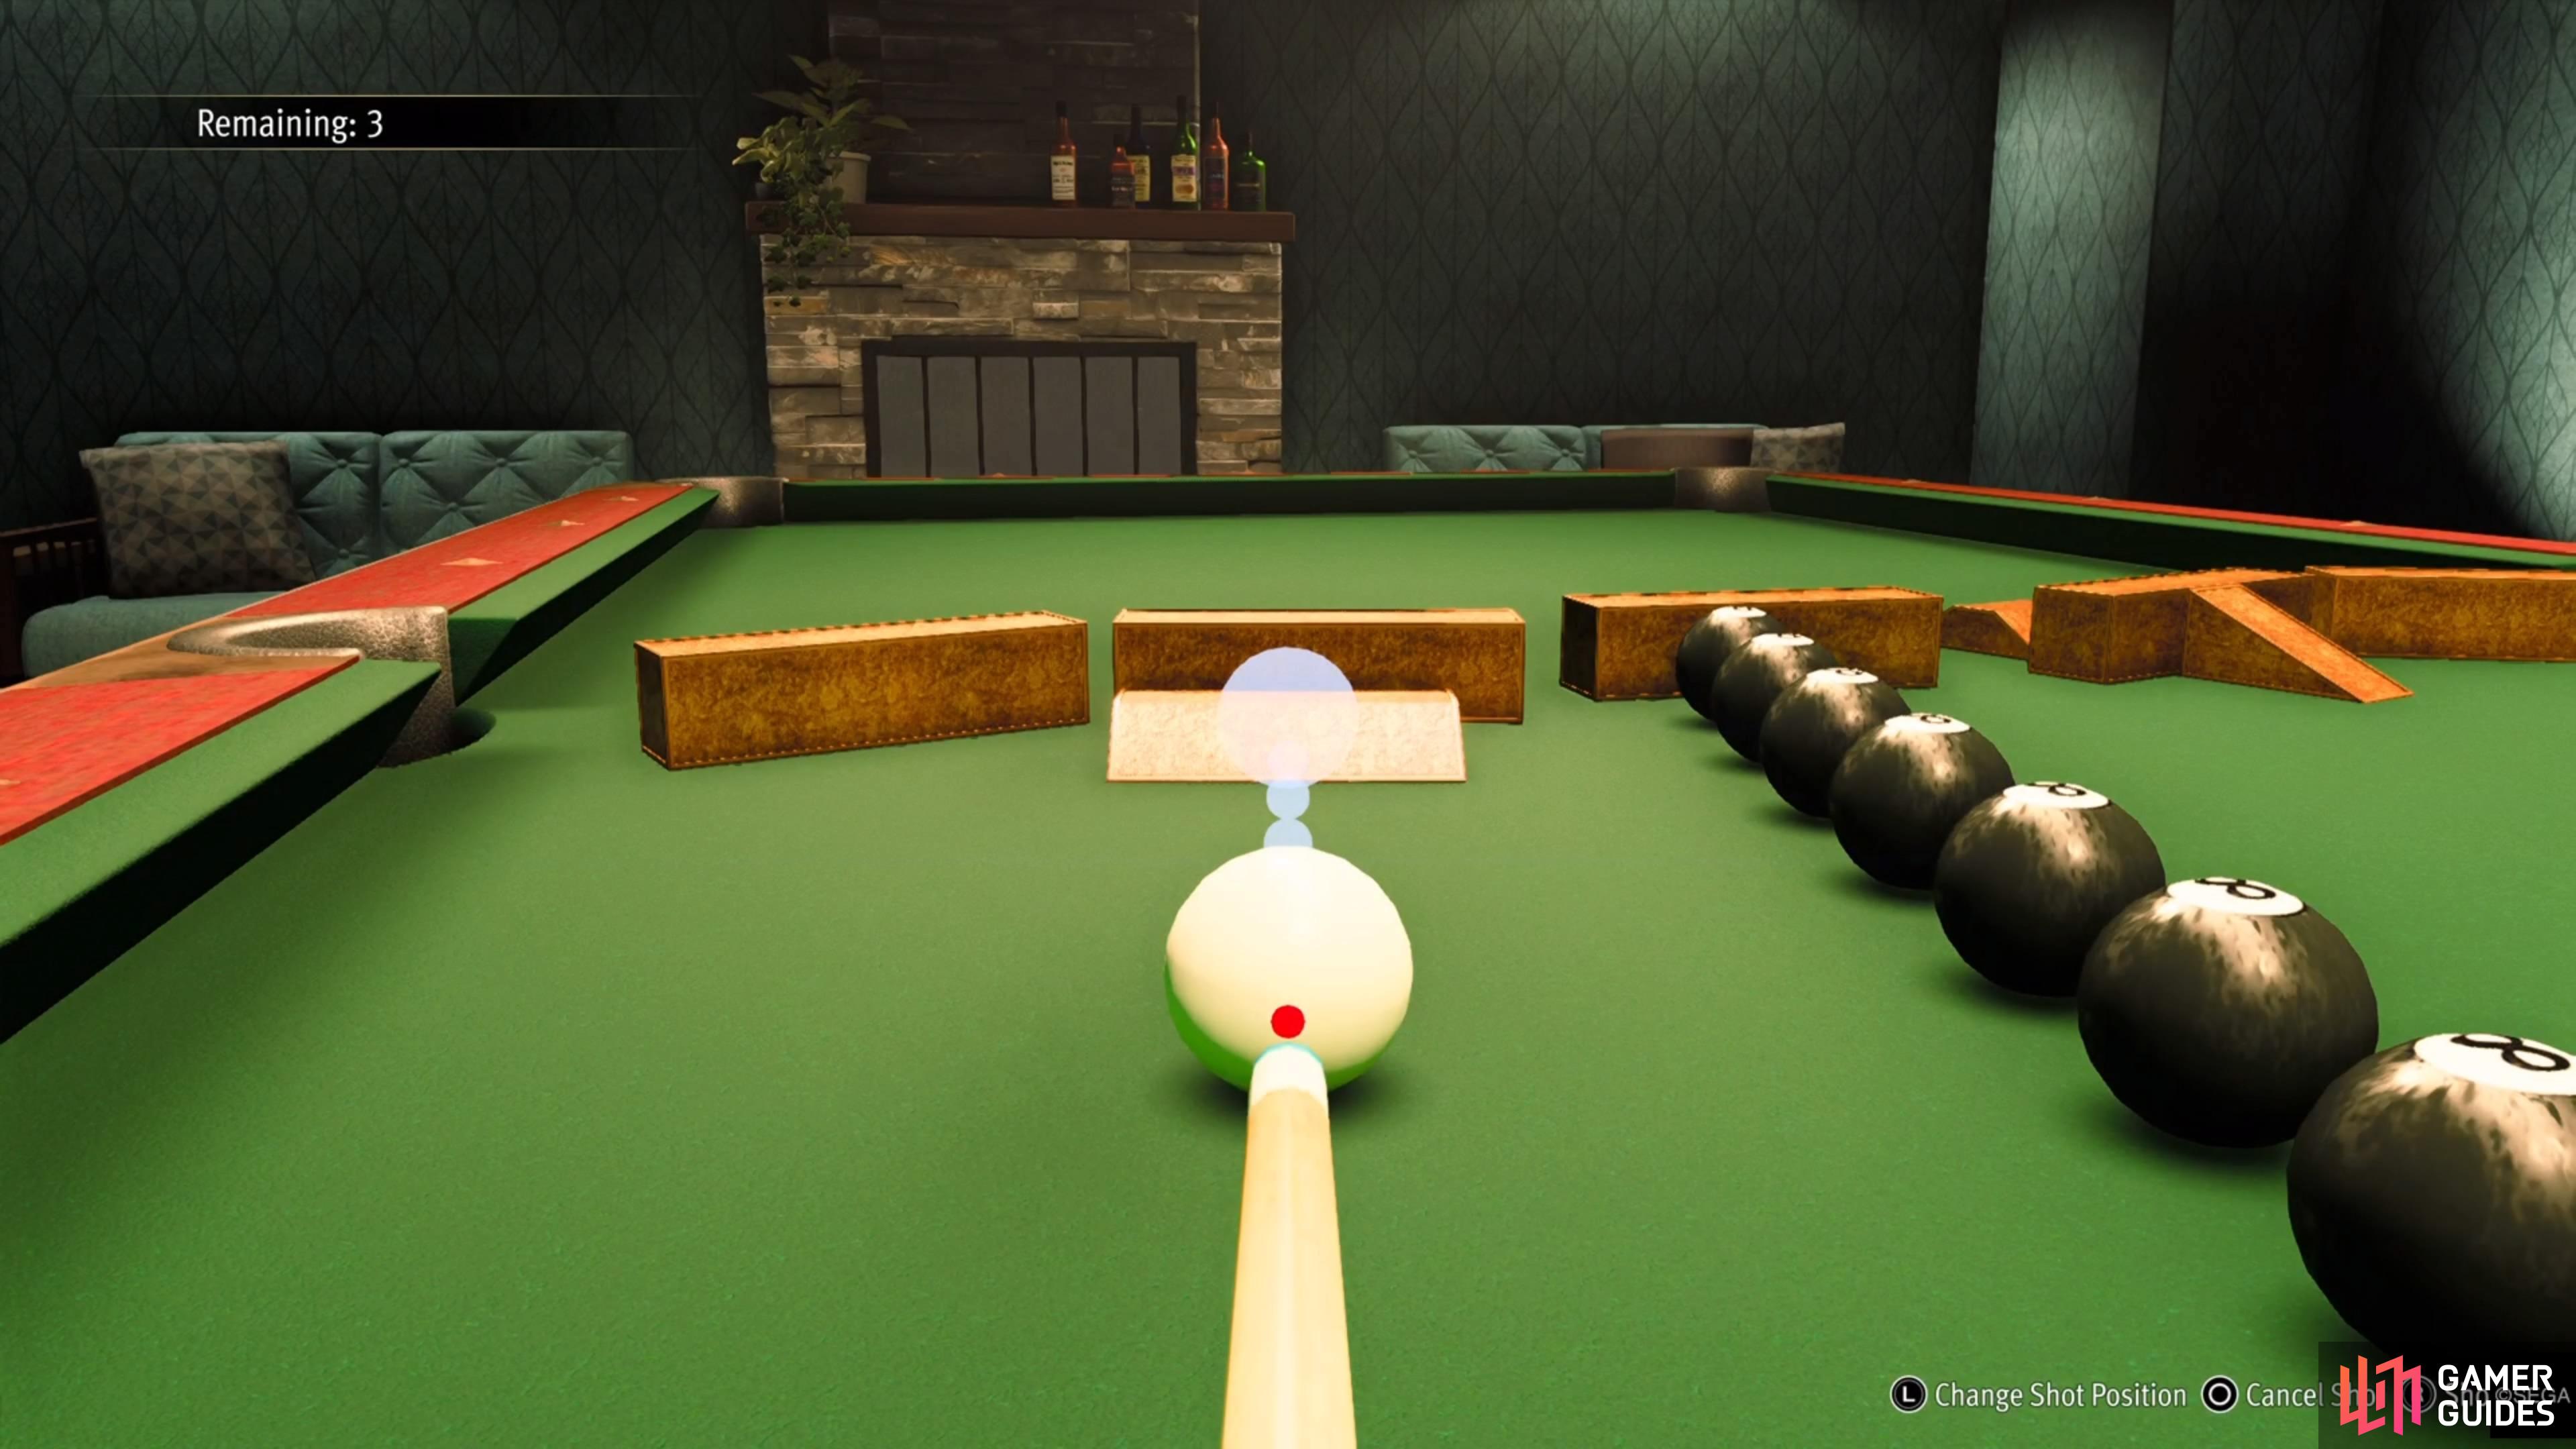

Go full power right in the middle of the first ramp for the third Normal challenge shot. (left), It may take a few tries to get it to hit the red ball just right. (right)
This shot is a little bit annoying, as even if you do everything right, there’s a little bit of RNG involved. You’ll need to hit it off the ramp straight ahead, off the left wall of the table, then over a second ramp on the other side. The red ball is right next to the corner pocket, but you can’t get to it because of a row of 8-balls in the way. You will basically just want to hit the first ramp in the dead center, as hard as you can. The reason this shot is annoying is because even if you do everything correctly, the cue ball will sometimes just stray off course with the second ramp. The best thing to do is have as many tries remaining when going into this shot.
Hard 1-Shot Challenges Guide
The trick shots will become ever more difficult with the Hard difficulty. There’s especially a little luck involved with the second and third shots, too, but the first one shouldn’t be all too challenging.
Hard 1

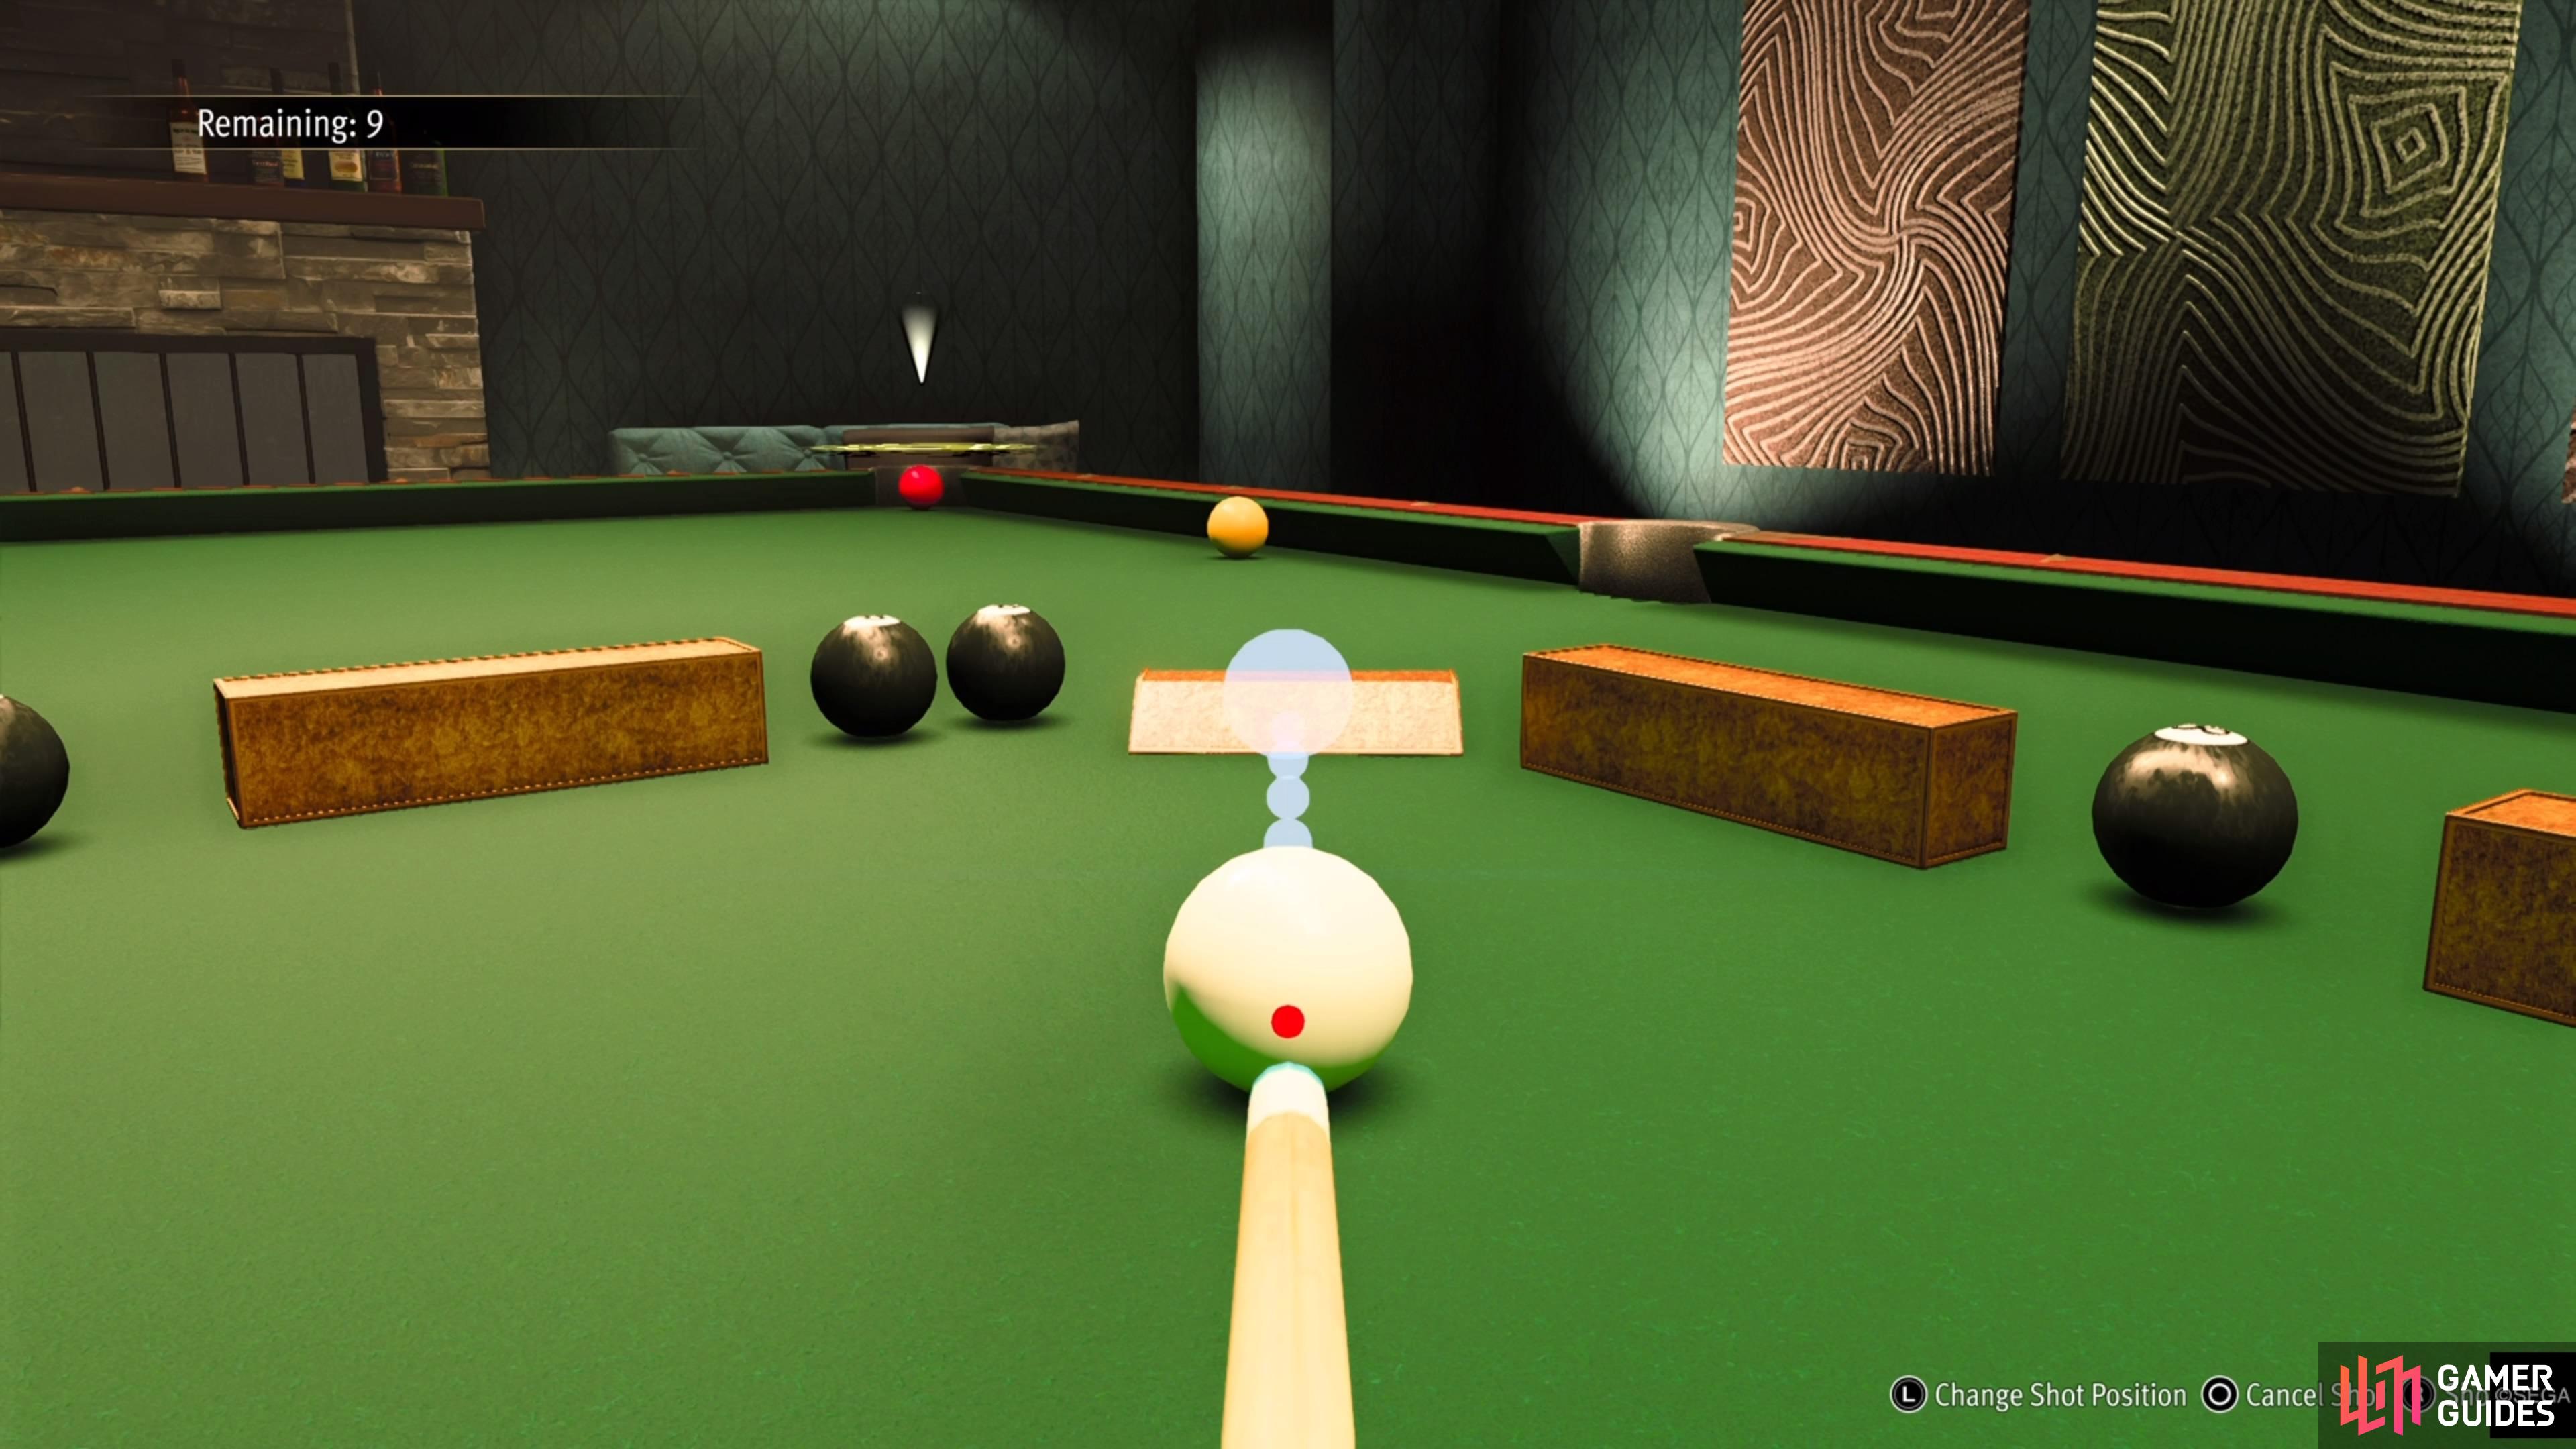
(1 of 2) Aim your shot for the first Hard challenge like this.
Aim your shot for the first Hard challenge like this. (left), Try not to hit the cue ball too hard, either, as you don’t want it go into a pocket or hit something else. (right)
There is a lot going on here and it looks a little confusing at first, but the solution is relatively simple. You will see a bunch of wooden blocks on the table, with the red ball being placed towards the southwestern corner. You could try to do a lot of banking to get the cue ball to hit the red one, but it’s kind of unnecessary. Aim the cue ball on the right side of the table, where you’ll bank it and hit the red ball (as shown in the screenshot). There is a very small window where you can actually do this, too, so you won’t need to fiddle around with where to hit the red ball.
Hard 2

(1 of 2) Aim to hit the yellow ball a little left of the center.

Aim to hit the yellow ball a little left of the center. (left), The idea is to make it bounce between the wall and wooden blocks. (right)
You will notice a row of wooden blacks, with some 8-balls in between them, with the red ball right by the corner pocket. Towards the upper half, there are three 8-balls lined up, with the yellow ball next to them. This can be a little bit of luck here, as the idea is to bank the cue ball off the top wall and hit the yellow ball with enough force, so it bounces between the left wall and wooden blocks. If you hit the yellow ball head-on, then it likely won’t reach the red ball. Hitting it slightly off center, to the left, is what you want to do. If it doesn’t get the red ball into the pocket, make some slight adjustments and try again.
Hard 3
The most annoying of the three Hard shots, the red ball is near the upper left corner of the table, with it being blocked by some wooden blocks and yellow balls. There is a wooden block right in front of you, so you’ll have to go around it. To the southwest of the block in front of you, there is a ramp that has a yellow ball near it. The idea for this shot is to hit that yellow ball off the ramp, onto the two elongated wooden blocks, and straight into the red ball.
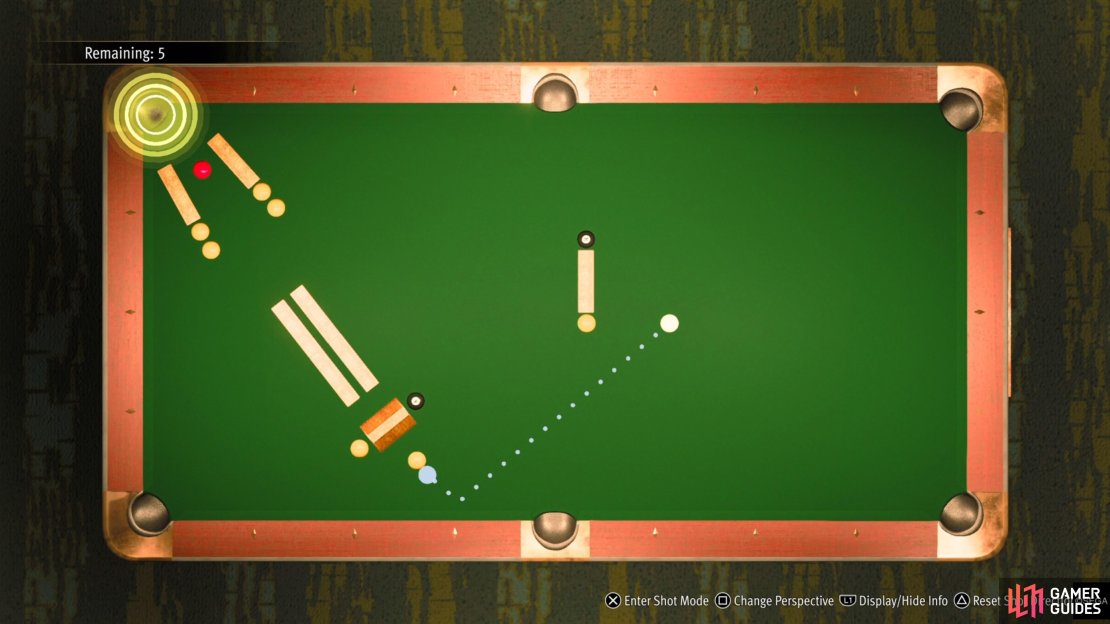


(1 of 3) You will be hitting the yellow ball as shown here.
The luck comes into play here, as you will need to hit the yellow ball at a precise angle and without enough force to not send it flying too far. The first thing to do is line up the shot by banking it off the bottom wall and straight center with the yellow ball. Once you have that square off, move it very slightly to the left of the center. You don’t want to hit the cue ball at full blast here, as that will likely give the yellow ball too much power. About 75% power is good enough, where the yellow ball should glide over (without much bouncing) the wooden blocks and hit the red ball into the pocket.
Legend 1-Shot Challenges Guide
The final tier of challenges are definitely the hardest, with them all requiring luck to some degree. The final one is the worst, so you will want to become good enough on the first two to have enough extra shots for that third one, just in case.
Legend 1


(1 of 2) It’s a bit finicky, but this is where you should be aiming the cue ball.
It’s a bit finicky, but this is where you should be aiming the cue ball. (left), Pull back the stick to about this spot to hit the ball. (right)
The first shot will have some wooden blocks and 8-balls towards the middle of the table, with your cue ball on one side and the red ball on the other side. There will be a small ramp in front of you, which means you have to shoot your ball off the ramp and to the other side. One way you can do this is shoot your ball over the ramp and bounce it off the far end, with it banking off the wooden block and hitting the red ball at just the right angle that it gets sent into the designated pocket.
The only problem with this method is that it’s kind of nitpicky and you’d have to line it up just perfect. Even then, there’s the off chance it won’t fully work all the time. The other method, which is a bit more consistent, is to shoot over the ramp and hit the ball as it goes over. When you are getting ready to shoot, the cue ball’s shadow should be about halfway off the right side of the ramp. This will take a few adjustments, but when you do shoot it, the stick should be right underneath the cue ball (in terms of the power needed).
Legend 2
The second challenge for Legend is just as tricky as the first one. There are a number of wooden walls set up around the table, with two yellow balls that are surrounded by 8-balls. In fact, you shouldn’t even bother with the yellow balls, since you’re not going to hit them without hitting one of the 8-balls. The red ball is right by the bottom right pocket, but it’s kind of blocked in by two wooden blocks. There is only a small gap that will allow you to squeeze the cue ball into it, which makes this a troublesome shot.

(1 of 2) Aim for the side of the wooden block, like shown here.

Aim for the side of the wooden block, like shown here. (left), Use the left stick to move the red dot on the ball to about here for the shot. (right)
Looking at the top-down view of the table, there is a wooden block in the middle, on the northern side. Aim at the side of this block, slightly to the left of the center. When you hit the cue ball, you will want to move the left analog stick to the left some. This will put it about halfway between the default shot and the left edge of the ball. Shoot it with about 3/4 strength, or a little below full, and adjust as needed. If it’s not making it into the area with the red ball, then you might need to move the red dot more left.
Sometimes, the cue ball will hit the red ball, but also go into the pocket right after it. If this is the case, then you might put the red dot when shooting a little down, too. This will apply a little backspin on the ball, so it will stop moving upon striking the red ball.
Legend 3
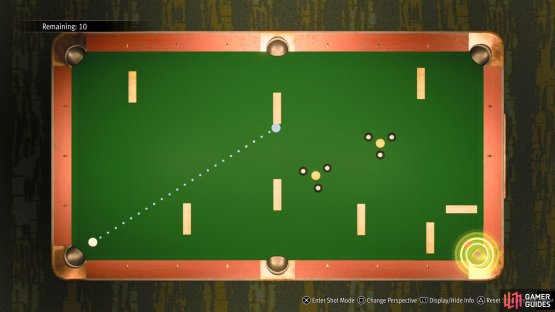
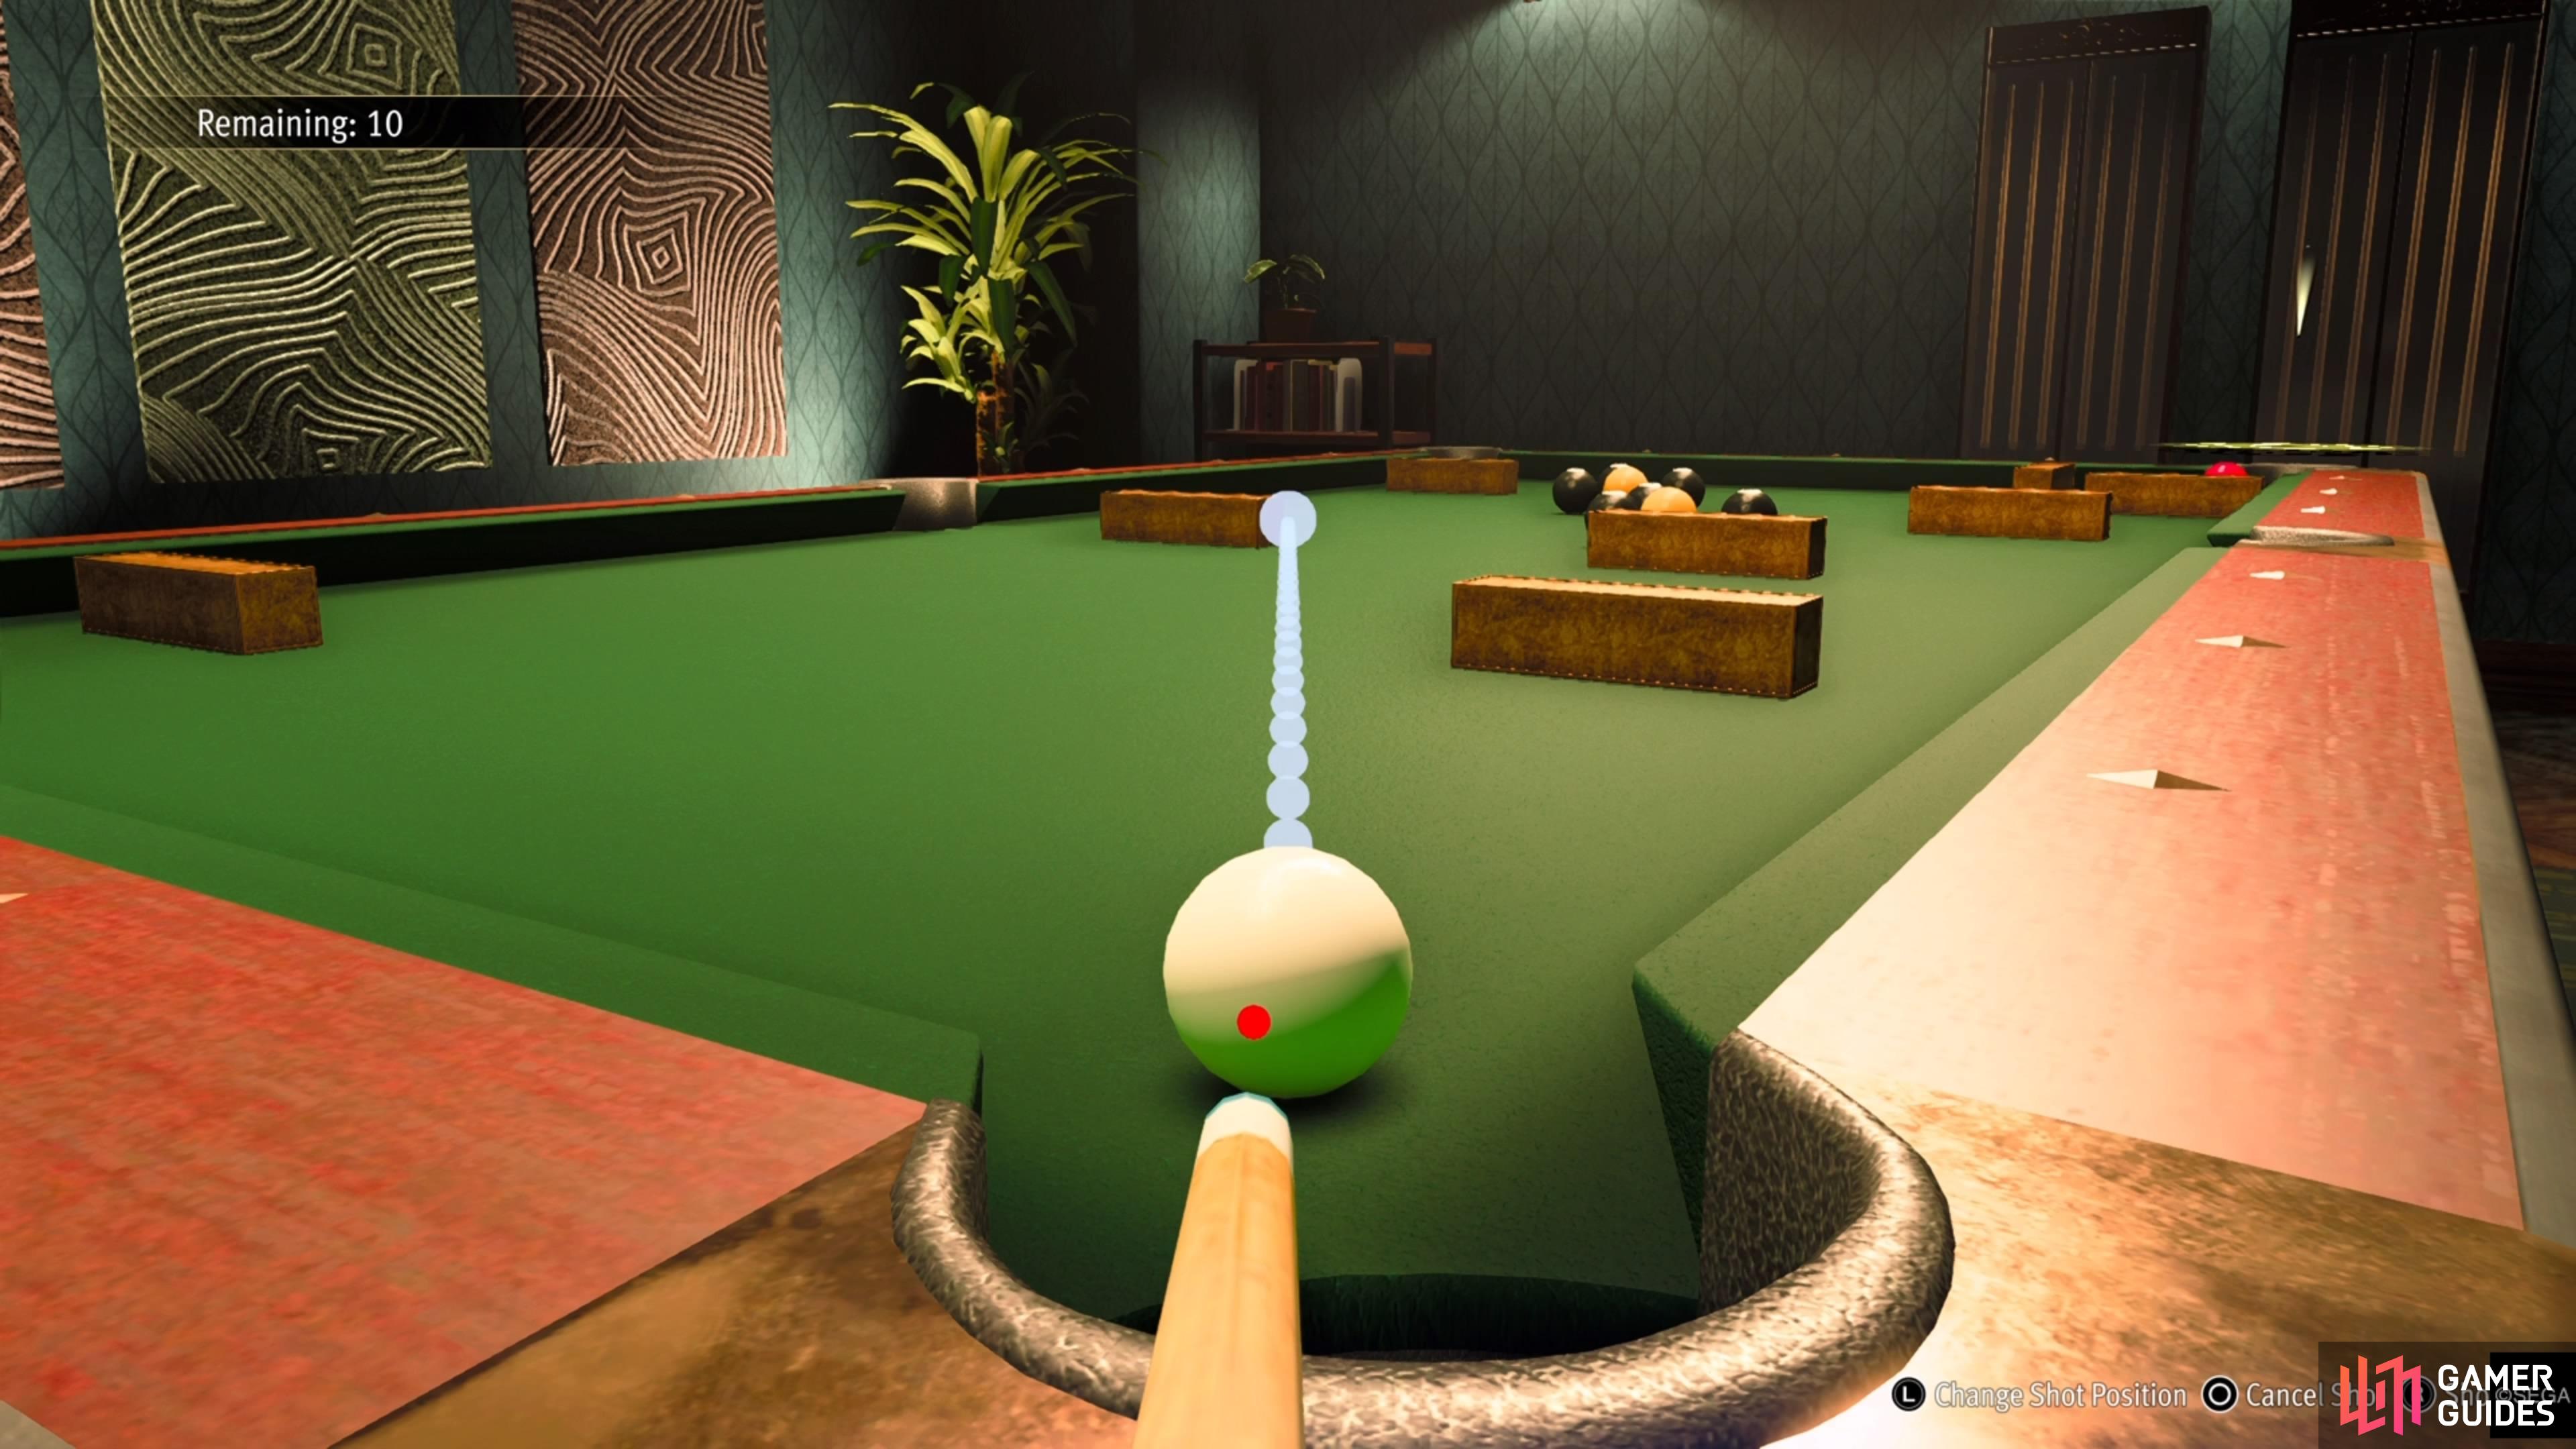
The final shot is a tough one, simply because the odds aren’t stacked in your favor here. The red ball is by the top left corner pocket, but there are wooden blocks placed that basically isolate it. There are two ramps along the northern wall, with some 8-balls right next to the ramp by the middle pocket. You will have to bank it, too, since there are more wooden blocks and 8-balls in front of you. The idea behind this trick shot is to bank it off the upper wall and over the ramps, without hitting the 8-balls.
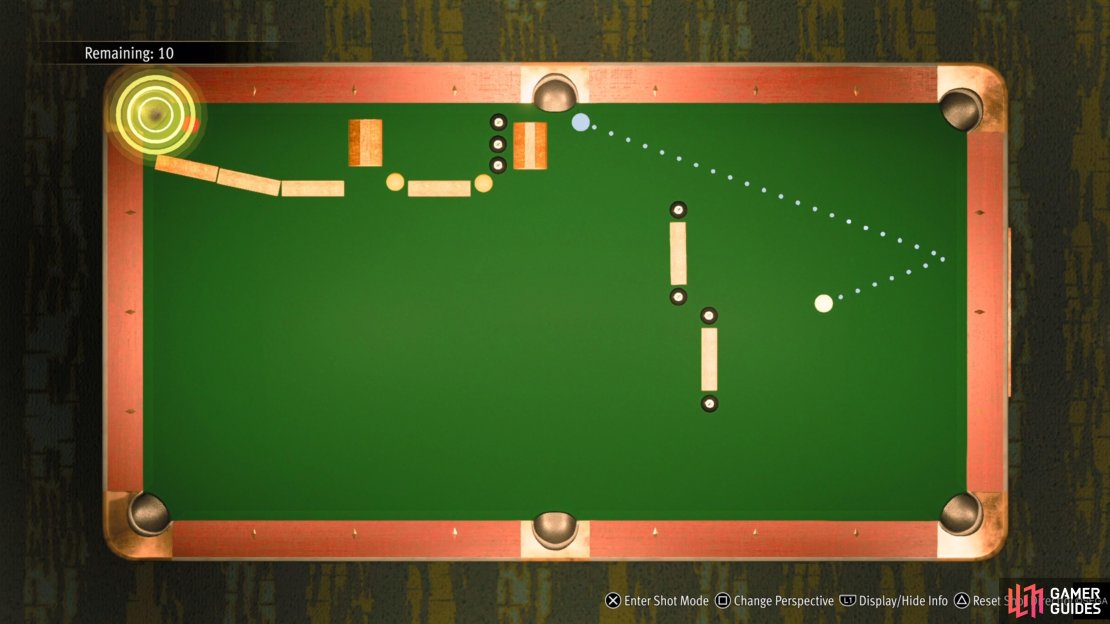
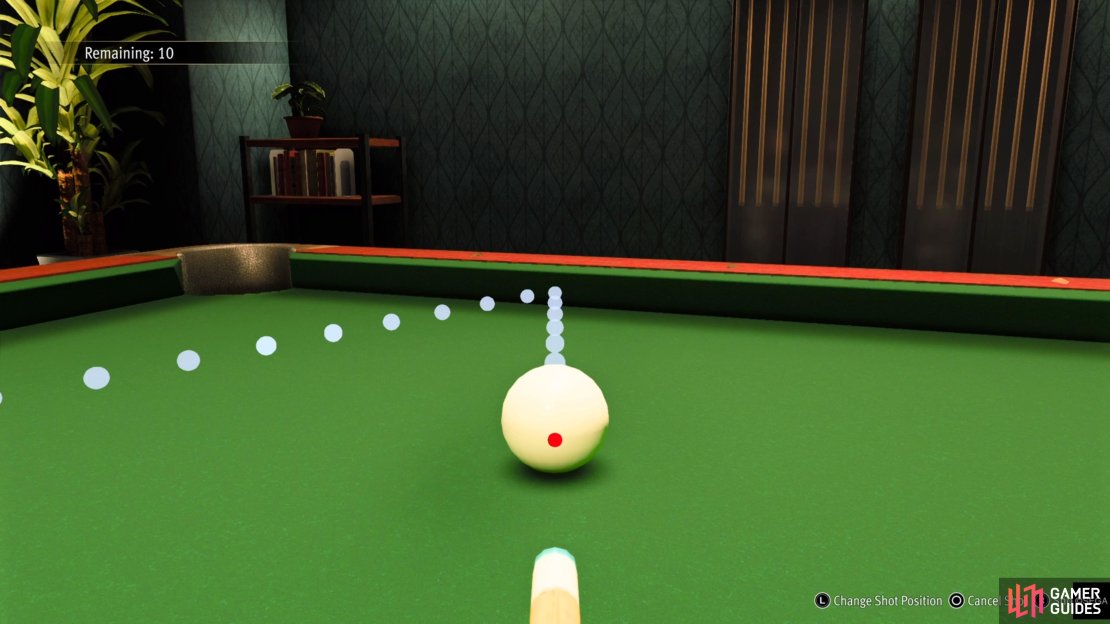
(1 of 3) Bank the shot to make the cue ball hit right before the side pocket.
So, the first thing to do here is to bank it off the right side of the table, while aiming it right before you would sink the cue ball into the side pocket. That’s pretty much the entire setup for this shot, with the rest of it solely coming from how much power you put into your actual cue ball. Full power won’t work here, but a little less than full power should be the ticket. You want to hit the cue ball hard enough to clear the first ramp and the 8-balls. It might take a few tries to get it just right, but this method will work.
No Comments