
There are a lot of unique characters in Elden Ring, and the Shadow of the Erdtree DLC adds a few more. One of them is ![]() Count Ymir, High Priest, who can be found in their abode at the
Count Ymir, High Priest, who can be found in their abode at the ![]() Cathedral of Manus Metyr in
Cathedral of Manus Metyr in ![]() Scadu Altus. Completing each stage of his quest will reward you with Talismans and unique sorceries that you can purchase from him. Read on to find out exactly where you can find Count Ymir and how you can complete his quest.
Scadu Altus. Completing each stage of his quest will reward you with Talismans and unique sorceries that you can purchase from him. Read on to find out exactly where you can find Count Ymir and how you can complete his quest.
Count Ymir is an NPC who asks you to sound three bells as part of his quest.
Table of Contents
If you want to jump straight to a specific meeting, or perhaps see what rewards you get from finishing this Questline, check out the following table:
First Meeting - Cathedral of Manus Metyr
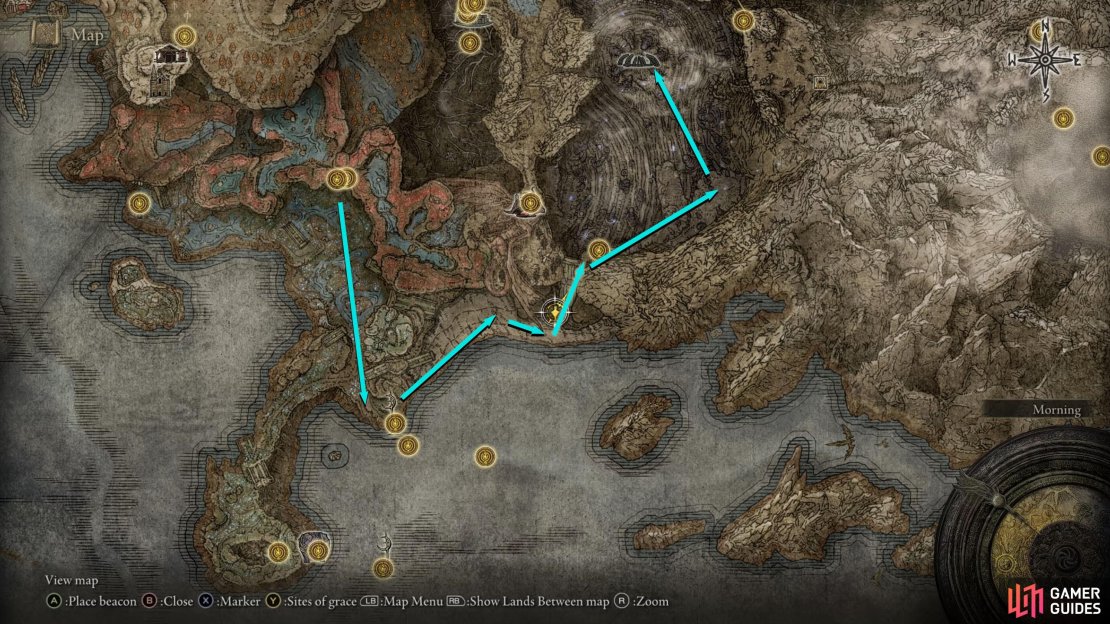
Count Ymir’s location is at the Cathedral of Manus Metyr which is situated in the eastern region of Scadu Altus. Before you can reach Ymir, you’ll need to complete the ![]() Castle Ensis dungeon, as that’ll lead to Scadu Altus. You can find Castle Ensis across the
Castle Ensis dungeon, as that’ll lead to Scadu Altus. You can find Castle Ensis across the ![]() Ellac Greatbridge to the northeast of the Three-Path Cross site of Grace in the
Ellac Greatbridge to the northeast of the Three-Path Cross site of Grace in the ![]() Gravesite Plain region. After going through the castle, you’ll find the
Gravesite Plain region. After going through the castle, you’ll find the ![]() Highroad Cross site of Grace to the north.
Highroad Cross site of Grace to the north.
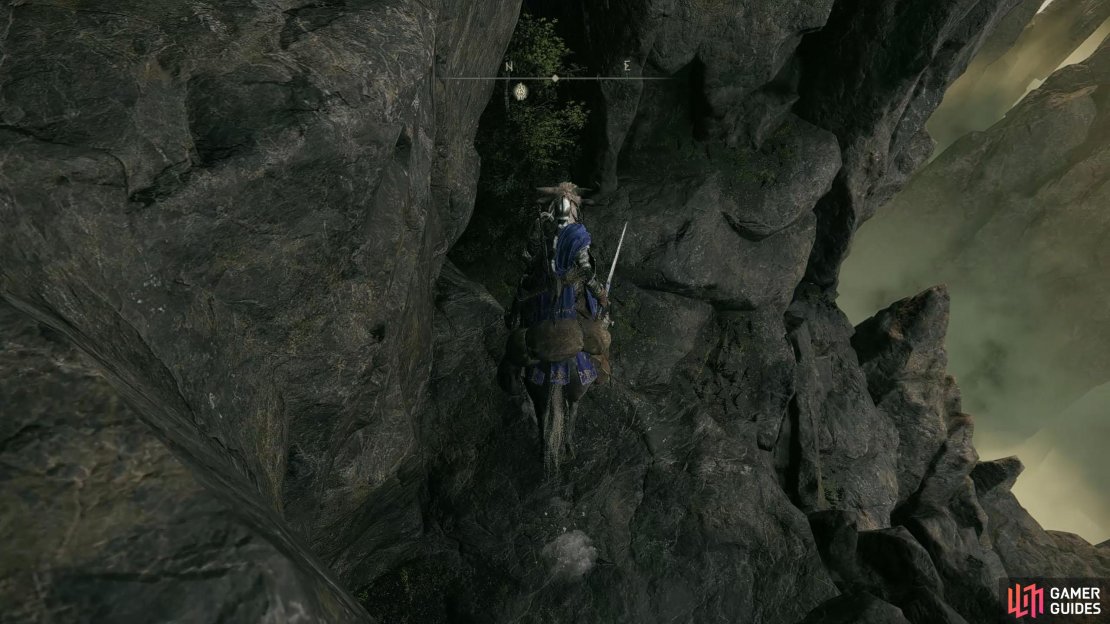
Follow the road northeast until you get the map fragment at the intersection, and then follow that road southeast until you find ![]() Moorth Ruins. In the center of the ruins, south of the Moorth Ruins site of Grace, is a large hole that at first may look like you can’t drop there, but with a careful drop, you can. This drop may take you a few tries to get right because if you don’t land in the right spot, you’ll die.
Moorth Ruins. In the center of the ruins, south of the Moorth Ruins site of Grace, is a large hole that at first may look like you can’t drop there, but with a careful drop, you can. This drop may take you a few tries to get right because if you don’t land in the right spot, you’ll die.
Near the hole is a house with a doorway you can go in. Go through, down the stairs, and onto the rooftop. Head east along the rooftop a little and look down over the edge. You should see a destroyed wall in an L-shape, if not, change the time to the morning or noon to get a better look. Line up your camera with the long part of the “L”, and then jump forward to land on it. Note that you will take some fall damage, so make sure you’ve topped up your health.
From the dilapidated building you just landed on, and follow the ruins towards the building in the east. This building contains the ![]() Golden Arcs Incantation inside a chest, but you will have to deal with the nearby
Golden Arcs Incantation inside a chest, but you will have to deal with the nearby ![]() Horned Shamans. Turn around, and jump onto the dilapidated building in the northwest corner before dropping to the building south of it. Finally, drop to the floor from the southern side. In the southeast corner, you’ll find a cave. Head through it, and you’ll find a ladder at the end leading to
Horned Shamans. Turn around, and jump onto the dilapidated building in the northwest corner before dropping to the building south of it. Finally, drop to the floor from the southern side. In the southeast corner, you’ll find a cave. Head through it, and you’ll find a ladder at the end leading to ![]() Bonny Village with its site of Grace to the right of the well you just came up.
Bonny Village with its site of Grace to the right of the well you just came up.


(1 of 6) Stand at the edge of the broken path and drop onto the L-Shape wall below.
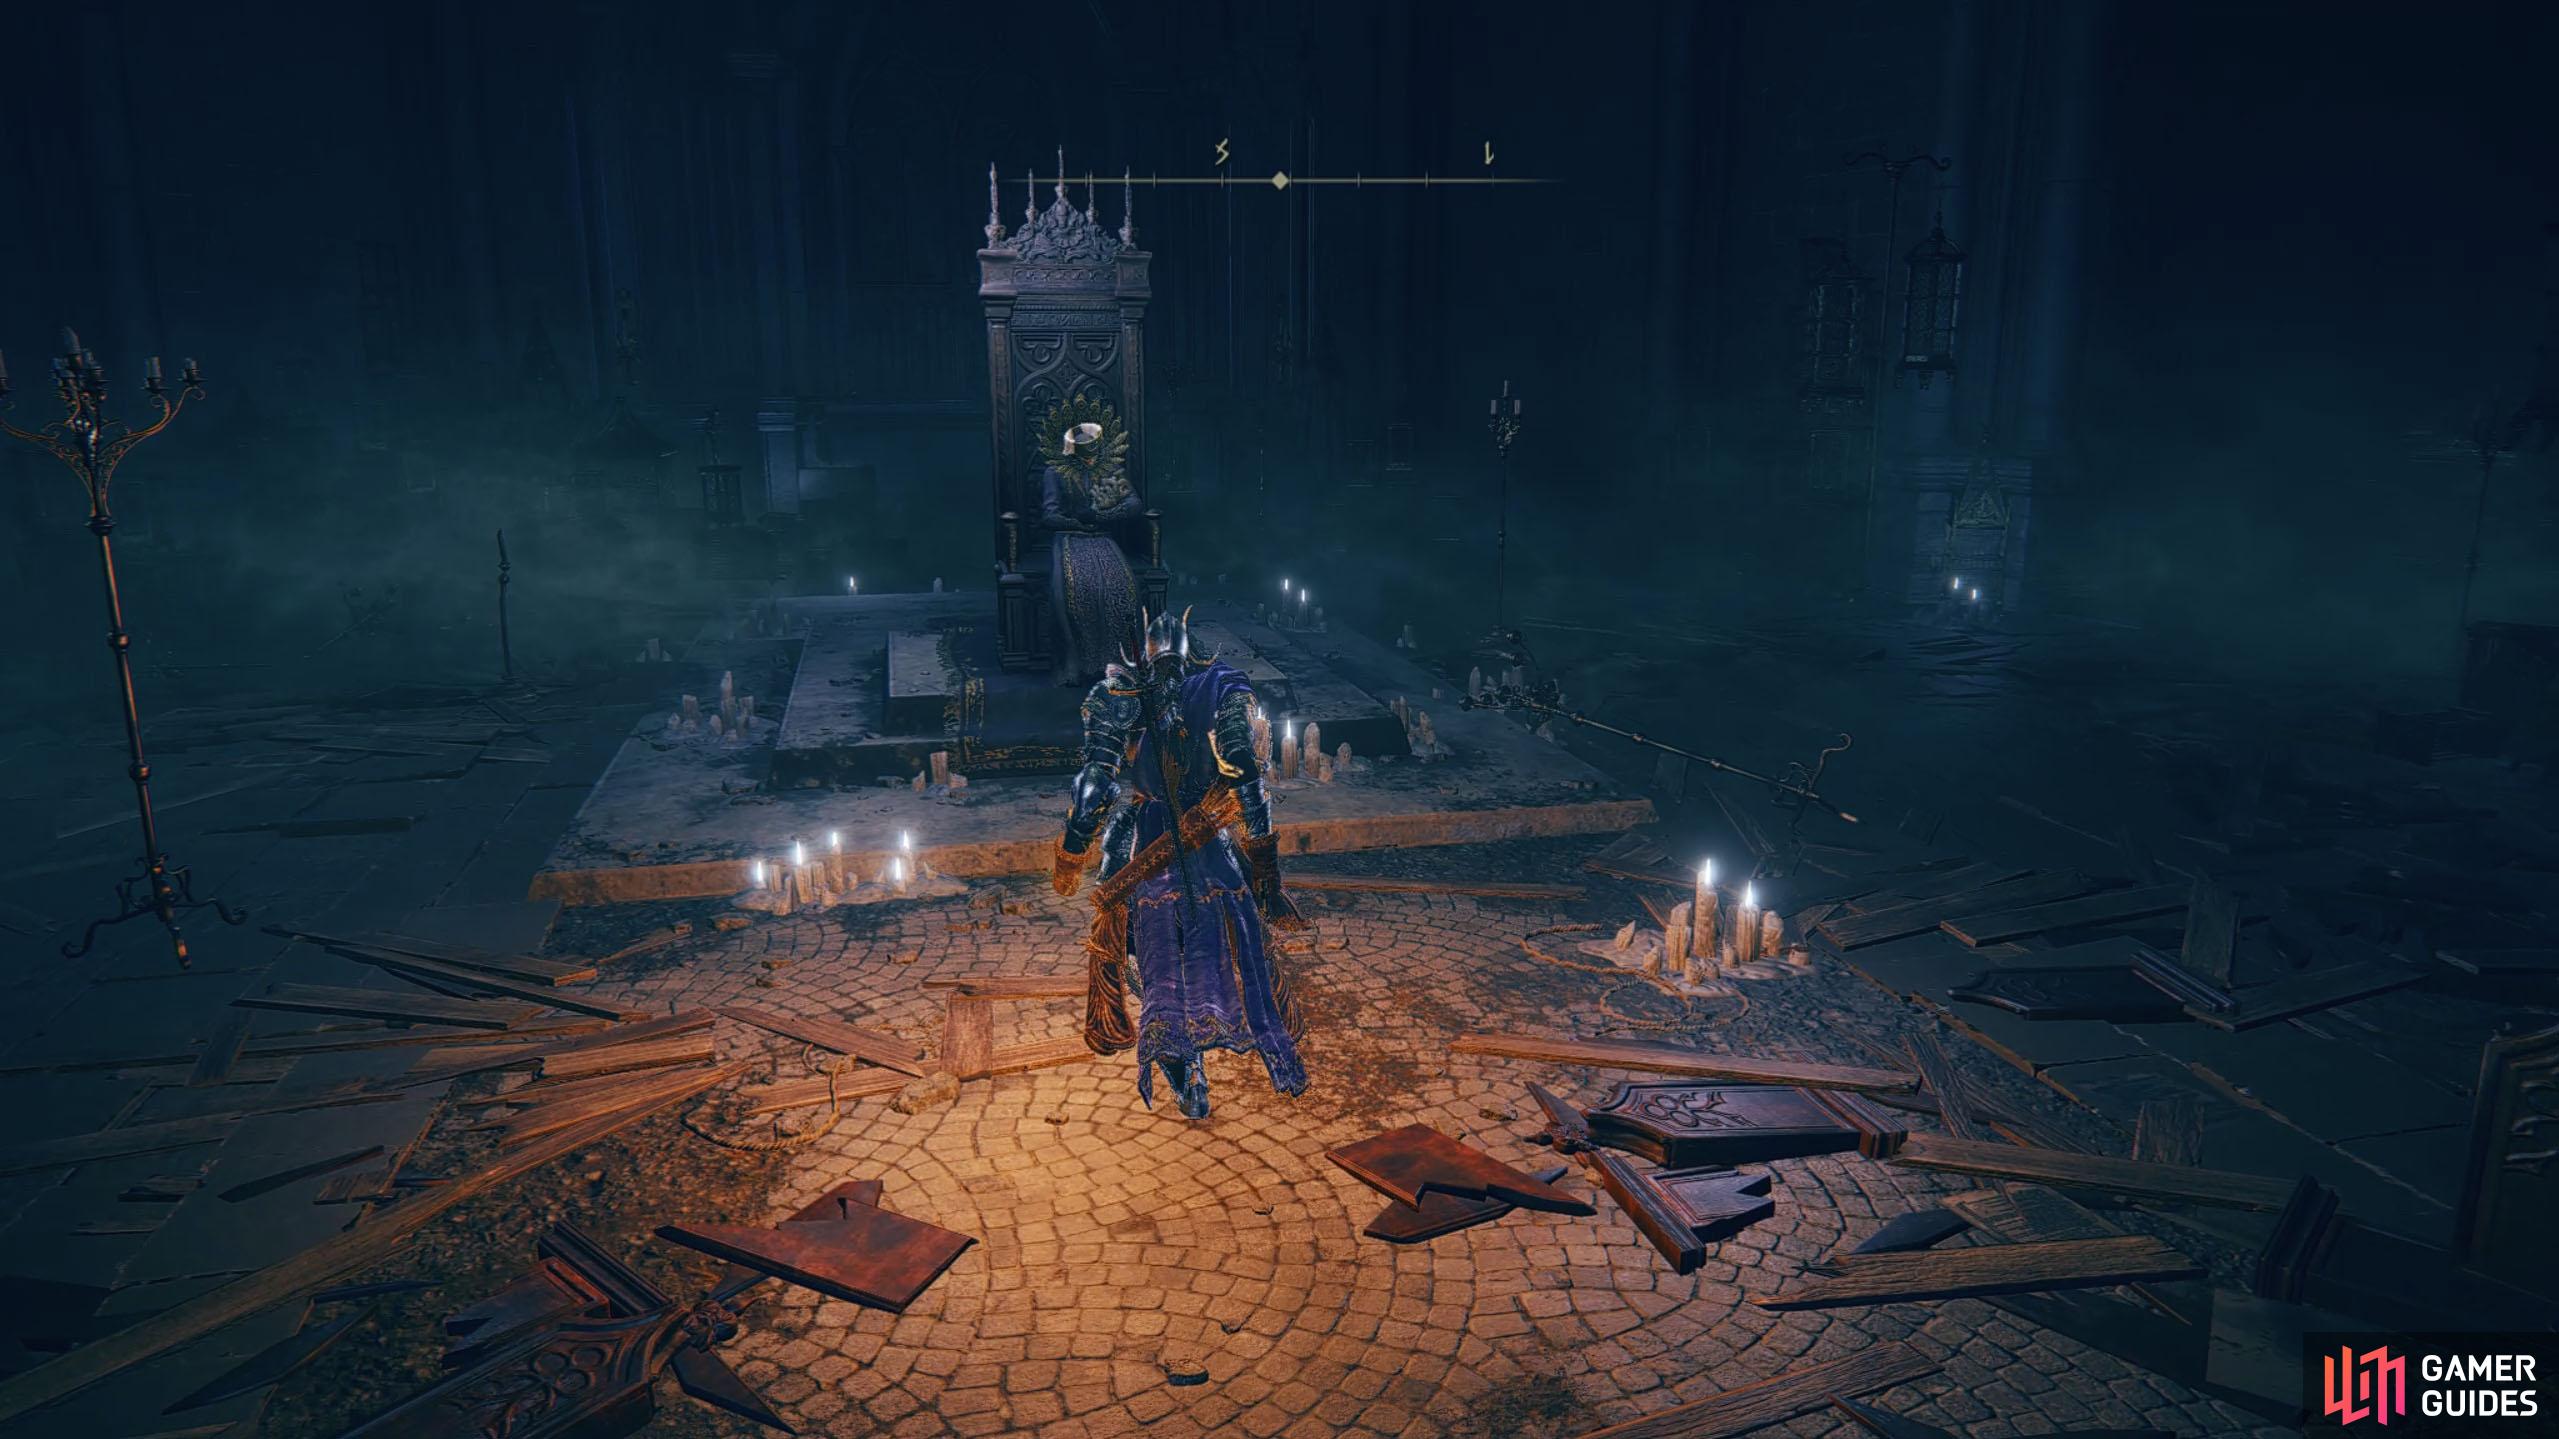
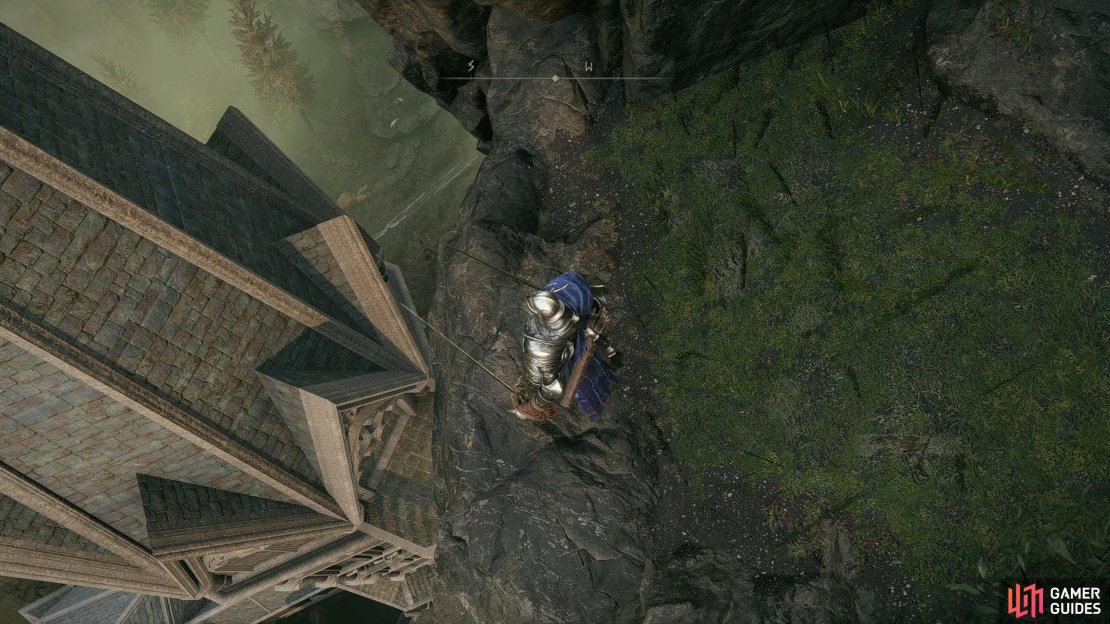
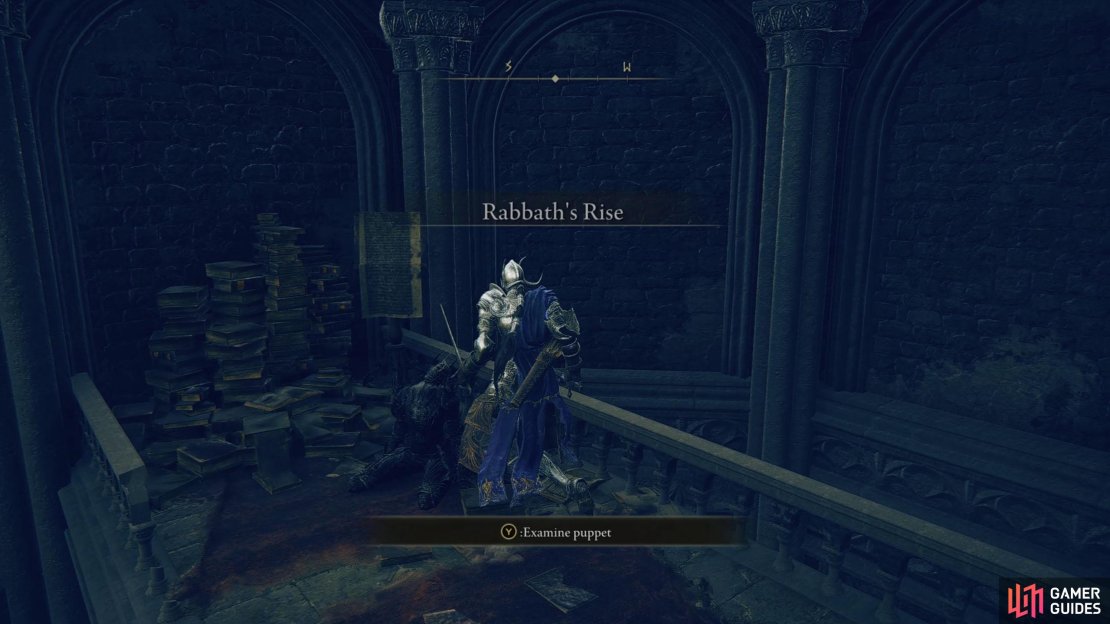
There is a lot to see and do in Bonny Village, so you may want to look around here first. When you’re ready, jump on your steed, and travel east, jump over the broken bridge, and continue east/northeast across two rope bridges. After the second bridge, you’ll find an aptly named site of Grace called “Bridge Leading to the Village”. Not far now. From the site of Grace, follow the path north until you reach another site of Grace called “Church District Highroad”, which is west of ![]() Rabbath’s Rise. Stay on the path as it curves around to the south, and eventually, you’ll reach the Cathedral of Manus Metyr.
Rabbath’s Rise. Stay on the path as it curves around to the south, and eventually, you’ll reach the Cathedral of Manus Metyr.
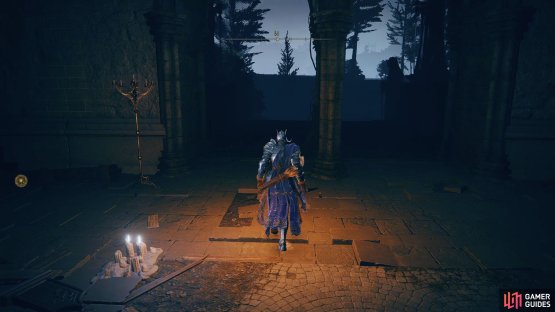
Inside the Cathedral, head in, and you’ll find Count Ymir, perched on his throne. Speak to him, exhaust his dialogue, and you’ll receive the first ![]() Ruins Map and a
Ruins Map and a ![]() Hole-Laden Necklace. The maps you receive from Ymir will lead to the numerous Finger Ruins around the
Hole-Laden Necklace. The maps you receive from Ymir will lead to the numerous Finger Ruins around the ![]() Land of Shadow, but we’ll tell you how to get there later on. After exhausting his dialogue, you’ll be able to purchase sorceries from him.
Land of Shadow, but we’ll tell you how to get there later on. After exhausting his dialogue, you’ll be able to purchase sorceries from him.
Reload the area either by exiting the game to the menu and loading it back up or traveling to a different Grace and coming back again. When you do, you’ll find Swordhand of Night, Jolán, exhaust her dialogue, and then head back to Ymir who is now cradling a creepy fingercreeper baby, and let him know that you’ve spoken to her. With Map and Holy-Laden Necklace in hand, it’s time to go to the ![]() Finger Ruins of Rhia and sound the hanging bell.
Finger Ruins of Rhia and sound the hanging bell.
First Bell - Finger Ruins of Rhia
These ruins can be accessed from the ![]() Cerulean Coast area, south of Gravesite Plain. If you’ve never been there before, you’ll have to head through Ellac River, which can be accessed by heading south from the
Cerulean Coast area, south of Gravesite Plain. If you’ve never been there before, you’ll have to head through Ellac River, which can be accessed by heading south from the ![]() Castle Front site of Grace. When you reach the Cerulean Coast, head south past the Ghostflame
Castle Front site of Grace. When you reach the Cerulean Coast, head south past the Ghostflame ![]() Dragon, collect the map fragment, and then head up to find the Cerulean Coast Cross site of Grace. From there, head northeast, and you’ll find some ledges leading down to the coast. Continue northeast along the coast until you go over the shallow water, and then head north over the large stone coffin to find the Finger Ruins of Rhia.
Dragon, collect the map fragment, and then head up to find the Cerulean Coast Cross site of Grace. From there, head northeast, and you’ll find some ledges leading down to the coast. Continue northeast along the coast until you go over the shallow water, and then head north over the large stone coffin to find the Finger Ruins of Rhia.
Follow the path northeast where you’ll find the Finger Ruins of Rhia site of Grace. For a place so large, there is no loot to pick up outside the ![]() Nailstones scattered across the floor. However, there are a lot of enemies you’ll need to get through, with most of them being either
Nailstones scattered across the floor. However, there are a lot of enemies you’ll need to get through, with most of them being either ![]() Fingercreepers or
Fingercreepers or ![]() Large Fingercreepers, although there are also numerous
Large Fingercreepers, although there are also numerous ![]() Lamprey enemies who can root you in place.
Lamprey enemies who can root you in place.
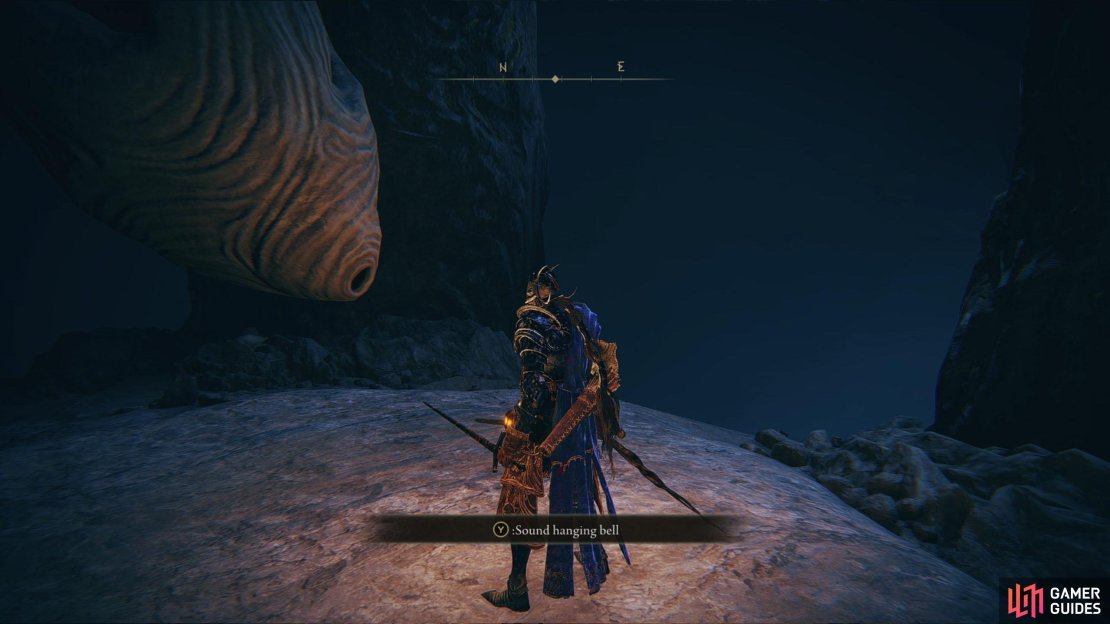
Here, you’ll want to head to the northern center of the area, where you’ll find a circle of stone fingers protruding out of the ground. You can get here easily by simply heading north after going down the northeastern path. When you get there, you’ll find a finger hanging down in the center. As you approach it, you’ll be able to “Sound hanging bell” with the Hole-Laden Necklace. This will reward you with the ![]() Crimson Seed Talisman +1.
Crimson Seed Talisman +1.


(1 of 7) This is the route from the Cerulean Coast site of Grace to the Finger Ruins of Rhia.
Return to the Cathedral of Manus Metyr
Head back to Ymir in the Cathedral of Manus Metyr (fast travel) and exhaust his dialogue. You’ll make him happy, and he’ll reward you with the ![]() Beloved Stardust Talisman and the
Beloved Stardust Talisman and the ![]() Ruins Map (2nd). Ask him about the nature of the world and Miquella, and then talk to Jolán again.
Ruins Map (2nd). Ask him about the nature of the world and Miquella, and then talk to Jolán again.
Second Bell - Finger Ruins Of Dheo
If you take a look at the Ruins Map (2nd), it’ll show you a rough location of the next ruins. On the right side of the map, there is a distinctive part of land that looks like…err…something familiar. This area is called the ![]() Hinterland and the area where you’ll find the next set of ruins. Unfortunately, to get here, you’ll need to traverse through the
Hinterland and the area where you’ll find the next set of ruins. Unfortunately, to get here, you’ll need to traverse through the ![]() Shadow Keep, and head through a hidden door to find it. Read our Abyssal Woods Location Guide to find it as you need to go the same direction to reach the woods.
Shadow Keep, and head through a hidden door to find it. Read our Abyssal Woods Location Guide to find it as you need to go the same direction to reach the woods.
When you reach the ![]() Shadow Keep, Back Gate site of Grace, head to the room on the right and perform the “
Shadow Keep, Back Gate site of Grace, head to the room on the right and perform the “![]() O Mother” Gesture in front of the statue, which can be obtained in Bonny Village. Read our O Mother Gesture Location page to find its exact location.
O Mother” Gesture in front of the statue, which can be obtained in Bonny Village. Read our O Mother Gesture Location page to find its exact location.
From here, head outside, and go east across the ![]() Hinterland Bridge to the northeast. Continue east until you reach the
Hinterland Bridge to the northeast. Continue east until you reach the ![]() Fingerstone Hill site of Grace, and then head all the way south until you find another circle of stone fingers. Once again, interact with the “bell” in the center, and you’ll receive the
Fingerstone Hill site of Grace, and then head all the way south until you find another circle of stone fingers. Once again, interact with the “bell” in the center, and you’ll receive the ![]() Cerulean Seed Talisman +1.
Cerulean Seed Talisman +1.
Return to the Cathedral of Manus Metyr Again
Return back to the Cathedral, speak to Ymir, who is pleased with your progress, and he’ll give you the ![]() Ruins Map (3rd) which depicts the place you’re standing in now. Interesting. Speak to Jolán again for a bit more backstory, and then reload the area to find Ymir gone.
Ruins Map (3rd) which depicts the place you’re standing in now. Interesting. Speak to Jolán again for a bit more backstory, and then reload the area to find Ymir gone.
Third Bell - Finger Ruins Of Miyr
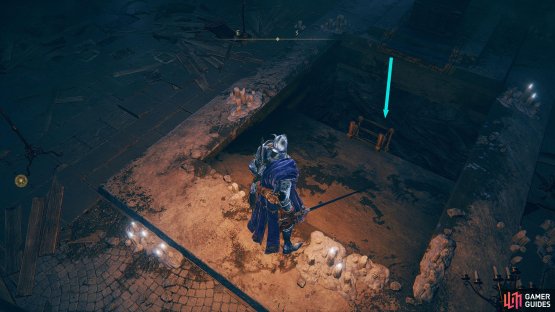
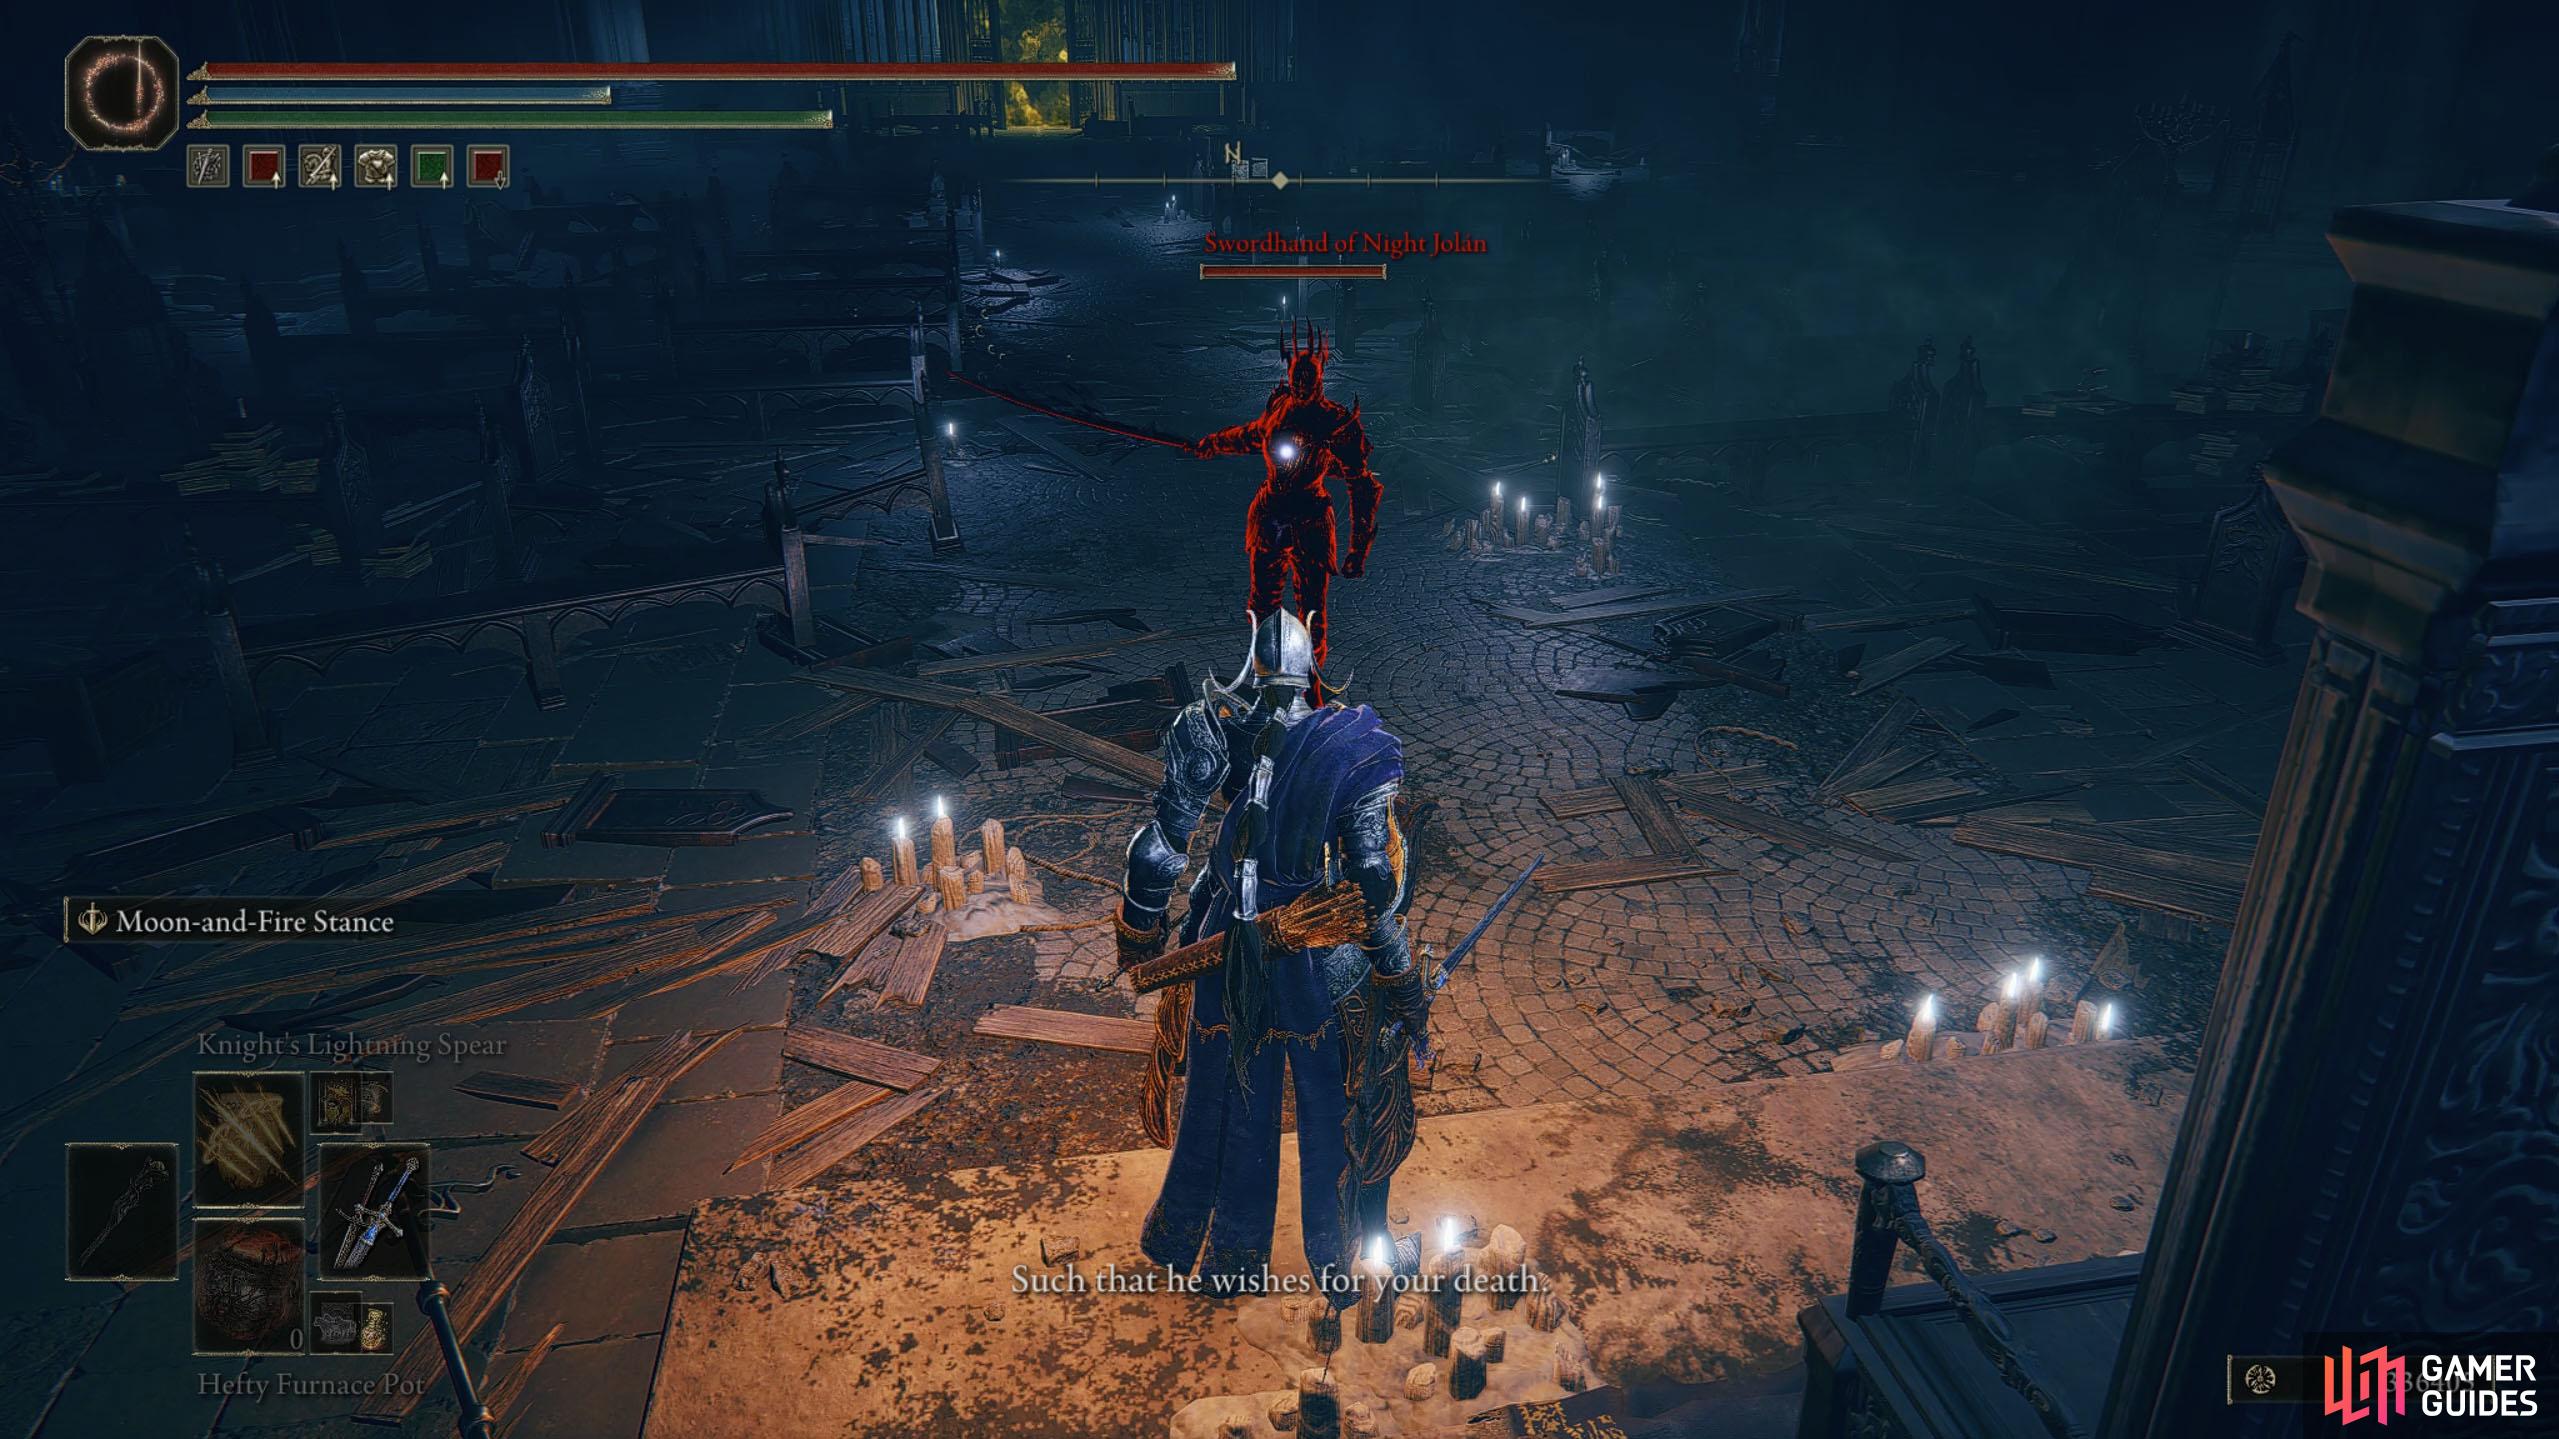
Ymir has disappeared, and his throne is empty. Head over to the throne and interact with the front of it to find a hidden button that, when pushed, will reveal a hidden entrance. Take the ladder down and walk forward a bit to get invaded by ![]() Swordhand of Night Anna.
Swordhand of Night Anna.
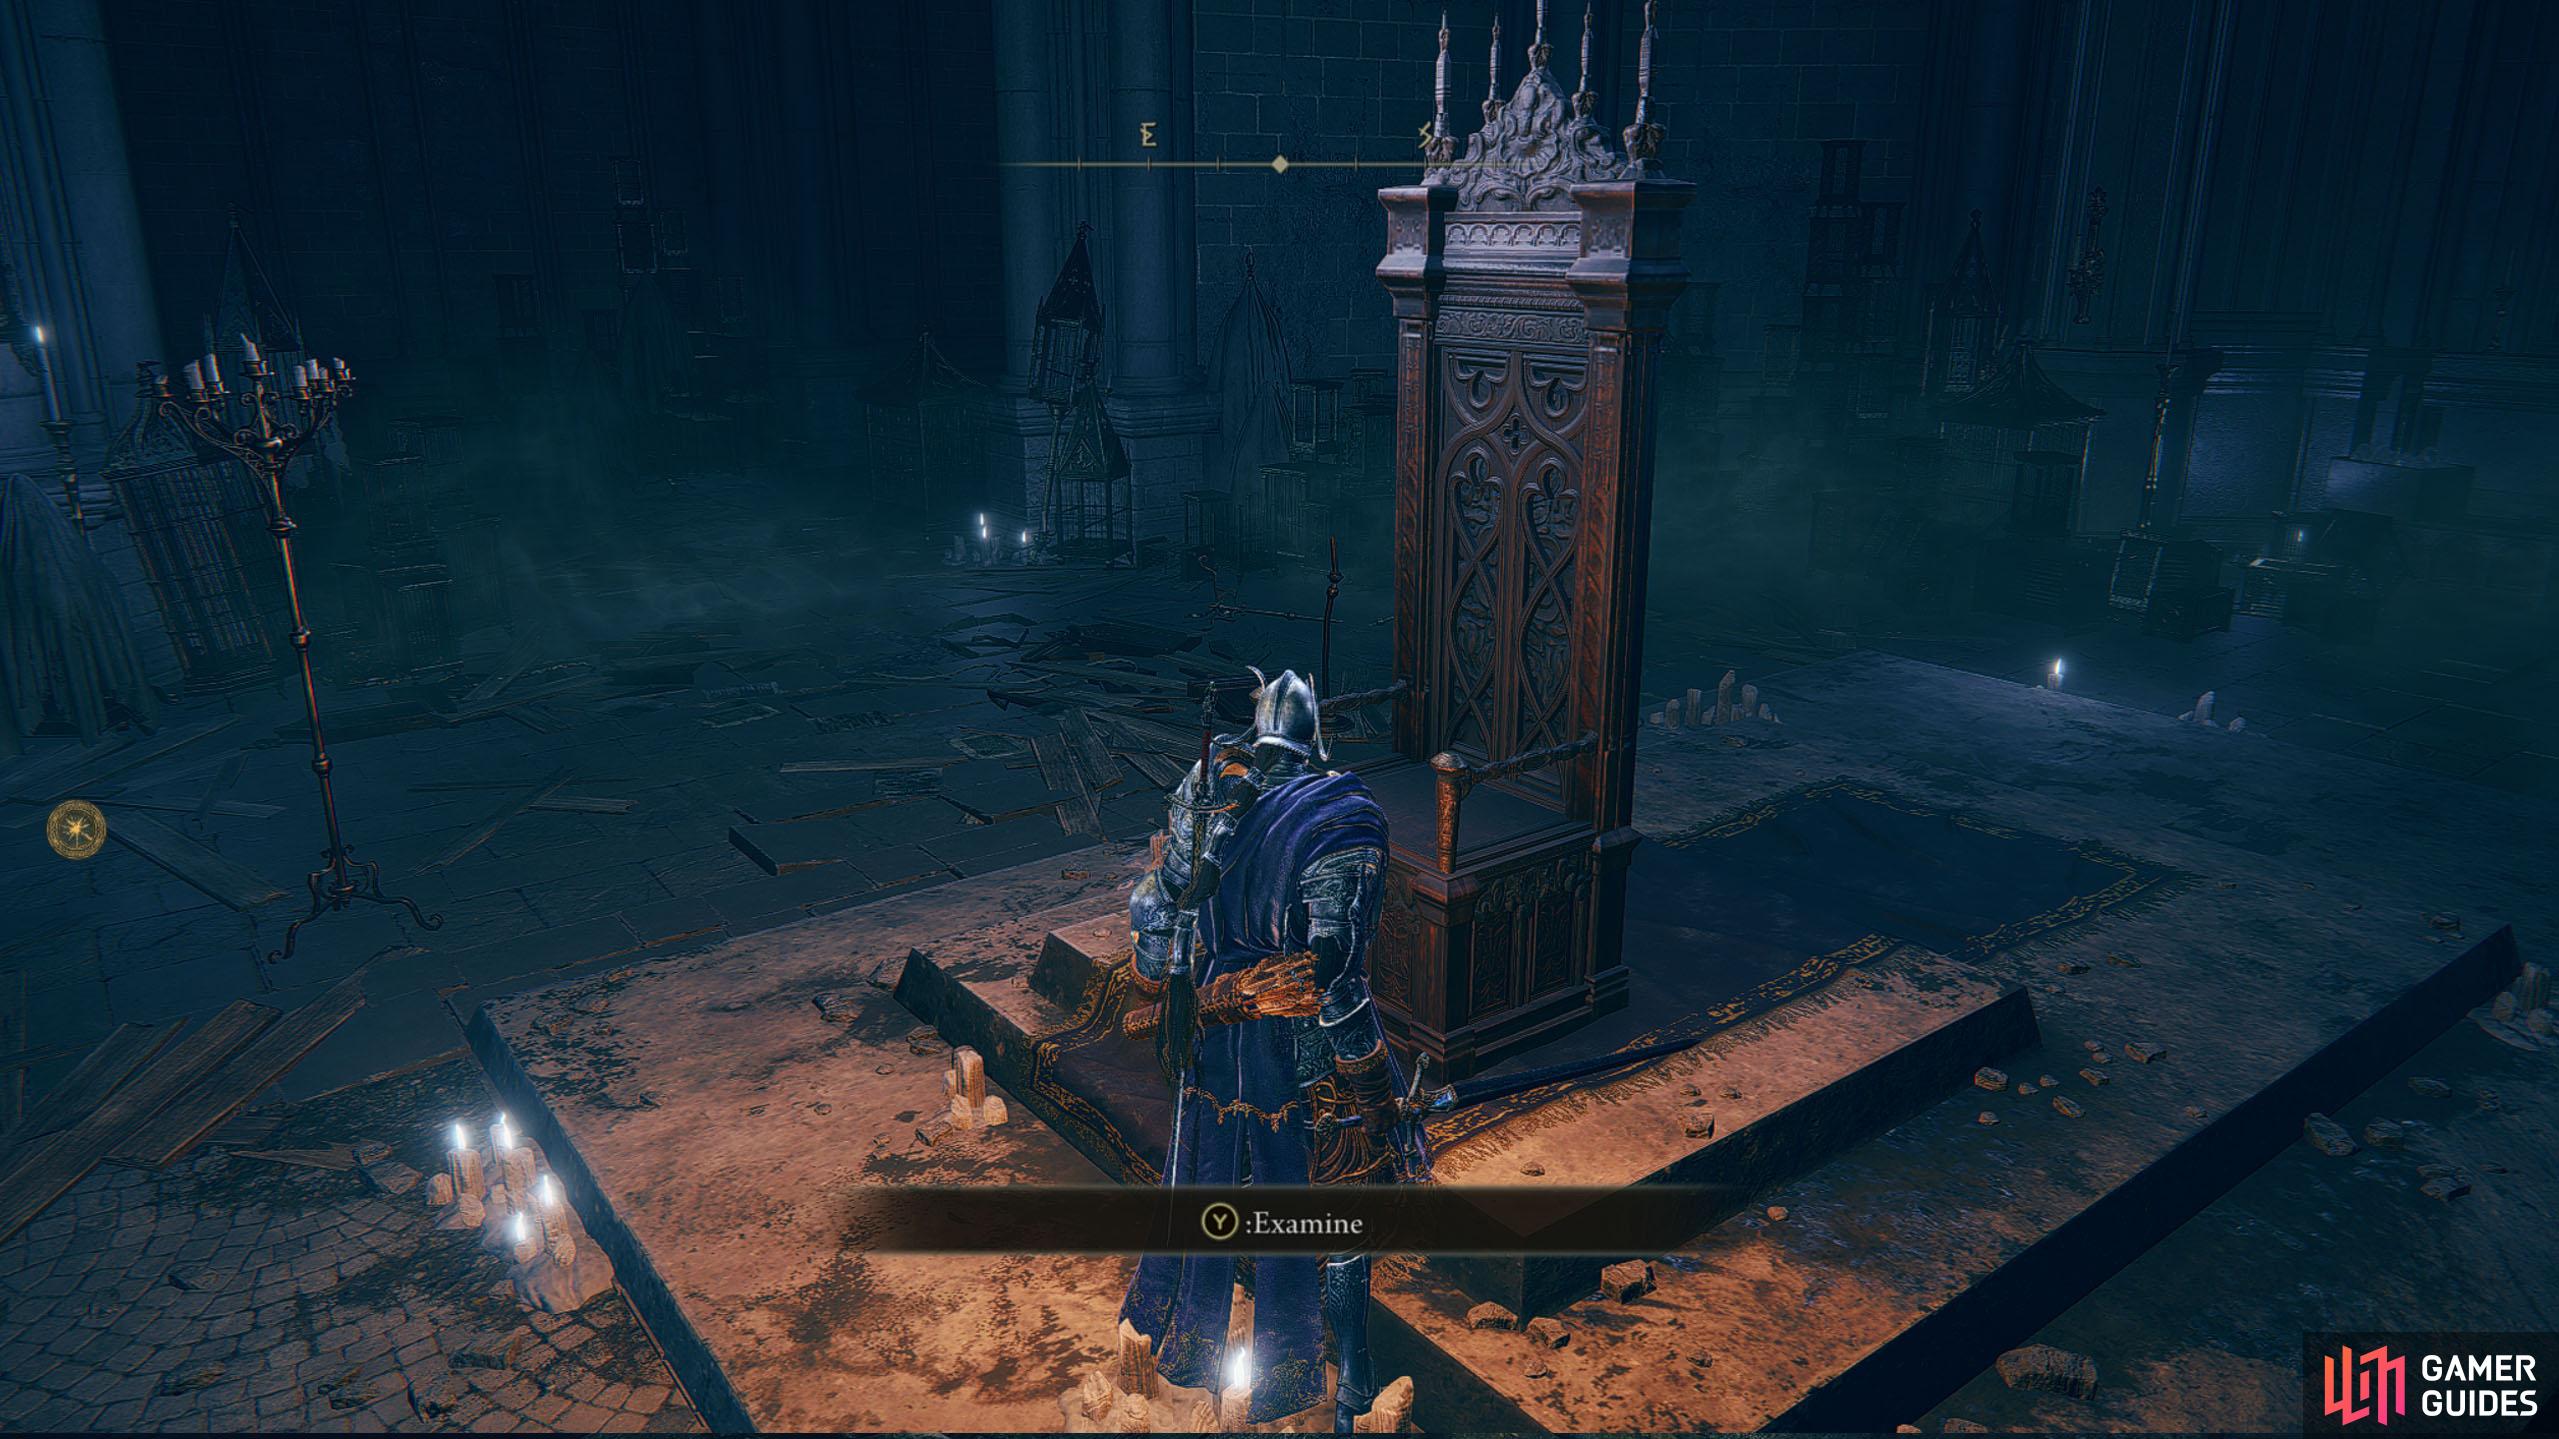
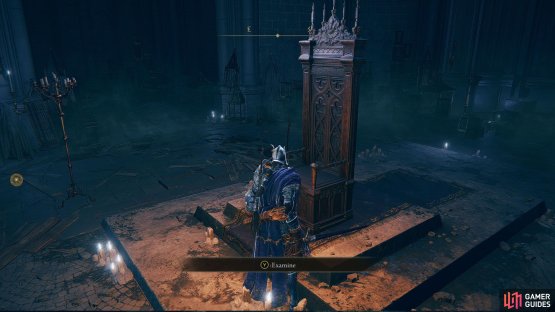
(1 of 2) Interact with the front of the throne to find a button.

Interact with the front of the throne to find a button. (left), Pressing the button will reveal a ladder leading to the Finger Ruins of Miyr. (right)
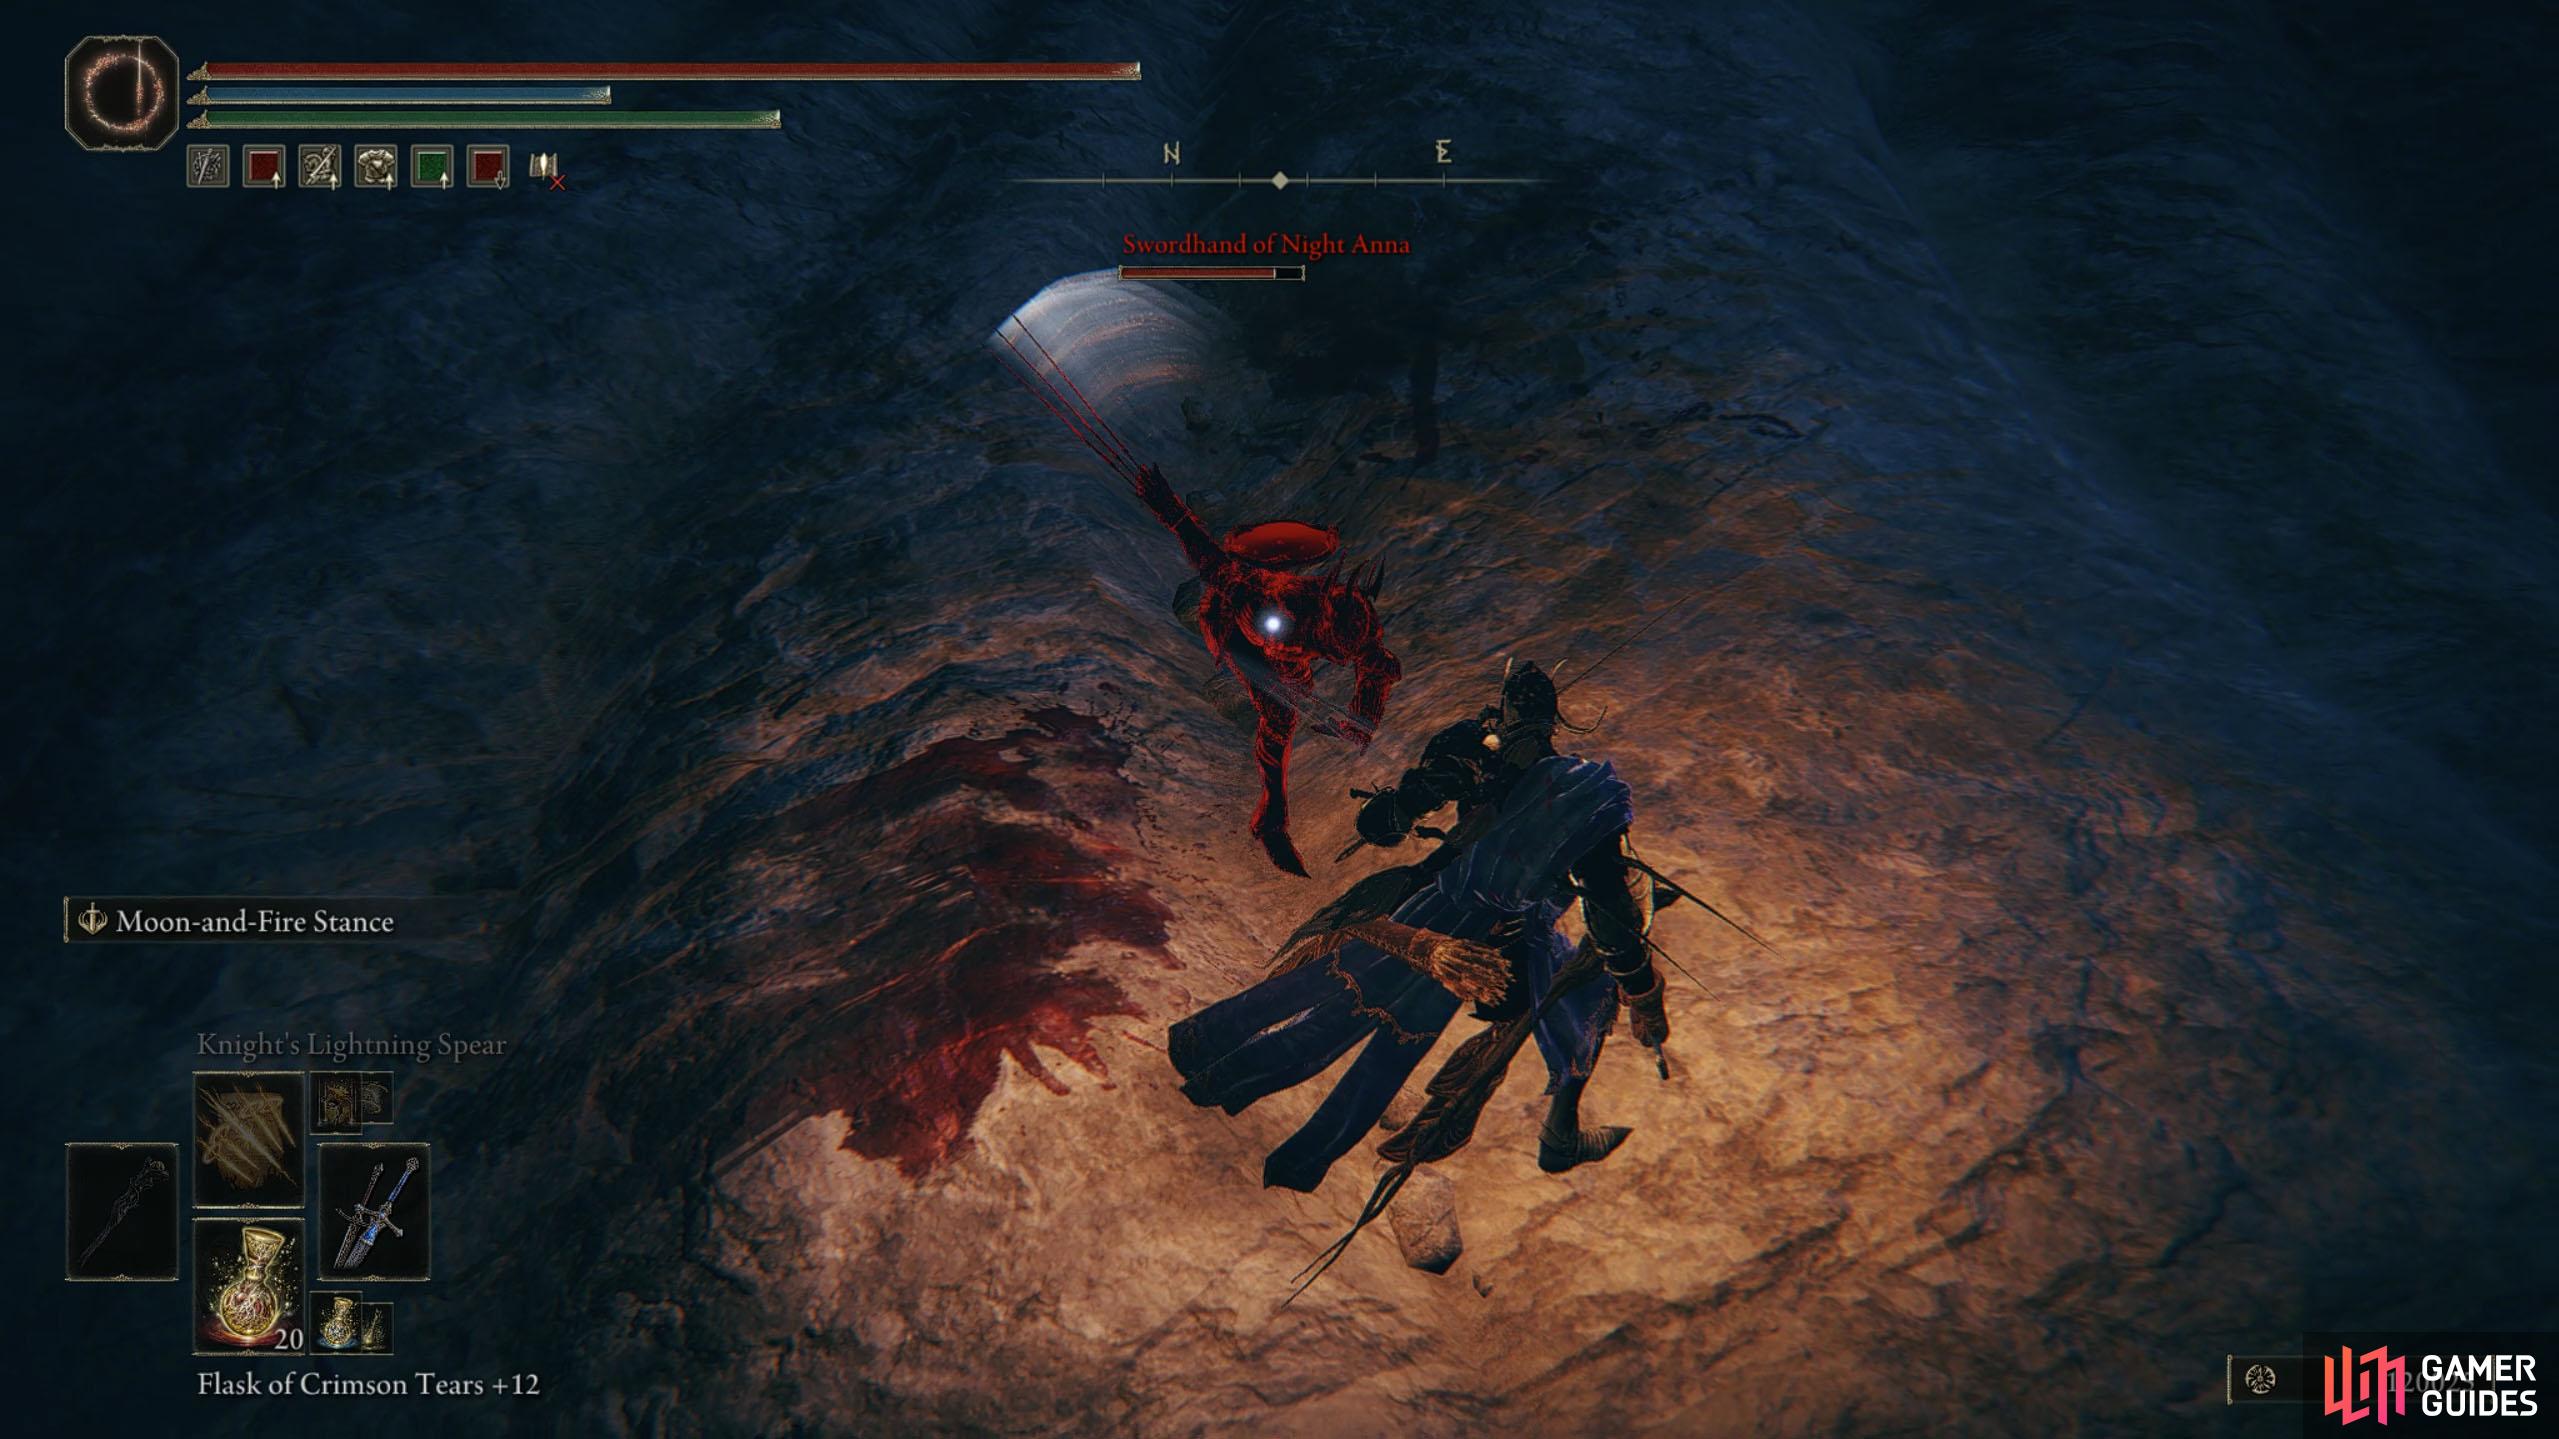
Swordhand of Night Anna Strategy
The difficulty of this battle depends on your build really. In general, Anna isn’t too difficult provided you know what to expect. She will regularly switch between two weapon sets, one being a Sword and Shield, and the other being Dual ![]() Claws. The former will let her parry and riposte you, while the latter will attack you with quick attacks that will build stacks of Bleed upon you quickly.
Claws. The former will let her parry and riposte you, while the latter will attack you with quick attacks that will build stacks of Bleed upon you quickly.
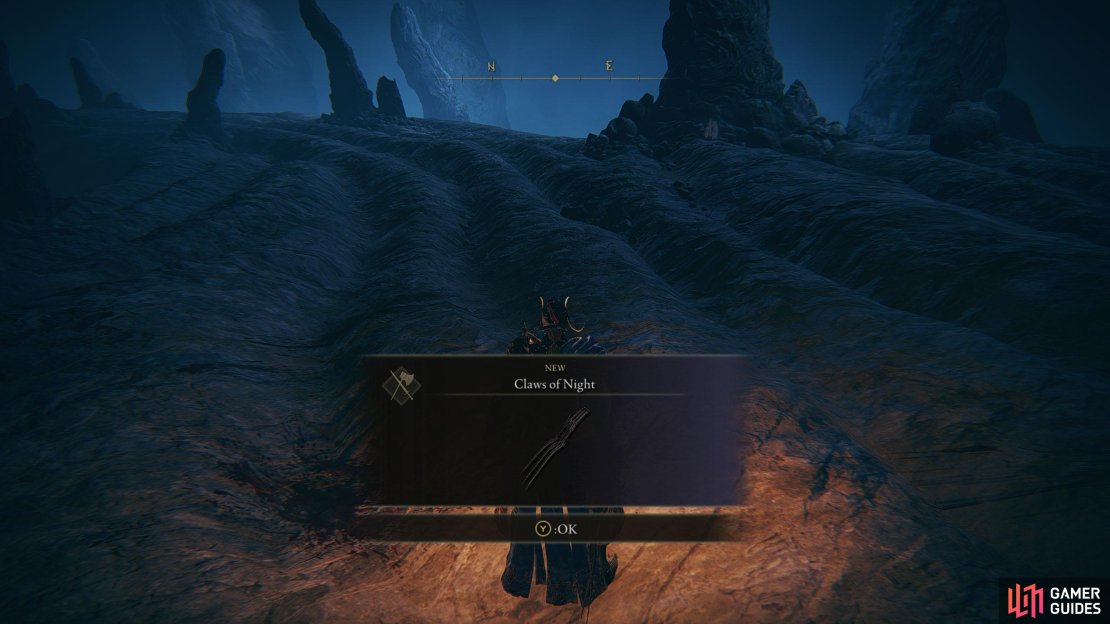
Her attacks are rather simple, where she’ll predominantly use horizontal swipes followed by a jump attack. These move sets appear to be the same or at least similar, outside of these, she will occasionally perform multiple quick slashes with the claws. Although she may sound difficult, she has relatively low poise, meaning that you can stop her from attacking you by staggering her with repeated strikes, provided you have the stamina to do so. If you run low on stamina, back up, and wait until she does a jump attack, and then go in for another series of attacks. Keep this up, and Anna will be down in no time, and you’ll get rewarded with her Claw Weapon, ![]() Claws of Night.
Claws of Night.
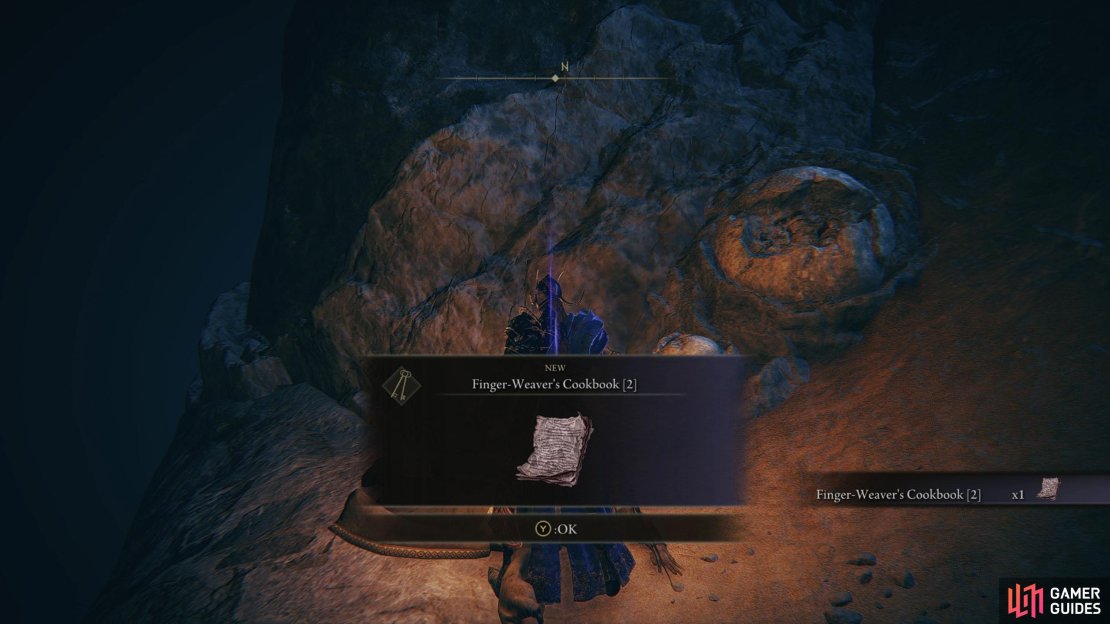
With Anna defeated, head north and go down the slope to your left to find the ![]() Finger-Weaver’s Cookbook [2] on a corpse, and then head back up the slope and continue north until you reach another Hanging Bell. Interact with it, and you’ll be transported to a boss arena where you’ll need to defeat
Finger-Weaver’s Cookbook [2] on a corpse, and then head back up the slope and continue north until you reach another Hanging Bell. Interact with it, and you’ll be transported to a boss arena where you’ll need to defeat ![]() Metyr, Mother of Fingers.
Metyr, Mother of Fingers.

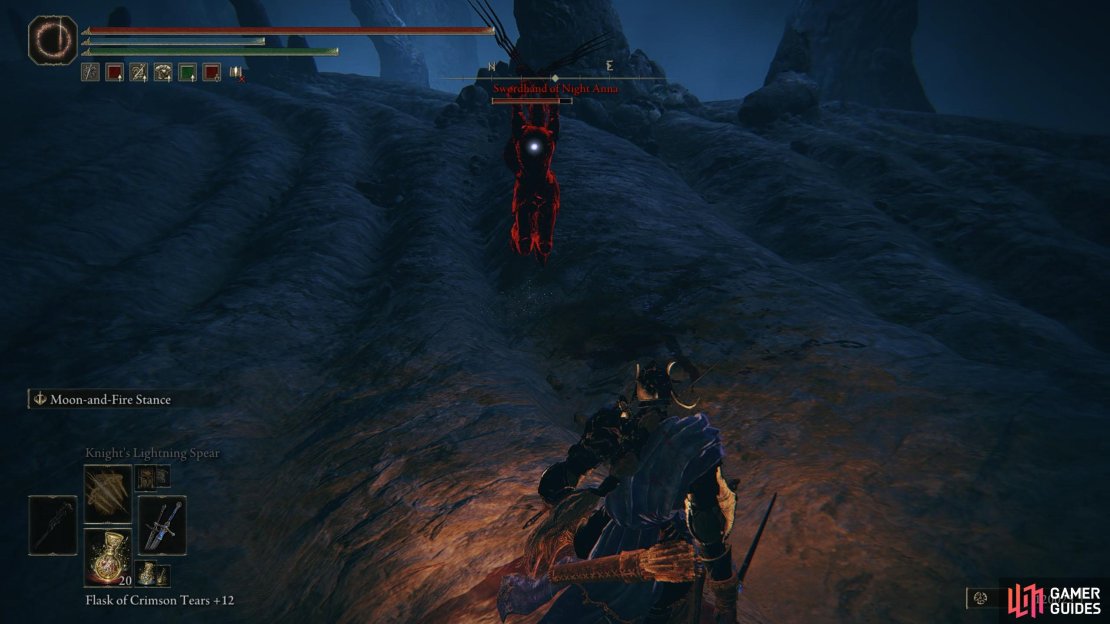
(1 of 5) Anna is a pushover, provided you don’t get caught in her multi-hit slashing combo.
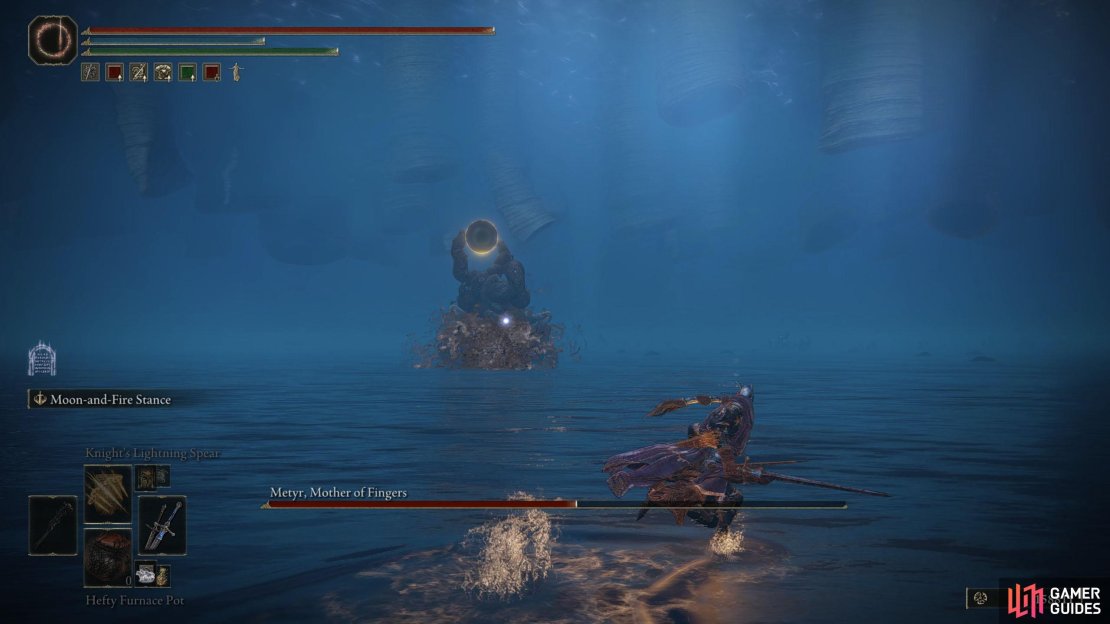
Metyr, Mother of Fingers Strategy
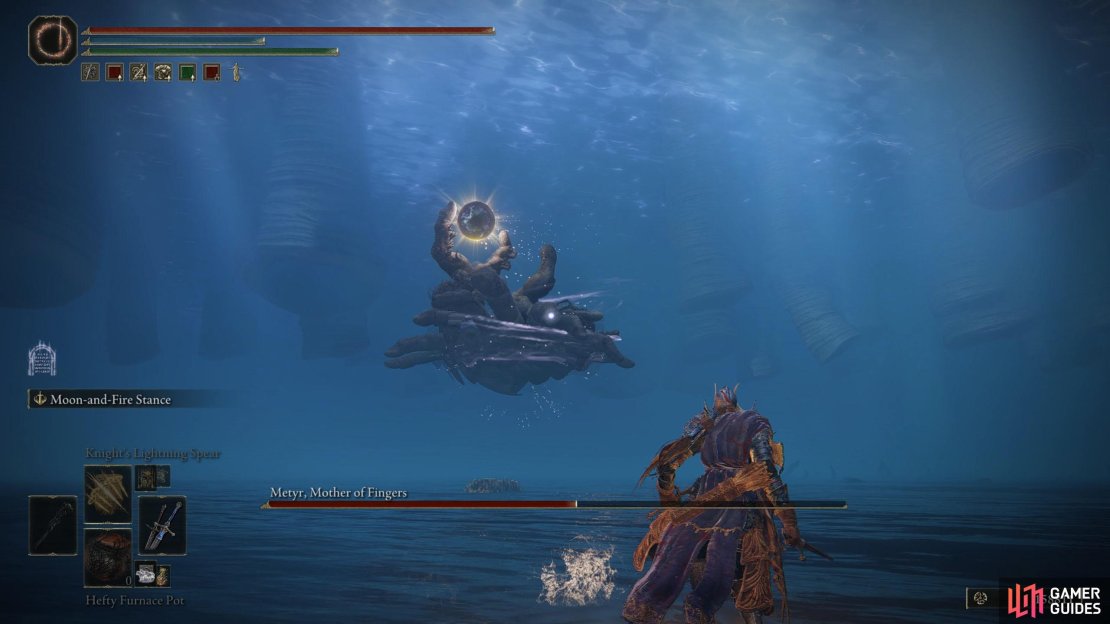
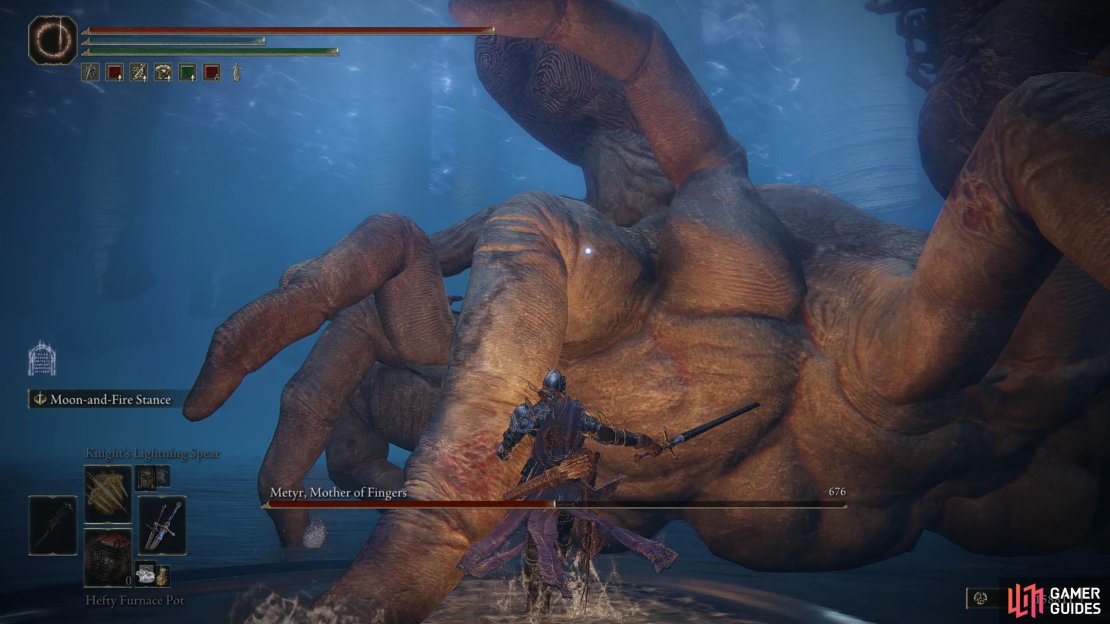
This isn’t a particularly fun battle as Metyr can hit you from all directions due to it being a massive hand and will summon Large Fingercreepers at regular intervals. The safest spot to attack the boss is as far away as possible, especially if you have a good bow, and/or have long-reaching magic. Unfortunately, most of us have a melee weapon of some kind, meaning you’ll need to get close to it. So, the only “safe” spot is directly in front of it, by its chest, and by safe, I mean safer than the sides or back, but she’ll still slam down on you dealing ridiculous amounts of damage. This boss has a similar vibe to Rom, the Vacuous Spider in Bloodborne, enjoy.
Metyr has numerous attacks to watch out for, all of which deal significant damage. The main one you’ll deal with at the start, especially if you’re hugging her body in front of her, is the Head Pound attack where she slams her head at the ground directly in front. She can use this three times in succession, although this happens more often the further you are into the battle. When she does this attack, dodge to the sides to avoid it and then continue attacking the chest. Another attack you’ll frequently see is her Arm slam, where she slams down one of her arms. This can be avoided by dodging into the center of her chest (or by dodging away from it).

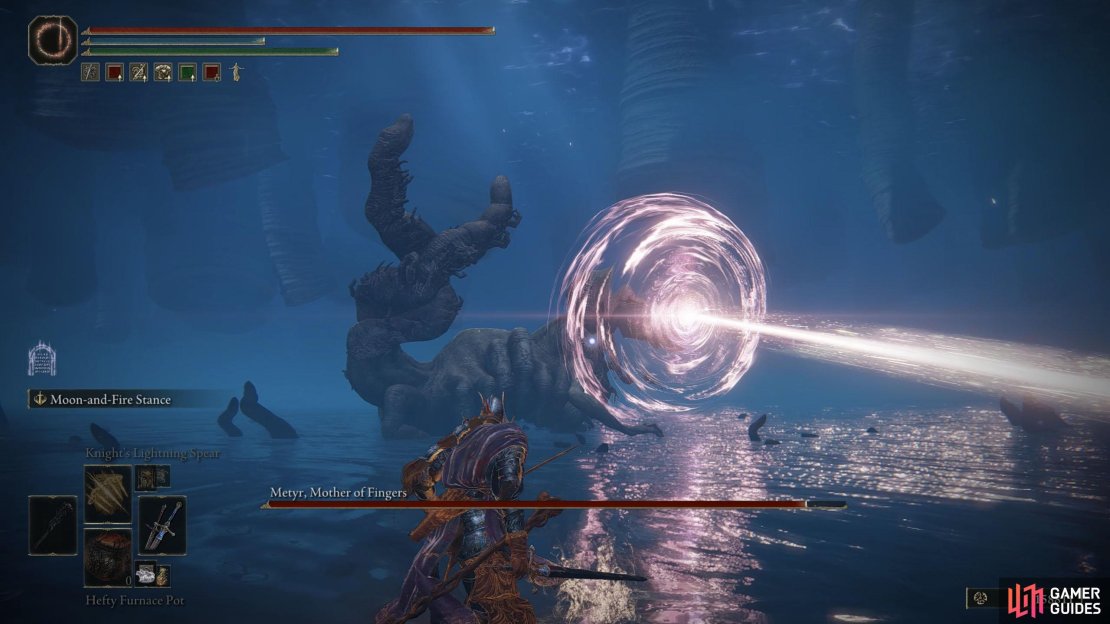

(1 of 5) Laser Beam: Metyr will launch three laser beams at you in quick succession.
Here are the other attacks to watch out for:
-
Finger Slam: Metyr will briefly lift her side before slamming down with her fingers. Roll away when you see her raise her side.
-
Finger Flick: Metyr will flick her fingers at you if you’re at her side. A simple roll should avoid this.
-
Finger Crawl: Similar to the last attack, she’ll raise her side, but this time she’ll crawl along on her fingers toward you. Roll away and to the side to avoid this attack. Sometimes running away from her will work better.
-
Leap: She will jump into the air and reposition, which can also land on your head. Whenever you see her go to the air, run. This goes for many of her attacks.
-
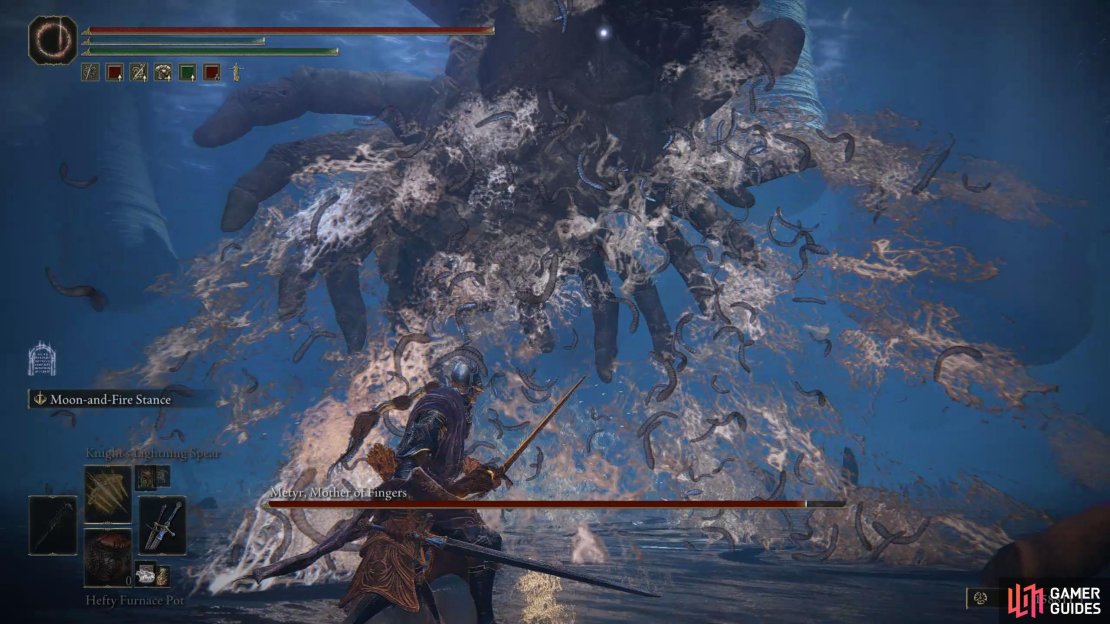
Body Leap: Similar to Leap, Metyr will perform a leap, although this is more of an attack as she briefly opens her chest to release smaller fingers from it as she goes toward you, which will damage you. When you see her put her hands toward her chest, run far and wide from her to avoid the attack.
-
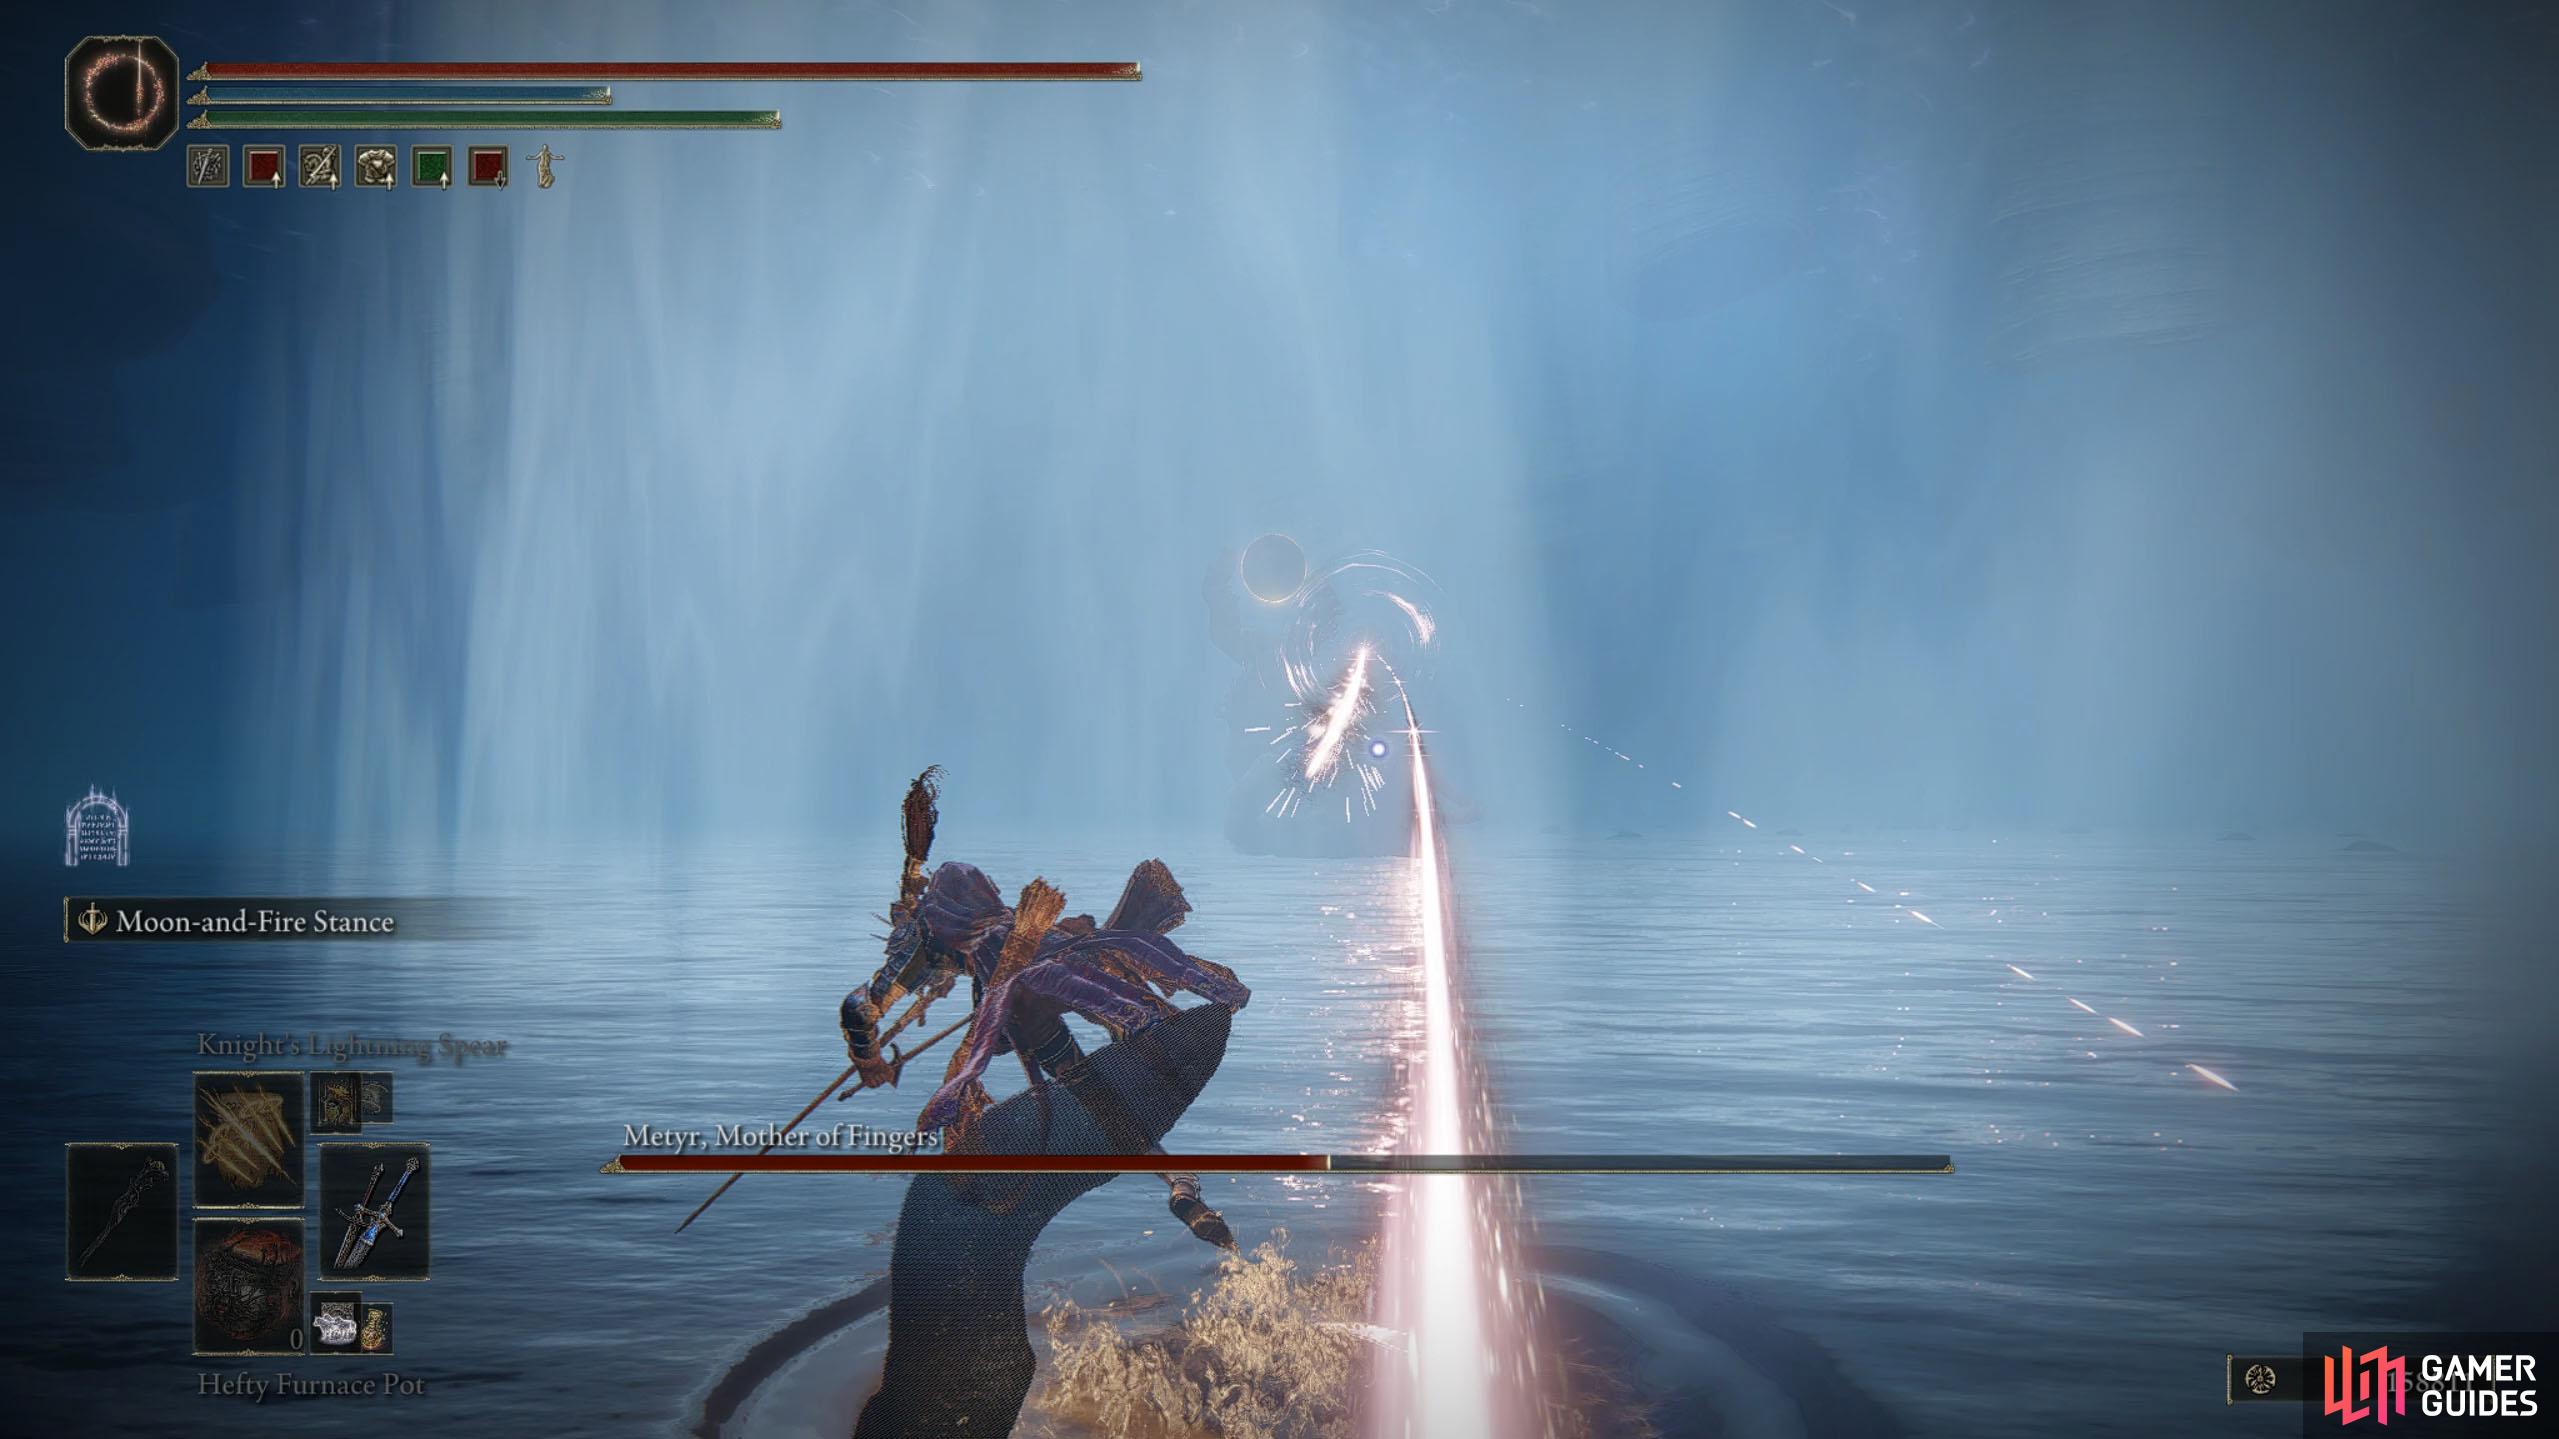
Laser Beam: Metyr will fire a beam from its head at your location. Roll to the side when it’s about to hit you.
-
Laser Sweep: Instead of a laser projectile, she will sweep her head from left to right while unleashing a continuous beam in an arc in front of her. Either run to the sides or hug the chest to avoid it. Worst case, you can roll through it provided you wait until the last second.
-
Arm Slam: Metyr will tilt her head to the side, indicating what arm she will slam down with. Dodge toward the slam to avoid it.
-
Fingercreeper Summon: Metyr will open up her chest and release a few Colossal Fingercreepers. Get far away from her and take out the creepers while avoiding her ranged attacks. Always keep an eye on what Metyr is doing while you’re taking these out.
-
Air Spin: In the second half of the battle, Metyr will levitate into the air and spin toward you before she comes crashing down. This attack is difficult to avoid due to its tendency to lock on to you. When you see her levitate, run as far away as you can from her and keep running until she lands.
-
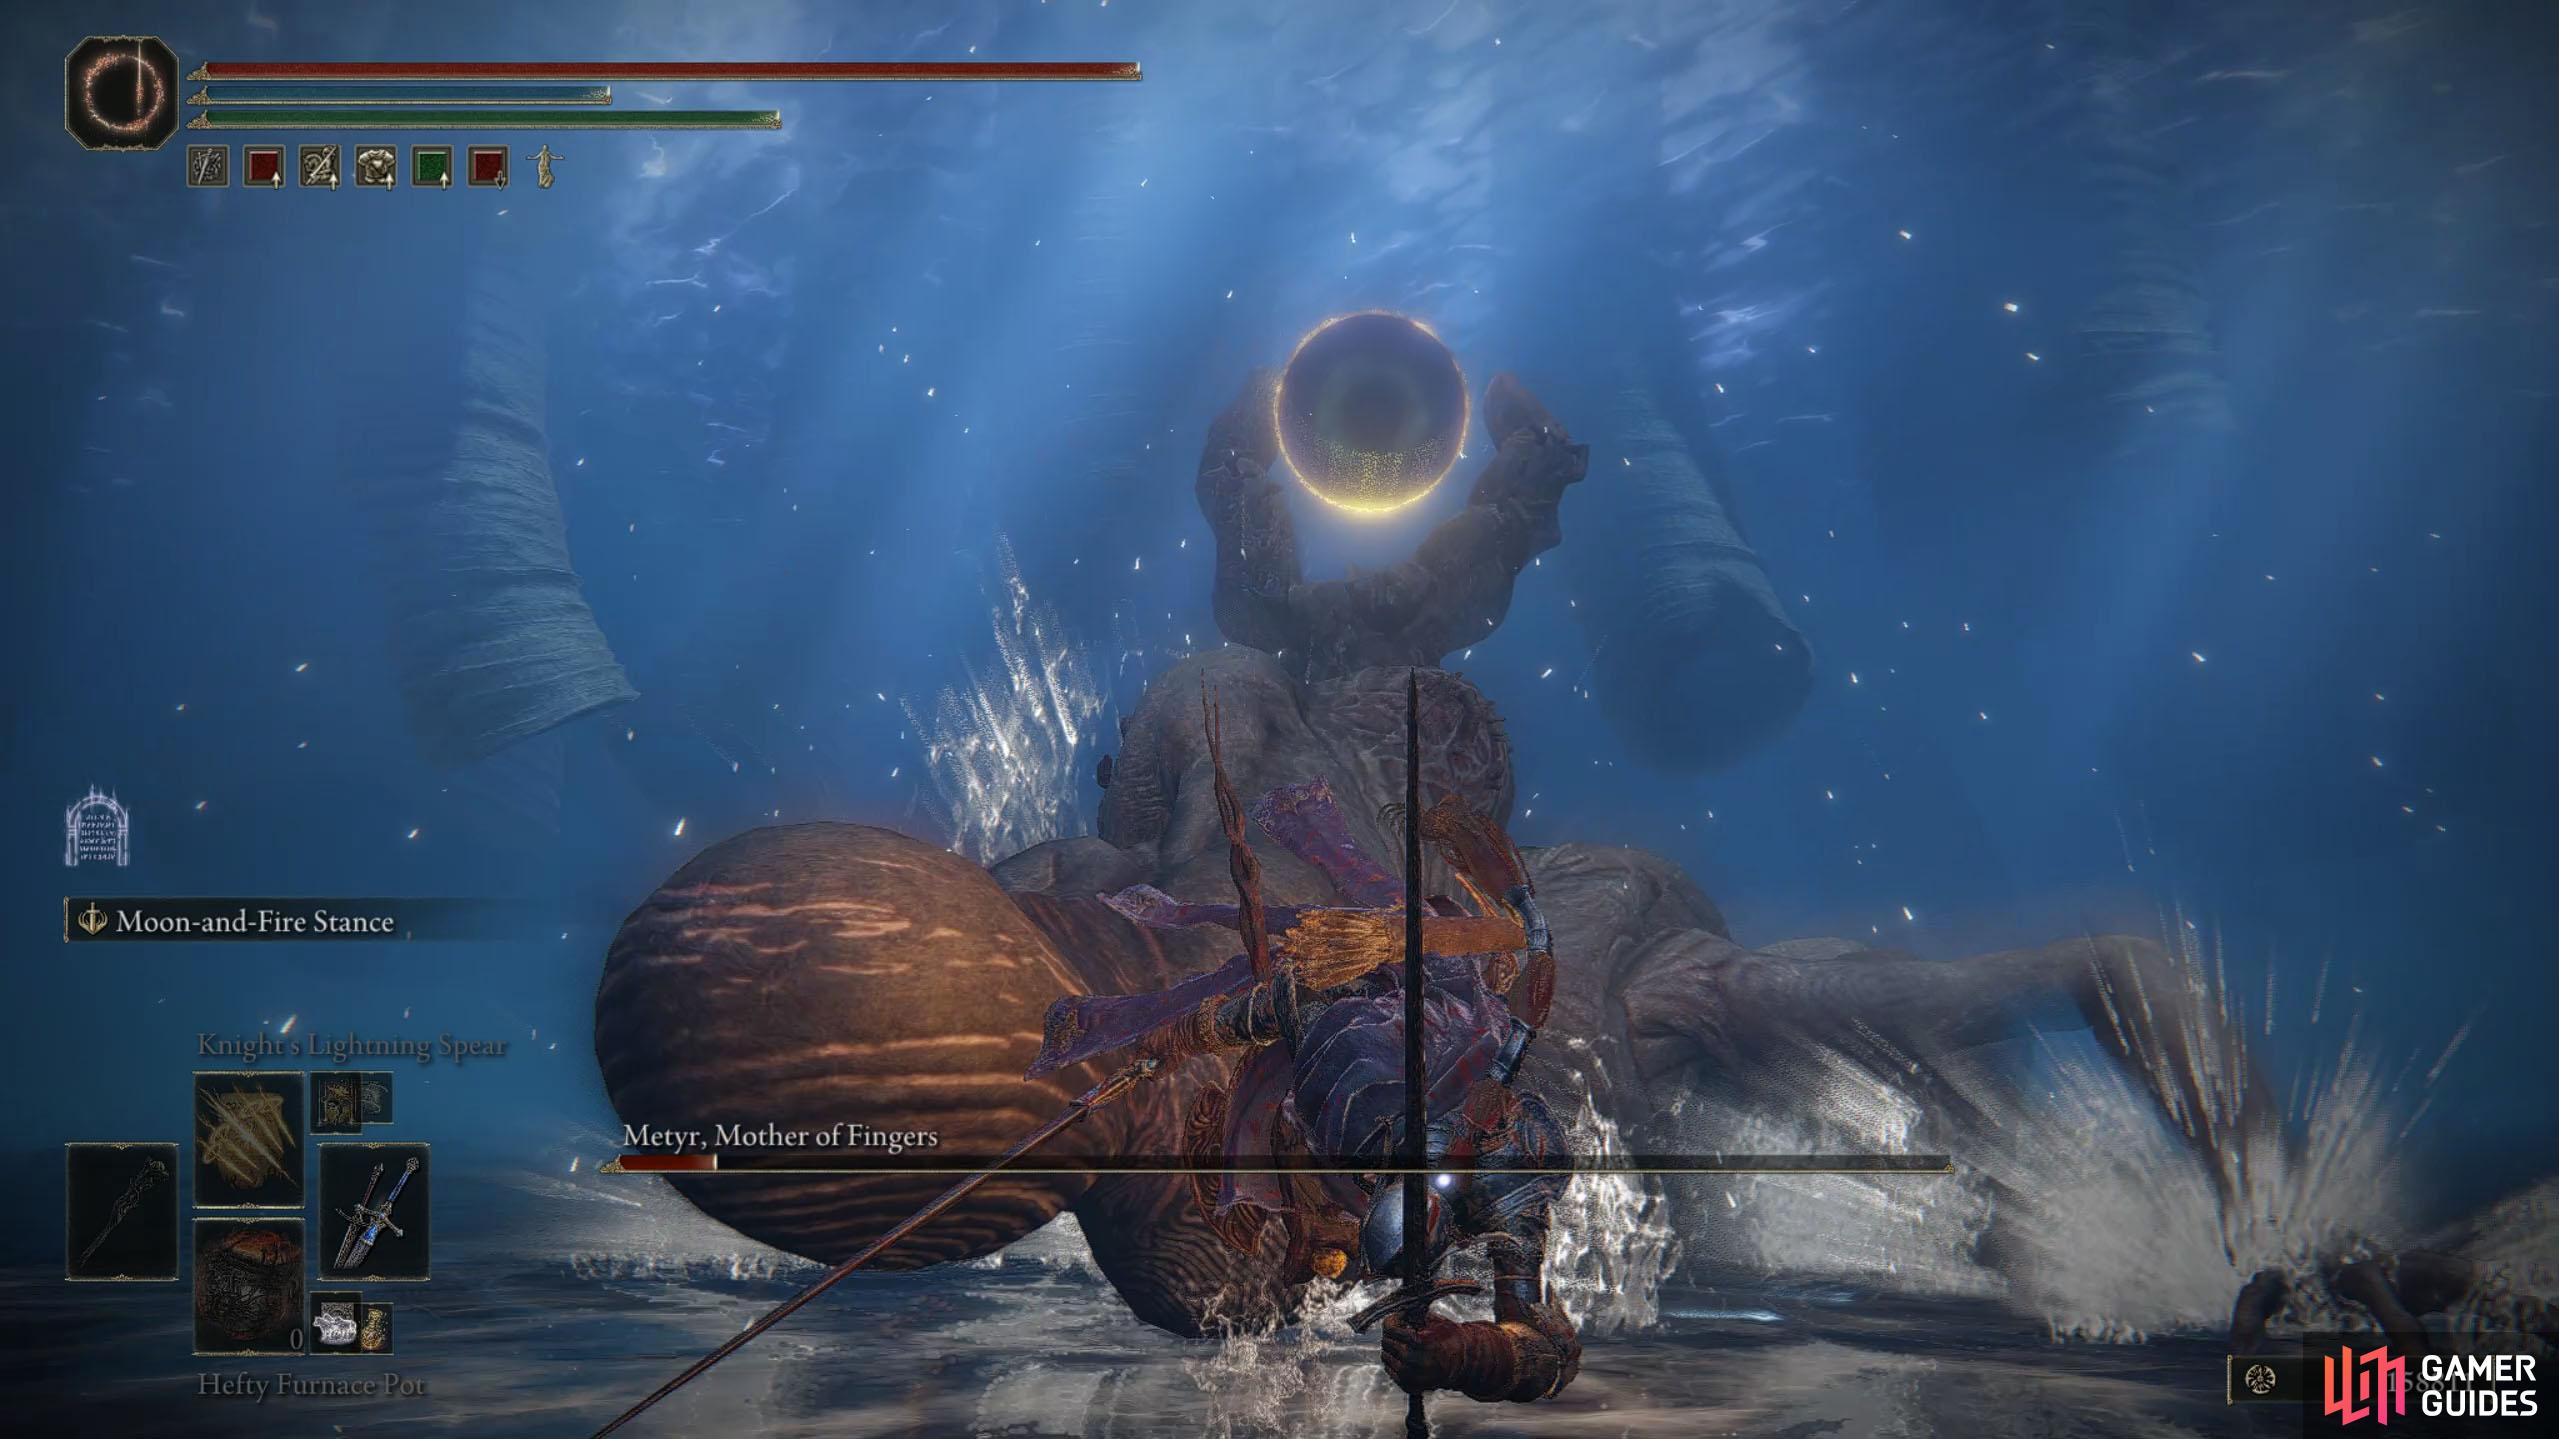
Exploding Orbs: Metyr will place numerous orbs across the arena that explode shortly after. Get as far away from them as quickly as possible.
-
Levitating Tail Orb: Arguably the worst attack in her arsenal, also used in the second phase. An orb will appear by her tail that unleashes two lasers that rotate around while moving in and out. This is difficult to avoid at the best of times, but if you take off lock-on, it will give you a better view of where it’s going to hit you. When it gets close, roll forward if it’s coming toward you or backward if it’s coming from behind you. There is a spot near Metyr where the lasers and the knockdown (near her body) area of effect can’t hit you, but this is difficult to calculate.


As you can see, this boss is no pushover. If there was ever a time to use your summon ashes, now would be the time. If you don’t want to take the easier method, the regular hard hitters deal a good amount of damage to her such as ![]() Comet Azur, Bloodhound Step,
Comet Azur, Bloodhound Step, ![]() Shard Spiral,
Shard Spiral, ![]() Pest-Thread Spears, and
Pest-Thread Spears, and ![]() Knight’s Lightning Spear to name a few. For your spells, don’t lock on, and instead use it at her chest, which is her weak point, otherwise, you’ll hit her head for less damage. Finally, if you’re a Dex build, the Claws of Night you just obtained from Anna is very good against her. For your talismans, the
Knight’s Lightning Spear to name a few. For your spells, don’t lock on, and instead use it at her chest, which is her weak point, otherwise, you’ll hit her head for less damage. Finally, if you’re a Dex build, the Claws of Night you just obtained from Anna is very good against her. For your talismans, the ![]() Ritual Shield Talisman is great while the
Ritual Shield Talisman is great while the ![]() Spelldrake Talisman +3 will help you negate some damage, and the
Spelldrake Talisman +3 will help you negate some damage, and the ![]() Two-Headed Turtle Talisman will increase your stamina recovery. Also, any of the damage-enhancing talismans depending on your build are worth equipping.
Two-Headed Turtle Talisman will increase your stamina recovery. Also, any of the damage-enhancing talismans depending on your build are worth equipping.
When Metyr is defeated, you’ll receive the ![]() Remembrance of the Mother of Fingers and a site of Grace will appear at the back of the arena.
Remembrance of the Mother of Fingers and a site of Grace will appear at the back of the arena.
Return to the Cathedral One More Time
When you’re ready, teleport back to the Cathedral of Manus Metyr site of Grace, but be warned that you will have a boss or two. When you enter the building, you’ll either get invaded by ![]() Swordhand of Night Jolán followed by a boss battle with Count Ymir, or you’ll face both of them at the same time depending on whether you spoke to Jolán after defeating Anna.
Swordhand of Night Jolán followed by a boss battle with Count Ymir, or you’ll face both of them at the same time depending on whether you spoke to Jolán after defeating Anna.
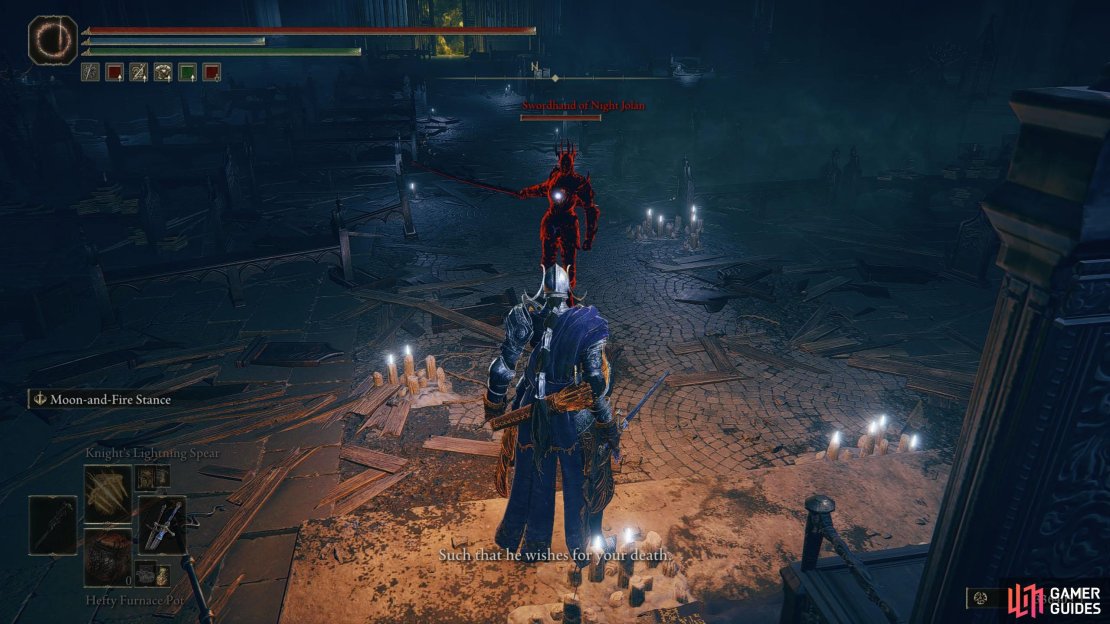
Swordhand of Night Jolán Strategy
Jolán is a more talented fighter than her sister and wields the ![]() Katana,
Katana, ![]() Sword of Night. Similarly to Anna, she will regularly change stances between two-handing the sword or using it with a shield. If she has the shield out, she can parry and riposte you, although this doesn’t happen often. She doesn’t have many attacks, and most of them are easily avoided by moving backward or rolling away from her when she uses a jumping attack.
Sword of Night. Similarly to Anna, she will regularly change stances between two-handing the sword or using it with a shield. If she has the shield out, she can parry and riposte you, although this doesn’t happen often. She doesn’t have many attacks, and most of them are easily avoided by moving backward or rolling away from her when she uses a jumping attack.
Throughout the battle, Jolán will regularly use the unique weapon skill, Witching Hour Slash. This is a multi-hit attack that is preceded by a short animation where she’ll point her sword out to the side, the blade will glow black before she moves toward you, unleashing three wide slashes similar to the Waterfowl Dance from Malenia. As soon as you see Jolán points her sword out to the side, get some distance, and each attack should miss you.
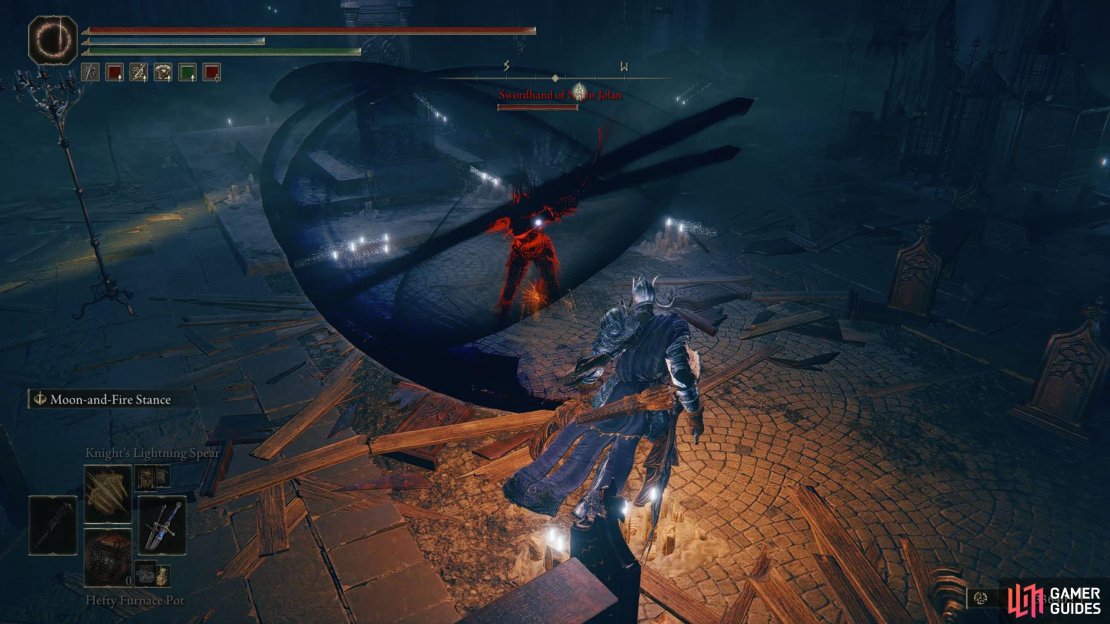
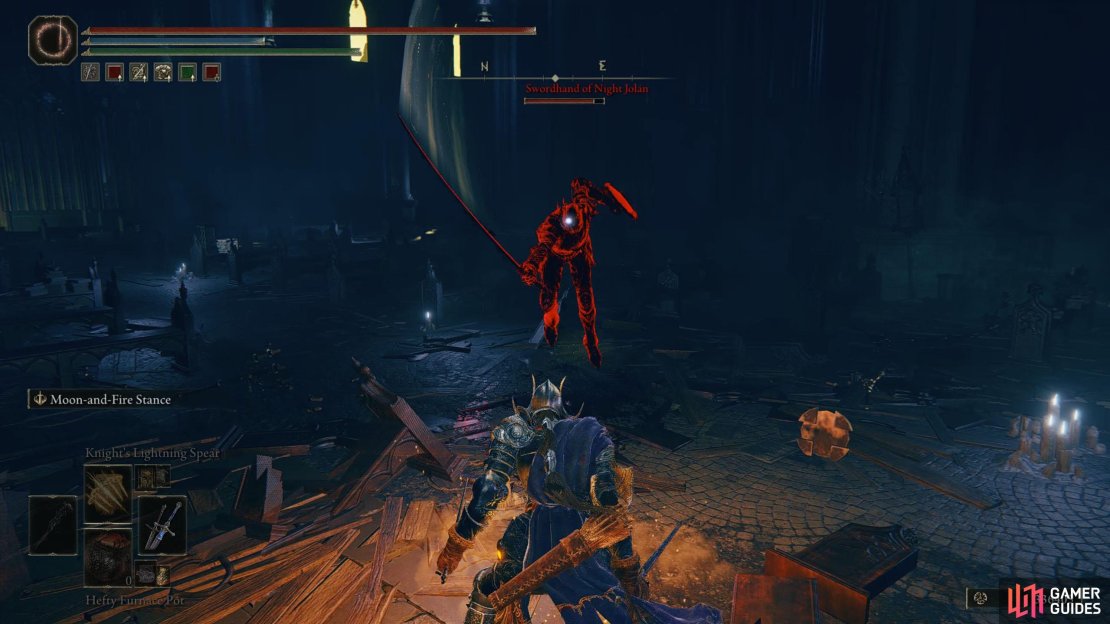
(1 of 3) When Jolan puts the sword to the side, get ready to back away as she uses Witching Hour Slash.
For the most part, you can wait for Jolán to use her attacks, which are normally multi-hit combos with the highest being five hits, a jumping attack, or Witching Hour Slash. Wait for her to use her combos, run in, get some attacks on her, and retreat. You can do this for the whole battle, and be relatively safe. Another good tip is to use charged attacks, as that can and will stagger her, but this is a double-edged sword, as she is quick, and charging up takes a while. When you defeat Jolán, Count Ymir will appear on his throne with a different look to him.
Count Ymir, Mother of Fingers Strategy
Count Ymir, who has taken the power from Metyr is now ![]() Count Ymir, Mother of Fingers. This is your typical mage boss fight with lots of teleporting, summoning enemies (fingercreepers), and hurling spells at you. Fortunately, if you can get close to her, she gets easily staggered from melee attacks, preventing her from casting spells. However, she does have a spell called
Count Ymir, Mother of Fingers. This is your typical mage boss fight with lots of teleporting, summoning enemies (fingercreepers), and hurling spells at you. Fortunately, if you can get close to her, she gets easily staggered from melee attacks, preventing her from casting spells. However, she does have a spell called ![]() Cherishing Fingers, that surrounds her with fingers. This will shield her from projectiles while also dealing damage to you, which we presume is to stop you from standing in front of her the whole battle. The animation for this attack is, that she will raise her staff in the air and the tip of it will glow blue with a sigil before she slams it down. This happens pretty quickly, so make sure you’re ready to roll backward when you see this.
Cherishing Fingers, that surrounds her with fingers. This will shield her from projectiles while also dealing damage to you, which we presume is to stop you from standing in front of her the whole battle. The animation for this attack is, that she will raise her staff in the air and the tip of it will glow blue with a sigil before she slams it down. This happens pretty quickly, so make sure you’re ready to roll backward when you see this.
When she isn’t teleporting, or you’re at a distance from her, she’ll unleash the ![]() Glintstone Nails spell that has six projectiles that lock onto you. Either dodge to the side or wait for the projectiles to reach you and then roll through it. Finally, and arguably the most difficult part of the fight, is that throughout the battle, Ymir will summon a group of Fingercreepers. When this happens, back away from Ymir and take them out as quickly as possible while still keeping an eye on what she’s doing, as she’ll launch spells at you while you’re not looking at her.
Glintstone Nails spell that has six projectiles that lock onto you. Either dodge to the side or wait for the projectiles to reach you and then roll through it. Finally, and arguably the most difficult part of the fight, is that throughout the battle, Ymir will summon a group of Fingercreepers. When this happens, back away from Ymir and take them out as quickly as possible while still keeping an eye on what she’s doing, as she’ll launch spells at you while you’re not looking at her.
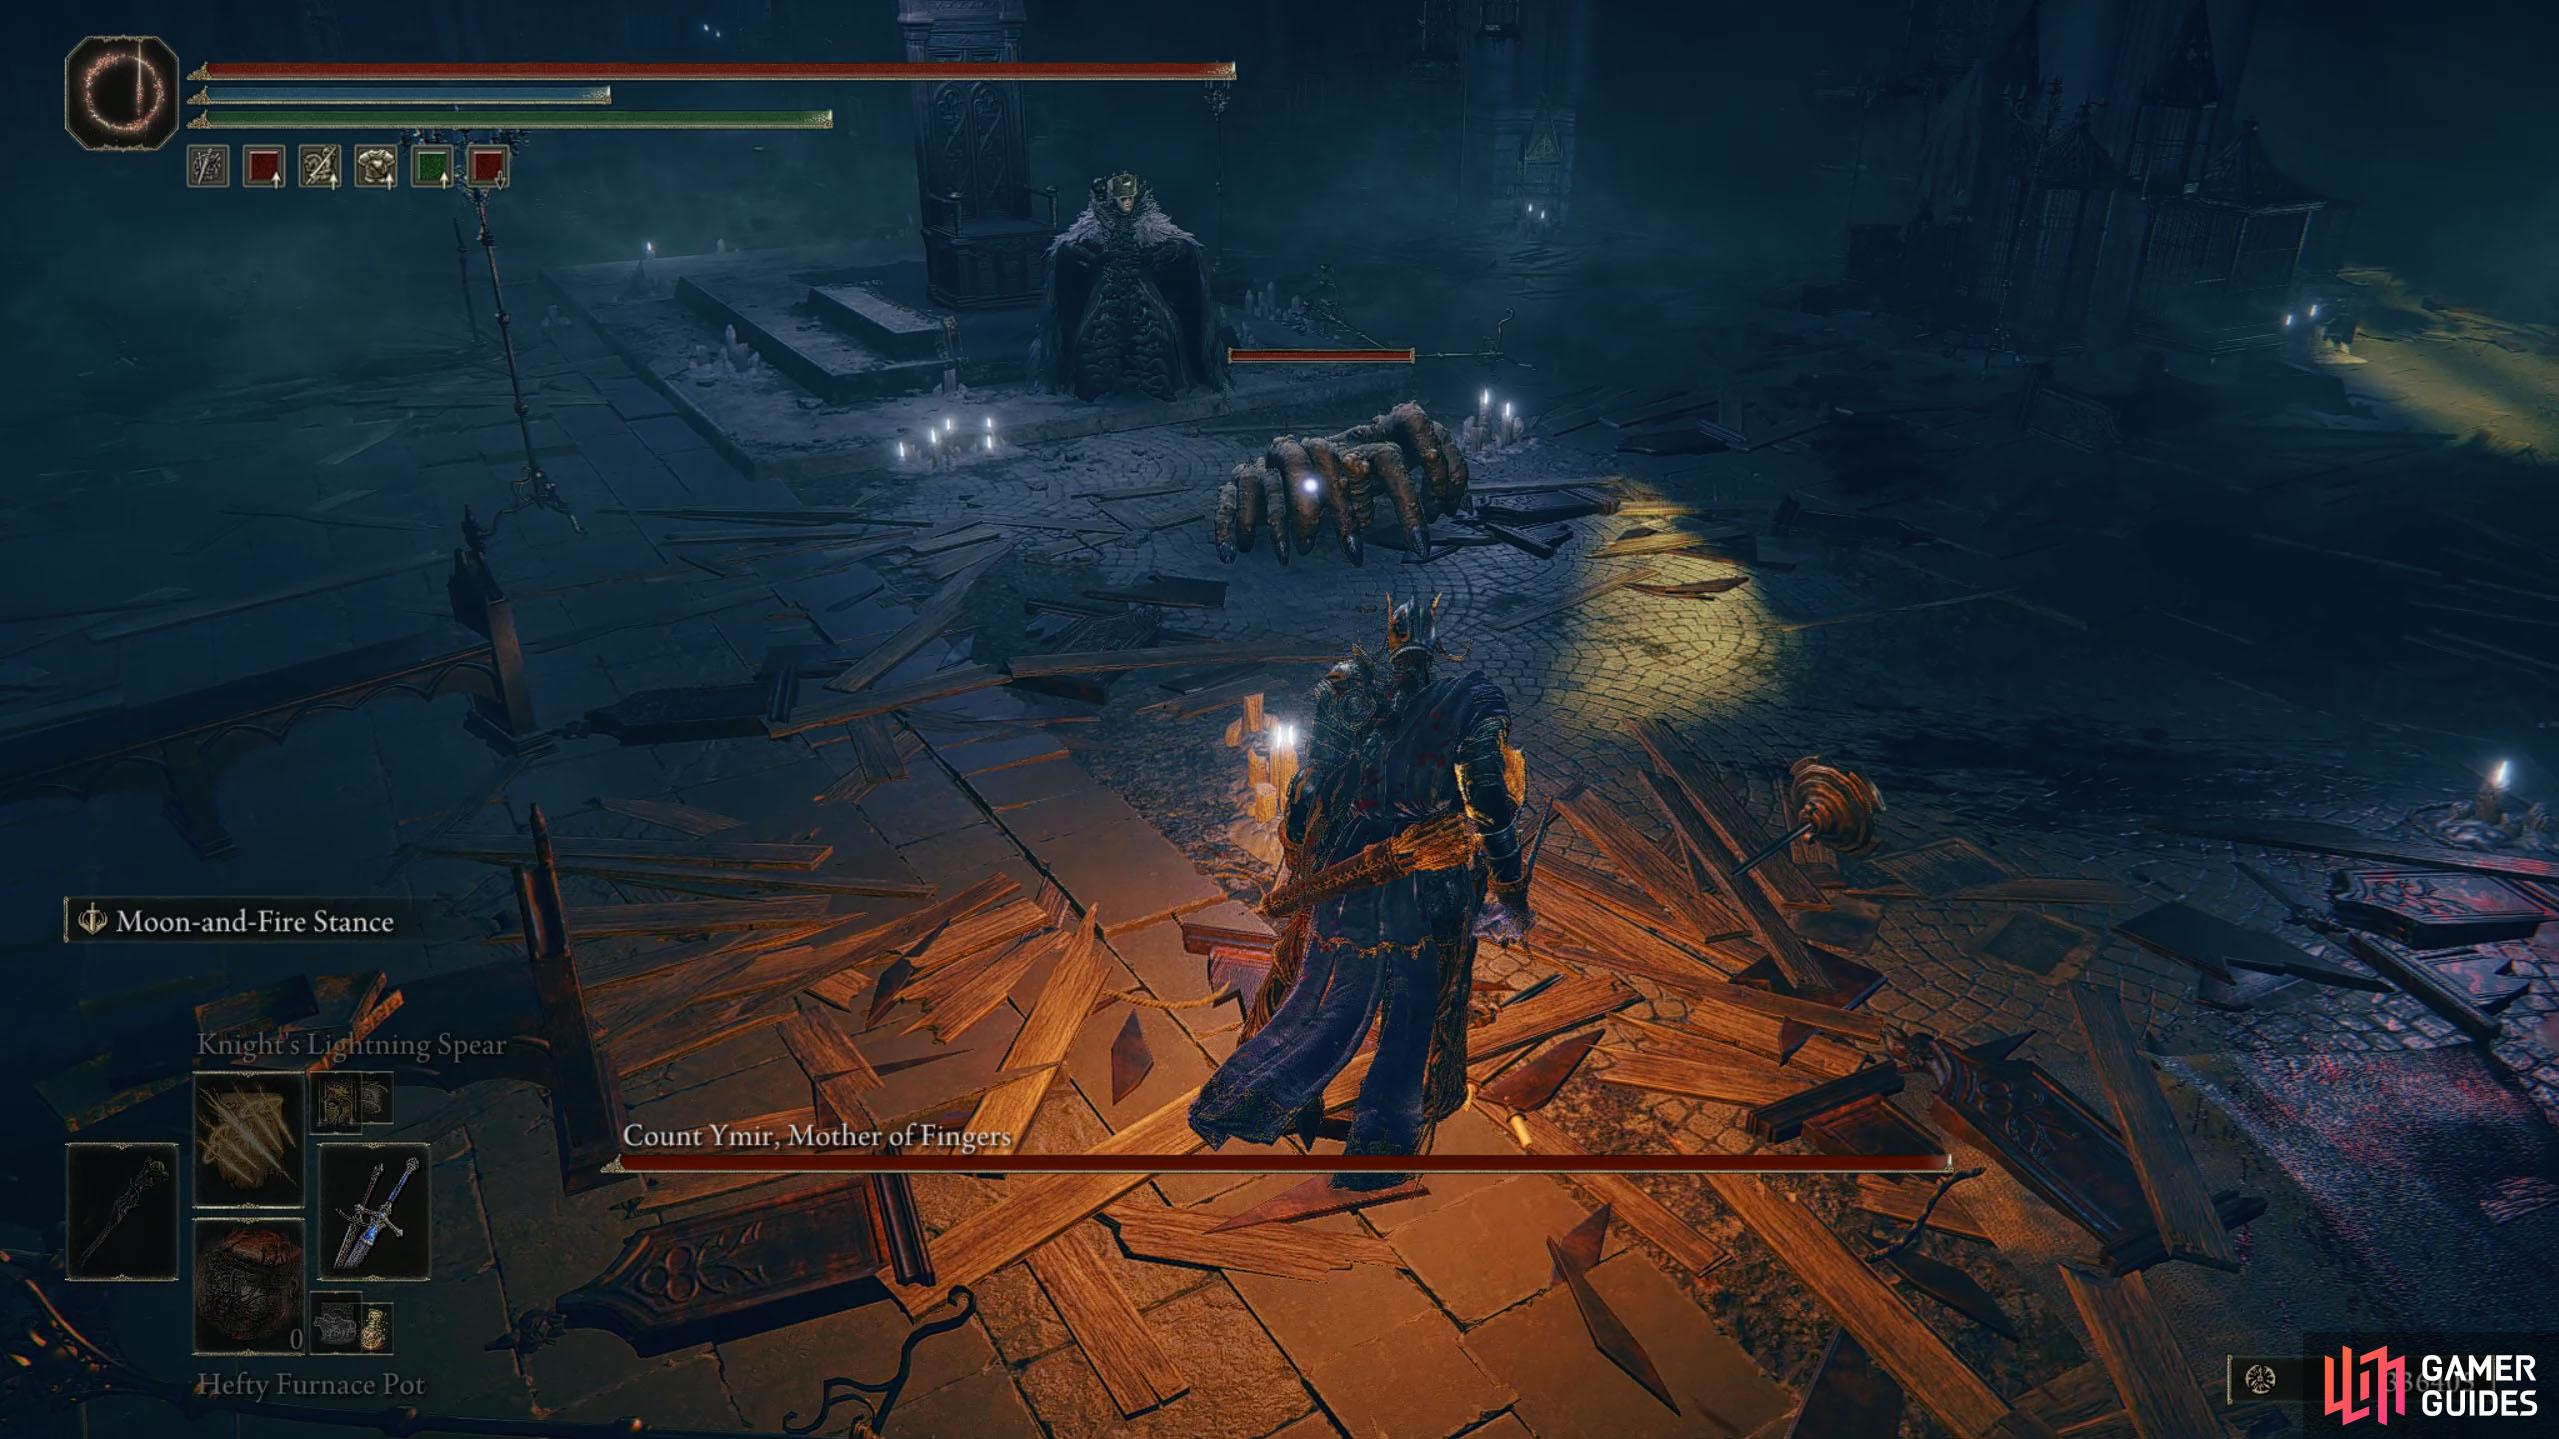


(1 of 4) Count Ymir pretty much has only three attacks. At times, she’ll summon Fingercreepers to aid her.
For the most part, this is one of the fairer bosses in the DLC, and you shouldn’t have many problems defeating her, just make sure you defeat the summons as soon as you can as they will overwhelm you, dodge through the ![]() Glintstone Nails spell, and always be ready to move out of melee range if she uses the hand spell that shields her. Defeating Count Ymir, Mother of Fingers will reward you with the High Priest Armor Set, the
Glintstone Nails spell, and always be ready to move out of melee range if she uses the hand spell that shields her. Defeating Count Ymir, Mother of Fingers will reward you with the High Priest Armor Set, the ![]() Maternal Staff, and
Maternal Staff, and ![]() Ymir’s Bell Bearing.
Ymir’s Bell Bearing.
Jolán Choice - Iris of Grace or Iris of Occultation?
With Count Ymir dead, reload the area or teleport back to the site of Grace to find Jolán slumped over by the stone pillar. Talk to her and it’s clear she’s dying. This allows you to give her one of two items, the Iris Of Grace or an Iris Of Occultation, each with its rewards. You can find the former in the ![]() Specimen Storehouse area in Shadow Keep while the latter can be obtained in the
Specimen Storehouse area in Shadow Keep while the latter can be obtained in the ![]() Fort of Reprimand as well as all over Shadow Keep.
Fort of Reprimand as well as all over Shadow Keep.
Iris of Grace
Giving Jolán the ![]() Iris of Grace will blind Jolán while putting her out of her misery, which isn’t great for someone who is Swordhand of the Night, but it will reward you with the Swordhand Of Night Jolán Spirit Ash. After you’ve done this, you can also obtain the
Iris of Grace will blind Jolán while putting her out of her misery, which isn’t great for someone who is Swordhand of the Night, but it will reward you with the Swordhand Of Night Jolán Spirit Ash. After you’ve done this, you can also obtain the ![]() Jolán and Anna Spirit Ash by heading to the top of Rabbath’s Rise to the north. Teleport to the Hinterland Bridge site of Grace, head west across the bridge, and up the slope to the south, which leads to
Jolán and Anna Spirit Ash by heading to the top of Rabbath’s Rise to the north. Teleport to the Hinterland Bridge site of Grace, head west across the bridge, and up the slope to the south, which leads to ![]() Shaman Village. From here, go to the back of the village in the southeast corner, and make your way down the platforms until you’re above the tower. Look below, and you’ll find a balcony you can land on. Do this, head into the building, and you’ll find a puppet of Anna, Jolán’s sister. Interact with it to get the Jolán and Anna Spirit Ash. Note, this can only be obtained if you gave Jolán the Iris of Grace.
Shaman Village. From here, go to the back of the village in the southeast corner, and make your way down the platforms until you’re above the tower. Look below, and you’ll find a balcony you can land on. Do this, head into the building, and you’ll find a puppet of Anna, Jolán’s sister. Interact with it to get the Jolán and Anna Spirit Ash. Note, this can only be obtained if you gave Jolán the Iris of Grace.

Iris of Occultation
If you give Jolán the ![]() Iris of Occultation, she’ll end her life in darkness, perfect for someone of the night, and you’ll be rewarded with her unique weapon, Sword of the Night. This is arguably the better reward, but you won’t be able to get Jolán and Anna Spirit Ash from Rabbath’s Rise, so the choice is yours.
Iris of Occultation, she’ll end her life in darkness, perfect for someone of the night, and you’ll be rewarded with her unique weapon, Sword of the Night. This is arguably the better reward, but you won’t be able to get Jolán and Anna Spirit Ash from Rabbath’s Rise, so the choice is yours.
Cherishing Fingers Sorcery
The final thing to do in this questline is to pick up the Cherishing Fingers Sorcery. This is the same spell that Ymir used against you in the recent boss battle with her. From Jolán’s corpse, head west into the graveyard, where you’ll find the item by a grave. Also, you can read the gravestone for a bit more lore.


(1 of 2) After defeating Count Ymir, head into the graveyard to the west.
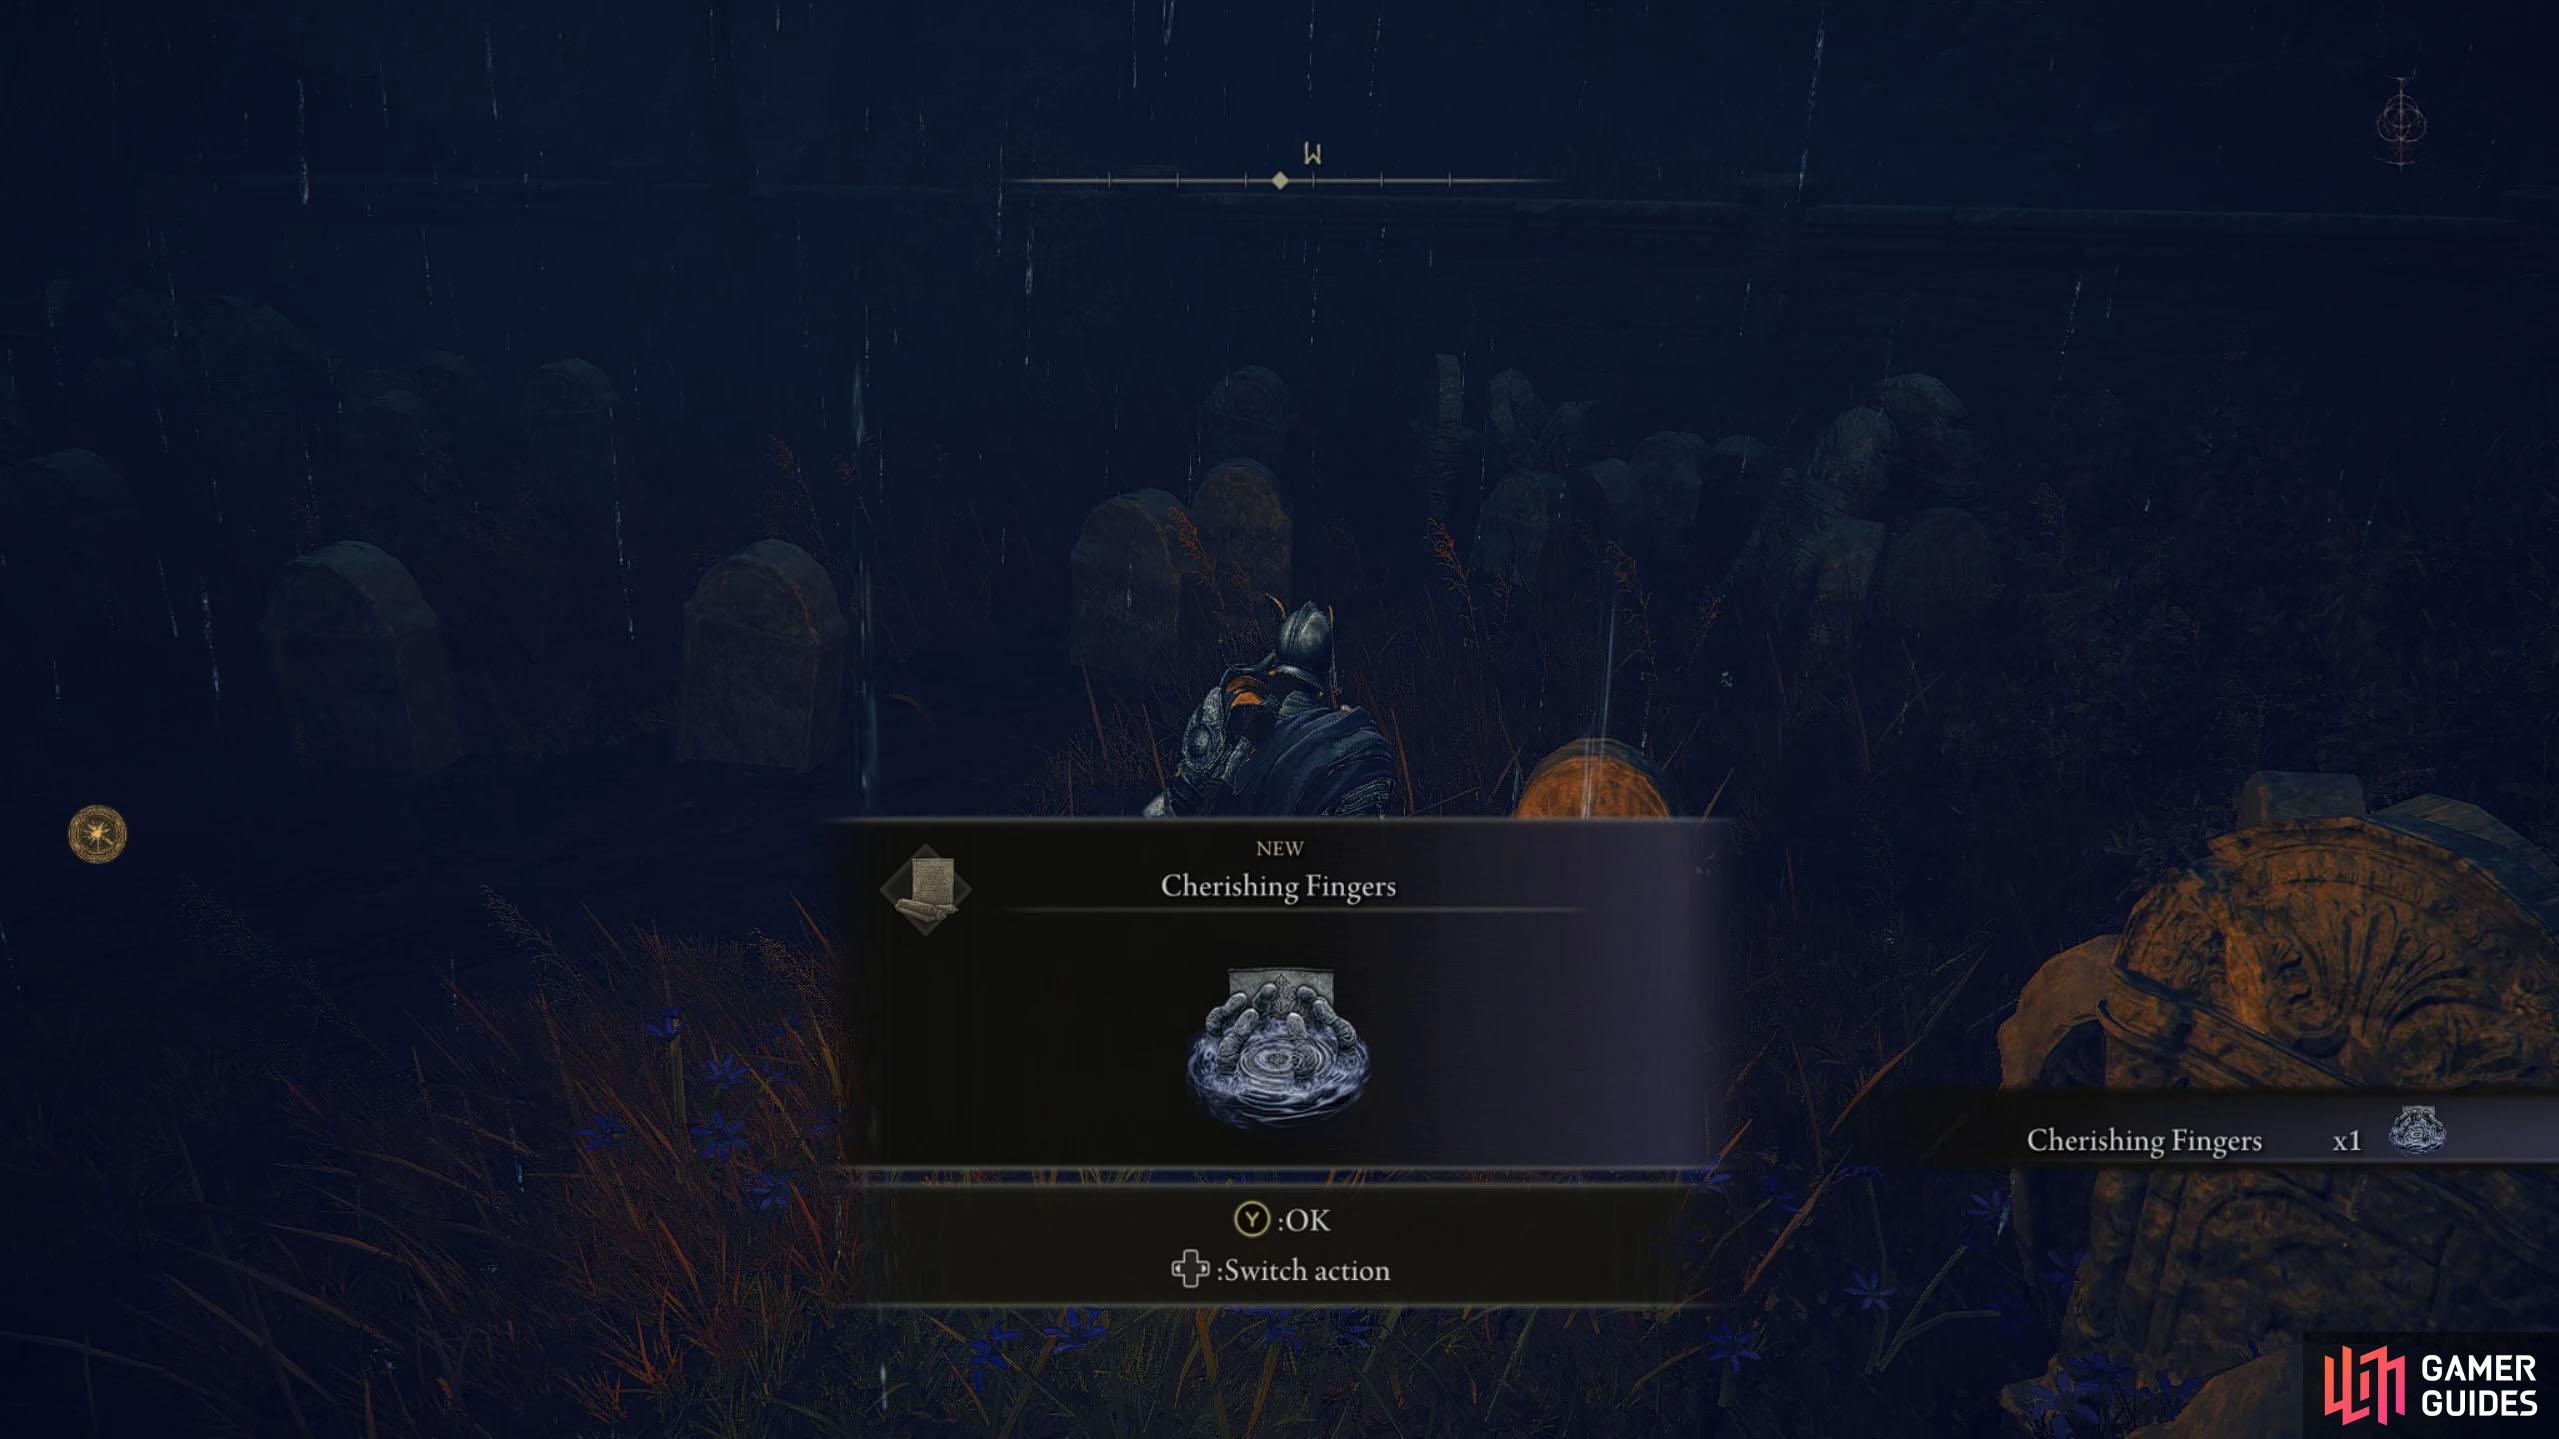
After defeating Count Ymir, head into the graveyard to the west. (left), Examine the grave to obtain the Cherishing Fingers spell. (right)
All Ymir Questline Rewards
Here is a list of all the rewards you can get by completing Count Ymir’s Quest line. Note that giving Ymir’s Bell Bearing to the Twin Maiden in Roundtable allows you to purchase the spells Ymir was selling before the boss battle.
| How to Obtain | Reward |
|---|---|
| Ring First Bell | |
| Speak to Ymir after the First Bell | |
| Ring Second Bell | |
| Defeat |
|
| Defeat |
Remembrance Of The Mother Of Fingers |
| Defeat |
|
| Defeat |
|
| Defeat |
|
| Defeat |
|
| Defeat |
|
| Defeat |
|
| Give Jolán the |
Sword Of Night (Choice) |
| Give Jolán the |
Swordhand Of Night Jolán Spirit Ash |
| Give Jolán the |
Jolán And Anna Spirit Ash |
| Visit the Graveyard after completing the quest |
That’s it for Count Ymir’s quest line, and as you can see, you’ll get a lot of valuable loot for your troubles. This is a lengthy quest, but arguably one of the better ones in the DLC.
No Comments