
Despite you blasting through the main missions in the Seaside Kingdom, there’s still quite a bit to do here. You should be back at the Odyssey now and if you look closely, you will see a familiar dog nearby. Approach the puppers and it will run off to some rocks next to the Odyssey, where it will dig up a glowing spot. Unfortunately, this spot has nothing but coins, but the dog will follow you now. Lead the dog to the west of the Odyssey, to the rocks before the water there, and it will dig up something else this time, a Power Moon (Found on the Beach! Good Dog!) .
Look at the nearby water and you will spot a hole at the bottom of the wall, underwater. Swim underneath it to find a small cave with four chests, which need to be opened in a specific order. If you don’t, then the chests will despawn and will be replaced with Chinchos (the mummies from Sand Kingdom). You will have to defeat them all (jump on their heads) before the chests will respawn. Looking at the chests with the camera behind you, at the water’s edge, open them in the following order: north, west, east and south to obtain a Power Moon (Treasure Trap Hidden in the Inlet) .
Return outside, to where the dog dug up the moon and look at the ledge to your south. You should be able to spot a piece of art on this ledge, so go up to it and investigate it. The art shows off the word “KEEP”, with an image of a moon above the first “E”. This moon is located in the Metro Kingdom, which you will get after finishing up here at Seaside. Put that in the back of your mind and go capture a Gushen, one of which is just east of your ship. There is a ledge behind the Odyssey, too high to get to normally.
Boost up to the little pool first in the vicinity, then you can jet up to the ledge with the Power Moon (On the Cliff Overlooking the Beach) . For the next moon, you may have seen the hole in the wall near the art piece. Fly into the hole to reveal a small cave-like system, where you need to move up, right and up to grab the Power Moon here (Ride the Jetstream) . Near the Odyssey is a pipe in the wall, which leads to a room similar to one in the Sand Kingdom, where you need to feel the rumble to unearth a Power Moon; the moon is in the bottom right corner (A Rumble on the Seaside Floor) . There is another ledge to the west of the art piece, which requires the Gushen and you will find a rocket sitting on it.
Ground pound towards the bottom right corner of the room for a moon
Not the Foggiest Idea
The rocket will bring you to a large area filled with fog, or at least the paths are obscured by the fog. There are two moons here, one of which is hidden a bit if you aren’t actively looking for it. You can dissipate the fog by moving through it, using your hat or by utilizing the various shockwave contraptions laying around. The path is fairly linear for the most part and easy to navigate at the beginning, but the fog can be a hindrance not long after that. Go down the ramp at the beginning and use the shockwave device to reveal the next path.
Before the next device gets covered, quickly use it to uncover the next platforms that lead to some ramps going up. You’ll encounter a batch of Burrbos here, so either defeat them normally or use the shockwave device. Keep going and after the next device, look in the one direction to spot a square area that seems cut out, which is where the hidden moon is located. The path that leads here is located just before the gap with the step and three shockwave devices. You don’t have to worry about any deviations, as it goes straight to the “hole,” which isn’t really a hole at all.
When you reach it, drop down into it to spot a chest obscured by the fog. Open the chest to uncover a Power Moon (Sunken Treasure in the Cloud Sea) . Return to the main path and activate the devices now, which will trigger one another consecutively and indefinitely, letting you see the path that leads to the end. Nab the Power Moon (Wading in the Cloud Sea) and use the rocket to return to the main area.
The Narrow Valley
Not much further west is the beach house and if you planted the seed from earlier, it should be ready for harvest, netting yourself another Power Moon (Sea Gardening: Canyon Seed) . On the western side of the house are three purple coins in a shallow pool (60) and just a little further are three more purple coins in the water (63) . While still underwater, follow the edge of the land you just came from to the north, and you should find three purple coins in a small alcove not far from the last ones (66) . Capture the lone Gushen in the area, then use it to collect three more purple coins above the coin blocks to the south of the hole in the wall (69) .
Enter the hole and boost up to spot a door you can access. This sub-area is filled with Gushens and will require you to use its abilities to traverse across many chasms. There is a large pole in the way immediately after the third Gushen, which has two rectangular holes you can go through to get some gold coins if you wish. Past that will be one final water station before a section with some purple goo, which will kill the Gushen instantly should you touch it.
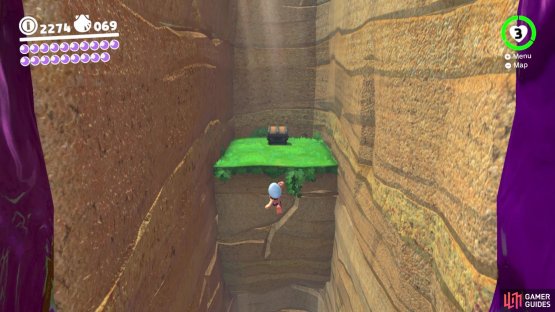
(1 of 2) It may take a few tries to get to the chest

It may take a few tries to get to the chest (left), but you will eventually reach it and be rewarded with a moon (right)
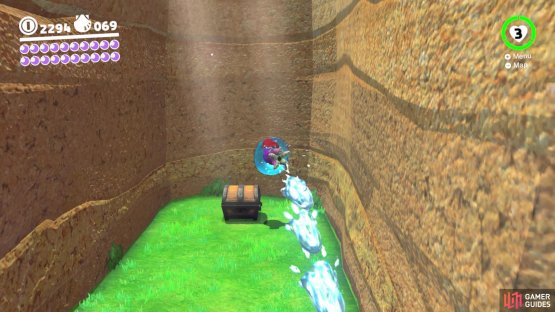
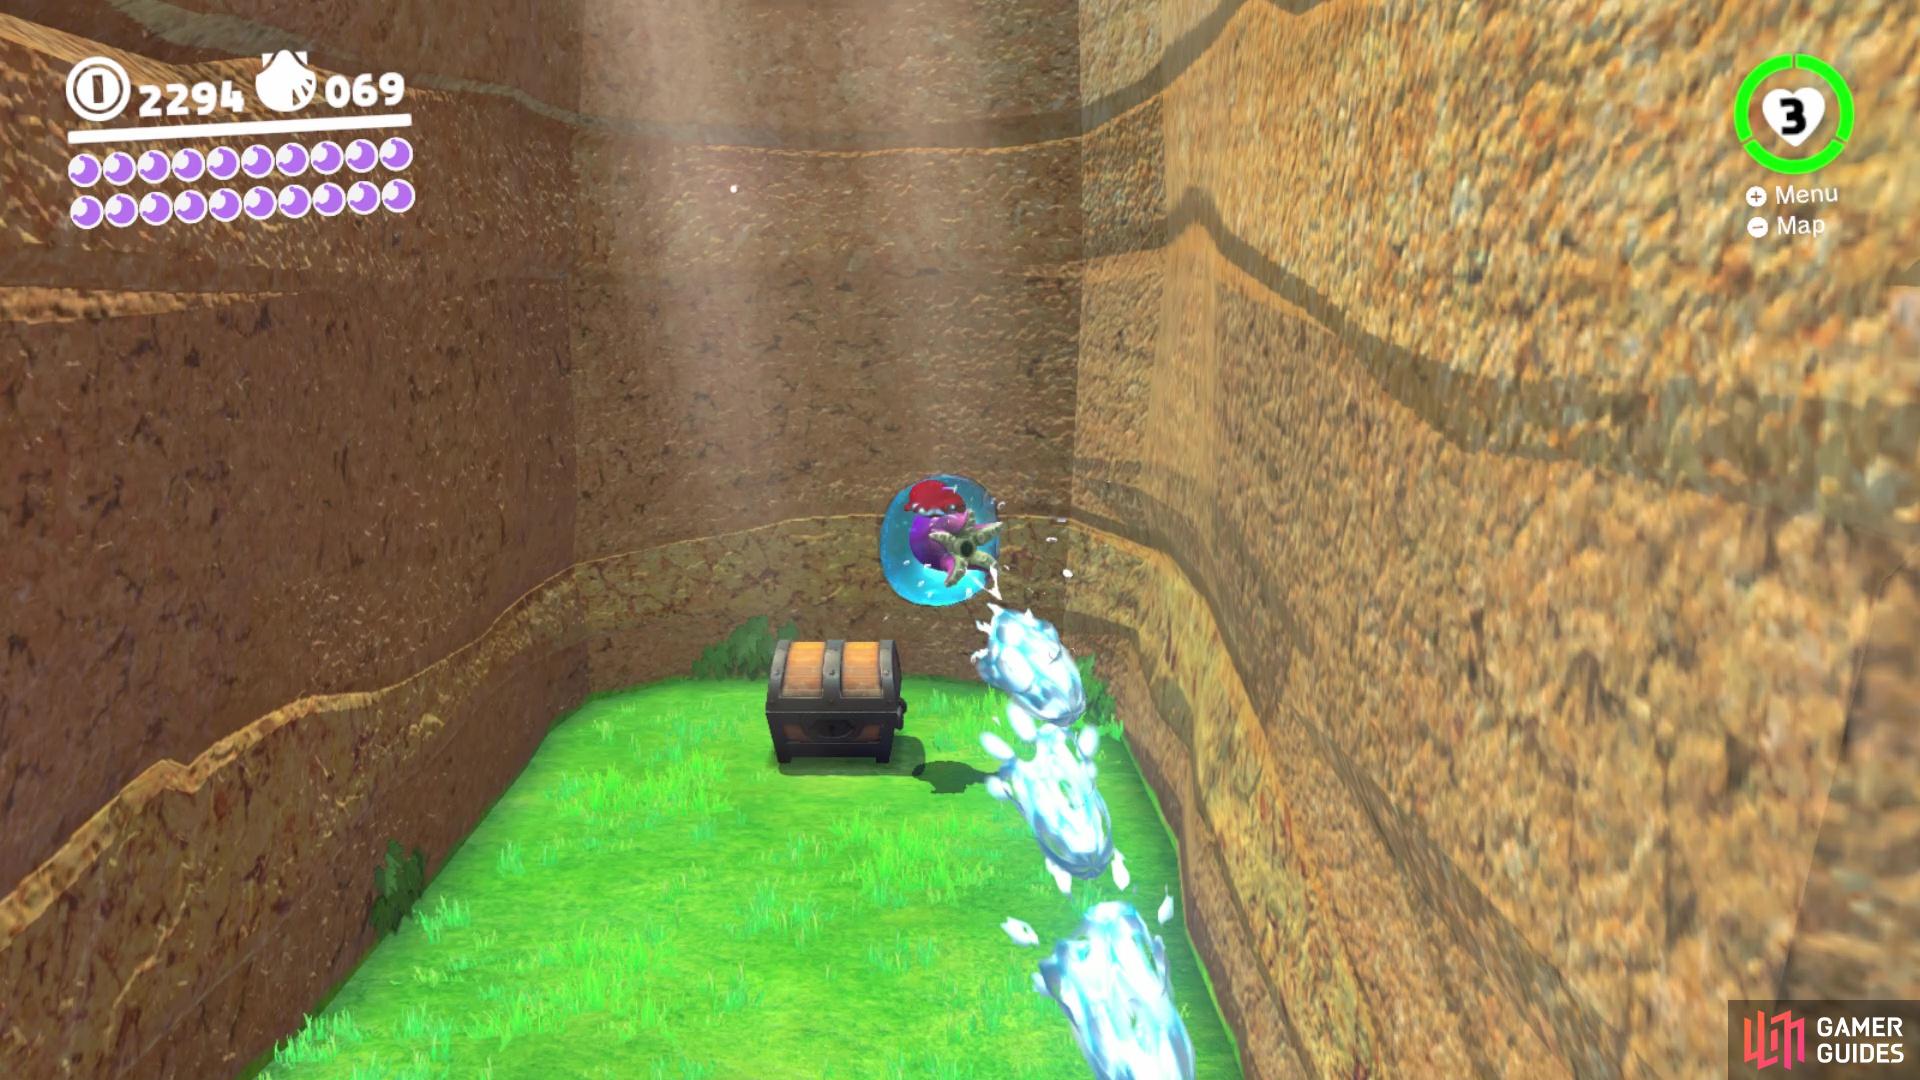
To get the extra moon here requires a bit of precision with the Gushen. From the final platform with water, do a little boost to get on the ledge, then scoot forward without using any water to fall off the ledge. Keep following and as soon as you can go straight through the purple goo section, hold down Y to jet forward. Keep that held down when you need to move upwards, just enough to clear the goo, then propel forward to the end area with the chest (Treasure Chest in the Narrow Valley) . Once you get this moon, drop down into the giant area below to find the other Power Moon (Fly Through the Narrow Valley) , then use the pipe to return to the main area.
Bump, Set and Spike
After exiting from the slightly stressful Gushen area, head on over to the volleyball court to begin another stressful activity. Simply stepping onto the court will begin a volley with a ball, which you simply have to touch with either Mario or Cappy to return the ball. It starts out rather slow, where you can simply run to the ball and return it each time, but similar to the jump rope in the Metro Kingdom, it will get faster over time. The ball gets faster usually after every three returns, with it reaching a maximum speed at around a count of 50.
At some point, maybe around 20 or so, you will want to start using your hat exclusively to return the ball. Note that the ball can touch the ground for a brief second and you can still return it, so that isn’t an automatic loss. The best place to stand will be in the center of the court, which gives you the easiest access to all points where the ball can be hit to. The first moon is easy, as you need to hit the ball 15 times, but the second will take a bit more work, as you need to hit it 100 times. Do that to get two more Power Moons, (Beach Volleyball: Champ) and (Beach Volleyball, Hero of the Beach!) .
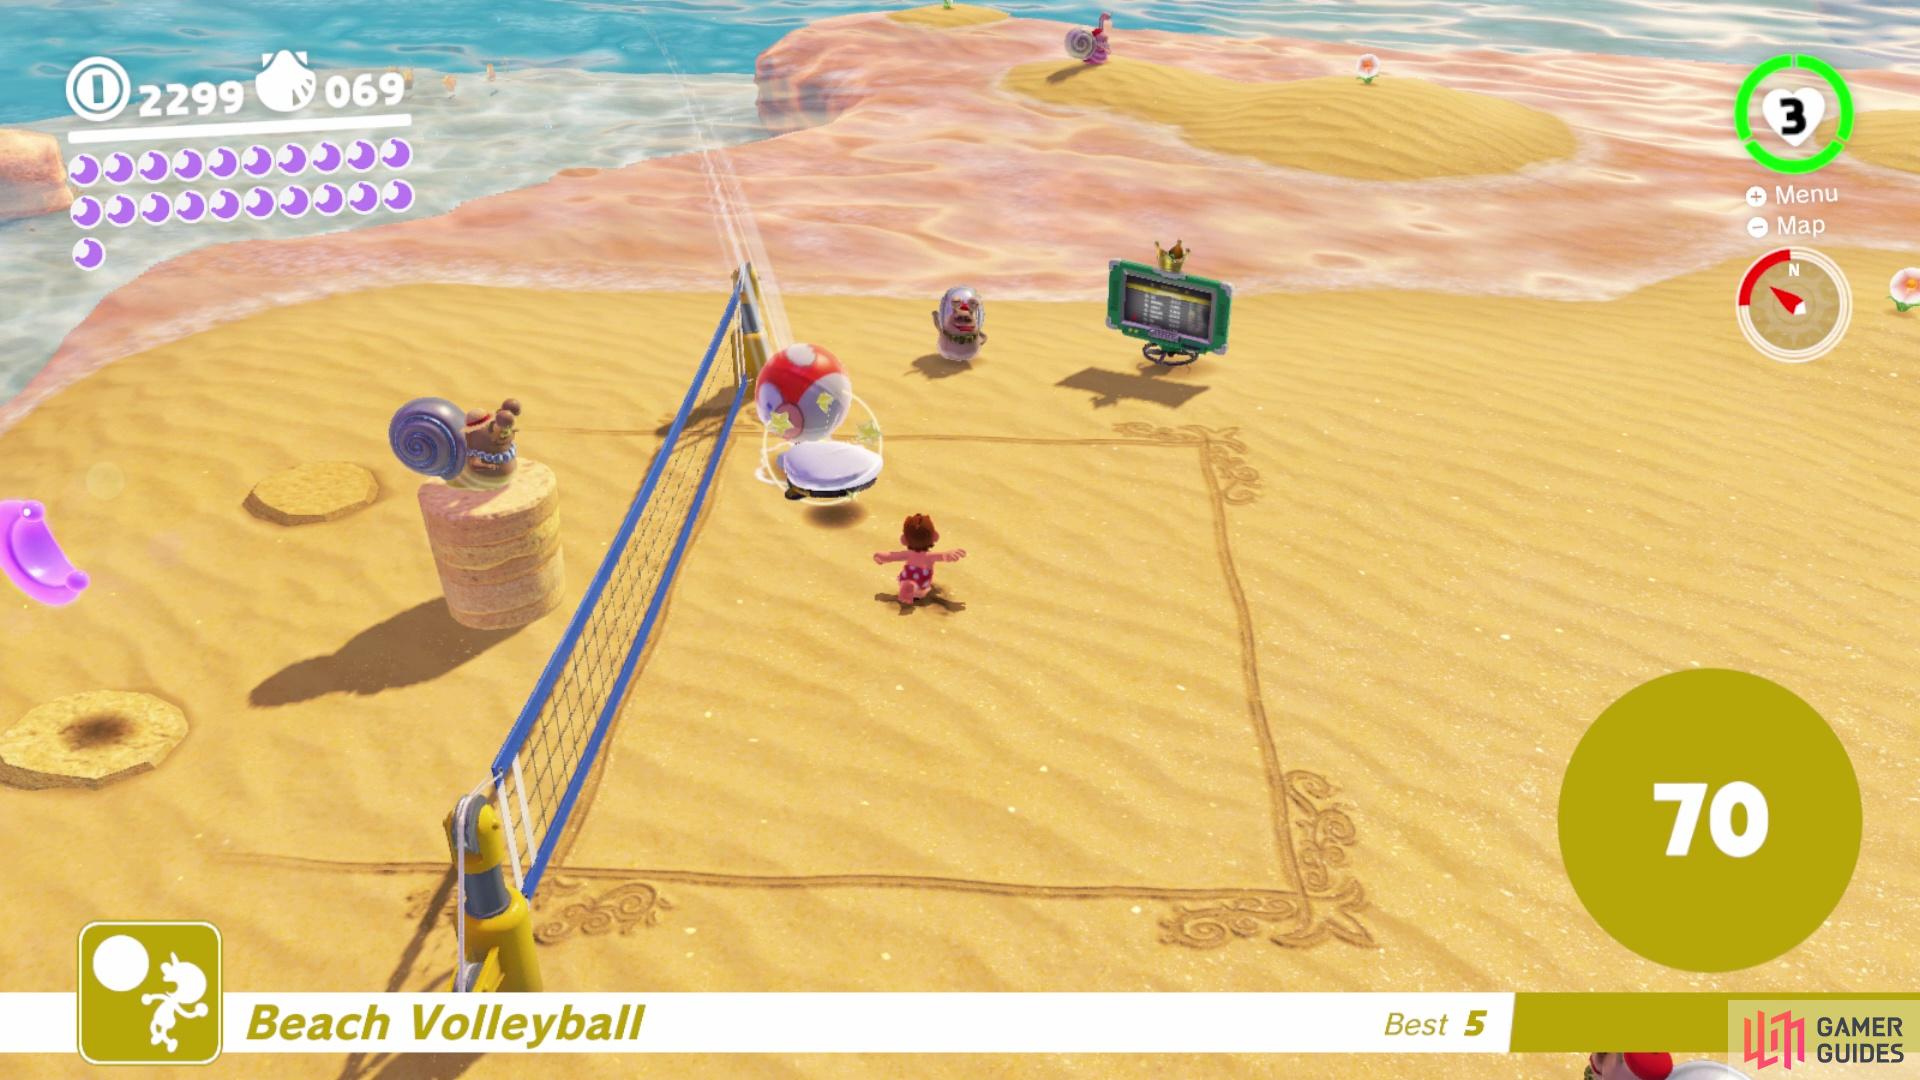
Standing in the center and using your hat to knock back the ball is the best thing to do here
Return to the Odyssey for now and look for the closest fountain, which should be spraying liquid into the giant container that Lanceur was occupying earlier. Simply jump into the water and you will be launched up to the oversized goblet. Swim down to the bottom of it to find a painting, bringing you to another kingdom. Again, this is one of those paintings that can bring you to three different kingdoms, depending on which ones you chose first at the two forks. If you’ve been following this guide, you will be brought to the Lake Kingdom (it can also lead to Cascade or Wooded), so grab the moon from the chest and return to Seaside (Secret Path to Lake Lamode!) .
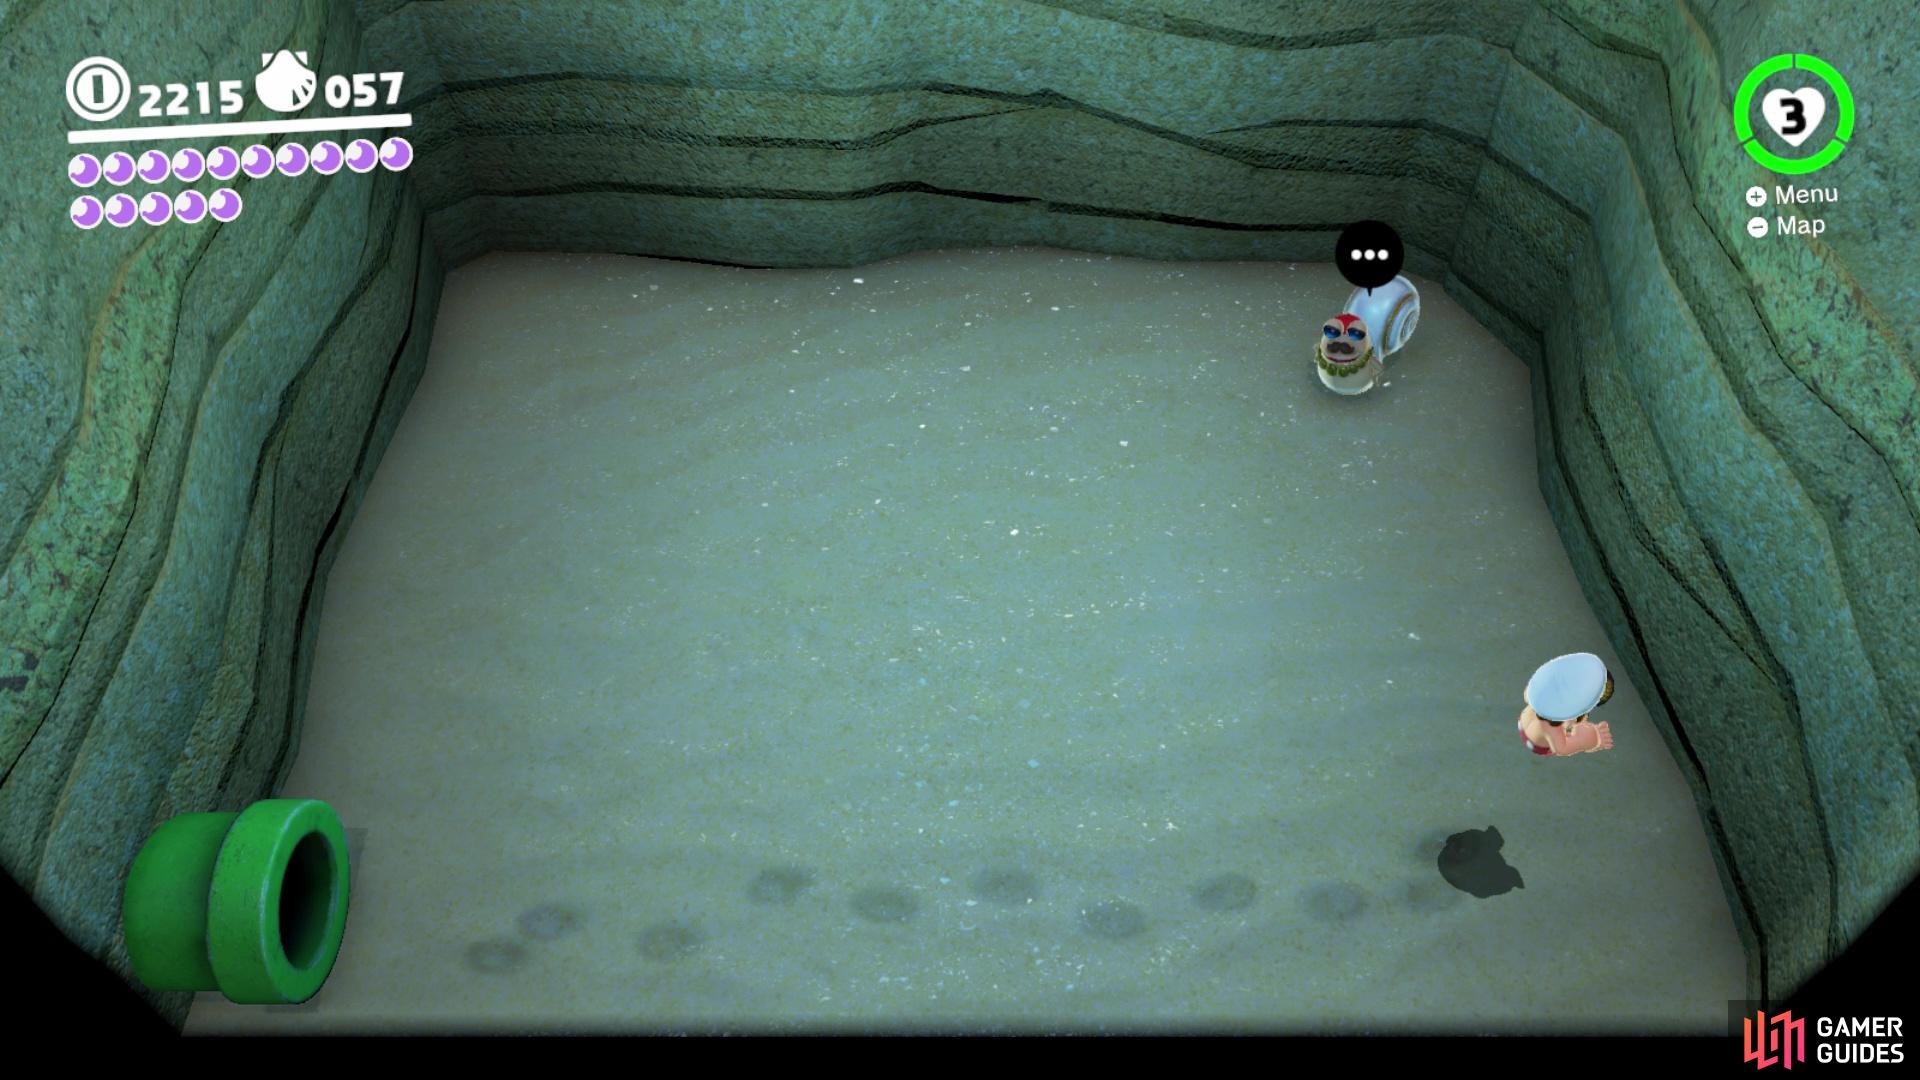
Underwater Adventure
Return to the top of the container and drop down to its base, where you have a few different ways to go here. Speak with the one snail with the speech bubble to have him mention some lizard on top of the lighthouse and how he will fly all the way to him. So, warp to the top of the lighthouse to find Glydon, our familiar gliding lizard friend. Capture him and look to your east, which is where that goblet is located. Avoid landing in the water and glide over to the island, approaching the snail from before to receive a Power Moon (Lighthouse Leaper) .
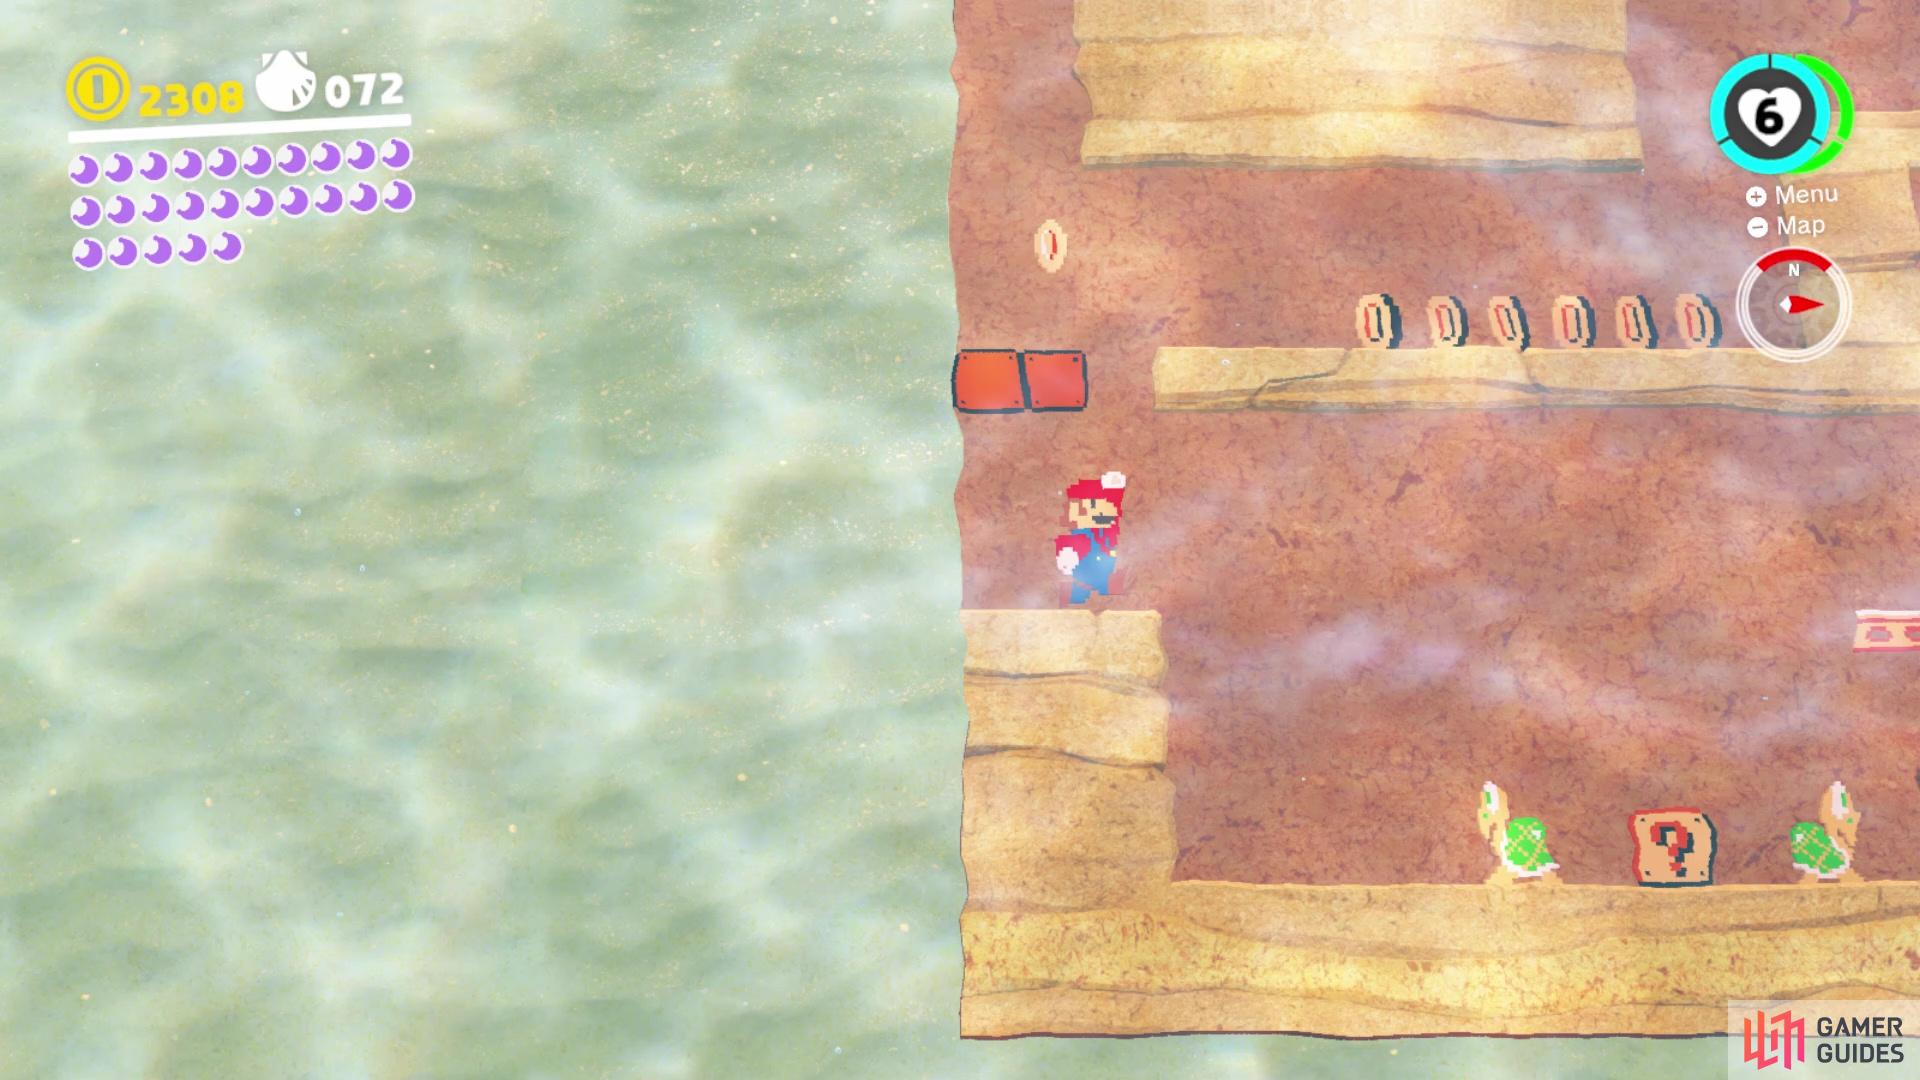
Slightly to the west of the goblet are four pipes underwater, which lead to a big 8-bit mural. Using the actual directions on the compass, enter the northeastern pipe and don’t move when you get in, as you will get an overview of the entire mural. As you can see, the northwestern pipe leads to nothing valuable, so ignore that. The main moon is in the center and there is another hidden moon behind a brick towards the southeast corner. Besides those, there are three purple coins in the northeast corner.
To begin, hop on the moving platform to your left and get on top of the blocks with the red Koopa Troopa. Hit the shell to the right to break the brick just below it, where you can perform a sliding crouch to get to the right side. Wait for the moving platform over there and get to the upper right corner to collect the three purple coins (72) . Drop straight down and hit the red Koopa Troopa walking up the stairs to the left to break the brick below it, allowing you to do another crouching slide to find the hidden room with a Power Moon (Ocean-Bottom Maze: Hidden Room) .
For the other moon, venture to the left and use the moving platform to get to the ledge just below the path leading to the moon. However, when you jump up here, you will find the path is blocked by some hidden coin blocks. There’s nothing you can do about them, but they will help you in a short bit. Exit the maze via the pipe to your right and enter the northeastern pipe again. This time, you can just head left, past two green Koopa Troopas, and drop down the coin blocks you revealed before, letting you reach the Power Moon in the middle (Ocean-Bottom Maze: Treasure) . Leave via the pipe.


(1 of 2) You’ll need to hit these coin blocks to form a bridge

You’ll need to hit these coin blocks to form a bridge (left), which will allow you to reach the moon in the middle (right)
Capture a Cheep Cheep and head west, to the base of the lighthouse, staying in the water. There will be a hole in the terrain, where you can find three purple coins (75) , so grab them and head around to the northern side. Look for the tunnel with three Cheeps swimming back and forth, and enter the tunnel to find some bricks on the floor. Use the Cheep’s spin attack (shake the controller) to break them, then swim down to collect a Power Moon (Underwater Highway Tunnel) . Continue going around the perimeter of the island until you happen upon the checkpoint flag, then keep going around until you find the path cutting through the middle.
You’ll know you’re in the right spot by the Komboos and a door, which leads into a small room with something crawling under the ground, similar to the one moon in the Sand Kingdom at the top of the pyramid. If you feel like you need air at all, don’t let the room’s initial appearance fool you, as you can just swim to the top for a refill. To get the moon here, you need to use your hat to stun the creature moving underground, then perform a ground pound while directly above it, which is a little easier said then done. It’s not as annoying as the one in the Sand Kingdom, so it shouldn’t take too long (Wriggling on the Sandy Bottom) .
Capture a Cheep after coming out of the room and get to the surface, looking for the closest Gushen. Release the Cheep and grab the Gushen, then look for the yellow Dorrie swimming around. Although you might not have seen it, but there is a moon hovering above the yellow Dorrie, which moves along with it. So, you need to reach some height to get it with the Gushen (Bonjour, Dorrie!) . After getting that, release the Gushen and land on the Dorrie, purchasing the Power Moon from the shop (Shopping in Bubblaine) . Return to the Beach House flag and look for the note by the shore. Line up the camera to go straight, grab the flower with your hat and boost into the note. Collect all of the smaller notes that spawn to make a Power Moon appear on one of the small platforms (Taking Notes: Ocean Surface Dash) .
Exploring the Sea Floor
You should have hit the Ocean Trench West flag, so warp to it and grab the closest Cheep Cheep. See the large gap between the floor and one of the islands (this is the one with the binoculars)? You know it’s the correct one, because there are a bunch of Komboo walking upside down. There are three purple coins in that little area, so grab them (78) and continue east to find a bubble-producing machine, where you can nab another four purple coins (82) . Look to your north now to see a bunch of small holes in the rock wall, with one of them containing three purple coins (85) .
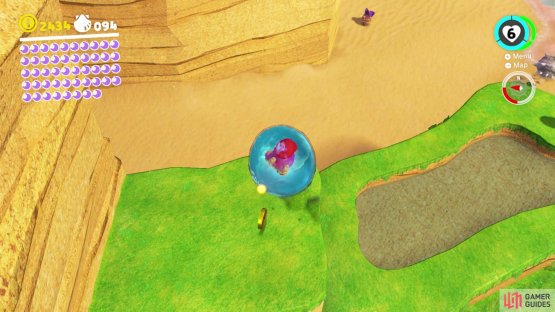
Return to the bubble machine and south of there will be a path underneath the giant goblet, riddled with Komboos. Go through it and there is an alcove inside the tunnel with a chest, containing a Power Moon (Glass Palace Treasure Chest) , as well as three purple coins on a ledge on the opposite end (88) . Double back to the bubble machine once more and glance over to the east. You should see a scarecrow, but that’s not what you’re looking for right now. You want to find the bubble with a gold coin in it, which is to the left and down a little bit from the scarecrow.
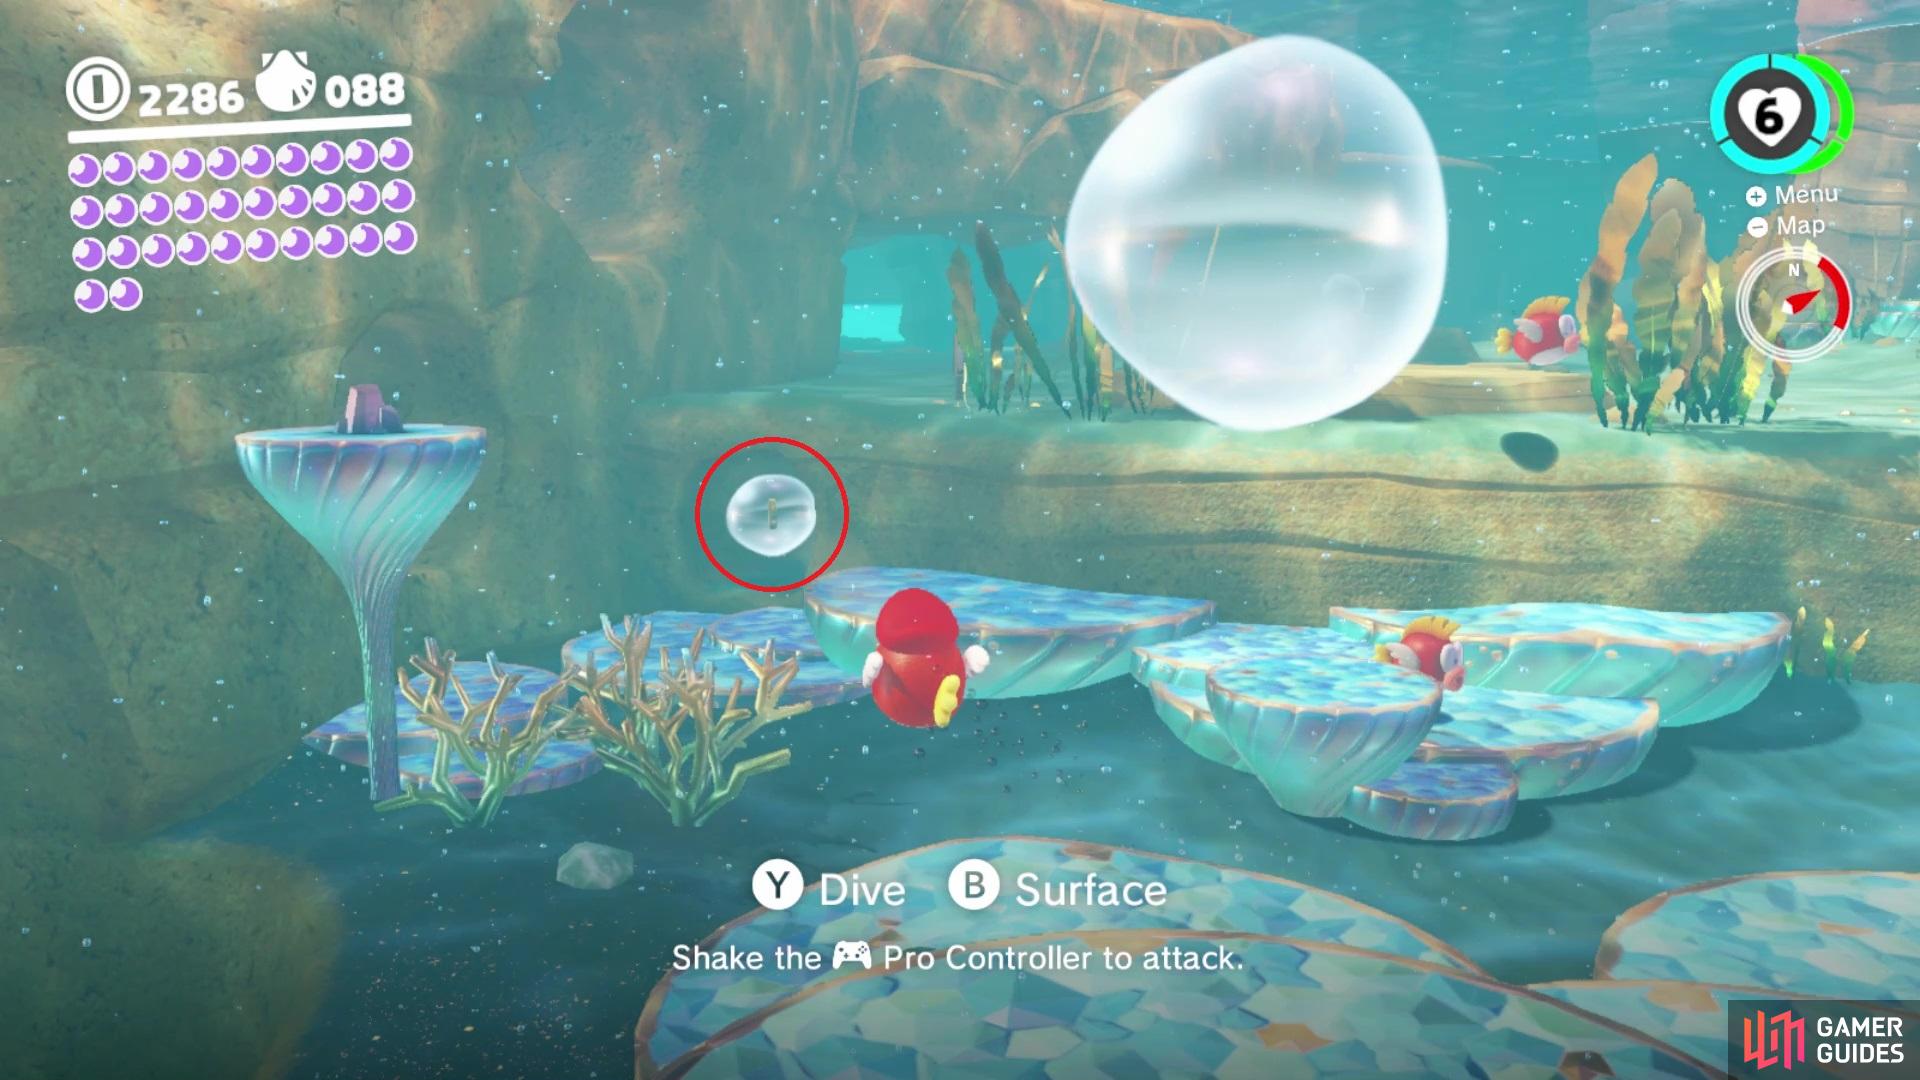
See the bubble circled in the screenshot? That’s actually a tunnel that is hiding a Power Moon
The coin in a bubble leads to a tunnel with a bunch of gold coins, but it also hides a Power Moon (Shh! It’s a Shortcut!) . Keep going through the tunnel and come out on the other side, just to touch the checkpoint, then go back through to return to the bubble machine. Head north this time, through the big hole, and look down to spy Sphynx. Behind Sphynx is a hole in the wall, leading to a tunnel with a Power Moon at the bottom (Gap in the Ocean Trench) . Now, release the Cheep Cheep and speak with Sphynx (he’ll tell you to go elsewhere as a fish), answering his first question with “Bubblaine.” This gives you access to his underwater vault, where you can open a chest for a Power Moon (The Sphynx’s Underwater Vault) . You can speak with Sphynx again to answer more questions, with the answers being as follows:
- Four
- Attack
- Resort Outfit
- To ask questions
This will net you another Power Moon (Ocean Quiz: Good) . Just northeast of the Sphynx, on one of the little platforms, is another seed, so grab it and quickly swim up to the surface, returning it to one of the planters on the beach house. Now would be a good time to mention that you can speed up the growth on the seeds, by using the water sprayed from the Gushens. So, it’s very possible to get the Power Moon from the seed by using the horizontal spray from the Gushen (Sea Gardening: Ocean Trench Seed) .


(1 of 2) You can use the water jet from the Gushen to water the plants

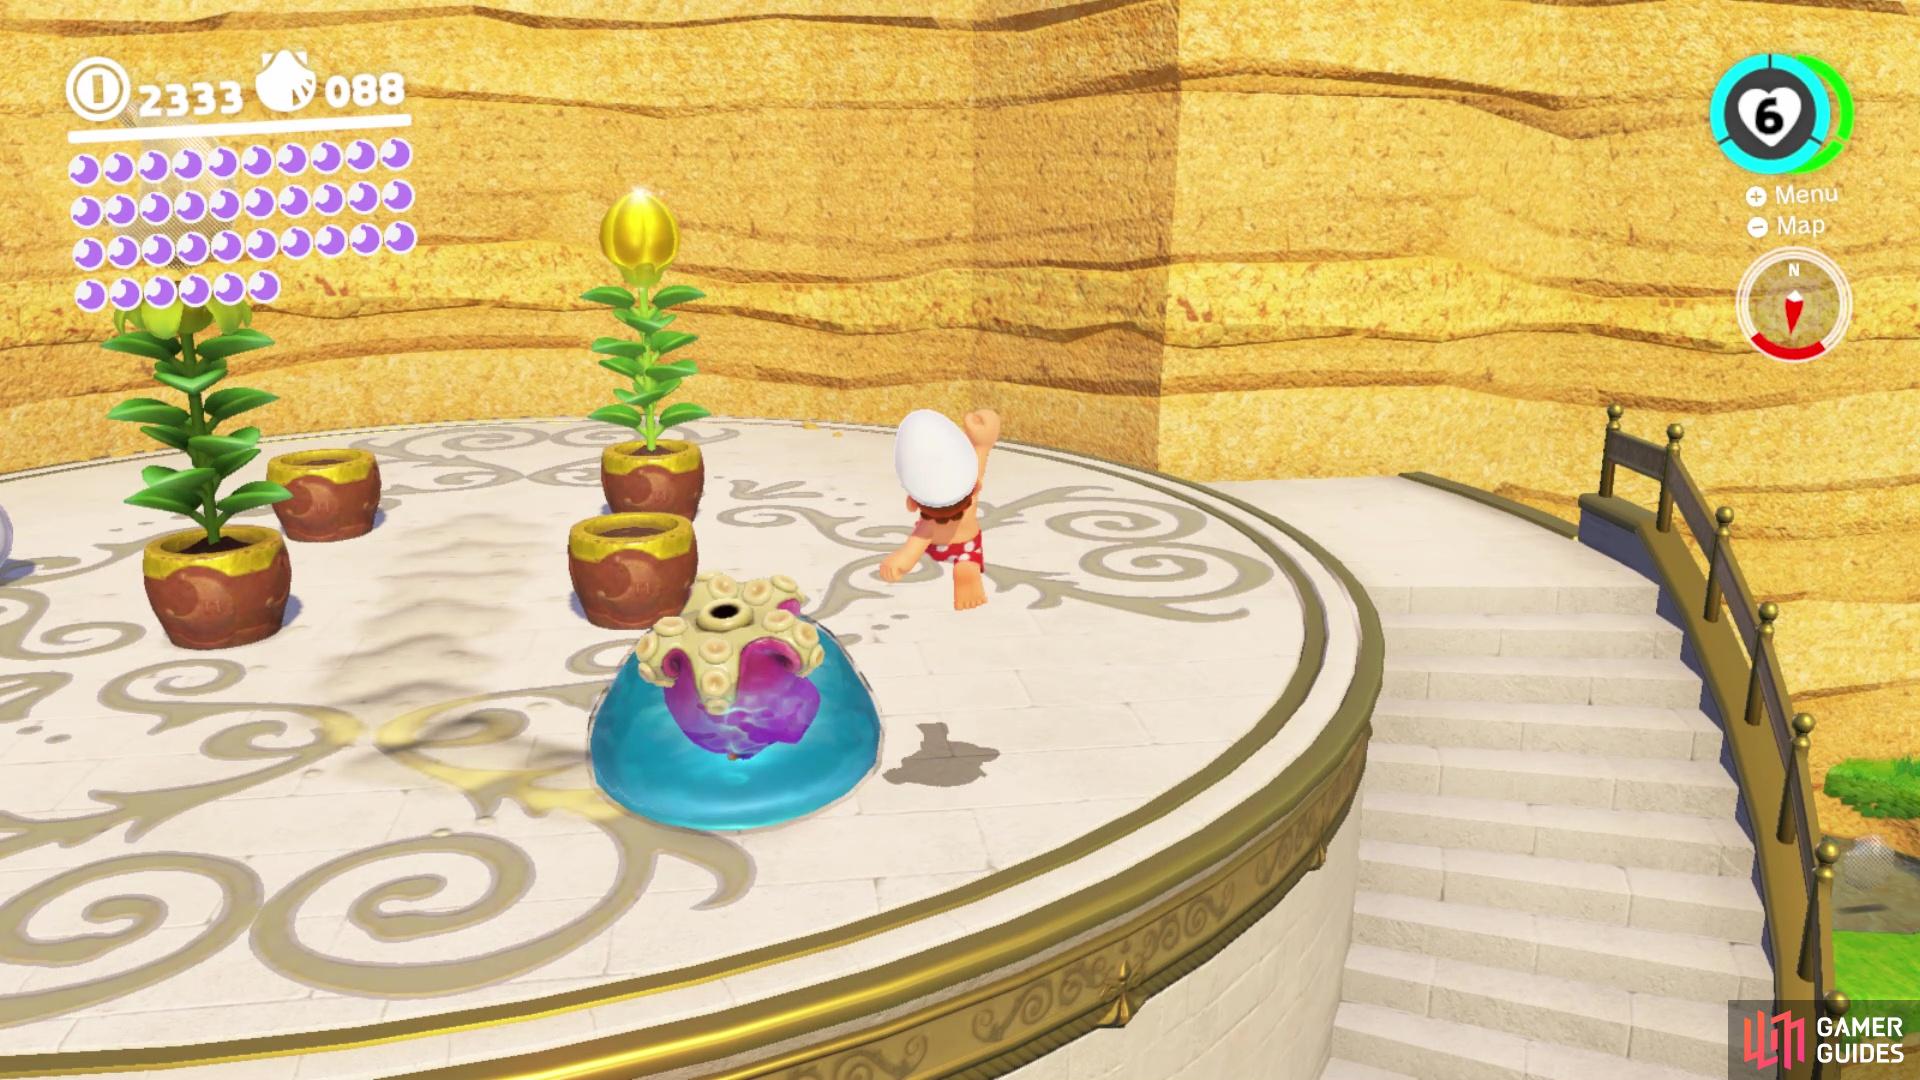
You can use the water jet from the Gushen to water the plants (left), instead of waiting for them to bloom naturally (right)
Remember that scarecrow from earlier? It’s time to do that little timer challenge now. The Power Moon will spawn nearby, but the problem here is that you don’t have the swimming speed to do this normally. That’s where the quick swim maneuver comes into play, which is done by pressing either ZR or ZL, then follow up quickly with either Y or X. Practice this repeatedly to get the timing down where you can do it back to back. With enough patience, you should be able to get to the moon within a couple of tries (Seaside Kingdom Timer Challenge 2) . Don’t forget to capture another Cheep Cheep to not drown.
At this point, you should be able to find the purple Dorrie nearby and if you look underneath it, you can grab another Power Moon (Merci, Dorrie!) . Return to the scarecrow and look northeast to spot some more upside down Komboos. Near them is a glowing spot on the ground and if you perform a spin attack with the Cheep Cheep by it, you will unearth another Power Moon (Under a Dangerous Ceiling) . East of the goblet will be three purple coins resting on the bottom of the floor, right in the middle of the open area (91) .
Warp or head to the Ocean Trench East flag, then swim to the east while sticking close to the northern wall. Eventually, you should see a hole and upon getting close, an eel will pop out to say hello…with its sharp teeth. Get right next to the opening and wait for the eel to retreat back into the tunnel, then quickly rush in while hugging the right wall to find another tunnel with a Power Moon at the end (Slip Through the Nesting Spot) . Directly across from the eel nest is an alcove in the wall behind some Komboos. This will lead to a small cave that extends to dry ground, where you can nab three purple coins (94) .
Get on the southern side of this island and you will be able to find another door being guarded by a Cheep Cheep. It’s time for a little change of scenery, as this sub-area is filled with lava. Not far from the start, an Uproot will spawn out of the ground, so capture it. As soon as you stretch to the first ledge, the lava will start rising, so you will need to start moving quick. Of course, things aren’t so simple, as there will be Moonsnakes in the way, so you’ll have to be careful to not get hit by these. When you reach the section with two Moonsnakes and a thin ledge on the one side, get over there and stretch to reach a Power Moon (Stretch on the Side Path) . The end of the area will be quickly after that moon, where you can get another one (Hurry and Stretch) .

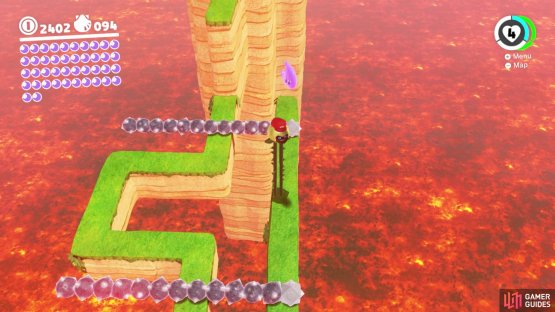
(1 of 2) The lava will rise as soon as you start ascending
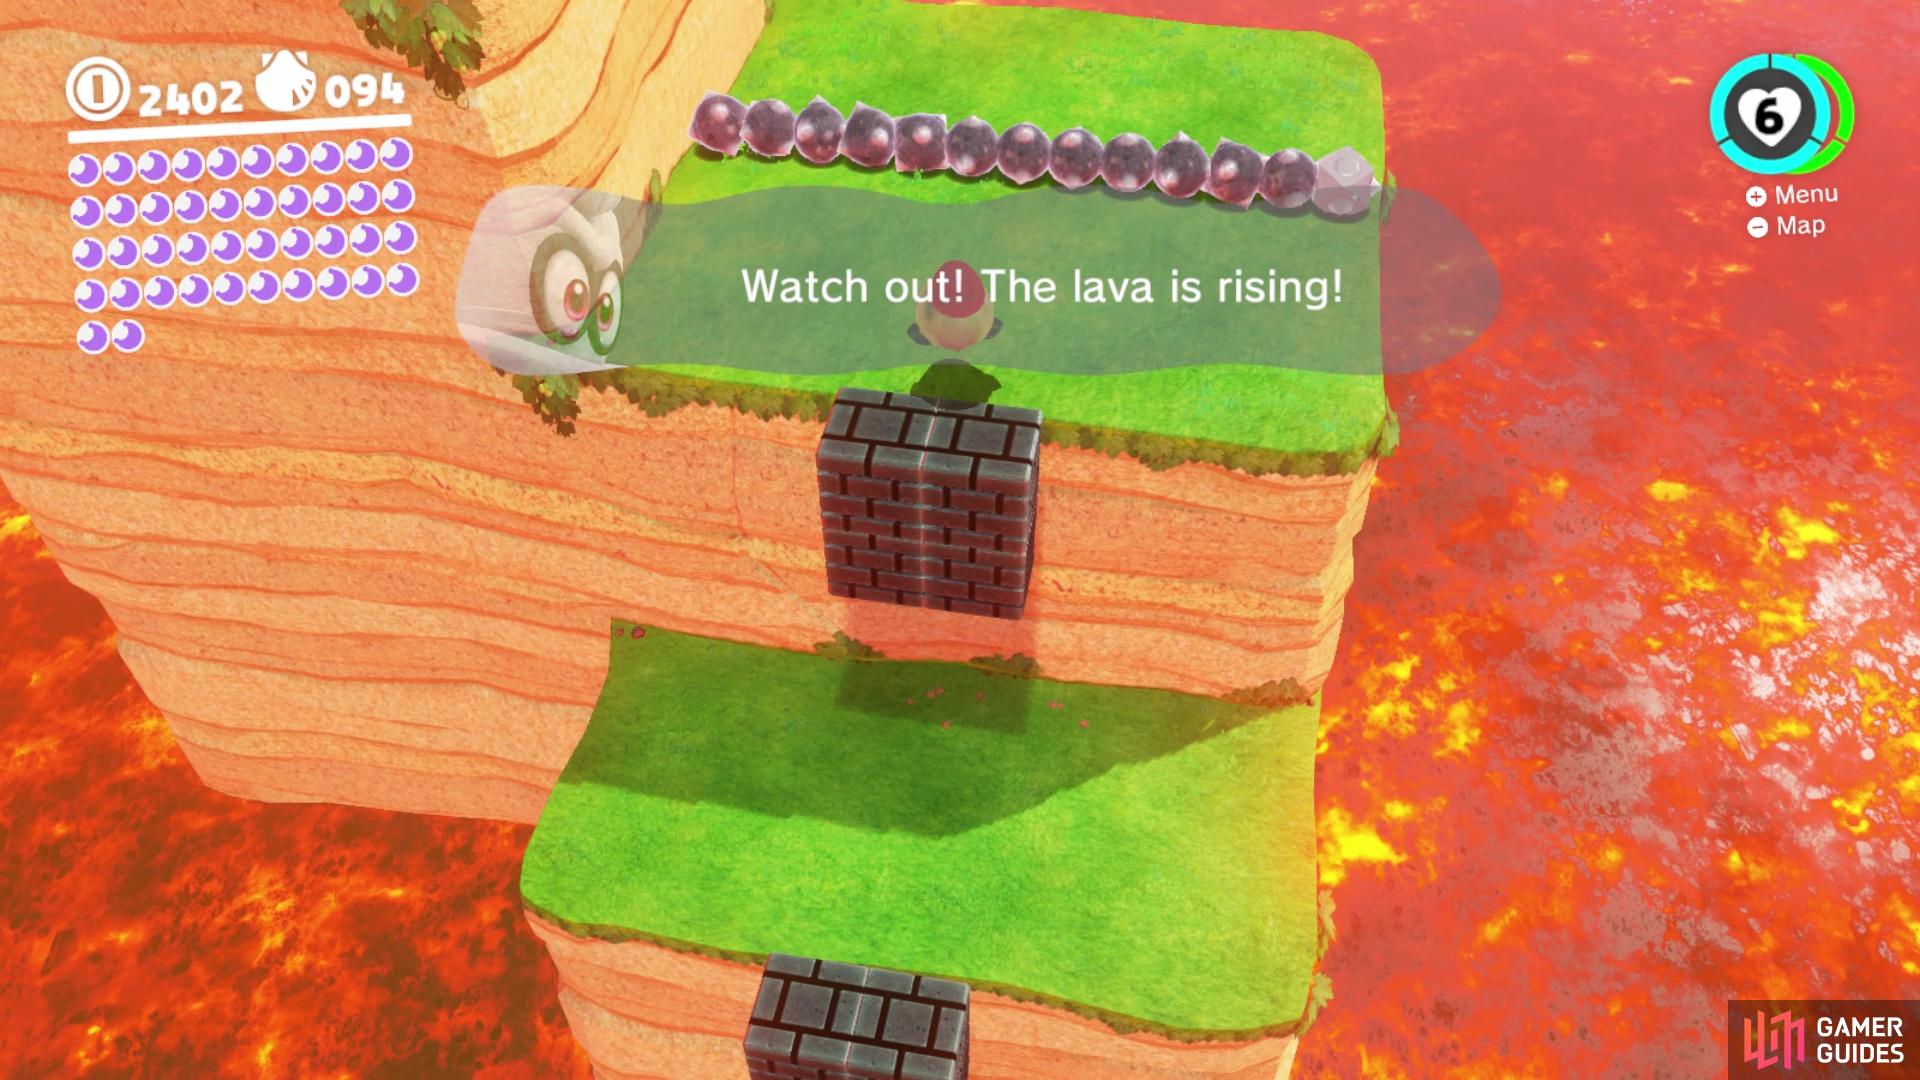

The lava will rise as soon as you start ascending (left), Don’t forget the extra moon in the air on the thin side path (right)
Upon exiting the previous door, head east a little bit to find a crack in the sea floor. Swim down into the crack to find a small hidden area with a big switch and an 8-bit mural. Ground pounding the switch will make some platforms appear in the mural, but they will disappear after a short time, so you will need to move quick. It may take a few tries to get to the moon, but if you manage to screw up after breaking some of the bricks, then it will become easier the following time. Grab the moon, then return to the surface before you run out of oxygen (Seaside Kingdom Timer Challenge 1) .
Cleaning Up in Seaside
Return to the giant goblet and find a Cheep Cheep to capture, then swim through the giant hole north of the oversized container. Get onto the upper ledge here to spot a large mound surrounded by three smaller ones, which are all glowing. Either ground pound them all or do the spin attack with the Cheep Cheep, which will make some Komboos spawn. Of course, this also makes the larger mound glowing and spinning/ground pounding it will reveal a Power Moon (Bubblaine Northern Reaches) .
If you recall, you should still have two more seeds to find to plant in the planters on the beach house. The first is underwater, in the little trench just east of the beach house, near some Komboos. Return to the house to plant it, then use a Gushen to water the plant to make it grow faster. Note that the one planter has a long stem to it, so you may need to replenish the Gushen’s water supply, which you can do by grabbing one of the other moons you’ve already gotten. The final seed is located by the Hot Spring Island flag. You can jump off the top to the north-northeast to find the seed on a thin stretch of land, so return it to the planter and use a Gushen to make it grow. Nab both moons, (Sea Gardening: Inlet Seed) and (Sea Gardening: Hot-Spring Seed) .
Warp to the Rolling Canyon flag and head northeast from it to find a giant metal gate in the water, with a scarecrow next to it. Toss your hat onto the scarecrow to open the gate, then drop into the opening to enter a large underwater area. Your objective here is to gather five Moon Shards, all of which are in plain sight, while avoiding the jaws of an angry eel trying to bite you. All of the shards are in bubbles, so you really shouldn’t be in any danger of running out of air, but there are two bubble machines at the bottom if needed, which is where the Power Moon will spawn (Moon Shards in the Sea) .
The next moon will require you to use a Gushen to reach Captain Toad, who is on a ledge above the main mission moon at the end of the Rolling Canyon. The easiest way to do this is to jet to the ledge behind the Odyssey with the small water pool, then boost up to the ledge above that with the one moon (grab it if you already got it to replenish your water). From there, you can fly over to the ledge with the Rolling Canyon moon and then reach the one with Captain Toad. You will have to get rid of the Gushen before he will speak with you (Good Job, Captain Toad!) .

(1 of 2) Start from the highest ledge near the rolling canyon

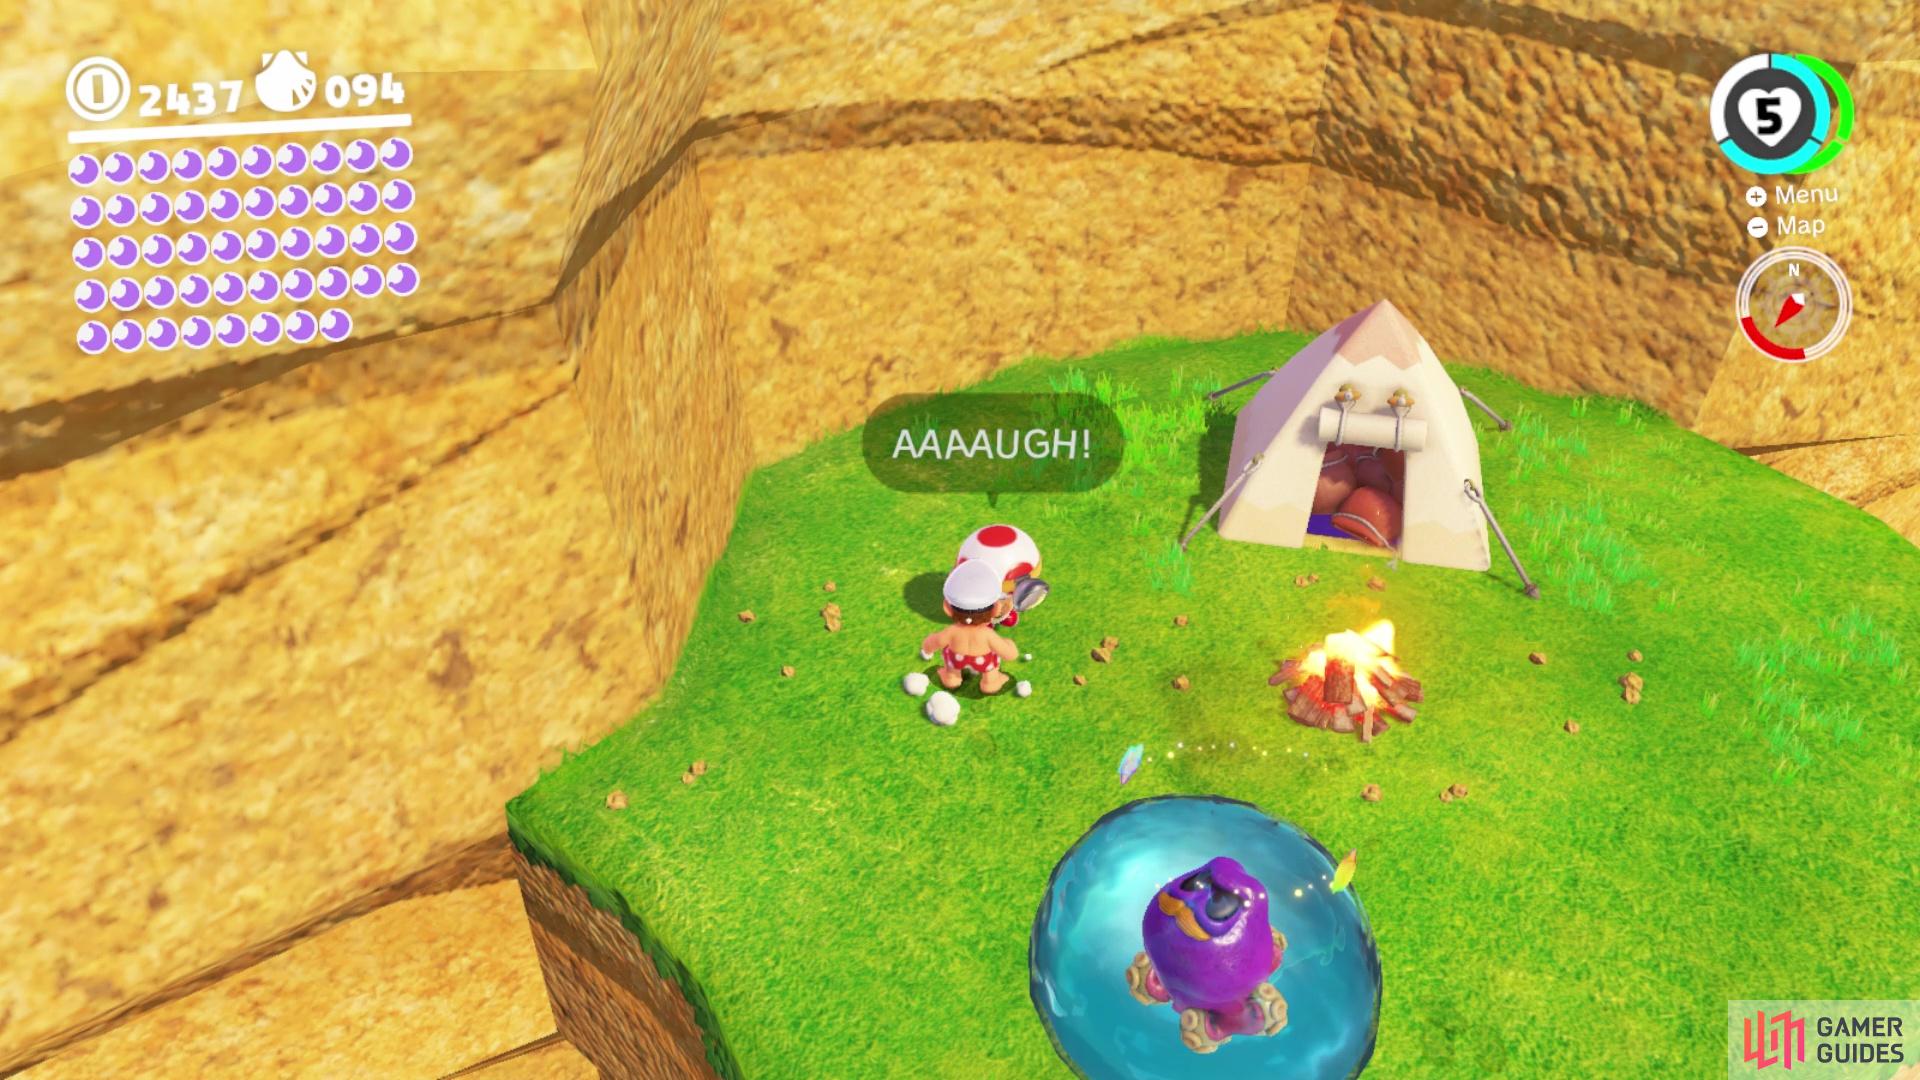
Start from the highest ledge near the rolling canyon (left), and you should have enough water with the Gushen to reach Captain Toad (right)
They were missed before, so a little backtracking is needed to get the remaining purple coins. Warp to Ocean Trench East and head west to the area with Sphynx. West of him will be three purple coins on a ledge with a Cheep Cheep swimming right next to them (97) . The last three purple coins not pointed out yet are near the beach house, in a shallow alcove underwater, on the piece of land sticking out with the Gushen. Dive into the water and look around that piece of land while underwater to get the purple coins (100) . Head on over to the purple coin shop and purchase everything, making sure you equip the Resort Outfit and Hat. Return to the beach house and speak to the snail out front, who will open the door thanks to the above outfit. Once inside, move into the circle to perform a little dance, which will make a Power Moon appear at the end (A Relaxing Dance) .
Found with Seaside Kingdom Art
That’s all you can do here in Seaside Kingdom, but there is one extra moon you can acquire, which is from the art piece you saw. Deposit your moons at the Odyssey and take off for the Metro Kingdom again. Thankfully, you don’t have to move too far to get the hidden art moon, so take the spark pylon to the Main Street flag and look for the “CLEAR” and “KEEP” words just a few meters away to the north. All you have to do to get the Power Moon is ground pound above the first “E” in KEEP (Found with Seaside Kingdom Art) . Return to the Odyssey and set sail for the Luncheon Kingdom, your next destination.
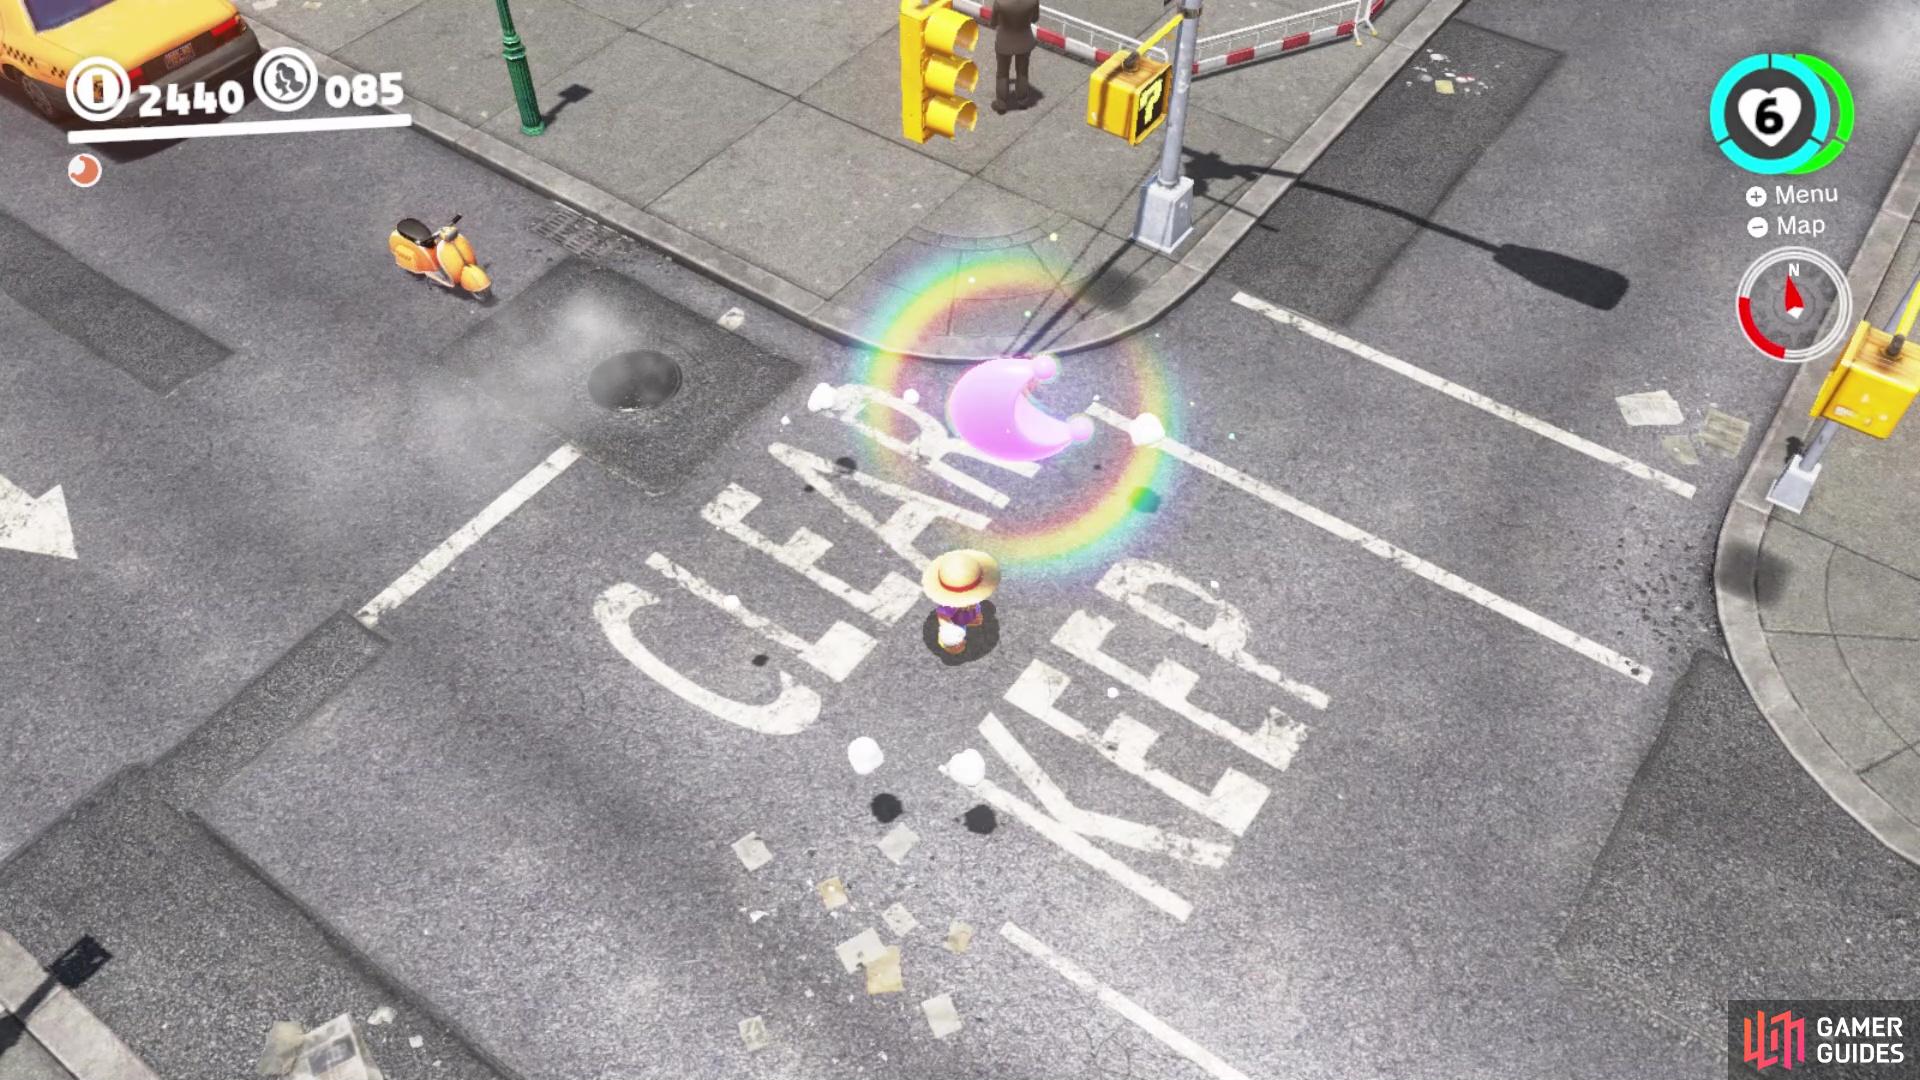
Pound the ground right above the “E”s to find the art moon
No Comments