
Alright, on your return trip to the Cap Kingdom, you should notice that things have changed a little bit, as there are now purple coins (in the shape of hats) and some other things. From where you land, go north and behind the large hill to find three purple coins (3) , then find the large puddle in the first area for three more purple coins (6) . Return to the Odyssey and head east-southeast from it to spot some ? blocks in the air above some hat-houses. To get to them, capture one of the nearby frogs and do a running jump to get onto the hats. You will then want to jump onto the blocks, get in the middle, hop up to reveal a hidden coin block and then jump from that one to get the Power Moon suspended in the air (Frog-Jumping Above the Fog) .
Get back to the mainland and capture another frog, if you released it before, as you will need its incredible jumping ability to acquire another moon. Find the double-stacked houses in the town portion and do a high jump (shake the controller) to grab the Power Moon (Frog-Jumping from the Top Deck) . That’s all you need the frog for, so say goodbye to it and touch the checkpoint flag before checking out the yellow shop for another Power Moon (Shopping in Bonneton) . You might have seen them before, but there are three purple coins on the archway leading into the Central Plaza (9) .
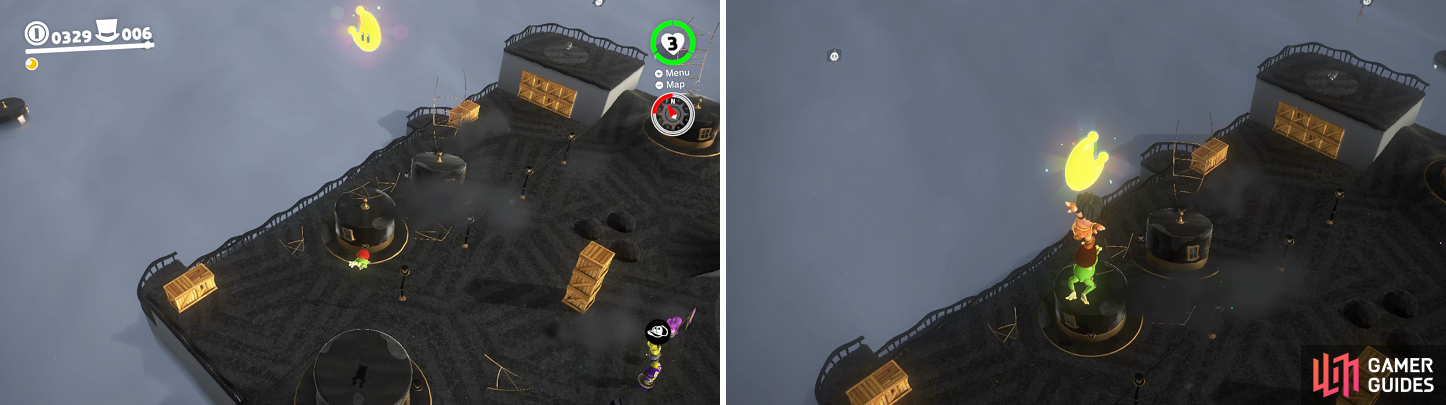
A normal jump with the frog won’t be enough to get the moon above the hat (left). Shake your controller to perform a high jump to get it (right).
One of the hills with wooden posts in front of it hides another three purple coins (12) (can use Cappy to remove them). The wall of boxes to the northwest will be concealing three more purple coins (15) . Get on top of the platform here and look over the edge to the north to spot a door below, so go ahead and enter it.
Feeling a Little Froggy
You are in an area with some frogs and what looks like a smaller Moon just ahead of you. This is a Moon Fragment and you need to collect five of them in order to form a Power Moon. So, collect the one in front of you, then capture the nearby frog. Jump up to the ledge above you, then continue climbing until you get to a square platform with another fragment. Look to the one end to spot another fragment near a thin, vertical platform, so go ahead and jump over there to grab it.
Now, this next bit might take a few tries, but you’re going to need to get on top of that very thin vertical platform with the moving one passing underneath it. Once you do, you should be able to see another ledge above you, so jump up to it and grab the Power Moon in the little alcove (Secrets of the Frog Pond) . Get back down to the platform where you collected the last fragment and turn the camera to spot another fragment in a hole in a nearby platform. The last one is just above where you entered, which will spawn the Power Moon (Searching the Frog Pond) . Before you leave, get to a high platform and look around to see four purple coins in the air above one of the platforms (19) . Once you collect those, you are free to leave.
From where you exit the frog pond, you should see some stacked coins on a ledge partially obscured by the fog. Beyond that, under the bridge, are some purple coins, but if you try to get them now, you’ll die and lose some yellow coins. You’ll be able to get them in a little bit, but it’s a good thing to know where they are located. There are also more purple coins on a hat in the middle of the fog, which will require another method of movement to get there. Note that the hat has a Paragoomba flying around it…hmm.
The Flight of the Goomba
For now, head to the entrance of the Top Hat Tower to find another scarecrow, so you know what to do. This will spawn the Power Moon on a platform just past the hills where you just came from, with the fastest way to get there is by rolling. You can do this by crouching (ZL/ZR) and then either hitting Y/X to roll; you can alternatively shake your controller to roll as well when crouching. With this technique, you should have no trouble getting to the Power Moon (Cap Kingdom Timer Challenge 1) .
It’s time to take control of the Paragoomba that is right by the Power Moon you just grabbed. The only action you can do as a Paragoomba is flying, which is done with the B button, but you can also fly faster by shaking the controller. Note that the Paragoomba can only fly so high, so if you feel like you’re not going higher, this is why. First thing you should do is drop off where you captured the Paragoomba to find a hat under the arch, with four purple coins (23) , then you can fly under to get those four other purple coins that were mentioned earlier (27) , as well as the four on the other hat you saw before (31) .
Flying Over the Poison Wave
Hopefully you have the same Goomba with you, as you need that particular one, as all of the others do not fly high enough to get to where you’re going next. Head back to the Top Hat Tower and fly to the back of it, where you’ll find a platform with a door. Head through it to find some poison water that comes in waves, another Paragoomba and some Moon Fragments. All five fragments are straight ahead and easy to get, but you’ll need to time it so you don’t hit the poison waves. The particularly tough ones involve dodging the very tall wave. Collect the Power Moon once you’ve gotten all five fragments (Skimming the Poison Tide) .
There is one more Power Moon here, but it’ll take a little more work to get to it. Underneath the platform at the end is a hole in the fence, which you can fly through with one of the Goombas (watch out for the highest tide). After flying through it, there will be another platform at the end with three purple coins (34) and one more Paragoomba. Take over this Goomba and look back from whence you came to see some ledges sticking out of the wall. Ditch the Goomba once you’re on one of the ledges, then climb your way to the top to snatch the Power Moon (Slipping Through the Poison Tide) .
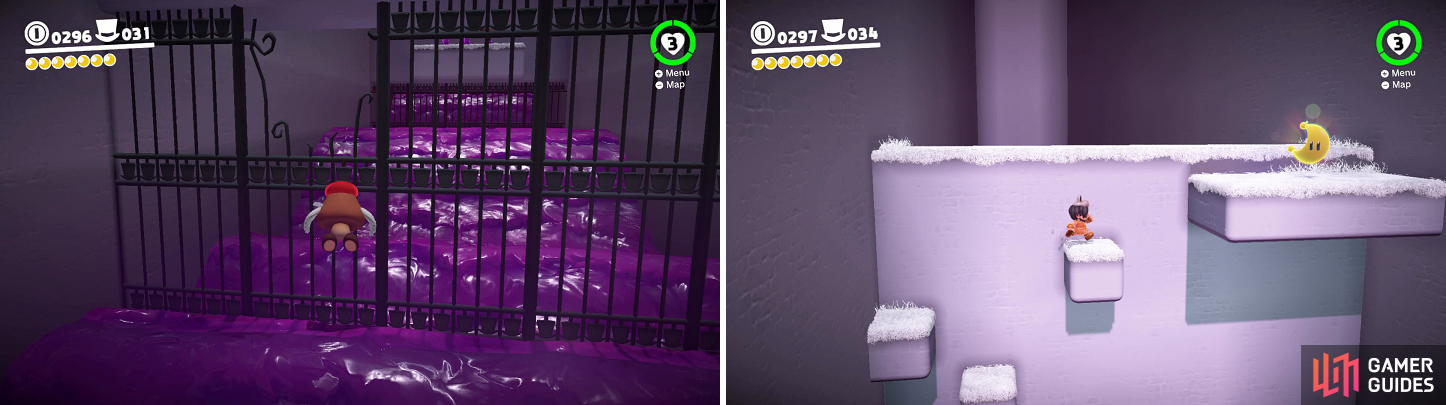
Look for the hole in the gate under the exit (left). Another Power Moon can be found on top of the exit (right).
Push-Block Peril
Get back to the main area and enter the tower. Grab one of frogs and head back to the entrance, using a high jump to get on top, where you’ll find four more purple coins (38) . Continue climbing as the frog, stopping at the last pool of water, where there should be more frogs. The lone platform here will have five purple coins in a column above it (43) . Exit at the top, then get to the very top where you fought Topper at the beginning to find Captain Toad, who will hand over another Power Moon (Good Evening, Captain Toad) .
Drop back down and go around until you spot a door, so go through it. This area is filled with blocks that go in and out of a giant wall, so you’ll need to keep a mindful eye on their patterns. To start, use the electric line to zip across the large gap and start your ascent up the push-block wall. The first few blocks are pretty easy to get by, but the ones after that are a little trickier, as if you fall, you’re going to die and will have to restart from beginning. After the gap, you’ll need to use the electric line to zip across and immediately jump up on push-blocks.
Beyond that will be another zip-line, where you can go around in “circles.” However, there will be another push-block here, in the middle, which has three purple coins. Stop in the middle at the top and when the platform is out, press ZR/ZL to drop down and quickly collect the coins (46) , then get back on the line before you fall down. Once you’ve gotten them, continue zipping up to the top, where you’ll encounter another gauntlet of push-blocks. When you get to the next yellow platform, stop and turn around to see a Power Moon hidden in the L-shaped blue block (Hidden Among the Push-Blocks) .
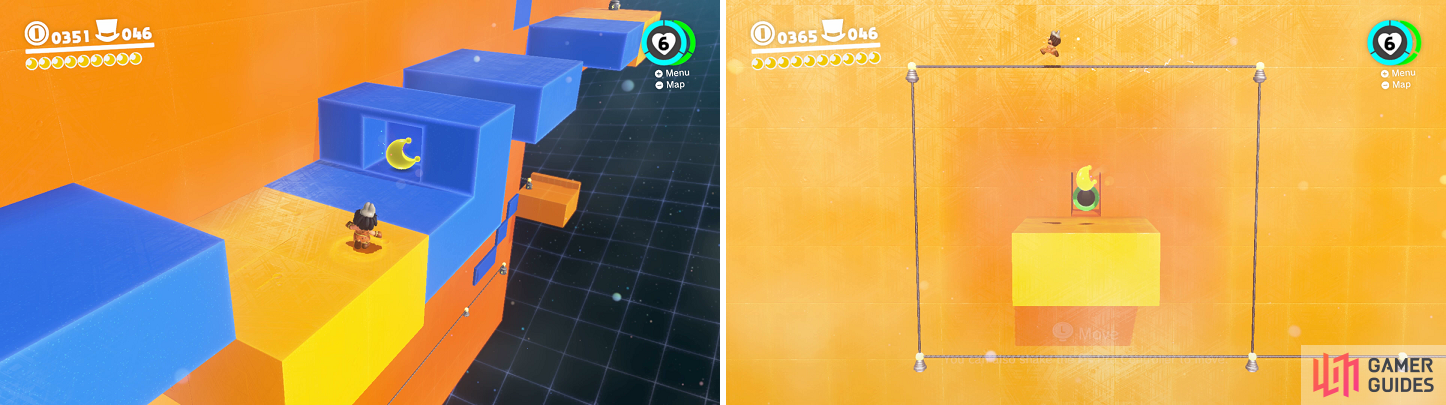
There is a moon hidden inside one of the moving blocks (left). You have to release the capture while above the moon at the end (right).
The last obstacle will be another “zip” line, where you need to move back and forth along the top and press ZL/ZR when in the middle to drop onto the platform with the Power Moon (Push-Block Peril) . Leave via the pipe and return to the main area, where you’ll want to go back to the Central Plaza. In the southwest corner is an area you can drop down to, where you will want to remove the wooden post there to find the last four purple coins (50) . Don’t forget to purchase the costume and souvenirs from the purple hat vendor before leaving. That’s all you can do here in Cap Kingdom, so board the Odyssey and blast off to the Sand Kingdom.
No Comments