
A new kingdom awaits you, which means you have more Power Moons and purple coins to collect. From where you land, look behind you and over the edge to spot an area below, with a lock and some purple coins. You won’t be able to get the key yet for the lock, but you can grab the three purple coins (3) . Use the nearby tree to get back up to the main area, where you’ll want to follow the path, making sure to look out for two more purple coins on top of a red tree not too far from the Odyssey (5) . As soon as you attempt to cross the bridge, a vulture will swoop down and take Cappy.
Note that there is a Power Moon underneath the bridge and while you can get it now (jump down and before you hit the purple goo, perform a dive in the air), it’s a little difficult and becomes much, much easier when you get your hat back. To the north are some stairs, but something seems odd about them. Notice how one side is raised and the other side isn’t, and both sides have a design on top of them. If you perform a ground pound on the side that is raised, that side will go down and other will rise.
To the east of those stairs is a lower section, with the same mysterious white cube you’ve been finding in other kingdoms and three purple coins along the wall (8) . Now, pound the one side of the stairs to get the other side to pop up, then continue to the next area, where you will meet a new enemy, the Trapeetle. While you can grab two moons right now, it’s best to get Cappy back first, as your movement options are a bit limited without him. From where you climb up, you should see some more stairs on the opposite side of this small area.
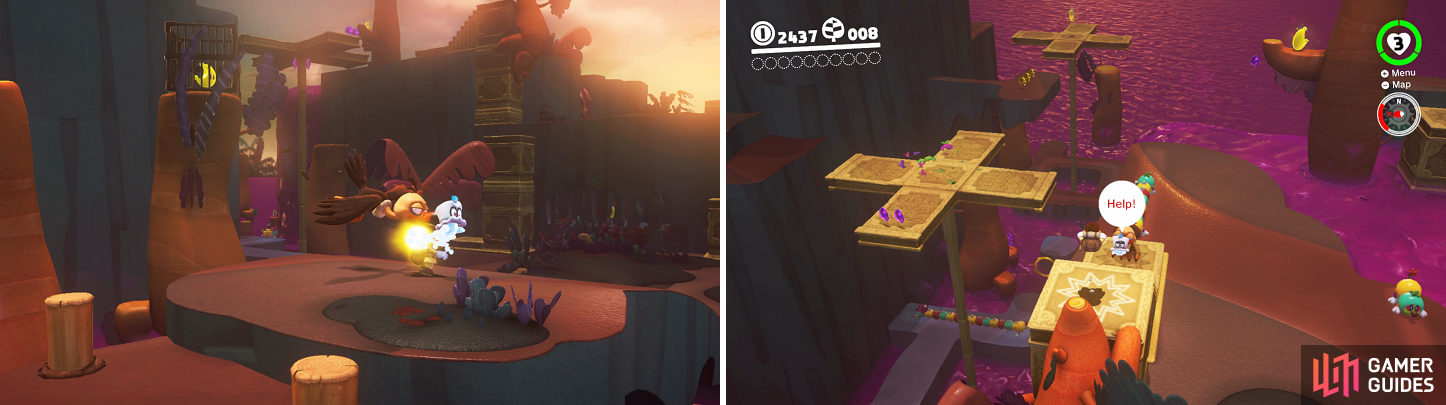
The stupid vulture will take Cappy from your head (left), but lure it to the poundable stairs to get him back (right).
Pound the stairs to reverse their positioning so you can reach the next section, where there will be some Tropical Wigglers, as well as the vulture perched on some more stairs. Time your jump past the Wigglers, then get on the stairs. Try to catch the vulture and it will move to the opposite end of the stairs, so you’ll need to do something else to make it drop Cappy. Luckily, the basic pounding of the stairs will make this easy, so make the vulture settle on the lower end of the stairs, then pound the other side. This will send the vulture plummeting into the ground and free Cappy, so rejoin with your companion, as it’s time to start plundering the Lost Kingdom.
Return to the previous area, with the Trapeetles, and start by located the tall pillar that you can ground pound, which was right by the first set of stairs in the kingdom. This will give you access to the Power Moon behind the “bars” near the beginning (Inside the Stone Cage) . Back with the Trapeetles, look for the little “waterfall” along the western edge and you should spot some purple coins in between the walls. Carefully drop down, sticking to one of the walls, to collect the three purple coins, then wall jump back to the top (11) . There is also a tree you might see over the edge, which has a Power Moon just sitting on it (Below the Cliff’s Edge) .
One of the stone blocks near the wester-n edge is glowing, but there doesn’t seem to be a way to break it open, as none of Mario’s attacks will do that. Of course, the nearby Trapeetle might prove to be useful, so toss your hat at it, then position yourself so it will hit the blocks, nabbing yourself another Power Moon (Wrecked Rock Block) . Now, the stairs leading to the checkpoint flag and Wigglers should still be up, but look behind it to find a Power Moon hidden in a small hole (Inside the Rising Stone Pillar) .
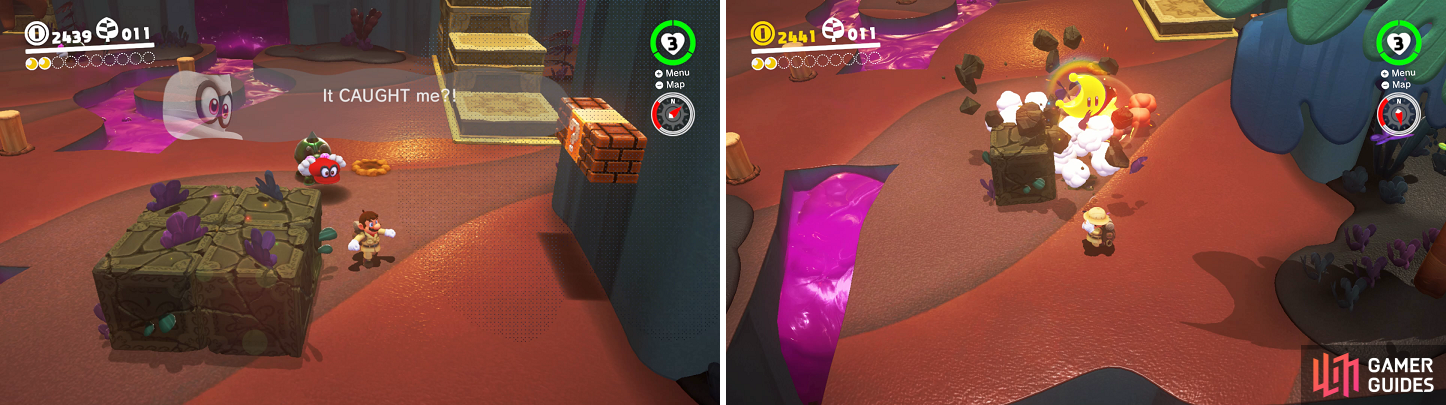
Trapeetles will catch Cappy if you throw him at them (left). Use their destructive nature to get a moon hidden in a stone block (right).
Wigglers Worries
The tree next to the Swamp Hill flag has another two purple coins at the top (13) , plus you should be able to see more floating above the deadly goo. That’s where the Wigglers will come into play, so capture one and test out its abilities. By holding down the Y button and moving with the left stick, you can stretch the Wiggler out horizontally. This will allow you to reach distant coins/moons, especially those in precarious positions. Also, if you stretch the Wiggler onto another piece of land, then when you let go, the Wiggler will move on over to that land.
Use the Wiggler to grab the four purple coins over the purple goo (17) , then navigate the thin ledge on the northern edge to find three more purple coins at the end (20) . Stretch onto the stairs and pound the middle portion to get the two sides to be higher, which will allow you to reach the Power Moon on the nearby tree’s branch (On a Tree in the Swamp) . Release the Wiggler and go to the southern end of this little area to find a spinning platform. Jump on this, collect the two purple coins (22) , then ground pound the middle of it to unearth a Power Moon (A Propeller Pillar’s Secret) .
South of this spinning platform is another Trapeetle and to your west is a moon in the open on top of another spinning platform. Near the Trapeetle, you should notice a caged Power Moon on top of a tree. To get this, return to the area with the two Trapeetles and get the southern of the two to shoot itself at the cage. It will likely take a few tries to get the angle right, so keep trying until it’s busted open. To reach the moon, just jump off the ledge with the Trapeetle that’s past the first spinning platform (The Caged Gold) .
Climbing to the Top
Return to the ledge with the lone Trapeetle and you should see that some blocks are in the way of your advancement. Use the Trapeetle to destroy them, then look over the edge to spot a tiny ledge with two purple coins near the triangular flower patten (24) . Continue along, having the Trapeetle blow up the next set of blocks, then ground pound the glowing ground to unearth a Power Moon (On the Mountain Road) . Use the gap in the nearby wall to wall jump to a large button, which when ground pounded, will create walls for you to wall jump to the top of the mountain.
The first thing you should do at the top is hit the checkpoint flag, then climb the tree to find another Power Moon (Enjoying the View of Forgotten Isle) . Enter the shop and purchase the next moon (Shopping on Forgotten Isle) , then exit and capture the Glydon. There are two things you need to use Glydon for, the first of which is an island to the south, so glide down there and grab the Power Moon (Soaring Over Forgotten Isle!) . Return to the top of the mountain and use Glydon to glide to an isolated tree to the far north, which has four purple coins sitting on top of it (28) .
Use the slingshot at the base of the tree to return to the mainland, by the Swamp Hill flag. Capture another Wiggler and stretch yourself over to the spinning platform with the visible Power Moon (Atop a Propeller Pillar) . Stretch over to the ledge with the Wiggler and nab the three purple coins there (31) , then from the edge there, you can stretch around the corner to find three more purple coins in a hole in the wall (34) .
Moon Shards in the Jungle
Warp back to Swamp Hill and drop back down to the bridge, as it’s time to venture on the other path down here. You’re looking for the path with the grayish-blue land, with the spinning platforms above you. Jump on the first piece of land and climb the spinning platform’s pole to grab four purple coins (38) , then continue to the first Wiggler. Capture it and use its ability to stretch onto the nearby tree’s root for two more purple coins (40) . Keep going and climb the second pole for two more purple coins (42) , then you’ll come to a “fork” in the road.
North of you are some moving platforms, a checkpoint flag, and an 8-bit mural, while south will lead to a series of platforms with Moon Shards. Head north for now, touching the flag, then go through the nearby door to find the pipe leading to the 8-bit mural. Jump and ride your way across, avoiding the Fuzzies, to grab a Power Moon at the end (Avoiding Fuzzies Inside the Wall) ; don’t forget to get the three purple coins above the coin block (45) . Exit the mural and use the moving platforms here to reach the Power Moon at the far end (Over the Fuzzies, Above the Swamp) .
Double back to the fork and capture a Wiggler, as you’ll be needing it to get the shards. The first one is right in front of you and the second is being circled by some Fuzzies. For the third one, look at the tree embedded in the goo waterfall and you will see a hole near the bottom; stretch the Wiggler to go inside and retrieve the shard. The fourth will be on a round platform with another Wiggler and the final shard is found on a root of a tree in the corner of the swamp. The moon will spawn by the fork, but don’t hurry back just yet.
Instead, go east, past the two Fuzzies and onto the lone little stump by the tree. Move your camera enough and you should be able to see a hole in the nearby wall. Use the Wiggler to get inside the hole to discover a small camp, with who else but Captain Toad. Speak to him to get a Power Moon (Get Some Rest, Captain Toad) , then return to the fork and nab the other Power Moon (Moon Shards in the Jungle) .
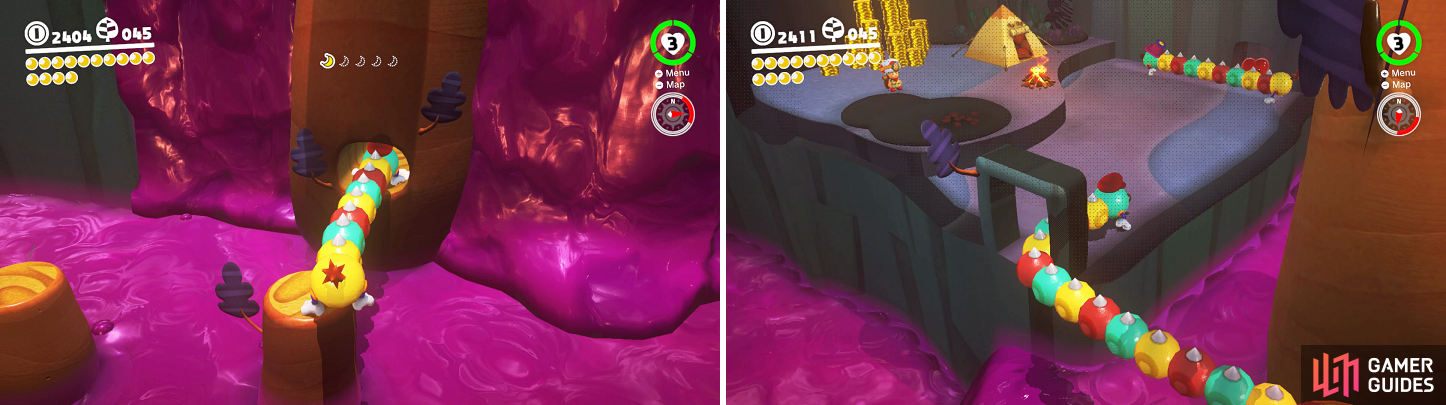
There is a Moon Shard hidden inside a tree (left). You’ll need a Wiggler to reach the hidden area with Captain Toad (right).
Cleaning Up in the Jungle
Warp back to the summit and peer over the northern edge, where you’ll be looking for an area below with a blue Toad walking about. Drop down here and look for the thin ledge that has a butterfly sitting at the end. Approach very carefully, just before the halfway point, and toss your hat at the butterfly, which should drop a Power Moon (A Butterfly’s Treasure) . Continue west on this ledge and enter the cave to find four rows of buds. Bloom all four rows without any of them retreating back into the ground for another Power Moon (Cave Gardening) .
At the southern end of this ledge, opposite to where you can find Talkatoo, there is a small brick on the wall. Break it with your hat, then crawl through the opening to find three purple coins (48) . Return to the blue Toad and drop down to the platform in between the two spinning ones. From here, it’s possible to perform a long jump to the tree branch sticking out of the goo to the north and grab the final two purple coins (50) . Feel free to return to the top and purchase the goodies from the purple coin shop at this point.
There are two more moons you can nab at this point, both of which you should remember. You’ll need the Wiggler for both, so grab the closest one to your ship. The first moon is located underneath the bridge and you can use the trees’ roots to get close enough to stretch for it (Peeking Out from Under the Bridge) . The second is located in the little drop-off area where you collected the first purple coins. Use the Wiggler to the collect the key, then get the Power Moon that appears behind you (Twist ‘n’ Turn-Up Treasure) . That’s all you can do here for now, so repair the Odyssey with your moons and you’ll automatically set sail for the Metro Kingdom, your original destination before Bowser’s forced detour.
Hopping in the Jungle
As soon as you land, get back in the Odyssey and return to the Lost Kingdom, as there is another moon that is available now that your ship has been repaired. Make your way back to the first spinning platform, where you’ll find one of those lovely rabbits occupying it now. It will just continually hop from each end of the spinning platform, so you’ll need to slow it down a tad by hitting it with your hat. A homing throw will work best and once you do this, try to time your run-in with it to make the rabbit cough up the Power Moon (Caught Hopping in the Jungle!) .
No Comments