Local Enemy Bestiary
| Enemy Name | Notes |
|---|---|
| Chocobo | None |
| Coeurl | None |
| Coyote | None |
| Flan Azul | Weakness to Lightning |
| Iron Giant | None |
| Purpurea | Weakness to Fire |
| Sahagin | Weakness to Lightning |
| Sallet | None |
Welcome to Besaid : After landing in Besaid Village, there will be a scene. Afterwards, head into the shop to the west. Buy stuff there if you want, then ask her about having any “rare finds”. She will offer something for 900,000 Gil, the Besaid Key . This will unlock a chest in the monks’ chamber in the temple, which contains a Search Sphere . If you can’t afford it, or don’t want to buy it right now, it can be offered for free via a sidequest in the Calm Lands in Chapter 3. And why would you do this? You can simply make your life a bit easier. It doesn’t really matter, though - the guide will get you through this.
When you’re done, if you ever started, go into the middle of the huts to the east, inside which you’ll find Lulu. Tell her “Yes, I’d love to” and there will be another scene. Upon awakening, leave the hut and speak with Lulu and decide to go and find Wakka.
Cipher Set #1 : Get some paper, by the way, to write down the ciphers as you find them. There are four numbers in all, and we’ll be finding them in the order we come along them, not necessarily in the order you use them. They’re randomized from playthrough to playthrough as well, just so you know.
Leave Besaid and go along the path to the Promontory. There, look at the red shape on the minimap and press X near it to find the first cipher. Continue along to the ruins-filled area and climb up the pillar on the right; there, press X and you should find the fourth of the ciphers. Return to ground level and go north to the Waterfall Way area; as you cross the bridge, go left and fall down to find two Chocobo Wings . Get back up and go further along to the Crossroads area; you’ll find the sealed door here, but you don’t have the remaining two ciphers yet.
Continue south to the Beach and go west immediately upon entering, then climb the ledges to find a person on the cliff. The red emblem on the minimap marks the cipher. Also continue along the path and jump around to get a Hi-Potion and 1,000 Gil . Return to ground level and go to the west side of the beach. Use the minimap to find the remaining cipher around there.
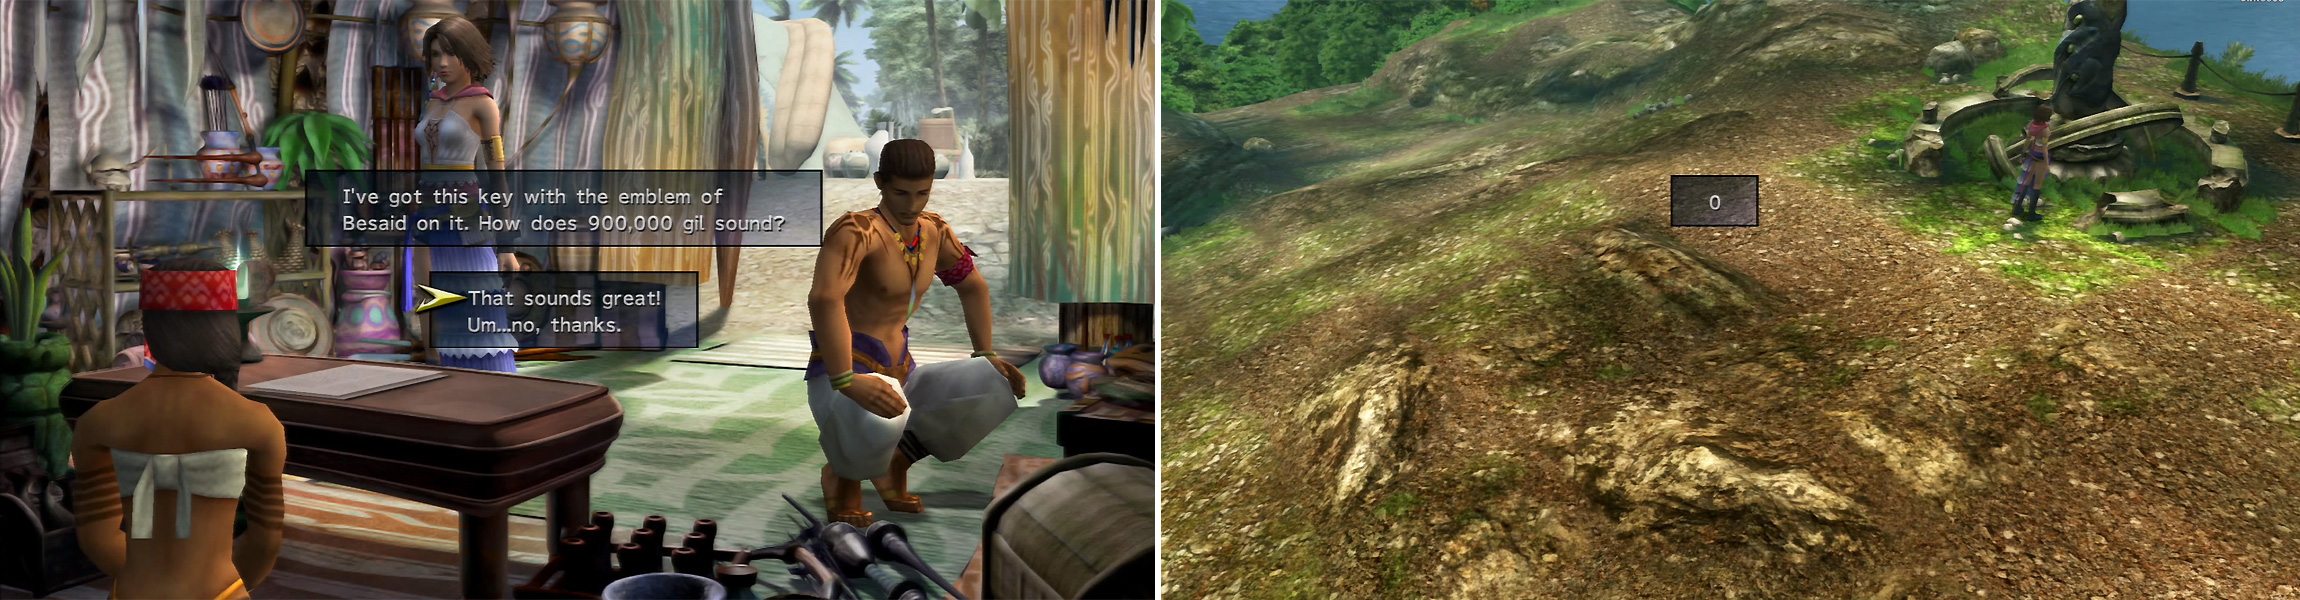
Buying the Besaid Key (left) isn’t worth it and it’s unlikely you have the money anyway. You can get it later on. The Ciphers (right) can be found by a red mark on your minimap.
Cipher Set #2: Upon leaving the main temple in Besaid, go to the southeast and examine the blue orb. You can use the blue orb and the ejected blue bar to find four special spheres around Besaid; it’s essentially a dowsing rod that will pulsate the closer you are to the special sphere you need.
The first is between the two western buildings. You’ll need to press X to dig it up, then use the sphere and direct it to the roof of the temple. Write down the number on the green ball you see.
Next, head to the village slope outside Besaid. South of the Save Sphere, you’ll be able to get the sphere you need. Direct it to the top-left of the screen and you will see the second number you need.
For the third sphere, go down to Waterfall Way and, at the first bridge, go southwest, counting the poles you pass on your right. At the twelfth, you can start digging to find the sphere. Direct the view just below the east waterfall to find the green ball with the third cipher.
For the final number, go to the Valley area and head northeast as far as you can to find the sphere. Direct its view a bit to the right. See that palm tree in the distance? Zoom in on it three times and you can spot the green ball; write down the number.
Enter the Cave : Now that you have both sets of ciphers, head to the crossroads off the beach and use the first cipher to enter the cave. There, go north at the intersection to find two Potions , and left at the intersection and examine the switch. Put in the next set of ciphers to get an Ether . Continue along to the end to find yourself above the waterfalls: go to the far west to find the Raging Giant Garment Grid . Backtrack to the first intersection of the cave and head east and along the path to another intersection; go north there and jump over the gaps. Approach the Save Sphere and use it, then approach the nearby sphere and – oh.
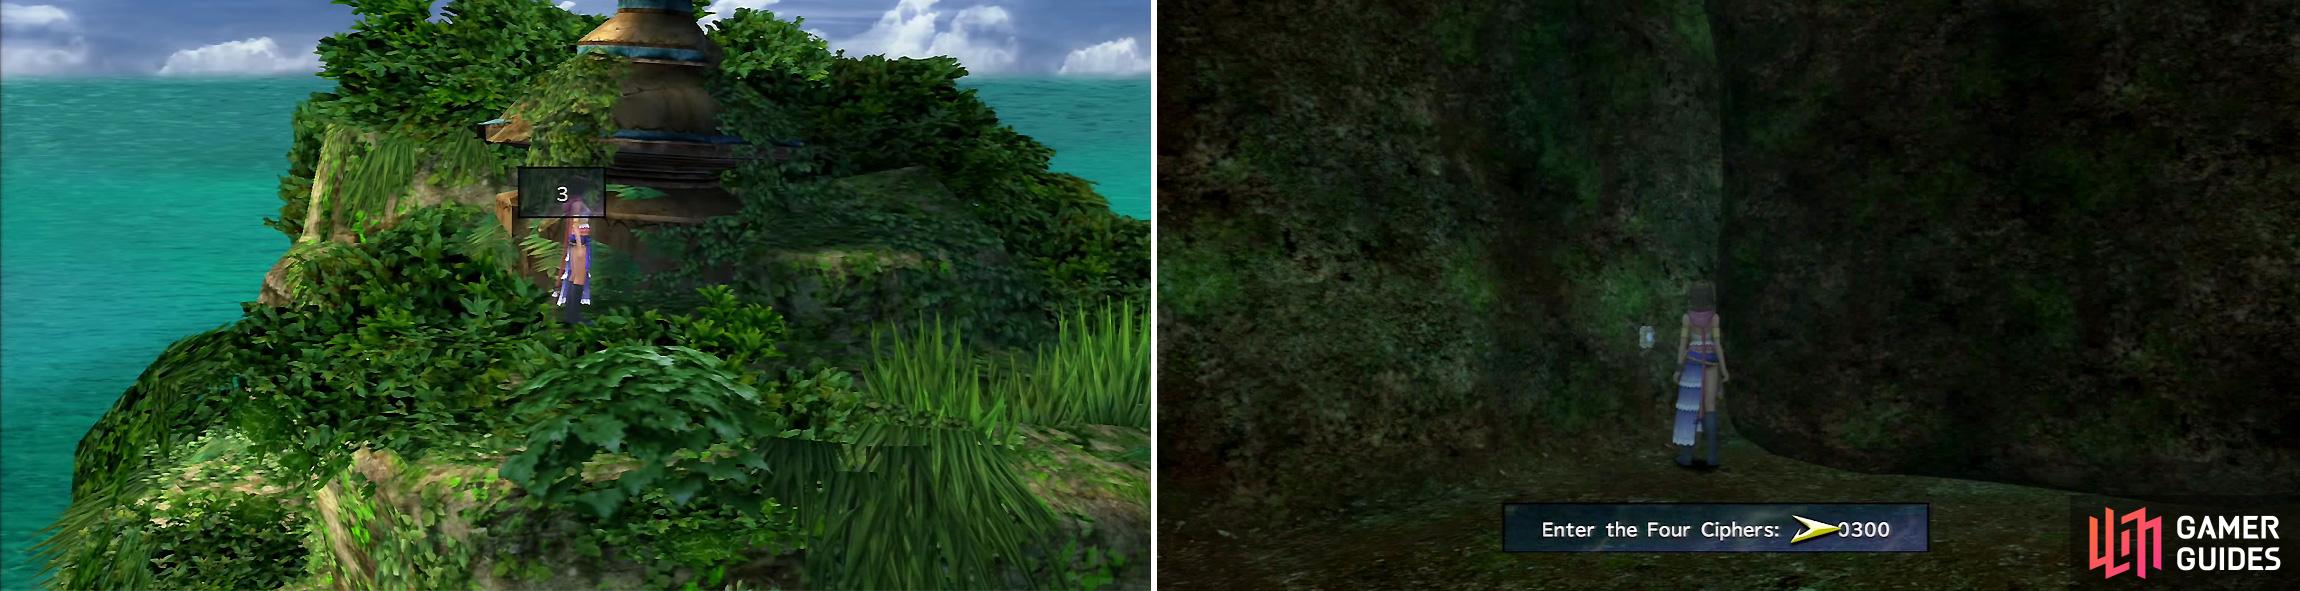
You can find two Ciphers in the beach area (left). The input for the second set is inside the cave (right).
BOSS - Flame Dragon
| Boris | Details |
|---|---|
| Max HP / Max MP | 980, 1883 (Oversoul) / 84 |
| Elem. Weak / Resis / Immunity / Absorb | Ice / Fire / Gravity / None |
| EXP / GIL / AP | 60, 180 (Oversoul) / 300, 350 (Oversoul) / 1, 2 (Oversoul) |
| Common Steals / Rare Steals | Hi-Potion, 4 Hi-Potions (Oversoul) / 2 Hi-Potions |
| Common Item Drops / Rare Item Drops | 1 Red Ring / None |
The Flame Dragon ought to look very familiar to those of you who played FFX HD first. Sanctuary Keeper fell quite a way it seems. In any case, he’s still nothing to snigger at. If you’re fighting the regular form, you’ll see the Flame Dragon either use a basic attack or Flame Breath . Flame Breath will actually be its first move, hitting for 150-200 damage. If you bought some of the Fire-resistant accessories in Bikanel, you’ll halve that. The basic attack isn’t much, usually 40-60 damage.
Now, if you’re fighting the Flame Dragon’s Oversoul… Ouch. The only attack you’ll really see is Bruiser Tail , which will hit two or three of your character’s physically and delay their next turn. The damage is set at exactly 37.5% of their maximum HP, so three hits will kill you. Since it takes a turn to charge up, it’s closer to the boss needing six turns to kill you.
If you’re fighting the regular form, you won’t see Flame Breath, really, outside of the start and the end of the battle. Other than that, all we saw was the basic Attack, which targets the girl with the highest HP. There’s a bit of a way to abuse that; Sentinel ! Sentinel will help a ton by reducing damage even further from the attack, making it nearly ineffective, giving your other two characters time to attack. Note that this is a Warrior skill.
In any case, the main offense for either form is ideally one situated around the use of the Blizzard spell so you can abuse its Ice weakness. You’ll also want a Warrior to open by using Power and Magic Break against the beast to halve its offense, and perhaps Armor/Mental Break to halve its defense for whatever purposes you’ll be using them for. Having someone also inflict Darkness (Darkness Dance) can really help lessen the damage you’ll sustain from that Attack as well, and can make the Bruiser Tail in the Oversoul battle likely to miss.
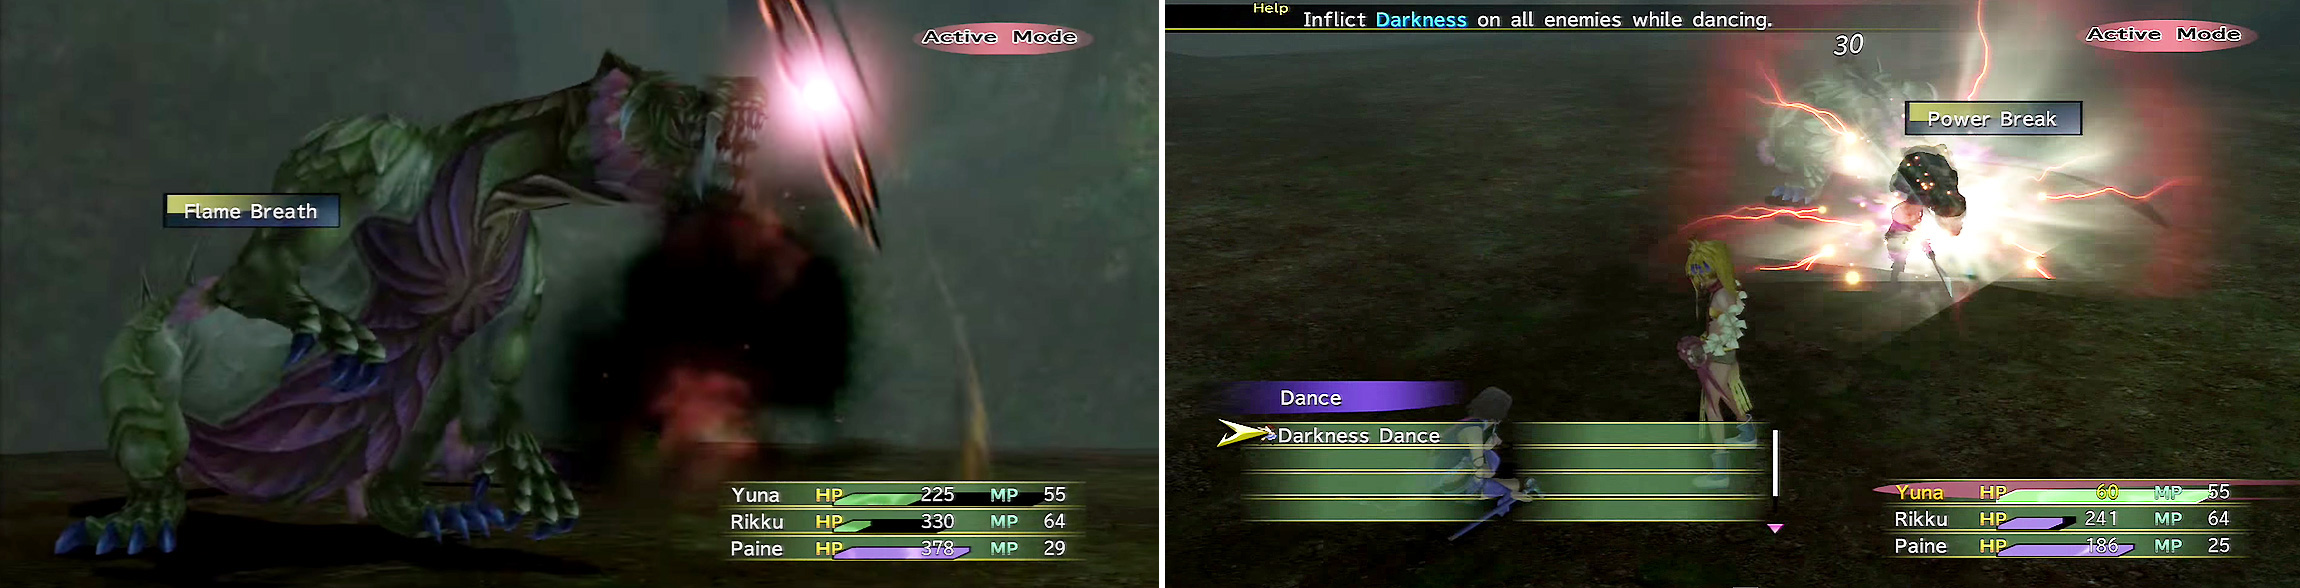
Flame Breath (left) is quite powerful so if you have Fire resistance, use it now. Power Break and Darkness Dance (right) are great ideas for this battle.
That’s about it - cripple it, abuse its weaknesses, and heal as needed.
After the fight, you’ll gain the White Mage Dressphere ! Return to the cave entrance and speak with Wakka for a scene, in which you’ll get a Besaid Sphere and the Protection Halo Garment Grid .
No Comments