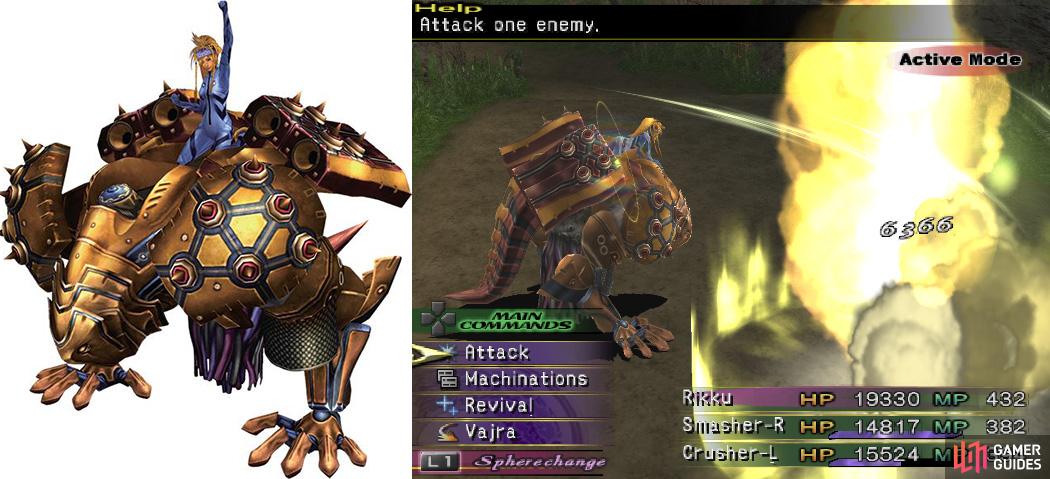
General Description: Rikku’s machina-themed Garment Grid is one that mostly relies on the crippling of enemies and their offenses. Many of Rikku’s skills here will mostly be damaging with a statusing side-effect, though a few deviate from that rule; even so, most of those attacks are physical and, with 201 Strength by Level 99, that’s pretty strong (201 being approx 80% of the max of 255). The little things allying Rikku mostly serve the same purpose as she does, but they can also play a statistically-crippling role and one of a support. It’s a pretty decent Dressphere, but it kind of falls short in physically-bulky enemies and those immune to most ailments.
*Obtained:* See **Chapter 2 - Bikanel** .
- *For Whom?:* Rikku
- **Abilities Learned - Rikku:**
**Death Missile - Auto - 12 MP Cost:** Damages and KOs the target. (Damage only occurs if the target isn't KO'ed.)
- **Bio Missile - Auto - 12 MP Cost:** Damages and Poisons the target.
- **Break Missile - Auto - 12 MP Cost:** Damages and Petrifies the target.
- **Berserk Missile - 10 AP - 12 MP Cost:** Damages and Berserks the target.
**Stop Missile - 10 AP - 12 MP Cost:** Damages and Stops the target.
**Confuse Missile - 10 AP - 12 MP Cost:** Damages and Confuses the target.
- **Shockwave - 20 AP - 36 MP Cost:** Heavily damages all enemies.
**Shockstorm - 20 AP - 36 MP Cost:** Heavily damages and Delays all enemies.
**Vajra - 30 AP - 0 MP Cost:** Severely damages all enemies with unblockable damage.
- **Revival - 10 AP - 0 MP Cost:** Revives one of the allying parts with half of their maximum HP.
- **Double HP - 20 AP - 0 MP Cost:** Doubles the user's HP, up to 9,999 (5,000 base HP) without Break HP Limit.
**Triple HP - 30 AP - 0 MP Cost:** Triples the wielder's HP, up to 9,999 (3,333 base HP) without Break HP Limit.
- **Break HP Limit - 20 AP - 0 MP Cost:** *(Must have Aurora Rain key item!)* Allows you to have more than 9,999 HP, up to 99,999.
- **Break Damage Limit - 20 AP - 0 MP Cost:** *(Must have Twilight Rain key item!)* Allows you todeal more than 9,999 damage/healing per action, up to 99,999.
- **Abilities Learned - Left Part:**
**HP Repair - Auto - 0 MP Cost:** Restores 1/4 of the target's max HP.
- **MP Repair - Auto - 0 MP Cost:** Restores 1/4 of the target's max MP.
- **Homing Ray - Auto - 0 MP Cost:** Hits one target physically.
- **Howitzer - Auto - 0 MP Cost:** Damages the target.
- **Blind Shell - 10 AP - 12 MP Cost:** Damages and Blinds the target.
**Silence Shell - 10 AP - 12 MP Cost:** Damages and Silences the target.
**Anti-Magic Shell - 10 AP - 12 MP Cost:** Damages the target and lowers their Magic by three levels (-1/4).
**Anti-Mental Shell - 10 AP - 12 MP Cost:** Damages the target and lowers their Magic Defense by three levels (-1/4).
- **Booster - 20 AP - 30 MP Cost:** Applies Haste to the party.
- **Offense - 20 AP - 10 MP Cost:** Boosts the target's Strength by 3 levels (+1/4).
**Defense - 20 AP - 10 MP Cost:** Boosts the target's Defense by 3 levels (+1/4).
- **Double HP - 20 AP - 0 MP Cost:** Doubles the user's HP, up to 9,999 (5,000 base HP) without Break HP Limit.
**Triple HP - 30 AP - 0 MP Cost:** Triples the wielder's HP, up to 9,999 (3,333 base HP) without Break HP Limit.
- **Break HP Limit - 20 AP - 0 MP Cost:** *(Must have Aurora Rain key item!)* Allows you to have more than 9,999 HP, up to 99,999.
- **Break Damage Limit - 20 AP - 0 MP Cost:** *(Must have Twilight Rain key item!)* Allows you to deal more than 9,999 damage/healing per action, up to 99,999.
- **Abilities Learned - Right Part:**
**HP Repair - Auto - 0 MP Cost:** Restores 1/4 of the target's max HP.
- **MP Repair - Auto - 0 MP Cost:** Restores 1/4 of the target's max MP.
- **Homing Ray - Auto - 0 MP Cost:** Hits one target physically.
- **Howitzer - Auto - 0 MP Cost:** Damages the target.
- **Scan - 10 AP - 0 MP Cost:** Views the target's stats and such.
- **Sleep Shell - 10 AP - 12 MP Cost:** Damages the target and puts them to Sleep.
**Slow Shell - 10 AP - 12 MP Cost:** Damages and Slows the target.
**Anti-Power Shell - 10 AP - 12 MP Cost:** Damages the target and lowers their Strength by three levels (-1/4).
**Anti-Armor Shell - 10 AP - 12 MP Cost:** Damages the target and lowers their Defense by three levels (-1/4).
- **Shellter - 20 AP - 10 MP Cost:** Puts Shell on the party.
**Protector - 20 AP - 10 MP Cost** **:** Puts Protect on the party.
- **Double HP - 20 AP - 0 MP Cost:** Doubles the user's HP, up to 9,999 (5,000 base HP) without Break HP Limit.
**Triple HP - 30 AP - 0 MP Cost:** Triples the wielder's HP, up to 9,999 (3,333 base HP) without Break HP Limit.
- **Break HP Limit - 20 AP - 0 MP Cost:** *(Must have Aurora Rain key item!)* Allows you to have more than 9,999 HP, up to 99,999.
- **Break Damage Limit - 20 AP - 0 MP Cost:** *(Must have Twilight Rain key item!)* Allows you to deal more than 9,999 damage/healing per action, up to 99,999.
No Comments