Speak with Boddly when you’re ready and she will tell you your first task. She wants a specific rose, but it grows on a cliff and you won’t be able to reach it under normal circumstances. Boddly mentions that the Bridge spell will help you, then points you in the direction of someone named Li Li.
Li Li, the Troubled Genius
Not too far northwest of the library, you will find Li Li standing on a bridge. Disillusioned with all of the recent events in Goldpaw, Li Li wishes for a change of scenery, which is why Boddly sent Evan her way. She will gladly come with you to Evermore, but she wants to test you a little bit to be on the safe side. The simple task set out for you is to defeat three Skeleplasms. Lucky for you, Skeleplasms are fairly common enemies in the region outside of Goldpaw, so you simply need to get into fights right outside of the city until you strike down the required number. Return to Li Li to report your deed to not only recruit her to your kingdom, but also finish a sidequest.
| Objective | Reward |
|---|---|
| Defeated three Skeleplasms for Li Li | 650 Exp, 320G, Strong Sixth Censer (x2), Li Li as Citizen |
Unfortunately, Li Li won’t be able to teach you the Bridge spell right then and there, so you’ll need to return to Evermore. When you get there, assign Li Li to the Spellworks, then look for the Bridge research. Start this up and it shouldn’t take more than a minute to actually finish it. Now, if you remember when you were on your way to Goldpaw, you came across a path that wasn’t there, despite it showing up on your map. That is where you’ll need to use the Bridge spell (it was right past a Manticore), so get moving to that spot.
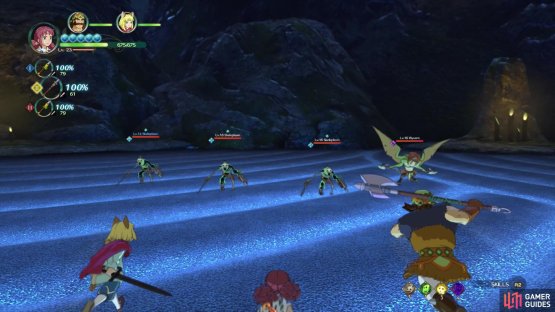
(1 of 2) It shouldn’t be hard to find Skeleplasms outside of Goldpaw
It shouldn’t be hard to find Skeleplasms outside of Goldpaw (left), You have to research the Bridge spell in Evermore before you can use it (right)
When you finally get there, you’ll be able to interact at the edge and will cast Bridge to make the path reappear. Cross the bridge to find a battle standard, which is level 16, so you won’t be doing that right now. Just past that will be a chest, which contains a Hig-Piggy Longsword and just beyond that will be the Red Red Rose that Boddly wanted. Fast travel back to Goldpaw and hand over the rose to Boddly, who is happy and will set you on your second task, to retrieve an incineraptor’s horn. She will also hand over a secret supplement, saying you will need it for something, but she’s not sure.
Incineraptor’s Horn
As Batu pointed out already, you will find the incineraptor in Cloudcoil Canyon, so fast travel to Sidewinder Gorge, which is near the beginning of the dungeon. Make your way to the first prop-clover in the dungeon, where you’ll find the higher level enemies from your first visit. Well, you’re around their level now, so you don’t have to run away this time. Ignore the story marker and continue to the end, where you’ll find a chest with a Breezy Ring in it. Backtrack to the marker to view a short scene, where Evan will find a dead prop-leafed clover.
Thankfully, Boddly’s secret supplement seems to restore, so you can use it and the others to reach the top of the cliff. Before you go and confront the Incineraptor, though, you can drop down to a small ledge with a chest (Burnguard Pendant). Feel free to equip this (think it’s safe to say something called the Incineraptor will use fire attacks), and adjust your Tactics Tweaker to reptilian foes, then enter the large area for a boss.
BOSS - Incineraptor
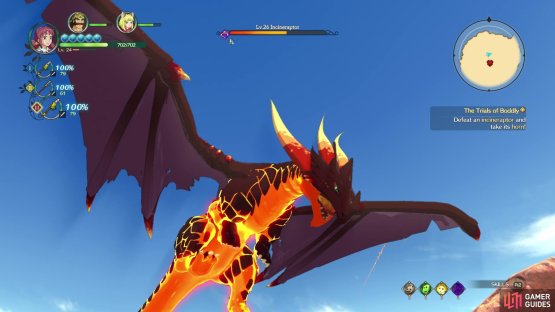
The boss isn’t too bad, but it does have quite a bit of health. You will likely see it charge you at the beginning of the battle, but its attacks don’t end there. The boss can also breathe fire right in front of it, in a sweeping motion, but its range is fairly limited. You will want to be careful when behind it, as it can move its tail back and forth. At one point during the battle, at probably 60% health or lower, the Incineraptor will fly into the air, roar, then begin dropping fiery boulders onto the ground, which explode a bit.
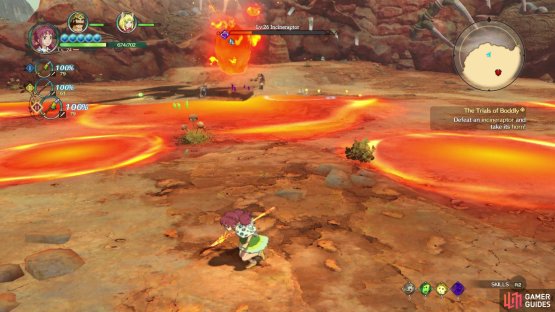
Fortunately, the locations at which the boulders hit the ground are marked, so it shouldn’t be too hard to dodge them; just make sure you are far enough from the blast radius. There’s really not much more to this fight, as you’ll want to stick to the boss’ sides and hopefully you have some water-imbued weapons to deal extra damage. It also helps to set your Monster Affinities to reptilian in the Tactics Tweaker. Eventually, the boss will fall and you will receive your Incineraptor’s Horn.
(1 of 2) When the boss flies into the air, it’ll drop exploding rocks on you
When the boss flies into the air, it’ll drop exploding rocks on you (left), but they are marked on the ground, so they should be easy to avoid (right)
Before return to Boddly, have a look around the area where you fought the boss to find a higgledy stone and a chest (Songbook No. 13). You don’t have the item for the higgledy and the Songbook item is something for later. Teleport back to Goldpaw and hand over the horn to Boddly, who will set you on your third, and final, task. For this one, she needs an army, but yours is a little too small. Thankfully, she knows just the right person, a dogfolk named Gao Jia, who happens to like visiting the casino.
Gao Jia, the Sullen Soldier
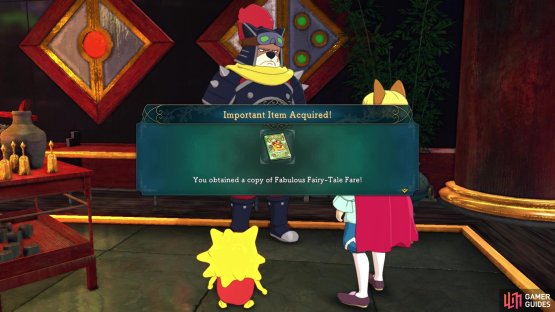
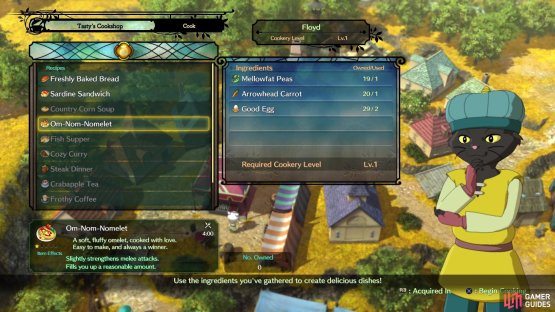
Head on over there to find him sitting down, but it seems he isn’t in the mood to listen to you. However, his stomach growls and once the promise of food is made, he will hand over a copy of Fabulous Fairy-Tale Fare. The recipe he wants, which is an om-nom-nomelet, is in the book, but no one in Goldpaw is able to make it. Well, you have a chef at Evermore, so return to it and if you haven’t built Tasty’s Cookshop, do that now. Once you do that, assign Floyd to it and speak with him in person.
With the book above, he will learn a bunch of new recipes, one of which is the required one. You will need Mellowfat Peas, an Arrowhead Carrot and two Good Eggs to cook it, all of which are sold in the Everyday General Store, should you not have the correct amount. When you do, cook up the Om-Nom-Nomelet and return to Gao Jia in Goldpaw. Serve him the dish and he will be more than happy to advise your army, although you are lacking in some manpower. He says that both Bai Gon and Min Ti will help you, as long as you mention his name.
| Objective | Reward |
|---|---|
| Satiated Gao Jia’s hunger | 550 Exp, 540G, All-Be-Gone, Gao Jia as Citizen |
(1 of 2) Gao Jia hands over a book
Gao Jia hands over a book (left), which will be used to unlock the recipe he wants you to make (right)
Bai Gon, the Grizzled Veteran
Bai Gon is found to the north, just before Fortune Square, and upon talking with him, he will join you but has one condition. He wants you to defeat three grimchilla bangers, which you’ve fought plenty of at this point in the game. Exit the town and you shouldn’t have any trouble at all searching for them on the world map. Once you’ve defeated the three bangers, return to Bai Gon and not only will he join your kingdom, but you will gain a new unit for your skirmishes.
| Objective | Reward |
|---|---|
| Defeated three Grimchilla Bangers for Bai Gon | 720 Exp, 330G, Venom-Be-Gone (x2), Bai Gon as Citizen |
Min Ti, the Sharpshooter
Min Ti can be found to the west of the inn and like Bai Gon, her task for you is just as simple, or even simpler. All she requires of you is to deliver a sleep-be-gone to her. This is an item that you can buy from any general store, so if you don’t happen to have one, visit the item shop in town to purchase one. Deliver it to her to not only have her join your kingdom, but also gain the fourth unit necessary to continue with the main story.
| Objective | Reward |
|---|---|
| Delivered a sleep-be-gone to Min Ti | 500 Exp, 360G, Grass-Green Thread (x5), Min Ti as Citizen |
Upon recruiting both Bai Gon and Min Ti, you can return to Boddly to get started on the next story bit, but there are a few things to do before that. You should have gotten a new Leafbook posting upon finishing both sidequests, which is titled “Ones to Watch: Fai Do.” Go ahead and read that, which will put a new sidequest on your map, 012 Fai Do, the Downbeat Armorer.
If you glanced the rewards for Min Ti’s sidequest, then you saw that the item you received was a Grass-Green Thread. Recall that Pi Chi needed one of these for her sidequest and what luck that she is found literally right next to Fai Do. Hand one over to her and you will have completed another sidequest.
| Objective | Reward |
|---|---|
| Delivered the Green-Grass Thread to Pi Chi | 450 Exp, 350G, Glowproof Spring Mantle, Pi Chi as Citizen |
(1 of 2) Finishing Min Ti’s quest will reward you with Grass-Green Thread
Finishing Min Ti’s quest will reward you with Grass-Green Thread (left), which can be used to finish Pi Chi’s quest (right)
That’s pretty much all of the optional content out of the way, although you are free to mess around with your kingdom at this point. You always want some kind of research going on, especially the armor and weapons one for the Outfitters and Weapon Workshop, since you can make some nice equipment with those (better than your current equipment). It also gives you an excuse to return to Evermore and empty your stores and coffers, since they fill up around once an hour or so.
Return to Goldpaw, when ready, and speak with Boddly about the bandits she wants you to beat up. They are located in the Sunrise Shore area, which is located to the southeast of Goldpaw, so travel to the Calmlands trip door and cross the bridge to your south. As soon as you do, the standard will be to your west, so get ready for another skirmish.
Steal Back the Starlight Stone
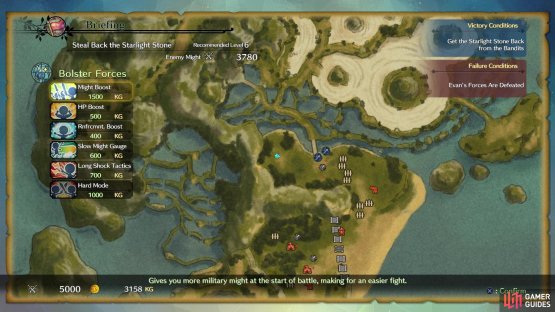
This skirmish is level 6, which is what Bai Gon and Min Ti joined at, so you should be fine. Whenever you start this, you might receive a new tutorial about a new option on the briefing screen, Bolster Forces. Since your kingdom has grown enough, you can use Kingsguilders to give your forces some bonuses, like more might or more HP. There is also an option to retry skirmishes in hard mode, where you’ll face tougher enemies, but you’ll get better rewards.
| Bolster | Cost | Description |
|---|---|---|
| Might Boost | 1500KG | More military might at the start of battle |
| HP Boost | 500KG | Makes your units able to take a good deal more punishment |
| Reinforcement Boost | 400KG | Reinforcements arrive more quickly when you call for them |
| Slow Might Gauge | 600KG | Might Gauge depletes more slowly |
| Long Shock Tactics | 700KG | Shock tactics lasts much longer |
| Hard Mode | 1000KG | Gives enemy more military might |
Start the skirmish and you’ll see another tutorial, this one about independent units, like Min Ti. Her special tactic lets her act independently of your main forces, and they’ll rejoin your main army after some time passes. The first two enemy units you will face are spear ones, so put Bai Gon in the front to deal with them. Beyond the first set of fences will be a cannon, which will continually fire on you, but its shots will show a red circle on the ground so you will be able to avoid them.
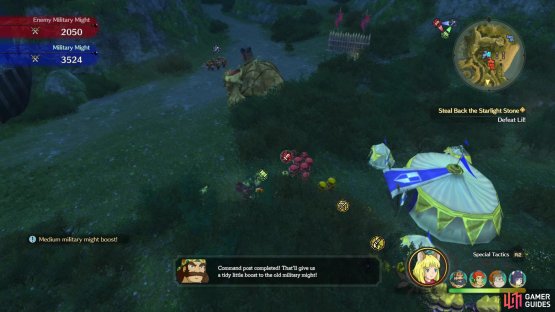
More units will appear near the cannon, so try your best to avoid its fire while you take care of them, then go after the cannon itself. When it has been destroyed, you will witness another short tutorial about rebuilding enemy installations to use for yourself. Of course, this costs some of your military might, but it might be worth it in the end. Note that the camps will provide a small boost to your military might over time, so those are definitely worth rebuilding.
(1 of 2) Bolstering Forces will help make some difficult skirmishes a bit easier
Bolstering Forces will help make some difficult skirmishes a bit easier (left), You will want to rebuild camps for the military might over time (right)
Keep Bai Gon in the front, as you will continue facing enemy spear units. Destroy the next set of units, as well as the archer tower, then pass through the gate to face more. There will be another cannon next to the camps, so get that before it can do any damage, then take out the tents to rebuild them for yourself. One last unit will spawn to the south, but as you approach it, two giant robots will show up. These are sword units, so you want to be careful and rotate Bai Gon out of the front to avoid him getting smashed. Don’t forget to use special tactics, shock tactics and your might gauge to take them out. Once the final unit is defeated, you will retrieve the Starlight Stone and finish the skirmish.
Return to Goldpaw and there will be a new sidequest available close to the library, 014 Tabbias, the Trusting Traveler. Note that finishing that sidequest will reward you with a fifth unit for your skirmishes. When you’re ready to continue, hand over the stone to Boddly and she will finally give you a Library Card.











No Comments