
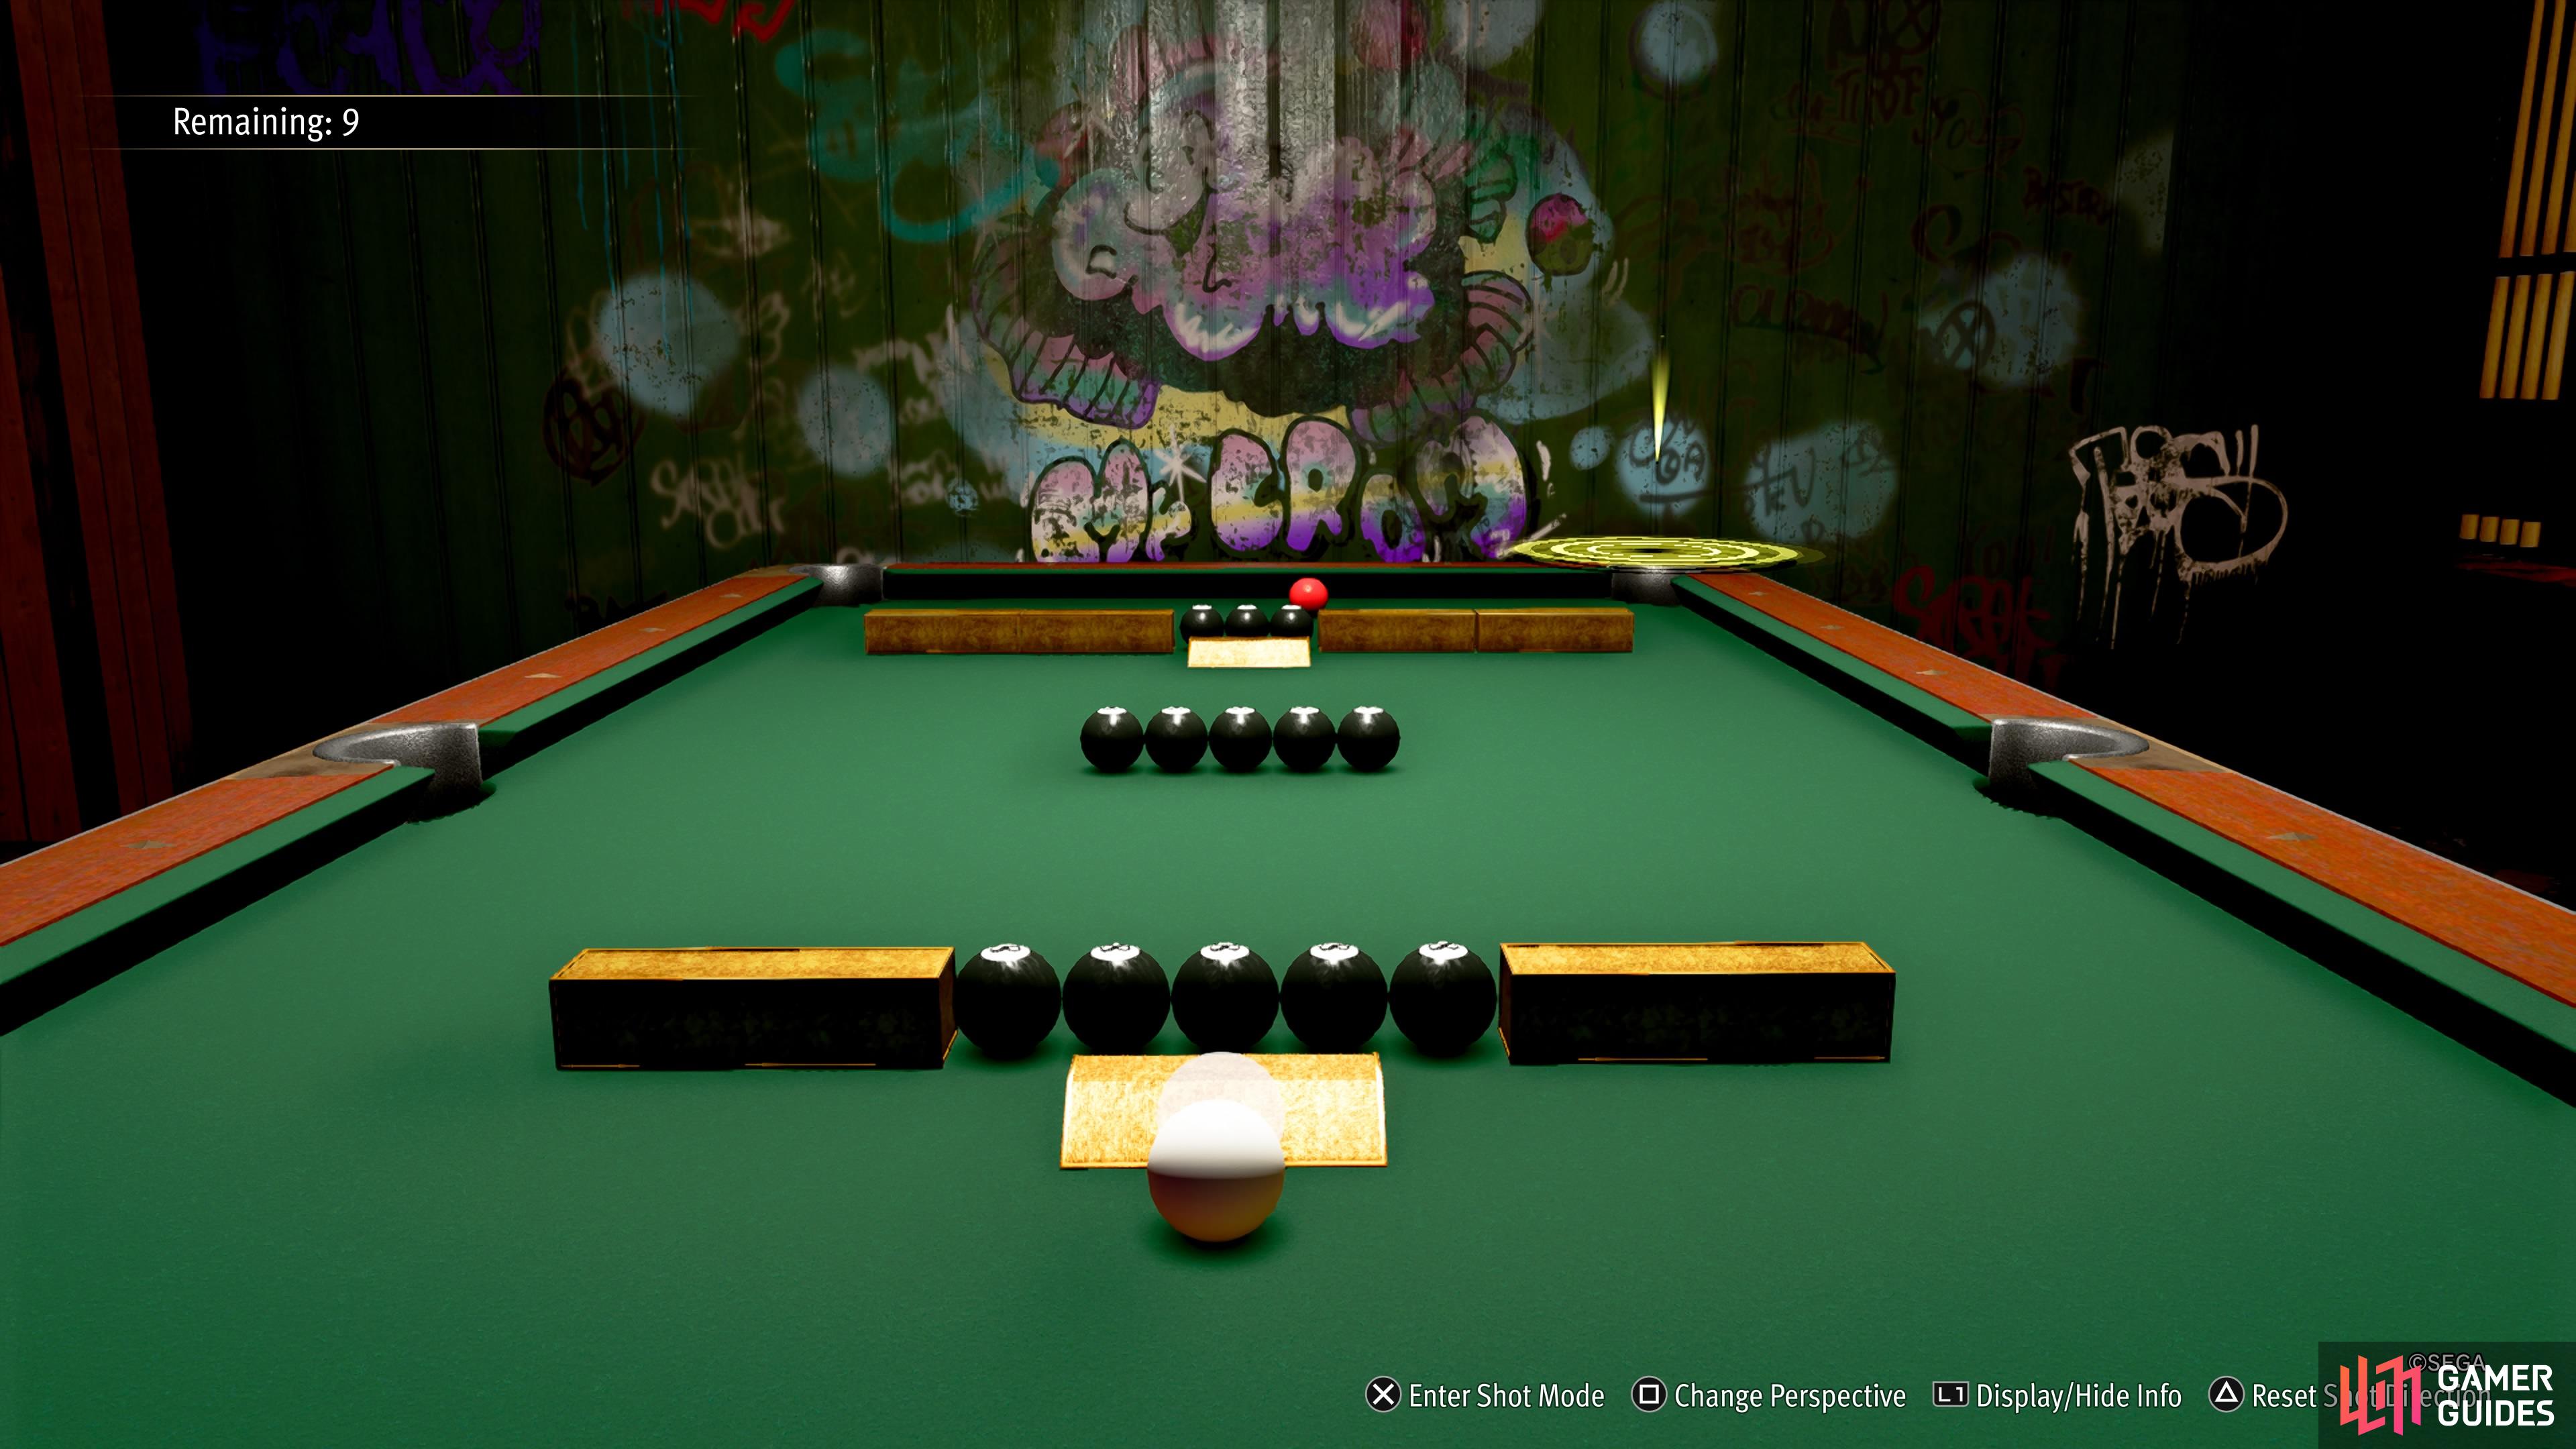
Some of the minigames in Like a Dragon: Pirate Yakuza in Hawaii are ones you might have played if you went through previous titles. Pool has been a minigame in the series for a long time, ever since Yakuza 3, although it wasn’t until the fifth game that they introduce puzzles involving the minigame. The goal of this mode is to hit the red ball into the designated pocket, without touching any of the 8-balls or knocking the cue ball into a pocket.
Pool Location in Pirate Yakuza
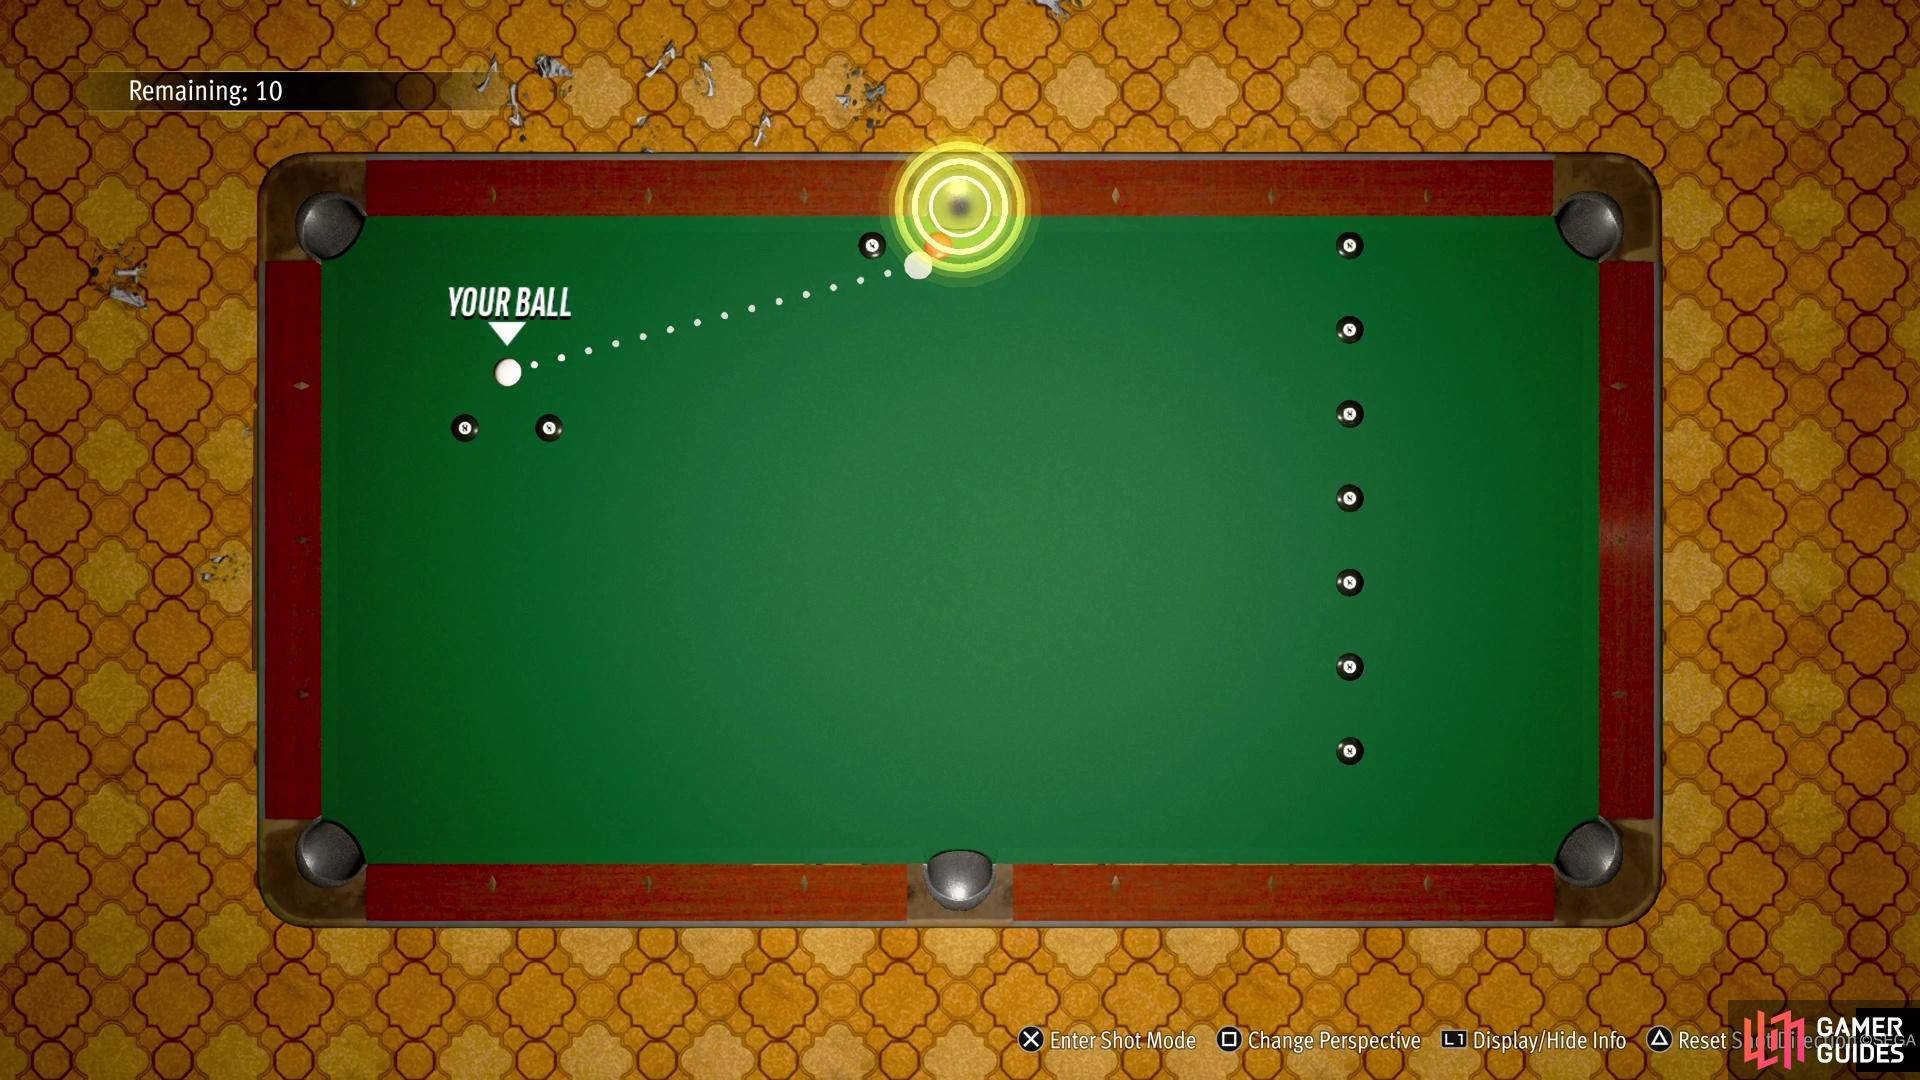
The only pool table in the game is located at the Diamond Head bar in District Five in Hawaii. Note that when you first gain access to Honolulu, you won’t be able to go here right away, as the game won’t allow you into the western half of the map. At some point during Chapter 2, you will be asked to go to Diamond Head for a Bounty, which is the first time that the minigame will be accessible. Simply talk to the NPC in front of the pool table, then choose the 1-Shot Challenge option to start.

You can find the pool minigame at the Diamond Head bar.
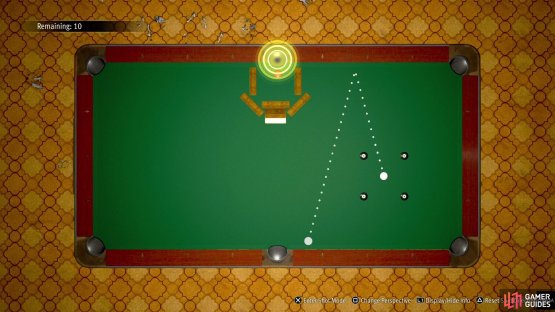
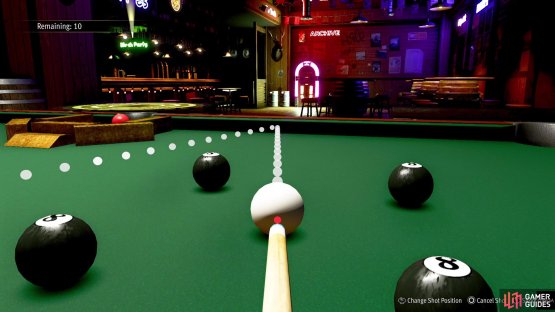
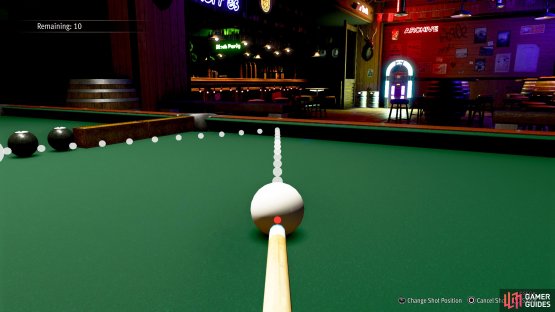
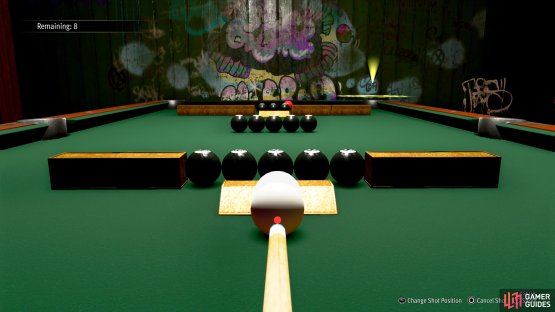
There are four different difficulties for the 1-Shot Challenge, with only Easy being selectable at the beginning. You need to clear Easy to access Normal, then Normal to get Hard, and finish Hard to be able to play Legend. As mentioned above, the goal of the minigame is simple, as you need to hit the red ball into the highlighted pocket. You cannot sink the cue ball (white one) into any pocket, and none of the balls can touch any of the 8-balls on the table. You also only can miss a total of 10 shots before you’re forced to start over. Each of the difficulties will have three levels to it that need to be done in the above 10 shots.
Easy 1-Shot Challenge
Naturally, the Easy challenges are not going to be all too difficult, besides the annoyance of getting the right hit on the third challenge.
Easy 1
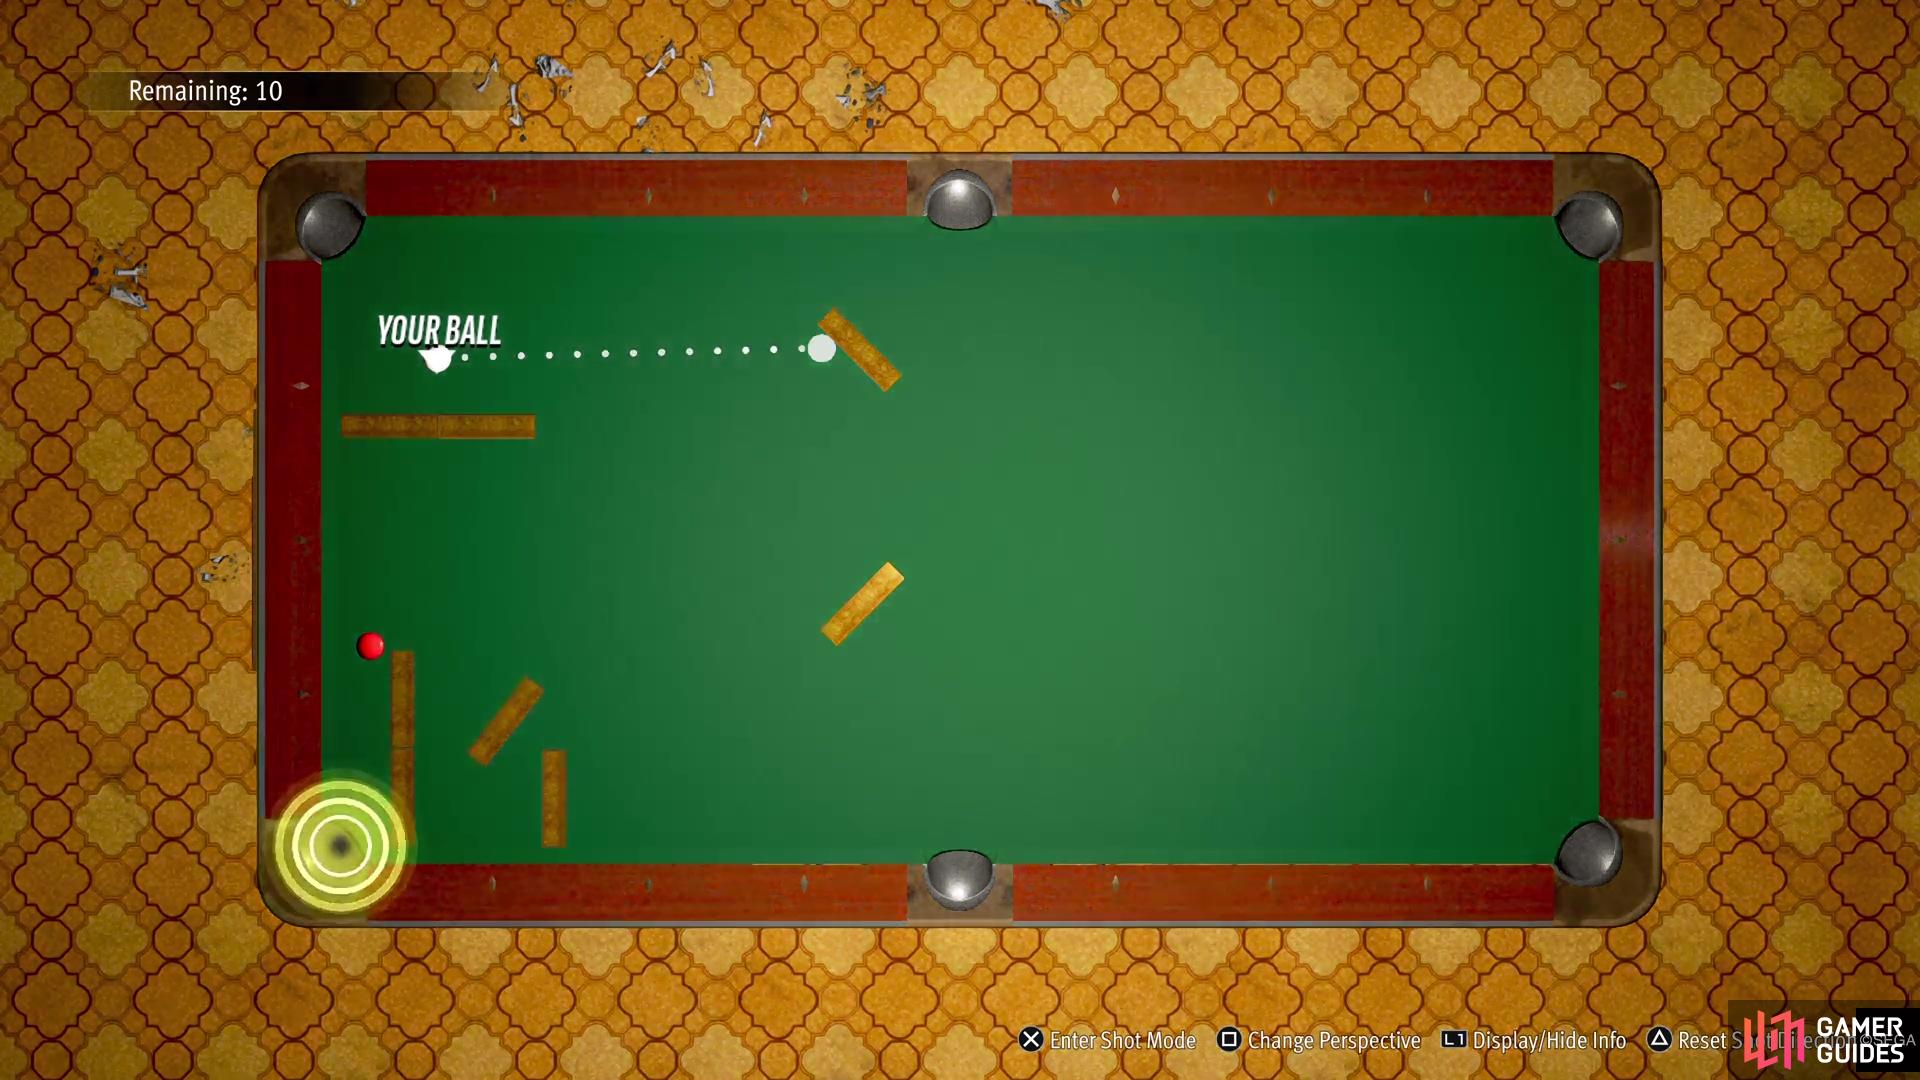
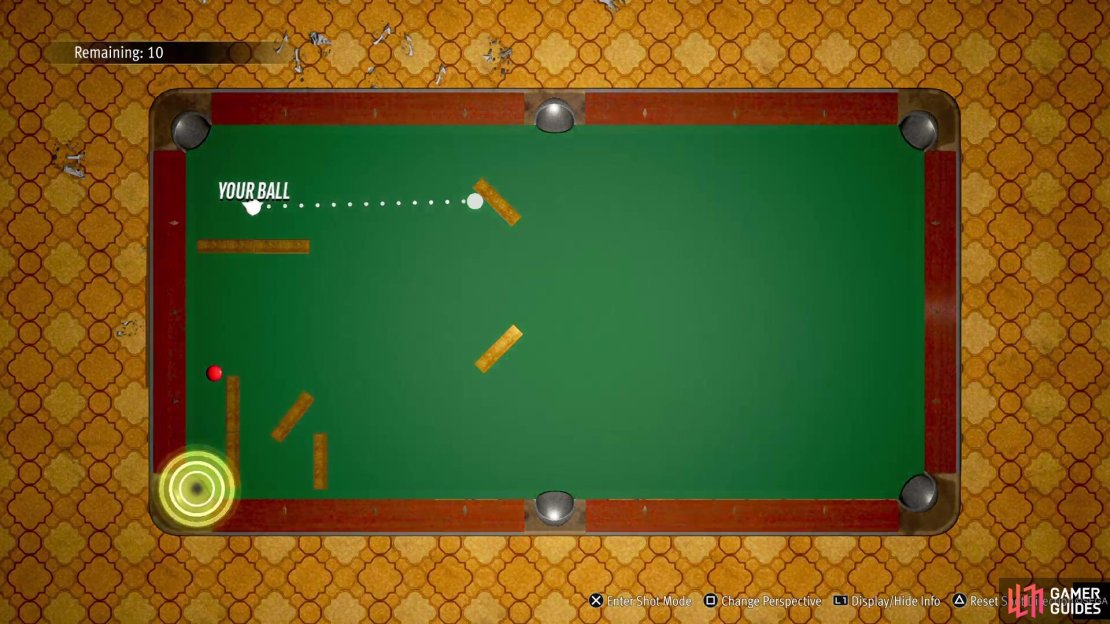
The first challenge for Easy will have the red ball lined up right in front of the corner pocket, with the cue ball aimed straight at it. The only problem is that there’s a wooden barrier in front of you, so you need to go around it. When you go to the overhead camera, you’ll want to aim the cue ball at the top wall and bank it off of there. You should be able to hit the red ball square on and knock it into the pocket, but make sure you don’t use too much power.
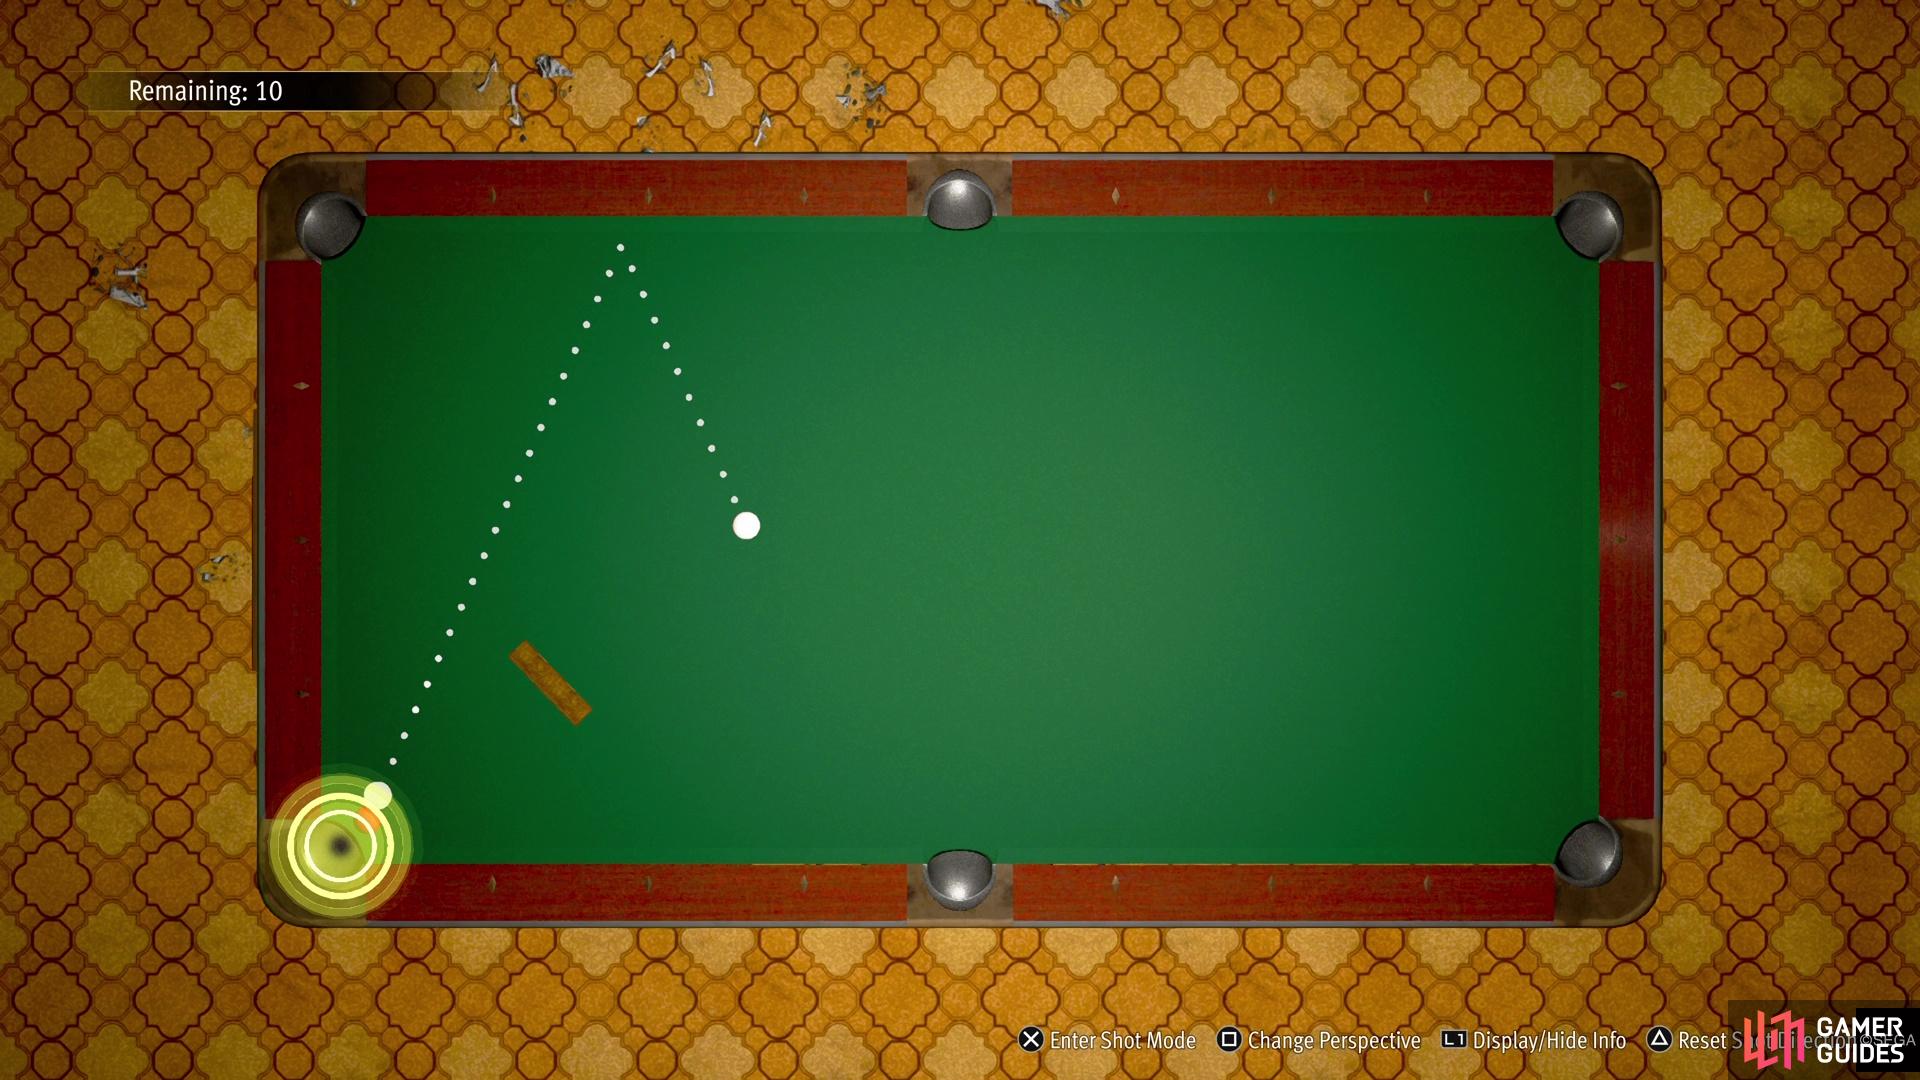

(1 of 2) Easy 1 is a simple bank shot, but make sure you don’t shoot too hard.
Easy 1 is a simple bank shot, but make sure you don’t shoot too hard. (left), You can easily nip the side of the red ball for Easy 2. (right)
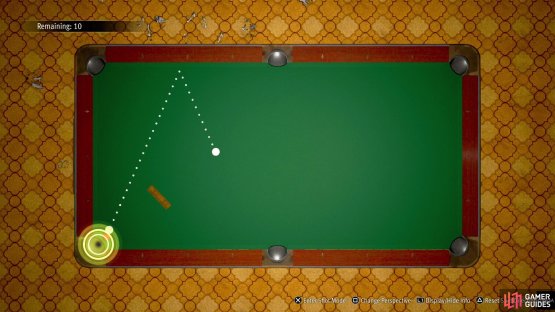
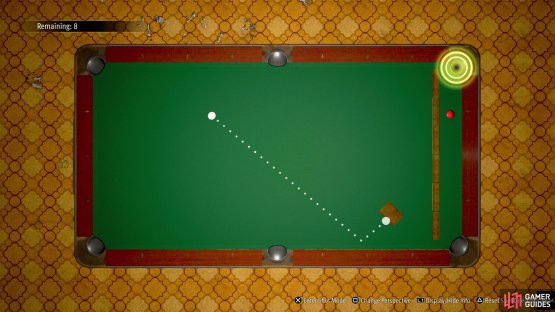
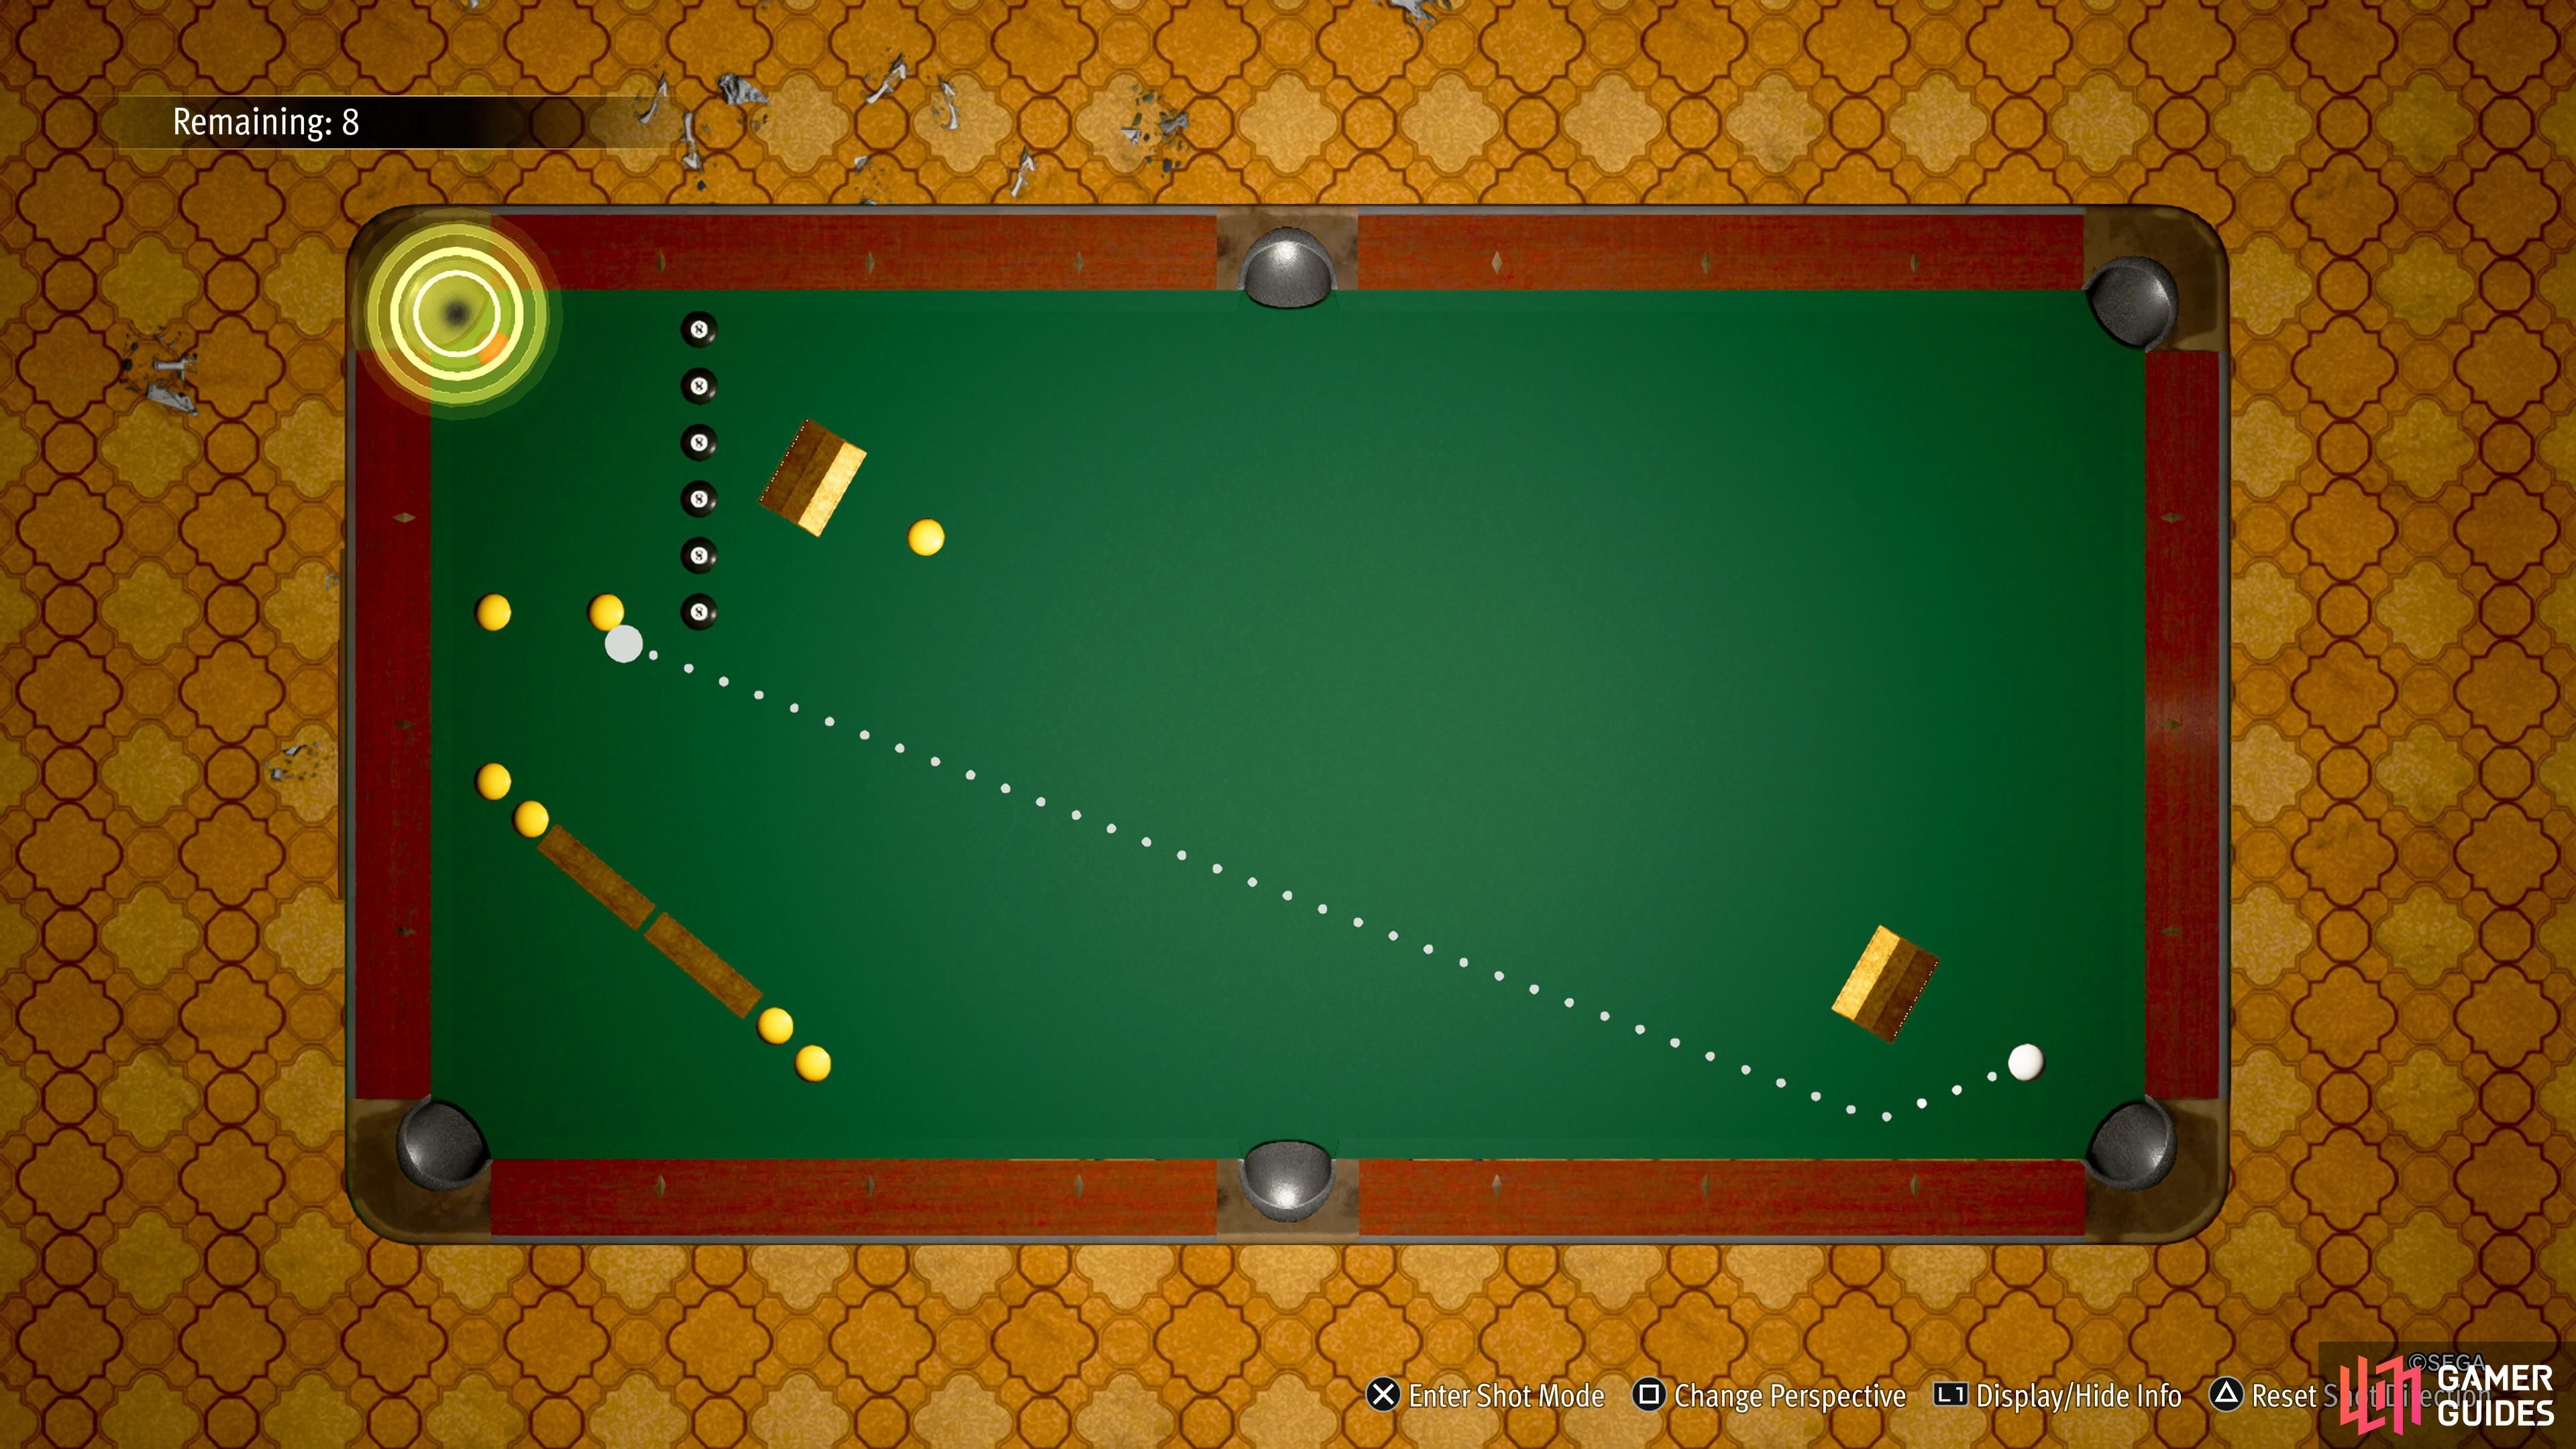
Easy 2
For the second challenge, you have the red ball going into one of the side pockets, but there’s an 8-ball right in front of it. Additionally, there are two more 8-balls next to the cue ball, meaning that you can’t just bank it off the side rail easily, as well as a row of more 8-balls opposite the end you start. The game seemingly wants you to probably bank off the top wall, then hit it off the bottom one to try and sink the red ball.
However, there is a much simpler solution, as you can just move the cursor for your shot over to the right slightly, then just tap the side of the red ball to hit it into the pocket. Just make sure you’re over enough that you don’t hit the 8-ball next to it, plus you also want to not hit the cue too hard, as it ricochet and move towards the row of 8-balls.
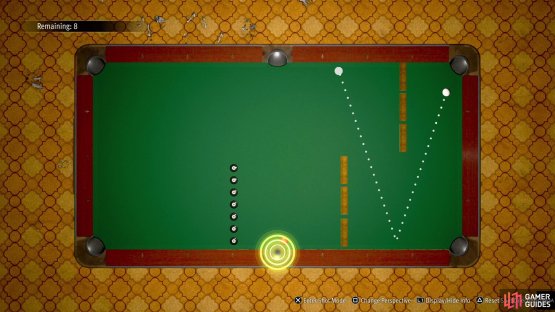
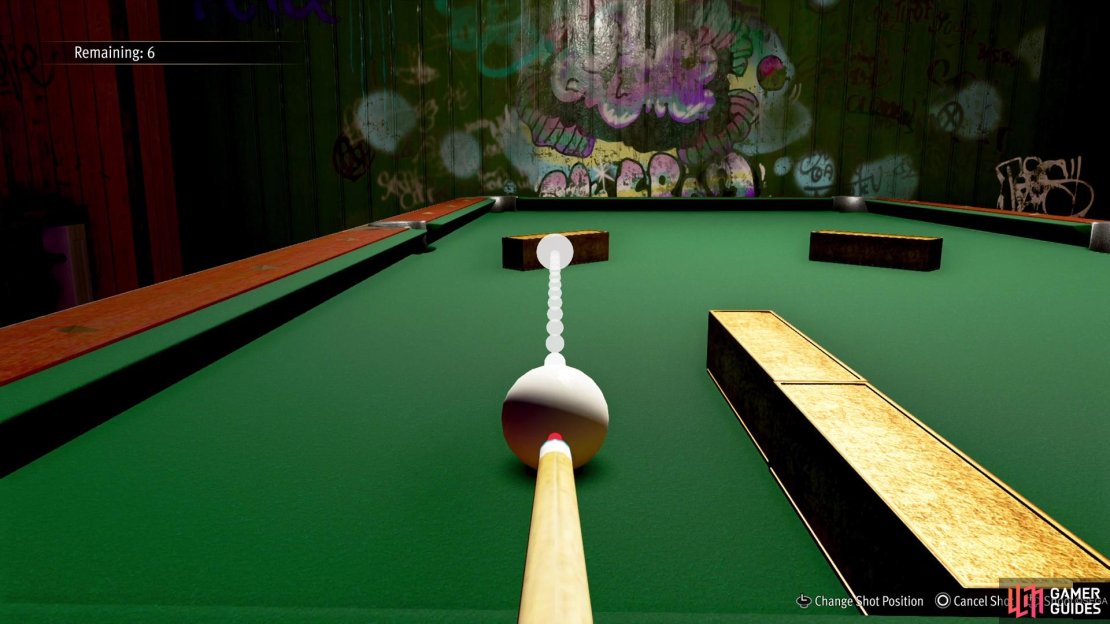
Easy 3
The third challenge here can be tricky, and somewhat annoying. The red ball will be going into the side pocket, but it’s encased by the wooden blocks, meaning you don’t have direct access to it. However, there is a ramp on the one side, which you can use to jump over the wooden blocks and hit the red ball. You will need to bank the cue ball off of the wall on the right (overhead camera) with enough force that it jumps off the ramp and into the area with the red ball. The biggest problems here are hitting it with enough force, as well as making sure the cue ball stays on the table.

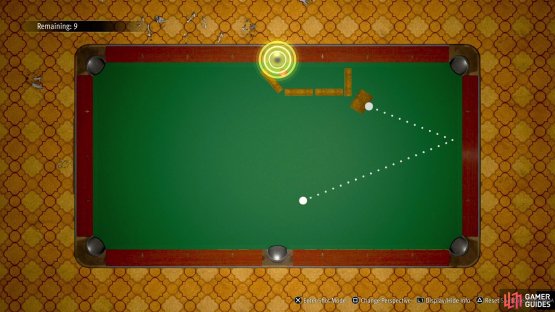
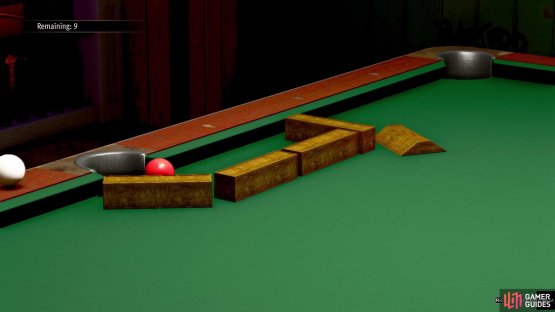
(1 of 2) Try to aim towards the center/upper part of the ramp in Easy 3.
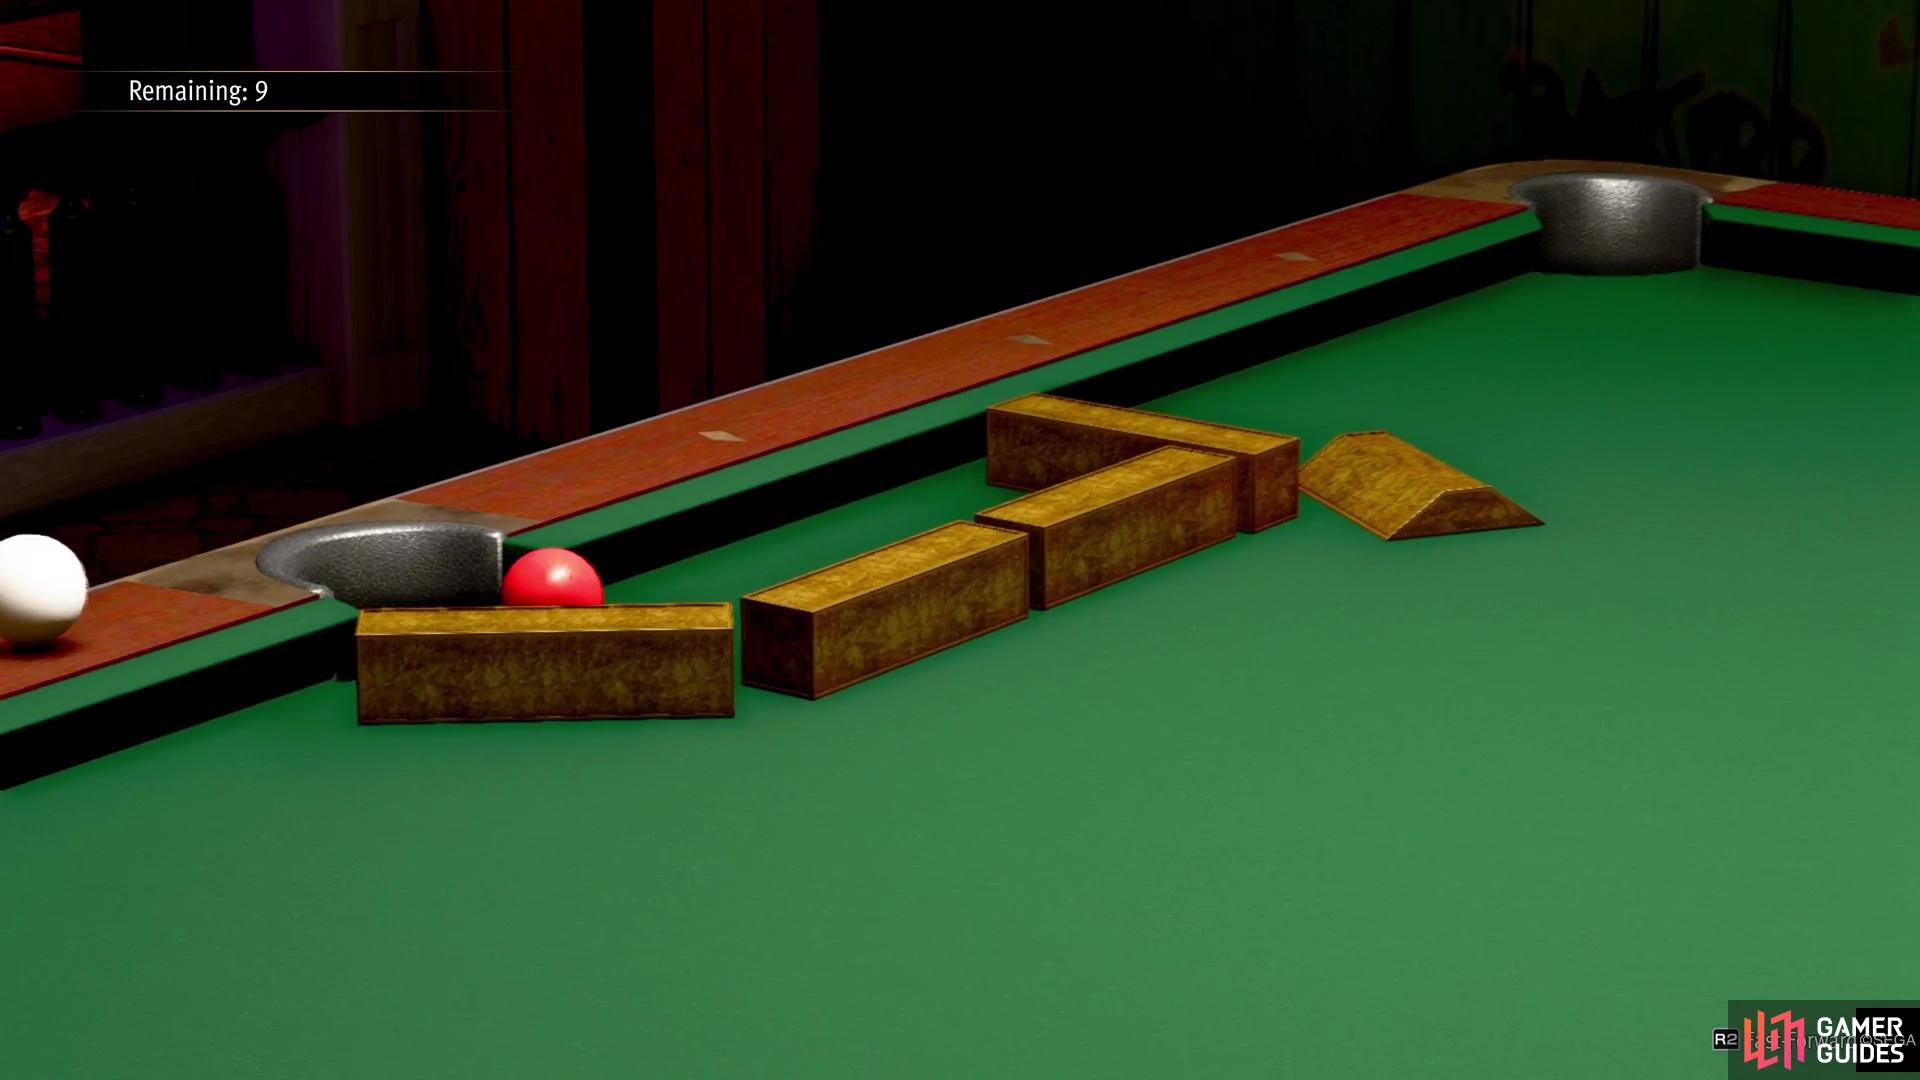
Try to aim towards the center/upper part of the ramp in Easy 3. (left), There are many times you might see the cue ball just fly off the table. (right)
The best thing to do is to just smack the cue ball as hard as possible each time, adjusting the angle of your shot ever so slightly if it misses. If you try to hold back some power, then the ball won’t make it into the enclosed area. This is why this challenge is annoying, simply because it seems some randomness is involved.
Normal 1-Shot Challenge
The Normal set of challenges aren’t that much more difficult than the Easy ones, with only a slight increase in being harder. The third one is similar to the third of the Easy, as it can be a little annoying to get it just right.
Normal 1
The red ball is situated next to one of the corner pockets, while the cue ball is on the opposite side. Unfortunately, there is a long row of 8-balls down the middle of the table, extending to about the halfway mark, so you cannot directly shoot at the red ball. You’ll have to shoot the cue ball down the length of the table, bank it off of the far wall, and back to the red ball. As with most shots, make sure you use too much power, since you don’t want the cue to bounce off at the end and touch one of the 8-balls.
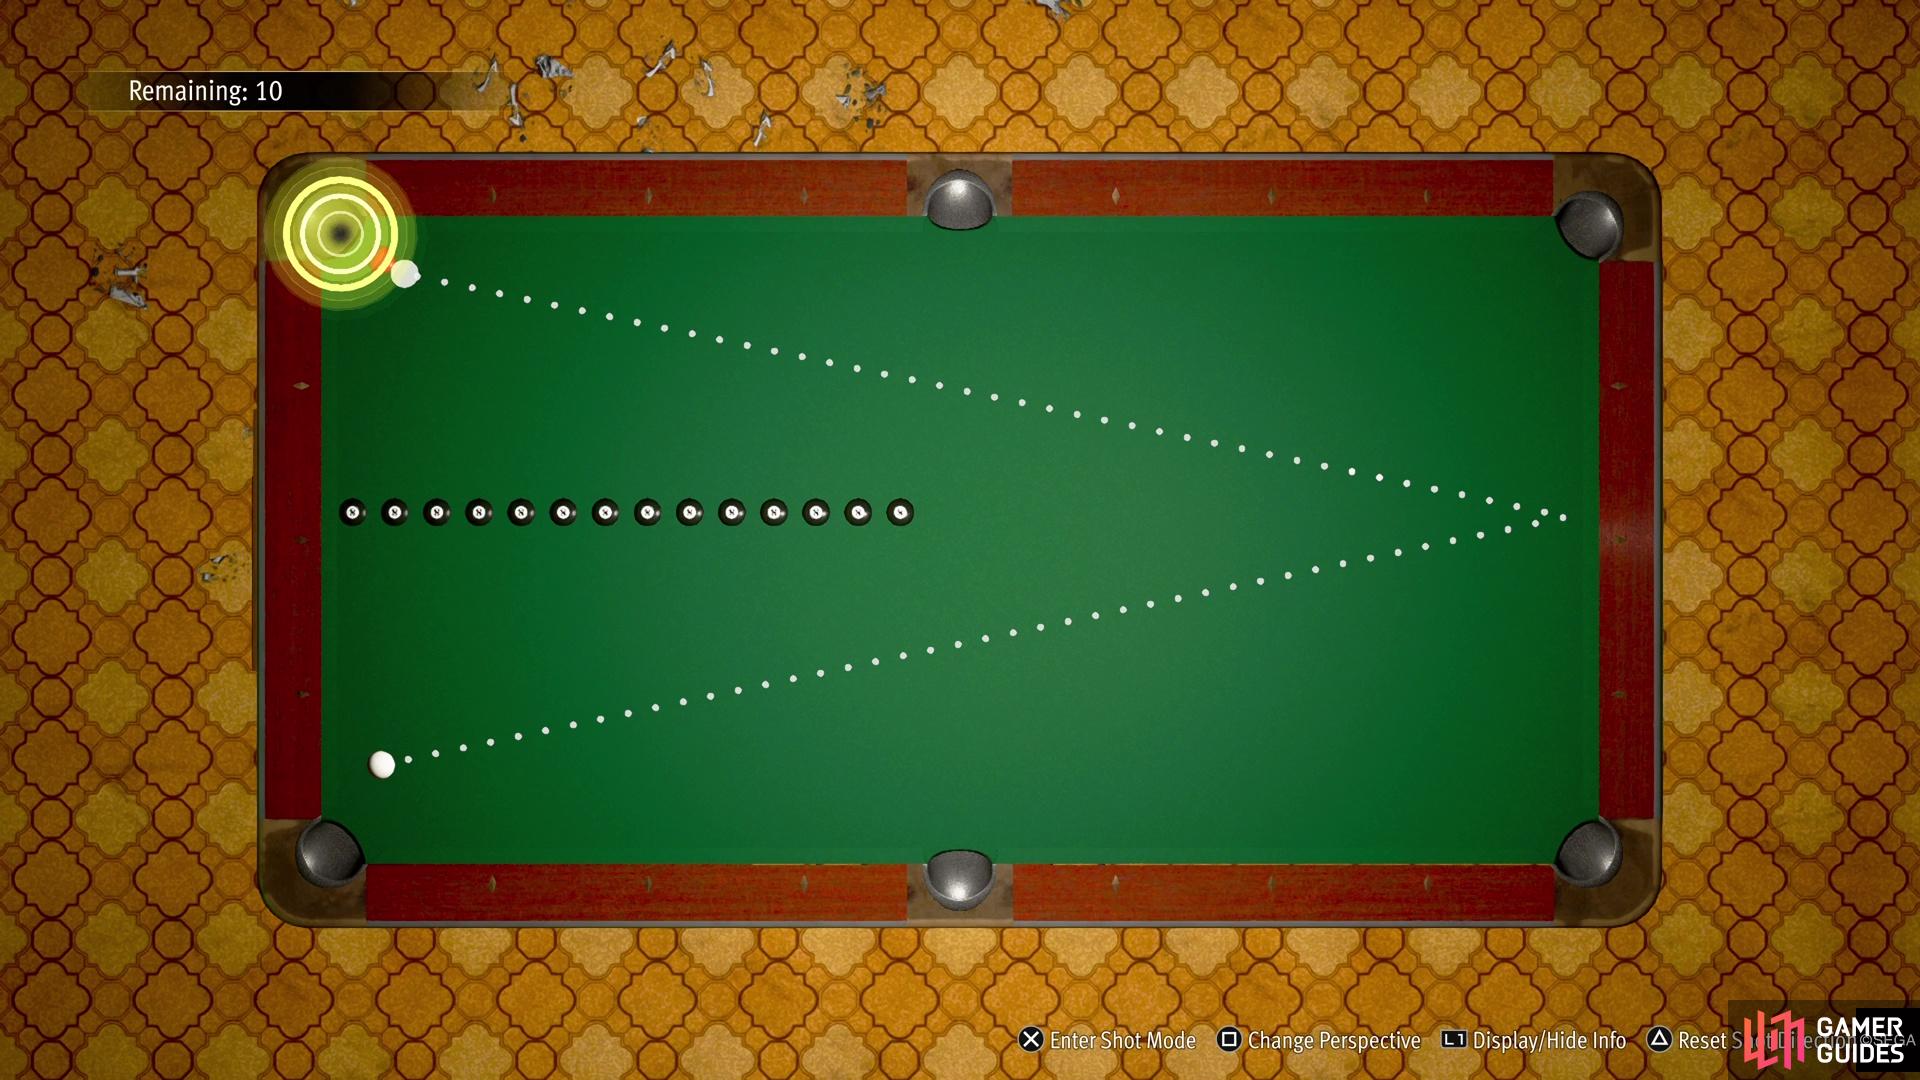
Normal 1 isn’t much more difficult than the challenges in easy.
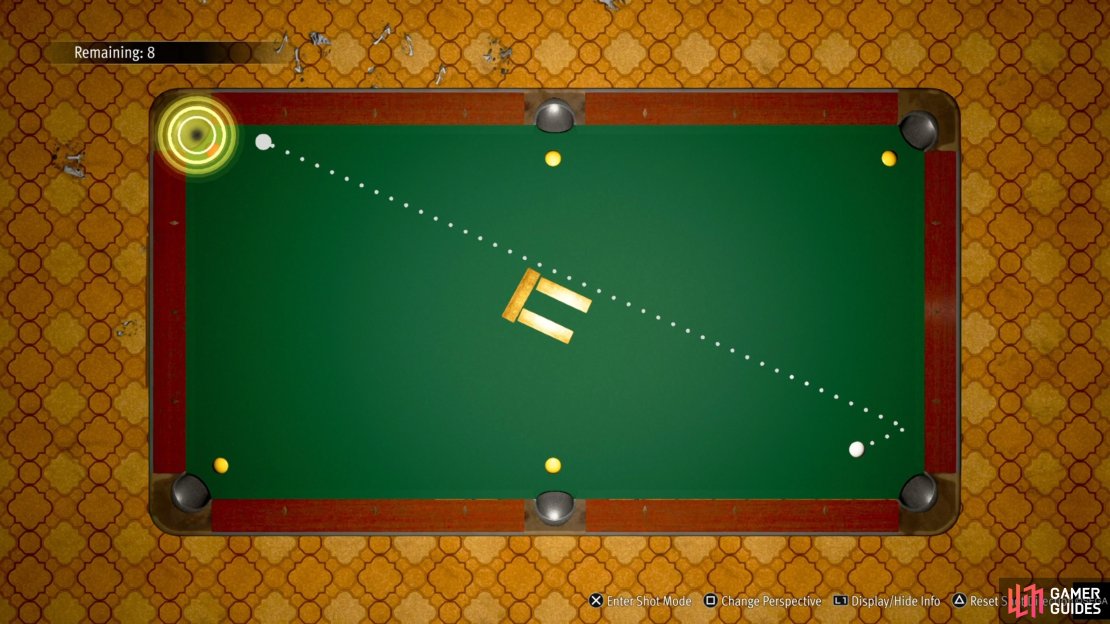
Normal 2
For the second challenge in Normal, there are two sets of wooden barriers separating you and the red ball, which is right next to one of the side pockets. Just beyond there is a row of 8-balls, so you’ll need to be a little careful with shooting it too hard. Now, the goal with your shot here will be to do a double bank, first off the southern wall, then the northern one. The slight problem is that the guide in the game only shows you the trajectory off the first bank, so you won’t know where the ball is headed after hitting the northern wall.
Thus, you’ll need to play a little bit of trial and error on getting the angle just right. You’ll also need to be a little careful with how hard you hit the cue, since you have to contend with some 8-balls just past the red ball. If you line up the top bounce just at about, or a tad bit past, the lower set of wooden blocks.
(1 of 2) Try to aim like in this screenshot for Normal 2, as you have to bank it twice to win.
Try to aim like in this screenshot for Normal 2, as you have to bank it twice to win. (left), You’ll have to bank off the bottom wall to get to the ramp and the red ball in Normal 3. (right)
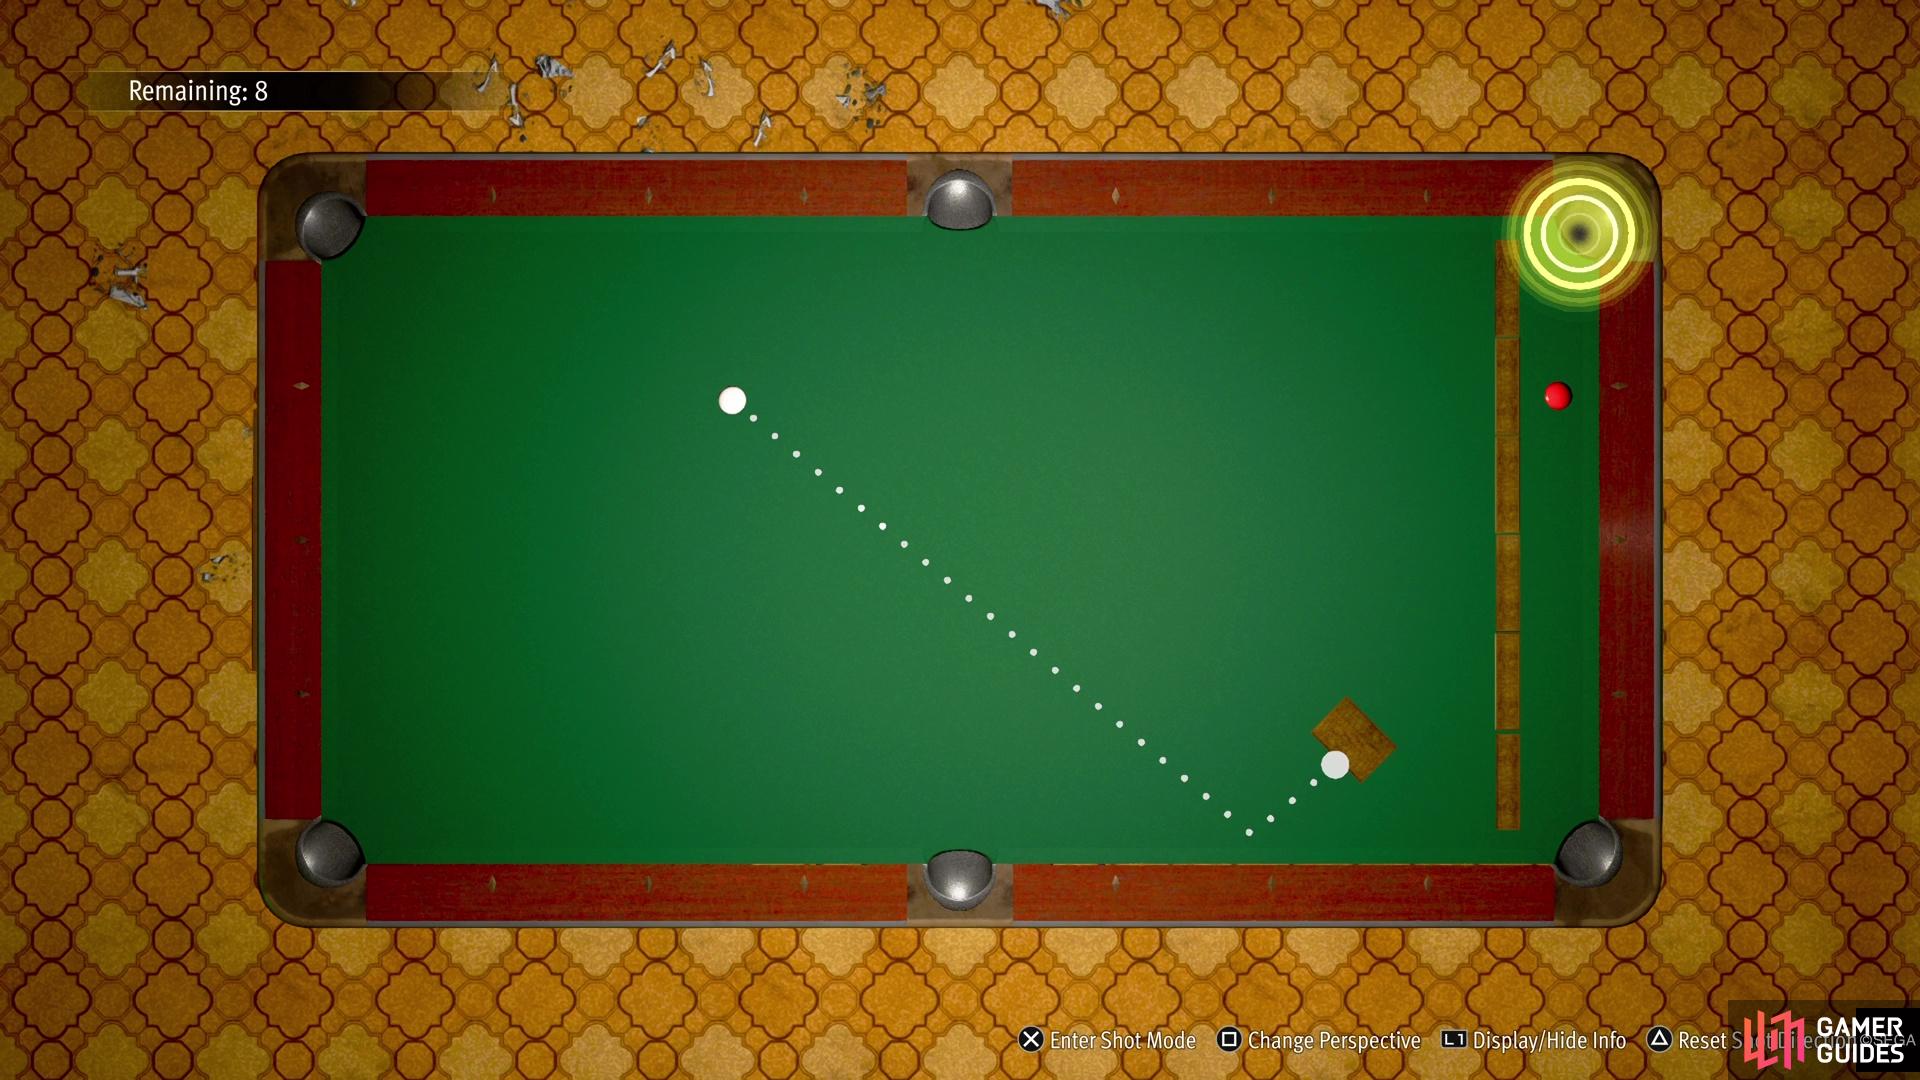
Normal 3
The red ball is meant to be sunk into the upper right corner pocket, but it’s completely isolated by a wall of wooden blocks. There is a ramp before it, in which you are meant to launch the cue ball off of and into the area with the red ball. Of course, you’ll need to bank the cue ball off the bottom wall first, since that’s the only way to get the angle on both the ramp and the red ball. The trick here is to hit the ball hard enough to make it go off the ramp, but sometimes the ball might bounce off the table, similarly to Easy 3. Aiming at the middle of the ramp should be a good spot.
Hard 1-Shot Challenge
If you thought Easy and Normal were simple, well, Hard is going to ramp up the difficulty.
Hard 1
The first shot here is going to be tricky, as even if you hit it correctly, you might not get the red ball into the side pocket. The target is surrounded by wooden blocks and the only way to get to it is via a ramp. To make matters worse, the cue ball has four 8-balls around it, so getting a good angle is going to be difficult. There is a slight spot where you can bank it off the bottom wall, but the window for getting it over the ramp is small.
(1 of 2) Banking the cue ball off the top, then the bottom, is probably the easiest way to do Hard 1.

Banking the cue ball off the top, then the bottom, is probably the easiest way to do Hard 1. (left), Here is a visual cue of where you’re aiming when in shot mode. (right)
Your best bet is to do a double bank, starting off the northern wall first, then bouncing off of the southern one. Describing where to shoot is a bit difficult, as there isn’t really any specific indicators, so look at the screenshots below for more information. As for power used, you pretty much need full power to get enough momentum to get over the ramp. If you don’t succeed on the first try, adjust the angle slightly and try again.
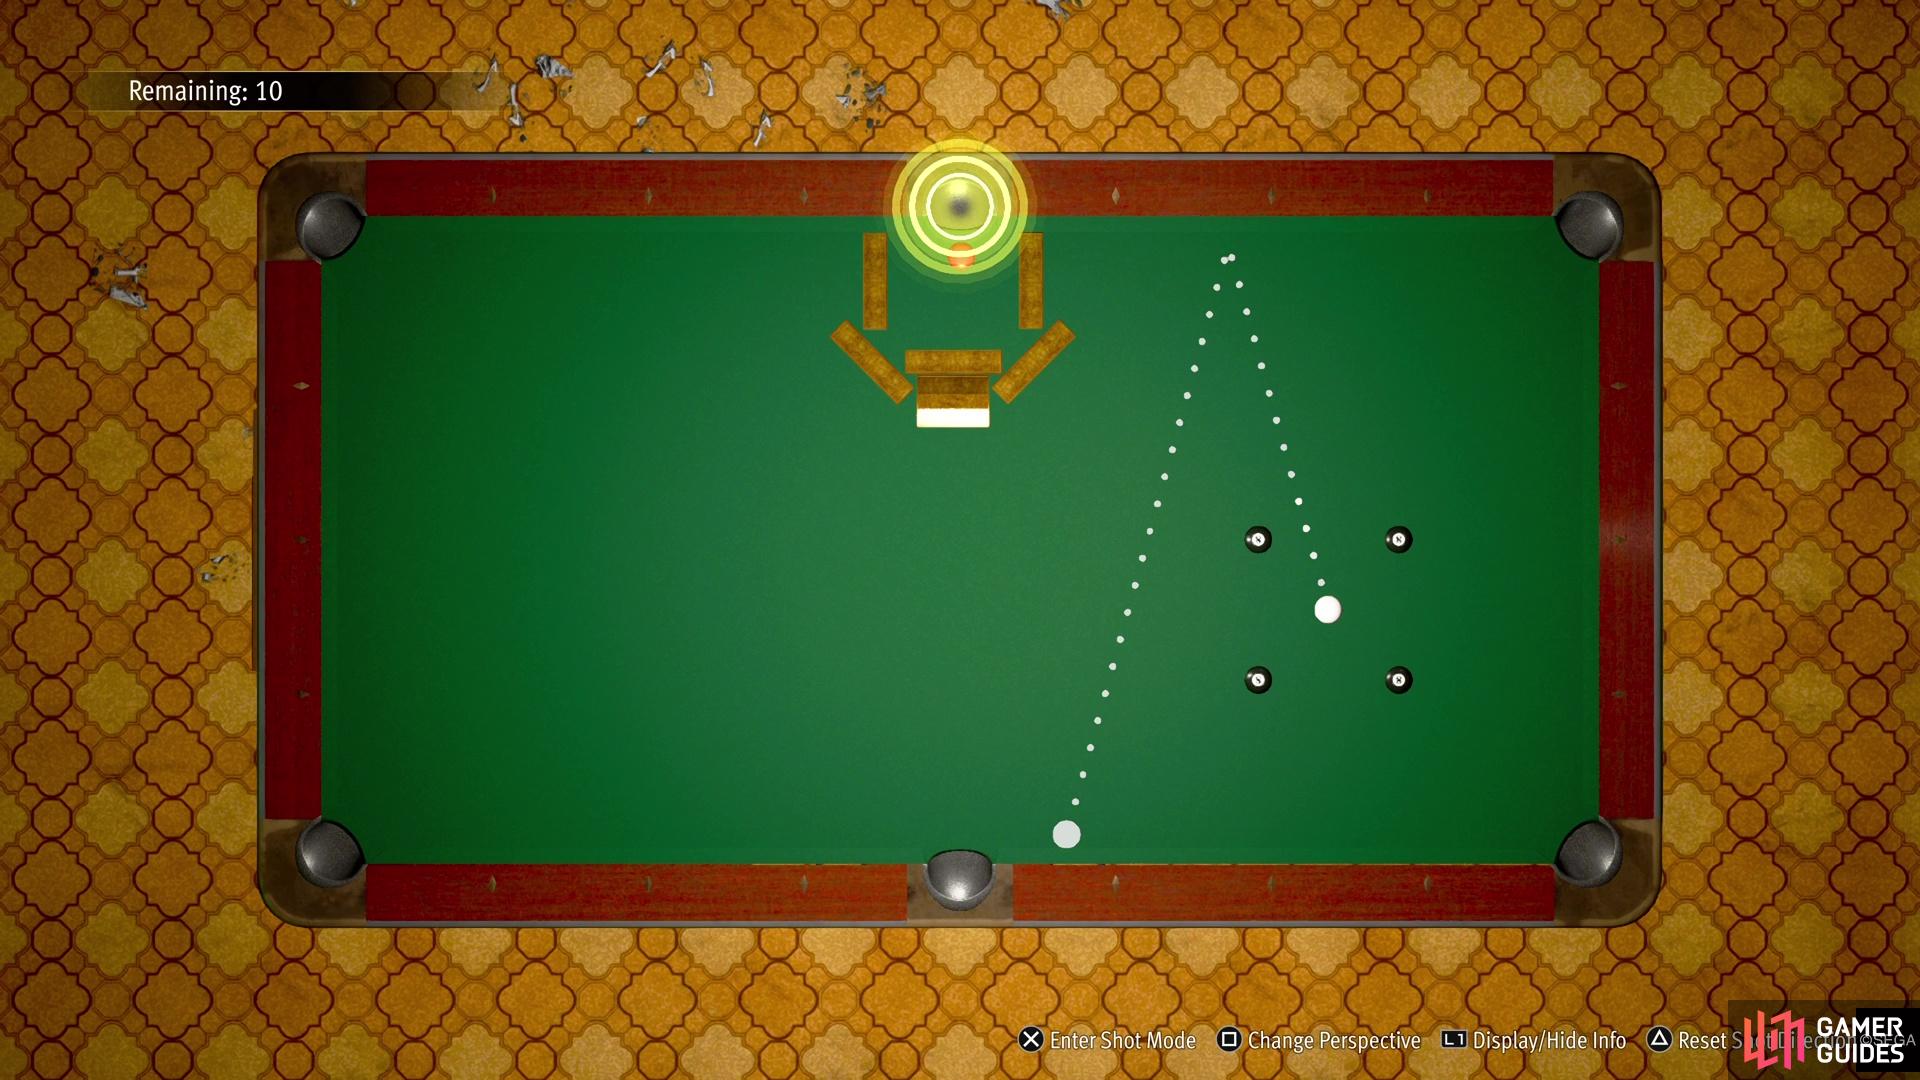
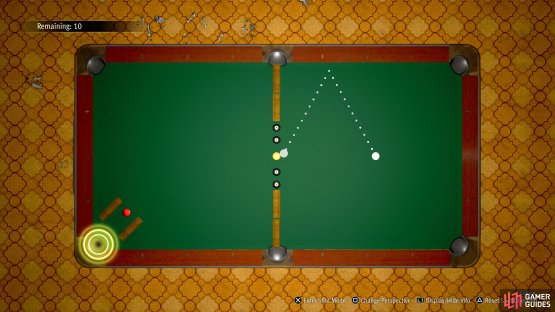
Hard 2
The second challenge is about getting the right angle on the shot and banking it off of the various objects. The red ball is meant to go in the lower left corner pocket, but getting to it is a task, as there are a bunch of wooden blocks in the way. The only real method to doing this challenge is to bank the cue ball off of the diagonally-placed blocks near the middle of the table. You’ll want to aim at the slanted block right in front of you, hitting it towards the northern end (when looking from an overhead view). If done right, the ball will the other slanted block towards the bottom, then connect with the red ball. Try not to use too much power here (about half or a little above it), as you don’t need the cue ball bouncing about and sinking into one of the other pockets.
(1 of 3) Doing a double bounce off of the slanted blocks is the goal for Hard 2.
Hard 3
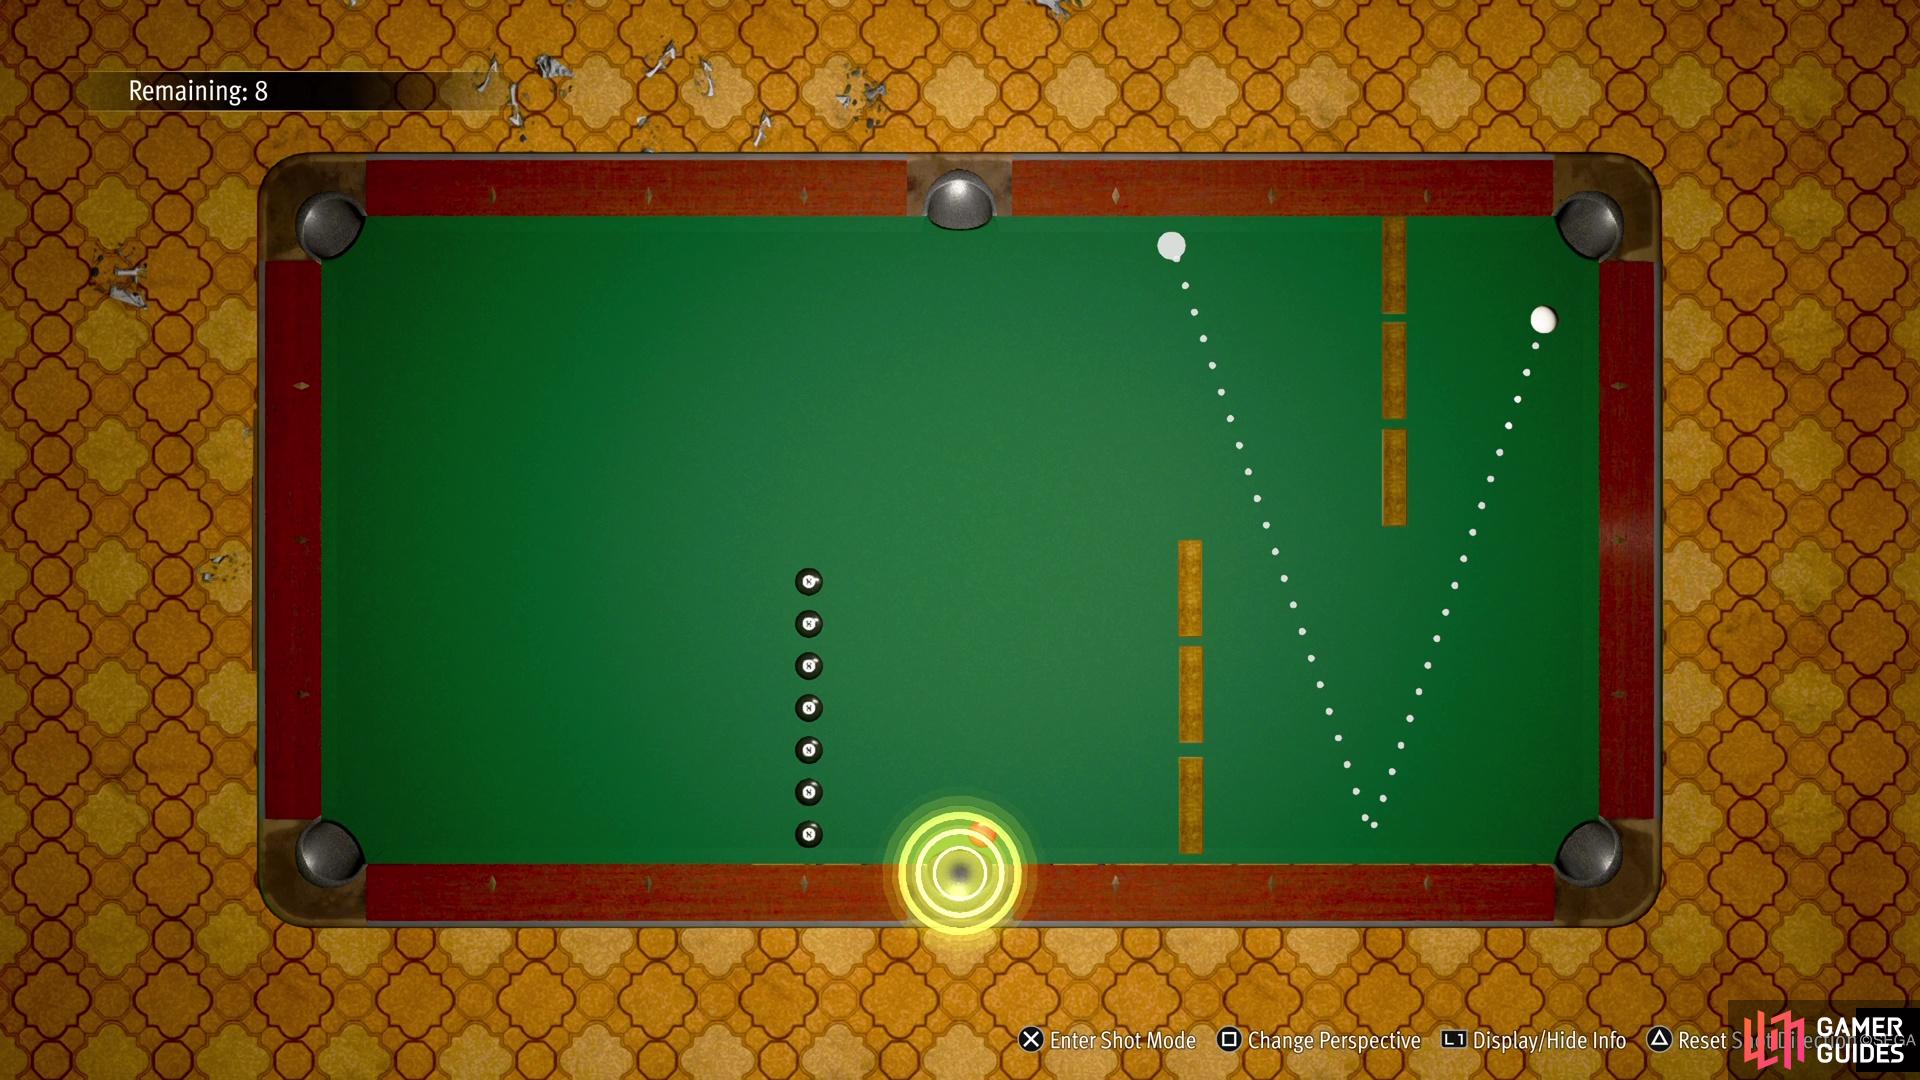
This challenge introduces the yellow balls, which are safe to hit, but you still only need to concentrate on sinking the red ball to win. There are wooden blocks in the middle of the table, preventing you from getting direct shots on the red ball. The game kind of wants you to use one of the yellow balls to knock the red ball into the pocket, but you can kind of avoid doing that with the right angle. When you go into overhead view, you can see that the majority of angles don’t get you close to the cue ball.
However, there is one angle that kind of does get you close enough. Start by aiming to the right and make sure that you clear the central blocks. Now, it’s just the matter of inching the target line closer and closer to the central blocks, without hitting them. For power, about halfway should do it, as long as you get enough juice to make it to the red ball. This is much easier than trying to connect a yellow ball into the red one, especially the one near the side pocket. The reasoning behind this is because there’s a bigger chance of knocking the cue ball into a pocket.
Legend 1-Shot Challenge
It goes without saying that the Legend challenges are definitely very hard. There’s quite a bit of randomness to some of them, so even with the methods below, you might not get them on the first try.
Legend 1
The first challenge has the red bal near the bottom left corner pocket, and is flanked by two wooden boards. In the middle of the table, there is a yellow ball that has two 8-balls in either side, as well as two more wooden boards. The only way to complete this stage is to hit the yellow ball into the red one. However, there is a big problem if you try a direct approach, as you are almost guaranteed to hit one of the 8-balls, so you’re going to fail.

(1 of 2) Banking it off the top will avoid you hitting the 8-balls in Legend 1.

Banking it off the top will avoid you hitting the 8-balls in Legend 1. (left), Try to aim at the one diamond here, or just a hair left of it. (right)
Instead, you’re going to try and bank it off the upper wall (overhead view) and do the same thing as with the straight-on approach. Going by the diamonds on the edge of the table, you want to aim a little before the third diamond from the right side (overhead view). When you are taking the shot, it will look like you’re aiming straight at the diamond, or maybe a hair to the left of it. From here, use medium power or so and see if the yellow ball hits the red one. If not, then you can do some minor touches on the cue ball’s trajectory.
Legend 2
The second challenge is definitely the toughest of the three for Legend. There are three rows of 8-balls, spread out in three locations on the table, with two of those also having some wooden barriers on the sides of them. To get to the red ball, on the far end of the table, you’ll need to use the two ramps in front of the first and third walls. The problem is that the angle for this is kind of hard to pinpoint, since your cue ball is literally right next to the ramp. The goal is to basically hit it at full power and if the angle is right, the red ball will do a few banks towards the pocket and go into it.

(1 of 2) Try to aim to hit the left side of the red ball for Legend 2.

Try to aim to hit the left side of the red ball for Legend 2. (left), You want to hit the cue ball with full power to clear the ramps. (right)
You want to aim slightly towards the red ball, if you can see it, but not straight at it. Aim to the left of it, but make sure you’re not going straight down the middle. If done right, when using full power, you should clear the middle row of 8-balls, go off the second ramp and hit the red ball. Note that there is a chance that the cue ball might hit the middle row of 8-balls, for some strange reason. You’re basically just hoping for the best and shooting for the red ball to bounce into the designated pocket.
Legend 3
The final 1-Shot Challenge is probably the easiest in the Legend set, simply because it’s pretty easy to get the strategy down to working all the time. The red ball is in front of the upper left corner pocket, with the cue ball in the lower right corner. There’s a ramp in front of the cue ball, as well as one more in front of a yellow ball in the straight line from your starting position. There are some wooden blocks and more yellow balls in the corner opposite the red ball, as well as a row of 8-balls in front of the second ramp.
Ignore the ramps and aim the cue ball like this for Legend 3.
The game seems to want you to go off the first ramp, hit the yellow ball over the second ramp, and knock it into the red ball. However, there is a much easier way to do this challenge without having to resort to that. Instead, look at the two yellow balls just south of the red one. You’re going to be aiming at the right one there, which you can hit by banking the cue ball off the bottom wall. Use the guide to aim the shot at the side of that yellow ball, then make sure you don’t hit the cue ball too hard.
All Pool Rewards in Pirate Yakuza
The following list contains all of the rewards you can get from the Pool minigame.
| Reward | Points Needed |
|---|---|
| Silver Treasure Chest | 2,500 points |
| Crewmate: Sheep Man | 900 points |
| Eyepatch (Perforated) | 200 points |
| Eyepatch (Medical) | 200 points |
| Heavy Makeup | 200 points |
| Visual Kei Makeup | 200 points |
| Super Monkey Ball Soundtrack CD 1 | 20 points |
| Super Monkey Ball Soundtrack CD 2 | 20 points |
| Super Monkey Ball Soundtrack CD 3 | 20 points |
| Super Monkey Ball Soundtrack CD 4 | 20 points |
| Bronze Plate | 10 points |
| Silver Plate | 100 points |
| Gold Plate | 500 points |
| Platinum Plate | 1,000 points |
| Swiss Watch | 2,000 points |
| Vintage Luxury Watch | 5,000 points |
The two biggest rewards from this minigame are obviously the treasure chest and the crewmate. You should get more than enough points from doing all of the 1-Shot Challenges, so don’t worry about trying to do normal pool games. The chest will yield the Forest Goblet treasure, which is worth a nice $13,300.
No Comments