There are a total of six smashing stuff challenges in Sunset Overdrive and fortunately, they are fairly short and simple. Each challenge begins with a set number of objects in the environment that need to be destroyed. Players are only given melee options with which to dish out damage and to earn a gold medal, you must destroy every single item.
There is a time limit, so finding a fast route and using grinds and other manoeuvres efficiently is a must. Below youll find a list of the challenges in the game and some short hints and tips as to how to approach each one to get the best possible score.
Smash Crates
The goal of this challenge is to smash all of the crates within the challenge zone within the time limit. Sounds simple enough right? Just keep in mind that there is very large number of them and that you must smash every last crate in the area to receive the gold medal.
The game gives you plenty of time for this mission and as such there is no real strategy. However, there are a few tips that can make this challenge easier still.
It is clearly more efficient to seek out and destroy the explosive barrels when you see them as they can take out multiple crates at once a lot quicker than you can melee them all.
Additionally, you can use the railway tracks here and mash the melee button to whack crates as you grind past them. This is quite efficient and between melee grinding and explosive barrels you should have this challenge covered with little difficulty.
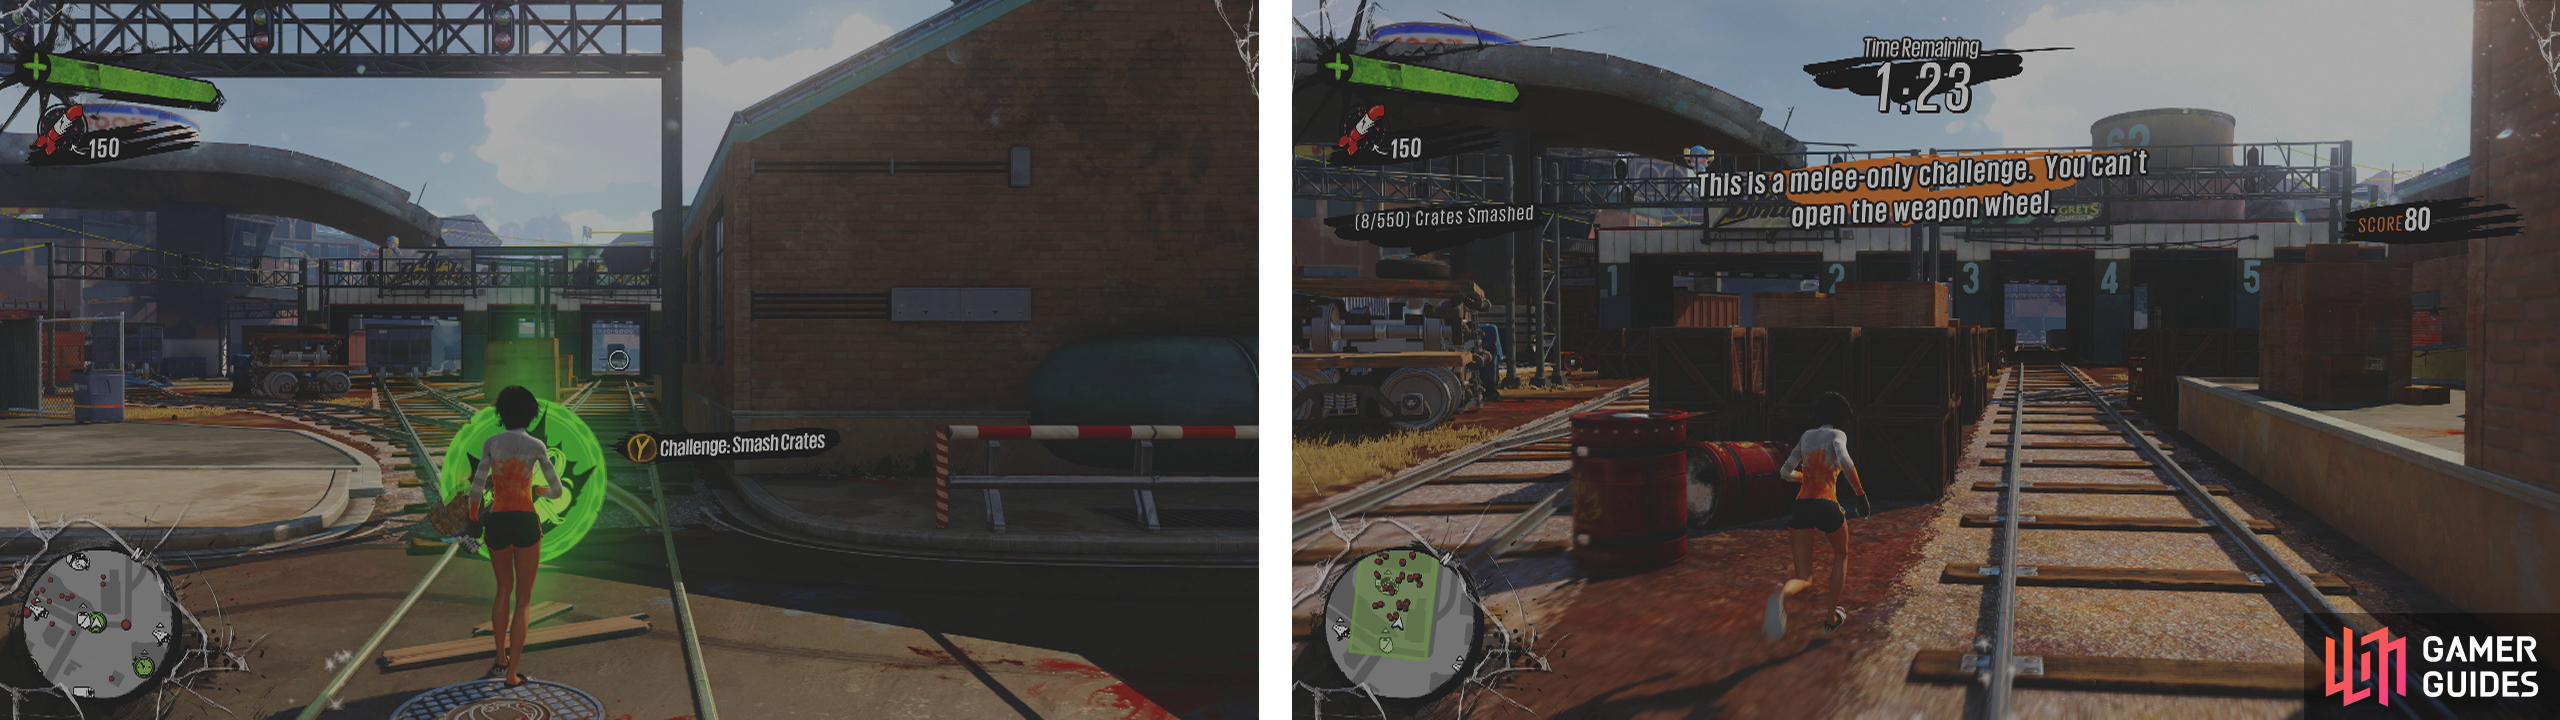
Start the challenge at the Train Depot (left). The key to success is to use the explosive barrels (right).
| Medal | Score | Reward/s |
|---|---|---|
| Bronze | 1,500 | $ 200 |
| Silver | 4,500 | $ 800 |
| Gold | 5,500 | 1,000 x Overcharge |
| Clothing: Basketball Shoes |
Smash Fizzco Stuff #1
This is where the smash stuff challenges become a little more difficult. As this challenge provides us with quite a tight time limit, we need to ensure that we are able to put together an efficient route through the area in order to destroy all of the equipment as quickly as possible.
As soon as the challenge starts hop down to the catwalk below on the right. Grind the rail and smash the crates here. Use the awning at the end to bounce up to the platform above. Grind to the right of this platform and melee grind all of the objects present. Hop off when you reach the wall and clear any other objects.
Drop down to the next catwalk to destroy another crate before hopping up onto the adjacent roof. We need to hop on both skylights here and grind them all the way around whilst meleeing to clear the rooftop.
Once clear, use the vents to bounce to the rooftop above. Clear the Fizzco objects here quickly and then climb to the rooftop on the right to destroy the remaining crates and satellites.
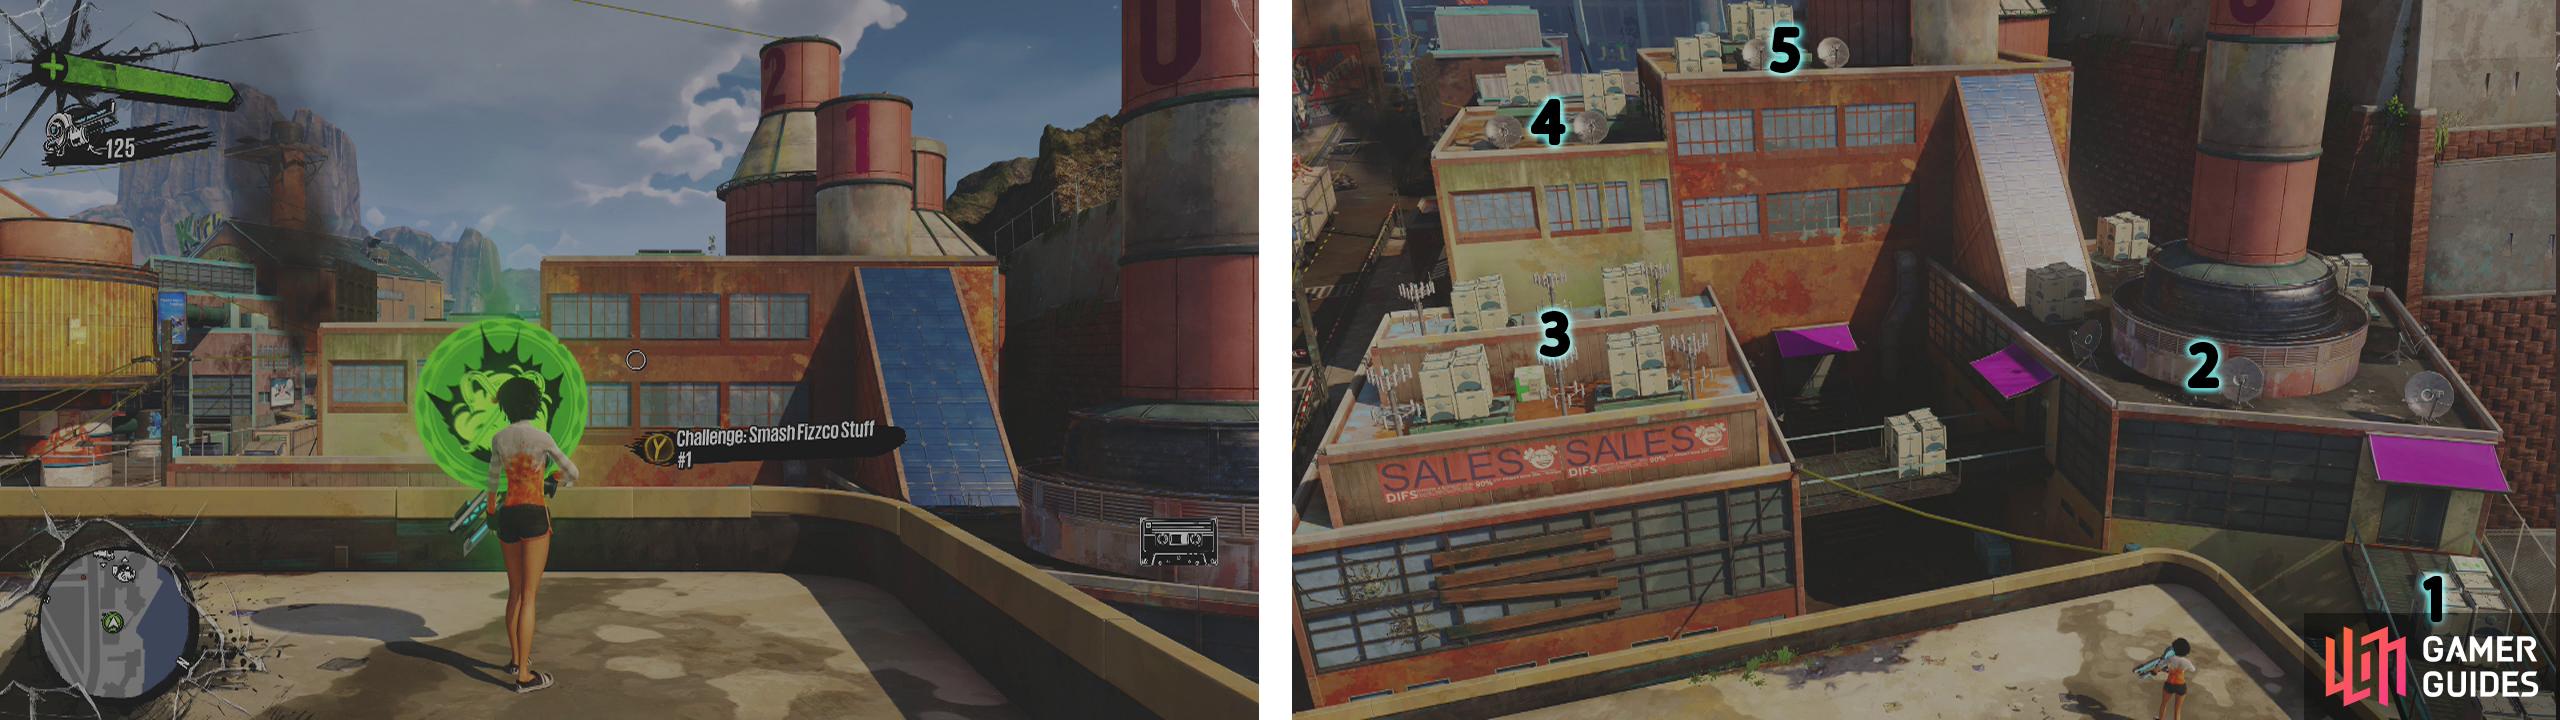
You can begin the challenge here (left). Here is our suggested route of destruction through the area (right).
| Medal | Score | Reward/s |
|---|---|---|
| Bronze | 500 | $ 200 |
| Silver | 700 | $ 800 |
| Gold | 1,350 | 1,000 x Overcharge |
| Clothing: Football Pads |
Smash Fizzco Stuff #2
This is most definitely the trickiest of the Smash Stuff challenges and this is not only because of the limited time, but due to the locations of the objects being on balconies on various height levels on multiple adjacent apartment blocks it is very easy to miss some of the objects.
As we begin, hit up the wall directly in front and grind to the right, meleeing as you go. You’ll head down some stairs and round a corner. Smash a few more objects and as you reach the next corner you need to jump and air dash to the balcony of the adjacent building. Grind this rail to the far end and then again air dash to the next building.
Grind to the left and follow the railing all the way around and up the stairs, smashing everything that you come across. Just before heading down stairs again, you’ll want to air dash to the balcony ahead and cut a lap of that whilst dispatching Fizzco paraphernalia. Now drop down to the lower balcony on the same building and do another destructive lap.
Finally, jump down to the lowest level. You’ll have to clear out the left and right buildings by doing a lap of each and destroying everything as you go. There is also a pair of balconies located both in front and behind the central building to clear out.
Once you have destroyed everything the challenge will be complete!
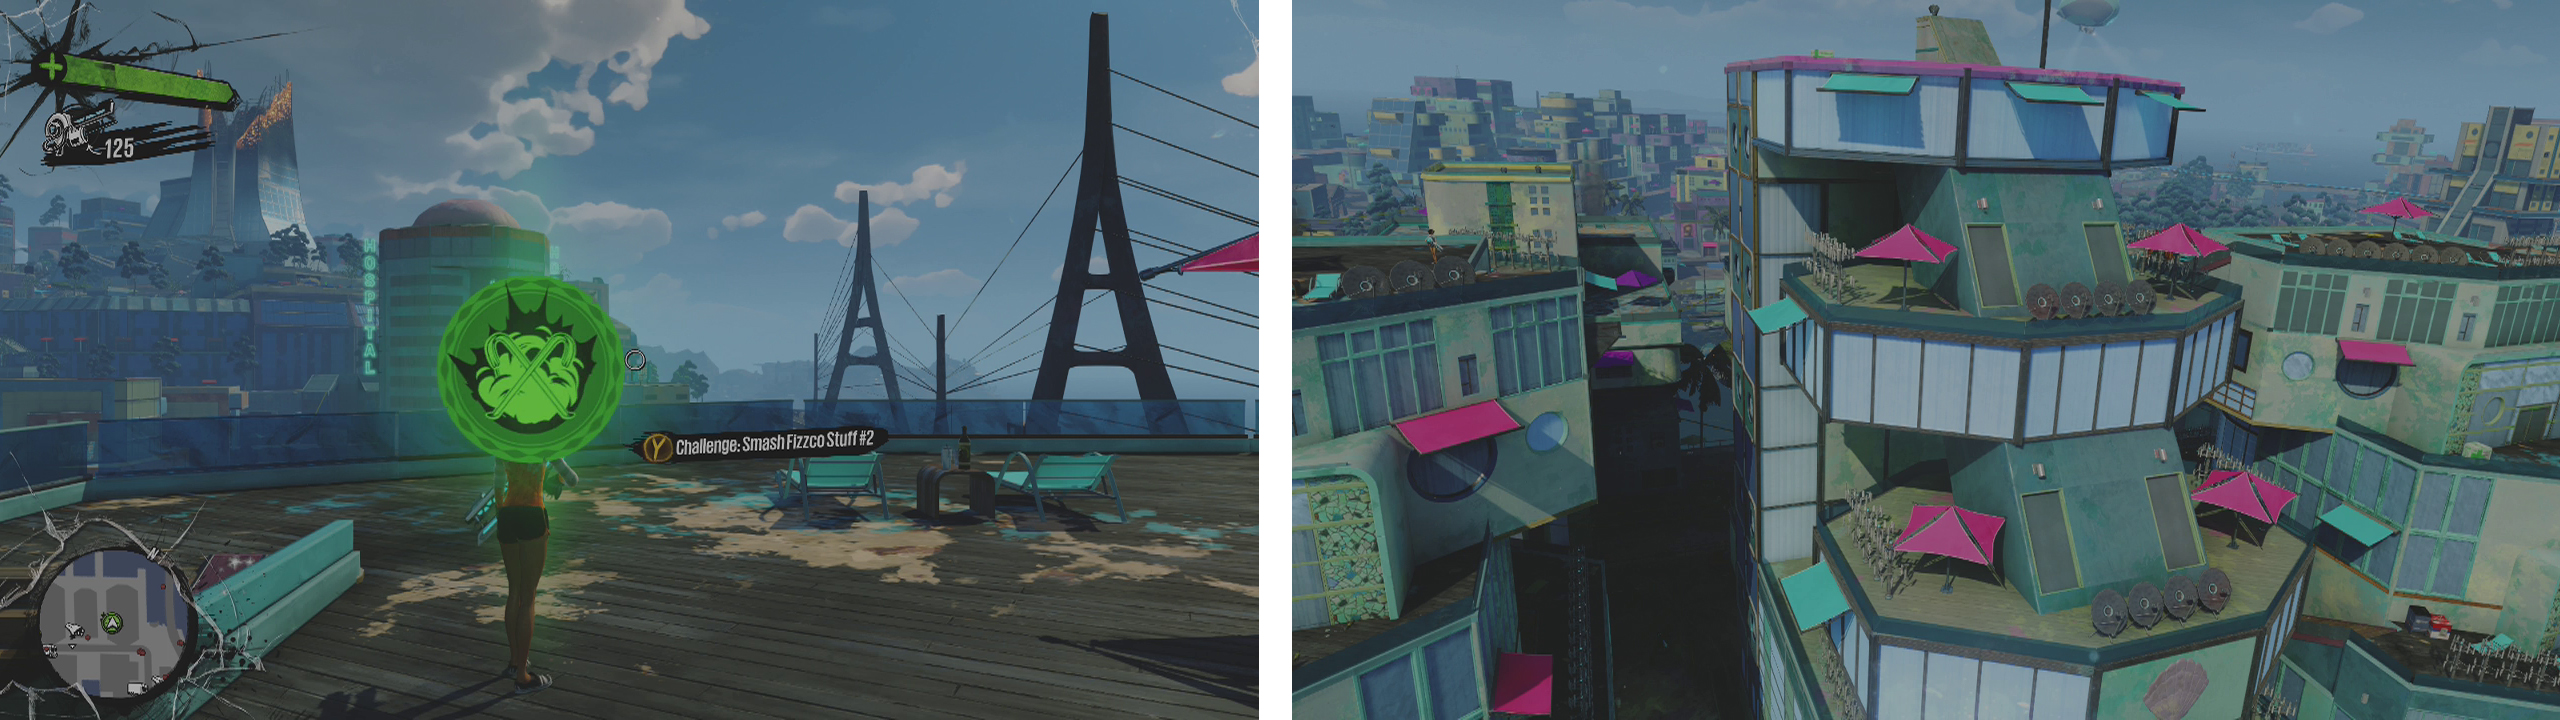
You can begin the challenge here (left). There are three tiers of balconies housing the destructibles (right) finding the right route takes trial, error and patience.
| Medal | Score | Reward/s |
|---|---|---|
| Bronze | 600 | $ 650 |
| Silver | 1,500 | $ 2,500 |
| Gold | 2,200 | 3,000 x Overcharge |
| Clothing: Sports Jersey |
Smash Plants
This is probably the easiest of all of the Smashing Stuff challenges and is very straight forward. During this challenge we will have the Triceratops figurehead on that we used during one of the story missions. Remember that hitting the melee button with this equipped will perform a short rushing charge attack.
Essentially, there are a series of pots in a row. We need to use the Triceratops charge attack to run through and destroy them all. Just make sure that you line the plants up before initiating the charge attack, or you’ll have to burn some valuable time doing it again. Rinse and repeat until all the plants have been defeated!
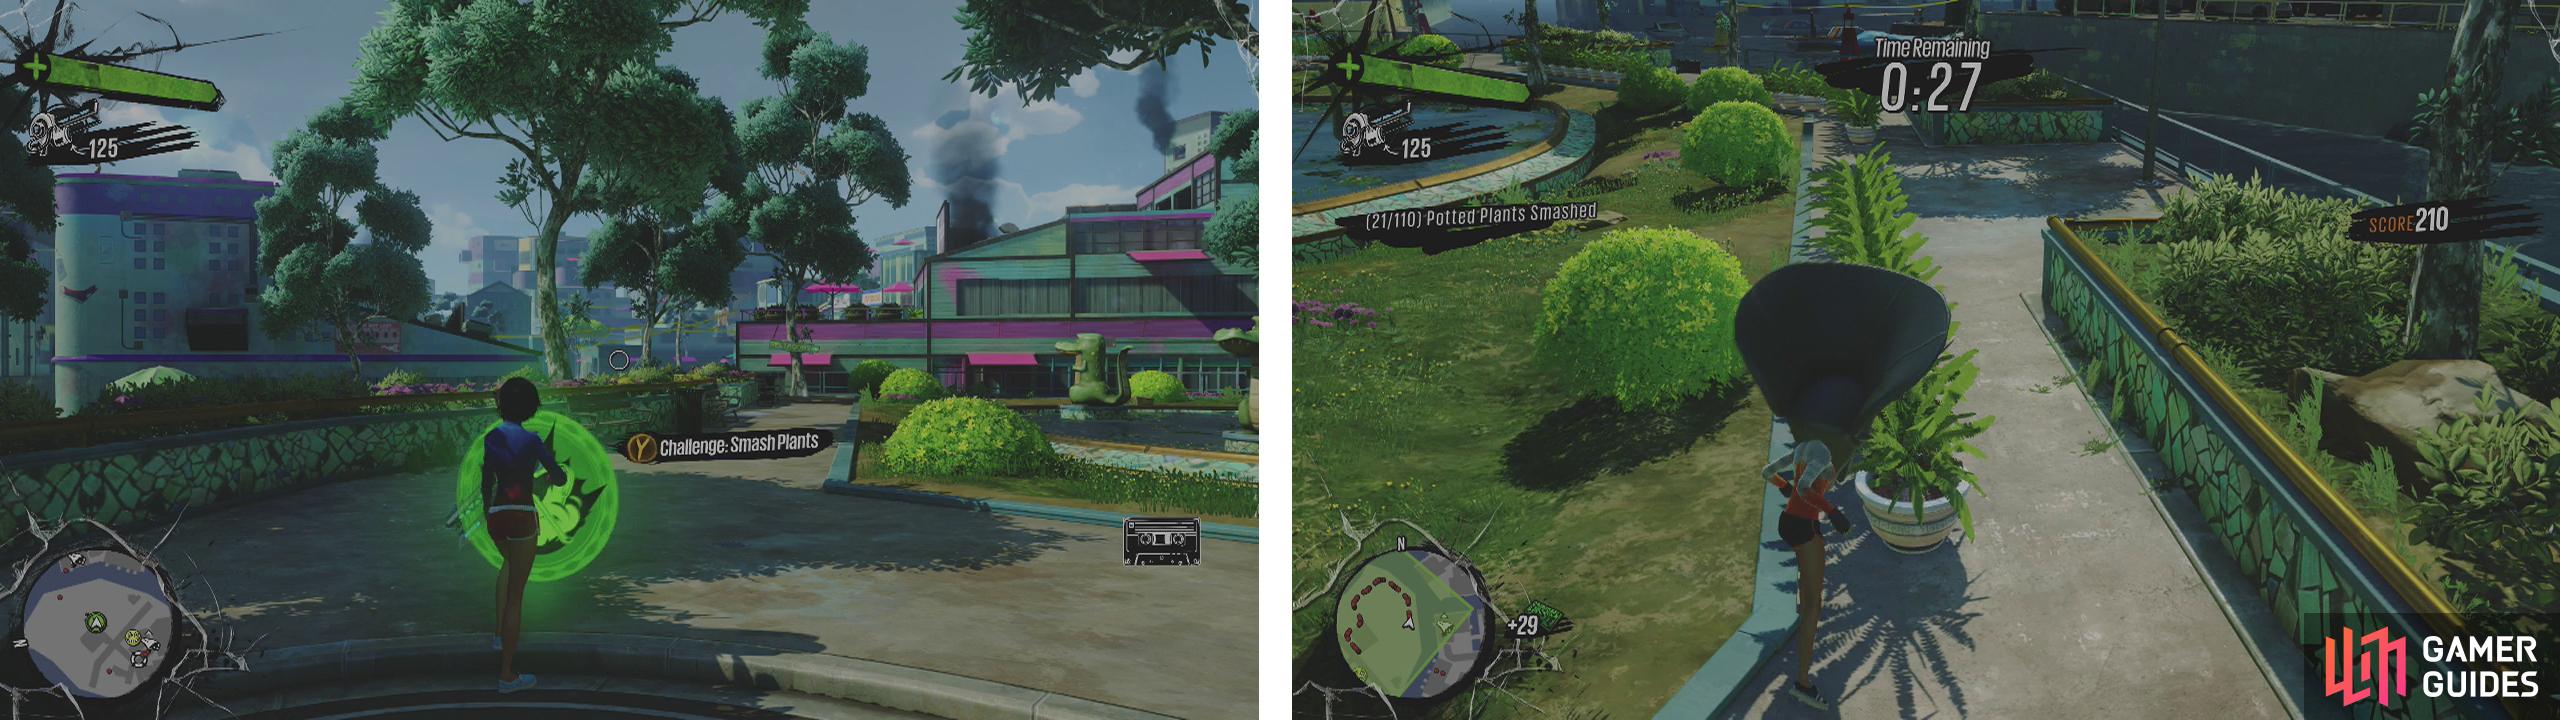
You can begin the challenge here (left). Charge through the lines of plants in order (right).
| Medal | Score | Reward/s |
|---|---|---|
| Bronze | 500 | $ 400 |
| Silver | 750 | $ 1,500 |
| Gold | 1,100 | 3,000 x Overcharge |
| Clothing: Football Facepaint |
Smash Scab Stuff
This challenge is particularly difficult as it is tricky to find a safe and efficient route through the area as there are both grind-based melee paths and other targets requiring bouncing that are located well away from anything else. To make things even worse, the time limit on this particular challenge is not very forgiving.
To begin with, you’ll want to drop down to the ledge below on the left. Destroy the launcher on the vent and grind to the right, destroying the railing mounted objects. Hold to the right to maintain grinding around the building and destroy the remaining items.
Jump down the wooden bridge here and perform a bounce slam and follow up with a melee if necessary to destroy the launchers and turrets here. Drop down to the left onto the bridge and hit the launcher on the back of the car. Hop on the rail and grind along until you reach a truck on the right. Hop up here and destroy the launcher.
Now look back up the bridge towards where we came and jump and bounce between the objects with the launchers on them as you return back along the bridge. Once you reach the far end, grind back towards the truck we stopped at earlier, but this time do so on the railing, destroying the turrets lining the way as you go.
When you reach the lookout area, hop up and destroy the two turrets. Drop down the opposite side and grind the bridge railing back to the right, smashing as you go. This should take you round a corner and over a makeshift wooden bridge populated with three launchers to destroy. When you reach the far end, jump to the left and grind the railing here to melee the final objects to end the challenge.
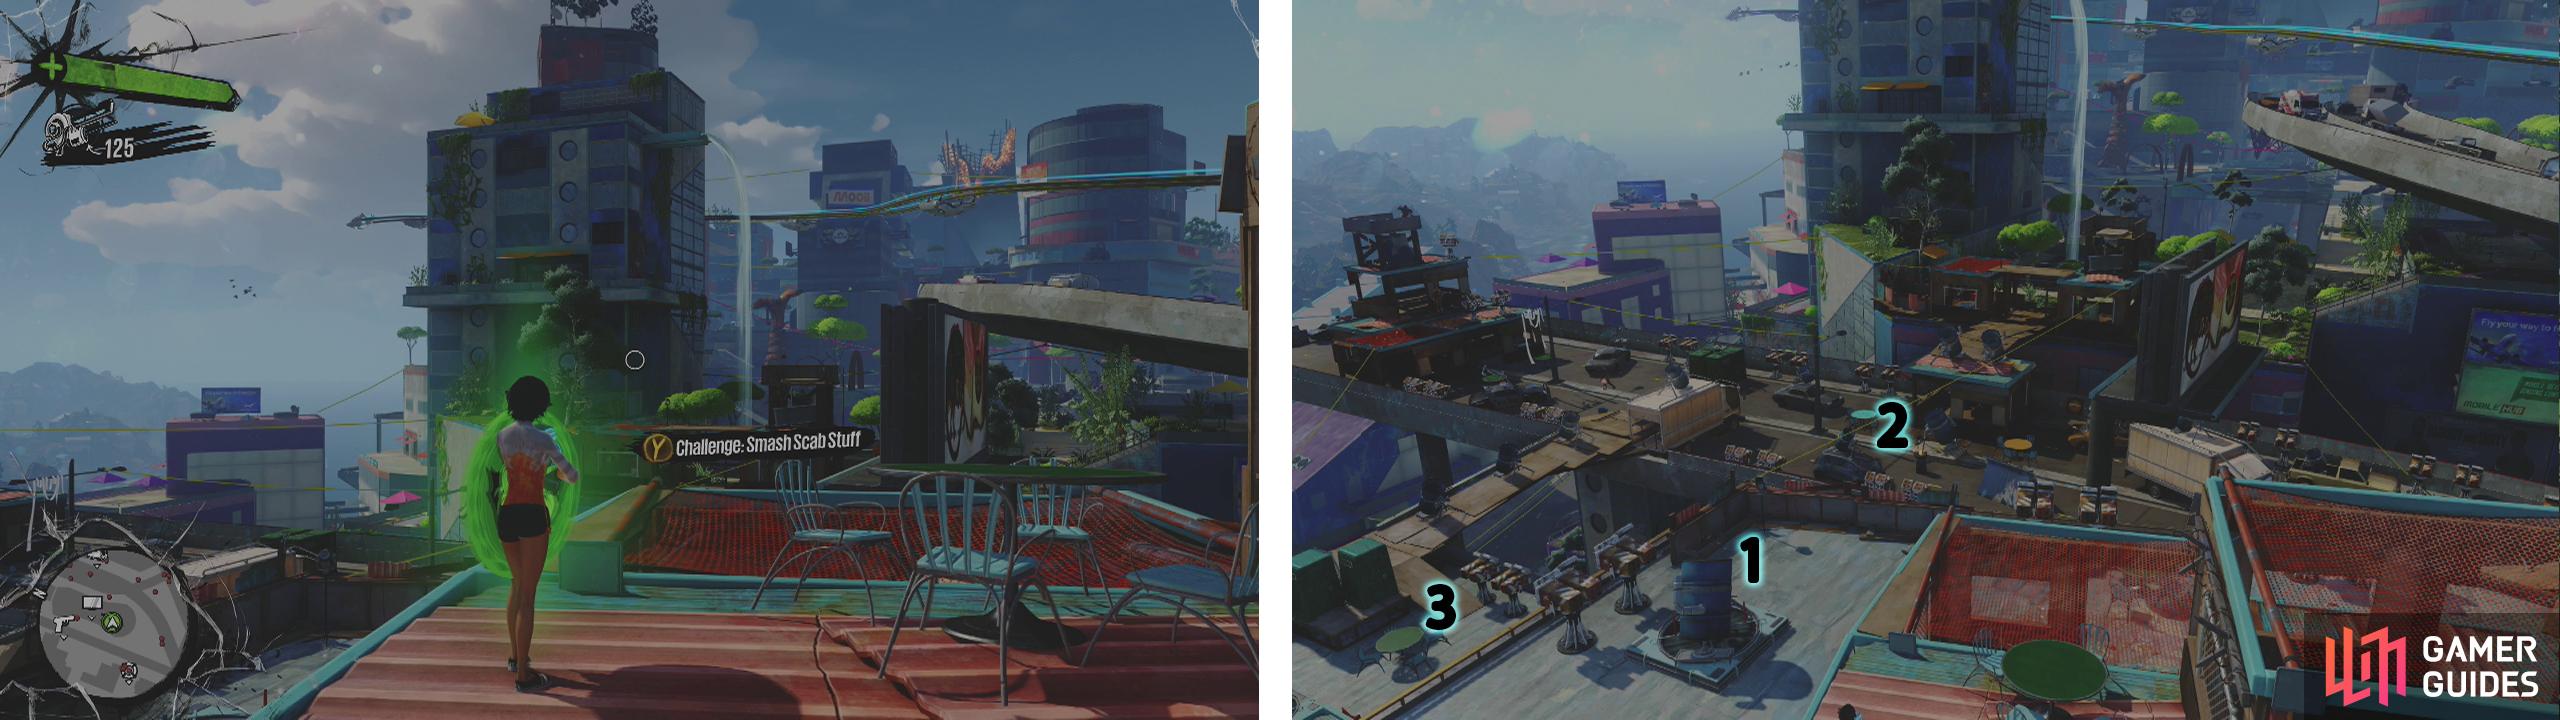
You can begin the challenge here (left). Here is our suggested route of destruction through the area (right).
| Medal | Score | Reward/s |
|---|---|---|
| Bronze | 500 | $ 400 |
| Silver | 750 | $ 1,500 |
| Gold | 1,100 | $ 5,500 |
Smash TVs
From the start, run up and smash the TVs at the back of the truck. Proceed to the front of the truck and smack the explosive barrel here. Do a quick 180 to find another truck, hop up to the small platform near the front of this and destroy the TVs there. Melee the TVs atop the truck whilst you are at it, then drop down to find more TVs behind it.
From here air dash over to the explosive barrel against the wall opposite the back of the truck ad hit that. Smack the TVs on the ground next to the destroyed car and then grind up the stair railing nearby.
As you grind along, destroy the TVs ahead and keep an eye out for some more on a bounceable shade sail to the left. Hop out and get those, then return to the rail and grind it until the very end.
Hop over to the right of the building and use the awnings to reach a balcony on the far side. Smack the explosive here. Look for another balcony on the eastern side of the building for a couple more TVs before climbing to the roof to find the remaining targets. Destroy them all to end the challenge!
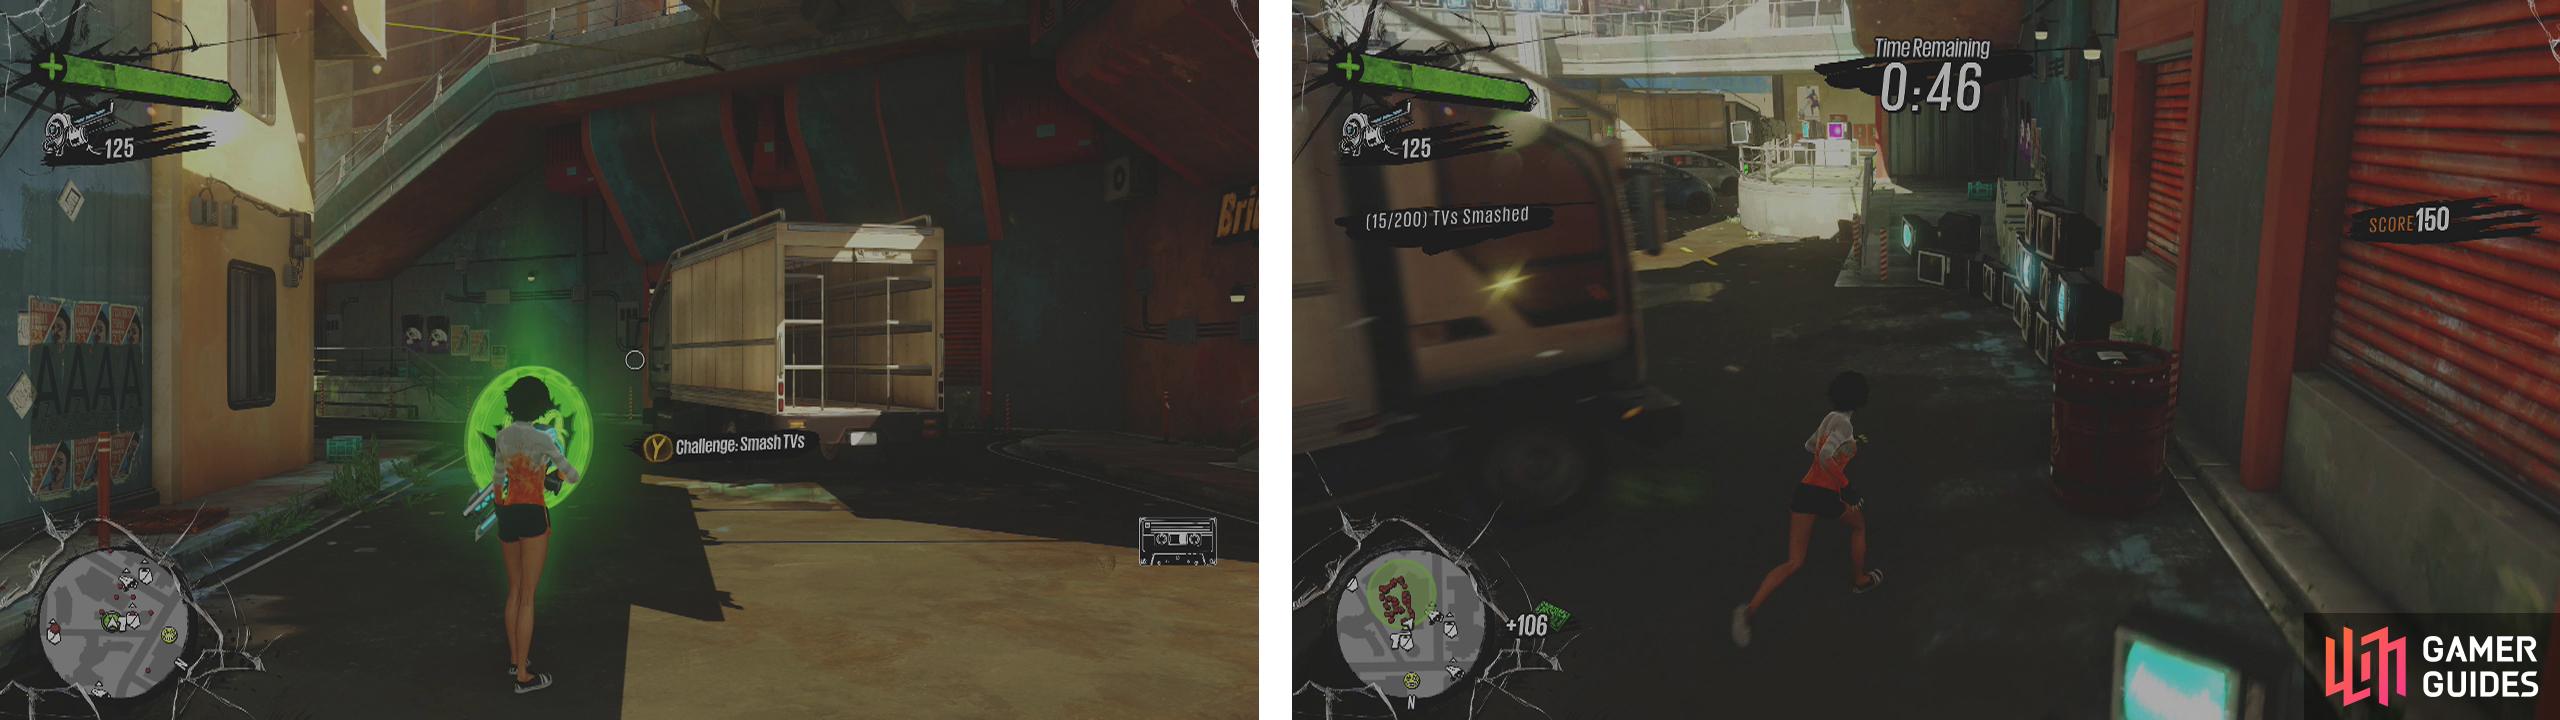
You can begin the challenge here (left). Hit the two groups of explosive barrels at ground level to save a bit of time (right).
| Medal | Score | Reward/s |
|---|---|---|
| Bronze | 500 | $ 550 |
| Silver | 1,000 | $ 1,000 |
| Gold | 2,000 | 2,000 x Overcharge |
| Clothing: Hockey Mask |
No Comments