Alright, you’ve done pretty much all of the Side Stories and got some shiny new gear for your characters, so it’s time to finally tackle the optional superboss. However, there is something that must be known, as you will be required to use all eight characters against the boss. What does that mean? Well, if you’ve neglected characters up until now, then you’ll need to grind them up to the point that they aren’t dead weight in the boss battle. The strategy outlined above, for the Apothecary 1HP Last Stand build, will work wonders for grinding, too.
What is the best place to grind? There are a few choices for you, such as trying to find Caits, but that’s not ideal and you might find a few while grinding normally. You could also use the Dancer’s Bewildering Grace to try and increase the multiplier for experience, but the x100 outcome is very rare and requires you to fully boost to have a chance at it. That means the best place to do this is at the highest level enemies, in the Forest of Purgation. Using the Last Stand build above, equip the necessary EXP and JP boosting skills and items, then go to work in grinding your characters. Note that you might want to use Cover (Warrior) on another character to ensure the enemies don’t kill off Olberic. Around level 70 or so should be enough for everyone.
(1 of 2) Olberic can make grinding easy with the low HP Last Stand build
Olberic can make grinding easy with the low HP Last Stand build (left), You may even get lucky and run into a Chubby Cait (right)
Preparations
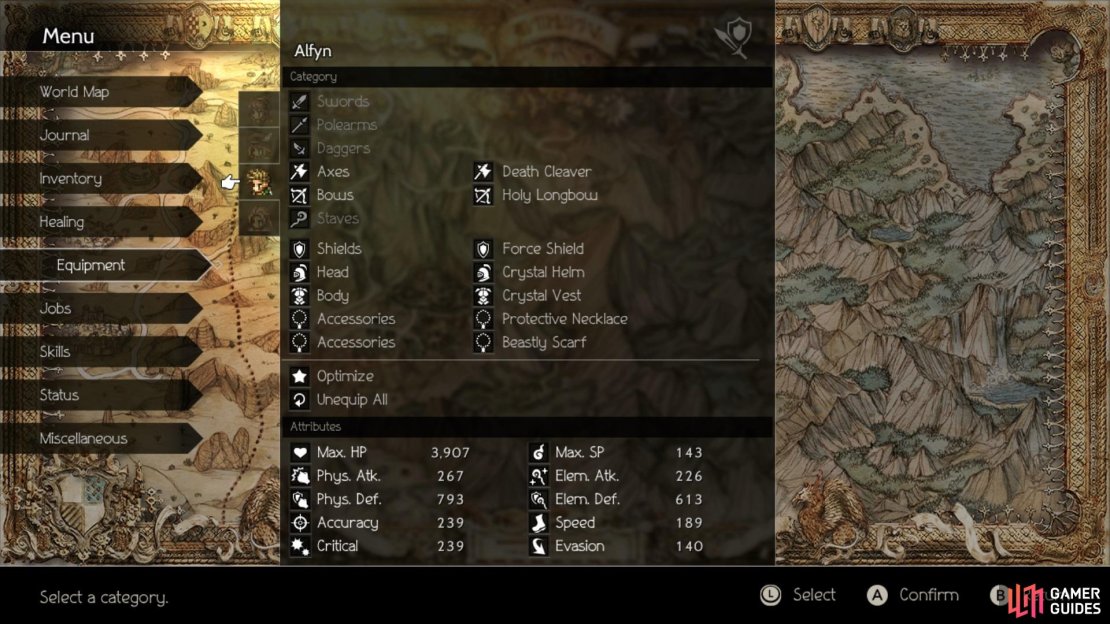
Necessary skills to include for your characters are definitely Saving Grace and anything else that helps with survival, like Starseer’s Divine Aura, especially on those less than meaty characters. You will want BP Eater on your main damage dealers (probably Sorcerer and Warmaster, as well as any other damaging skills. Surpassing Power (Warrior) is also a necessity for your main damage dealers, as you want them breaking the 9999 damage limit. You could make some slight adjustments to the Last Stand build to reflect the Warmaster, as that class will be a useful tool.
Class distribution will also be key, since your characters will be split into two parties. The main damage dealers (Sorcerer and Warmaster) will be in different parties and you’ll likely want Apothecaries in both groups, so have the non-Alfyn one have the Divine Skill, while Alfyn will be in the other one. Likewise, you’ll want a Cleric in each party, so Ophilia will be in one and someone with the Cleric class will be in the other. Leghold Trap is going to be essential during the superboss, so a Hunter might prove useful in each group.
| Character | Secondary Job | Support Skills |
|---|---|---|
| Primrose | Sorcerer | Saving Grace/Surpassing Power/Elemental Edge/BP Eater |
| Tressa | Runelord | Saving Grace/Divine Aura/Surpassing Power/Elemental Edge |
| H’aanit | Apothecary | Saving Grace/Divine Aura/Elemental Edge/Patience |
| Ophilia | Starseer | Saving Grace/Divine Aura/SP Saver/Elemental Edge |
| Character | Secondary Job | Support Skills |
|---|---|---|
| Olberic | Warbringer | Physical Prowess/Fortitude/Surpassing Power/BP Eater |
| Therion | Merchant | Saving Grace/Divine Aura/Patience/Physical Prowess |
| Cyrus | Cleric | Saving Grace/Divine Aura/SP Saver/Patience |
| Alfyn | Hunter | Saving Grace/Divine Aura/Patience/Physical Prowess |
Unlocking the Superboss
Before you can just hop straight at the superboss, you will need to unlock it first. All Chapter 4 stories need to be completed, plus there are a few Side Stories that must be finished. Those Side Stories are In Search of Father (II), Daughter of the Dark God (II) and all of their prerequisites. Once you do this, a new Side Story will pop up in the game, although the game doesn’t notify you about it. Fast travel to S’warkii and exit to North S’warkii Trail, then to West S’warkii Trail.
That is where you will find the new Side Story, Alphas and the Impresario. After Kit left the troupe, the impresario continued wandering around, but a monster stopped his travels. A swordsman came to take care of the monster, but this swordsman (Alphas) couldn’t defeat the monster, so they ask you to get rid of it for them. You won’t have to go too far, though, as the monster is a few steps to your west. It’s time for a mini-boss!
Well, not much will be talked about with the Azure-eyed Tiger, as at this point, it’s a big pushover and shouldn’t last more than one or two rounds. It can buff its own attack, as well as use Soporific Fang to put a character to sleep, but it’s a good chance it won’t be able to use any of that. It has four shields and is weak to swords, daggers, staves, ice and wind. Once you’ve defeated the tiger, you’ll automatically return to the impresario and talk about Kite, who seems to have gone to Hornburg with Lyblac. You’ll receive 10,000 Leaves for your troubles, plus you can speak to the Impresario again to unlock what should be the final Side Story in the game, At Journey’s End.
Prelude to the Superboss
You will receive a prompt on your screen, saying you can fast travel to the Ruins of Hornburg. This is your chance to get everything together, as once you enter the Gate of Finis, you will not be able to exit or save. The Ruins of Hornburg is located to the southeast of Everhold and there will be a long trail before you find a save point. Approach the large gates ahead for a quick scene, then this will be the point of no return. Before you’re able to tackle the actual boss, you will have to fight eight bosses you’ve conquered already, only they will have more HP and be stronger.
(1 of 2) The best way to take care of the refights is with Warmaster’s Divine Skill
The best way to take care of the refights is with Warmaster’s Divine Skill (left), Read the book on the ground after finishing the refights for a lore dump (right)
The best way to cut through them all is with the Fortitude build on Warmaster Olberic. The build outlined above does wonders and should be able to kill the bosses in one use of Winnehild’s Battle Cry, with their shields broken or not. If not, then you could try with their shields broken and if you still can’t do it, then you just try and fight the bosses normally. Individual strategies won’t be discussed here, since they are outlined in their respective Chapters (and will be linked). It’s important to have Olberic at low HP before stepping through the gate, so make sure you do that. The Old Storyteller in the tavern in S’warkii is probably the easiest way to lose a Challenge, especially if you have low elemental defense.
Once you step into the Gate of Finis, you will see some blue flames off to the sides, as well as a small statue of some flags in front of you. The statue is used to switch characters, should you wish, while interacting with the flames will trigger a boss fight. There are eight in total, four on the bottom row and four on the top row. The bottom row bosses, from left to right, are as follows:
– Simeon (Spear, Dagger, Staff, Wind, Dark)
– Miguel (Sword, Bow, Wind, Dark)
– Darius (Spear, Dagger, Axe, Ice, Wind)
– Dragon (Sword, Axe, Bow, Ice, Light)
The only one that might be annoying, should you be using the low HP build, is Darius. He will use Steal Item on his first turn, which hits everyone, so your low HP character will likely die and you won’t be able to use items until Darius is broken. Once you do that, though, resort to normal strategy. The top row bosses, from left to right, are as follows:
– Mattias (Sword, Axe, Ice, Light)
– Yvon (Dagger, Staff, Light)
– Venomtooth Tiger (Spear, Bow, Fire, Light)
– Werner (Dagger, Axe, Lightning, Wind, Light)
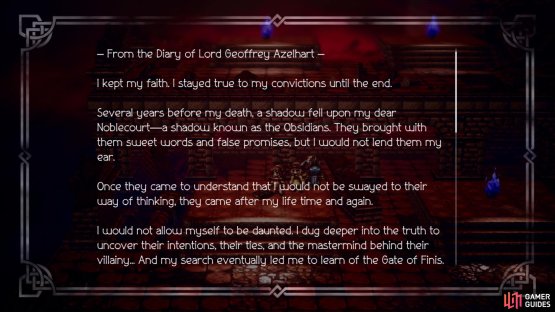
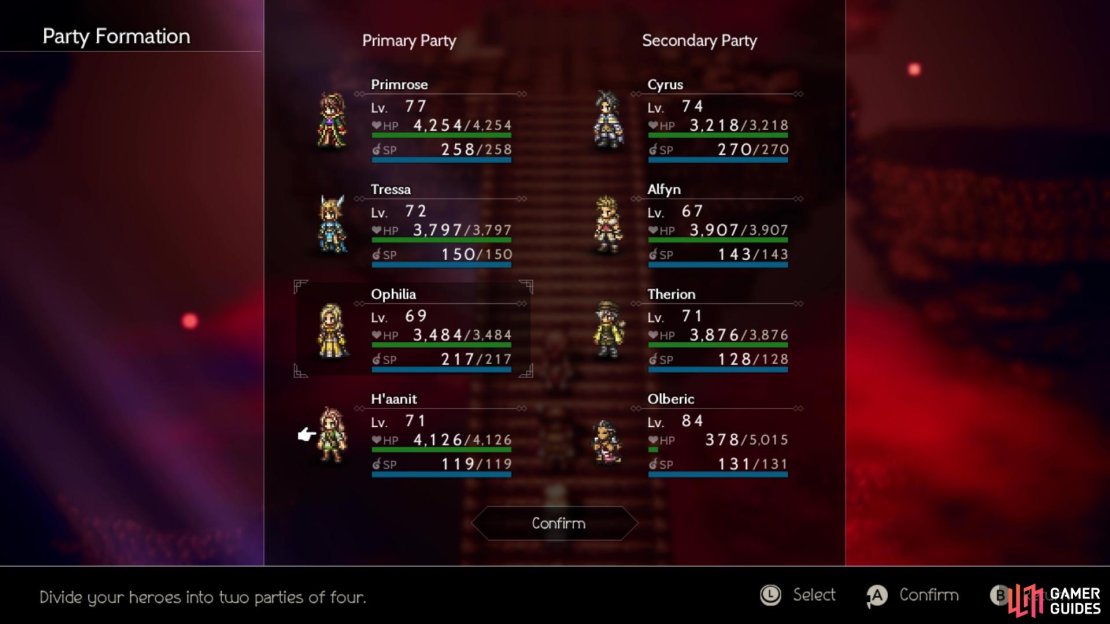
After defeating each boss, you should spot a book on the ground where each flame was located. Interacting with this book will give you some lore about the backstory of the game’s world and how some of the people you encountered factored into the overall happenings and the Gate of Finis. When all bosses are defeated, approach the central staircase to witness another gate appear out of nowhere. Heal up at this time (except for Olberic, of course, if you’re using the low HP build), then walk through the newly-opened gate to find another statue where you can switch characters. As you approach the top of the stairs, you will be prompted to create two parties. There are two phases and the first is more magic-oriented, with this guide utilizing the party listed earlier on this page.
You’ll have to form two parties before you fight the superboss’ first form
BOSS - Omniscient Eye
This is it, the first phase of the superboss, and if you thought the bosses during the character chapters were easy/hard, then you’re in for a surprise. At the beginning, the Eye will summon a soul that hangs off of the left side of the eye. Upon doing so, all of the Eye’s weaknesses will be blocked and you might notice a special buff next to them. Basically, the Eye is impervious to all damage/debuffs for the time being, until the Raging Soul is defeated. Of course, to make matters a little more complicated, the Raging Soul only has a single weakness, which happens to be light.
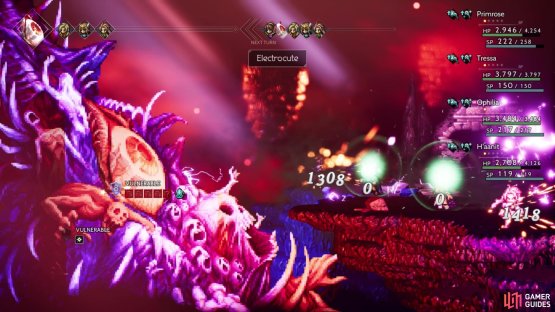
Your first order of business is to get rid of the Raging Soul, so have your Sorcerer use their first turn to cast Lux Congerere, which will break the Soul. While you’re doing this, the Eye will pelt you with attacks. Electrocute will hit all party members for around 1500-2000 damage, depending on your elemental defense (and all characters should have a permanent elemental defense buff, thanks to Elemental Edge). Searing Orb will hit harder than Electrocute, but it only attacks a single person. It can also put up a “shadowy mist,” making it harder for you to hit the enemies. The Raging Soul can put up a counterattack buff (only physical attacks), as well as perform Strike of the Dead, a major damaging single-target physical attack. Rend Flesh will hit all party members for heavy damage (2000+) and Overpower is a more powerful attack than Strike of the Dead
Once you defeat the Raging Soul, the Eye will be vulnerable until its next action, where it will summon two more souls, Wailing Soul (bottom right) and Screaming Soul (top). It will then revert to the same invulnerable state as before, meaning you’ll have to take out these two souls. Both have five shields, but the Screaming Soul is weak to spears, daggers and bow, while the Wailing Soul is weak to swords, daggers, ice and wind. They have a number of attacks, with the Eye also using a few new skills of its own. The Eye can put out some “noxious fumes,” making it so poison will also drain SP and BP, in addition to HP.
The Eye can also use the “power of elements” to erect another barrier of sorts, making it so the enemies’ elemental attacks are more powerful, with one addition that will be mentioned in a little bit. It can use Elemental Drain to lower your elemental power, plus it will “shudder ominously” to remove all buffs on your party, except for those that are from support skills or equipment. Let’s move onto the souls and their attacks. The Wailing Soul definitely likes its status ailments. It can poison a single character with Tainted Touch (medium damage), as well as the entire party with Debilitation. This can be even nastier if the Eye uses that “noxious fumes” fog.
(1 of 2) Divine Aura really helps a lot when it manages to proc
Divine Aura really helps a lot when it manages to proc (left), The Eye is immune to all damage and debuffs during the beginning portions of the fight (right)
In addition to the above, Umbral Strike is a medium damage attack that can inflict Blindness, plus Contamination will place every single ailment on a single character. With Tressa as a Runelord, you can use Transfer Rune with Rest to get rid of the ailments, or just use the Apothecary’s Rehabilitate; otherwise, you’ll have to remove them one-by-one with items. The Screaming Soul will focus mainly on damage, with Accurst Flame hitting a single character for some major damage. Shatter Mind does medium damage to a single target, but it will also drain all of their SP. Eternal Rancor is another single target attack that hits for major damage.
The last skill for the Screaming Soul is a bit different. Delayed Incantation does nothing on the turn it’s used, but if you don’t break the soul or kill it before the next turn arrives, a character will take immense damage at the very beginning of the turn. This will likely kill them, unless you have a lot of HP with Saving Grace. If the Eye has the “power of elements” field activated, then it seems like Delayed Incantation will invoke another attack that does around 2000 damage, but to the entire party. Note that this attack is always carried out at the beginning of the following turn and doesn’t use up the soul’s actual action.
Remove those two souls and the Eye will be vulnerable, with all of its weaknesses exposed. This is your chance to try and break it within another turn or two. The Eye has eight shields and is weak to daggers, axes, staves, lightning and light. Hopefully, you have Light Runes on everyone with Tressa (if you’re using her here), as you can double the effectiveness of attacks by always striking the one weakness with physical attacks. Plus, with a strong elementally-inclined weapon, you should add up the damage quite nicely. Having a Hunter here is also useful, as you can finally use Leghold Trap to make sure you can break the boss before it can transition into the next phase.
Eventually, though, the Eye will resummon all three souls, which will be a little different this time. They all will have four shields, along with five weaknesses, with four of those being blocked. Every time you damage one of the souls, its exposed weakness will shift one over to the right. For example, Wailing Soul is vulnerable to fire and you damage it, meaning its weakness will move over to ice. The ideal strategy for this phase is to make it so all of the souls have the same weakness, then use enemy party-wide attacks on them to make sure their weaknesses stay the same. This might prove difficult, but that’s why you have the Sorcerer in this battle, especially dedicated to damage.
The reason why this phase can prove difficult is that if you just happen to defeat one of the souls, then the Eye will summon it back. Was it mentioned that the Eye is in that invincible state when even a single soul is present? Well, it is and that means being able to inflict damage on it will be a huge problem. Keep fighting until you get the Eye’s health to 50%, which is when it’ll bring back all three souls and add a little twist to the battle. Each of the three souls will have a colored aura about them, plus three of your characters will have colored numbers above them.
(1 of 2) The open weakness will shift to the right whenever you damage one of the souls
The open weakness will shift to the right whenever you damage one of the souls (left), The Eye will continually resummon the souls during the second phase (right)
Before delving into that, all of the souls will revert back to their original weaknesses, but will have one added shield to their original totals. Also, the Eye will be vulnerable at this time, so you’ll be able to inflict damage/debuffs and also break down its shields. So, back to the numbers, they appear to be doom counters, so whenever a number reaches zero, then that character will die. However, the Screaming Soul will self-destruct, damaging your entire party once the counter reaches zero. It also appears some new skills show up at this point. Wailing Soul uses Decay on itself, which will inflict poison on your character should you physically attack it. Raging Soul will use a skill that removes a party member from the fight, so just break it to bring that character back.
Breaking the soul won’t get rid of the counter, so you will actually have to destroy them. Continue the battle until the Eye’s health reaches 25% or so, which is when it will resummon all the souls, then use Consume Soul to take them into itself. This grants the Eye more shields, plus it will now gain three actions per turn. At this point, it can use Evil Eye to petrify a single character, similar to Redeye, so hopefully you still have some Herb-of-grace Potions leftover. It also has Encroaching Darkness, a three-hit dark-elemental attack. At this point, you just want to go ham on the Eye, breaking it when possible and doing as much damage as you can.
The souls are gone for good at this point, so you don’t have to worry about them. Make sure your Cleric keeps your health up high and if you get your buffs removed, you can try putting them back up, but if you heeded the warning and outfitted your characters with Elemental Edge, then your elemental attack and defense will always be up. The only buff that might matter if the Runelord’s Light Rune, as the damage is definitely worth it. By now, you should know what to do, so keep fighting and the Eye will eventually perish. Once it does, the second battle will begin.
BOSS - Galdera, the Fallen
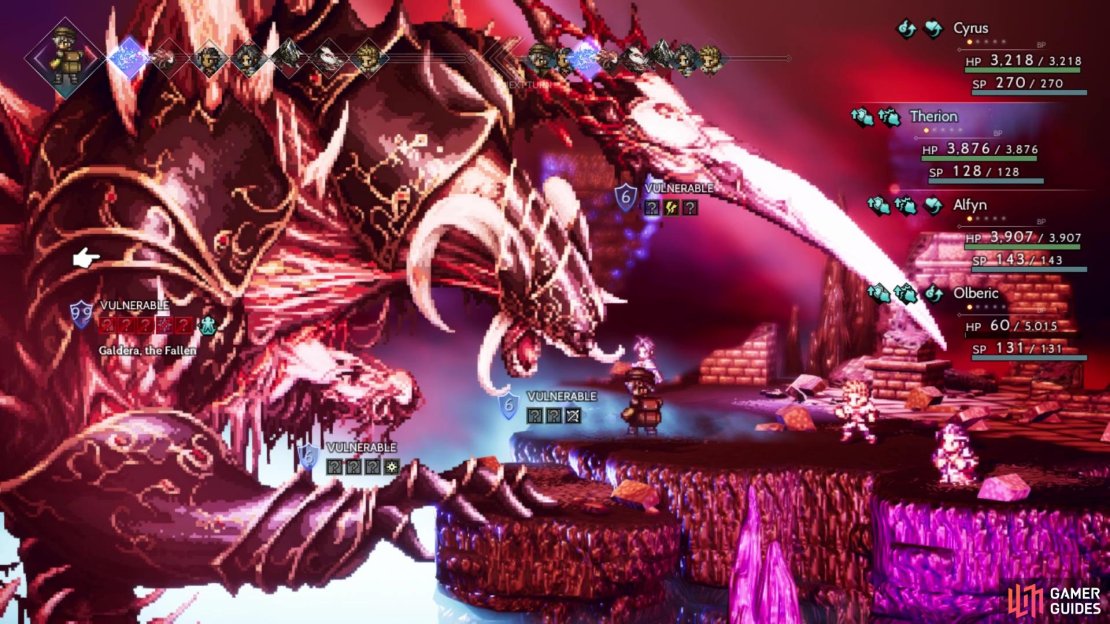
Welcome to the second form of the superboss, where you take command of your second party to battle. There are four targets, with the main body being in the back, and three body parts. The first thing that will happen in this fight is Galdera using “The Veil of Darkness Expands,” which will block all of his weaknesses, raise his shield points to 99 and make him invincible, similar to the Eye in the previous battle. He won’t become vulnerable until you defeat the three body parts, but the good thing is that these parts don’t respawn once destroyed.
Don’t be alarmed by the 99 shield points on Galdera, as that’s just there for show
All three parts have the same amount of shield points, at six, but different weaknesses. Lyblac, the bottom one, is weak to swords, daggers, fire and light. The Abyssal Maw, the head, is weak to swords, spears and bows, while the Blade of the Fallen, the big sword-like thing, is weak to ice, thunder, and wind. This form of the boss battle can be very hard or very easy, depending on what you want to do. Out of the three body parts, the first one you might want to take out is either Lyblac or the Abyssal Maw. Lyblac is a buffer for the most part, with a few attacks, while Abyssal Maw is mainly magical and Blade of the Fallen is mainly physical.
While you’re fighting the extremities, Galdera does have a few attacks of his own, but they aren’t really much. Augmentation will buff a single enemy’s physical attack and speed, while Shadowy Aura can do one of two things. It can remove all status afflictions from enemies or it can remove all status augmentations on your party. Apart from a normal attack, there is one more thing that Galdera can do. Given enough time has passed, the veil of darkness will expand, giving more shields to the body parts or even changing their weaknesses. This might not happen until you defeat a body part or two, though.
Let’s move on to the individual body parts and their moves now. Lyblac, as previously mentioned, focuses mostly on buffing the other enemies. Elemental Augmentation will increase the elemental attack of a single enemy, while Protection will increase everything’s physical defense and Soul Healing gives three shields to a single enemy. What Enchantment: Darkness does is basically buff an enemy so that their attacks can inflict Blindness; Enchantment: Fear does the same thing, but with Terror. The only attack seen was Deceleration, which hits a single character for medium damage and also removing two BP.
Moving on to the Abyssal Maw, it is mainly magical in nature, as it pelts you with all kinds of spells. Frozen Hell is a three-hit ice elemental attack that does medium damage each hit, while Hell’s Thunder is a three-hit lightning one that does the same thing. It can steal some SP from the entire party with Consume Aether, as well as debuff everyone’s physical defense with Shadow Eye. Another annoying move from the Maw is Dark Flame’s Curse, which blocks you from using multi-target elemental moves. You might also see Nightmare, a party-wide attack that hits for immense damage and also debuffs your physical and elemental defense. Although it might not happen unless it’s the last extremity left, but the Maw can use Toxic Rainbow, which you might remember from Alfyn’s Ogre Eagle fight, as it lowers your party’s max HP each turn; quickly defeat the Abyssal Maw to get rid of it.
(1 of 2) Not only can the Abyssal Maw do crazy damage with its spells
Not only can the Abyssal Maw do crazy damage with its spells (left), but it can also steal SP from everyone with Consume Aether (right)
Last on the list is the Blade of the Fallen, which is purely physical. Sweep hits the entire party for major damage, while Mistcutter and Shrieking Blade also hit all characters for medium damage. There is a caveat with the latter two, though, as it requires Lyblac to use Enchantment: Darkness or Fear, respectively, for the Blade to use those moves. The Blade also has a number of single target physical skills, such as Overpowering Slash, which can does immense damage. Vorpal Strike hits a character and reduces their HP to one, which can prove fatal if another extremity goes afterwards. If the last piece left, it will grant itself two actions per turn and add some new attacks. Almighty Sweep hits the party for major damage and Wanton Bloodshed will randomly attack allies for medium to major damage for around four hits.
The first part of this battle is about quickly killing the body parts, as prolonged fighting will only prove taxing on your characters. The quickest way to do this is with Olberic or H’aanit spamming Winnehild’s Battle Cry, especially if they have low health and Fortitude equipped. Should you not have that, you want to use your most damaging moves that will hit everything, or concentrate one by one on the more troublesome parts. One particular helpful tip is that Alfyn can pretty much negate Lyblac’s buffs in the fight (at least, for a little while) with Ruinous Dust and Curious Bloom, as it removes buffs and prevents them, too. Of course, Galdera can remove this, but it definitely helps.
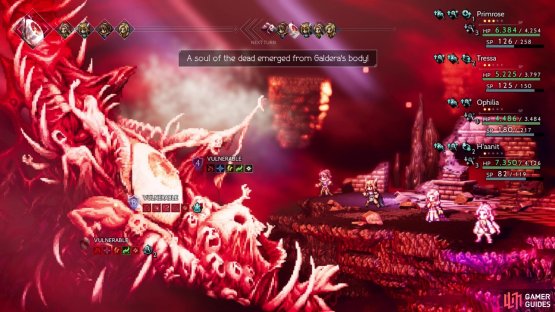
Once you’ve removed all three body parts from the picture (remember, they stay gone, unlike the souls from the first form), the “veil of darkness” will be removed and Galdera will finally be vulnerable. Note that this makes it so Galdera will have three actions per turn, but on his very first turn, the “souls of the dead writhe ominously before you.” If you can manage to break Galdera before his next action, then you won’t see the following two attacks. Speaking of that, Galdera is weak to spears, daggers, bows, ice and light and he has nine shields.
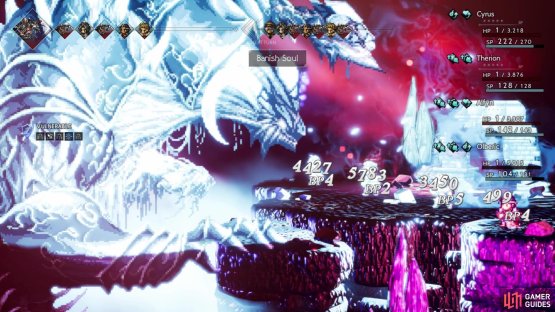
So, if you don’t manage to break him after doing the whole “souls of the dead writhe” thing, then you will see a combination attack. Banish Soul reduces every character to one HP, plus it removes all of their BP. This will be followed up with Create Soul, which adds shields to Galdera based on the number of BP removed from your party, except it doesn’t seem to be one-to-one. Anyway, quickly recover from that attack and continue fighting Galdera. He can still do Augmentation to increase his physical attack and speed, plus you’ll see more moves in this phase.
Crushing Death is a three-hit physical attack that adds up to some major damage, around 2,000 or so in total. External Void is an attack that deals immense damage to the entire party, possibly even one-hit KOing them if their health is around 3200 or so. Exterminate will randomly hit allies for a few hits, but Divine Aura procced both times, so the damage wasn’t seen. One of the more annoying attacks is Meteor Storm, which will randomly hit all allies a total of eight times, with each hit dealing medium damage.
(1 of 2) Banish Soul removes all BP and reduces everyone’s HP to one
Banish Soul removes all BP and reduces everyone’s HP to one (left), with Create Soul turning that stolen BP into more shields for the boss (right)
Note that Banish Soul seems to block two of his weaknesses, so you’ll have to act around those blocked vulnerabilities. With Galdera now fully exposed, you can go all out in defeating him for good. Break out the debuffs like Shackle Foe and Leghold Trap, which will help minimize some of the damage and ensure you can break through his shields before he gets a turn. Should you have a Thief, Steal HP/SP is useful in two hits on the shield, as is a Scholar’s Blizzard attack. If you can manage to not get spears blocked, then the Warrior’s Thousand Spears does good work in eliminating the shields.
You will want to quickly finish off Galdera, who has around 180,000 HP, as the longer the battle lasts, the more likely it may come that Galdera will kill you. You definitely don’t want to be starting over from before the boss refights, do you? Keep your health topped off at all times and beyond, with Saving Grace. A Merchant can buff your physical defense with the Mercenaries from Hired Help, plus a Cleric can do the same with elemental defense with Sheltering Veil. Of course, you could make short work with the Warmaster’s Winnehild’s Battle Cry, especially with low health and Fortitude.
When Galdera has finally been finished, you will see a few scenes, then you’ll receive your reward for completing At Journey’s End. Your reward is 100,000 Leaves and an accessory called Spurning Ribbon. This particular accessory, when equipped, will remove all random encounters from areas, so you are free to explore without having to worry about fights. Of course, there’s not much else to do after beating Galdera, so congratulations on finally finishing Octopath Traveler.














No Comments