Ophilia’s third chapter will take place in Goldshore, where her next stop on the pilgrimage takes place. She’s not in Goldshore long before she runs into a familiar face, Mattias, the merchant from her first chapter. After a little conversation with him, you will need to head to the cathedral here in Goldshore. It is located in the northern part of town and upon entering, a scene will take place. It appears that something is troubling the Bishop, so Ophilia offers to help in any way she can.
Without breaking through to him, she decides to leave and notices a small boy quickly exiting the cathedral. Head to talk with this boy, who can be found just east of the save point near the cathedral. He mentions that he brought a letter to the bishop, which might explain his behavior, so return to the bishop to find out nothing. You will have to go back to Daniel, the boy, and use Guide on him to get him to follow. Once more, return to the bishop to find out the truth. The letter he received said that his daughter had been kidnapped and the culprits want the ember from the Flamebearer.
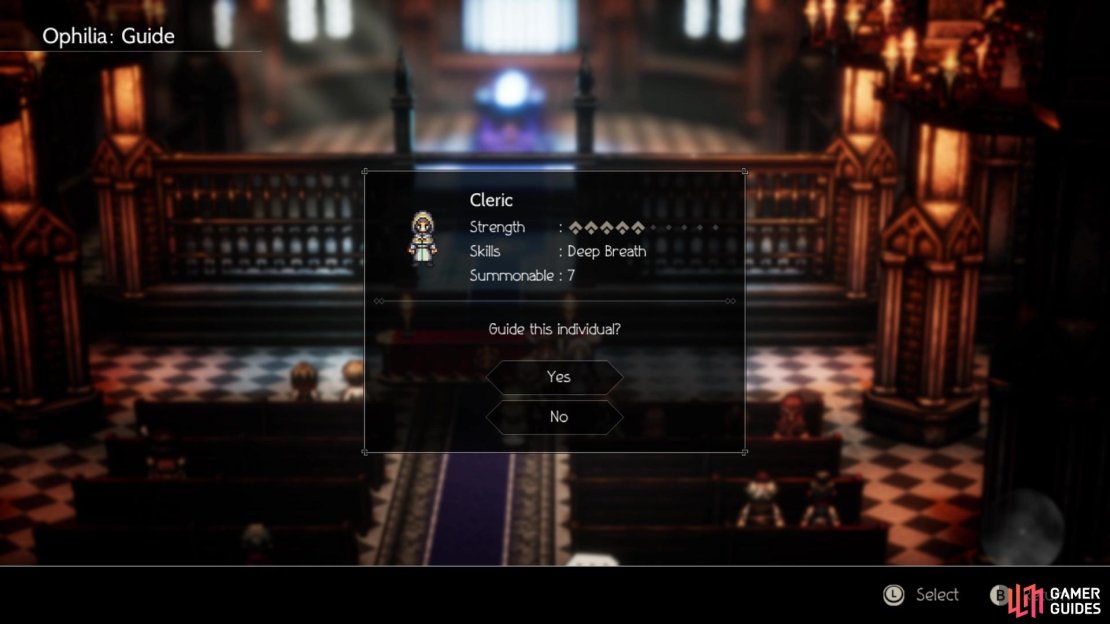
Some more scenes follow and Ophilia takes it upon herself (and her full party, of course) to head to this cave to rescue the bishop’s daughter. When you regain control, head to the altar in the cathedral and have Ophilia use Guide on the cleric there. Not only does she have a nice 1,500 heal in her arsenal, but Deep Breath replenishes 25 SP to your entire party, making her a great utility summon. You can speak to Mattias in front of the tavern in the southern section of town before leaving for the cave. Leave via the path south of Mattias.
The Cleric with Deep Breath is an excellent choice for Ophilia’s Guide for the upcoming dungeon
Road to the Seaside Grotto
As with a lot of areas thus far in the game, you will need to go through a small area before actually arriving at the dungeon. There will be a save point to your south not far from where you entered, with a side path leading to a chest next to it (Thunder Soulstone M). Near the save point, there will be a fork in the road, with one path leading north and another heading west. The northern brings you to a chest with an Ice Amulet, while the western will have two diversions, leading to two more chests (Bottle of Poison Dust and Healing Grape Bunch).
Continue west and you will come across another chest along the way, so open it for an Herb of Awakening. You’ll eventually run into the entrance for Seaside Grotto, so go ahead and enter it.
Seaside Grotto
Not far in, you will come across a fork, so head south first to find a chest waiting for you at the end (Inspiriting Plum Basket). Delve deeper into the dungeon, until you cross a bridge and have two ways to go. North seems like it leads to nothing, but around the bend, there is a small opening on the left side that you can squeeze through to get to a chest (Refreshing Jam). Return to the bridge and go south this time, until you spot the save point just north of you. Keep heading west and up the trail, stopping somewhere in the middle. See that plant growing out of the rock? There is a hidden path here that leads to that one purple chest you saw earlier (Grand Helm).
Return to the save point and you should see a path to the far west, which is just a dead end with nothing. So, venture east from the save point to another bridge, so go ahead and cross it to find a chest at the end (Energizing Pomegranate M). Double back to before the bridge and head northwest this time, opening the chest along the way (Olive of Life). Follow this trail up and around to another bridge, with a path leading south of it to another chest (Inspiriting Plum M). Cross over the bridge and you’ll run into another save point, with the path south of it leading to one final chest (Silver-filled Pouch). All that’s left is to head east from the save point to find yourself with another boss.
BOSS - Mystery Man and Shady Figure
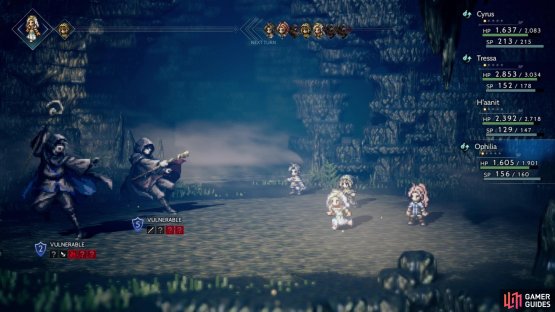
As you can see, you are literally fighting two bosses right now, and they work similarly to the Cleric and Scholar job classes you have. On their initial turns, the Shady Figure will make it so he has two actions per turn, while the Mystery Man will basically block the elemental weaknesses of both bosses. That essentially means that you will only be able to utilize the physical weaknesses of both bosses until one of them goes down. The Mystery Man is weak to spears, axes, light and darkness, while the Shady Figure is weak to swords, daggers, fire, ice and lightning.
(1 of 2) The Mystery Man will block the elemental weaknesses on his first turn
The Mystery Man will block the elemental weaknesses on his first turn (left), The Shady Figure will always spend one of his two actions on Heal Wounds (right)
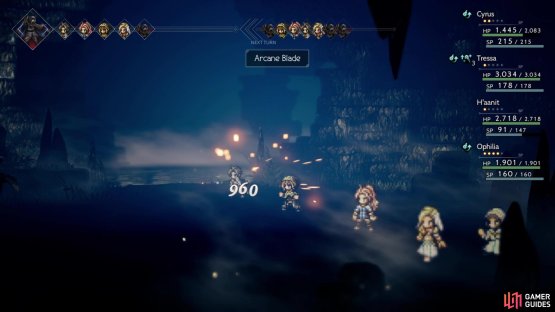
Despite having two actions per turn, the Shady Figure will always use one of those actions to cast Heal Wounds, which heals both bosses for 800 HP. So, as long as you deal more damage than 800 per round, you should be fine. Of the two, the Mystery Man definitely deals a lot more damage, as he has Fireball, Icewind and Lightning Bolt, all spells you already know. They hurt quite a bit, so you will probably want a Cleric of your own healing every turn (whether that’s Ophilia or a secondary one). He also has Arcane Blade, which deals massive dark-elemental damage to a single character, likely either one-shotting them or putting them near KO status.
The Shady Figure, while not as damage heavy as the Mystery Man, has more of a utility role in the fight. In addition to Heal Wounds, he also can buff both of their elemental attacks with Arcane Enchantment, while using Break Spirit to debuff your elemental defense. Other than his normal attack, the Shady Figure uses Luminescence against your party. This attack seems to do a little bit less damage than the elemental spells from the Mystery Man, but it’s still something you need to keep track of, in terms of healing.
The biggest question in this battle is asking yourself which one you want to defeat first, as the other will receive a buff when left alone. Note that this buff does remove the blocked weaknesses, so you will be able to utilize them now. This buff comes in the form of gaining three actions per turn, as well as adopting some new moves and gaining three permanent shields. For example, the Shady Figure will be able to use Arcane Blade, although it is definitely weaker than his ally’s. He’ll also use Black Magic, which is a party wide darkness attack that can inflict Terror. The Mystery Man will tend to get a bit trigger-happy with Arcane Blade, pairing it with a one-turn elemental attack buff, Channel Energy. He also seems to upgrade Fireball into Fire Storm, which hits twice.
Either one can spell trouble, since they can either debuff your elemental defense or buff their own elemental attack, which means big damage all around. It might be a tad easier to manage the Mystery Man alone than the Shady Figure, since Black Magic hits for a lot more than Fire Storm, plus you will be dealing with Arcane Blade either way. To add onto this, the Mystery Man will always waste an action each turn on Channel Energy, so you will only have two attacks versus the three (Shady Figure drops Heal Wounds when alone).
There is one strategy that makes this battle a breeze, but it involves having a Cleric with Reflective Veil and a Dancer with their Divine Skill, Sealticge’s Seduction. Have the Dancer use that skill on the person with Reflective Veil, then on their next turn, you can cast it on the entire party, instead of just a single character. With a max boosted Reflective Veil, you can reflect back four spells. The only one that can’t be reflected is Arcane Blade, which only hits a single character.
(1 of 2) When alone, the enemy left alone will power up and use some of the other foe’s moves
When alone, the enemy left alone will power up and use some of the other foe’s moves (left), while also breaking out some new skills (right)
When you finally finish off both of the mystery men, you will return to Goldshore with the bishop’s daughter unharmed. Approach the cathedral for another scene, with the Kindling going off without a hitch. It looks like you will be able to return to Flamesgrace to finish the pilgrimage, but a series of events happen that will prevent that. It seems like the next stop for Ophilia will be Wispermill.




No Comments