The second round of sidequesting will begin here, focusing on the very hard Side Stories from the normal walkthrough, as well as those that unlock from completing the Chapter 4 stories. There are two quests that give extremely useful accessories, so they will be done first, but there is no set order for the others.
Friends Again
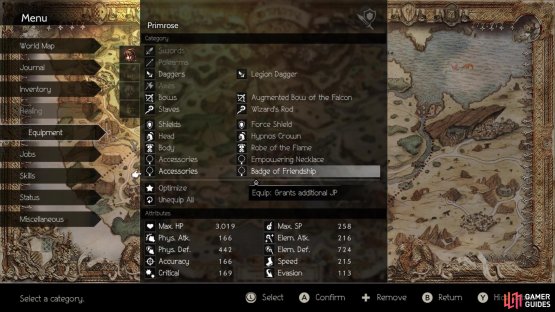
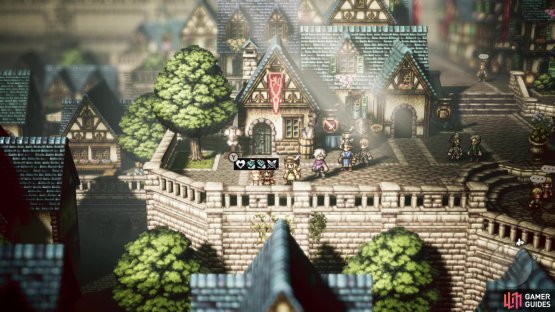
The first Side Story on the list requires the completion of Ophilia’s Fourth Chapter. Head to Saintsbridge and seek out Emil in the Upstream section of town, who will be in the large area in the middle. Worried about Nate, they want to help cure him of this “lovesickness.” To complete this quest, return to the first section of Saintsbridge and look for the Bully not too far from the bridge connecting to the Upstream section. Steal/Purchase the River Blossom from the Bully, then hand it over to Nate, who’s standing just north of the other two boys to complete the quest.
(1 of 2) You can find the Bully with the River Blossom here
You can find the Bully with the River Blossom here (left), Don’t forget to equip the Badge of Friendship to someone for the extra JP (right)
| Objective | Reward |
|---|---|
| Helped cure Nate of his lovesickness | Badge of Friendship |
Back with Bale
This next Side Story will require both Ophilia’s Fourth Chapter and Olberic’s Fourth Chapter to be completed. Fast travel to Wellspring and enter the house by the western exit, which is where you will find Bale to start this Side Story. Speak with him a second time to learn that he hasn’t heard from Bishop Donovan in a while (and to actually start the sidequest). If you don’t remember where Donovan was located, he can be found in Goldshore, inside of the cathedral there. Inquire/Scrutinize Donovan’s Condition from him, then bring that info back to Bale to finish.
| Objective | Reward |
|---|---|
| Checked up on an old friend for Bale | 9,000 Leaves, Captain’s Badge |
Tilting at Windmills
You need to finish Ophilia’s Fourth Chapter for this Side Story to be unlocked. The Side Story can be found in Wispermill, from the Slender Farmer on the eastern half of the town. It seems like someone is raising the price to use the windmills again, so something needs to be done. There are two solutions for this sidequest, with the first one having you travel to Atlasdam. You’re seeking out Dan, a NPC in front of the weapon shop. Using Primrose or Ophilia, Guide/Allure Dan back to the questgiver to finish.
For the other solution, head to Sunshade and enter the tavern there. There is a man named Bryan on the left side; he’s the one dressed all fancy in front. You will need to Challenge/Provoke Bryan and win the duel, which should be extremely easy, as he only has a strength of four. Once you defeat him, the quest will end.
(1 of 2) You can just bring Dan back to the questgiver as one solution
You can just bring Dan back to the questgiver as one solution (left), or you can beat up Bryan inside of the tavern in Sunshade for the other solution (right)
| Objective | Reward |
|---|---|
| Helped solve the issue with the overpriced windmills | 22,000 Leaves |
Russell’s Repentance
Requires completion of Cyrus’ Fourth Chapter to unlock. Stonegard will be your next step, where you’ll find Russel in one of the small houses on the eastern side of the first area of town. Atoning for his previous actions, Russell now works with Dominic in Stonegard. They are currently researching histories of the land, but are lacking info on certain places, specifically the Woodlands, Frostlands and Cliftlands. You will need either Cyrus or Alfyn for this, as you’ll be using Inquire/Scrutinize on three specific NPCs.
The first NPC is in Bolderfall, north of the inn, in the little square plot of land and is an older gentleman wearing green (Cliftlands Know-it-all); get the History of the Cliftlands info from him. The second NPC is in Stillsnow, in front of the chapel in the northern half of town; get the History of the Frostlands info from him. The third NPC is in Duskbarrow, near the center of the village and is clad in armor; get the History of the Woodlands info from him. Bring all three pieces of info back to Russell to finish the quest.
| Objective | Reward |
|---|---|
| Helped Russell research some history | 9,000 Leaves, Confessional Armor |
Princess Mary, Redux
Requires completion of Cyrus’ Fourth Chapter to unlock. You will find Princess Mary, one of Cyrus’ students, in Rippletide, a little west of the tavern. She has come to Rippletide to meet with Professor Paul, someone who taught her when she was younger. Something goes awry, though, as the ship Paul was on went down, so it’s up to you to find him. Before setting off, you will need either Primrose or Ophilia in your active party. You’re heading to a dungeon called Undertow Cove, which is located in North Rippletide Coast.
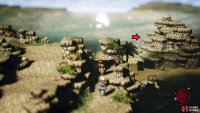
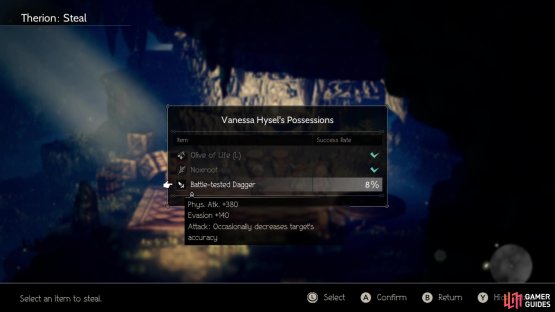
Exit Rippletide and head north into North Rippletide Coast. Follow the trail north a little bit until you see a trail off to your right, with the entrance to Undertow Cove behind in the back of the rock formation here. Head south at the beginning, hugging the right side, until you uncover a hidden path that leads to a chest (Inspiriting Plum M). Continue south as much as you can, to a save point, then start moving south/east until you find a spot with a NPC. This isn’t Paul, but rather Vanessa from Alfyn’s story. While she’s not relevant to any Side Stories, you can Steal/Purchase the Battle-Tested Dagger from her, which is the most powerful dagger in the game.
(1 of 2) The location of Undertow Cove
The location of Undertow Cove (left), Make sure you snatch the Battle-Tested Dagger from Vanessa while inside the cove (right)
Open the chest next to her for 20,000 Leaves, then return to the save point. There is another path opposite of the one that brought you to Vanessa that leads to a chest (Inspiriting Plum Basket). At the save point, go west, north and then east to open the chest there (Olive of Life M). If you loop around west, back to the northern end, you can find a hidden path down some stairs to the east that will let you pilfer the chest in plain view (Healing Grape Bunch). Return all the way west, to the end, then go north to reach a purple chest (Justice Breaker). Continue south from before, looting the chest to your left (Refreshing Jam), and you’ll find Professor Paul to the right. Guide/Allure him into following, then return to Princess Mary in Rippletide to finish.
| Objective | Reward |
|---|---|
| Tracked down Professor Paul and brought him back | 9,000 Leaves, Absolute Zero Staff |
The Diarist’s Desire
Must have completed Tressa’s Fourth Chapter in order to unlock. Make your way to Grandport now, where you’ll find Ing the Diarist in the northern part of the Markets area. Having recorded his journey for many years now, Ing doesn’t know if there’s anything worthwhile still left to record in a diary now. To complete this quest, you will need to find three items to bring back to Ing, which requires the use of either Tressa or Therion’s talents (Steal or Purchase).
To start, head to Bolderfall. Locate the Proud Collector in front of a tree, just north of the inn in the main portion of town. He has the Astonishing Object on him, so get it and journey to Wellspring next. You’re looking for the Satisfied Merchant, who can be found along the bank of the pond in the middle of town, along the southwestern edge. Grab the Incredible Item from him and travel to Duskbarrow for the third item. Standing just left of the shops is a Smirking Townsperson, who has the Marvelous Memento. Bring all three items back to Ing in Grandport to complete the quest.
| Objective | Reward |
|---|---|
| Sparked Ing’s desire to write in his diary | 6,500 Leaves, Alluring Ribbon |
The Adventures of Ali
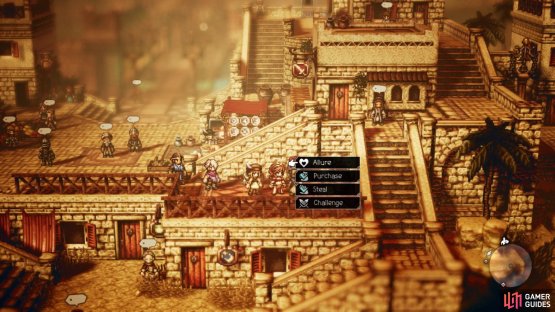
Requires completion of Tressa’s Fourth Chapter to start. Ali, Tressa’s competitive friend, can be found in Sunshade, in the middle of town. He is on his way home, but doesn’t seem all too in a hurry to actually return, so he sends you on an impossible errand to stall for time. Travel to Marsalim and search out Maruf, who is in the little corner just south of the equipment shop. It’s hard to see, but there are some stairs on the southern side of the main square that allows access to this little area. Use Guide/Allure on Maruf, then return to Ali in Sunshade to finish the quest.
(1 of 2) Although hard to see, there are stairs pictured above
Although hard to see, there are stairs pictured above (left), which allow you to access Maruf, Ali’s father (right)
| Objective | Reward |
|---|---|
| Helped Ali and his dad make amends | 9,000 Leaves, Tradewinds Spear |
Hello Again, Harald
You have to complete Olberic’s Fourth Chapter in order to unlock this Side Story. Travel to Riverford and you’ll find Reggie on the western side of the main square. Speak to him twice to learn that Harald has been selling his precious family heirlooms to help rebuild Riverford, with Reggie mentioning that he’d like to at least keep those. The necklace, specifically mentioned, is located in Wellspring and you’ll probably want a fairly strong H’aanit or Olberic. In the northern half of the town, there is a guard blocking the door to a building.
You will need to Challenge/Provoke him to get out of the way, although he has a strength of nine. Being weak to spears, you can use the Warrior’s Thousand Spears to bring his shields down faster. Defeat the guard, then head inside to find three merchants. The one along the northern wall has a Memorial Necklace on him, so Steal/Purchase it, then bring it back to Reggie in Riverford to finish the quest.
| Objective | Reward |
|---|---|
| Retrieved Harald’s mother’s necklace | 8,000 Leaves, Harald’s Sword |
Ogen’s Epilogue
You need to finish Alfyn’s Fourth Chapter to unlock this. Your next stop will be Northreach, in the Frostlands, where you’ll find Ogen near the weapon shop. After initially speaking to him, head into the northern area to find him at his wife’s grave. He mentions that he wanted to bring some of his wife’s favorite flowers to her grave, but they don’t grow here anymore; they are called Mind-me-always. Make your way to Victors Hollow and look for the Flower Girl south of the Provisioner. Steal/Purchase the Mind-me-always from her, the bring it back to Ogen to complete the quest.
| Objective | Reward |
|---|---|
| Brought some flowers for Ogen’s wife’s grave | 9,000 Leaves, Double Tomahawk |
Heathcote’s High Jinks
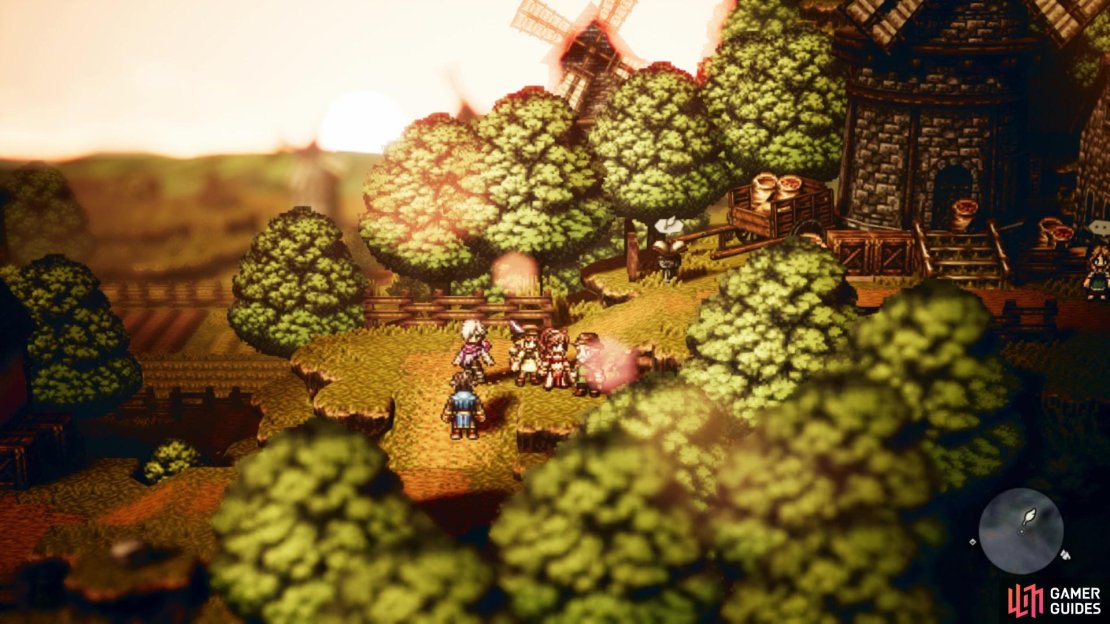
Requires completion of Therion’s Fourth Chapter to unlock. Fast travel to Bolderfall and head to the Ravus Manor to find Heathcote right outside of the main door. Some thief managed to sneak into the mansion and delivered a letter, saying he’s going to steal a precious gem. Mosey along to Wispermill and not far from the windmill at the top of the town is an Old Man. Use Guide or Allure on him, then return to Heathcote in Bolderfall; speaking to him with the Old Man behind you will finish the quest.
The Old Man for Heathcote can be found close to the windmill in Wispermill
| Objective | Reward |
|---|---|
| Helped solve the thief problem | 12,000 Leaves, Heathcote’s Dagger |
Revello and Odette
Requires completion of Cyrus’ Fourth Chapter and Primrose’s Fourth Chapter to unlock. Start by going to Quarrycrest, where you wish to speak to Revello, who seems to be at Odette’s door. We learn that Odette was taken care of by Primrose’s father as a wee one, but she never visits his grave. Head inside Odette’s house and use Inquire/Scrutinize on her to learn Why She Doesn’t Visit Geoffrey. Travel to Noblecourt and enter the eastern half of the city. The big house on the eastern end of this section is where Revello lives, so bring the information you found out to him to finish this quest.
| Objective | Reward |
|---|---|
| Found out why Odette doesn’t visit | 9,000 Leaves, Revello’s Helm |
Keeping Up with the Wyndhams
Requires completion of Tressa’s Fourth Chapter and Therion’s Fourth Chapter to unlock. In Grandport, you will find Cordelia north of the shops in the first portion of town, where she will talk about how she and Noa have been exchanging letters. However, she hasn’t received the last few letters from Noa, making her worry that something happened. With either Olberic or H’aanit in your active party, exit Grandport and cross the bridge that leads into town. On the left side, you should spy a NPC, who is the one you want. This Brigand has been robbing everyone who passes by of their possessions, including letters. Challenge/Provoke the Brigand (strength of seven, but not a difficult fight considering when you can do it), and bring the Letter from Noa he drops back to Cordelia to finish.
| Objective | Reward |
|---|---|
| Stopped the brigand from stealing letters | 12,000 Leaves, Blessed Blazon |
Mikk and Makk Make Good
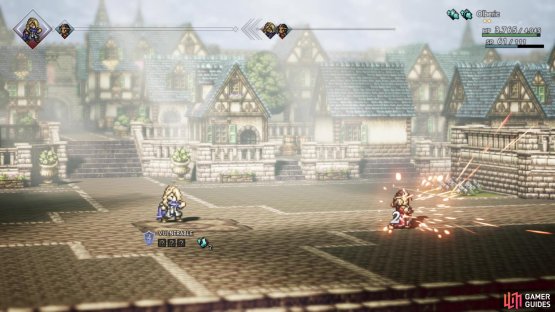
Requires completion of Tressa’s Fourth Chapter and Therion’s Fourth Chapter to unlock. Head to Noblecourt and find the house in the southeastern corner of the first portion of town. Speak to either Barham or Orlick to begin this Side Story. Mikk and Makk pay a visit, but it seems a tall tale from the scholars speak of Captain Leon returning to his pirate ways. By the stall near the inn, you will find Leon, but something seems a little off. Challenge/Provoke him, then defeat him in combat (strength of five), which will bring this sidequest to an end.
(1 of 2) At this point in the game, the fake Leon should be an easy win
At this point in the game, the fake Leon should be an easy win (left), He is weak to axes (right)
| Objective | Reward |
|---|---|
| Revealed the false Captain Leon | 11,000 Leaves, Mikk and Makk’s Shield |
Zeph and Mercedes (I)
Requires completion of Cyrus’ Fourth Chapter and Alfyn’s Fourth Chapter to unlock. This Side Story is a two-parter, with the first one starting in Clearbrook. Speak to Zeph’s little sister, Nina, inside of their house. It appears that Zeph likes someone from his childhood and can’t concentrate on making medicine, as his thoughts are filled with this Mercedes lady. He has written a letter for her, but hasn’t sent it, so take it off of his hands using Purchase or Steal (Letter from Zeph). The only clue you have is that she likes books. Fast travel to Atlasdam and head to the library, where you’ll find Mercedes behind the desk. Deliver the letter to her to finish this first part.
| Objective | Reward |
|---|---|
| Delivered Zeph’s letter to Mercedes | -- |
Zeph and Mercedes (II)
Requires completion of Zeph and Mercedes (I) to unlock. After reading a letter from Zeph, you learn that Mercedes also wrote a letter to Zeph. Steal/Purchase the Letter from Mercedes off of her person, then bring it to Zeph to finish this two-part Side Story.
| Objective | Reward |
|---|---|
| Delivered Mercedes’ letter to Zeph | 11,000 Leaves, Memorial Axe |
Arianna Again (I)
Requires completion of H’aanit’s Fourth Chapter and Primrose’s Fourth Chapter to unlock. This is another Side Story that is split into two parts, with both taking place in Stillsnow. Arianna can be found just to the right of the save point, near the entrance to Stillsnow. With her former job no longer there, Arianna is searching for a place where she can “feel warm” again. To complete this quest, you will need to use either Guide or Allure on Arianna, then bring her to Natalia in Stonegard. She can be found standing outside of her house in the Stonegard Valleys area of town, next to the shops. Speak to Natalia with Arianna in tow to finish the quest.
The location of Natalia’s house in Stonegard
| Objective | Reward |
|---|---|
| Found a new job for Arianna | -- |
Arianna Again (II)
Requires completion of Arianna Again (I) to unlock. Once you’ve guided Arianna to Natalia, you will need to do the same with a certain coachman. Oren can be found in Stillsnow, in front of the snowmen that is to the right of the tavern. Use Guide or Allure on him, then speak with Natalia in Stonegard with Oren following to finish the second part of this quest.
| Objective | Reward |
|---|---|
| Found a new job for Oren | 11,000 Leaves, Adamantine Dagger |
King Khalim’s Conundrum
Requires completion of all eight Chapter 4 stories to unlock. King Khalim can be found in Marsalim, in the palace. He is looking to offer up a new form of entertainment for his people, as they need to know the pleasures of life. He wants to start up a theatre, but he and his advisors know little of that business, so he’s going to need some outside help. Travel to Everhold and head inside of the theatre there. On the right side of the initial room, there is a Theater Manager standing there (make sure to steal the Empowering Necklace before doing anything). Use Allure or Guide on him, then bring him back to King Khalim in Everhold to finish.
| Objective | Reward |
|---|---|
| Helped the king open the world of theater to his people | 30,000 Leaves |
Lianna and Eliza
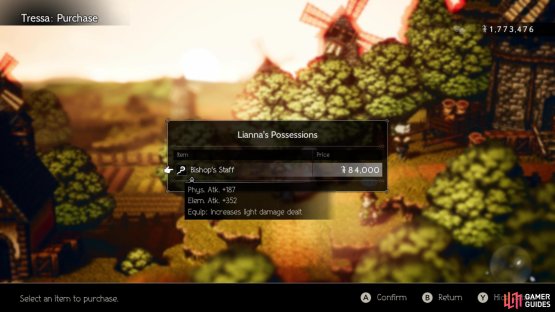
Requires completion of Ophilia’s Fourth Chapter and H’aanit’s Fourth Chapter to unlock. To begin this Side Story, head to the cathedral in Flamesgrace to find Lianna in the side room on the left. She has a nice staff on her called the Bishop’s Staff, so snatch it before speaking with her to start the sidequest. She is worried that the people of Wispermill haven’t fully recovered after the incident, so she decides to head there and try to atone for her sin. Head there to find both her and Eliza not too far to the left of the windmill. They wish to investigate the altar that was used in Ophilia’s story, but someone is preventing them from doing such a thing.
(1 of 2) Don’t forget to grab the Bishop’s Staff off of Lianna
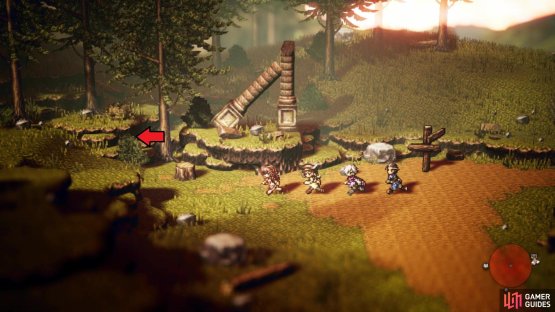
Don’t forget to grab the Bishop’s Staff off of Lianna (left), The entrance to the Forest of Purgation is to the west of the signpost (right)
Talk to Eliza once you regain control to hear mention of a den located deep in the Forest of Purgation, which is where you will be heading. The Forest of Purgation is a Danger Level 58 dungeon located in Western Wispermill Flats. To get there, go all the way to the western entrance of Western Wispermill Flats, where there is a signpost. West of this signpost will be the entrance to the Forest of Purgation. Your goal is to head deep into the forest, all the way west, to some kind of altar, where a NPC named Remnant Leader will be located. Challenge/Provoke the Remnant Leader into a fight. With a strength of eight and access to a lot of elemental spells, this fight could be a little challenging. However, being weak to spears, you can use the Warrior’s Thousand Spears skill to easily break him. Defeat the leader and the quest will be complete.
| Objective | Reward |
|---|---|
| Stopped the cult leader | 11,000 Leaves, Bishop’s Staff |
Again with Alaic
Requires completion of H’aanit’s Fourth Chapter to unlock. Alaic can be found in Victors Hollow, not too far from the entrance to the town. Speaking to a merchant, he finds out that his goods were stolen and has vowed to get them back. This bandit is located inside of the Forest of No Return, with its entrance being in the northern area of Victors Hollow. Before heading there, you’ll need to use Guide/Allure on Alaic, as he needs to be with you when you go after the bandits.
The Bandit Leader you need to defeat is found straight north from the entrance in the Forest of No Return, at a little camp. Make sure you steal the Viper Dagger from him before speaking, as it’s a great weapon to have and there’s no penalty for failing to Steal the weapon. The Bandit Leader can hurt a little bit, especially with Roundhouse Kick, but it should be a fairly easy fight at this point in the game. He is weak to daggers, axes, lightning and light and should go down in no time. Upon defeating the bandit, the quest will be over.
| Objective | Reward |
|---|---|
| Defeated the Bandit Leader | 9,000 Leaves, Primeval Bow of Storms |
There are two more Side Stories left to do, aside from those leading up to the superboss, but they will be pitting you against two of the more challenging bosses in the game. You definitely want your characters to be in your 50s or 60s for the upcoming battles against these two bosses, so grind in the Forest of Purgation to get them leveled up.
Into Thin Air
You could get this Side Story as soon as Chapter 2, when you first visit Victors Hollow, but it requires you to make a trek through a Danger Level 48 dungeon and fight a boss that is clearly too strong for said dungeon. When you’re ready, you’ll find the NPC who gives this quest south of the inn in Victors Hollow, who mentions that his daughter has gone missing. Head to the northern section of town to find the exit to the Forest of No Return in the southwest corner. Go ahead and enter the forest.
The entrance to the Forest of No Return
As soon as you enter, there will be a chest to the west of the save point, which contains a Healing Grape Bunch. Venture north a little bit and look east to spy another chest hidden to your right (Inspiriting Plum Basket). Run west from there to find a trail that brings you to a purple chest, so open it for an Elemental Glaive. Continue straight north, on the main path, to the camp there, where there will be a treasure laying there (Silent Bandana). West of there will be where the main path delves deeper into the dungeon.
As it curves south, there will be a chest slightly hidden behind some rocks, holding a Shadow Soulstone (L). To your immediate left is a hidden path leading to a chest with a Vivifying Stone. You’ll come to a save point, as well as a clearing, with a NPC there. Make sure you save your game and get everything ready, as the boss is coming up. The boss will like to use dark-elemental attacks, so if you have anything to help with the damage, then equip those accessories to your characters. Void Amulets, in particular, will make the boss’ dark magic pretty useless.
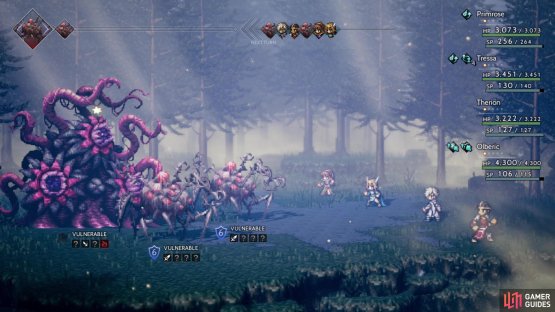
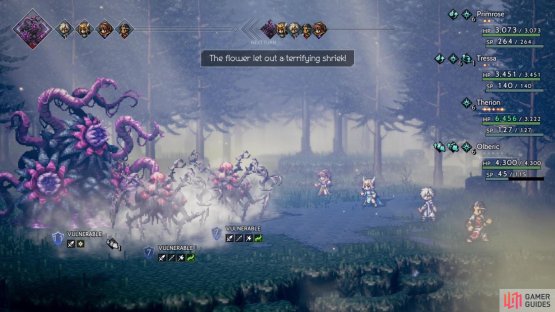
Step into the clearing and get ready for the boss, Devourer of Men. The boss will be accompanied by two Deadly Spores, who live up to their name. Their normal attack can hurt quite a bit, plus Charge hits a lot harder. Their most annoying attack is Exploding Spore, which damages the entire party and has a chance to inflict Confusion. They can also use Drink Lifeblood to deal major damage, with them being healed by the same amount. They are quite meaty, having seven shields and close to 38,000 HP. They are weak to swords, spears, axes, and wind and should be taken out first, before worrying about the Devourer of Men.
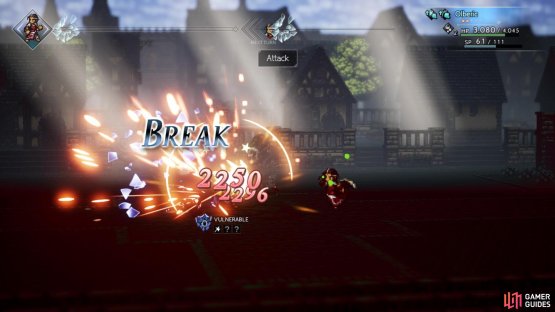
However, the boss will continue to annoy you throughout the fight, especially whenever it uses Spirit Away to remove a character from battle. It can Spirit Away more than one person, if you give it enough time to do so. To get them back, all you have to do is break the boss, with its first weakness set consisting of spears, daggers, staves, and fire. Upon recovering from the break, it will gain more shields and change weaknesses to axes, bows, and wind. The third weakness set is just swords and light, with the boss having a total of eleven shields.
(1 of 2) The boss will use Spirit Away to remove a party member from battle
The boss will use Spirit Away to remove a party member from battle (left), Break the boss to get that character back (right)
As for moves, the boss can also use Charge, dealing about the same damage as the Spores, if not a little more. Black Magic will hit all allies with dark-elemental damage, plus it has a chance to inflict Blindness. At 50% HP, the boss can resummon the Deadly Spores, with full health and shields, but it can only do this once. Any attempt to resummon them later will result in a failure. It will also upgrade Black Magic to Shadow Magic, which hits twice. Lastly, it can enter boost mode, with the following turn producing Devour. This instantly kills a single character and the boss will recover HP equal to what the character had before they died.
There isn’t much in the way of attacks from the boss, but what it and its minions have hurt a lot. Outside of Black/Shadow Magic and Exploding Spore (has no element), set up defenses by boosting your physical defense. Hopefully, you’ve gotten the extra jobs, as the Sorcerer helps cut down the shields with Ventus Saltare and Lux Congerere, with the latter being during the last set of weaknesses. You are free to apply Shackle Foe on the enemies, but keeping that on all three is cumbersome, so resort to only the boss.
If you have Tressa as your Runelord (and you should), using Transfer Rune on herself and then applying an elemental rune will help quicken the fight. Plus, on turns when she is waiting to do something, she can perform Rest on the party, getting rid of any ailments and recovering SP. The biggest hurdle to this battle is getting rid of the Deadly Spores twice and while the Devourer of Men is strong, it’s not a tough battle when it’s alone. Having only a single action per turn definitely helps with that.
(1 of 2) The Deadly Spores have some nasty attacks
The Deadly Spores have some nasty attacks (left), The boss can summon them once more later on in the fight (right)
Once you defeat the boss, you will see Ellie there. Using Primrose or Ophilia, Guide/Allure her back to town (can just teleport), then talk to her father with her behind you to finish the quest. Note that the Devourer of Men can appear as a random battle in the Forest of No Return as a normal enemy, meaning that H’aanit can capture it to use later on, if you feel like waiting to secure the low chance of that happening.
| Objective | Reward |
|---|---|
| Rescued Ellie in the Forest of No Return | 9,000 Leaves, Deathly Blade |
Scaredy Sheep
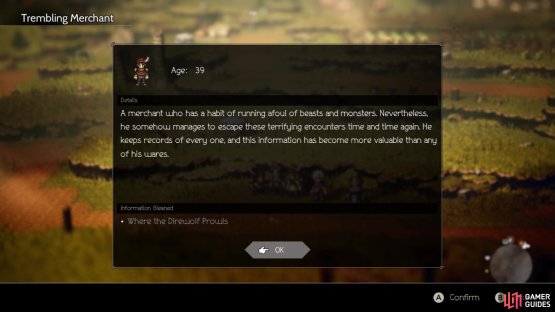
To begin this Side Story, head to Wispermill and exit the town, where you will see a NPC right there. Note that you will need either Alfyn or Cyrus for a quick step, so make sure one of them is in your active party. It seems some monster or something is nearby, scaring the farmer’s sheep, so he wishes someone will take care of it for him. Follow the trail down and around, until you spot another NPC, a Trembling Merchant. Inquire/Scrutinize this NPC to get the Where the Direwolf Prowls info; inspect it in your inventory to see that the wolf has been spotted in the Forest of Purgation.
Note that the upcoming boss is purely physical, so make sure you stack physical defense on your characters. If you don’t remember where the Forest of Purgation is located, it’s on the western side of the Western Wispermill Flats; there’s a slightly hidden path to the left of the signpost there. Once inside, you won’t have to go too far to get to where this direwolf is located, as it’s pretty much north of the entrance. Check out everything for your equipment, save your game, then step into the small clearing to initiate the boss fight.
(1 of 2) The questgiver can be found right outside of Wispermill
The questgiver can be found right outside of Wispermill (left), The Trembling Merchant is a little further down the trail (right)
This fight is definitely one of the toughest in the game, since Managarmr is very strong and some of its skills make the fight go a lot longer than needed. Managarmr starts out with two actions per turn, gaining a third whenever it drops to 50% HP. It starts out with six shields, then gains an additional three shields after recovering from a break, up to a maximum of twelve. Thankfully, the Managarmr doesn’t change its weaknesses at all, which are spears, axes, thunder and dark. However, it can block out its weaknesses whenever it summons Direwolves.
The boss can summon these Direwolves three times throughout the entire fight, with the first one being a single Direwolf. On subsequent summons, it will summon two and then three Direwolves, all of which are the same. They will have five shields and are weak to swords, daggers and staves, plus they have around 30,000 HP. When it summons a single Direwolf, the boss will have two of its weaknesses blocked. Two Direwolves block three weaknesses and three Direwolves will block all four. Because of the boss’ damage output, combined with the Direwolves, it’s imperative that you get rid of them as soon as possible.
Of course, things are a little difficult in breaking them, as their weaknesses don’t make it easy to do just that. However, having a Warmaster with a lot of strong weapons and high strength will help in taking them out quickly, since Winnehild’s Battle Cry is one of the better moves. In fact, a fully boosted Battle Cry with BP Eater and high enough strength should be able to take out the Direwolves with no problem (average of 5-6k per hit). Doing this when there are two and three Direwolves will help tremendously, even if they aren’t broken. Triple Slash and Rend are the only moves they have that hit all characters, although Bite does do quite a bit of damage.
With the Direwolves out of the way, it’s time to concentrate on Managarmr. It doesn’t have a lot of moves, but the ones it has hurt a lot. Savage Fang will likely deal around 1500+ damage to a single character, plus it has a chance to inflict Terror. Savage Claw will hit the entire party for major damage (upwards of 2,000 damage), plus it will lower your physical attack. Bestial Growl will raise the physical attack of all enemies, which is something you never want in this battle, so make sure you at least cancel that out with Shackle Foe. Lastly, Lunar Howl will damage your entire party for medium damage, but the big kicker for this is that it removes all of your buffs that aren’t a part of your equipment.
Naturally, with as much physical power that Managarmr has, you want to try and have Shackle Foe on it as much as possible. Sure, it can cancel it with Bestial Growl, but the more you have it on the boss, the better. Likewise, you want to buff your own physical defense with Hired Help’s Mercenaries, even though the boss can remove it. At this point, you should also have access to all four advanced classes, with the Sorcerer, Runelord and Warmaster being extremely helpful. Although the Sorcerer isn’t viable against the Direwolves, it can be helpful against the boss, since it has two elemental weaknesses.
(1 of 2) Lunar Howl will remove all of your buffs
Lunar Howl will remove all of your buffs (left), Things will become scary when all three Direwolves are summoned (right)
Likewise, putting a Thunder or Dark Rune on your characters will be a good idea to help whittle down the boss’ shields. If you have the Double Tomahawk axe equipped, then you can get a lot of hits on the boss’ shields with that, since it hits twice with each normal attack. Even better, boosting your normal attack with that will even double it, so a fully boosted Double Tomahawk hits eight times. A weakness to spears means you can also use the Warrior’s Thousand Spears skill for breaking shields. One other thing you can do is have Runelord on Tressa, then combine Transfer Rune with Sidestep, since everything is physical, provided the boss doesn’t get too happy with Lunar Howl.
When you manage to defeat Managarmr, it will drop a Direwolf Fang. Bring this item back to the questgiver to finish the Side Story.
| Objective | Reward |
|---|---|
| Took care of the monster terrorizing the area | 12,000 Leaves, Elemental Augmentor |




























No Comments