Since you have all of the party members now and their Path Actions, it’s about time to go ahead and clean up the Side Stories you couldn’t complete earlier. Note that some of them might require venturing into some higher-level areas, so you won’t be able to finish all of them right now.
Theracio’s Tutelage (I)
Fast travel to Atlasdam and if you didn’t pick up the side story earlier, you will find Theracio in the southeast corner of the city. In order to do this, you will need either Olberic or H’aanit in your active party. The moneylender that is harassing Theracio is standing right next to him, so either Challenge/Provoke him to start a battle. Note that he has a strength of four, so it won’t exactly be a pushover, depending on Olberic’s or H’aanit’s levels (and H’aanit’s summons). Defeat the moneylender and you will finish this side story.
| Objective | Reward |
|---|---|
| Defeated the moneylender hounding Theracio | 1,500 Leaves, Invigorating Nut |
The Prodigious Painting
This side story begins in the palace in Atlasdam and is one of those that require you to head through a more challenging area. Luckily, the area only has a Danger Level of 20, so it will be good practice for the upcoming Chapter 2 stories. Begin by fast travelling to Clearbrook, noting that you will need either Therion or Tressa to complete this sidequest, so bring one of them along. Exit to West Clearbrook Traverse and journey to the south, across two sets of bridges (there’s a chest you might not have gotten past the second bridge, containing a Healing Grape).
East of the second bridge will be the exit to South Clearbrook Traverse. Since this area wasn’t explored in the walkthrough yet, it will be now. As soon as you enter, there is a path south of the main one that leads to a chest with an Olive of Life. Continue east to a fork in the road, with the northern branch going to a cave called Twin Falls (Danger Level 20). You’re not going there right now, so venture south and then west to find another chest (500 Leaves). There will be another split in the other direction, with east going towards Sunshade and west towards Saintsbridge.
Go west, crossing the bridge to the south for a chest (Healing Grape), and along the way, you will see an older man that will net you another Side Story, [A Sweet Reunion]. You can come back to this later, as it requires either Ophilia or Primrose. Past the bridge to the west is one final chest (Soothing Seed) and the exit to East Saintsbridge Traverse. By the first bridge, you will find a chest hidden to the left of it (Herb of Healing). Follow the path south, across a bridge, to find many different paths before you.
(1 of 2) With a Danger Level of 20, you will want to be careful in East Saintsbridge Traverse
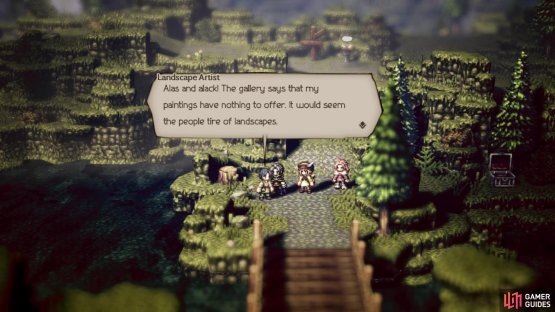
With a Danger Level of 20, you will want to be careful in East Saintsbridge Traverse (left), Buy the Final Masterpiece from the NPC above and bring it back to the questgiver (right)
East will lead to a curious cave called Shrine of the Healer. If you head inside, you will see some kind of “altar” of sorts and upon inspecting, you will unlock the Apothecary secondary job for your characters. Only a single character can equip the secondary job at a time, so you won’t be able to have everyone use Apothecary; you can equip them from the Jobs option on your menu. Back at the split, go south and you will find another chest (Healing Grape M), as well as a man standing on a bridge. This is the NPC you’re looking for, so either Purchase/Steal the Final Masterpiece from him (easier to Purchase), then return to the split. The western path will lead you straight to Saintsbridge. Feel free to look around, but you’re just putting the town in your fast travel catalog, so teleport back to Atlasdam and turn in the quest.
| Objective | Reward |
|---|---|
| Delivered the Final Masterpiece | 13,000 Leaves |
Love Unrequited
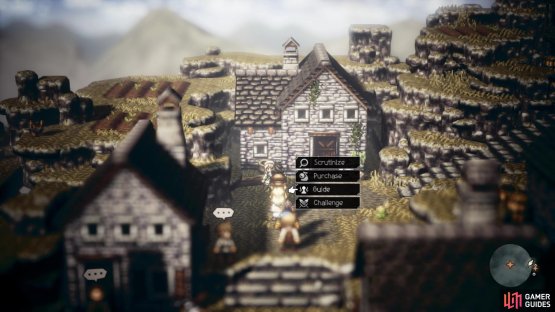
The next side story to be completed is in Rippletide and can be gotten from the woman standing just south of the equipment shop. She is having trouble with a lovestruck man who keeps pestering her, and there are two different ways to handle this. The first involves using either Ophilia or Primrose to Guide/Allure Tony’s Mother to him. Tony, himself, is found in between the Provisioner and tavern, while his mother is just to the left of the inn. Note that you need to be at least level 15 in order to Guide her with Ophilia.
The other way to complete this quest is to either Challenge or Provoke Tony with Olberic/H’aanit. Tony has a strength of five, but you won’t be winning this battle, as you will want to lose to Tony. Just note that losing as H’aanit will make you lose some reputation with Rippletide. Upon doing either method, the side story will be over.
| Objective | Reward |
|---|---|
| Solved the case of unrequited love | 1,500 Leaves, Critical Nut (M) |
Way Through the Woods
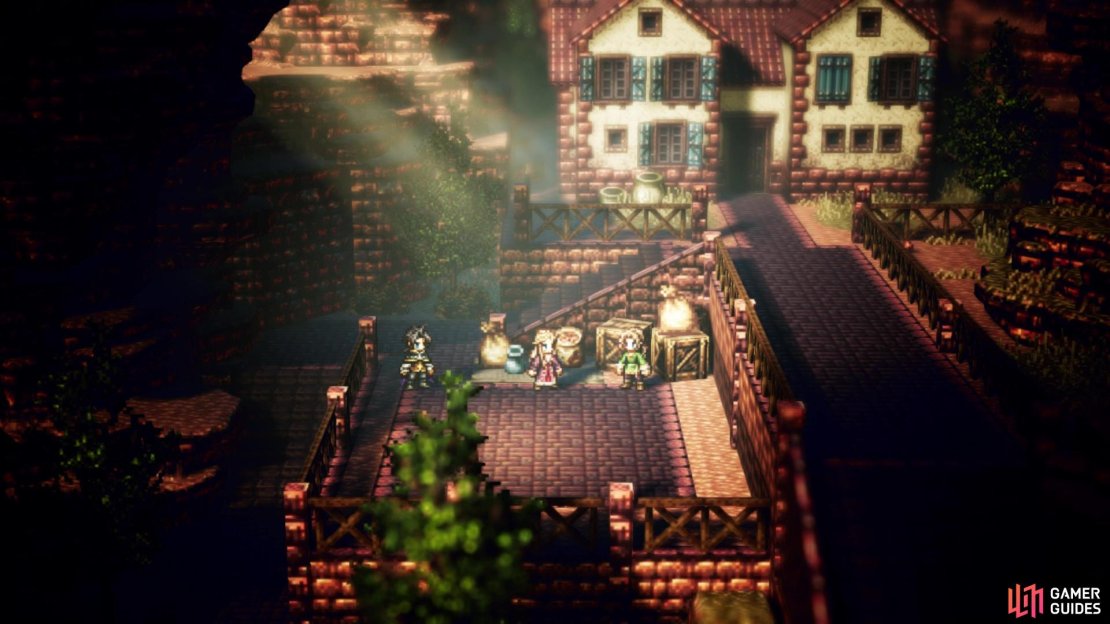
Fast travel to S’warkii and speak to the woman on the western side of the village, who wishes to be with her husband in Bolderfall. As should be obvious, you will need either Primrose or Ophilia to use Allure/Guide on this NPC, then fast travel to Bolderfall. Her husband isn’t marked on your map, but he can be found near the northern house in the main portion of town. There are some stairs leading down near the previously mentioned house and a NPC with green garb right there. The Industrious Husband is the one wearing the green clothes. Simply speak to him to finish the side story.
The lady’s husband in Bolderfall
| Objective | Reward |
|---|---|
| Reunited wife with husband | 1,500 Leaves, Magic Nut, Critical Nut |
Daughter of the Dark God (I)
Since you are in Bolderfall, you should have two more Side Stories to complete here. The easier of the two is [Daughter of the Dark God (I)], which can be started by talking to the one guard in the Ravus Manor area. Alphas believes the dark-haired woman standing nearby is the perfect one for him, but he is having trouble getting her to glance in his direction. To complete this quest, you will need either Olberic or H’aanit to Challenge/Provoke him. He has a strength of five and is quite strong, with moves like Triple Strike doing upwards of almost 600 damage (stack physical defense to lessen this). He also isn’t weak to swords or spear, which makes both Olberic and H’aanit’s Linde useless, but he is weak to axes and daggers. Defeat him and the side story will be over.
| Objective | Reward |
|---|---|
| Captured the dark-haired beauty’s attention | 5,000 Leaves |
The Bandits’ Code
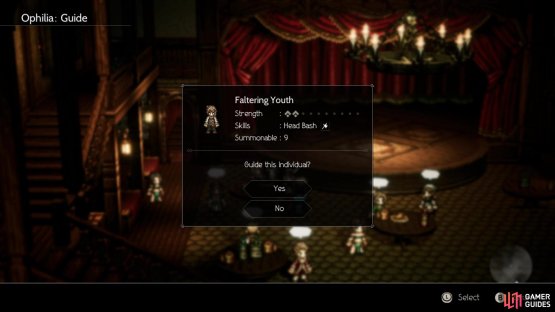
The other Side Story in Bolderfall is located in Lower Bolderfall and as with some of the others, this one has two solutions. The easier of the two involves using either Primrose or Ophilia to Allure/Guide someone to the Veteran Brigand here in Bolderfall. The NPC you need is the Faltering Youth inside of the tavern in Sunshade; he is standing at the northwestern table. Allure/Guide the Faltering Youth, then fast travel back to Bolderfall and speak with the brigand to finish the side story.
The other method to clearing this Side Story involves having to go to Victors Hollow, which is located north of S’warkii. Teleport to that village and make your way to the West S’warkii Trail. Here, go straight west from the signpost to a fork in the road, then north to get to East Victors Hollow Trail. This place has a Danger Level of 21, so be especially careful about encounters here. Go straight north from the save point and when the path starts heading northwest-west, there is a hidden path to the east that leads to the Shrine of the Huntress, where you can unlock the Hunter secondary job (there is also a chest with an Olive of Life L in the cave).
(1 of 2) The location of the Faltering Youth inside the tavern in Sunshade
The location of the Faltering Youth inside the tavern in Sunshade (left), Inquire/Scrutinize this woman in Victors Hollow as an alternate solution (right)
Back outside, continue west to the split and then south, where the path will eventually lead you to Victors Hollow. Despite the longing to go around and look at all the goodies, head straight to the lower section of the first part of town. On the western side of this area, there is a woman standing in front of a building, named Orphanage Matron. Inquire/Scrutinize her for some information (Marta’s Gang), then return to the brigand in Bolderfall with that information, which will finish up the side story.
| Objective | Reward |
|---|---|
| Helped the brigand figure his calling | 2,400 Leaves, Blazon of Protection |
A Sweet Reunion
The next Side Story you will be taking care of is on the outskirts of Clearbrook. Fast travel to Clearbrook and make your way to South Clearbrook Traverse. Here, go east, then south and finally, west to find the Side Story. The Lost Grandfather was on his way to visit his grandchild in Clearbrook, but as his name suggests, he got lost. Use Guide/Allure (Ophilia needs to be level 15 to Guide him) to get the grandfather to follow you, then return to Clearbrook. You can find the grandchild on the bridge in the center of town, so just speak to the child to end the side story.
| Objective | Reward |
|---|---|
| Guided the lost grandfather to his grandchild | 2,000 Leaves |
Fertile Fields
There are only three more Side Stories left, both in Cobbleston, so head on over to that town next. The easiest one to finish is Fertile Fields, which can be started in the lower left corner of the town. To do this one, you will need either Therion or Tressa to get the item. Luckily, the person you need is actually very close, as he is standing on the eastern side of the house that is just north of the tavern. When you find the Courageous Cowherd, either Steal or Purchase the Cow Droppings, then bring them back to the questgiver to finish.
| Objective | Reward |
|---|---|
| Fetched some manure for the farmer | 1,500 Leaves, Inspiriting Plum (M) x3 |
Noelle, Seeker of Knowledge (I)
For the next Side Story, look towards the northwestern corner of the village to spot a woman named Noelle. She is seeking any traces of the legendary King Beowulf the Great and asks you tell her if you come across any ancient plinth or carved granite. You will need either Ophilia or Primrose for this one, as you need to Guide/Allure Noelle to a certain spot. Go ahead and do that, then leave Cobbleston.
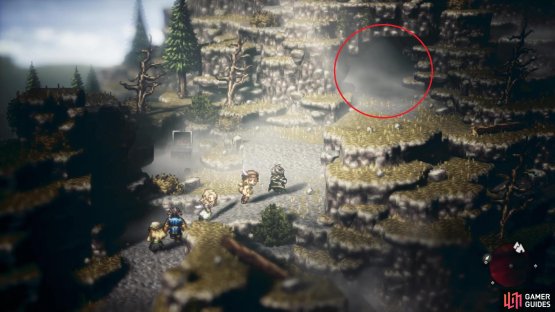
(1 of 2) Don’t forget to use Guide or Allure on Noelle before setting off for Untouched Sanctum
Don’t forget to use Guide or Allure on Noelle before setting off for Untouched Sanctum (left), The entrance to Untouched Sanctum (right)
The place you’re going to is called Untouched Sanctum, which is found to the northeast of Cobbleston. Exit to South Cobbleston Gap and make your way to North Cobbleston Gap. Once you arrive in that area, head east until you spot a spot in the northeast that you can get to, which is where the entrance to Untouched Sanctum is located. This cave has a Danger Level of 15, so be wary of the enemies inside.
Follow the trail inside until you come to a split, which is where you will find a save point. Go west at first to find a chest, which contains an Inspiriting Plum, then look for a hidden path to the west of that, which will bring you to another chest (Pole Mace). Return to the save point and go in the other direction, opening the chest you find at the next fork (Healing Grape M). Continue delving deeper until you see a path heading southeast, which is where you want to go for two more chests (Olive of Life M and Inspiriting Plum M). The other direction will lead to a purple chest (Sharp Nut) and the plinth that is needed for the quest. Examine the plinth to finish the side story.
| Objective | Reward |
|---|---|
| Showed Noelle the knowledge she sought | 4,000 Leaves, Tough Nut |
Never Forget
The final Side Story you will be doing right now can be gotten from a NPC near the northeastern exit in Cobbleston. The Melancholy Youth is looking for a girl named Lorie, who once lived in Cobbleston, but when he arrived, it was said she already left. This Side Story has two different solutions, but both of them will require you to head to Noblecourt. One of the solutions requires you to Allure/Guide the youth to Noblecourt, so make sure you do that before leaving Cobbleston. The other way involves using either Therion or Tressa to Steal/Purchase something in Noblecourt.
Either way, you need to travel to Noblecourt, which is located in the Flatlands, so fast travel to Atlasdam. Go to North Atlasdam Flats and head north to the crossroads there, where you will want to travel north at the signpost to reach Western Noblecourt Flats. To the northwest will be a signpost that will point you to the east for Noblecourt. Note that as you head along the road, the area surrounding it is pretty open. Edge your way to the southern edge of the screen to find a NPC and southeast of that is a trail that leads to the Shrine of the Sage, which will unlock the Scholar secondary job.
Back outside, there is a chest on a nearby hill by the cave, which contains a Wind Amulet. Return to the road and there will be another NPC standing next to a tent (you can Steal an Oasis Hat from him, which is fairly nice). There is a chest just north of this NPC that contains a Healing Grape (M). Not much further to the east will be the entrance to Noblecourt. Now that you’re in Noblecourt, you can proceed with the Side Story.
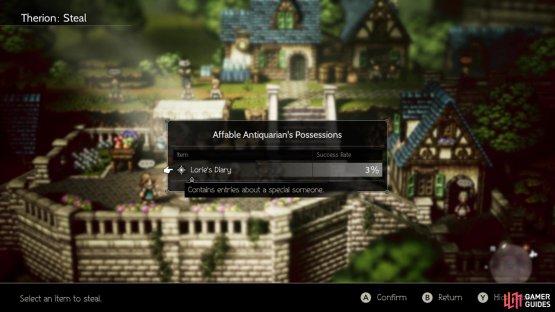
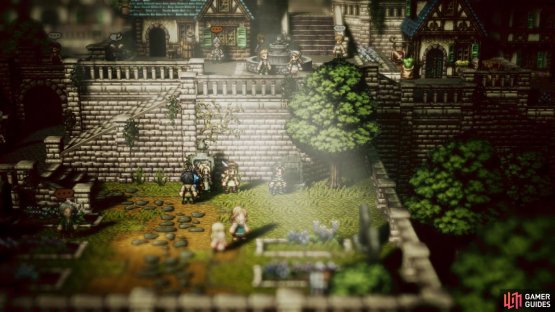
(1 of 2) Lorie’s Diary is a lot easier to Purchase than Steal
Lorie’s Diary is a lot easier to Purchase than Steal (left), If you opt for the alternate solution, approach the right grave with the questgiver in tow (right)
If you brought the youth with you, then head to East Noblecourt. On the southern side of this area are some graves, one of which belongs to Lorie. Examine it with the youth in your care and the side story will be finished. If you went the other route, then in the first area of Noblecourt, there is a NPC (Affable Antiquarian) standing in front of the stall not far from where you entered (blue clothing) that is holding onto a diary. Purchase or Steal (a lot easier to just buy it) Lorie’s Diary, then bring it back to the youth in Cobbleston to complete the quest.
| Objective | Reward |
|---|---|
| Helped the youth find Lorie | 9,000 Leaves, Sharp Nut (M) |
That about wraps it up for Side Stories, although the keen eye should notice that two weren’t listed here. The reason for that is because they either have you going through some very dangerous areas or they involve fights that might prove a little troublesome right now. Either way, you have finished the majority of the Side Stories available in Chapter 1 and it’s finally time to move onto Chapter 2.





No Comments