The fourth chapter is the final one and will present one of the bigger challenges in the game. All of them take place in new towns, so you will have to travel to all of them. Of course, with new towns come new treasures, meaning you’ll finally be able to upgrade some of your equipment. Rather than do piece by piece, the guide will take a detour and have you visit all of the towns before doing anything else. This allows you to pilfer and get new stuff for your characters, making things a little easier on your end, plus it should help you gain some extra levels for the upcoming stories.
Onward to Duskbarrow
To start off, you will be visiting Duskbarrow first, which is where Cyrus’ final chapter will take place. Fast travel to Victors Hollow and exit the town. Head north at the signpost to arrive at East Duskbarrow Trail. As the path bends west, you can head south to find a chest at a dead end (Herb of Revival). Continue north a little bit and there will be a slightly hidden trail that heads west to another chest (Herb of Clamor). As you journey north, you will come to a trail that leads north.
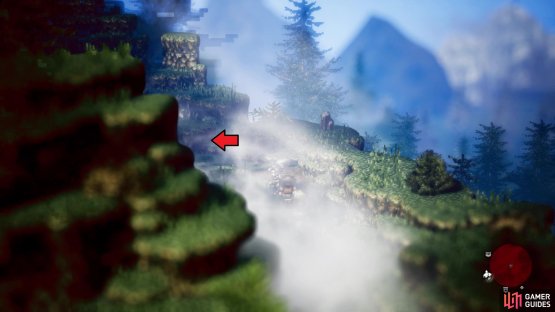
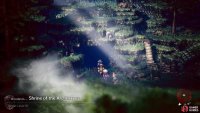
Take this to come upon another chest (Olive of Life M), then keep going to find the entrance to the Shrine of the Archmagus. This is an advanced job shrine and unlike the others, it is actually a dungeon with a danger level of 50. In order to get the advanced job, you will have to fight a boss, so make a note of it (enter the dungeon to put it on your map) as you will come back to it later. Return to the main trail and follow it west, all the way until a save point. There is another hidden trail to the east of it that leads to another dungeon, the Moldering Ruins (Danger Level of 45).
(1 of 2) You can find a secret passage as shown above
You can find a secret passage as shown above (left), which will lead you straight to the Shrine of the Archmagus (right)
South of the save point is a chest (Copper-filled Pouch) and west will be the town of Duskbarrow. Remember that you’re not here to start Cyrus’ final chapter just yet, so you’re just here to browse for the goodies. The first person near the entrance can be Inquired/Scrutinized to add more items to the shop. Speaking of that, it’s right to the south. If you’ve been still using Elusive Shields, this might be the perfect opportunity to upgrade them, as the item added is a new shield, the Force Shield.
Just west of the shop is a save point and the middle of the town, with a purple chest (30,000 Leaves) and normal chest out in the open (Bottle of Poison Dust). In the upper left corner will be one more chest, which holds a Curious Antique. The only real worthy item to Steal/Purchase in Duskbarrow is from the lady in the bottom left corner, who’s blocking the door to the house there. She has the Viper Dagger, which is quite powerful in its own right, but it also has a chance to inflict poison (it’s better than the Forbidden Dagger).
Onward to Grandport
Next up is Grandport, located to the north of Goldshore, so teleport there. Exit Goldshore and cross the nearby bridge, then begin heading north. Cross the second bridge and continue east, where you should spot a chest right before the stone bridge (Thunder Soulstone M). The stone bridge will lead you to West Grandport Coast. Not too far from where you enter, there will be a chest to your south, so open it for a Wind Soulstone (L). South of that will be a split, with the western path containing another chest (20,000 Leaves).
Continue west to a signpost and a save point, with some docks being to your south, where a chest will be waiting for you to open it (Thunder Soulstone L). Go north of the save to find another chest (Healing Grape Bunch), as well as the entrance to Loch of the Lost King, a Danger Level 50 dungeon. East of the save will get you to another stone bridge, so cross it to find the city of Grandport.
Grandport has a lot of NPCs to Steal/Purchase items from, but there is a bit of a caveat. The reputation restore cost here is very costly, as you will be required to pay 100,000 Leaves to bring it back to normal. That means you’ll want to be very careful on what you do in terms of the rogue Path Actions. The first NPC should have a few pieces of decent gear, like the Adamantite Shield and Victor’s Spear. The man with the green hat in front of the equipment shop has a Blade of Bravery, plus you can Inquire/Scrutinize him to gain a hidden item inside of the guarded house to the east.
Should you fight that person, he has a strength of seven and can inflict both Blindness and Poison. The hidden item inside of the house is a Revitalizing Jam and the elderly woman will have a Blizzard Amulet (might be easier to buy this). The one NPC inside of the tavern has five medium stat-raising nuts on him, so make sure you grab those. Make your way to the next section of town, the Grandport Markets. There are a lot of NPCs to interact with here, but start by opening the chest on the left side of your screen (Empty Coin Pouch).
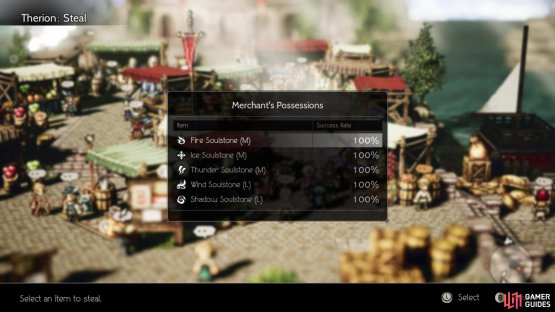
(1 of 2) There is a lot of Steal in Grandport
There is a lot of Steal in Grandport (left), but it might be easier to Purchase some things with Tressa because of the steep reputation restore cost (right)
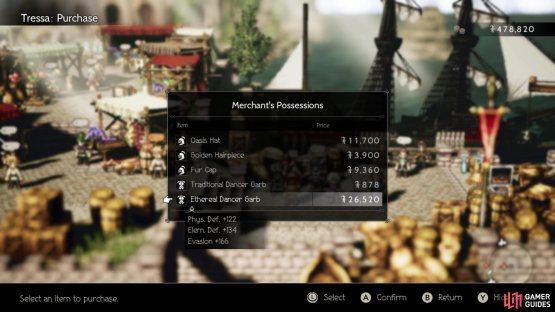
The church will be to your left and there’s another chest hidden behind a rock on its left side (Silver-filled Pouch). For the final chest, look among the barrels and boxes on the right side of the docks to the right (Bottle of Sleeping Dust). The merchant in black clothing nearby has a decent bow, the Brilliant Bow, while the one in red right next to him has an Ethereal Dancer Garb. Inquire/Scrutinize the woman to the right of the save to get new weapons in the equipment shop; she also has a Light Nut (L) on her.
For the sake of making things a little easier to understand, the main markets area is divided into a right side and a left side. On the right side, you will find a NPC with a bunch of Soulstones, another with elemental-heavy axes, and one more with an assortment of daggers. On the left side will be a NPC with a bunch of spears, two of which are very nice. The Rune Glaive has a huge elemental attack boost on it, which is perfect if your nuke-heavy character has access to spears. The other spear, Scourge Lance, just has some nice physical attack on it.
The NPC up north, to the left of the Grandport Bazaar entrance, has the Forbidden Shield for Purchase, although it’s not too great. Enter the Grandport Bazaar to find a few more NPCs that you can interact with, although they don’t have much in the way of worthy items. There are also two chests in the northern room, containing 25,000 Leaves and a Dazzling Artwork.
Onward to Marsalim
Travel to Wellspring and exit the town, then when you can, head south to Eastern Wellspring Sands. Not far into this area, you can go east to find a chest at a dead end (Copper-filled Pouch). Hug the western edge of the map as you venture south and you will run into another chest, this one holding a Thunder Soulstone (L). East of that chest is a signpost that points you to the south for Marsalim and cleverly hidden behind that signpost is a chest (Healing Grape M). Continue straight east and locate the trail that’ll bring you to West Stonegard Pass. Instead of entering there, though, look for the incline that will bring you to that chest you saw on the way (Fool’s Gold Ore).
Back at the save point you passed along the way, head straight south and you will eventually spot a purple chest (Enlightening Bracelet). South of there will be the exit to Eastern Marsalim Sands. Go south of where you entered, as well as a little west, to find a signpost. See that rock formation immediately to the left of the signpost? There is a purple chest right behind it, which contains 20,000 Leaves, as well as another chest in front of the rock formation just to the right (Thunder Soulstone L). Following the eastern edge, keep going south and you will find the entrance to the Marsalim Catacombs (Danger Level 50). Double back to the signpost and venture west, crossing the bridge and opening the chest in the open (Inspiriting Plum Basket). To the north will finally be Marsalim.
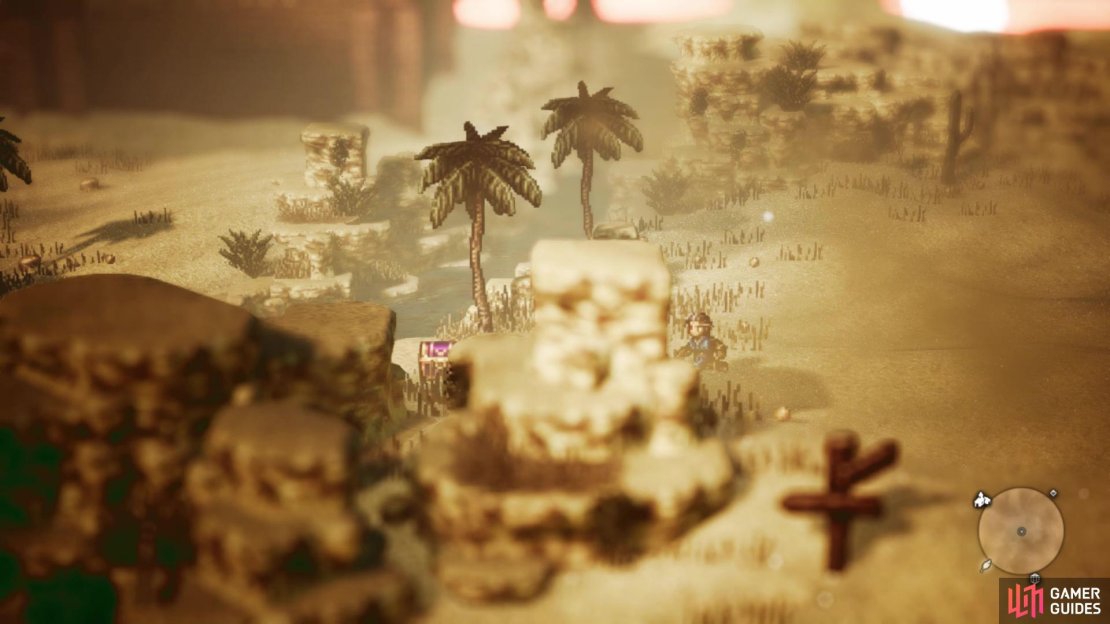
There is a purple, locked chest hidden behind the rocks by the signpost in Eastern Marsalim Sands
The NPC just left of the inn will have the nice Thieving Tips & Tricks when you use Inquire or Scrutinize. Up the stairs to the right is the equipment shop and on the level above that will be a chest (Herb of Light). Back down on ground level, in the middle of the square, is a Side Story, with another NPC clad in armor right next to the old man. This is Swordsman Yuri and he will have some nice goodies on him, a Dragon Saber and a Dragonscale Armor. There is also another chest slightly hidden to the right of him, in front of the stairs (Bottle of Sleeping Dust).
Inside of the palace to the north, there are some miscellaneous goodies to get, but nothing too good, aside from a Gargantuan Axe. You can find three chests in the room in the upper right, containing some High House’s Armor, 25,000 Leaves, and an Enchanted Circlet.
Onward to Northreach
That about wraps up your visit to Marsalim, so the next stop on this tour will be Northreach. Teleport to Stillsnow and exit to Western Stillsnow Wilds. As soon as you can, head northwest and you should some semblance of a “trail,” which will lead you to Southern Northreach Wilds. In this area, head straight west and you will come to the entrance of Maw of the Ice Dragon, a Danger Level 45 dungeon. Hop inside to put it on your map, then return to the split you passed, taking the journey north. At the end, you should spot a chest to your east, so go open it for an Energizing Pomegranate (M).
Continue west and at the end of this path, you can find another chest to the north, which holds a Shadow Soulstone (M). When you reach the top, you will see the entrance to Northreach just beyond a save point. Before heading inside, though, look to the right and left of the entrance for two more chests (Inspiriting Plum Basket and Herb of Revival). Go ahead and enter Northreach now.
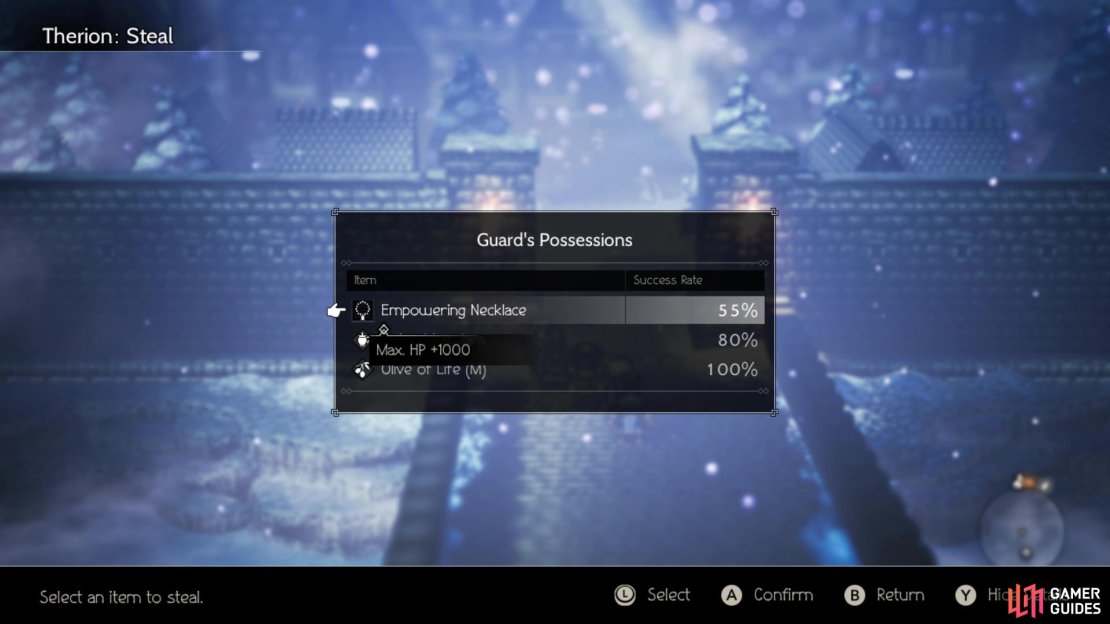
The person by the entrance has an Empowering Necklace, an accessory that boosts your max HP by 1000, which is nice to have. You can also Inquire/Scrutinize the same NPC to get a new piece of equipment at the shop, the Dragon’s Vest. Inside of the tavern is a purple chest, which contains a Master’s Longbow, a nice bow that can poison enemies. Head north to find the equipment shop, then move to the right to find a small house with another chest inside (Refreshing Jam). In the northwest is the entrance to another area, which has a single NPC, another chest (Inspiriting Plum M) and the entrance to a dungeon for Therion’s fourth chapter (and an inaccessible chest by its entrance).
The Empowering Necklace is a nice accessory for those who need a HP boost
Onward to Wispermill
The grand tour continues with Wispermill, a town to the northeast of Noblecourt. Upon leaving Noblecourt, just head northwest to find the exit to Western Wispermill Flats. Follow the trail to a signpost and to the west will be a path to the Forest of Purgation, a Danger Level 58 dungeon. This is the highest level dungeon in the game, so if you ever feel the need to grind, come here, as the enemies shouldn’t prove too difficult with good equipment. Back outside, continue east and when the trail bends south, loot the chest you find for an Energizing Pomegranate (M).
Venture south, looting the next chest you see for a Cat’s Eye, then keep going east, opening another chest along the way (Olive of Life M). You’ll eventually reach a save point, with the entrance to Wispermill not far to the east, but there’s a secret nearby. Right by the red flag near the save point, there is a hidden path that leads to the Shrine of the Starseer. Similar to the Starmagus one near Duskbarrow, this is a Danger Level 50 dungeon that will pit you against a boss that unlocks one of the four secret jobs. Ignore it for now and enter Wispermill. Other than a Side Story and a lone chest by the shop (Thunder Soulstone M), there is nothing you can do here.
(1 of 2) The enemies in the Forest of Purgation might be a little challenging for you right now
The enemies in the Forest of Purgation might be a little challenging for you right now (left), There is a hidden path behind the save point that leads to the Shrine of the Starseer (right)
Onward to Orewell
The next stop will be Orewell, so fast travel to Quarrycrest. Find the nearby signpost and head west from there. Cross the bridge when you get to it, opening the chest along the way (Energizing Pomegranate), until you eventually come to South Orewell Pass. Not far into the new area, you can head down a ramp and find a chest at the dead end (Olive of Life M). Cross the bridge to the north and head down the ramp to grab the chest on the dock (Fire Soulstone M). There is a split nearby, with multiple ways to go. Head northeast to find a chest at the dead end (Energizing Pomegranate L), then journey northwest.
There is a NPC along the way, who has a Rune Hatchet on him, but failing to steal it will lower your reputation and the axe is more magically inclined. Above him is the entrance to a dungeon, Dragonsong Fane, which has a Danger Level of 50. Ignore exploration, then return to the split, journeying to the west this time. The path to the south will lead you towards Riverford, so ignore that and open the chest that you see below you and to the left (Healing Grape M). The entrance to Orewell will be to your west.
This town doesn’t really have too much available, as far as powerful pieces of equipment are said, although you will find a bunch of other useful items. The very first NPC in the town will unlock a new weapon when using Inquire/Scrutinize. This weapon, the Ogre Cleaver, is the first axe that is stronger than the Golden Axe, although it’s not by too much. North of the inn is an older woman blocking a door. Feel free to Challenge/Provoke her (strength of six), then head inside the building to find an old man and a chest (Scrap of Rope). When you use Inquire/Scrutinize on the old man (low chance), you will uncover a hidden item near Kaia at the entrance (Hill Cleaver).
North of the previous building is a run-down one, which is all but empty inside, save for a lone chest (Soothing Dust). To the west is the tavern, just across the short bridge, with another chest inside (68 Leaves). Lastly, there is a woman blocking a door to the south of the tavern. Inquire/Scrutinize her first to get a hidden item to appear inside of the house she’s guarding, then duel her (strength of seven) to gain access to the house. The hidden item is a Revitalizing Jam and there’s also a chest inside of the house (Weathered Boots).
Onward to Riverford
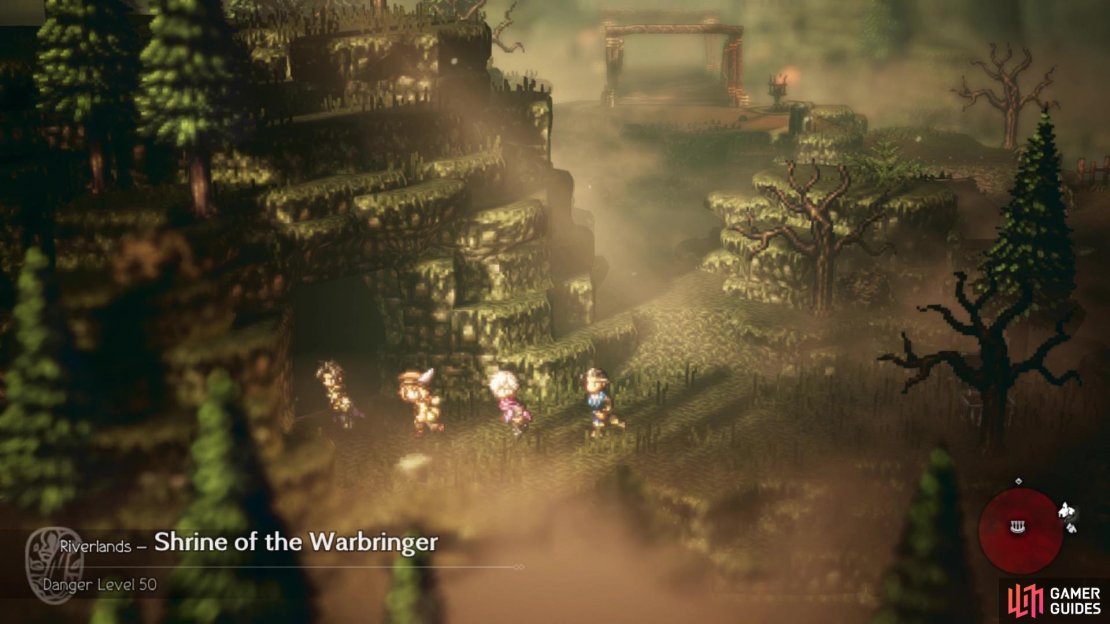
Normally, Primrose’s Chapter 4 town would be next, but you’re not too far from Riverford, so you’ll be heading there next. Exit Orewell and return to that save point just to the east of it, then go south to arrive at the exit to North Riverford Traverse. Just past the bridge will be a hidden path you can take, which leads to a chest (Herb of Revival) and the entrance to the Shrine of the Warbringer. This is one of the four optional dungeons that will pit you against a boss, unlocking a secret job for your characters. Unfortunately, this boss is considered the hardest out of the four, so don’t worry about heading inside just yet.
You can find the Shrine of the Warbringer in a slightly hidden area south of the bridge
Follow the trail and when you reach a save point, there is a slightly obscure path to the southwest. West will lead to a chest (Wind Soulstone L) and east will bring you to a Danger Level 50 dungeon named Refuge Ruins. There’s also another hidden path slightly north of the previous one, which brings you to another chest to the west (Silver-filled Pouch). To the east of the save point is the entrance to Riverford.
Before doing anything, head to the tavern and Inquire/Scrutinize the guard on the right, which will dramatically increase the success rate of Therion’s Steal. Use that increase success rate to steal the Unseen Saber from the very same guard. To the north is the Manse Gardens area, which has nothing at all, so ignore it for now. There is a NPC on the eastern side of this area that has three large stat-increasing nuts, then a little further will be the exit to Lower Riverford. In Lower Riverford, the first NPC right there will have a Giant’s Club, a staff that seems more physically oriented.
There’s nothing in the first two houses, and a NPC in the third, although you can’t do anything with that NPC. If you look in between the second and third houses, you should be able to spot a NPC standing behind them. To get to him, head into the alley to the right and you should spy a path to the left. He doesn’t have much, but there are some weapons you can Steal/Purchase from him. There is another NPC blocking a door to the right of the save point and should you challenge him, be careful of his Befuddling Balm move (strength of eight). Inside of the house is a small girl that you can Inquire/Scrutinize to add more goods to the equipment shop. There is a single chest down the stairs, which contains an Herb of Valor.
Onward to Everhold
The last town you haven’t visited yet is Everhold, which isn’t all too close to another town. If you have to start anywhere, it’s probably best to teleport to Wellspring. Exit that town and go south when you can to Western Wellspring Sands. Head into the big section of this area and look for the path to the east, which will bring you to West Stonegard Pass. Follow the trail all the way north, across the bridge and as you head south, take the eastern diversion to eventually reach West Everhold Pass. There is a chest slightly hidden from view by the flag in the forefront, which contains a Light Soulstone (L).
Continue south, bypassing the bridge, and you will come to another chest in the corner (Silver-filled Pouch). Cross the bridge to the east and look for the slope to the right that allows you to go down and collect another chest (Energizing Pomegranate M). South of the chest is a hill you can go down that leads to the Everhold Tunnels, a dungeon with a Danger Level of 55. Ignoring the main path for now, get on the ledge right above the Pomegranate chest and move to the right to discover a hidden path. This will bring you to the Shrine of the Runeblade, the fourth dungeon that will unlock a secret job, once you defeat the boss at the end.
There is a hidden trail here that’ll bring you to the Shrine of the Runeblade
Back outside and on the main path, climb the stairs by the save point, stopping to grab a chest (Fire Soulstone M). There will be another chest a little further up (Inspiriting Plum M), then you’ll find the entrance to Everhold. Everhold is fairly small and doesn’t have a lot of stuff to do (or get) in it. The female NPC right there at the entrance has a Wisdom Staff and Sorcerer’s Robe, plus you can Inquire/Scrutinize her to get a new dagger for sale in the shop. Speaking of the shops, they will be to the right of that NPC, although there isn’t too much available.
Go north of the former NPC to find another in front of a house, who happens to have a Rune Bow on her. To the east of that will be a man standing in front of a house, but ignore him and open the chest next to the house for a Healing Grape (M). Sandwiched between the tavern and the save point will be another chest, this one holding a Rare Stone. The rest of the town is down the stairs to the left, although it’s only three more NPCs. The one does have three large stat-increasing nuts, though, so make sure you grab those. That’s all for exploring all of the towns for Chapter 4, so let’s get started on the individual stories.








No Comments