The exit in the southwest of town is now unblocked, allowing you access to the Sunshade Catacombs, your next dungeon. Make sure you outfit Primrose with updated equipment before you set off for the dungeon, as that could make things a little difficult in the beginning. When you’re ready, go ahead and enter the catacombs to get started.
Exploring Sunshade Catacombs
As with the majority of the dungeons you’ve explored thus far, you won’t really find anything different with the catacombs, although there are a lot of stairs here. From where you enter, head down the stairs and you will find a save point. There’s nothing to the right, but you should see a chest on the ledge below you. You can reach this chest by heading west and using the stairs going down, so open it for a Healing Grape. Return to the top of the stairs and go up one more level, venturing west until you find two more sets of stairs.
Up will lead you to another chest (Shadow Soulstone), while down will progress deeper into the dungeon. There will be another chest to the right of the bottom set of stairs, which contains an Inspiriting Plum. To the left will be the familiar merchant, as well as a save point, with some stairs leading to the left. This will bring you to the boss, but there is one more set of stairs leading down here. Take them and follow the path, through a secret tunnel, to one final chest (Empowering Earring). You’re already done exploring this place, so head on over to the save point and try to grind Primrose’s levels up to around 7-8 at least. When you’re ready, take the stairs to the left of the save point to encounter the boss.
BOSS - Helgenish
Helgenish can be a bit of a pain, but he shouldn’t be too rough as a boss. He will come with some lackeys, who can only do a normal attack. They are weak to swords, axes, wind, and darkness. In fact, they should go down fairly quickly and shouldn’t last more than a round or two, which leaves Helgenish on his own. His normal attack isn’t that much stronger than his lackey’s, but he has some others in his arsenal that can be a nuisance. Oppressive Shadow deals dark damage to everyone, plus it has a chance of lowering physical attack power.
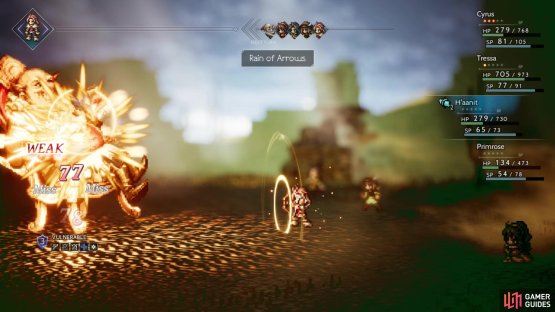
(1 of 2) His weakness to bows means you can Rain of Arrows to chip at his shields
His weakness to bows means you can Rain of Arrows to chip at his shields (left), Helgenish’s ultimate move can be very damaging (right)
Outside of that, he’ll get angry and gain the familiar dark aura, then follow that up with Know Your Place!, which does a lot of physical damage to the entire party. Of course, you will want to break him before he has a chance to pull it off, which essentially makes Helgenish a relative pushover in terms of battle strength. Helgenish is weak to spears, daggers, bows, ice and light.
Sunshade Sidequesting
With that battle over, Primrose will put an end to Helgenish and grab a map from his body, pointing her to Stillsnow. That’ll put an end to her first chapter, so return to Sunshade to find the usual new NPCs, as well as some new Side Stories. Unfortunately, you won’t find too much new stuff from these NPCs, as they don’t have much in the way of worthwhile items to Purchase/Steal, plus none of the NPCs yield anything (non-related to Side Stories, of course) when Scrutinized/Inquired.
In the northwest corner of the town, you will find a man harassing a woman, so interact with them to begin Ria, Born to Roam (I). All you have to do to finish this sidequest is Provoke the Ne’er-do-well, who has a strength of four. At this point in the game, H’aanit should be fairly strong with a level in the teens and some good equipment. The foe has three shield points and will like to use Sleepweed. Whenever your HP dips below 500, you will want to use a healing item. He is weak to swords, so use Linde to break him, then use a stronger summon to do more damage. After finishing off the enemy, you will be finished with this Side Story.
| Objective | Reward |
|---|---|
| Rescued Ria from her accoster | 1,500 Leaves, Magic Nut |
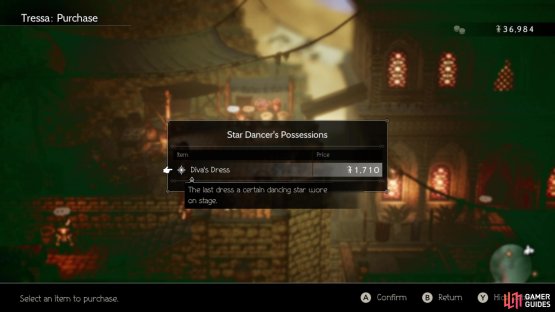
The second Side Story you can finish begins in the dancers’ quarters to the right of the main entrance. Her Time to Shine has you helping a dancer fulfill her final dance, and it actually has two different ways of finishing it. The first method will require either Tressa or Therion. In the northwest corner, near where the last Side Story began, is a Star Dancer. You can Purchase/Steal a Diva’s Dress from her and bring it back to the questgiver to finish. The other method involves either Primrose or Ophilia. Return to the dancer who gave you the quest and Allure/Guide her to follow you. Bring the dancer to the sickly girl right outside of the living quarters to get a different ending (but the same reward).
| Objective | Reward |
|---|---|
| Helped the dancer realize her curtain call | 1,500 Leaves, Wind Amulet |
(1 of 2) You can bring the dancer to this girl
You can bring the dancer to this girl (left), or acquire the dress to finish this Side Story (right)
There is one more Side Story, which is inside of the tavern. The Bouncer will have you fighting with a bouncer, who spends all of his time drinking instead of doing his work. He will be right outside of the tavern, to the right, and has a strength of five. This means it will be a challenging battle and he isn’t weak to the typical sword, but rather spear. If you have a spear-using beast, use that first, which should trigger Linde to use Pounce. As with any hard challenge, keep an eye on your health at all times, healing anytime it dips below 650. Hopefully, the bouncer wastes a move due to being “too drunk to move,” which will give you a free turn. Hopefully, you can win, but if not, return when you’re stronger.
| Objective | Reward |
|---|---|
| Knocked some sense into the Drunken Bouncer | 1,500 Leaves, Fortifying Nut |
There is only one more party member to recruit, Olberic, in Cobbleston, which is south of Rippletide. If you’ve been following this guide, then you should have already visited there during [Onward to Sunshade], where you also looted the town.


No Comments