Exploring Quarrycrest
Cyrus’ Chapter 2 begins in Quarrycrest, which is located in the Cliftlands. If you haven’t visited there yet, then you can go west from South Bolderfall Pass to get to South Quarrycrest Pass. It is there that you can get to Quarrycrest (it’s very close to the Shrine of the Prince of Thieves). Upon finally arriving, you will want to explore the town, as there’s a lot of different goodies to get. Next to the inn is a chest that contains a Pseudo Gold Ore. The man by where you entered can yield the Smarter Bartering information from Inquiring/Scrutinizing, meaning there’s more of a chance to get a discount when using Tressa’s Purchase.
There’s a man to the left of the save point, who is standing in front of a house. It’s best to not Provoke/Challenge him, because he’s a pretty high level, but there is a chest sitting next to him (Dubious Gold Ore). Continue west from him to find the Provisioner, and climb the ramp behind that to find a small building with a chest inside (Wind Soulstone M). On the far western side of this area of town is an exit to the Road to Morlock’s Manse, which is not important right now.
Kaia, Mother of Dragons (II)
Note that there are two Side Stories in this part of town, one of which wouldn’t be present if you didn’t finish Kaia, Mother of Dragons (I) back in Bolderfall. Yes, Kaia is here and is looking for some more help. To finish this side story, you will need either Primrose or Ophilia. Of course, you need to track down this Egg Man fellow before you are able to do anything. Behind Kaia is a ramp that leads to the Quarrycrest Mines, the other part of the town. You’ll find the tavern and equipment shop here, so take a gander at the latter if you want.
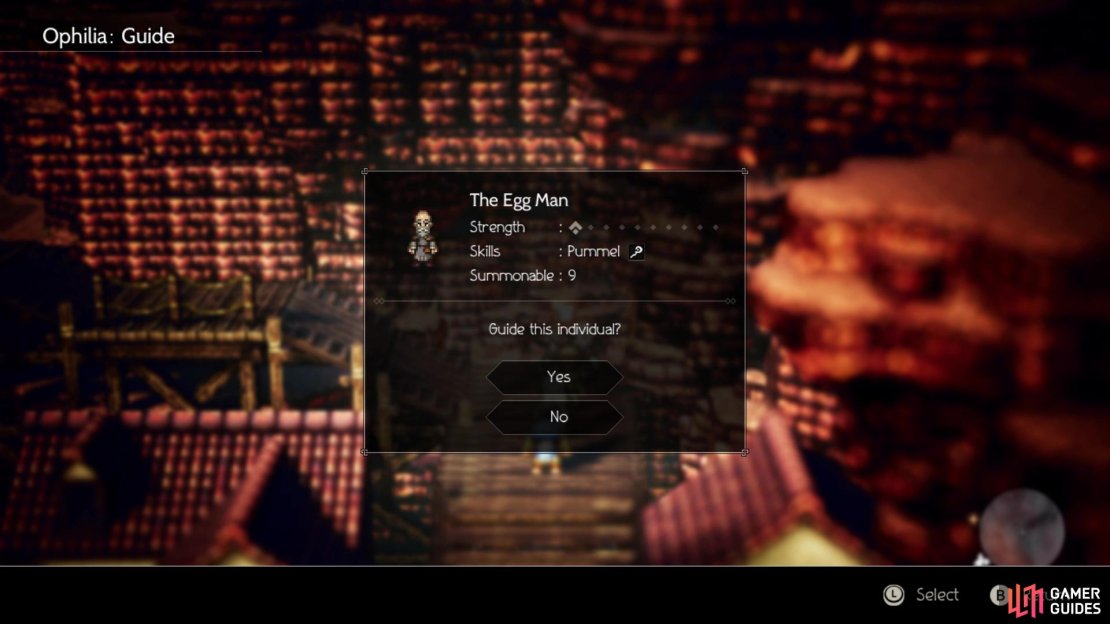
The location of the Egg Man for Kaia’s second quest
Either way, the old man behind the equipment shop, in the corner, is the Egg Man. Guide/Allure him to get him to follow, then return to Kaia in the bottom area to finish the quest.
| Objective | Reward |
|---|---|
| Helped Kaia find out how to hatch the dragon’s egg | 6,600 Leaves, Light Nut (M) |
The other two Side Stories (there’s one more in the Quarrycrest Mines area) require you to travel to other cities, so they will be put on hold for right now. Back to ransacking the town, there is a chest to the left of the tavern, near two NPCs with speech bubbles (Healing Grape Bunch). Across the short bridge nearby is another chest, which contains an Herb of Valor. There’s one final chest, up past the Egg Man used for Kaia’s quest, at the top portion of the Mines area (Fool’s Gold Ore). The NPC by this chest has a nice piece of headgear for stealing/purchasing, called the Silent Bandana.
From the Far Reaches of Hell
You probably saw a prompt upon entering the city, if Cyrus was in your active party, asking to start the second chapter of his story. If you denied this, then you can head to the tavern, pick Hear a Tale, and choose to start it from there. After some reflection on previous events, Cyrus decides to pay a visit to Odette. Her house is located in the first area of Quarrycrest, up the ramp behind the Provisioner. When you get close enough, a scene will take over and you’ll meet with Odette.
Cyrus will speak to her about the tome that was stolen from the archives, but she doesn’t have too much information about it. While she researches it, she asks a favor of Cyrus, as some townspeople have mysteriously gone missing recently. Before you dive into the investigation, Scrutinize Odette to learn where the incidents happened. It seems all of the people went missing near the inn. Go back outside to see two more green markers on your map, who are people you need to Scrutinize. One is near the save point, while the other is in front of the inn. After Scrutinizing them both, you’ll need to answer some questions. The answers are “Near the inn,” “At all hours,” and “The sewers.”
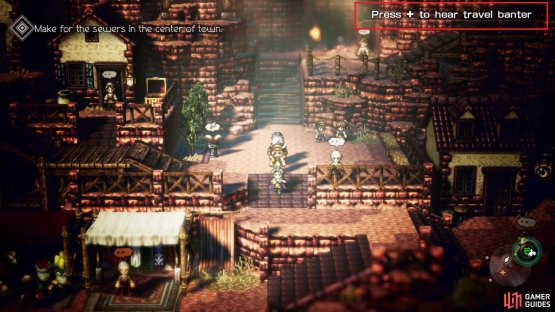
(1 of 2) You will see a button prompt during story sequences in Chapter 2
You will see a button prompt during story sequences in Chapter 2 (left), which will present some party banter between characters (right)
With the investigation finally over, the way to The Sewers will open, with the opening being behind the inn. This upcoming dungeon has a Danger Level of 24, so make sure you are well-rested and ready before venturing inside.
The Sewers
As soon as you regain control, go north, west and then south to open the chest at the end of the path (Inspiriting Plum Basket). Follow the trail north, across the bridge, then immediately head straight south to spot a purple chest (Snipe Saber). Journey west from the purple chest to find another chest in the open, so grab the Fire Soulstone (M) from it and enter the room you see just above you for another chest (Energizing Pomegranate L). The stairs to the right of this small room lead to a hidden passage that connects to the eastern side of the map, so you aren’t missing any chests there.
West of the small room is another small bridge, so hop over it and open the chest just north of it for a Healing Grape Bunch. There is a very well hidden path to the left of the previous chest, which will go all the way west and south to a chest that contains a Sprightly Ring. Return and continue straight south, past the save point, and open the next chest you find at the end down here (Bottle of Befuddling Dust). Save your game and enter the room just beyond for a scene, leading you into a boss fight.
BOSS - Gideon
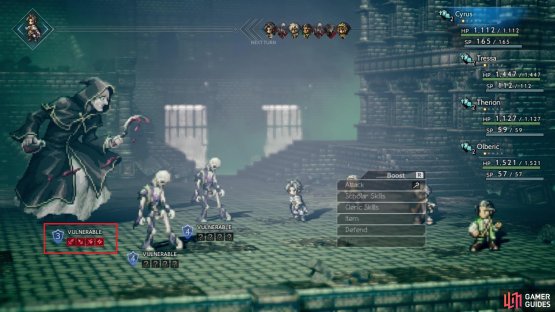
If this is your first Chapter 2 boss, then you will see a new mechanic brought into play here. On his first turn, Gideon will summon two Dancing Bones, upon which you will see the message that Gideon is being protected by these creatures. This causes some red boxes to go over his weaknesses. What this means is that while you can hit his weaknesses, his Shield Points won’t go down because of this protection. So, your first priority in this battle is to quickly get rid of the Dancing Bones to make Gideon vulnerable again.
These Dancing Bones have four shields and are weak to axes, staves, fire and light. They have a normal attack, like every enemy does, and can also inflict the terror ailment with Terror Claw. Lastly, Bone Toss will hit random allies from four to six times. After getting rid of them, Gideon’s defenses will be dropped and you can continue working on his shields. Gideon has some nasty attacks of his own, like Hands of Darkness dealing moderate dark damage to everyone in your party. On top of this, it also has a chance to inflict Blind.
(1 of 2) Upon summoning the two skeletons, Gideon’s weaknesses will be blocked
Upon summoning the two skeletons, Gideon’s weaknesses will be blocked (left), Creepy Laugh can be very dangerous, as it lowers both physical and elemental defense (right)
Creepy Laugh will lower the physical and elemental defense of your entire party, which makes Gideon’s one attack a little more dangerous. Executioner may only target a single character, but it can deal upwards of 1,300 or more damage with the defense debuff. With normal defenses, it should only deal around 600 or so damage, which is much more manageable. Gideon doesn’t seem to use the familiar dark aura or an ultimate attack, so you’re safe there. He may resummon the Dancing Bones, which will come with half the health and one less shield. Gideon himself is weak to swords, daggers, axes and light.
Once you’ve finished off Gideon, some more scenes will play out and you will return to Quarrycrest. He will confer with Odette on many things and finally find out his next destination, which is Stonegard. Attempt to leave Quarrycrest and one more scene will happen, leading to the end of Cyrus’ second chapter.


No Comments