
Nameless Terror (Part 1)
Exit Gran Soren via the southern gate (near Fountain Square). You’ve got one more quest to pick up as you set out. On the bridge outside of Gran Soren, talk to the guard to the north-one ‘Ser Rickart’-and he’ll tell you about some trivial matter. Apparently somebody is looking for you, and doesn’t want you to know you’re being sought. You’ll be given an ‘Unsigned Letter’ that, if you look at it, reads “Let the Arisen’s only peace be death.” The camera will zoom out and reveal a group of unsavory characters watching the bridge you’re on. It seems you’ve made some more friends.
This is an annoying quest, as the game is purposefully vague. It’s likely one of the most often-missed quests in the game, as you’ll only get quest markers after encountering some of your assassins. These assassins tend to come in small groups, and their encounters-although static-range from the Deos Hills to Seabreeze Trails. It’s worth going out of your way a little bit to deal with them during the next few bits of questing, but remember, they’ll only show up at night. So… run back to Gran Soren and rest until night if it’s not night already… and even if it is-resting specifically until nightfall will ensure that you’ll encounter some assassins.
The first stop on this trip will be to the Deos Hills… which is a little bit out of the way, considering out destination is the Shadow Fort, but it’s a smaller detour now than heading back to Cassardis later will be. After you cross the bridge separating the Deos Hills from the Estan Plains, continue north-east along the road until you hit the split. Near the rocks between the branching roads you’ll find your first few assassins-Phantom, Ghost, Soul, and Spirits. Two of them are spell-casters, and two are Strider-types. There will be plenty of Skeletons popping up, as well. Still, it’s night-time, which means ‘Bloodlust’ will be boosting your offenses… if you bothered to get it, which you should have done by now, regardless of Vocation or build.
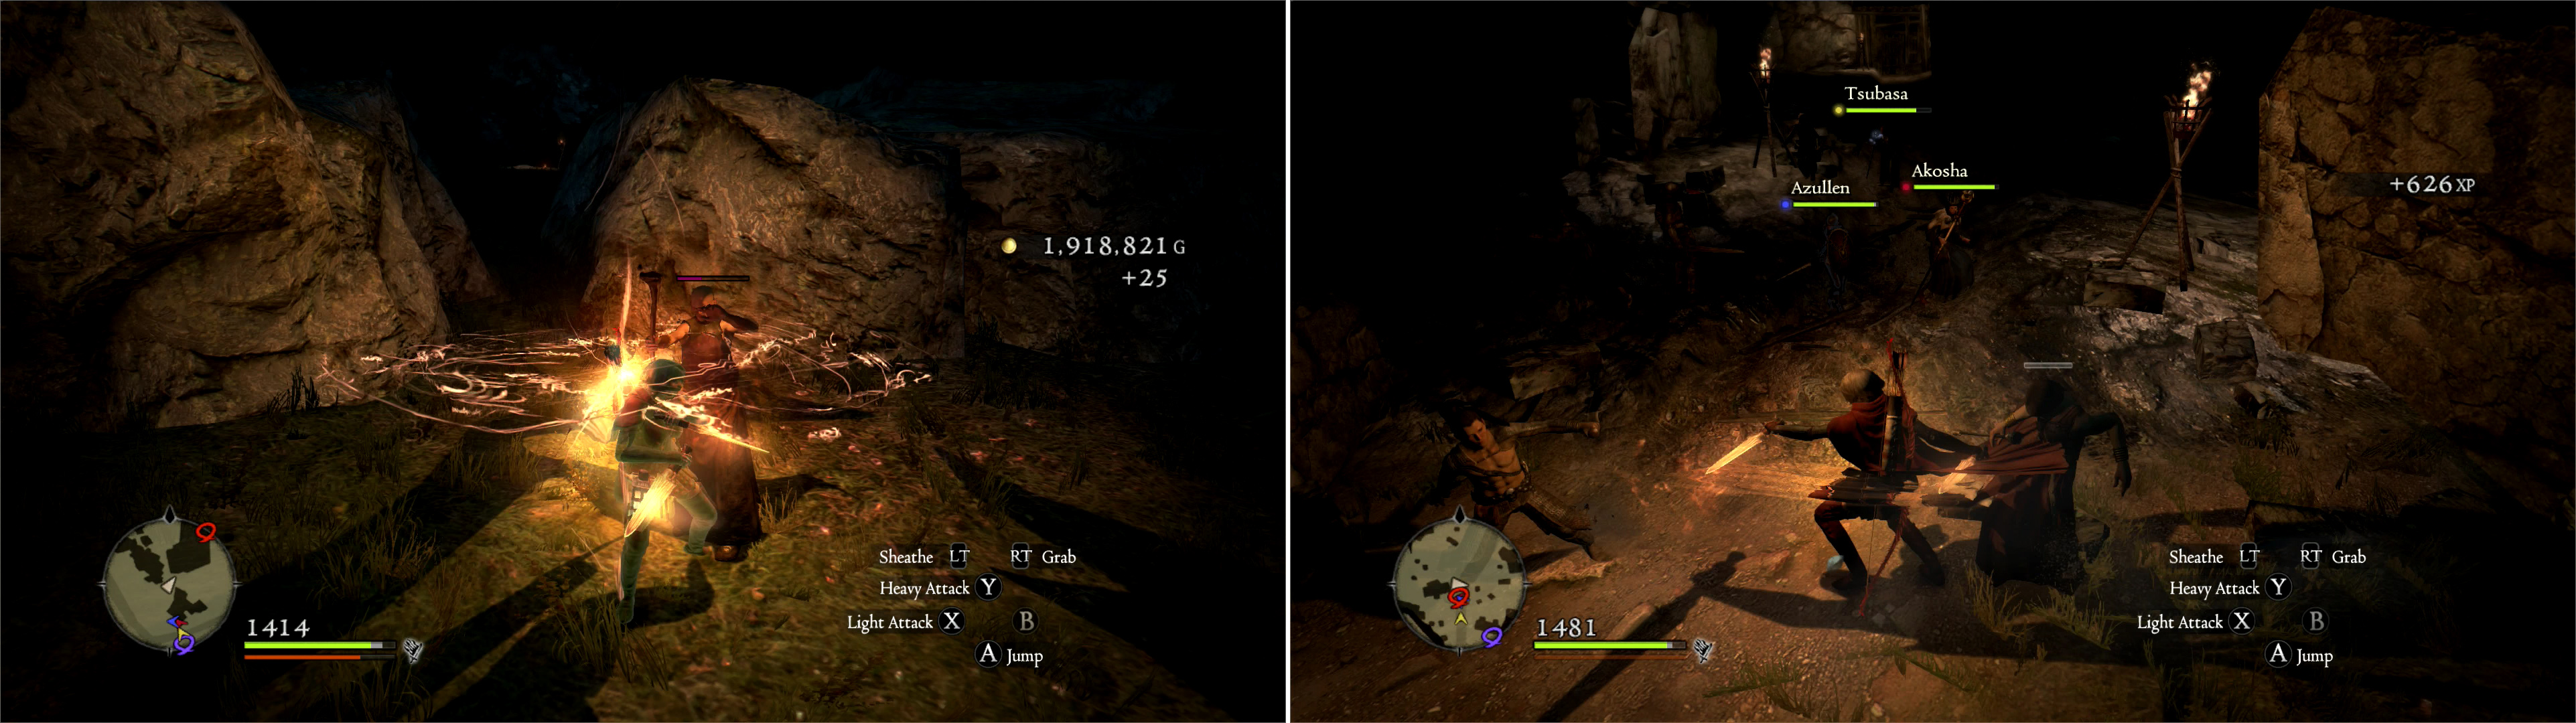
The first group of assassins can be found in the Deos Hill (left) while the second group is located outside of the Ancient Quarry (right).
Put the Eye Out
Once these ‘nameless’ men are dead, make your way to the Ancient Quarry North Entrance. Instead of merchants begging you to clear some old mine for them, you’ll find another group of assassins-Raven, Hawk, and Condor. Two more Strider-types, and another spell-caster. Dispatch them and head into - and through - the Ancient Quarry. Loot as you please, and remember, there should be new passages now that you’ve cleared the mine and some time has passed. In any event, you should know the way back to the Shadow Fort from here.
When you reach the Shadow Fort again, loot as you please. when you’re ready to head off to the Frontier Caverns, find a large Goblin hole near the walls of the citadel. This particular hole is south-west of the unmarked structure along the northern tower of the citadel, east of the front gates, and immediately in front of some wooden scaffolding along the wall. Drop down into the hole and follow the tunnel north-west until you reach the…
Ah, the Frontier caverns, presumably these are the tunnels from whence the Goblinoids came. When you enter you’ll score the trophy/achievement ‘Into the Frontier Caverns’. Head north, then east to reach a chamber crawling with Goblinoids - both normal and Hob - of all different fighting inclinations. If there are so many Goblinoids camping out near an open tunnel to the Shadow Fort, it would take a serious force to hold the place… but, from what you’ve seen of the duke thus far, it seems more likely that your victory in the Shadow Fort earlier is likely going to be squandered. Slaughter your way to the east to reach a small side chamber. Ignore a long-running tunnel to the north for now and loot some ledges to the south and east, which contain treasure. On the eastern shelf lies two Coin Pouches, two Large Coin Pouches, and a Giant Coin Pouch (for a grand total of 19,000 gold.) The southern one is crammed with pots, explosives, and Foreign Knives.
Now peruse the northern tunnel you neglected earlier. It’s a long, narrow run, packed with Goblinoids heading south. Cut your way through them (they seem less intent on attacking you than heading south) to reach some stairs. Head down and you’ll find yourself in a spacious arena marked on your map as the ‘Proving Grounds’.
This room is occupied by about a half-dozen Goblins and an armored Cyclops; the target of the quest ‘Put the Eye Out’ and the frail pretense for coming here. By now you should know what to do-kill the Goblins, scale the Cyclops to get it to remove its helmet, then shoot it in the face a bunch. Once the Cyclops bites it, you’ll score the ‘Silver Idol’ if you started ‘Put they Eye Out’. Before you leave, note the large gate to the north and the smaller one to the east-neither of them will open yet, but it’s worth noting that there’s more to see and do here… later, at least. Search the perimeter of the room, as two chests lie along the wall east and west of the large northern gate, both of which can contain a wide variety of loot that’s of excellent quality for this point in the game.
| Rounded Chest | Rounded Chest |
|---|---|
| Assembled Breeches | Caladbolg |
| Assembled Breeches | Crescending Roar |
| Bespoke Longbow | Divine Axis |
| Fluted Bow | Fiery Talon |
| Gryphic Gauntlets | Fine Magick Buckler |
| Master’s Merle | Frozen Tomorrow |
| Runic Bangles | Malignance |
| Violet Neck Wrap | Scorched Pelta |
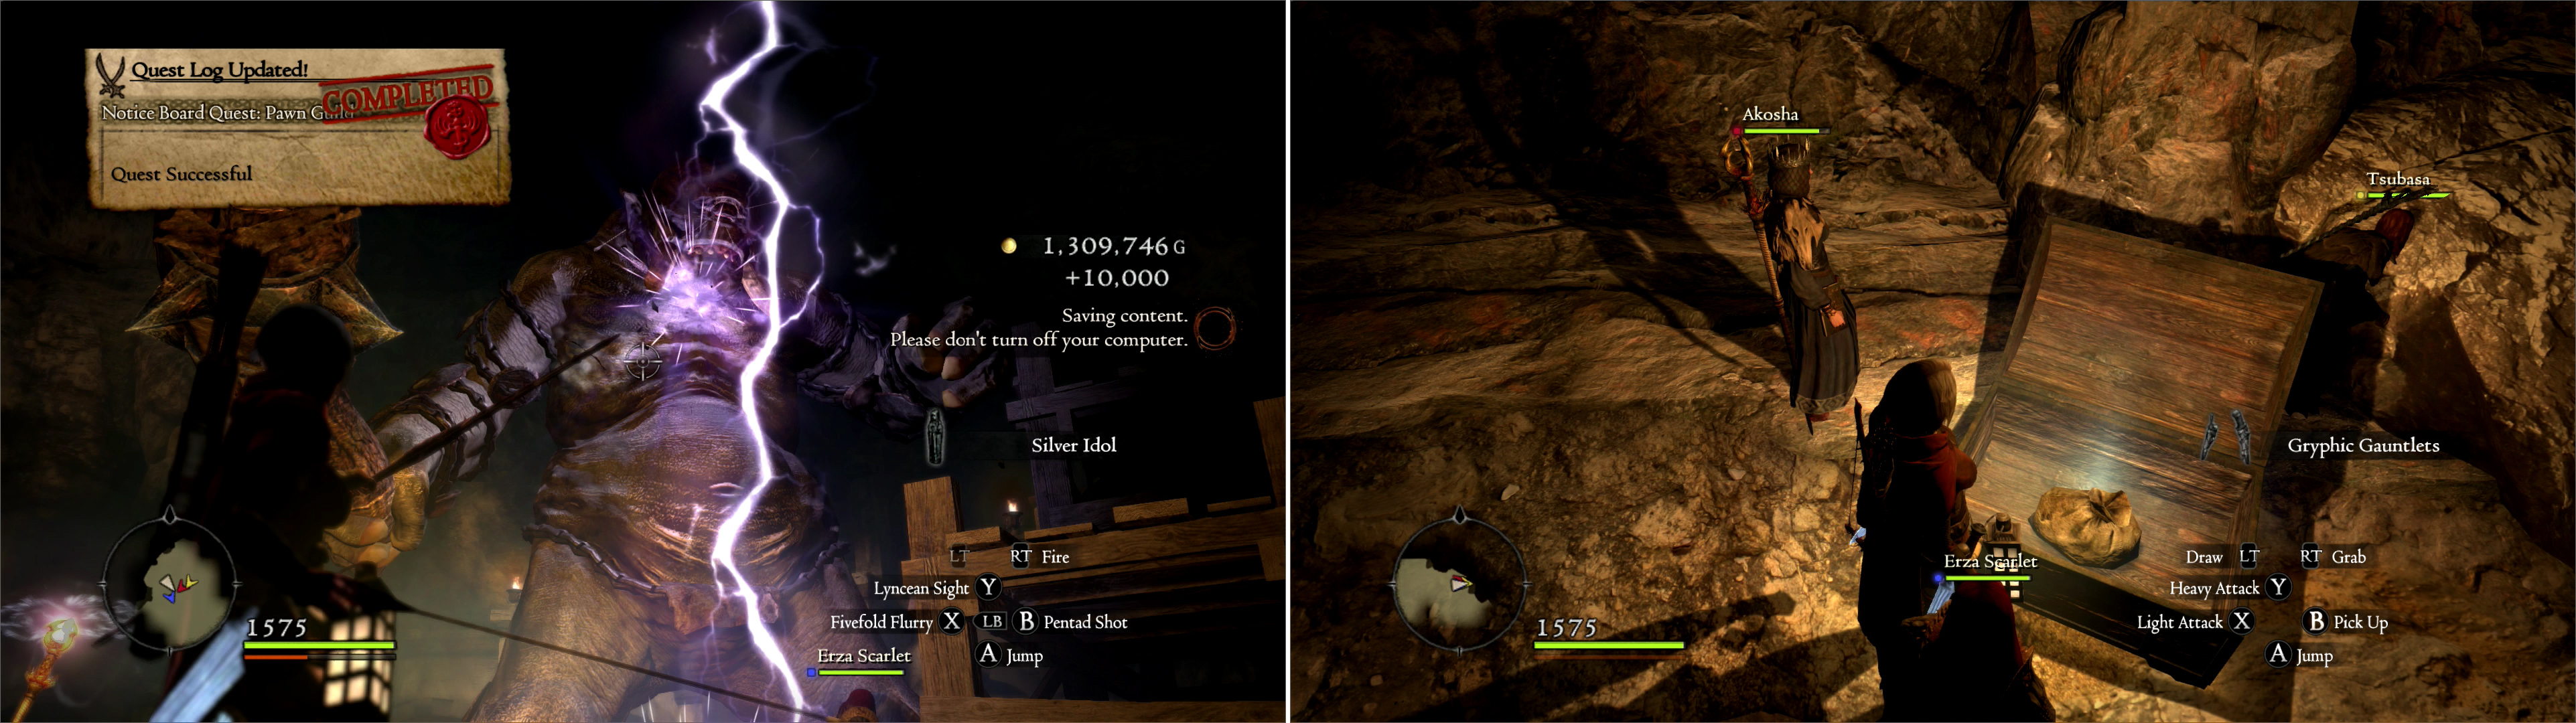
Kill the Cyclops in the Frontier Cavern to obtain the Silver Idol (left), then score several treasure chests lining the arena (right).
Once done, return to Gran Soren. Time to prepare for your next, longer, journey, this time you’ll be returning to the Witchwood to aid Selene… which will also bring you back to Cassardis and the Encampment. With any luck, you’ll complete ‘Nameless Terror’ while you’re down there, and grab a few new quests, too.
Back in Gran Soren, stash what you need to stash, and in general get ready to explore. Before you head out, make sure you are playing a Vocation that can deal physical damage at a range. Not your Pawns. You. This might be tricky if you’re playing a Mage build, but you’ll be fighting foes that simply cannot be defeated with magic. You can always return to Gran Soren before leveling up to change your Vocation back, if necessary. Just keep an eye on your experience as you play. Also be sure to rest until nightfall, so you can get another assassin encounter.
No Comments