Seeking Salvation
When you’re ready to continue the Wyrmhunt, return to Ser Maximilian and start up the quest to ‘Investigate a Cult’. The goal here is to look into a group called ‘Salvation’, which you’ve heard of a bit here and there. Apparently they’re a bunch of Dragon worshipers, who think the end of days and destruction it embodies is a good thing. Crazy, right? Anyways, a massive, fire-breathing, flying lizard scares people, and when people are scared, they’re ready to turn to all sorts of stupid cults for comfort. After all, if you worship the Dragon, and convince yourself that it’s not just some scaly agent of destruction, but your salvation from a world of corporeal misery and petty sensations and needs, you turn a negative into a positive! Right… well… yeah. Anyways, huge digression there… you need to look for signs of this cult in your travels.
Oh, if only you knew of some shifty, street-wise, city-dweller who might have heard something of Salvation! If you follow quest-markers, you’ll be directed to Devyn - the owner of Devyn’s Barber Shop - or to Meridith, a layabout at the Gran Soren Union Inn. Either way, you’ll be referred to Mason, who is apparently now hiding out in the Slums… and by the Slums, they mean the sewers (politely marked as an ‘Aqueduct’ on your map) north-east of the Venery. Head on to the ‘Aqueduct’ and take a ladder down. Mason is in the eastern-most ‘Aqueduct’ tunnel. Talk to him and he’ll admit to looking in on Salvation himself, but it seems people around here know of him, and hence, have spoken little. You, being a new face in town and with no bad reputation to your name as of yet might induce the citizens to speak. He’ll give you ‘Salvation’s Badge’, which will mark you as a member of the cult, and perhaps loosen the lips of genuine cult converts.
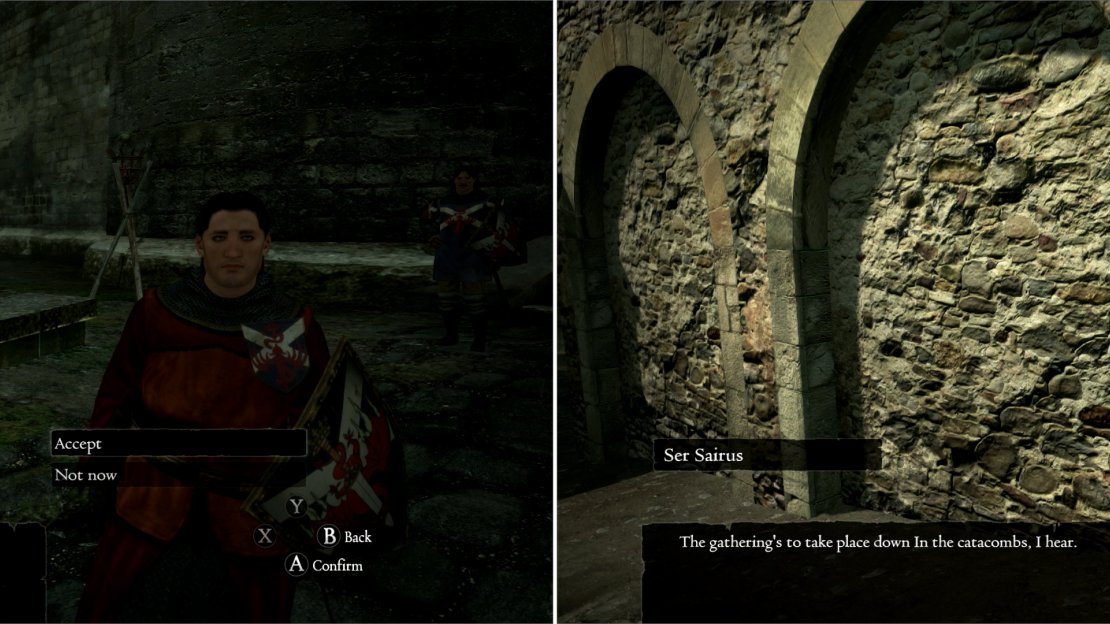
Agree to help Ser Maximilian invest a cult (left) then get this cult’s location from a soldier (right).
The map will now mark three potential people for you to score info off of, but you need only find one; Ser Sarius, a Gran Soren soldier who makes rounds around the Gran Soren Union Inn down to the bridges to the south-east. Talk to him and he’ll mention that there’s a gathering at the Catacombs, a venue that’s too dangerous for his tastes. With that, you have your destination. Getting to the Catacombs will force you to leave the Estan Plains and cross to the Deos Hills to the north, giving you ample incentive to finally explore that area, as well. Before you head off, be sure to bring plenty of lantern oil, as the Catacombs are one of the few places in the game that really require a light source in order to explore it.
Before you head out to the Catacombs, however, there is one encounter worth covering first. The obvious journey to the Catacombs begins by leaving via the northern (Craftsman’s Quarter) gate of Gran Soren. Instead of doing what makes sense, however, leave via the more familiar southern gate… you know, the one you entered when you first traveled to Gran Soren? Once outside cross the bridge leading to the city and continue south-west down the road, where you’ll see a cart under attack by some Goblins. Rush off to the rescue and assist some Gran Soren guards in fighting off the Goblins. During the fight your pretty squabble will be interrupted by a Griffin, of all things! Probably drawn to the fray by the nearby Oxen-and the wounded beast leading the wagon. This will not considered your first Griffin fight, so no monster strategy here. In all likelihood the beast will snatch the Ox that was pulling the cart and fly off… although you avoided a serious encounter at the present moment, a Griffin stalking the fields so near Gran Soren is probably something somebody should look into at some point, no?
As you leave Gran Soren you’ll witness a wagon being attacked by some Goblins (left). Eventually a more dire threat - a Griffin - will show up and make off with the wagon’s Oxen (right).
Deos Hills
If you must go patch up some boo-boos in Gran Soren, do so. When you’re ready to set out for the Catacombs (for real this time!) exit out the northern gate. Follow the road to the north-west, and make your way to the bridge that crosses the river separating the Estan Plains in the south and the Deos Hills in the north. The bridge itself can rarely house monsters in the form of a Goblin tribe, which randomly appear as an ‘Ambush!’ quest, but most of the time you’ll cross unimpeded (as if Goblins are any sort of impediment in the first place…) Cross the bridge and follow the road to the north-east until it forks, at which time follow the north-western fork. If it’s during the day time, you should see very little opposition-maybe a few Bandits to the south of the road. On the other hand, if you’re here during the night you’ll have to fight through a host of Skeletons and Phantoms, particularly the former, which line the road and manifest as you approach. Whatever your opposition, after the fork, but just south of the bend where the road turns from heading north-west to west lie two warrior remains just west of the road. Although it’s uncommon, you might find a sacked caravan along the road near these warrior remains, where Undead prowl.
| Warrior Remains | Warrior Remains |
|---|---|
| Rusted Daggers | Light Outfit |
| Snapdaggers | Rusted Shield |
| Rusted Spellbow |
Follow the road west and north-west. It’ll either be a leisurely stroll for you day-walkers, or a Skeleton-fraught walking battle for you night owls. Eventually you’ll find another fork; the road you’re on continues west, but an unmarked - yet distinctly visible - path diverges to the north. More warrior remains await north of the east-west road you’ve been following (east of a large boulder near the unmarked path north), if you need more junk loot. The Catacombs, however, lie at the end of the unmarked northern road. The smashed sarcophagi along the road should be a rather obvious clue that you’re on the right path. Outside of the ominous hillside entrance to the Catacombs sits a Riftstone, should you need to heal/summon any Pawns. Equip your lantern and head on into the depths.
| Warrior Remains |
|---|
| Light Outfit |
Into the Catacombs
Immediately inside you’ll spot a Flask of Water and an Empty Flask, which can be filled with oil, to shore up your stores. Continue down some stairs to the south to reach your first chamber. Its condition will give you a clue as to why this place would make an ideal hiding spot for a cult-the invading plant life and general collapse suggests this place has been abandoned for quite some time. You can score some minor loot in this room-including a junk-filled rounded chest in the north-eastern corner, and you can kill some Giant Rats, but nothing here stands out as important enough to bother including in the guide. Note, however, that the sarcophagi here will sometimes contain a miasmic curse within them, which will inflict nearby characters once they open (reducing your attributes)… so, open them up and walk away to avoid suffering.
When you’re done scrounging for scraps, continue south. Note a door to the east which will provide you with a shortcut back… just as soon as you reach the far side. After a short distance rubble will block your way south, forcing you to turn east into an even more irregular, claustrophobia-inducing tunnel, which then turns south again. Go through a doorway to enter a more intact chamber running west, lined with sarcophagus-filled coffers. Of course, with death being an industry that oddly keeps pace with population growth, not all sarcophagi found themselves provided with coffer space. Loot the less lofty sarcophagi at your leisure. At the western end of this room you’ll find your first foes; Undead. Not anything to get worried about, disposing of them should be well within your means. Along the southern wall you’ll also find a cauldron on a crude table, which can be lit to provide continuous light, if you have an inclination for time wasting. Speaking of time-wasting, it’s time to score your first bit of loot. From the cauldron turn to face the northern wall of this corridor. To the north-west you should see that the top of the wall has collapsed, exposing a hole only a sane person could ignore. With Double Vault or Levitate, you should be able to climb into the ruined coffer, and from there, drop down into the northern room beyond… which is not recorded anywhere on the map… Sneaky, sneaky, Capcom. A rounded chest awaits here for your looting pleasure.
| Rounded Chest |
|---|
| Ferric Talon |
| Iron Helm |
Climb out of the unmarked room and explore to the western end of the tunnel. Note that as you loot sarcophagi, you might uncover undead. Dead people? In sarcophagi? Travesty! At the western end of the corridor turn south, where you’ll find a more numerous-if not any more dangerous-host of Undead, led by a Stout Undead. Smite your way south, then turn east into a chamber with a few straggler Undead shuffling around. There’s also a few warrior remains you can loot for junk (one in the south-western corner of the room is a bit more generous, with luck), some sarcophagi, and another elevated cauldron along the northern wall. Along the eastern end of the room is a sealed door, but fear not, your search for the opening mechanism will be brief, as a level lies just to the south. Flip it an continue deeper into the Catacombs.
| Warrior Remains |
|---|
| Bronze Sallet |
Go through the doorway you just opened and into some natural tunnels beyond. They venture a short ways east before running north a fair distance. A few Undead exist to slow you down, and you can score some warrior remains in the tunnel for a very rare shot at some very mediocre loot, but there’s nothing terribly interesting until the tunnel opens up into an Undead-filled, sarcophagus-lined chamber. No brickwork anywhere in sight, these poor undead just got thrown into an excavated cavern. No wonder they’re restless. Here they employ the more traditional tactic of digging themselves up from the ground-which might result in surprise if it didn’t take them half of forever to do it. After the initial opposition is put to rest, search the sarcophagi, light another cauldron if you must, search the Warrior Remains nearby, and explore past a smashed sarcophagus to the east that rather poorly hides a tunnel. At the end of this short tunnel lies a rounded chest, guarded by a Stout Undead. Loot, kill, and return to the main chamber.
| Warrior Remains | Rounded Chest | Warrior Remains |
|---|---|---|
| Padded Armor | Iron Armguard | Padded Armor |
Continue through a doorway in the north-western corner of the room and you’ll shortly reach an elevator. Beyond the elevator (which can only be activated by flipping the lever nearby) is a barred door. Smash the bar and you’ll find that you’ve opened the way back to the beginning of the Catacombs. Hopefully, however, you’ve still got plenty of exploration in you. South of the elevator is a locked door that you simply cannot open yet-just ignore it for now, it’ll be a while before you can explore down there. When you’re all ready to go, flip the lever north of the elevator and you’ll get a cutscene showing you and your Pawns as they calmly descend into the depths.
Inside the Catacombs you shouldn’t be surprised to find various undead (left). Fight your way to a functional elevator and descend into the depths (right).
Deeper Into the Catacombs!
Step off the elevator and head south, where Capcom will show their boundless mercy by providing another oil jar and two Empty Flasks. Once you’ve restocked head through a doorway to the west to find a curving, sarcophagus-lined tunnel infested with Giant Spiders. Kill them as you head south, then south-west. Along the northern end of the tunnel is a rounded chest, and along the western wall near a sarcophagus is a square chest. At the far southern end of the tunnel, your progress will be terminated by another locked door. Again, ignore it, it’ll be a while before you can affect it’s opening. Beyond, however, are some Stout Undead you can take pot-shots at, if you want the free experience.
| Square Chest |
|---|
| Ogre Bone |
Obliterate the helpless fatties and head to the east. A short tunnel opens into a large chamber thronging with Undead - both normal and Stout - joined by a pair of Phantoms. Avoid possession if possible, loot sarcophagi, light a cauldron in the center of the room, and avoid curse-clouds within closed sarcophagi. You know the drill. Along the eastern side of the room you’ll encounter some Undead playing dead; a novel disguise if ever there was one. In an alcove along the eastern end of the chamber you’ll find a rounded chest containing the Second Journal Entry , some Harspud Sauce, a Large Coin Pouch (3500 G) and some lootable books hidden amidst the ruins of a Sarcophagus. When you’re done plundering this room, head into a small side-chamber to the south and pull a lever to open another sealed door. Note that there are two sarcophagi along the western wall here, opposite the door. Some loot can rarely be obtained from the northern one.
| Sarcophagus |
|---|
| Scale Greaves |
Opening sealed sarcophagi can prove to be debilitative (left). You can also find the Second Journal Entry in a rounded chest (right).
Continue down a tunnel to the east revealed by the door you just opened until you find another chamber, somewhat more shoddy than the last. Instead of Phantoms, a trio of Skeleton Magi attempt to break up the monotony. Instead of Undead, you get to dispatch more… Giant Spiders. Other than that, there’s another cauldron in the middle of the room, some sarcophagi… and a rounded chest on the eastern end of the room, which actually contains some loot this time-generally some type of fire-enchanted weapon, which might be worth save/loading for, if you’re a Magick-build character. You never know when you’ll get bored and want to switch to a Magick Archer or Mystic Knight for a while…
| Rounded Chest |
|---|
| Eden’s Warden |
| Scalding Razors |
After clearing and looting the room, note that you’ve got an illusion of choice to indulge in-two paths leave this room, one to the north, the other to the south. Both turn east and lead to the southern or northern end of the same chamber-the northern path forces you to drop down a short ledge, while the southern pass forces you to descend some stairs. The two paths converge in a column-lined hall, the floor of which is haunted by slumbering Skeleton Knights, which will rise to fight when you approach. Dispatch them-I counted seven in total. Once they’re gone, there’s a cauldron you can light, and along the northern end of this chamber is a rounded chest that always holds a ‘Set of Salvation Robes’, in case you wanted to fit in with the cultists. There are also some Warrior Remains nearby which could be worth looting.
| Rounded Chest | Warrior Remains |
|---|---|
| Set of Salvation Robes | Bronze Sallet |
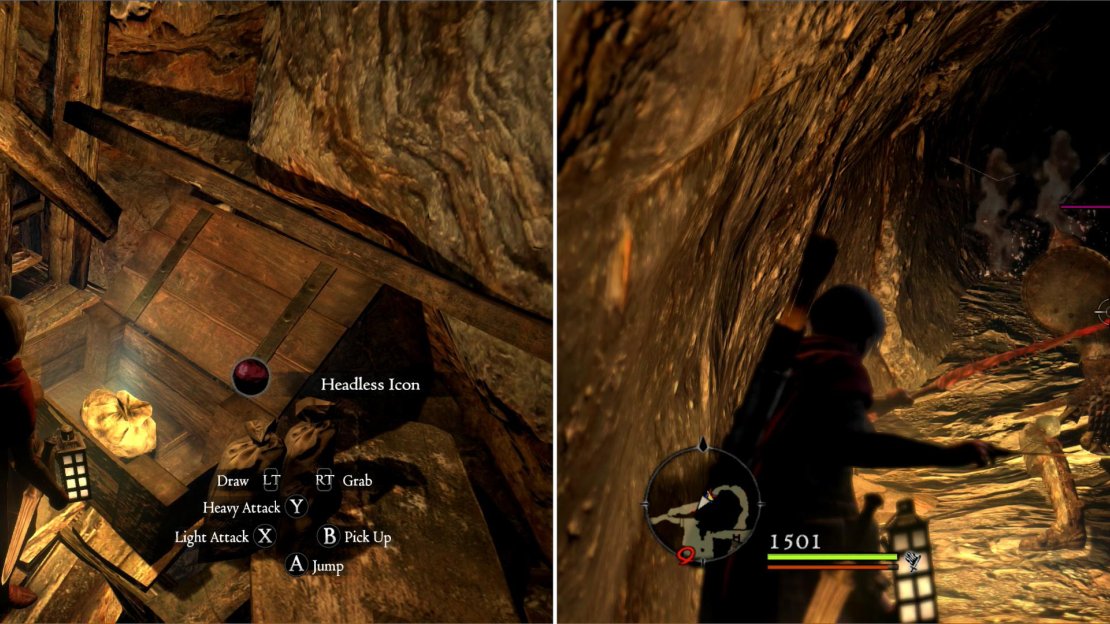
Beyond the columns to the east, on the southern side of the chamber, is a square chest that can drop some loot. To the north you’ll find a hole dug into the eastern wall that leads out onto a wooden platform, built upon a rocky ledge overlooking a rocky chasm. Descend a ladder and note your options briefly: the wooden platform ends to the south and a rocky tunnel continues in that direction. It’s where you want to end up sooner or later, but first, some loot beckons. For instance, score the square just behind (north of) the ladder you descended, which is one of the few locations where you can find a Headless Icon , a rare item that may be the subject of one of Arsmith’s later quests. Climb off the platform to the east, then head north up a rocky tunnel. As you pass two ore veins (which you should mine since they have a chance to yield Catacomb Gold ) you’ll be assaulted by a trio of Skeleton Knights. After fending off the skeletal fiends, continue following the tunnel west until it terminates at a gate overlooking the northern passage’s eastern run from the previous Step… and more importantly, an ornate chest that has-without fail-contained the very decent female-only Frame Plate armor.
| Square Chest | Ornate Chest |
|---|---|
| Bronze Sallet | Frame Plate |
| Magick Buckler | |
| Violet Ring |
Search a chest under a wooden platform to find a Headless Icon, another rare component (left). Skeleton Knights guard a passage, at the end of which you’ll find some treasure (right).
Ogre in the Depths
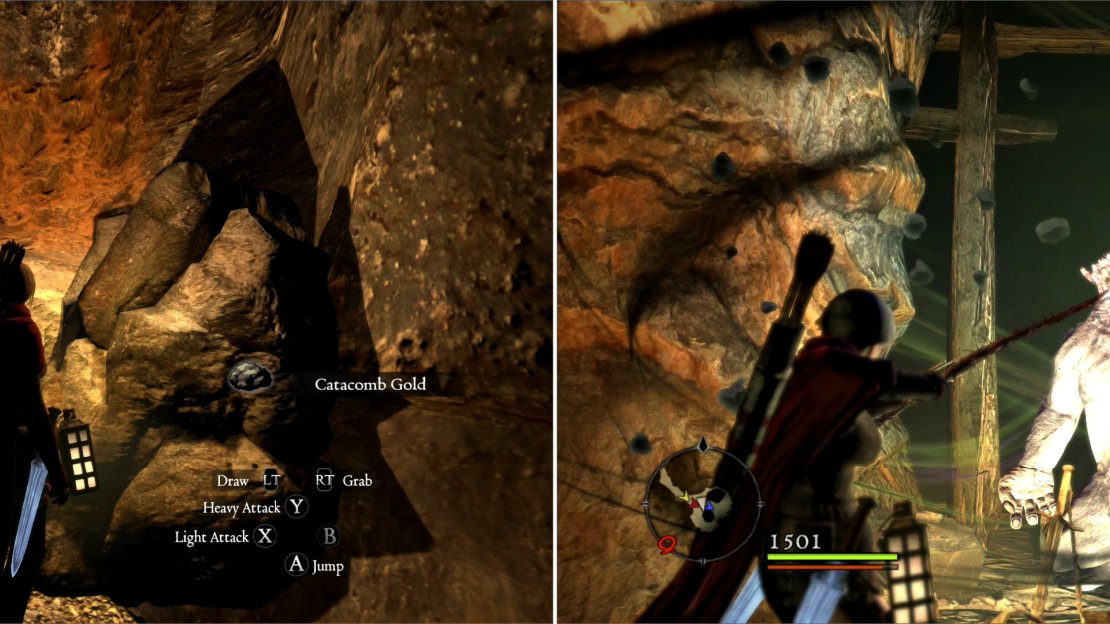
Backtrack to the south and be sure to loot the ore vein just north of the wooden platform on the western wall. Again, you can score Catacomb Gold here, and… well, it’s rare. If it was found somewhere other than the Catacombs, it wouldn’t be called Catacomb Gold, would it? Take the southern tunnel mentioned (and ignored) previously and loot another ore vein at the mouth of the southern tunnel. Continue across a natural stone bridge that traverses a for-all-intents-and-purposes bottomless pit. The tunnel turns south-east and opens up into a chambered partitioned by three natural stone pillars. Unfortunately, this chamber is also home to an Ogre.
Enemy Strategy: Ogre
Don’t let their size fool you-Ogres are much stronger than Cyclopes, and although they won’t awe you with disposable life bars, their offensive powers far exceeds the purely aesthetic edge the Cyclops seems to have in resilience.
Stay Frosty
No, that doesn’t mean use ice attacks. Was that title misleading? Anyways, Ogres are much, must faster and more aggressive that Cyclopes Their arsenal includes running drop-kicks, charging clotheslines, and leaping haymakers. Their attacks are somewhat clumsy and will usually leave them open to counter-attacks, but all in all, you can expect far less down-time between their assaults as compared to the Cyclops, which all but telegraph their attacks and hope their range (and your foolishness) make up for their speed. You can also expect Ogres to perform 180-degree swings at foes standing behind them, and in general to swat and pummel anything in front of them.
Putting in Some Face Time
The big vulnerability of the Ogre is their face. Not their head, not their neck, but their face. Since Ogres aren’t nearly as towering as Cyclopes, ranged attacks aren’t quite as important-they’re still preferred-but Heavenward Lash can do boatloads of damage, as can simply climbing and stabbing their face, or, yes, shooting them with arrows and spells. Target them too much, however, and an Ogre will block with its massive arms, negating all damage you do (stupidly enough, even area-of-effect attacks) and occasionally lashing out in spastic counter-attacks. Another simple tactic is to take a high-level Mystic Archer and use Immolate. Find an Ogre and jump on its face. Depending on your offensive power, it could die in under two seconds.
A Slave to its Passions
Ogres can, like Cyclopes, fly into a rage when injured severely. They’ll attack more often, which is enough to cause serious problems, considering their speed and already prodigious aggression. They also have controlling other… primal urges, as well. Ogres are, well… a bit turned on by the sight of women, and will endeavor to visit upon them the worst of their attentions. Womenfolk risk having Ogres snatch them before running away and subjecting them to a bit of licking. It’s not a good thing.
The fight with the Ogre is no joke. If you’re having trouble-try reducing it to less than half it’s life. When it flies into a rage, lure it north to the natural stone bridge, where it’s charging attacks could prove a liability for it-if it doesn’t succeed in knocking you into the abyss, first. Once it’s dead, loot the chamber it was in, which has two square chests to loot, several warrior remains (they mostly impart junk) and a few ore veins to try your luck out with. Some Undead prowl to the south-east, but after fighting an Ogre, it’s hard to take them seriously.
| Square Chest | Square Chest | Warrior Remains |
|---|---|---|
| Leather Circlet | Iron Cuisses | Bronze Sallet |
| Mage’s Shoes |
Ore veins can yield Catacomb Gold, which is unique to the Catacombs (left). An Ogre has set up a lair in some of the Catacomb’s natural caverns (right).
When you’re done looting, continue south-east, smite some undead, and you’ll ultimately end up crossing some wooden bridgework to the south. Eventually you’ll reach a ledge which leads to a doorway to the west, beyond which the Catacombs continue. Enter a relatively intact chamber to the west, loot some sarcophagi, and head down some stairs. After spending so much time crossing rickety wooden bridges over chasms and walking through Undead-and-Ogre infested narrow tunnels, it actually feels good to be back inside a man-made structure, even if it is crawling with Undead. Turn south and go down some more stairs. To the east lie two side-chambers, the southern-most which houses two Coin Pouches and one Large Coin Pouch (5500 G) and a square chest in the south-eastern corner, which can yield loot.
| Square Chest |
|---|
| Bliaut |
| Rose Ring |
At the southern end of this chamber, however, are tunnels leading onward… and outward, as the case may be. The former can be found by perusing the western tunnel, while the latter lies at the end of the southern one. If you need to get back to town to rest, stash loot, or whatever else you crazy kids do back in town, follow the southern tunnel. You’ll find some sarcophagi to loot before you eventually end up at a barred door you can now open by smashing the wooden brace holding it shut. Beyond is a small chamber with an ore vein and a ladder leading up to daylight-you’ll surface in the Estan Plains, just west of Gran Soren.
When you’re ready and able to carry on, head up the western tunnel. You’ll arrive in a chamber where a gate blocks your progress westward, but fortunately, you can go down some spiraling stairs to the south. In the distance you’ll hear the voice of the ‘Elysion’ rambling about how the flesh is evil, pleasure is bad, and life sucks. The only answer? Death. Sounds like the Dustman philosophy from Planescape. His ‘true and proper’ world sounds like it really sucks. Why do all religions hate fun? Anyways, note how he talks about the Dragon being the source of their salvation-that they must cede their souls to it. What are the odds that these cultists will find common cause with the Arisen, who seeks to slay the Dragon? Probably not very high.
Head down the stairs until you reach the bottom, and ignore the door to the west, which, like all things westward, is inaccessible. Instead head north, then east, west (oops) into a small chamber. Climb some cut stones in the south-western corner of the room to reach a ledge to the south, head east up some stairs, and at the landing turn south to reach a balcony overlooking the little cult gathering.
Crashing the Catacombs Cultists
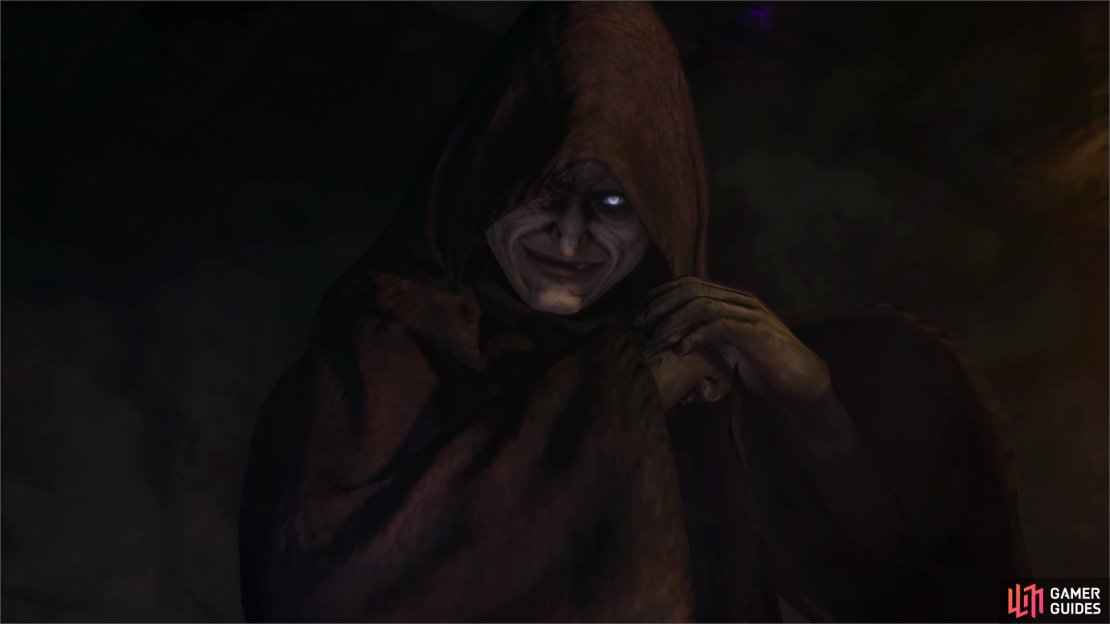
Once you walk onto the balcony, the Elysion - your ugly little robed friend from Cassardis/the Encampment, who was responsible for the Cyclops and Hydra attacks - will knock you down with magic. The man you followed as per Mason’s request back in Cassardis will put on his mask and walk away, and the Elysion will summon some undead to deal with us, and his deluded flock. Once you’re back in control, you’ll have to kill two waves of weakling Undead; eight Undead each wave, sixteen deaders in total. It’s a fight that nobody should have trouble with at this point in the game.
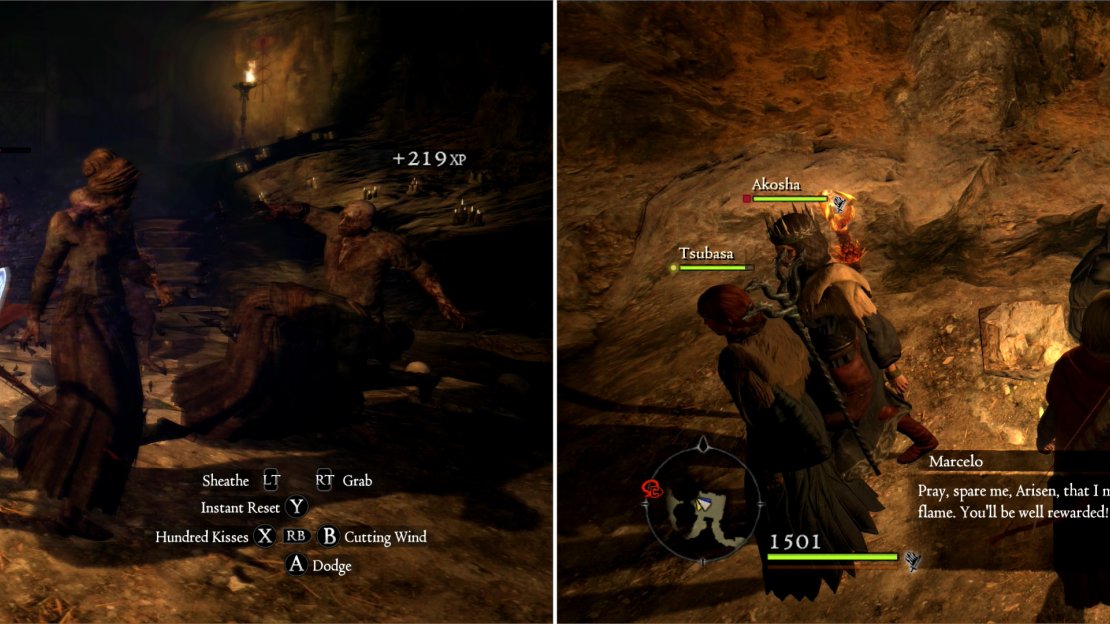
After the Undead have been dispatched, Mason will congratulate you through a door. Head west up some stairs and go through said door, then up more stairs to witness a cutscene. Apparently Mason snared one of the Salvation cultists, although the Elysion escaped. The cultist will try to explain himself-joining with a doomsday cult seems to be a popular past-time amongst the peasantry these days-and Mason suggests that it would be dangerous to let him go, now that he’s seen the two of them together. To be fair, it was that very same anonymity that allowed you to track down this meeting in the first place. The cultist will whine and mention something about some promise Mason made him, and Mason, seeming quite amused with the situation, will leave the cultist’s fate up to us. The cultist will try to reason with you, even offering association and money in return for sparing him. You can either kill him, or ignore him and head out the doorway to the south. If you kill him, Mason will be pleased-or at least amused-and offer further jobs ahead. If you leave the cultist be, Mason will be disappointed, and in light of you lacking the stomach to get the job done will decide that you two shouldn’t work together anymore. If this seemed like a pivotal plot-point around which many great future events would revolve… well, you’re going to be sadly disappointed.
Destroy the Undead Salvation summons (left) then decide what to do with the cultist Mason captures (right).
Whatever you do with the cultist, head through the doorway to the south, into some natural tunnels, and up a slope. Mine an ore vein along the way and loot a rounded chest before ascending a ladder and leaving the Catacombs behind. You’ll find your way back here, don’t you worry, but it’ll be a while. You’ll surface at the ‘Catacombs Rear Passage 2’, under the bridge that connects the Estan Plains to the Deos Hills. Return to Gran Soren, stash loot, heal, and report your success to Ser Maximilian… but before you get started on another Wyrmhunt quest, it’s time to officially explore the Deos Hills.
| Rounded Chest |
|---|
| Direwolf Cape |
| Restless Earring |
| Violet Neck Wrap |
| Objective | Reward |
|---|---|
| For investigating a cult | 18000 XP, 20 Rift Currency, 15000 Gold |


No Comments