
To continue the story, head back to the ship and sleep in the Private Quarters, only to be awoken by some alarms. Get on the elevator and head to the bridge, where you’ll be briefed on the situation. Watch the battle that ensues, then get ready to board the enemy ship. Take the elevator back to the transport room and once you make it to the teleporter, you will automatically board the enemy ship, the Cavaliero.
| Enemy | Species | Items |
|---|---|---|
| Eliminator | Machines | Diffusion Device, Quantum Processor, Wire |
| Kronos Authority | Humanoid | Relaxation Device, Rivets |
| Kronos Gunner | Humanoid | Mixed Syrup, Rivets |
| Kronos Scholar | Humanoid | Blackberry Potion, Signet Card: Shadow Needles+, Signet Card: Radiant Lancer+ |
| Kronos Soldier | Humanoid | Blueberry Potion, Rivets |
| Toy Soldier | Machines | Carbon Fiber, Diffusion Device, Quantum Processor |
As soon as you’re on board, you’ll be thrown straight into a battle. Target and take out the Authority enemy first, then clear the rest of them. If you had trouble with that first batch, then load up a previous save and grind some, or make some nice equipment, like the Elemental Leathers. After the battle has finished, feel free to use the healing spot and save point nearby, then it’s time to start diving into the enemy’s ship.
At the first split, go west to find a small room with a treasure orb ( Solid Protector ). In the next room to the east, you’ll find your first run-in with the Eliminator enemy, which is similar to the Sentinel you fought during the first Anne protection mission. Although they may not have a lot of health, their attacks are strong and should always be taken out first. Go into the room to the southeast to find another treasure orb ( Laser Oscillator ), then continue north.
You will come to another split, with one path going east and another going west. Take the western path until you come to a small side room, where there will be two treasure orbs ( Carbon Fiber x2 and Anti-paralysis Amulet ). Continue to the end of this path to find another treasure ( Cloak of the Stars ). Return to the split and go east this time, stopping by the side room near the exit to the north to find a treasure orb ( Attack Bracelet ). Follow the path to the end and take the teleporter to the next area.
As soon as you reappear, grab the treasure orb nearby ( Manacloth ) and head into the next room, where you’ll find a creature called a Guardian Beast waiting for you. Think of this like a mini-boss, with its most dangerous attack being Crystal Ray, a beam it shoots straight in front of it that can do some nice damage. The Guardian Beast is more annoying than lethal, though, as it will move around a lot. Eventually, it will go down (it doesn’t respawn) and you can continue to the south.
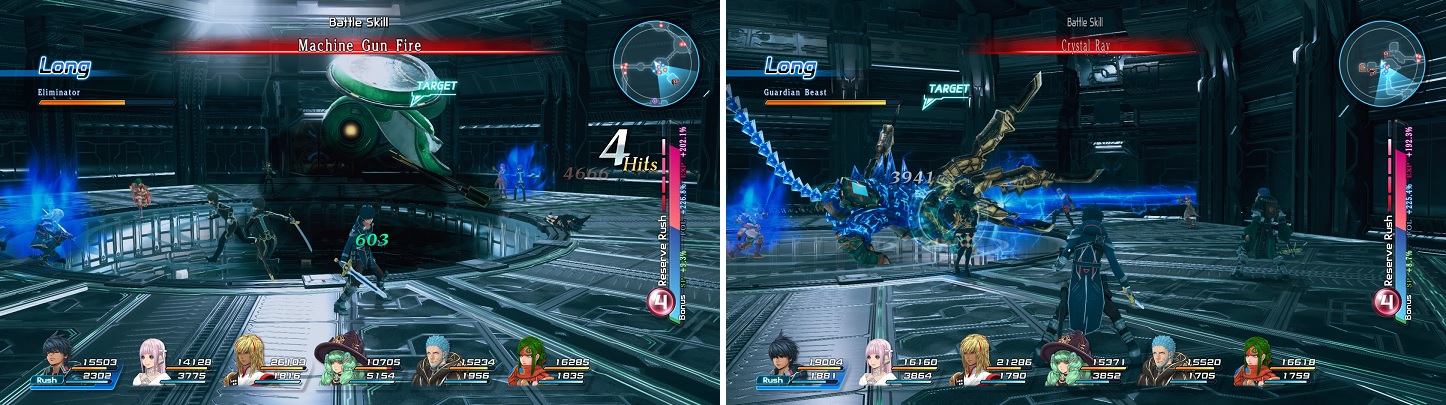
Eliminators should always be defeated first (left). The Guardian Beast’s Crystal Ray is a very dangerous attack (right).
In the next room, take the little detour into the southern room to find another treasure orb ( Photonic Blaster ), then head east. You will come to a four-way intersection, with a save point not far to your south. Before using it, go east and into the room at the end for another treasure orb ( Blank Disk ). Save your game, then go south to view a short little scene. It seems one of the girls is on the ship, so it’s time to rescue her, but go into the room to your west to find another treasure ( Resurrection Mist ).
Defeat all of the enemies waiting outside of the door, then go inside to encounter a lot more enemies. One of them will be a Kronos Commander, who is nothing more than a normal Kronos enemy, but with a lot of health. Concentrate on the other foes first, then save the Commander for last. Once they are all gone, Relia is now safe and you can leave the room…only to find out that a silent self-destruct sequence has been initiated. You will have around 27 minutes to get to the cargo bay in the north, which is a lot of time considering it’s not that far of a run.
Start taking the path laid out for you, stopping by the southeastern small room in the second circular one to find a treasure orb ( Resurrection Elixir ). In the room with just two Eliminators, there will be another treasure orb to the west ( Reinforced Gunpowder x2 ), then another two orbs in the next small room to your north ( Defense Seeds and Mentality Seeds ). There’s nothing left between you and the cargo bay, except a few more packs of enemies, as well as one last treasure orb just outside of the cargo bay doors ( Ultimate Bomb ). Head inside the final set of doors to escape.
Back on the Charles D. Goale, you’ll be in lone control of Fidel and will need to check up on Relia. She is with Miki, with both of them being on the west side of the Transport Room. They will join up with you, so head to the bridge and you’ll overhear something that shouldn’t have been said, with Relia running off on her own. You will find her in the cargo bay, where a heartwarming scene will play out, then you will need to report to the bridge once it is over. It turns out that the location of Feria has been located, which is the Symbological Facility Prime in Trei’kuran Dunes.
Quick Sidequesting
Before you head there, there are a number of new Private Actions that you can trigger, with two unlocking new Roles. Both of them are automatic PAs, with one being found in Sthal (Scary Dream; unlocks Poltroon role ) and the other found in Myiddok (Keeping Up with the Kennys; unlocks Unfortunate Soul role ); they may be triggered in other places. Likewise, you will find a number of new Quests available from the bulletin boards in Central Resulia, Santeroule and Eastern Trei’kur, as well as the final quest from Welch in Myiddok. Similar to Welch’s previous one, you simply need to kill an enemy in the Northern Territory of Sohma for a key item and bring it back to Welch to get the ability to augment both weapons and armor.
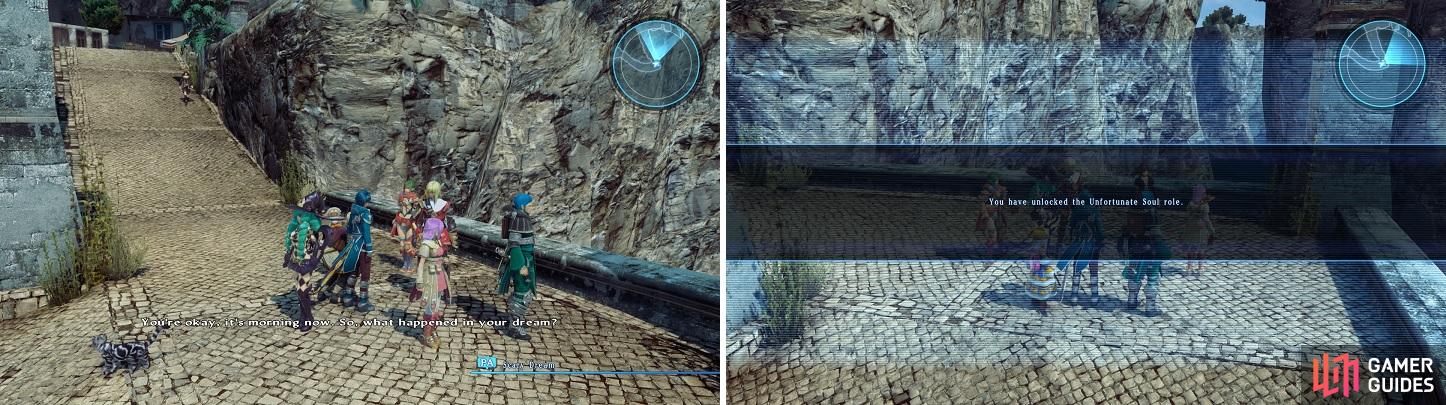
Keep triggering the random PAs until you get the ones that reward you with the Roles.
There’s one more quest you might want to do, as it will reward you with three Meteorites, which are items that can eventually be forged into very powerful weapons that can be equipped on any character. This quest’s name is Wanted: Abigail and can be gotten from Santeroule, with the enemy you need to defeat being in the Northern Territory of Sohma (northwest corner). With these three Meteorites in hand, go to the ship and purchase six Micro Blasters for each Meteorite, then save the game.
Take four of those Micro Blasters and synthesize them with the Meteorite to try and make a Hadron Collider, then synthesize that with the other two Micro Blasters to hopefully get your Laser Weapon. If you didn’t get Elemental Leather armors before, do that with six Wires each, then equip them on Emmerson, Anne, Fidel and Victor (so, you’d need 24 Wires). That just leaves armor for Fiore and Miki, and it’s possible to get almost as good as the Elemental Leather. Note that you can also make Meteorite by synthesizing a Metal-resulting item with an Impurity of 44, so you could make Laser Weapons for the entire party.
It is called a Laser Suit and it requires you to synthesize Machine with Impurities of 44. Use the following recipe to try and get two of them: Photonic Blaster (x2), Ghost’s Soul (x2), and Dragon Scales (x2). You can replace the Photonic Blasters with a Micro Circuit and Quantum Processor, but the former items can be bought and the Quantum Processor is scarce. For the Photonic Blasters, you can buy them on the ship, Ghost’s Souls drop from Misfortuners (Trei’kuran Dunes) and Bone Knights (North/West of the Eastern Eihieds), and Dragon Scales drop from Lesser Dragons (Dakaav Footpath). While they lack the resistances of the Elemental Leathers, they still sport an increased of 100 DEF/MEN over the best armors you have at the moment.
Symbological Facility Prime
Travel to the Aysoughk Riverbank option in Trei’kur and go to the entrance of the facility. It seems Kronos has updated their security, but thanks to Anne, you’ll be transported straight to the third floor. Head into the main room and into the northern one with the terminal, where you had to protect Anne earlier. Thankfully, you don’t have to do that again, but some enemies will show up to attack you. Quickly make short work of them, then go through the door they came out of to make your way to the fourth floor.
There are no enemies here, but there is a new door that has opened up, leading to the fifth floor of the facility. You will end up meeting up with one of the researchers, named Raffine, in the next room, who will want you to follow her. Before going into the next room, open up the two treasure orbs to get a CQC Program Delta and Swordsman’s Manual VII . In the next room, as you’re talking, some security drones (four Fafnirs) will appear.
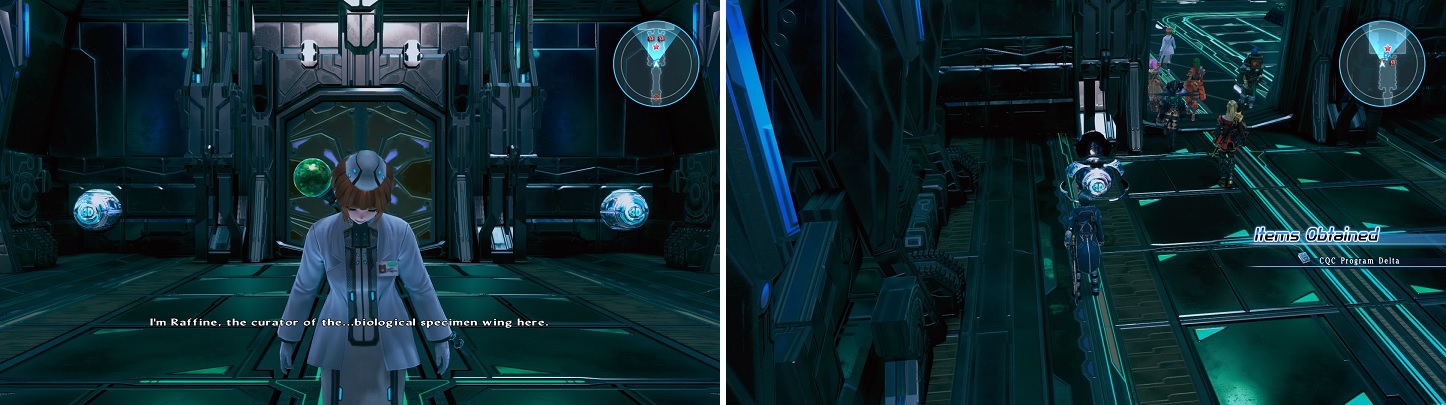
Meet Raffine, a researcher in the lab (left). Grab the skill books in the room where you meet her (right).
Destroy them, noting that things may get hairy for a short while, then move onto the next room, where there will be some plant-like enemies called Welwitschia waiting for you. These aren’t as dangerous as the Fafnir, but they are able to poison you, so make sure you heal up anyone after the fight and cure them of the affliction. You will also want to make sure everyone’s health and MP are topped off, as you will be coming upon a boss.
BOSS - Illustrious Manticore
This boss can certainly put out a pounding, with some strong physical attacks, but you will notice one thing from the very beginning. As you damage the Manticore, it will recover its health, making the battle during the beginning a lost cause, as you won’t be able to outdamage its regeneration. You will have to wait until Relia does her thing, which will slow down the monster’s movements, as well as its regeneration. It seems to have taken a liking to Fidel, so it will likely concentrate on going after him.
As for its attacks, it has a few to watch out for, with the physical ones being the annoying strikes at the beginning. It can slash with its claws while moving in a straight line, which can do some massive damage. Besides that, it will rear back and charge in a straight line, with its stinger. Soaring High is just it doing a front flip, dealing damage to whoever is in front of it. Leonine Onslaught sees it putting its stinger into the ground, shortly followed by spinning and damaging everyone around it. Seething Inferno is probably its strongest attack, doing something similar to Leonine Onslaught, but seemingly causing an explosion shortly after it puts its stinger into the ground.
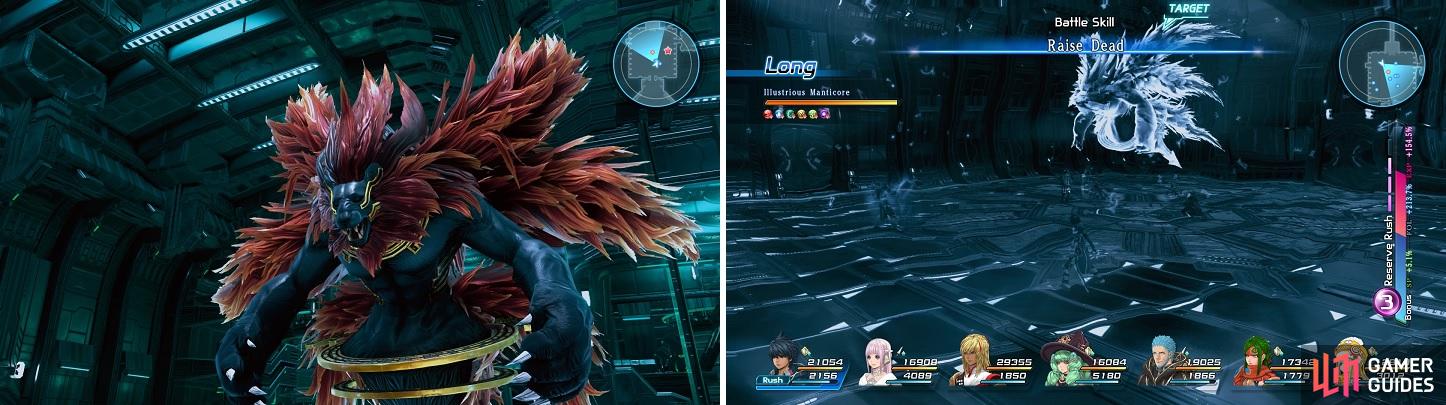
The Manticore is quite big (left). You have to wait until Relia does her thing to be able to outdamage its regeneration (right).
Once the boss has been defeated, watch the cutscenes that follow and you’ll end up back on your ship. Go to the bridge to view some more scenes (walk close to Emmerson and Anne if they aren’t talking). Your next objective is to head to the Signesilica, which is located in the Northern Territory of Sohma. However, there are some new quests and PAs available that you might want to do, with one particular one being named That Darn Ruddle (Eastern Trei’kur).
Talk to the guard near the bulletin board to find out he went to Myiddok. In the inn, talk to the Steward to learn Ruddle’s headed to Santeroule. The person you need to talk to is in the middle of the map, who mentions he went to Central Resulia. The girl by the bulletin mentions he went to Sthal, where you’ll find him inside your house. Talk to him, then turn in the quest and you’ll be finished chasing him around for good. He will open up a shop in the inn in Central Resulia, which will sell a few things that might be more annoying to find, such as Alchemist’s Water.
No Comments