Star Ocean 5 uses a seamless battle system, where you will spot enemies on the field and instead of loading in a separate area, you will fight the enemies right then and there (ex. like Final Fantasy XII). The game uses a weapon triangle system, consisting of a weak attack, strong attack and guard. Each of these is strong against one other command, while being weak against another. Depending on the distance from the enemy, you should see either “Long” or “Short,” which determines the skill/attack you will use.
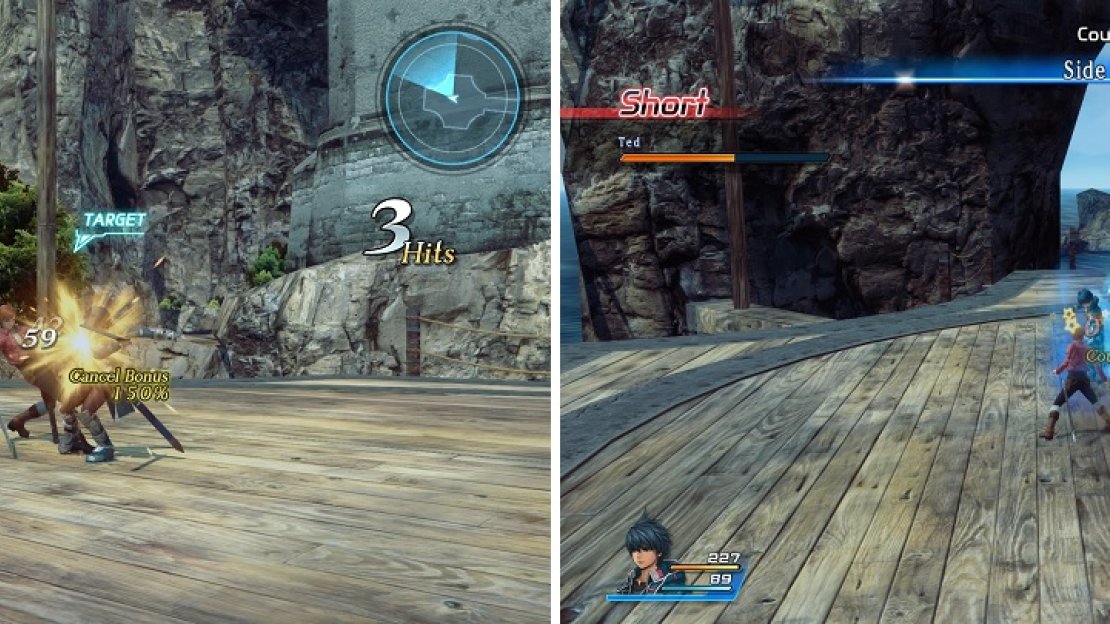
Cancel Chaining is just a matter of timing your attacks to make subsequent ones stronger (left). Countering weak attacks is a great way to mitigating damage and also do some of your own (right).
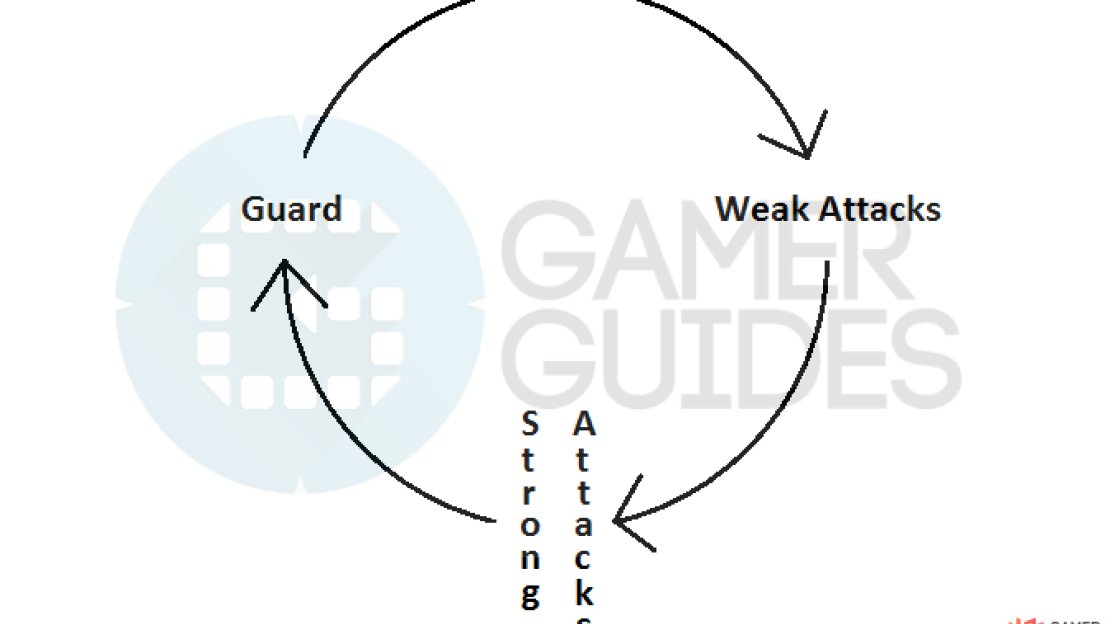
The weak attack is quick and very easy to use, with it nullifying strong attacks. The problem with these is that they don’t deal a lot of damage and guard will block out a lot of the damage done by these. Strong attacks are slower than weak ones, but they tend to be more powerful and can break through an enemy’s guard. You will know when a strong attack is being used, as it gives off an aura, but know that weak attacks can counter strong ones.
As you might have already guessed, Guard will reduce the damage done by weak attacks, but it can be broken by strong ones. However, if you press Square right after blocking an attack, you will perform a counterattack, which does damage and also interrupts the enemy’s action. Upon finishing a battle, you will see the experience, Fol (game’s currency) and SP (Skill Points) you have gained from that battle on the right hand side (there is no separate victory screen). The latter, Skill Points, has a number of uses that will be explained in later sections.
The attack triangle system used in battles.
Since battles start whenever you’re in the vicinity of the enemies, you may be wondering how exactly you get a preemptive strike or how an enemy gets the jump on you. If you start the battle without the enemies noticing you, then you’ll get a preemptive strike, which causes your physical and magical attack to be increased for the battle. On the opposite end, if the enemy gets the jump on you, then it is considered a surprise attack and your physical/magical attack will be reduced for the battle.
There will be multiple characters fighting for you during battles, with a total of seven as you progress through the main story, although only six of them you can freely control. While you can only control Fidel on the field, you can freely switch between characters in battle by pressing left/right on the Directional Pad. For those characters other than the one you’re controlling, you are able to manipulate their AI by utilizing Battle Roles.
Every character in the game is able to equip Roles via the menu, up to a maximum of four of them. These will dictate what your character will do during battle, such as Healing making it so the character will use recovery signeturgies whenever a character’s health is low. A Role can only be assigned to one character at a time, as equipping it on someone else will remove it from the first character. There are a lot of Roles in the game, although you won’t have access to them all right away.
You can learn new Roles by having new characters join your party, progressing in the main story, and even from leveling other Roles. Roles are leveled up by either using them in battle or by using Skill Points. Note that some Roles will actually affect your character’s attributes, such as Attacker increasing Strength. There are different categories for the Roles, so you will need to experiment with them as you unlock more to figure out a “class” of sorts for characters. For example, you can try to have Fidel as a straight-out attacker or try to equip Roles that make him into a tank.
Skills and Signeturgy
In addition to the normal attacks you can use on enemies, every character in the game has skills or signeturgies that they can unleash. Every character can assign up to four skills, two of which are set to the X button and two more to the Circle button. To perform the skills, you’ll need to hold down the appropriate button. Similar to regular attacks, the distance between your character and the enemy will determine whether you’ll attack using the long ranged skill or the melee-ranged one.
For the characters that use Signeturgies, they operate in the same manner, as they are assigned to X/Circle and you will need to hold the button down to use them. All of the skills still adhere to the triangle system mentioned earlier, so you can use a X button skill to interrupt an enemy’s strong attack. In order to level up both kinds of skills, you either need to use them in battles or find the corresponding Skill Books. It’s important to note that Skill Books don’t necessarily increase the skill by a level, but only increase it by the percentage shown to the right of the Mastery stat.
Reserve Gauge and Rush
A little bit into the main story, you will unlock the Reserve Gauge for use in battles. This will appear as a bar on the right hand side of the screen whenever you are fighting enemies. The Reserve Gauge serves two main purposes, which are to allow the use of Reserve Rush (will get to that in a little bit), as well as give you bonuses to experience, Fol and skill points. Everything sounds nice, but how exactly do you go about increasing this Reserve Gauge?
It all boils down to the same attack triangle system mentioned above. As you attack enemies during battle, you will notice that the bar will very slowly start to fill up. You can increase this even more by utilizing the attack triangle system in your favor, but the reverse also goes, as if you get smacked around by the same, then the Reserve Gauge will decrease (ex. you have your guard broken from a strong attack).
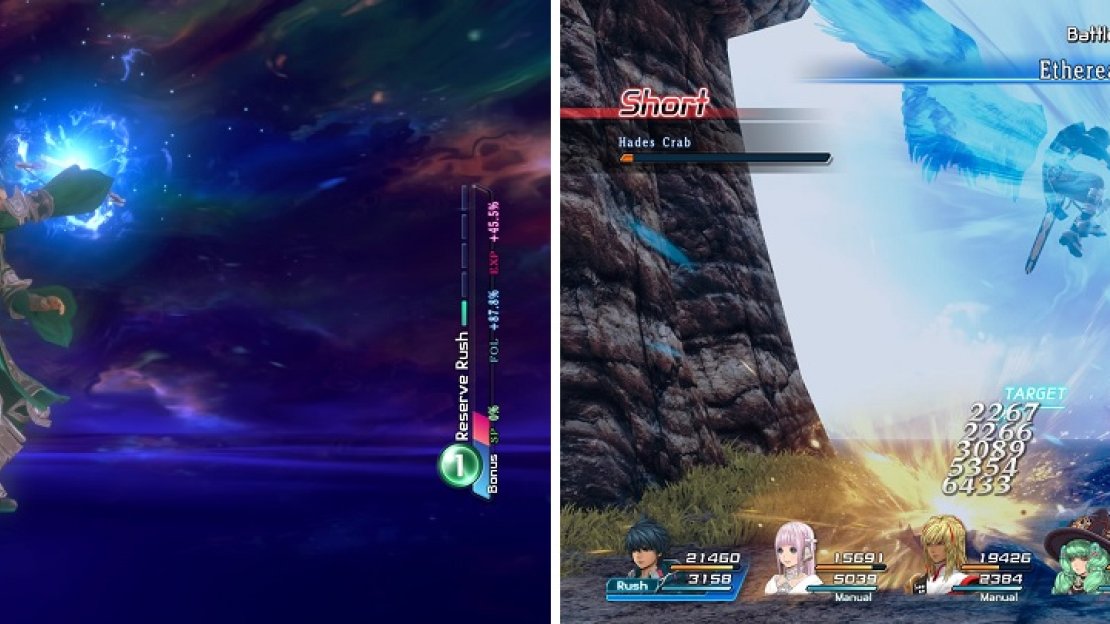
Reserve Rushes are basically ultimate attacks that should be used in tough battles to give you an advantage.
Weak attacks increase the red portion (increases EXP bonus), strong attacks increase the blue portion (increases Fol), and guard counters increase the green portion (increases SP). You may also have noticed a number appearing in the circle at the bottom of the Reserve Gauge. This pertains to the Reserve Rush, which is basically an ultimate attack. By pressing R2 and X together, you can unleash the Reserve Rush, as long as you have a “1” in the circle. You can press L2 while holding R2 to change the number of gauges you will use, and pressing left/right on the Directional Pad while holding R2 will allow you to choose who uses the Reserve Rush.


No Comments