
First Iteration
| Location | Item | Enemies |
|---|---|---|
| Coast of Minoz | Blue Talisman | Apprentice Scumbag x3; Axe Beak x2/Stone Golem; Eyebalone (level 25) |
| Resulian Plains | Green Talisman | Apprentice Scumbag x3; Harpyia x2/Carnivorous Plant; Eyebalone (level 30) |
| West of the Eastern Eihieds | Red Talisman | Sabre-Toothed Tiger x3; Kobold Bandit x3; Eyebalone (level 35) |
The Eyebalone isn’t too challenging, but it has a few moves that can output some serious damage to your characters. Dry Eye is the easiest of its attacks to avoid, with the Eyebalone shooting out three lasers that hit the ground not too far away from it; they don’t move at all, so as long as none of your characters are in front of the beast, you’ll be fine. It can also drop to the ground and spin around, knocking your characters around for a few seconds; this can be annoying for Fidel and Victor, as they are both melee characters.
By far, its most devastating attack is called Eye of the Beholder, where it will shoot a tracking laser beam aimed at one of your characters. If the character being attacked is the one you are controlling, you can easily dodge the attack by running around. If it’s not on the character you are controlling, then it’s a possibility that the character might die, especially if it’s Miki or Relia. One last attack it can do is called Radiant Lancer, a spell that can hit a character up to five times (Miki will later learn this).

The Eyebalone’s laser attacks should definitely be dodged, as it’s possible they can kill a character quickly.
Second Iteration
| Location | Item | Enemies |
|---|---|---|
| Coast of Minoz | Blood Chain Mail | Lizard Warrior x3; Corpse Bat x2/Ridiculer; Adephaga Milies x3; Devil Child x2/Seventh Core; Vidofnir (level 45) |
| Resulian Plains | Duel Armor | Lizard Warrior x3; Corpse Bat x2/Ridiculer; Stroper x3; Devil Child x2/Cursed Horror; Vidofnir (level 50) |
| West of the Eastern Eihieds | Atrementous Usurper | Lizard Shaman x3; Corpse Bat x2/Ridiculer; Stroper x3; Devil Child x2/Cursed Horror; Vidofnir (level 55) |
| Trei’kuran Dunes | Faerie Band | Metal Golem x3; Vampire Bat x2/Cursed Horror; Hades Crab x3; Lesser Dragon x3; Vidofnir (level 60) |
| Northern Territory of Sohma | Healing Band | Metal Golem x3; Stroper x2/Cursed Horror; Adephaga Prox x3; Antlered Tortoise x3; Vidofnir (level 65) |
Vidofnir can be a challenging encounter, since it has a lot more attacks at its disposal than the Eyebalone. However, it is weak to ice, so limited Fiore’s skills to only that element will help in bringing it down that much quicker. Divergent Shade is a spell that sends a bunch of energy orbs out that will home in on various characters. Nosedive will cause the Vidofnir to fly up in the air a bit and then crash down, cause a small explosion around it.
By far, its most devastating move is Tornado, where it will send out a whirlwind that not only hits multiple times for some decent damage, but it also keeps characters in the air for a few seconds. This will incapacitate them, meaning they can’t do anything, which is troublesome if it’s Miki. Its physical attacks aren’t too much trouble, despite one being a three-hit combo and the other being able to hit all melee characters around it. Volcanic Burst is another attack that has some worries, since it has a decent area of effect on it, despite only targeting one character.
Third Iteration
| Location | Item | Enemies |
|---|---|---|
| Coast of Minoz | Asclepius | Bone Knight x3; Toy Soldier x3; Lamia Radix x2/Welwitschia; Dinosaurus x3; Guiafairo x2/Jatayu; Chaotic Cell x2/Sacred Guard; Storm Dragon (level 80) |
| Resulian Plains | Arcadian Serenity | Adephaga Prox x3; Toy Soldier x3; Lamia Radix x2/Welwitschia; Dinosaurus x3; Guiafairo x2/Jatayu; Chaotic Cell x2/Sacred Guard; Storm Dragon (level 84) |
| West of the Eastern Eihieds | Carbuncle’s Prison | Great Scumbag x3; Toy Soldier x3; Lamia Radix x2/Welwitschia; Dinosaurus x3; Guiafairo x2/Jatayu; Chaotic Cell x2/Sacred Guard; Storm Dragon (level 88) |
| Trei’kuran Dunes | Bloody Knuckles | Kobold Ranger x3; Skeleton Soldier x2/Doleful Lord Brahms; Amber Princess x3; Chaotic Cell x2/Sacred Guard; Avenger x3; Valiant Conscript x2/Blutgang; Storm Dragon (level 92) |
| Northern Territory of Sohma | Chrome Nightmare | Kobold Knave x3; Skeleton Soldier x2/Doleful Lord Brahms; Amber Princess x3; Chaotic Cell x2/Sacred Guard; Avenger x3; Valiant Conscript x2/Blutgang; Storm Dragon (level 96) |
| Alcazar of the Golden Age | Farwell | Avenger x3; Valiant Conscript x2/Blutgang; Bane Dragon x3; Maidenly Blossom x3; Gust Hornet x2/Polyphaga Gamboge; Melusine x3; Storm Dragon (level 99) |
When you first unlock the final set of portals, you might be a bit underleveled to fight against the Storm Dragon, as its lowest level is 80. The Storm Dragon is a meaty enemy, sporting around 2.5 million HP on Galaxy difficulty (level 80 version), which is just a bit more than the story’s final boss! First and foremost, remove any spells/skills that do wind damage, as it absorbs this and they will heal him (Fiore and Emmerson should have the only wind-based skills/spells in your party). All other elements do neutral damage to it, but Fiore’s darkness spells might put her in harm’s way, so disable those as well.
The Storm Dragon has a lot of defense, so it’s very possible that some of your characters might be dealing low damage to it. If you’ve managed to synthesize Laser Weapons for your characters, you will want to use them in this battle, as they will help in whittling down the monstrous amount of health. As usual, Miki should be on healing duty, so turn off all of her other spells and only leave the healing/resurrection ones on.
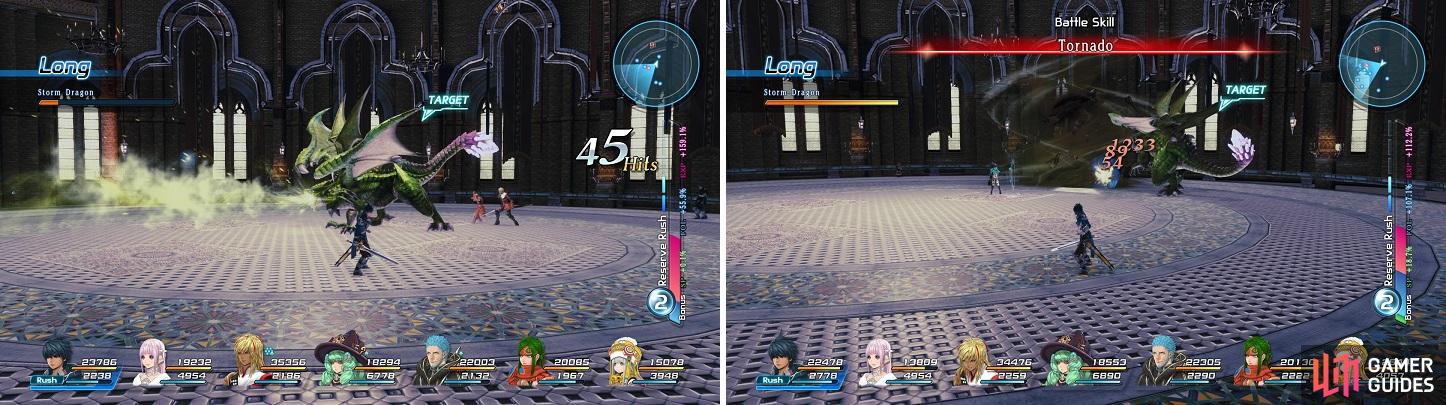
The breath attack (left) and Tornado (right) are the Storm Dragon’s most dangerous attacks.
Offensively, the Storm Dragon is not a true powerhouse, but it does have some dangerous weapons in its repertoire. Its biggest move is Tornado, which you should have seen plenty of, since Fiore also has access to this spell. Not only can it do some major damage, but it knocks whoever it hits up into the air, taking them out of the battle temporarily. It can also cast Enshelter on itself, which should be removed as soon as possible, since its defense is already high enough.
For its physical attacks, it can do a tail sweep that can hit all of your melee attackers, as well as a breath attack that goes straight. This breath attack can do some good damage to characters caught in it, so if you’re attacking yourself, stick to the sides. Bellow is simply a short shockwave at melee range, so it’s not a big deal. This fight is pretty much more of an endurance and if you can last more than five minutes, then you should have no trouble defeating it.
No Comments