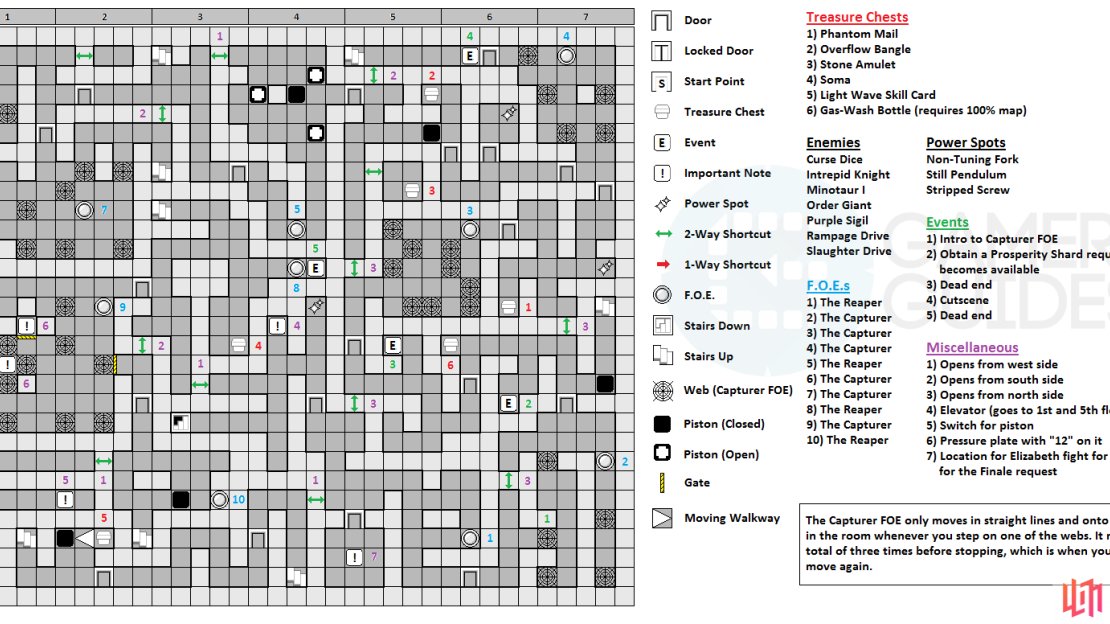
The map for the eighth floor of Clock Tower.
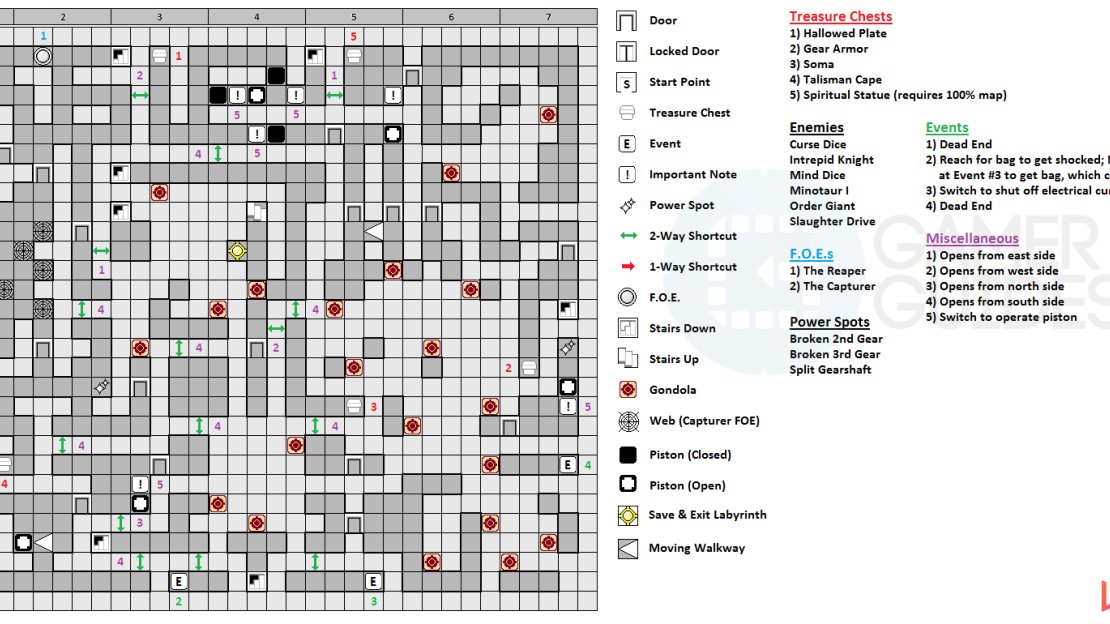
The map for the ninth floor of Clock Tower.
| Enemy Name | Weak | Resist | Null |
|---|---|---|---|
| Curse Dice | Light | Cut, Bash, Stab, Fire, Ice, Wind, Elec | Dark |
| Intrepid Knight | Wind, Light | Cut, Bash | Dark |
| Mind Dice | Dark | Cut, Stab, Fire, Ice, Elec, Wind | Light |
| Minotaur I | Fire | Bash, Stab | -- |
| Order Giant | Ice | Cut, Bash, Stab, Light, Dark | -- |
| Purple Sigil | Fire | Ice, Elec, Wind, Light, Dark | -- |
| Rampage Drive | Wind | Cut, Bash, Ice | -- |
| Slaughter Drive | Ice | Cut, Bash, Wind | -- |
As with the previous two floors, you’ll be going back and forth between the eighth and ninth floors of this labyrinth, which are bigger-sized floors and not the small ones like every other one encountered so far. At the start, head east and then north to find the elevator that you can use to return to the 5th and 1st floors. From there, go east and north again to find a Power Spot at the end of the path, then go south through the door. This entire area is being patrolled by the Reaper and you won’t make it to the southeast, which is where you want to go. You should see a door to your south, so head straight to that and enter to find an empty 3x3 room.
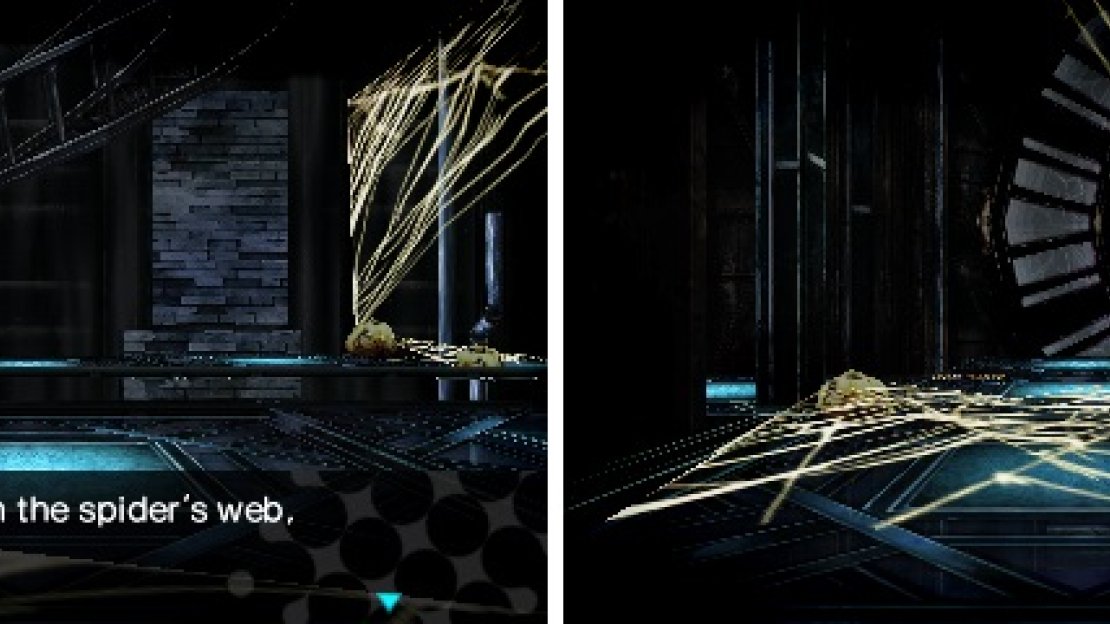
Move around a bit in the room until the Reaper returns to its initial position, then exit the room and begin heading east. You should make it to the beginning of a loop with the Reaper ending up right next to you. So, from there, go east and around the loop, then south to the door. As you make your way into the room, you’ll encounter a spider’s web. Step on it and you’ll become stuck, as well as get introduced to a new FOE, the Capturer . Basically, the Capturer will only move whenever you step on a web (meaning it’s only in areas with webs) and can only jump to other webs. It moves a total of three times and jumps in straight lines before you can move again.
The Capturer is an FOE that only moves whenever you step on one of its webs.
For this room, there’s only one place to go, so head north and step on the web, then open the shortcut to your west and go through the north door after that. You can’t go east here because of a piston, so head the other way, going south when you can to a dead end, where you’ll get the Obtain a Prosperity Shard request . Continue west to find the 100% map chest ( Gas-Wash Bottle , which gets you the Dawn Charm item; it replenishes a floor’s Power Spots), as well as a door leading south. In this area, there is a chest to the south that contains a Gaten Robe, as well as a dead end event to the north.
Through the next door will be more webs and another Capturer FOE. To easily get past it, once you step into the room, go east one step and then south onto the web there. Now, go north two steps and east two more to step onto another web, then you can get onto the web in the northeast corner to get to the door. You’ll find a chest ( Phantom Mail ) in the southwest portion of this area, as well as a shortcut in the south and a Power Spot towards the east; the door you want is in the northeast. This will put you in another room with a Capturer FOE and besides the web it’s on, there’s five others.
Ignore it for now and find the door just west of you, which will lead to a small room with a Power Spot, and another path that leads to a chest ( Overflow Bangle ). Return to the room with the FOE and you will want to step on the web on the western side that’s in the middle of the room, then you go on the web in the northwest and through the door. After watching the cutscene, use the stairs straight ahead to go up to the 9th floor. Press the first button you see to lower a nearby piston to the 8th floor, then follow the path north and around to a split. Go west here to find a dead end with a treasure chest, which contains a Hallowed Plate . Return and take the other path, pressing the switch to get the piston out of the way, then go through the door.
There are two paths leading south here, both going to the same area, but you don’t have access to everything from both spots. For now, take the eastern of the two and ride the gondola south and the next one east, then go through the door. There’s a piston in this area, but it’s already on the 8th floor, with a Power Spot behind it. Once you’ve looted it, press the switch to make the piston come to the 9th floor, then return to the two paths from before. Take the western of the two paths and go through the door, where you’ll see a gondola to the south. Ride this one south, the next east and one more to the north, then go through the door to the north.
There’s nothing on the path that goes east/south, so ride the gondola to the east, then ride the same one to the north. Go through the door you the west and press the switch to raise the piston to the south to the 9th floor. You’ll also find the 100% map chest in this room ( Sacrificial Statue key item, which makes the Growth 3 accessory available), as well as a shortcut leading back to the area with all of the pistons. With the pistons, press the switch to make the first one you hit rise to the 9th floor, then go back through the shortcut. Return to the room with the gondolas and ride the one from before to the west and south.
The eighth and ninth floors are very large (left), so make sure you keep up with your map making. Piston positioning (right) is also very important on these two floors.
On the east side of this area is another gondola, so get on it and go west, then ride the first one west, north and east to be on a one tile spot just north of the second gondola. Now you can ride this one south, creating a bridge of sorts so you can head east and through a door. There’s a chest on the south end with a Gear Armor in it, so grab it and then take the stairs to the 8th floor. If you did it correctly on the 9th floor, the piston just south of you shouldn’t be there, allowing you to pass. This is an area you visited before, but a new path north of you should now be available. Go through the shortcut to the north and return to the northeast room with the Capturer FOE (one with five webs).
Take the door to the west and go back to where you got the Overflow Bangle . The piston that was here before should be on the 9th floor, allowing you to go west. There’s a shortcut you can open to the far south, as well as another in the middle that leads to a small room with a chest ( Stone Amulet ). Find the door to the north (yet again, another shortcut) and go through it, where you’ll end up in an area with plenty of pistons and the Reaper FOE to the far south. If done right, there should only be one piston down on this floor in this room (if two of the northern ones are down, go back up and hit one of the switches), so lure the Reaper to the north to impede its movement so you can slip by and go south and around to a door.
Go to the north, open the shortcut that leads back to the room with the pistons and Reaper, then go through the door to the west (the stairs will put you face-to-face with another Reaper). There’s three things for you here, with the north/east having a shortcut to a small room with a Power Spot. Go west from here to find a Capturer FOE in a small area, with a piston. If you go on the tile just south of the piston and face south, you will get the Zen’s Inner Conflict request . Now, go through the southern door to enter a larger area with another Capturer FOE.
As soon as you step into the room, go south two tiles and east one onto the web. From here, go to the northwesternmost web and step on that one, then you can go to the northeasternmost one and get to some stairs that go back up to the 9th floor (as usual, open the shortcut). Before doing anything else, about midway on the path to the east will be a shortcut that leads north into the area with all of the pistons, so make sure you open it to allow easy access to the current area. Take the gondola you passed up and ride it south, then go around to the next one and ride it north.
Now, go east and then south to find another gondola that heads west, allowing you to ride the first one west to a new area with a door to the north. This is the area with the Reaper before, if you took the one set of stairs. From the door, go north, then east and north to open a shortcut, then move around a bit to reset the Reaper’s position. Back through the shortcut, so south and then west to find two doors, with the western one leading to a small area with a Power Spot and a piston, which is used to block the Capturer FOE in the northwest on the 8th floor, allowing you to complete Zen’s Inner Conflict .
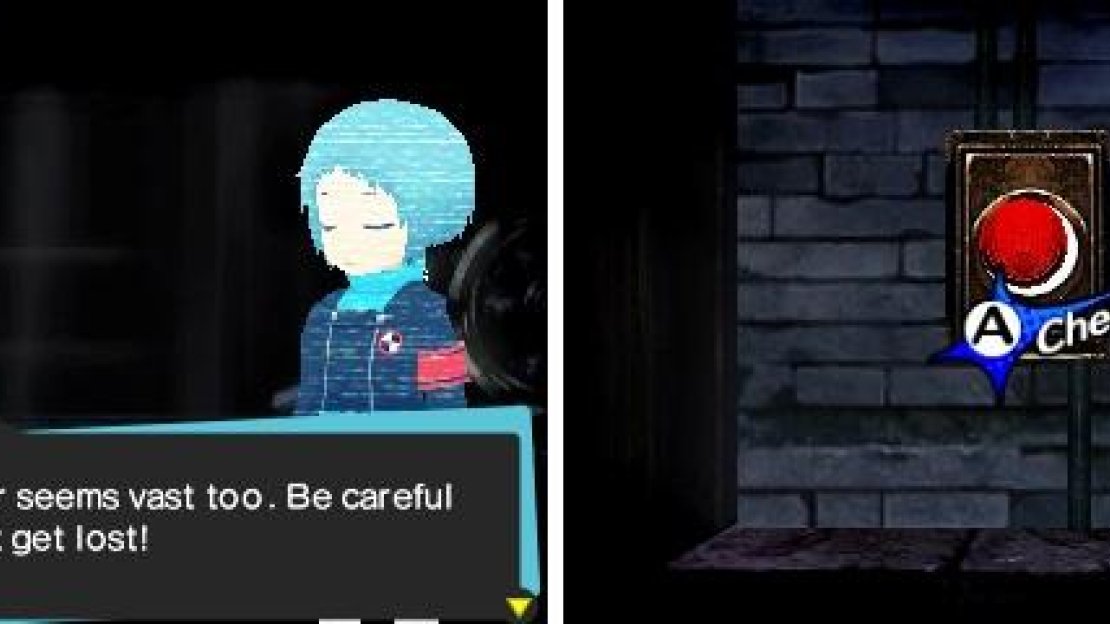
Don’t forget to keep up with Elizabeth’s requests, so you can get the nice rewards from them.
Take the southern door this time to come to a large room with a Capturer FOE, with the goal being the door in the southeast. From the entrance, go south two tiles, west one and south two more onto the web, then go south two more and one west onto the web there. You should now be able to access the door in the southeast without worry from the Capturer reaching you. There’s a bunch of twisted paths here, with the western ones leading to a dead end cutscene, as well as a chest with a Talisman Cape in it. The eastern ones will lead to a Power Spot, as well as a shortcut north of that and the path south of the Power Spot lets you reach a door.
Go through that door and ride the gondola north to another set of stairs that goes back to the 8th floor (open shortcut near stairs). In this area, there will be a Reaper towards the east side (a dead end cutscene behind its initial position), so for now, head south and then west to find a door, putting you in a room with a Capturer FOE. You have a choice here, as you can either go through this room or go back to the previous one with the Reaper, where there’s a chest and a shortcut back to the beginning of the 8th floor. If you chose the latter, go back into the room with the Reaper and lure it a bit closer to you as you go south.
There will be a one-way shortcut here that leads to the eastern portion of the area, where you want to open the chest ( Soma ) from the north side. If done right, you should be able to get back to the stairs without confronting the Reaper, but if not, then use your Goba-K More (or Goba-K) to instantly go back to the stairs. South of that one-way shortcut is a two-way one that goes back to the beginning of this floor, so you definitely want to open it in case. Now, head back to the room with the Capturer and get ready for some puzzle solving, as not only do you have to contend with the annoying FOE and its webs, you also have the gates with the pressure pads here.
There’s a gate on the east side of the room, which is where you want to go, but there’s also a web in front of it. In the room are two plates with “12” on both, but one is locked behind another gate towards the north. When you enter the room, find the pressure plate that is surrounded by four webs and step on the web to the south of it. Now, step on the plate, then the web to the west of it and back on the plate. The Capturer should be in the northwest corner and you’re on the plate, so step back on the web south of the plate and go south one tile, east two, north three, west one and north one to get to the other pressure plate. From here, you can go south one, east one, south one more and straight east to the web and past the gate.
Remember The Reaper? Well, it’ll continue chasing you on these floors (left). There are a lot of gondolas on these two floors (right) as well.
Don’t forget about the shortcut leading north, as you probably don’t want to do that room over again. Go south through the door to another area with yet another Reaper. There’s nothing else in this room, so go west around the loop and take the stairs to get back to the 9th floor. Go to the end of the path here and through the shortcut to a small room, where you’ll find a small bag stuck in the wall; attempt to grab it and you’ll get shocked, so ignore it and head back to find a gondola. Take it east and go south to find a shortcut with another small room, with a switch on the eastern end. This cuts the power to the previous one where you got shocked, allowing you to grab the item…which is a Goho-M .
Well, that was a waste, so head back east and go through the door to find more gondolas. There’s two in the initial portion, one being to the south and another to the east. Take the eastern of the two to the east, then ride the other one back west. Go to the other gondola from the beginning and ride it north, then east, allowing you to ride the first one south. From here, ride the next one north (the dead end to the east is just that, a dead end), and then one more to the west. Head through the door and through the shortcut to find a chest with a Soma in it, then open the shortcut at the north end.
Return to the room to the south and ride the gondola here to the west, opening the shortcut just north of you, as well as the one in the next room. Go back and through the door, opening any more shortcuts you find before heading through the next door ( do not touch the piston here as you want it to stay on the 8th floor ). You can’t go south because of a moving walkway, so go east (Power Spot to the north) and south to find some stairs. Back on the 8th floor, there’s two horizontal paths north of you, with the northern of the two just bringing you to a shortcut. The southern one has a switch that allows you to make the piston go to the 9th floor.
Head back to that floor and now you’ll be able to head south where you couldn’t before. To the east is another shortcut and west is another set of stairs. Ignore the chest you see and head east until you find some more stairs (the Reaper can’t reach you if you left the piston blocking it), bringing you back to the 9th floor. Just ride the gondola north and you’ll reach the golden gear that allows you to save and exit the dungeon. Go up the stairs to the north and then one more to face off against a boss!
BOSS: Captor Spider
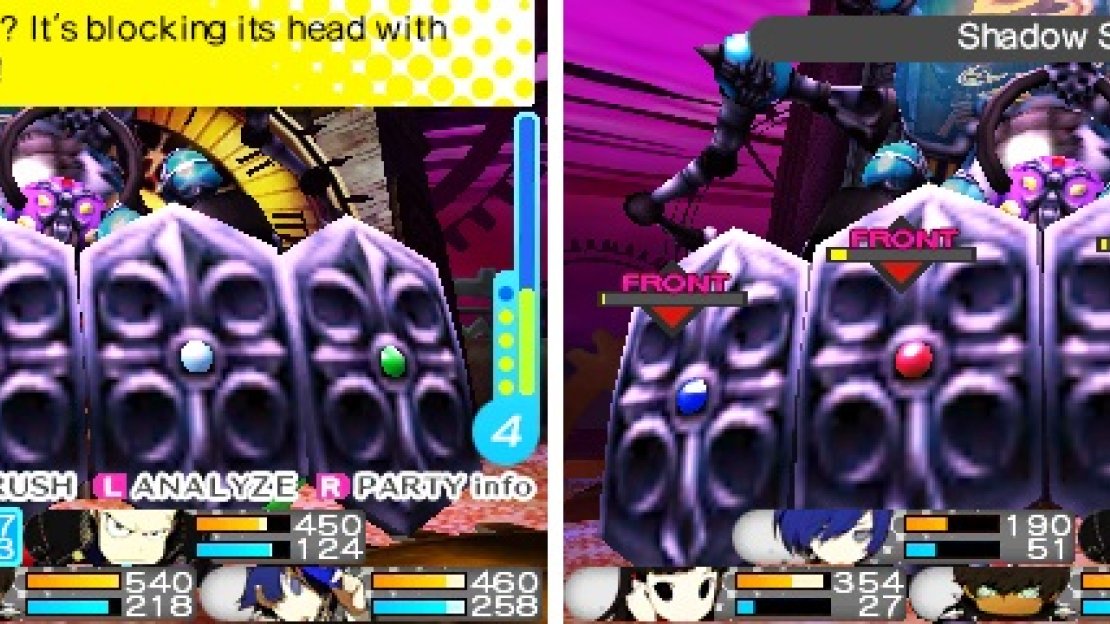
The boss doesn’t have much in the way of attacks (in fact, it will only really attack one or two rounds on its own), but it does have some trickery up its sleeves. Start off the battle by attacking the boss like usual and once you do enough damage, it will retreat behind its legs, which look like shields. Each leg has its own elemental affinity, starting with ice on the far left, then fire, lightning and wind in that order. Naturally, each leg is weak against its opposite element, while resisting damage from its own element, so fire works good against the ice leg, but won’t do much damage against the fire leg.
Each leg has its own turn and will spend it by either using a normal attack or -dyne/Ma-dyne of its respective element. That means things can get hairy pretty quick, especially if the legs gang up on one character. Once a leg is destroyed, it will reappear in a few turns, so there’s some strategy that will be needed in this fight. When all four legs are destroyed, the Captor Spider falls over and is vulnerable once again to your attacks (it doesn’t attack when it has fallen over).
The Captor Spider will block its head with its legs (left). You’ll want to defeat them all at the same time (right) to get the most opportunity in damaging the rest of the boss.
If you haven’t noticed, that’s the problem with this fight, as the legs will come back after a few turns, which means it’s possible that they can come back one at a time on sequential turns if you defeat them one at a time. That means you’re going to need attacks that hit multiple enemies, like Megido or all-elemental spells, the latter which will give you Boost if you hit all four legs with it (since one will be weak to that element).
The boss, although it doesn’t really matter, and the legs block all ailments, but they are susceptible to all binds, so having something like Silence Circle going to potentially negate its magical attacks will be helpful. This will ensure that your characters have a chance to stay Boosted, as well as make the legs waste a turn trying to use magic. When the legs are gone and you know you have a turn or two at the boss, unleash with everything you have, as you do not have to worry about your current HP/SP levels. The battle is more one of attrition than anything else, so you’re in for a long battle.
BOSS: Clockwork God
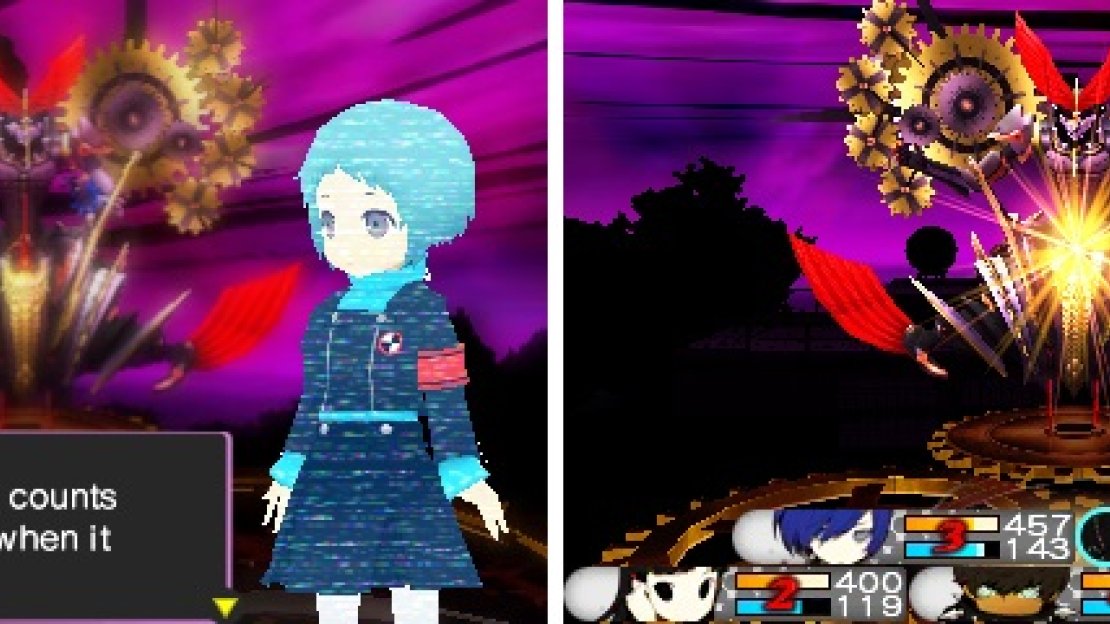
If you thought the Captor Spider was a tough battle, this one will be sure to give you a run for its money. Well, it’s not as tough as it can be, but there’s one thing that makes it highly annoying. The Clockwork God can have two turns per round and will likely use its very first turn to cast Gears of Time . This skill will place a counter over your characters’ portrait and should that number reach zero, then the character will die. However, you can prolong the timer by using revival skills/items on the character, which is why I said to load up on them before using the stairs on the ninth floor.
There is one potential good thing about Gears of Time, which is that the boss will only use it if all five characters in your party do not have the effect on them. This means that if you keep one character alive with the timer on them, then you do not have to worry about the Clockwork God using the skill again. Thus, it might actually be helpful to have all but one character die, then designate your weakest member to keep using a revival item on the person you chose to keep the timer.
Once the boss reaches 50% HP, it will use Time Reversal and bring its health back to full, as well as remove any stat penalties. This only happens once per battle, so you don’t have to worry about it happening more than once. It is entirely possible to make the skip this if you do enough damage, as it has another threshold at 25%. When you see the boss “concentrating,” make sure that you defend on the next turn, as it will use Time Stop, allowing the boss to perform up to four additional times on the turn it uses the skill.
Gear of Life is the final boss’ most formidable attack, as when the timer reaches zero, your characters will fall in battle.
Apart from the above skills, which are probably the only ones you really need to pay attention to, the rest of the Clockwork God’s skills are nothing to worry about. It has access to all four elemental -dyne spells, as well as the all-target versions. In addition, it can debuff your party’s attack, defense and evasion/accuracy with Matarunda, Marakunda and Masukunda (respectively). Some more skills it has is Megidolaon, Pulinpa (can Panic one person), and Vorpal Blade (only hits one person).
For strategies, the Clockwork God is immune to poison and curse, but it only resists every other ailment/bind (apart from neutral status on Paralysis). In fact, if you can get Panic to stick on your first turn, it’s possible to avoid the whole countdown thing with Gears of Time. Should this happen, try to extend the ailment with Stagnant Air so you can get more turns out of it before the boss automatically removes it from itself at the thresholds.

No Comments