Messing with MyCastle XV
There’s a bunch of upgrade in MyCastle this time! The previous chapters were a little slow, but this time you’ll upgrade most everything to its maximum level. You can upgrade the Dawn Armory, which adds a series of “Venge” weapons to the list and increase the stocks of most everything else. The maxed-out Rod Shop makes all seals infinite in quantity and adds a selection of limited-quantity stat-boosting items. If you upgrade the Smithy you’ll be able to upgrade weapons to +7 quality, if you can ever be bothered to horde the absurd amount of gold and gems this will take. Finally the Prison and Accessory Shop upgrades allow you to hold more prisoners and buy more flair, respectively.
Demons Falls
| Location | Objective |
|---|---|
| Demon’s Falls, Nohr | Defeat the boss. |
| Enemies |
|---|
| Swordmaster |
| Master of Arms |
| Spear Master |
| Sniper |
| Adventurer |
| Hero |
| Mechanist |
| Omnyoji |
| Master Ninja |
| Stoneborn |
The next chapter’s story events begin with some Nohrian exposition (how can they not realize they’re the bad guys?), which further the plot little, if at all. Meanwhile, the Hoshidans have somehow commandeered a vessel and are making for a most auspicious location. After hearing bad news from the front, however, they decide to take a shortcut… but of course, nothing goes as planned in life…
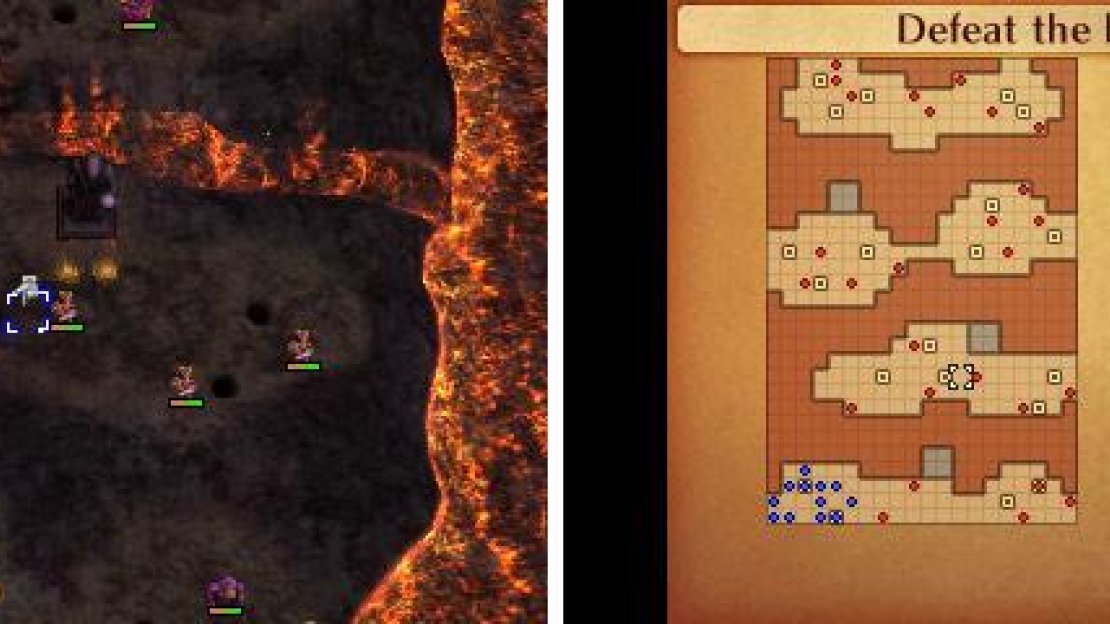
Map of Chapter 21.
The diversity in enemies is back! And you’ll find yourself fighting against a host of promoted units of varied classes, with all kinds of different weapon types. You should likewise bring a diverse selection of units to counter this. The level is also fairly large and the enemies are spread out, which is something flying units can really take advantage of, so consider bringing plenty of them as well… but be careful, there are also quite a few archers. Truck Takumi along with you, the terrain is absolutely nasty to footed units but his weapon will allow him to bypass that.
As for the units themselves, let’s just paint with broad strokes; the foes here are generally stronger than the illusions you fought in Chapter 19, boasting on average considerably higher Attack and Hit Points, and fewer holes in their defenses. The new unit that should be discussed are the “Stoneborn” that populate the map. Their Attack and Hit Points are fairly average for this map, their defenses are poor and they can’t move very fast, but they have an obnoxious attack range of up to five squares, making them long-distance threats that will pester you the entire map. It can be quite difficult to advance on them without forfeiting the first strike to them, but on the plus side, they have a rather low Hit rate, so you can always just use a high Defense, high Avoid rate character as bait to lure them into a compromising position. And always have healers on duty.
Start out your first turn by eliminating Masters of Arms to your east while being wary of the Stoneborns, who will move to attack you if you move too far out. Luring the eastern one is fine, as it can be easily swarmed and brought down, but the northern one is protected by a lava patch and some high ground. Rushing it with flying units may not be a great idea, either, as it’s surrounded by melee units… although you can target the Hero to the west, lure it, then take it down.
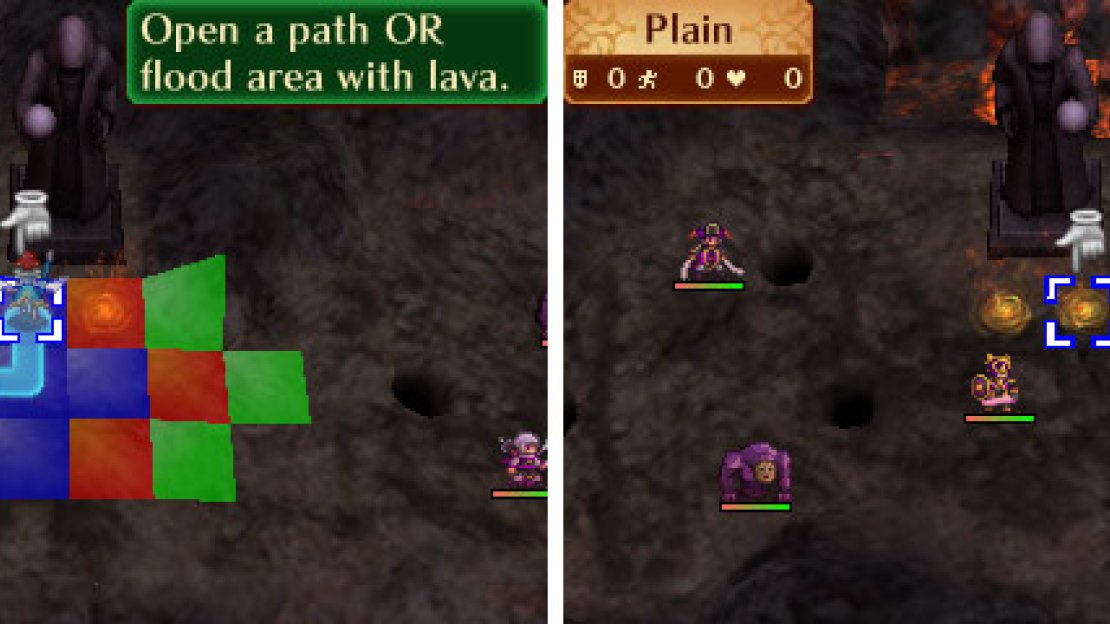
These Dragon Veins are key to your progression.
If that’s too complex, though, turn your attention to the nearby Dragon Veins, which “Open a path or flood area with lava”. You’ll notice they come in pairs. This is a guess you’ll have to make, and once made, you’re stuck with it. Flooding an area with lava does damage similar to the Acid Bogs in the last level, and since it prevents you from continuing on foot, you’ll need to ferry your ground units out of the fire by pairing them with a flying unit. Not ideal. So which one to pick? Well, the statue is the clue you’ll need; the Dragon Vein under the hand holding an orb is the one which will create a bridge, so that’s the one you’re going to want to trigger.
Kill the units to the east, then hit the correct Dragon Vein and challenge the foes to the north, who aren’t terribly different, all things considered. A bunch of melee units surrounding a Stoneborn; the only thing to note is that the Swordmaster here will drop a Venge Katana . Pop another Dragon Vein and continue north, where you’ll find another Stoneborn surrounded by three other units, including a Sniper and an Adventurer. You’ll need to keep your flying units safe this time, but luring the ranged units (including the Stoneborn) down by playing their different attack ranges should work well. You’ll obtain a Sun Festal from one of the units here, which might help out if you need some extra healing. The foes to the east are more of the same; a Stoneborn surrounded by ranged units. Lure them out and destroy them one at a time, and enjoy the Silver Yumi and the Master Seal you’ll get in the fray.
Once they’re dead, trigger the last Dragon Vein to create a bridge to the north, where you’ll find a more concentrated host of foes than found in the rest of the level. It includes Stoneborn, Spear Masters and the boss Stoneborn. Fortunately, the Stoneborn are easy enough to lure to their demise; although once you start engaging, you’re likely to start drawing more and more foes the more you advance. Just don’t be afraid to pull back and draw enemies out, even if it means giving them a free hit or two.
Eventually you should chip away at the weaklings until you reach the boss, who is joined by a lesser Stoneborn and another Spear Master. This fight might seem pretty straightforward, but keep in mind that once the boss attacks (even if it’s a counter attack!), it’ll spawn a Lava strip across the top of the map, slowing and damaging all units within. It can be killed by rushing it with flying units, but if you want the Arms Scroll the nearby lesser Stoneborn owns, you’ll need to avoid killing the boss beforehand. In this case, you may just want to move your melee unit adjacent to their targets and have them wait, then use flying units to initiate tag team combos with them. Some Spear Masters and Snipers may appear behind you after you engage the boss, but given the terrain, you can just ignore them and focus on taking down the boss.
After the battle, the Rainbow Sage will be proven to have been more helpful than originally imagined… perhaps. Takumi will turn back to complaining about a traitor. Ryoma becomes the voice of reason once again (he’ll make a great king!) and the protagonist will make a resolute statement. Off you go to the heart of Nohr!


No Comments