Messing with MyCastle XI
More stuff to build! This time you can create a Healing Tile for restorative uses in castle battles. As for upgrades, you can level up the Records Hall (play more music, defenders take less damage in castle battles), the Private Quarters (now six units will have hearts by their name every time you can visit your Private Quarters, +5 damage done by defenders in castle battles) and Lilith’s Temple (Lilith gains stats when fed until she maxes out all her stats, or reaches LV 99).
Ice Tribe Village
| Location | Objective |
|---|---|
| Ice Tribe Village | Rout the enemy. |
| Enemies |
|---|
| Fighter |
| Outlaw |
| Sorcerer |
| Mercenary |
| Maid |
You’ll rejoin your party marching through the snow, which doesn’t seem to bother Felicia and Flora nearly as much as it does the rest of group. Your protagonist will continue to whine about the mean things Iago said, and Ryoma will show up to tell you to trust your gut. Shortly afterwards, Iago will be proven right, and you’ll have to do battle in the Ice Tribe Village. Stupid, lying gut! Thanks, Ryoma!
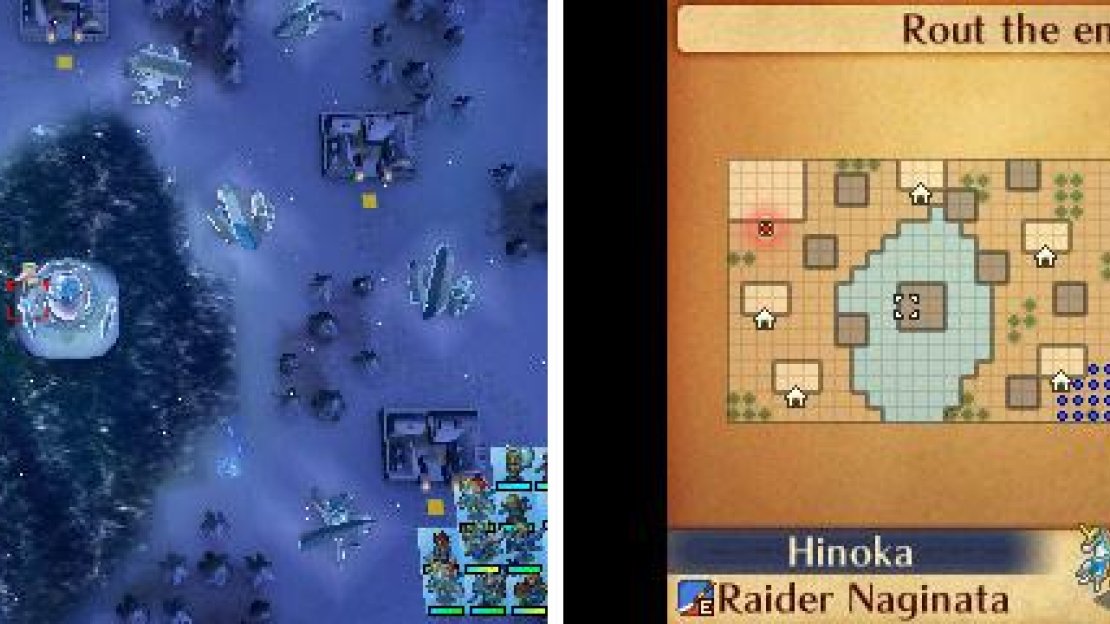
Map of Chapter 17.
The battlefield this time around is effectively a giant “U”, with an icy pond in the middle of the map that prevents direct passage. You’ll have to work your way from the southeastern corner of the map up north, then west to engage Flora in the northwest. There’s a Dragon Vein on the eastern shore of the pond you can use to freeze it, making it passable. The ice won’t even slow you down this time, as it did in the Opera House in Chapter 12. Just keep in mind that once you freeze the ice, the enemies can now move freely as well, so make sure no vulnerable unit could be ambushed after triggering the Vein.
The map starts out suspiciously empty, but you can expect that to change shortly. Specifically, if you cross around the northern end of the lake, fly a unit across it or wait until turn six, Flora’s minions will arrive. The lake will also freeze on its own starting on turn six, so it may be wise to wait near the start of the map until this happens to prevent the enemy from getting the drop on you. The enemies on this map are your typical Nohrians; Fighters, Mercenaries and Outlaws with a mix of Maids (most of whom can’t heal) and Sorcerers. Nothing you haven’t faced before, but low Defense characters can still take a beating if the enemy manages to land a hit.
While you wait, send units to search the houses on the eastern side of the map; there are a total of five houses, two to the east of the pond, two to the west of the pond, and on the northern edge of the pond. As hinted at earlier, the villagers aren’t all friendly, and you may not get the sort of reception you’re used to. Case in point, the house near where you start will spawn a group of baddies if you talk to them, which will give you an idea of what you’ll be fighting the rest of this map. Ignore them if you don’t want to deal with the hassle, or kill them for some juicy XP, as well as a Master Seal and a Surefire Yumi. The next house to the north will result in you being warned of another ambush, which functionally just means more troops are going to spawn and bother you… but at least this villager is nice about it! A Mercenary spawned by visiting the second house will drop you a Spirit Katana .
| House Location | Result |
|---|---|
| Southeast | Spawns enemies |
| East | Spawns enemies |
| North | 10,000G |
| West | Spawns enemies |
| Southwest | Spawns enemies |
After those two houses have been visited and their troops slain, wait to welcome a handful of troops from the west, who will cross the lake to get themselves slaughtered. After those are dispatched, you’ll have made a appreciable dent in Flora’s defenses. Continue on by looting the house north of the pond to score 10,000G from a sensible young villager. Score.
Now for the final push; Flora and her inner circle will not move, so if you want, you can visit the western houses. The south-western most house will spawn more troops, including Fighters and a Maid (the latter of which drops a Sun Festal upon death), while the western house will bolster Flora’s defenses to the tune of Fighters, Mercenaries, and Dark Mages (a Dark Mage will drop a Sheep Spirit).
Flora’s entourage will attack as soon as you come into their range, so expect them to interfere with your visitations if you let them. On the bright side, her Sorcerer underling will drop 5000G , and a Maid possesses a Silver Shuriken . Flora herself follows the typical boss rules of having no movement range, and refusing to attack until she’s engaged, so you can liberally thrash all her goons, then converge on her when she’s the only unit left. She has a ranged attack, so expect retaliation, and she’s also got a high Resistance score, so use melee attacks. Once she falls, victory is yours, although it might prove to be a rather bittersweet victory…

No Comments