Beachfront - From the start walk west until you can run again, then return all the way east to where you started and Mog’s bobble lights up. There’s a concealed treasure cube in the southeast corner just out of reach. Press R1 to uncover it and then toss the moogle to recover the AF700 NEW BODHUM FRAGMENT - Cartesian Board (01/05) + 600CP !
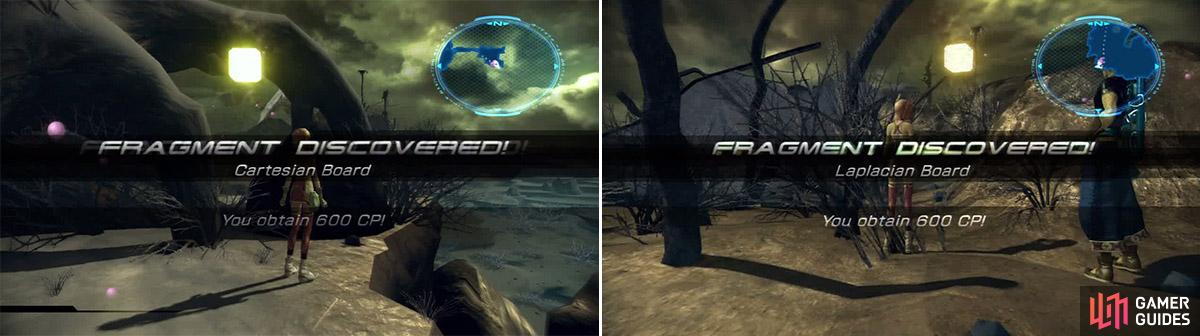
Cartesian Board location (left). Laplacian Board location (right).
On the northwest side of the map you can find the concealed Chocolina’s shop. R1 it to discover she sells nothing new. Directly south from Chocolina in the southwest corner Mog’s bobble lights up again - there’s a concealed treasure cube just out of reach. Press R1 to uncover it and toss Mog at it to recover the AF700 NEW BODHUM FRAGMENT - Laplacian Board (02/05) + 600CP !
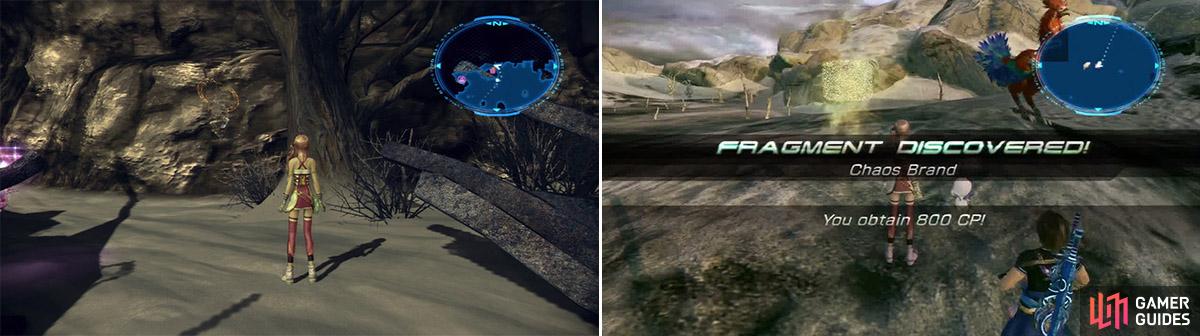
Artefact of the Ark location (left). Chaos Brand location (right).
Directly north from the pier there’s a super-concealed item - use R1 to uncover it and claim the Artefact of the Ark which activates the shiny gate on the pier of Town Square. Southeast from Chocolina’s is another super-concealed TC - uncover it with R1 to claim the Supply Sphere Access Code (this item allows you to open a special treasure sphere within the DLC version of Coliseum) and AF700 NEW BODHUM FRAGMENT - Hope’s Message (03/05) + 600CP ! And lastly, northeast from the pier is another super-concealed treasure cube that hides the Map of AF700 New Bodhum . Now go to the shiny gate and activate it with the Artefact of the Ark to leave the place and return to the Historia Crux. The next area unlocked is AF500 Academia … but return to AF700 Dying World for now.
You start in the Abyssal Fissure, in the upper part of the left segment. Check the northwest dead end for 1625 gi l, then run south towards the image of a super-concealed bridge. Press R1 to form the bridge and walk across to the southwest towards the red chocobo for 15 or so steps. Next to the red chocster is a super-concealed treasure cube. Press R1 to uncover it and bag the AF700 DYING WORLD FRAGMENT - Chaos Brand (02/04) + 800CP !
Go west from your current position to locate a toppled pillar. Near its end is another concealed treasure sphere with the Sacred Cross , a weapon for Noel. Now go northwest from the current location and locate 8x Mana Booster . Head south all the way to locate a crystal gate, and behind it is a tree with a treasure sphere on it. Use Moogle Throw to collect 9x Power Booster .
Going northeast from the crystal gate takes you to one more location of Chocolina’s, and a tree nearby has a concealed treasure sphere, that spits out a Platinum Casino Ticket .
Get to the super-concealed bridge connecting The Black Sands and The Border and press R1 to form the bridge. Now walk aaaall the way to the The Farseers’ Relic… Once there, press R1 near the pedestal, then examine it for a Live Trigger: (Caius is a warrior infused with the power of the goddess. Do you have the courage to turn your back on the goddess and destroy him? / Triangle). Your reward is a WILD ARTEFACT (07/10). Leave for the Historia Crux.
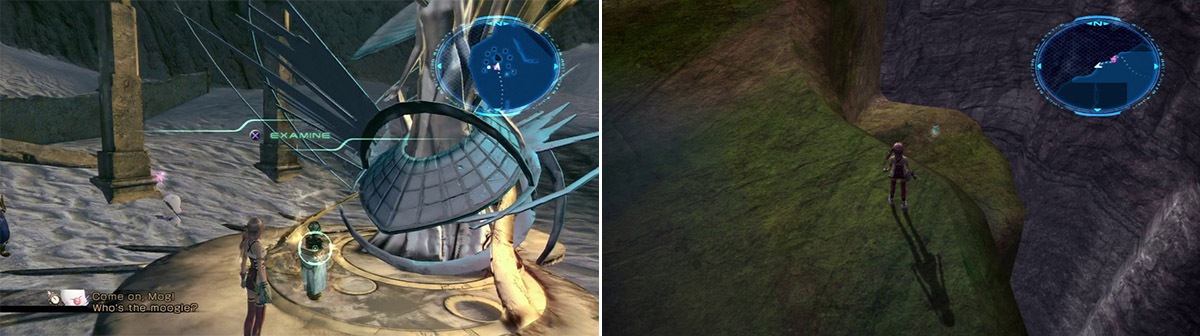
Another Wild Artefact awaits you here (left). Wild Artefact down in the ravine (right).
Drop by the Serendipity timeline to unlock two more fragment skills. You get the 3rd skill Bargain Hunter (can buy items at reduced price), and 6th skill Anti-Grav Jump (hold Circle while jumping to slow your descent). Now onward to AF??? Archylte Steppe.
With Anti-Grav Jump it is now possible to jump the gap separating the east and west sections of Archylte Steppe to enter the Clearwater Marshes. Actually, you can reach it earlier by using the gold Cactuar statue as a warp, but we did not focus on completing many subquests while we’re writing the main walkthrough.
In the southeast end of Clearwater Marshes find 700 gil. In the northeast end is a concealed treasure sphere with a Unicorn Horn , and on the west end is another concealed treasure with 3x Gysahl Greens . Head all the way west and then walk along the edge looking into the ravine, until you spot another ledge with something floating on it. Toss the moogle down there to recover a further WILD ARTEFACT (08/10).
Now leave for the Historia Crux and depart to AF500 Academia.
No Comments