
This section will begin with Steiner and Marcus trying to escape from their hanging cell. Basically, it’s like a pendulum and you have to press left or right at the correct time to swing it back and forth. The timing is short at first, but as the swings get wider, you will need to press the same direction more than once. It might be a little awkward at first, but you should get the hang of things as you continue to do it. Eventually, when the cage gets off screen on the right side, it will crash and break open, allowing you and Marcus to start going on foot to escape. Take this time to equip both of them for the upcoming bit, but remember that Marcus won’t be with you for long, so it might be best to equip common/low-tier stuff on him.

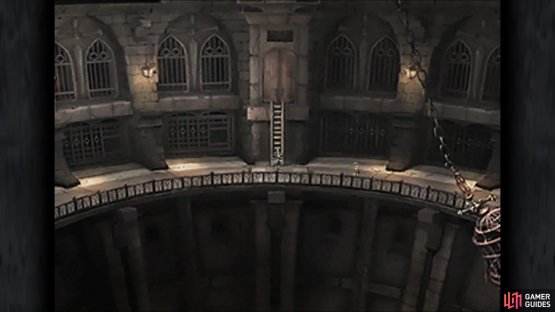
(1 of 2) Time your button presses to get good swings in the cage
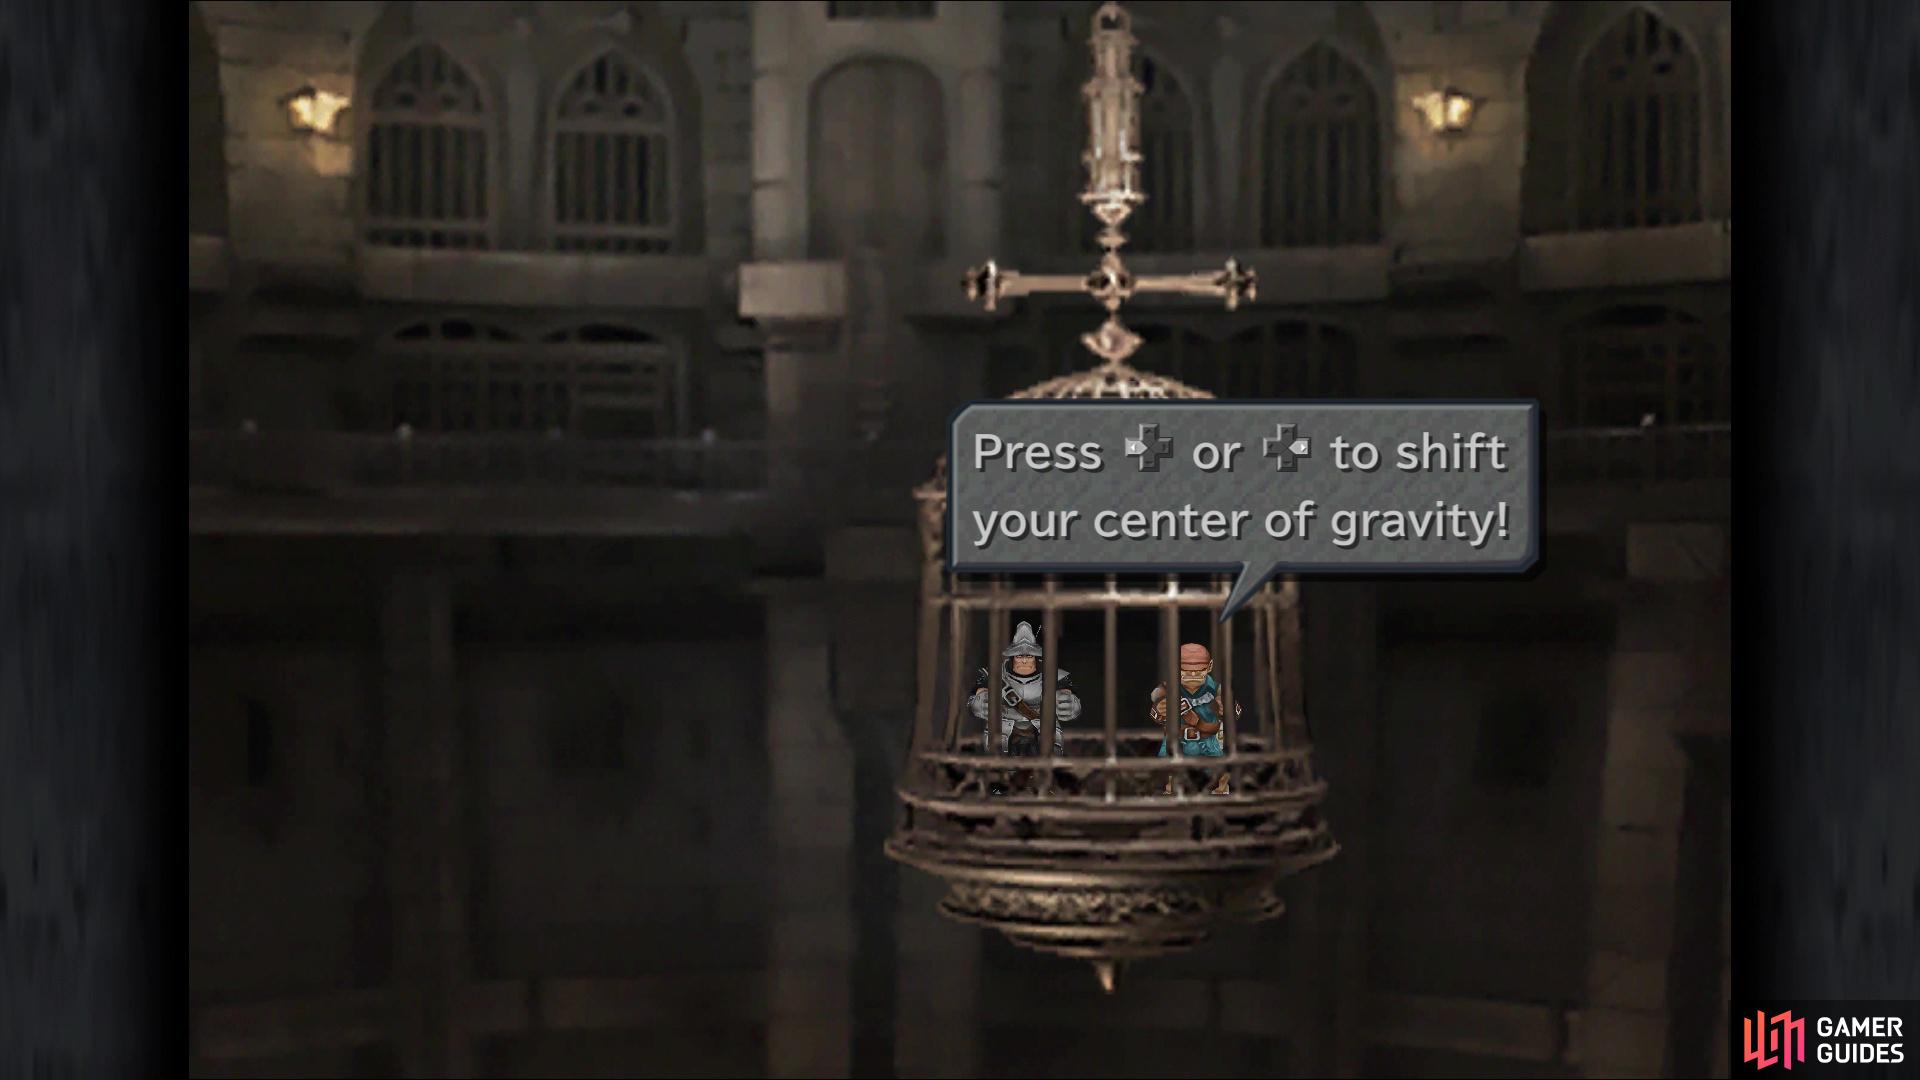

Time your button presses to get good swings in the cage (left), Stand in this spot to have the guards come to you, making it easy leveling (right)
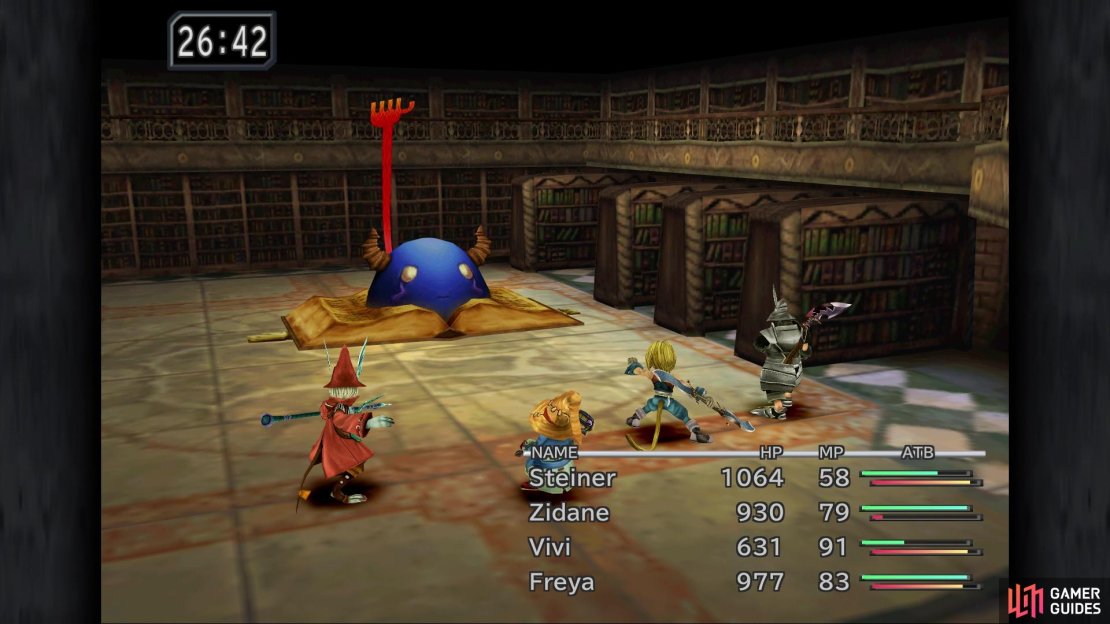
As you run to the left, some guards will appear and should they make contact with you, then a battle will commence. Climb the ladder at the end and at the top, go to the next screen to have Marcus leave. Of course, the rest of your party, or rather Zidane, Freya and Vivi, will join up with Steiner. At this point, a 30-minute timer will appear in the top left corner of the screen, which indicates how long you have to rescue Dagger. Of course, to add a little distraction to the mix, you have an opportunity to fight an optional boss at this point. It’s definitely not an easy fight, but this is only the first of two opportunities to fight the Tantarian.
To get to the Tantarian, exit the area where Marcus closed the gate and keep going until you get to the entrance of the castle (can either go up or left). Head inside the castle and then take the first exit on the left to end up in the library. Before initiating the fight, make sure that everyone has Antibody equipped, then check the bookshelf with the obvious book sitting on top of it.
OPTIONAL BOSS - Tantarian
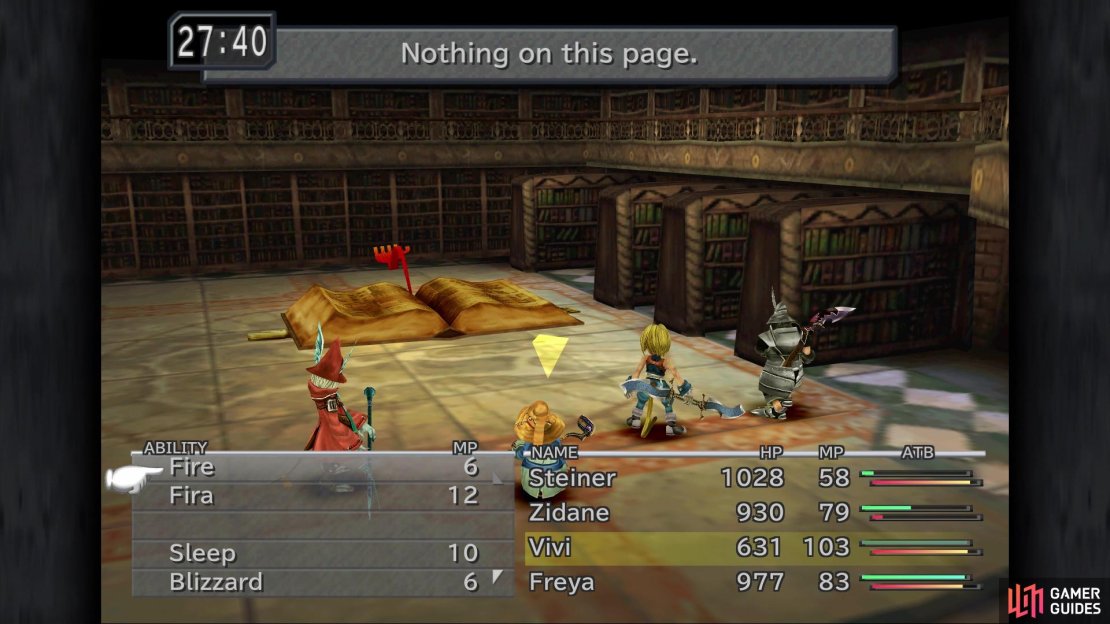
Tantarian is not your normal boss, as it has two phases, with it hiding in the book as its first form. While it’s hiding in the book, it can use Paper Storm, a deadly attack on everyone that will likely bring them to either low health or outright KO them. It can also use a physical attack, called Edge, and Doom while it’s hiding. To deal good damage against Tantarian, you will have to force it to reveal its true form. Inflicting damage against the boss will make it show the page, which is proportional to the damage done. So, if you deal 20 damage against Tantarian on your first strike, then it will open up and show Page 20.
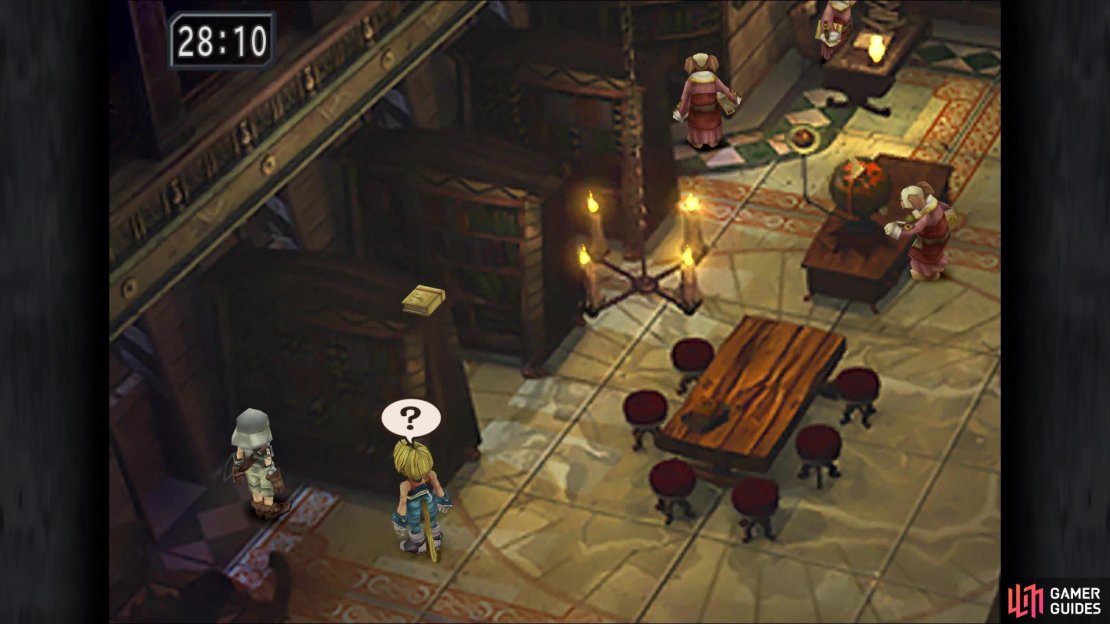
(1 of 4) The location of Tantarian
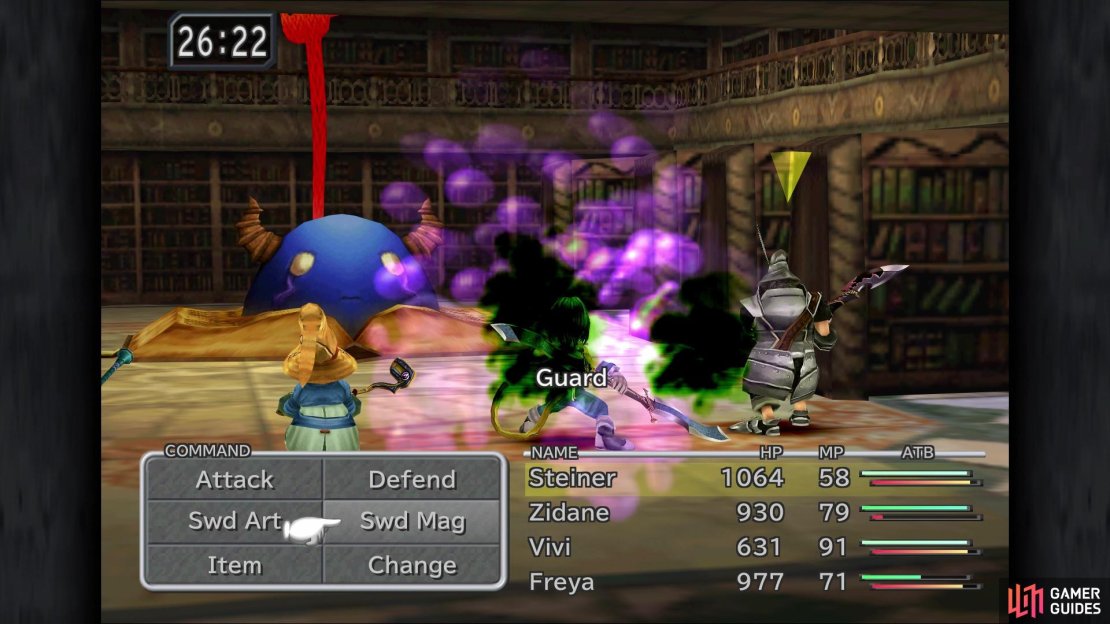
Due to its high defense while hiding, your damage will be pitiful against it, but it’s just a means to an end. Tantarian is actually hiding between pages 150 to 200, so attack with each character until you get to that range, then stop. Once the book opens up and Tantarian shows its true, do not physically attack it at all, or it will retreat into its book. The only thing Tantarian will do when it is out of the book is cast Poison and that shouldn’t do anything if they have Antibody equipped. At this time, Freya can cast Reis’ Wind, but should avoid doing anything else. Zidane should stick to stealing, as Tantarian has quite a few goodies, like an Ether, Elixir, Silver Fork and Demon’s Mail.
The last item on that list is a very nice piece of armor, but it’s an incredibly rare item to steal, so there shouldn’t be an emphasis on prolonging the fight any longer than needed to try and get it, especially with a timer. That will leave Vivi and Steiner, who will be your two big damage dealers in this battle. Vivi should concentrate on Fira, and Steiner should use Fire Sword (the extra MP cost for Fira Sword doesn’t offset the little bit of extra damage you might get out of it). After a few rounds, Tantarian will retreat back into the book and the page counter will begin anew, so keep at it and the book demon will go down in no time.
Rescuing the Princess
The main reason for going after Tantarian right now is that it’ll always drop some Running Shoes. This item alone isn’t that good, in terms of stats, but it can teach the Auto-Haste support ability to all characters, allowing your characters to get more actions during fights. When the fight is over, head back to the main hall of the castle and go up the stairs. Head around to the front of this area upstairs and through the bottom exit, then quickly climb the stairs to your left to try and avoid another battle. Remember those double doors that were locked on your first visit here, opposite of the balcony that Queen Brahne was sitting on during the play?
Well, you’re going through those doors now. As soon as you pass through the doors, go all the way to the back to enter the Queen’s chambers. Quickly go to the candle on the left side of the fireplace to find a secret passage, then head down there next. There is a platform in the middle here that is rotating around in a set pattern, so jump on the one side when it comes to you, then wait and jump off when you have access to the two chests to the north, which contain a Tent and Ice Brand. Hop back on the moving platform and off when you’re on the right side, then travel down the stairs until you end up in a completely new area. Keep going until you see some doors on the north end, which is where you will be going. It is in here that you’ll find Dagger, as well as Zorn and Thorn, your next bosses.
BOSS - Zorn and Thorn
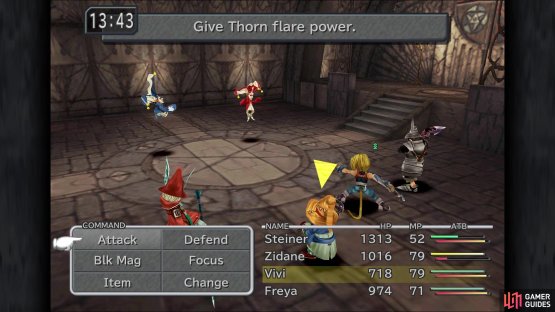

(1 of 2) One will always pass energy to the other during the battle

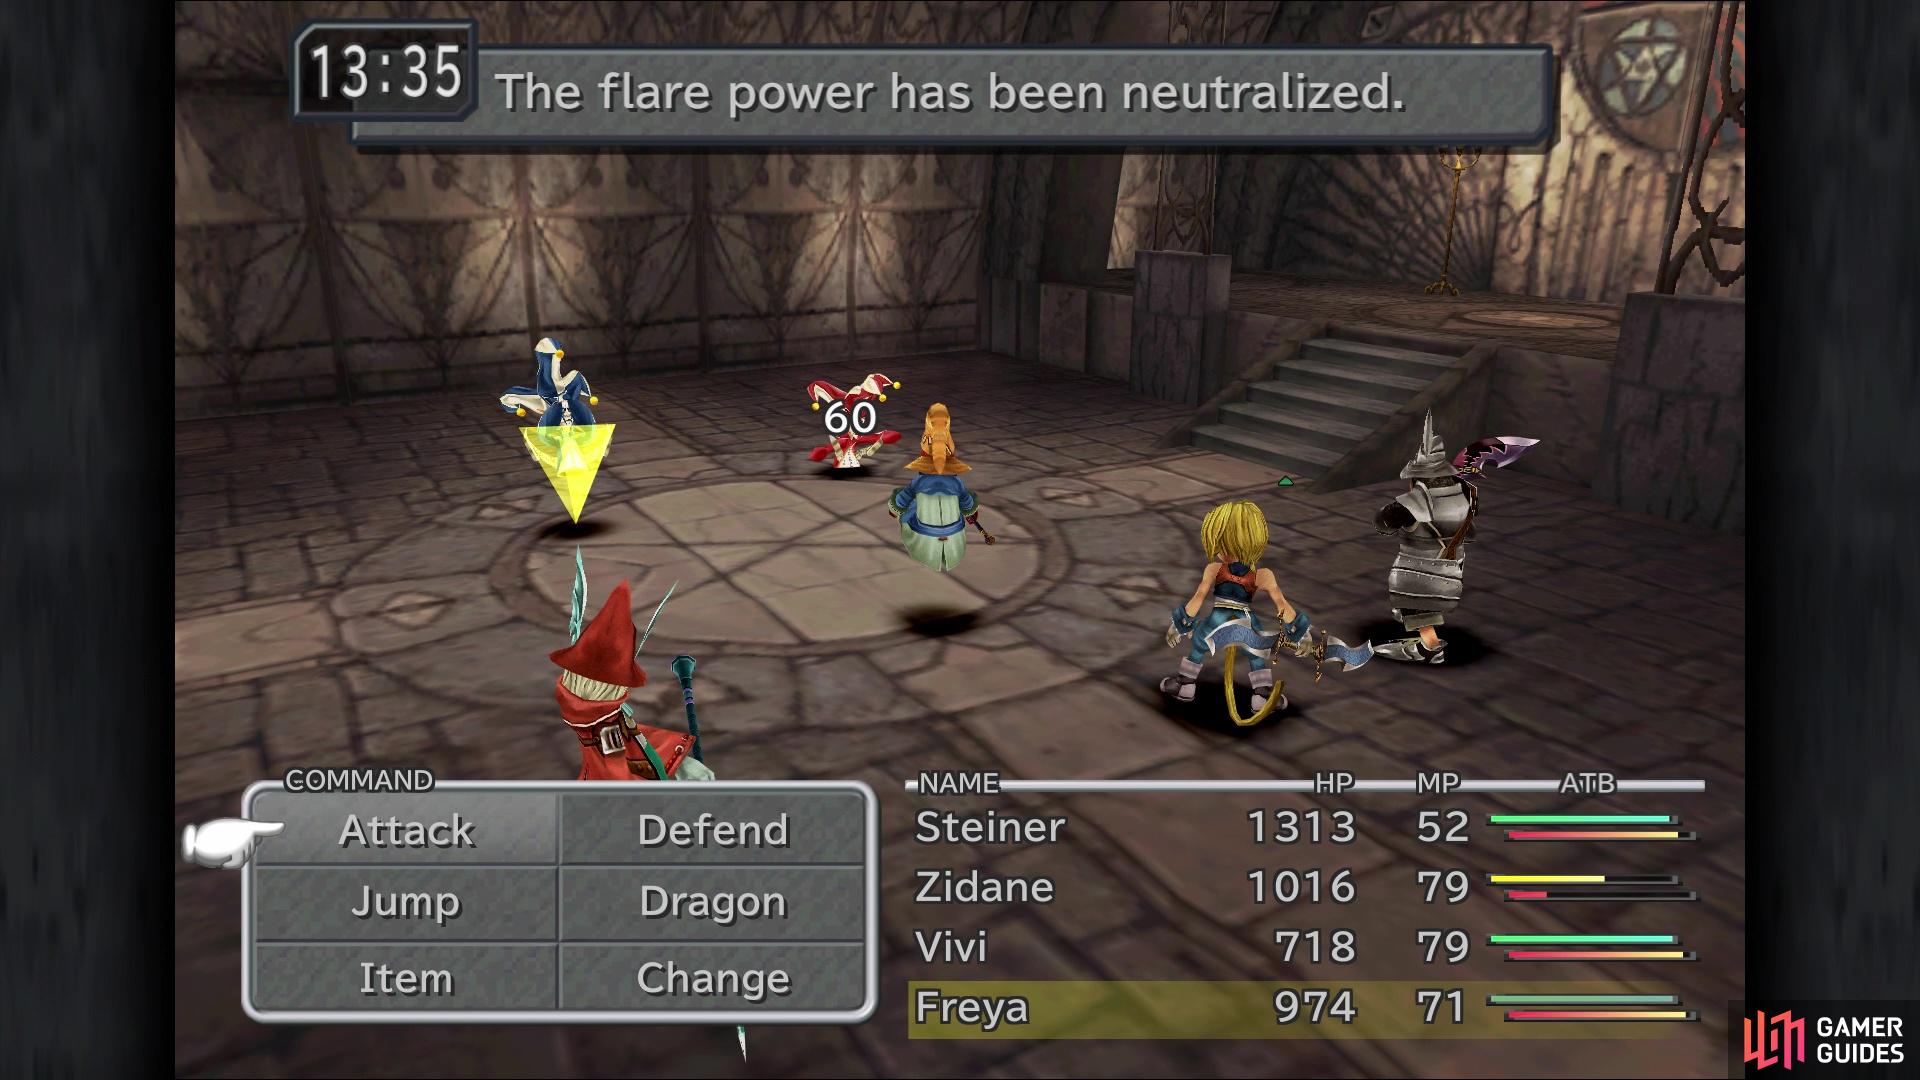
One will always pass energy to the other during the battle (left), Hit them before they can use the spell to neutralize it (right)
This can be a relatively easy boss fight, only complicated by the timer you have left, since it’s still running at this point. They will only attack once the other has charged one of them up with some magic power, but if you attack them when this happens, the charge will dissipate and you won’t be hurt at all. That’s the entire fight, but their spells can definitely hurt you if they manage to pull them off. Either way, have Zidane concentrate on stealing from Zorn here, since he has a Partisan and Stardust Rod; Thorn has a Mythril Armor and Mythril Armlet, so his items don’t really matter. Keep someone’s ATB charged and ready to strike at all moments, except for Zidane, who should be stealing. The battle will end when one of them have been defeated.
Once the battle is over, run up to Dagger on the altar and the timer will finally stop. A mandatory ATE called Friendship will happen at this point, then you will return to the main party. You will be returned to the Queen’s chambers, but there is a moogle in the same room as the altar, so take this opportunity to rest with a Tent, save and maybe read a new letter or two via Mognet. Take this chance to also put all of your characters in the back row, as when you finally return to the Queen’s chambers, you will be thrown into another boss battle.
BOSS - Beatrix
Yep, it’s Beatrix the Unwinnable again and you should know how the battle will go. Having everyone in the back row will help in mitigating some of the damage from her attacks, while you have Zidane go solely on stealing duty. Make sure you have Vivi cast Slow on Beatrix while you attempt to steal the Phoenix Down, Ice Brand and Survival Vest she has on her. She’ll end the battle as usual, by reducing the party’s HP to 1.
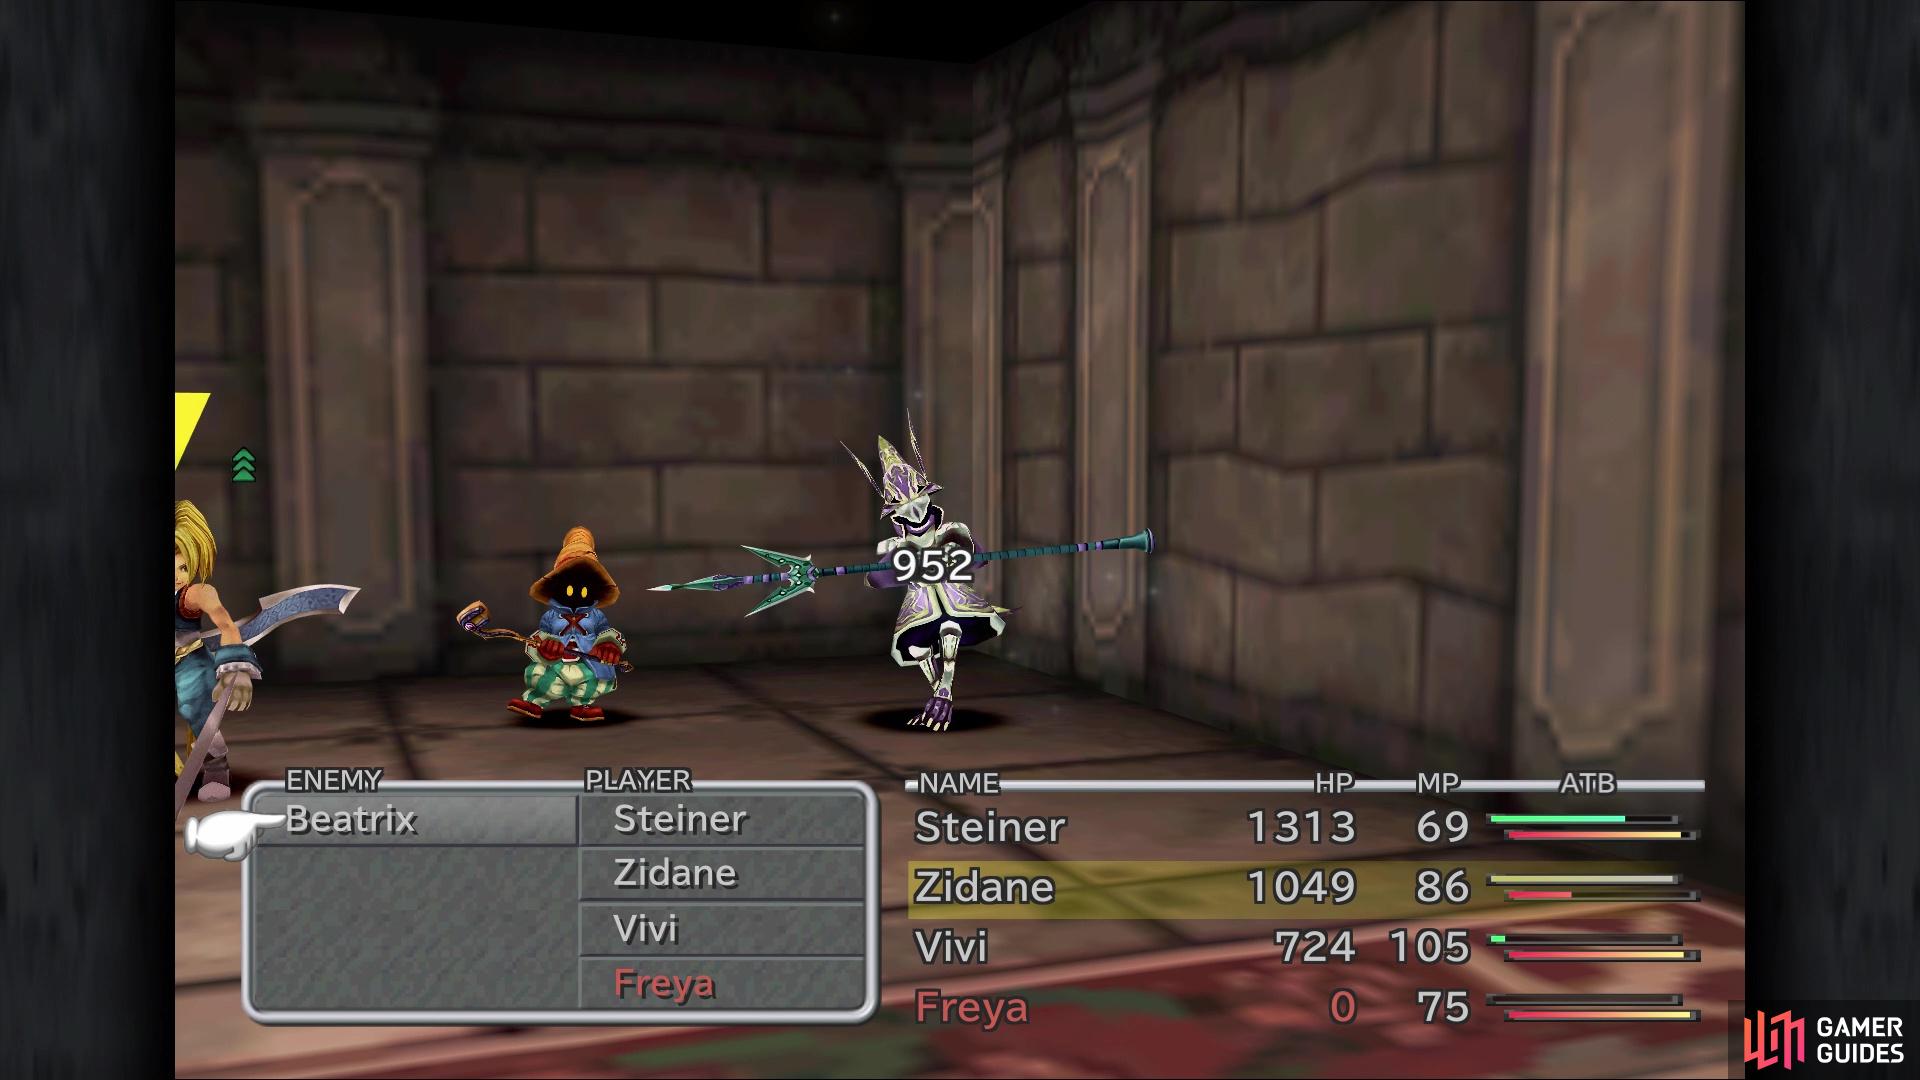
There is still no winning during this third battle with Beatrix
Watch the scenes after the fight is over, then it will be both Freya and Beatrix teaming up against a Bandersnatch. One attack from each will put the beast down, after which, you will be in control of Zidane’s party. Outfit Dagger with any new stuff you have, then start making your way down the long stairwell. You can avoid the Bandersnatch from behind if you’re quick enough and on the next screen, you’ll be thrown into a battle with three Type C black mages. They are pretty easy, so dispatch them and continue down the stairs to fight two Bandersnatches. On the next screen, Steiner will leave the party and you’ll have to fight another Bandersnatch.
As Zidane continues downward, the game will switch back over to Freya and Beatrix, who are forced to battle another two Bandersnatches. After that battle is over, you’ll fight two more, but Steiner will join in on the fun. You’ll be back in control of Zidane after that second fight, so head back to the altar room and pick up a letter from Mosh to Monty. Exit and descend the stairs opposite of the altar room, where you’ll get trapped again, like Steiner did earlier in the game. However, some friendly faces show up to rescue you, allowing you to escape via a gargant in the cellar. Unfortunately, things don’t go smoothly, as another monster blocks your path, leading to another boss fight.
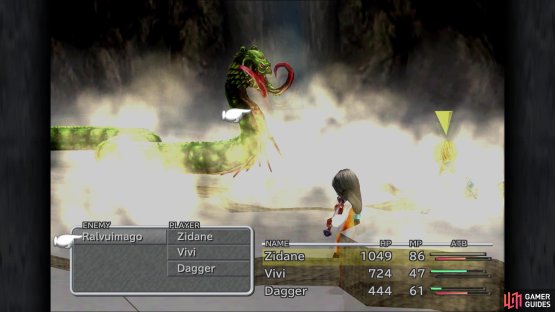
BOSS - Ralvuimago
This battle can be a little annoying, as physical attacks will cause the boss to react to the attack by curling up. Further physical attacks will cause it to counter with Earth Power, causing earth damage to all of your party, while also healing itself. Ultra Sound Wave is troublesome, as it inflicts the Mini ailment on someone, which can only be healed with a Remedy at this point; this effect will reduce your attack, magic and defenses. It also has a physical attack that deals some okay damage, and Thundara.
The main prize for Ralvuimago is stealing from it, like the majority of the bosses thus far. It has a Phoenix Down, Adaman Vest and an Oak Staff, with that last item being particularly valuable, especially if you didn’t get the one from a Chocograph earlier in the game. That’s because it can teach Vivi the Bio spell, which is non-elemental. Casting Slow on the boss will help tremendously, especially if it tries to cast Mini on everyone. Being weak to ice, punish it with Blizzard/Blizzara to make the battle go by much quicker.

(1 of 2) Striking the boss physically will cause it to curl up, upping its defenses immensely
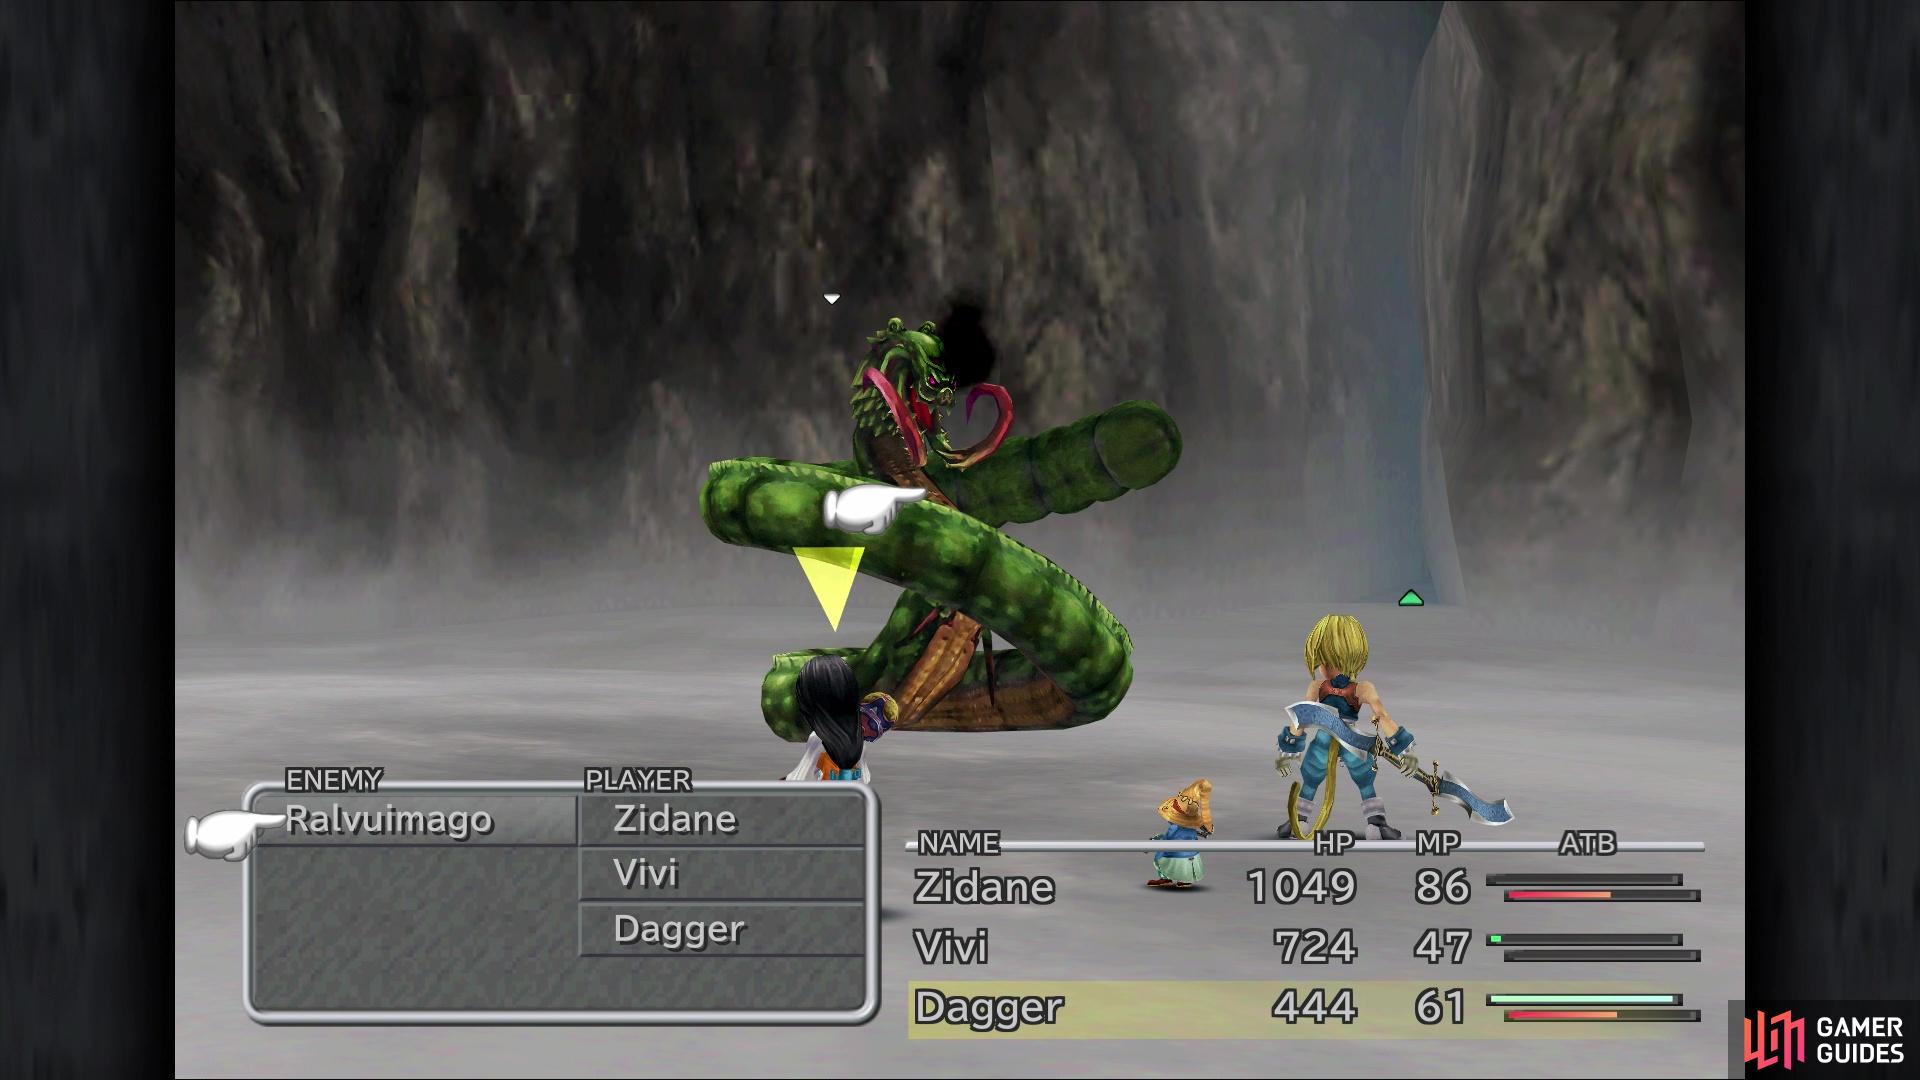

Striking the boss physically will cause it to curl up, upping its defenses immensely (left), Doing it again while curled up with cause a counterattack with Earth Power (right)
Well, things didn’t go so well for Zidane and the party, and it looks like they are about to get worse. After the scene with Brahne, you will arrive at Pinnacle Rocks.
No Comments