
Since we’ve already taken a detour or two, why not just go all out? This page details all the new things you can do in Hyrule with Link’s amazing new wall-merging ability–in particular, all the items you couldn’t grab earlier but can now. All of this will take some time and you don’t have do it immediately. If you prefer, you can wait until you get the next new item before backtracking. Or maybe you wish to head straight for the next dungeon; if so, skip this page for now.
Kakariko Village
Go into the storeroom left of Sahasrahla’s house. Inside, merge onto the wall to the right and walk left to slip past the iron bars. Beyond is a chest containing 100 rupees. Does this count as thievery? Well, it’s all for the sake of Hyrule…
Graveyard’s Secret Entrance
In the large corridor with the locked door, walk across the wire mesh overpass and, when at the end, merge onto the wall. Walk right along the wall to find a Piece of Heart sitting on a high ledge.
$$$item 3824
Eastern Palace Area
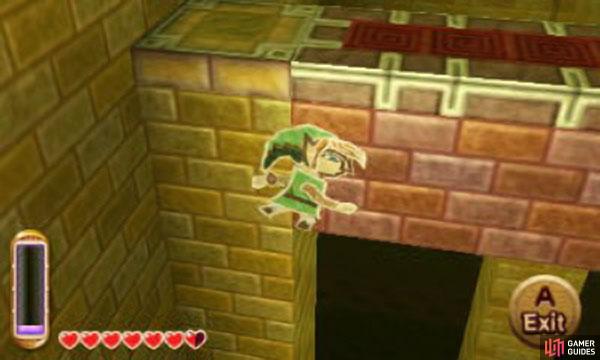
From the entrance to the dungeon (to quickly get here, warp to the Eastern Palace weather vane), drop down to the left. After landing, walk a few paces left and drop down again. Next, merge into the wall above you and walk left; at the end is a chest containing a smashing 1 00 rupees. Next, drop off to the left and walk down a few paces, then turn left. Drop down to the left (or descend the nearby stairs) to find a curious building at the bottom of a pit.
Inside, merge into the wall and then walk in the direction of the iron bars to get to the other side. Beyond is a puzzle room that will require extensive use of the wall-merging ability to conquer. Go around and descend the stairs to reach the front. For the first platform, merge into it when it lowers. Wait until it rises, then walk to the opposite side of the platform and emerge. Merge into the second moving platform when it’s lowered, then walk across to the side of the stationary platform.
Wait for the second platform to lower again, then walk to its direction and emerge on top of it. Finally, merge into the third moving platform when it lowers, then walk across to the side of the fourth moving platform. Once the third platform lowers, move to its direction and emerge on top of it. Then just walk up, across both platforms, to reach the chest containing 100 rupees . Phew, that was a bit mind-boggling!
Blacksmith’s Area
Merge onto the wall of the Blacksmith’s house and walk in the direction of the north wall, past the trees, then emerge. Go up one screen to find a Piece of Heart in an otherwise-isolated ledge.
$$$item 3825
Lake Hylia
From the big bridge south-west of the Eastern Palace area, go right one screen to the area with the line of trees, just before the Eastern Palace area. Next, take the corner in the bottom-right corner. You will be in the top-right corner of Lake Hylia; here, continue down until you reach the water. Then merge into the wall on the right and walk right to find a chest with 20 rupees inside.
Lost Woods Area
Carefully move onto either of the stationary platforms with the round switches and slowly navigate around the switch. Next, stand on the small moving platform and allow it to take you to the other side. When across, go down and merge onto the wall to the left or the right. Then walk all the way right if you merged left or left if you merged right.
Eventually you’ll come across a ledge, where you can emerge. Finally, use the the moving platform below you to cross the gap and claim the chest and your prize: a smashing 100 rupees .
To reach this foreboding area, go to the top-left corner of Kakariko Village and take the left exit. Then head north, through the clearing and you’ll find the entrance to the woods at the end, between the trees. In the woods, cautiously make your way to the top-left corner, where there’s a signpost.
From here, go right, into the log tunnel and look down to find a gap between the wall. Merge onto the wall below and head in the direction of the gap to find a Piece of Heart .
$$$item 3826
South Hyrule
Go one screen down from Link’s house to find a large grassy area with statue pillars here and there. Make your way to the bottom-left corner and take the left exit. You will be in an area enclosed by cliffs; here, go up and ascend the nearby stairs. Merge into the wall above and walk right, all the way across to the next screen. Eventually you’ll come across a ledge with a chest containing 100 rupees , but you’re not done yet. Stay where you are and let the energy gauge refill.
From the ledge, merge into the wall again and continue walking right, all the way across to the next screen. It’s a long walk and Link’s energy gauge will very nearly deplete, but trust us–there is something at the end. At your destination, you’ll find a peculiar formation of rocks, plus a cave. Inside the cave is a puzzle room, of sorts, where you must pick up a Cucco and float down to pick up rupees. Beware of the wind currents, as they’ll knock Link and Cucco flying.
For an easier time, head to the right side of the room and drop down from there, staying to the right for most of the descent. Then, when you’re low enough, swoop in for the silver rupee. Should you reach the bottom safely, step on the red glowing tile to warp back to the entrance of the room. Then repeat until you’ve grabbed the other rupees.
Sanctuary
From the weather vane, follow the road right, past the graveyard and stop before the road bends down. Head up to find a cracked wall; place a bomb here to expose a hidden cave–inside is a puzzle room. From the entrance, wait for the long platform to come down, then merge onto it and move to its right side.
Wait for the platform to reach the top, then walk right onto wall and emerge when you see a red platform directly below you. Go right and merge through the gap in the wall. On the other side, be sure there’s enough of the platform before you emerge, as you’ll fly forward a bit after emerging.
Carefully navigate up, merging into the wall should the platform subside. If you want, merge through the next gap to collect a red rupee on the other side, then return through the gap. Past the stairs, head left. Look down and you should notice a gap in the wall; merge to the left of the gap and walk left until you reach a ledge. From the ledge, there’s a gap to the left; merge below the gap and walk right to reach the other side. Like earlier, only emerge when there’s enough of the platform to make a safe landing.
Next, carefully go down, merging if necessary; at the very end, merge into the wall on your right and walk left into the gap and to the other side. Here, wait until the platform bridges the gap and then move onto the area with the red switch; step on the switch to activate the moving platform to the north.
Don’t let the new platform distract you though; go down and wait for the platform below to come, before stepping on it. Strike the two round switches with your sword and the two small platforms next to the round switches will begin moving.
Carefully move onto either of the stationary platforms with the round switches and slowly navigate around the switch. Next, step on the small moving platform and allow it to take you to the other side. When across, go down and merge onto the wall to the left or the right. Then walk all the way right if you merged left or left if you merged right. Eventually you’ll come across a ledge, where you can emerge. Finally, use the the moving platform below you to cross the gap and claim the chest and your prize: a smashing 100 rupees.
No Comments