
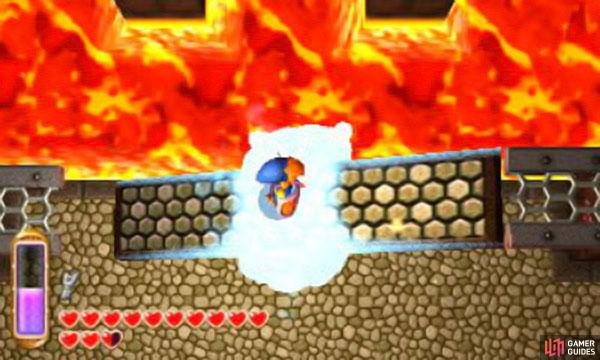
In the first room (1F south), there’s a pool of lava between you and the other side. Cast the Ice Rod ahead to create solid platforms in the lava and walk on them to get across. With the regular Ice Rod you’ll need to use the Ice Rod twice, creating two platforms to bridge the gap. However if you have the upgraded Ice Rod, you can bridge the gap in one go with its 2 x 2 ice blocks.
On other side; pass through the door leading up and you’ll be in a massive room (1F centre). Just ahead is a see-saw of sorts; climb on it from its left, then walk right to flip the position of the ramp.
Now cast the Ice Rod at the molten boulder in the middle to freeze it and prevent the see-saw from moving once you step on it. Then walk left across the see-saw and stop at the platform’s dead end. Watch out for a Flamola rising from the lava–use the Ice Rod to kill it when it’s near. In this area, there are six Flamolas; should you kill all six, a chest will appear.
Next; return to the see-saw and climb it from its right, then walk left to flip the ramp back to its original position. Freeze the see-saw and walk right across it. Head up to find another Flamola halfway along the path going up.
The see-saws can be frozen in the middle (or some of them can also be dashed up with the pegasus boots, but this isn’t as reliable).
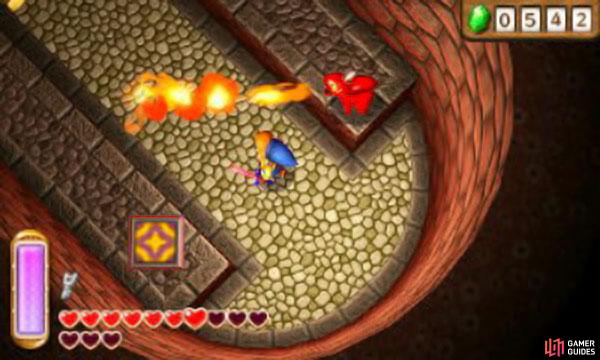
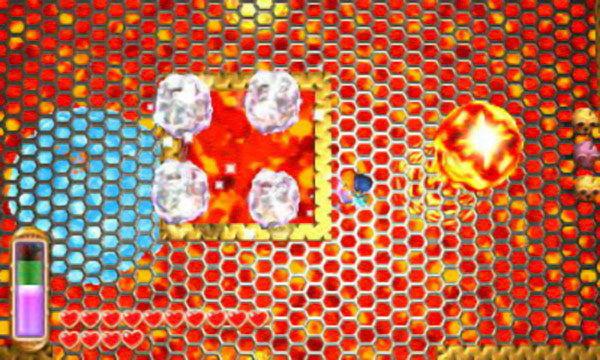
At the end, turn right before the next see-saw to find another Flamola. Go left and, at the end, use the Ice Rod on the lava pillar to solidify it, then walk across it to the left. Here, point the Ice Rod at the four round switches in the corners to reveal a chest containing the Compass .
From the chest; walk up to find a Flamola that you can kill when it gets close; then walk down for another. When ready, go left and quickly use the Ice Rod to solidify the two lava pillars to the left, then walk across them to the left. After crossing, immediately to the left is another Flamola.
Having slain all six Flamolas, a chest will appear near the top-left corner. From where you are, cast the Ice Rod left to solidify the lava pillar, then merge into it to get across. Next, merge into the wall on the left and walk right to reach the chest, which contains a nice 100 rupees .
Go back down and right until you’re before the see-saw. Step onto the see-saw and freeze its middle; then go up and across it to reach a small platform. To the right is a floor switch–stepping on it opens the door leading up, on higher ground. When you’re finished, drop down and head right.

Wizzrobes are ghostly wizards that appear out of nowhere, then shoot magic at Link–flames if they’re red, ice if they’re blue. Use the Hylian Shield to block their magic or just run out of the way. Then slash them quickly before they vanish again. If they’re high up, use the Ice Rod for an aerial attack.
Enter the door just ahead, leading up (to 1F north). The doors will lock and two Wizzrobes will appear–one ahead and one on the platform below. Cast the Ice Rod to drop ice blocks on top of them and kill them; afterwards, the doors will unlock. Go back down to the massive room (1F centre). From here, go right, then step on the see-saw below.
Freeze the see-saw and progress down, across it. When past the see-saw, turn right and merge onto the wall, then walk all the way right. Head through the nearest door, on higher ground (to 1F south-east) and step into the red warp tile.
In the next room (1F north-east), step on the red warp tile a few paces up and left. This next part (1F far north-east) is a bit tricky without the upgraded Ice Rod. Face right, then use the Ice Rod to create two platforms right. Next, wait for the right-most lava pillar to emerge, then use the Ice Rod to solidify it; then merge into the solid pillar and use it cross to the other side.
Take the door leading down to exit the dungeon and collect some fairies–use the sword spin or net when the fairies are nearby to catch them. Then head back inside the dungeon (1F far north-east).
This time face left and create two platforms left, then solidify the lava pillar above and merge into it to get across and return to the red warp tile. Back in the room with two nearby red warp tiles (1F north-east), drop down left, where the fire-breathing Kodongos are and step onto the third red warp tile.
You will now be back in the room with the initial red warp tile (1F south-east) and Kodongos on the other side. Patiently poke the Kodongos with arrows (you may have to shoot diagonally); throw bombs should they fall off. Once all three are dust, a chest will appear in the left corner–inside is a decent 50 rupees.
Next, drop off down or head back through the red warp tile; either way, make your way back to the bottom-right corner of the massive room (1F centre), on higher ground. From here, merge onto the wall left of the door and walk all the way right. Grab the potion ingredients and fall down to the ledge below, then step on the floor switch to open the door below.
Drop down and go through the new door. In the next room (1F south-west), there are some blob-like Gibos–use the Ice Rod to freeze and kill them (be warned that the Ice Rod can be finicky, especially if there’s higher ground nearby).
$$$item 3930
Walk across the see-saw to flip its position, then freeze it and walk back across it and onto higher ground. Step onto the nearest red warp tile, then do the same in the next room (1F north-west). In the last room (1F far north-west), face left and use the Ice Rod to create a solid platform. Then create one platform down, three across and two down to reach the other side.
Take your time and make sure the cursor aligns properly (hold the Ice Rod to view the cursor), so the platforms touch, before casting the Ice Rod. Towards the end you will very nearly exhaust the energy gauge, but have just enough to juice to reach the end.
Head through the door to exit the dungeon and collect a Piece of Heart . Go back inside the dungeon (1F far north-west) and create a series of platforms in the lava in the opposite direction to return to the red warp tile (one right, two up, three left and two up). In the next room (1F north-west) step into the nearby red warp tile to return to the initial warp tile.
From here (1F south-west), go right and drop down below, then continue down to find another red warp tile–step on it. You will be taken to a ledge with a Small Key (1F north-west). Return through the red warp tile and leave the room (1F south-west) via the top-right corner.
Back in the massive room (1F centre), go to the first see-saw and walk across it to the right, then head up and right on the wire mesh path. At the end, merge into the wall on the right and this time walk left. Emerge on the ledge to collect another Small Key . Next, merge back into the wall and continue left to reach a metal ledge with a door.
Head through the door (to 1F north) to claim a chest containing a decent 50 rupees. Finally, return to the massive room (1F centre), then drop down and head through the door going up (to 1F north). Continue up and take the next door, which leads downstairs.
Kodongos are red triceratops that breathe fire in one direction. Use the Hylian Shield to block their flames or sidestep out of the way, then slash them, shoot arrows or use the Ice Rod to dispose of them.
Downstairs in Floor B1, walk all the way down and through the door to reach another massive room (B1 centre). Immediately to the left is a round switch–ignore it for now (if you accidentally hit it, hit it again to deactivate it). Watch out for the Wizzrobe nearby–use the Ice Rod to drop an ice block on it to kill it.
A platform will appear below; ignore it for now and head all the way right. Above the nearby door, another Wizzrobe will assault you–kill it to make another platform appear. Enter the door leading right. In the next room (B1 north-east), there are some Gibos and a Beamos.
Use the Ice Rod to create a platform to cross the lava, then quickly use it again to freeze the Beamos; sneak behind the Beamos to nab the Small Key . Return to the massive room (B1 centre) and head all the way left. Ignore the Wizzrobe above the door and go through the door leading left. At the end of the next room (B1 north-west), the doors will lock and four Fire Gimos will awake. Kill all four and the doors will open, plus a warp zone to the entrance will appear.
Return to the massive room (B1 centre) and step onto the see-saw below. Freeze the see-saw and climb it to reach a platform below. This next bit can be tricky; to the right is a swinging fire bar and to the left is a Wizzrobe. Freeze the fire bar to stop it, then kill the Wizzrobe with the Ice Rod or arrows, revealing a third platform.
Next; head down and across the second see-saw. At the end, open the locked door in the bottom-left corner and enter through it (to B1 south-west). Make your way left and up, using the Ice Rod to create platforms bridging the gaps and avoid or freeze the cheeky fire-spitting blocks.
At the end, break the skulls in the corner to reveal a hidden floor switch–step on it to reveal a new bridge in the previous room. Head back the way you came, into the previous room (B1 centre). Make your way right, across the new bridge and to the other side.
Open the locked door leading right and head on through. Next (B1 south-east), make your way up and right, using the Ice Rod again to create platforms to cross the lava. If the moving spikes are proving bothersome, use the Ice Rod to freeze them. At the end, break the skulls to reveal another floor switch.
Step on the switch to create another new bridge in the previous room, this time touching the south wall. Return the way you came, into the previous room again (B1 centre). Stand on the white square just ahead and strike the nearby round switch. A bridge will appear ahead, but it won’t remain for long. Quickly go up and use the Ice Rod to drop ice blocks on the Wizzrobe on the overhead platform and return down before the bridge collapses. Once the Wizzrobe dies, a platform will appear near the right side of the room.
Push this bridge out to reach across the lava pit ahead. The door to our left contains the room with the Big Key in it.
Activate the bridge again and continue further up, this time firing arrows at another Wizzrobe–kill it to reveal a platform and chest further up. Again, run back down before the bridge leaves without you. Once you’re ready, re-activate the bridge and run up until you’re before the platform to the right, then cast the Ice Rod at the lava pillar right and merge into it to cross to the right.
Here; merge into the wall to the right and walk left until you’re behind a long metal platform, then emerge to push the platform out, creating a bridge to the chest–open it to discover 100 rupees.
Return to the top-right corner, on higher ground, and merge back into the wall, then walk left. Emerge on the metal ledge and enter the door leading up (to B1 north) to find a chest containing 50 rupees, then go back. Next (B1 centre), merge into the wall to the left of the door and walk left, emerging on a ledge with a Wizzrobe–kill it to reveal a fourth platform.
Once all four platforms have been revealed; a platform with a big chest will appear in the middle of the platforms. For now, drop down and head right; hit the round switch near the room entrance to raise the metal platform above.
From here, head left and cross the see-saw below, while its frozen. At the fire bar, face left and use the Ice Rod to solidify the lava pillars left, then walk left across the pillars. Wait a bit for the energy gauge to recover, then merge into the nearby wall and walk right. Emerge on top of the metal ledge and let the energy gauge recover again. Then merge back into the wall and continue right. At the end emerge to be in front of a locked door; open the door and go beyond (to B1 north) to find a big chest containing the Big Key , then go back.
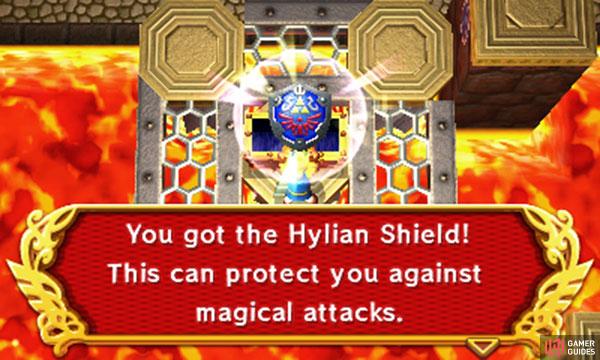
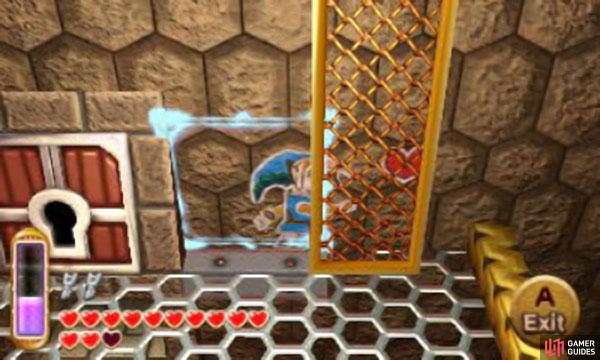
Next (B1 centre), merge into the wall immediately to the right. Walk right until you’re behind the long metal platform, then emerge to push it, creating a bridge below. Go down, across the bridge, and at the end, drop down to the left to reach the big chest–inside is the Hylian Shield.
With this fabled shield, you can now deflect magic attacks, useful when facing Wizzrobes and the like. Drop down above and head left, crossing over the frozen see-saw again. This time, from the fire bar, head down the next see-saw.
From here, head right along the bottom-most bridge and take the door, halfway along, leading down (to B1 south). Face the lava pool below and create platforms with the Ice Rod all the way down. At the end, use the Ice Rod to strike the round switch–the platforms to the left and right will now lower and raise.
Carefully make your way back and merge onto the wall, then walk toward one of the lowering and rising platforms and emerge on top. Ride the platform to its peak, then merge into the wall and walk toward the top of the room; emerge to be next to the big door.
Open the big door with the big key and head through (to B1 centre). Avoid the spiked rollers ahead or freeze them with the Ice Rod. At the end, break the skulls to reveal a hidden floor switch–step on it and two Wizzrobes will appear to the left and right. Kill the Wizzrobes and a gap will open nearby; leap into the gap to begin the boss battle.
Boss: Grinexx
Follow the boss as it swims in the lava and wait for it to swim where there’s a opening in the wire mesh, then use the Ice Rod to drop an ice block on it to inflict damage. You can hit the boss two or three times during this opportunity. While you do this, mind the lava pillars erupting across the arena. For reference, they spout in four fixed places, so just memorise their locations to avoid running into them. After a few hits, the boss will spew lava from its back and chase after you.
You can dodge this fiery attack very easily by repeatedly running in circles around the central opening. Eventually the boss will tire and return into the lava, at which point you can repeat the process. Once the boss has taken enough damage, it will leap from the lava onto the arena; the gaps in the arena will close up too. Now the boss will attack by elongating its neck and snapping its fangs.
During this stage of the battle, there’s a slow and steady way to win without taking damage. Simply stand in one of the far corners of the arena and repeatedly fire arrows at the boss (usually at a 45 degree angle). If you stay put in the corner, the boss cannot hit you!
From here, it’s a simple matter of whittling away at the boss until it’s dead. Don’t worry about conserving your energy gauge, as you can let it refill refill when the boss clams in and bounces around the arena like an idiot.
If you don’t mind taking a few hits; there’s the hands-on approach too. Keep moving to avoid the boss’s snapping head and strike its head with your sword (recommended), bow or Ice Rod after it attacks. Beware that the boss can quickly sidestep to catch you off guard. Upon taking some beating, the boss will withdraw into its shell and spin across the room. Due to the boss’s size, you can stay in the corners to avoid getting hit.
Later, the boss will gather air when it withdraws and do a big pressured air attack around it–keep your distance to avoid damagel again, the corner is a good place to retreat. Nearing the end of its life, the boss will often shoot out its head twice during its snapping attack; wait until after the second attack before going in. Once the boss has blown into smithereens, grab the heart container and Impa’s Painting just ahead.
No Comments