
The game begins, in classic fashion, with Link in the middle of a sinister and frightful dream–no doubt some premonition of a terrible event to come. However it’s not long before he receives a rude awakening from a little kid.
This kid, who we discover is called “Gulley”, informs Link that he’s late to the Blacksmith’s and should head there pronto. Oh dear, not the best way to begin your heroic career is it? Late to your job!
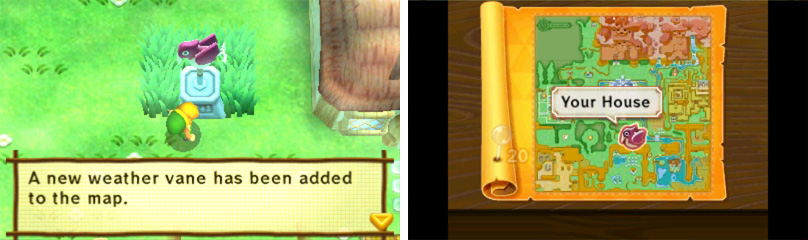
Leave the room, via the door to the south, and you’ll find yourself outside Link’s House. Before you can go anywhere, Gulley tells Link to check in with the nearby weather vane.
Apparently the weather vane lets you save the game; Gulley hasn’t a clue what this means, but we suspect you do. Walk up to the weather vane and press the A button. The game will give you the option to save: pick “Save” to continue.
In this game, you can only save your game by pressing A in front of a weather vane (and during important events, when prompted). There are many weather vanes dotted across the world map, so finding one isn’t usually a struggle.
After the first dungeon, you can warp to any weather vane, which makes it even easier to save. When it’s time to end your game or when you want to record your progress, don’t forget to head back to the nearest weather vane to save!
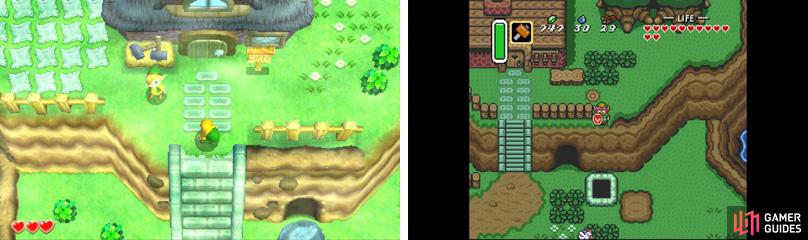
After saying “hi” to the weather vane, it’s time to get going. From your house, go one screen west and you will see Gulley leaving towards the north-west. Gently leap down the cliff and follow Gulley through the tree-lined path.
In the next screen, you’ll be before a stretch of water and Gulley’s nowhere to be seen; head directly west. You will find yourself in the Blacksmith’s area; walk toward the top-left corner of the screen, then up the stairs, to reach the Blacksmith’s house and proceed through the door.
Inside, the Blacksmith will be talking with the Captain. After the conversation ends, the Captain leaves and the Blacksmith will berate Link for his usual lateness.
However, before Link begins his smithing work, the Blacksmith’s wife notices that the Captain left without his new sword. Well, that was smart. Link’s task is, of course, to reunite the Captain with his sword.
Go up to the sword on the table and press A to pick it up. With the sword in hand, it’s time for Link to hurry to Hyrule Castle–its location will be marked on the map with a red cross. Check the map on the bottom screen if you ever get lost.
Exit the Blacksmith’s house and leave the area from the south-east (where you originally came from). In the next screen, keeping heading right until you’re below the large bridge. Then go up across the bridge and speak to the Hyrule soldier in front of the castle gates.
The soldier tells Link that the Captain isn’t at the castle and, instead, he’s probably at the Sanctuary to the north (it will be marked on the map).
To get to the Sanctuary, follow the castle wall left and then up; when you reach the end, exit left to reach the next screen. Here, there’s a road stretching from north to south and trees all on sides; go up along the road to the next screen.
You will now be standing in front of a small lake; turn right and exit the screen via the right. In the next screen, the Sanctuary will be toward the top right corner.
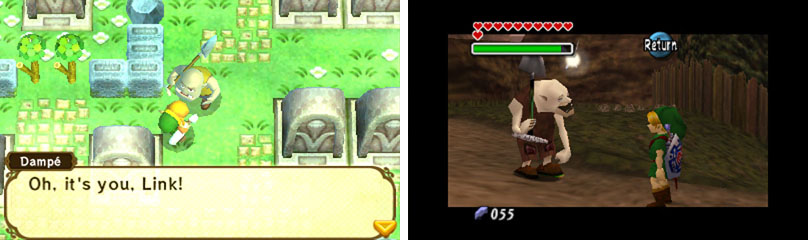
In front of the Sanctuary, Seres and Dampé will be chatting. Seres then notices Link and, after listening to Link speak about his errand, she offers to fetch the Captain who’s inside the Sanctuary.
While Link waits, Dampé talks with him about Seres’s charm and the Captain’s motives, but their conversation is broken short by a scream coming from within the Sanctuary–worse still, the Sanctuary’s door locks itself shut. Uh oh, we’ve a bad feeling about this…
After hammering away at the front door for a while, Dampé realises he’s not going to get anywhere and things are looking bad for Seres with each passing minute.
However, there’s a ray of hope–Dampé tells Link that there’s a secret way in the graveyard, which should lead inside the Sanctuary, where Link can rescue Seres. However it’s dangerous to go, so Dampé advises Link to wield the Captain’s sword for his own safety.
Link will receive the Forgotten Sword . Now you can slash with your sword by pressing the B button. Hold B to charge your sword and wait for a circle to briefly surround Link, then let go to perform a spin attack.
Your sword will be your primary weapon for attacking enemies, so familiarise yourself with its handling. You can also use the sword to mow down bushes and grass, as well as break small objects such as pots.
Go one screen right from the Sanctuary and you’ll find yourself in the Graveyard. Be careful: now that it’s past dawn in Hyrule, monsters will begin prowling the lands. To deal with most monsters, simply approach them and then slash them with your sword. Be careful not to get touched by a monster or you’ll lose health.

Navigate to the rather suspicious grave in the centre of the screen, surrounded by rocks. Cut down the small trees to get to it.
Walk up to the front of the grave and press A, when close, to grab it. With the A button held down, press forward on the circle pad to push the grave back, revealing a secret staircase going downstairs. When you’re ready, step down the stairs to begin your rescue mission.
No Comments