
Before you begin your adventure in Hyrule and beyond, here are some tips we’re desperate to tell you and will hopefully make your journey that much easier!
1. The Pegasus Boots
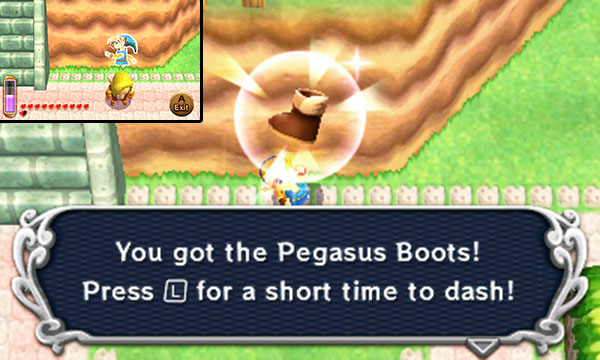
The game doesn’t make it completely obvious how to obtain the Pegasus Boots item. We didn’t realise until the very end that you could obtain it near the very beginning of the game and we’re certain there are others out there like us. To prevent yourself from joining the club, heed our words carefully!
After visiting Zora’s Domain, you’ll find Shady Guy standing near the north of Kakariko Village. However he’ll do a runner as soon as you go near and you won’t be able to catch him. This when you need to think outside the box. Instead of confronting Shady Guy normally, merge into the wall just ahead of him, then walk towards him, while as a painting, When you’re right behind him, emerge and you’ll catch him off guard. Your prize for your clever thinking is a nifty pair of Pegasus Boots.
Since we played through most of the game without the Pegasus Boots, you can probably imagine they’re not essential to completing the game. However they’re extremely handy for knocking out items and lost Maimai from trees (and other tall objects).
2. Fill Your Bottles
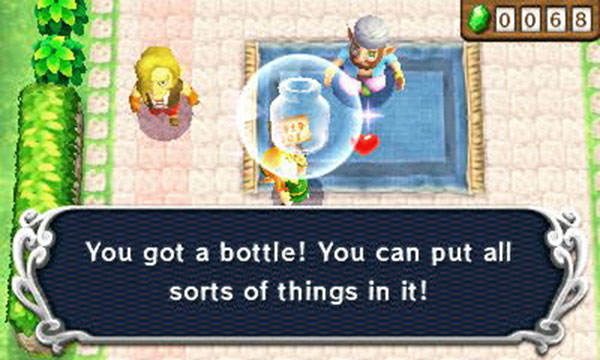
Bottles are very useful items, so be sure to put them to good use. It can be tempting to forget about them because you don’t think you’ll need them. However, you’re only human and liable to make mistakes and there will likely be times when you need a way to restore health pronto. Especially when you’re in the middle of a dungeon or hiking up a mountain.
To begin with, you can’t go wrong with keeping a fairy in a Bottle; they can be found in fairy fountains across the lands–there’s one in the first dungeon and another just outside Link’s House, if you go one screen south and bomb the right-most cracked wall. You’ll need a Net to catch a fairy, which you can obtain from Kakariko Village’s Bee Guy for free if you have a Bottle.
Fairies restore 5 hearts and automatically revive Link if he reaches zero hearts–an excellent safeguard against mis-timed Game Overs. Early on, you can probably afford to fill all your Bottles with fairies. Later, when your heart count rises significantly and the monsters become tougher, you’ll want to upgrade to Blue Potions from the Witch’s Hut, which restore all health. However, always keep at least one fairy for backup.
3. Paint a Picture
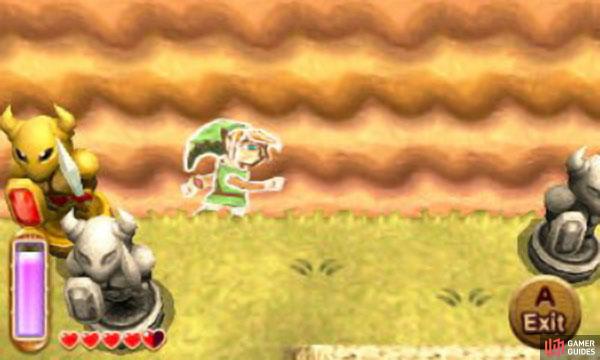
Merging into a wall doesn’t just make you look like a piece of art; it also stops you from taking any damage!
This will prove to be invaluable for most boss fights and any time you might need to dodge an enemy (especially if you’re low on health). You’ll chew through your energy gauge whilst you’re merged, so bear that in mind as you bask in your temporary near-invincibility.
4. A Stunning Victory
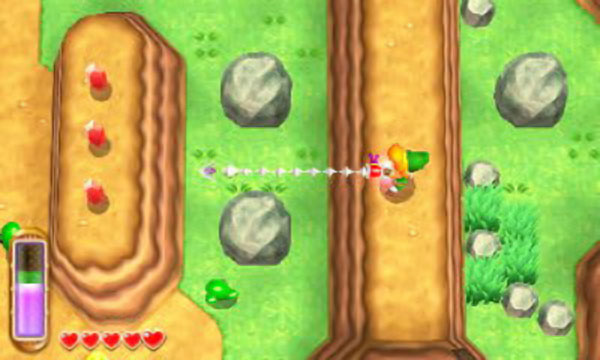
The Hookshot not only allows you to pull in Rupees, small hearts etc, but it also stuns non-armored enemies from a safe distance (along with pushing them backwards - useful if they’re near a ledge).
Following from the above, ranged combat is all well and good. However, later on, as your sword improves, you’ll find it’s often much quicker to fell monsters with your sword than with other items. Plus if there are lots of monsters or you’re surrounded, you won’t have time to pick them off one by one. At this point, you may want to go in all guns blazing again.
To minimise your injuries though, try to stun your foes before you pummel them. This is especially important later on, when the monsters do more damage and take more hits before dying. If there are only a few monsters, the Hookshot or Boomerang are good. When there are many foes or if you’ve no time to aim properly, use the Tornado Rod to daze them.
It’s easy to dismiss the above items as combat items because they don’t do damage, but if you can immobilise your foes before you attack, you’ll have a much easier (and safer) time. A lot of monsters can be stunned too; in terms of lackeys that can be felled with the sword, only the Lynel cannot be stunned.
5. Setup StreetPass
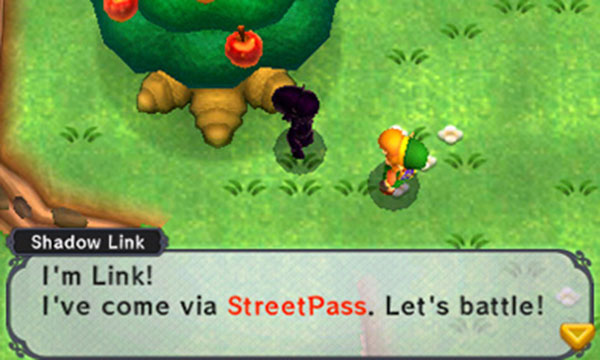
This one doesn’t really help you per se, except in a kind of roundabout way. While you’re enjoying the game, don’t forget to setup StreetPass, by speaking to Gramps on the west side of Kakariko Village and, similarly, don’t forget to update your Shadow Link every now and again. Enabling StreetPass for this game doesn’t take any extra effort, other than leaving your 3DS or 2DS on.
If you have StreetPass enabled, other people can receive your Shadow Link and, in turn, you will receive theirs. Shadow Link battles are a fun distraction, although not essential, and a good way of making rupees. You’ll also need to do a fair number of battles before you can complete all 50 StreetPass Challenges. So if you don’t turn StreetPass on, you’ll miss out on this experience.
Now it’s entirely possible that you live in a very remote area or somewhere where you’re unlikely to find other 3DS or 2DS players to StreetPass. In which case, this tip probably isn’t very helpful. However, sooner or later, you’re bound to go somewhere well populated and you may well want to bring your 3DS or 2DS along with you, even if it’s just to play while you’re away.
No Comments