

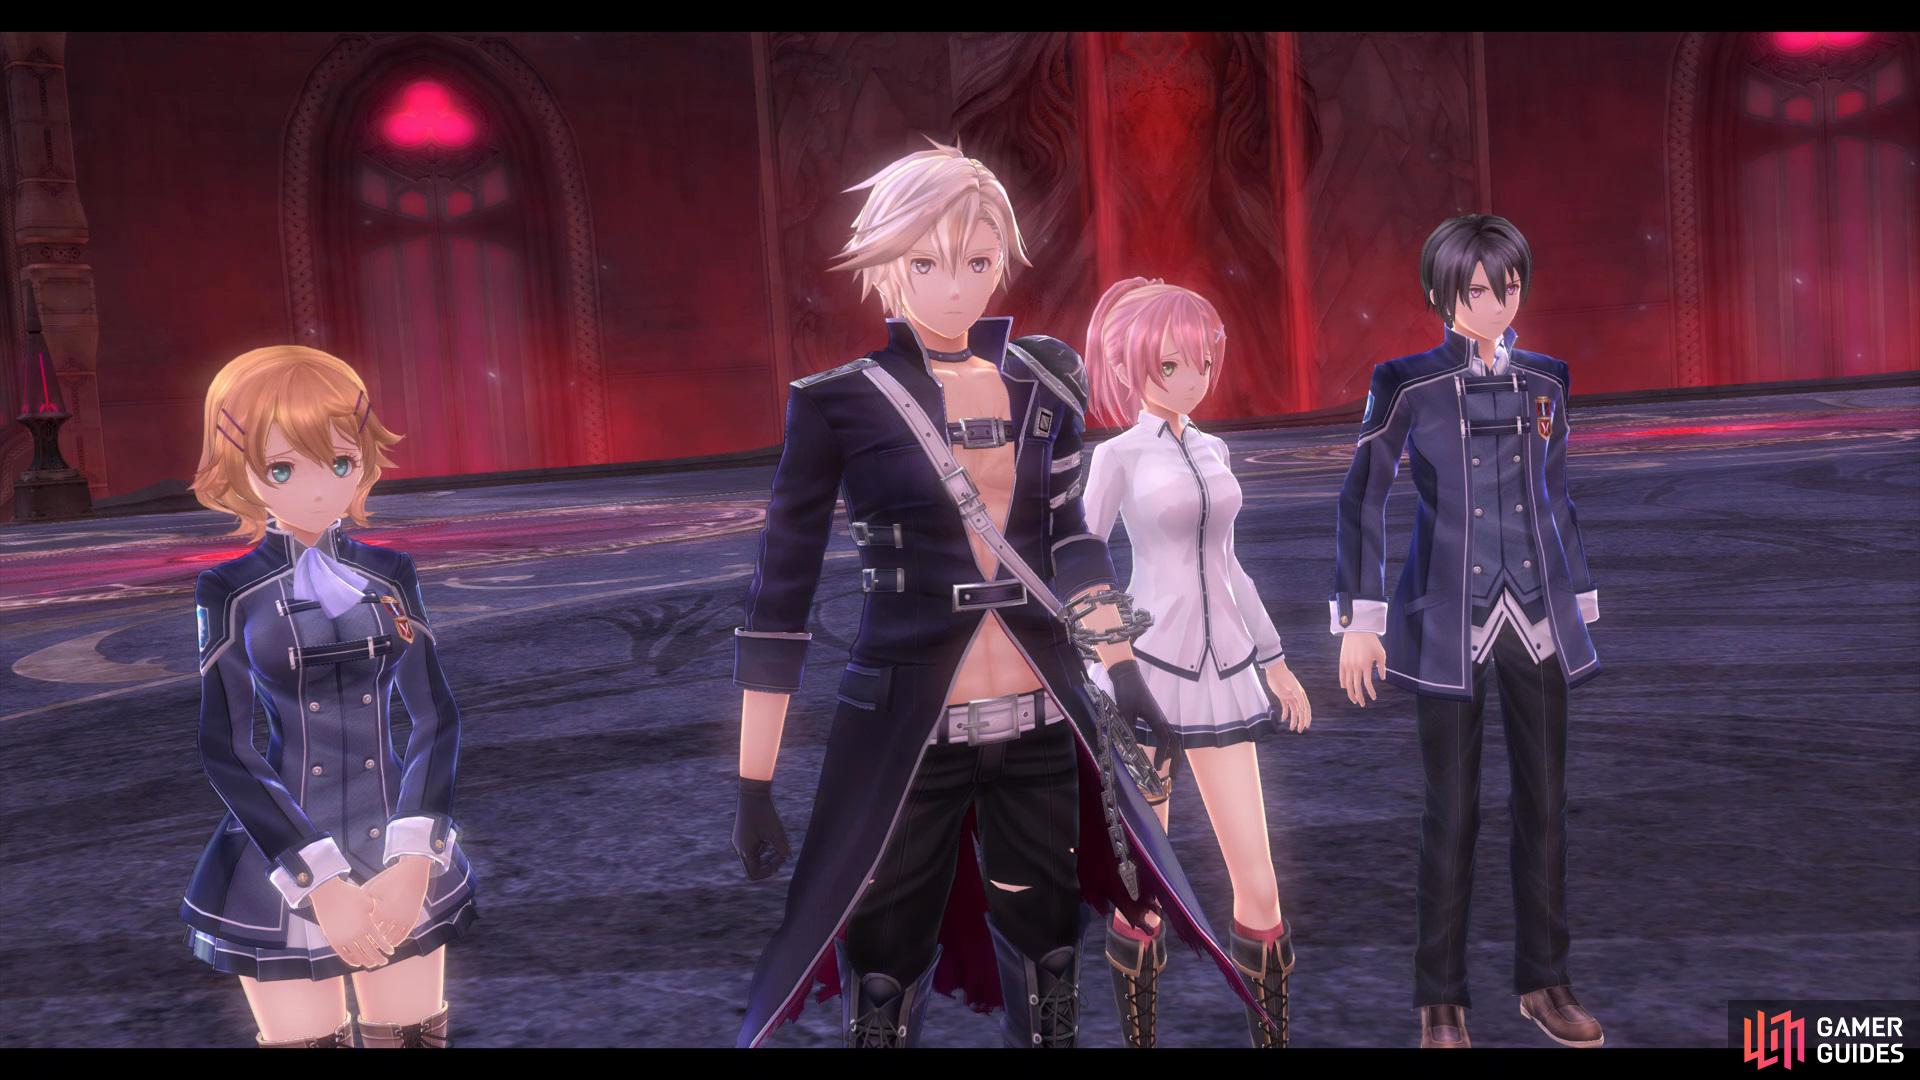
Head to the Cathedral
Head into the Heimdallr Cathedral (Sankt District) to view a cutscene, then you’ll find yourself fighting both Seah Unsurtr and Magic Knight Zelsheim at once.
Boss: Seah Unsurtr / Magic Knight Zelsheim
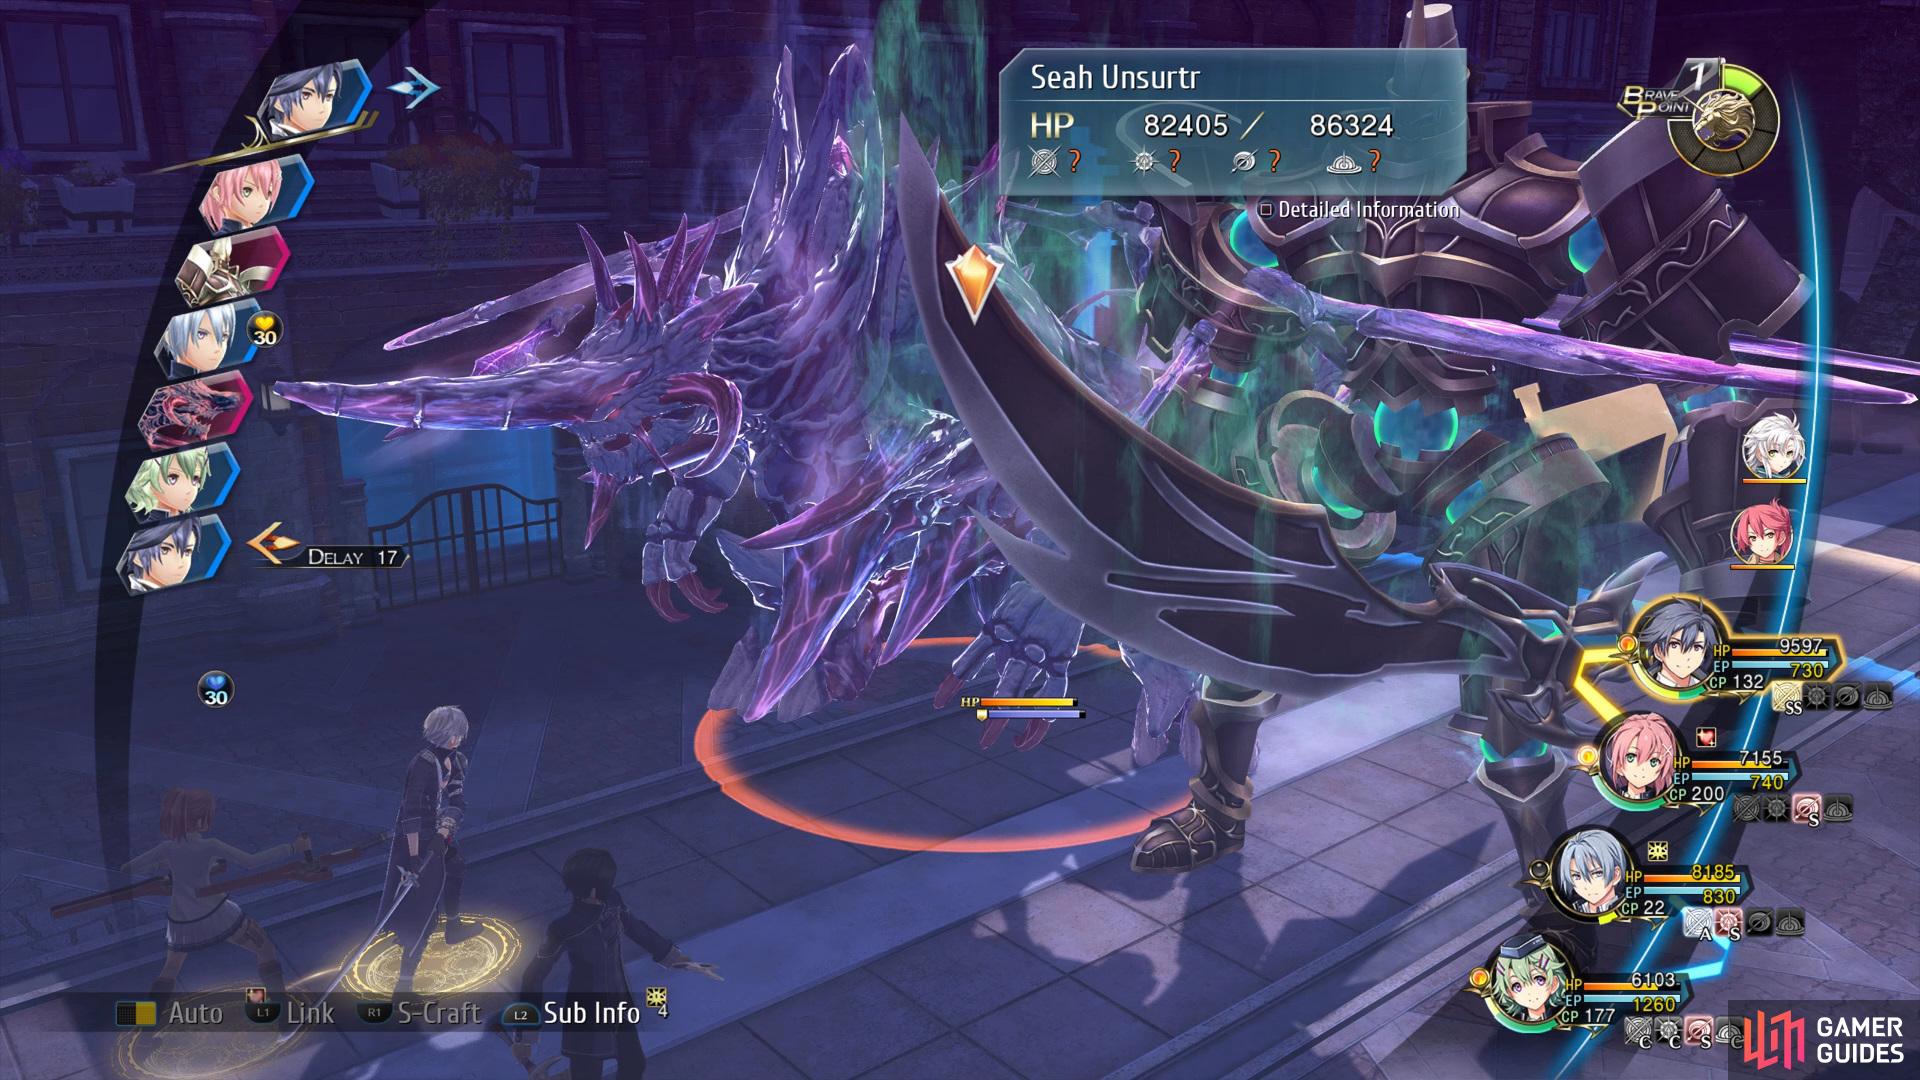
Battle #1: Seah Unsurtr / Magic Knight Zelsheim.
| Enemy | HP | Slash | Thrust | Pierce | Strike | Elemental Efficacy | Item Drop |
|---|---|---|---|---|---|---|---|
| Seah Unsurtr | 86324 | ☆ | ☆☆ | ☆☆☆ | ☆ | E - 200, WA - 100, F - 50, WN - 100 TI - 80, SP - 150, MI - 100 | Zeram Powder |
| Magic Knight Zelsheim | 86335 | ☆☆ | ☆☆ | ☆☆ | ☆☆ | E - 50, WA - 100, F - 150, WN - 100 TI - 100, SP - 80, MI - 120 | Brave Seed |
Begin this battle by scanning both of the bosses, then activate Sledgehammer and work on getting them into the Break Status. Once you’ve achieved this you’ll want to use Wind Blade along with Normal Attacks until their next turn, then use any S-Crafts to finish them off.
After you’ve defeated both Seah Unsurtr and Magic Knight Zelsheim you’ll then face another Magic Knight Zelsheim and Urkganon.
Boss: Urkganon / Magic Knight Zelsheim

Battle #2: Urkganon / Magic Knight Zelsheim.
| Enemy | HP | Slash | Thrust | Pierce | Strike | Elemental Efficacy | Item Drop |
|---|---|---|---|---|---|---|---|
| Urkganon | 86328 | ☆☆ | ☆☆☆ | ☆ | ☆ | E - 50, WA - 100, F - 200, WN - 100 TI - 150, SP - 100, MI - 80 | Zeram Powder |
| Magic Knight Zelsheim | 86335 | ☆☆ | ☆☆ | ☆☆ | ☆☆ | E - 50, WA - 100, F - 150, WN - 100 TI - 100, SP - 80, MI - 120 | Brave Seed |
Like in the previous battle you’ll want to scan them both, then activate Scared Roar and work on getting them into the Break Status. Once you’ve achieved this switch over to Valiant Hearts and finish it off with any S-Crafts.
Upon defeating Urkganon and Magic Knight Zelsheim you’ll view a lengthy cutscene, then you’ll find yourself in the Gral of Erebos.
Go to the bottom layer
- Explore Gral of Erebos - Top Level
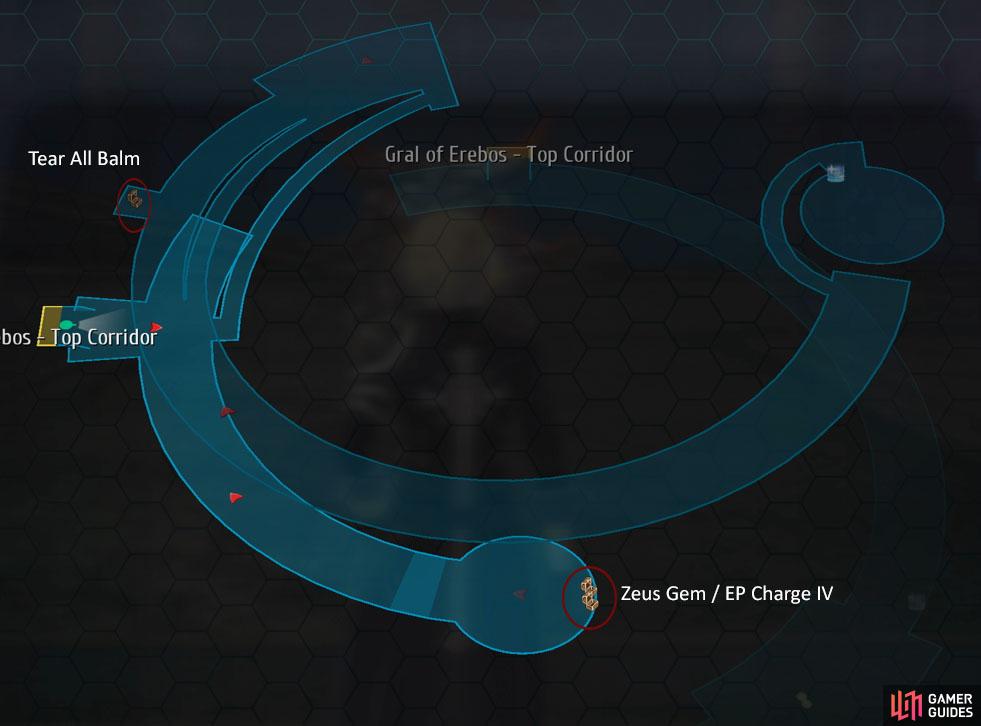
Top Level Map.
| Enemy | HP | Slash | Thrust | Pierce | Strike | Elemental Efficacy | Item Drop |
|---|---|---|---|---|---|---|---|
| Calvary Lancer | 18046 | ☆☆ | ☆☆ | N/A | ☆☆☆☆ | E - 120, WA - 80, F - 100, WN - 160 TI - 100, SP - 80, MI - 140 | Curia Balm, U-Material |
| Teropes | 48991 | ☆☆ | ☆☆ | ☆☆ | ☆☆ | E - 120, WA - 80, F - 100, WN - 120 TI - 40, SP - 200, MI - 100 | Gravion Hammer, Crescent Mirror |
| Tiamat | 76924 | ☆☆☆ | ☆☆ | ☆ | ☆☆ | E - 160, WA - 120, F - 80, WN - 100 TI - 80, SP - 140, MI - 100 | Impede 3, Lost Genesis |
Head to the west side of the area to find a Chest that contains Tear All Balm, then go down the ramp and continue south to find two Chests that possess a Zeus Gem and EP Charge IV.
- Explore Gral of Erebos - Top Corridor
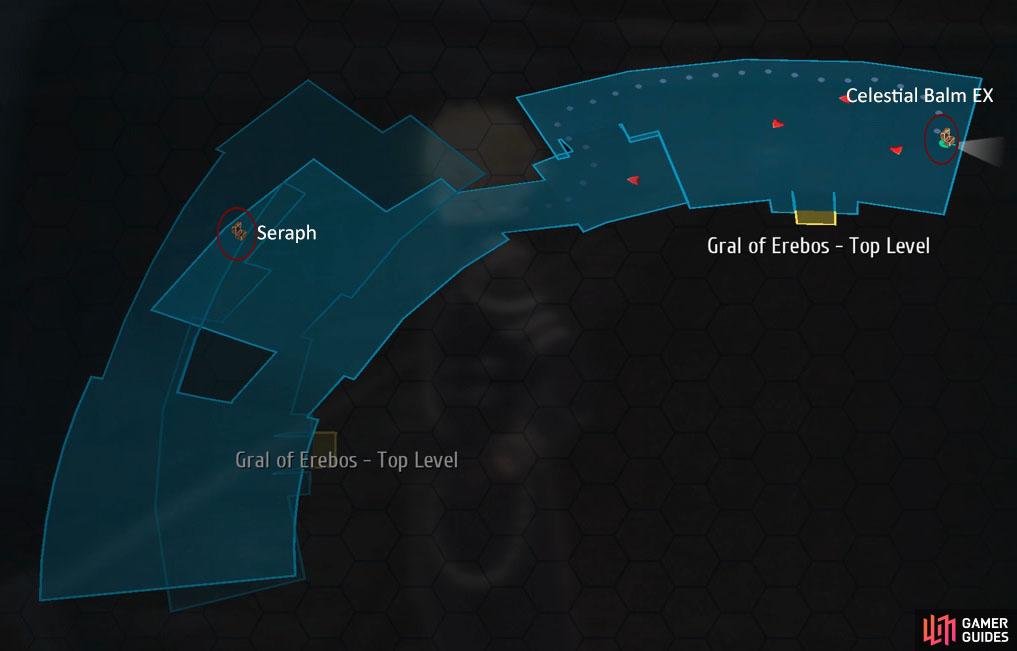
Top Corridor Map.
Go through the westside door and walk down to the bottom to find a Chest in an open area that contains the Seraph Quartz, then continue going south until you reach a large room that has another Chest that holds a Celestial Balm EX inside. Finally, go through the large door and follow the path to face Arianrhod the Steel Maiden and McBurn.
Boss: Arianrhod the Steel Maiden / McBurn
Battle #3: Arianrhod the Steel Maiden / McBurn.
| Enemy | HP | Slash | Thrust | Pierce | Strike | Elemental Efficacy | Item Drop |
|---|---|---|---|---|---|---|---|
| Arianrhod the Steel Maiden | 152880 | ☆☆ | ☆☆ | ☆☆ | ☆☆ | E - 80, WA - 80, F - 80, WN - 80 TI - 80, SP - 80, MI - 80 | N/A |
| McBurn the Blazing Demon | 152700 | ☆☆ | ☆☆ | ☆☆ | ☆☆ | E - 80, WA - 80, F - 0, WN - 80 TI - 140, SP - 140, MI - 140 | N/A |
Begin the battle scanning both of them, then use Juna’s Sledgehammer and save 5 BP to use Burst which will instantly put them into the Break Status. Once you’ve achieved this you’ll want to save up 4 BP and use Lightspeed Flash which will put a 60% Delay on their turn. Now save up 4 BP again to activate Sledgehammer, then save up to perform a burst attack which will quickly put them back into the break status. Finally activate Raging Fire to increase your damage and then use any available S-Crafts in quick succession to take them out.
After you’ve finished the battle, take the lift down to the Gral of Erebos - Middle Level.
- Explore Gral of Erebos - Middle Level 1
Middle Level 1 Map.
| Enemy | HP | Slash | Thrust | Pierce | Strike | Elemental Efficacy | Item Drop |
|---|---|---|---|---|---|---|---|
| Zaphkiel | 18738 | ☆ | ☆ | ☆☆☆ | ☆☆ | E - 80, WA - 100, F - 160, WN - 120, TI - 140, SP - 100, MI - 80 | U-Material, EP Charge III |
| Archangel | 50781 | ☆☆ | ☆ | ☆☆☆ | ☆ | E - 80, WA - 80, F - 80, WN - 80, TI - 200, SP - 150, MI - 120 | Celestial Balm, Seraphic Ring |
| True Abaddon | 79672 | ☆ | ☆ | ☆☆☆ | ☆ | E - 80, WA - 80, F - 80, WN - 80, TI - 200, SP - 150, MI - 120 | Cast 3, EP 3 |
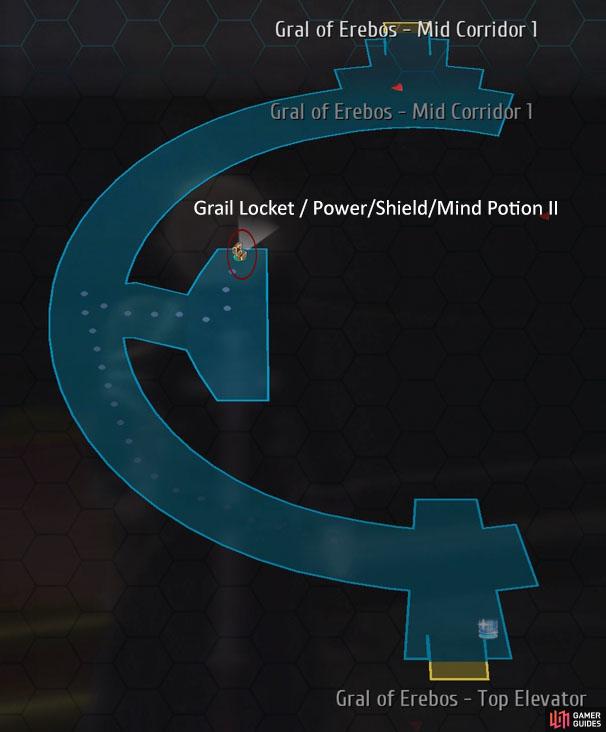
Once you’ve arrived on the middle level, head to the center to find two Chests that contains a Grail locket and a Power/Shield/Mind Potion II, then go through to the Mid Corridor 1.
- Explore Gral of Erebos - Middle Corridor 1
Middle Corridior 1 Map.
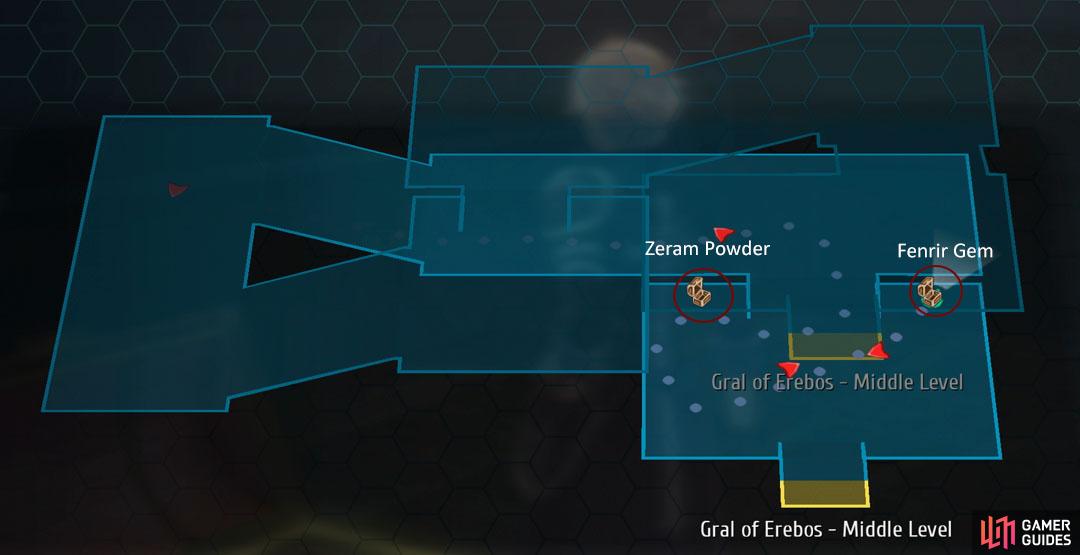
Fight your way through the enemies until you reach the area before the door, then open up the two Chests to acquire a Fenrir Gem and some Zeram Powder.
- Explore Gral of Erebos - Middle Level 1
Second half of Mid Level 1 Map.
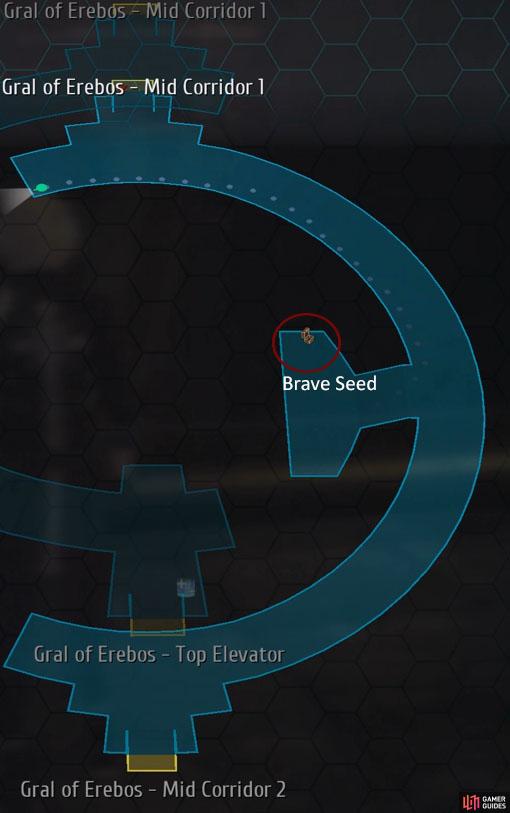
Head back into the Middle Level and make your way to the center of the area to find a Chest that possess a Brave Seed, now go through the door to the south to find yourself in Middle Corridor 2.
- Explore Gral of Erebos - Middle Corridor 2
Middle Corridor 2 Map.
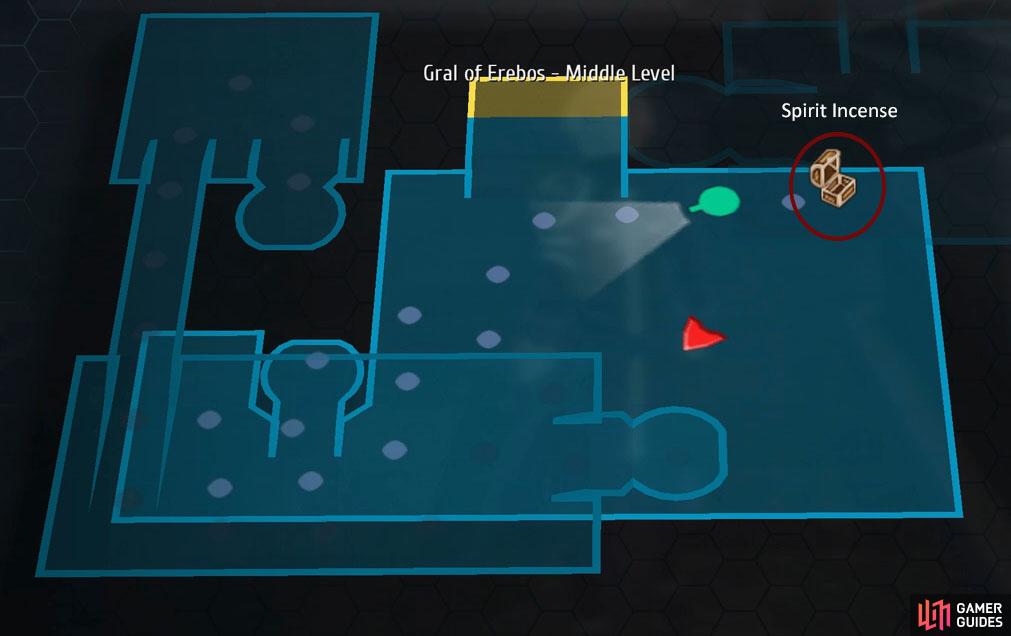
For this area you’ll want to take the lifts down to an open room, then open the Chest to acquire a Spirit Incense before proceeding into the room ahead. Here you’ll want to head north to face Jaeger King Rutger, Shirley the Sanguine Ogre, Kreuger the Severing Eclipse, and Azure Siegfried.
Boss: Jaeger King Rutger / Shirley the Sanguine Ogre / Kreuger the Severing Eclipse / and Azure Siegfried
Battle #4: Jaeger King Rutger / Shirley the Sanguine Ogre / Kreuger the Severing Eclipse / and Azure Siegfried
| Enemy | HP | Slash | Thrust | Pierce | Strike | Elemental Efficacy | Item Drop |
|---|---|---|---|---|---|---|---|
| Shirley the Sanguine Ogre | 104243 | ☆☆ | ☆☆ | ☆☆ | ☆☆ | E - 100, WA - 100, F - 100, WN - 100 TI - 100, SP - 100, MI - 100 | N/A |
| Kreuger the Severing Eclipse | 104252 | ☆☆ | ☆☆ | ☆☆ | ☆☆ | E - 100, WA - 100, F - 100, WN - 100 TI - 100, SP - 100, MI - 100 | N/A |
| Azure Siegfried | 123048 | ☆☆ | ☆☆ | ☆☆ | ☆☆ | E - 100, WA - 100, F - 100, WN - 100 TI - 100, SP - 100, MI - 100 | N/A |
| Jaeger King Rutger | 134696 | ☆☆ | ☆☆ | ☆☆ | ☆☆ | E - 100, WA - 100, F - 100, WN - 100 TI - 100, SP - 100, MI - 100 | N/A |
Begin this battle by scanning the group, then activate Sledgehammer and buff everyone up with Alis’a Heavenly Gift. Now you’ll want to work on getting everyone into the Break Status before activating Sara’s Brave Order Lightspeed Flash. Finally, activate Raging Fire and use everyones S-Crafts to finish them off.
Once you’ve managed to take out everyone you’ll want to take the lift down to the lower level.
- Explore Gral of Erebos - Lower Level 1 / Low Corridor 1
Low Corridor 1 Map.
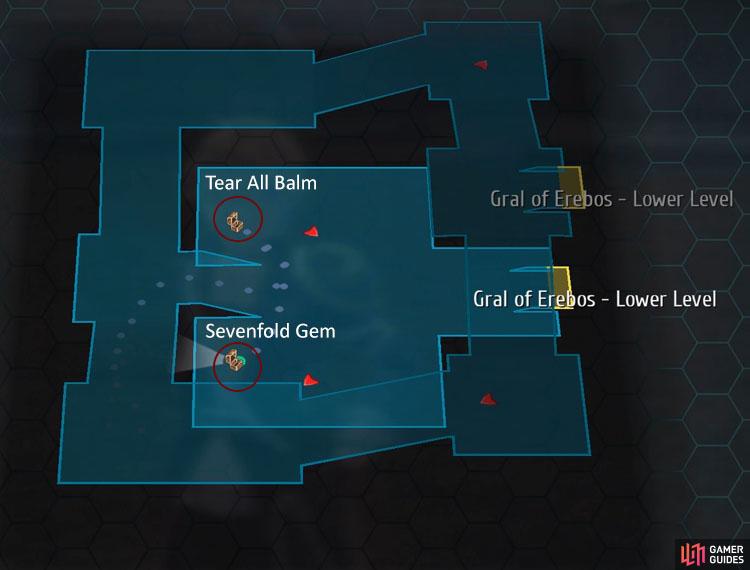
There isn’t anything to get in this first room, so you’ll want to go straight into the Low Corridor 1. Here you’ll want to make your way down to the open room to find two Chests that contain a Tear All Balm and a Sevenfold Gem. Go through the door and head straight for the Low Corridor 2, as there isn’t to get here.
| Enemy | HP | Slash | Thrust | Pierce | Strike | Elemental Efficacy | Item Drop |
|---|---|---|---|---|---|---|---|
| Dark Knight | 19405 | ☆☆ | ☆ | ☆☆ | ☆☆ | E - 120, WA - 80, F - 100, WN - 160, TI - 100, SP - 80, MI - 140 | U-Material, Tearal Balm |
| Greater Devil | 52578 | ☆ | ☆☆ | ☆☆☆ | ☆ | E - 80, WA - 80, F - 80, WN - 80, TI - 140, SP - 120, MI - 200 | EP Charge III, Albion Wolf |
| Arachne Zigma | 81048 | ☆☆ | ☆☆☆ | ☆ | ☆☆ | E - 80, WA - 80, F - 80, WN - 80, TI - 120, SP - 200, MI - 150 | Mind 3, Albion Wolf |
- Explore Gral of Erebos - Low Corridor 2

Low Corridor 2 Map.
Once you’ve arrived, head north to find a Chest that contains a EP Charge IV, then go down the stairs to find another Chest that possess a Proxy Puppet. Continue down the next set of stairs to find another Chest that holds a Celestial Balm EX, then head through the door and follow the path to face Lechter, Governor General Rufus, Millium, and Claire.
Boss: Lechter / Governor General Rufus / Millium / Claire

Battle #5: Lechter / Governor General Rufus / Millium / Claire
| Enemy | HP | Slash | Thrust | Pierce | Strike | Elemental Efficacy | Item Drop |
|---|---|---|---|---|---|---|---|
| Millium the White Rabbit | 106026 | ☆☆ | ☆☆ | ☆☆ | ☆☆ | E - 100, WA - 100, F - 100, WN - 100 TI - 100, SP - 100, MI - 100 | N/A |
| Major Claire | 105990 | ☆☆ | ☆☆ | ☆☆ | ☆☆ | E - 100, WA - 100, F - 100, WN - 100 TI - 100, SP - 100, MI - 100 | N/A |
| Major Lechter | 106060 | ☆☆ | ☆☆ | ☆☆ | ☆☆ | E - 100, WA - 100, F - 100, WN - 100 TI - 100, SP - 100, MI - 100 | N/A |
| Governor General Refus | 160780 | ☆☆ | ☆☆ | ☆☆ | ☆☆ | E - 100, WA - 100, F - 100, WN - 100 TI - 100, SP - 100, MI - 100 | N/A |
Begin this battle by scanning the group, then activate Sledgehammer and save up five BP to use the burst attack which will put them into the break status. Once you’ve achieved this, use the Brave Order Noble Rise and buff up Rean with Spirit Unification, then finish them off with any S-Crafts.
During this battle you’ll want to make sure to impede any attacks if possible and heal up everyone quickly after they use an S-Craft on you.
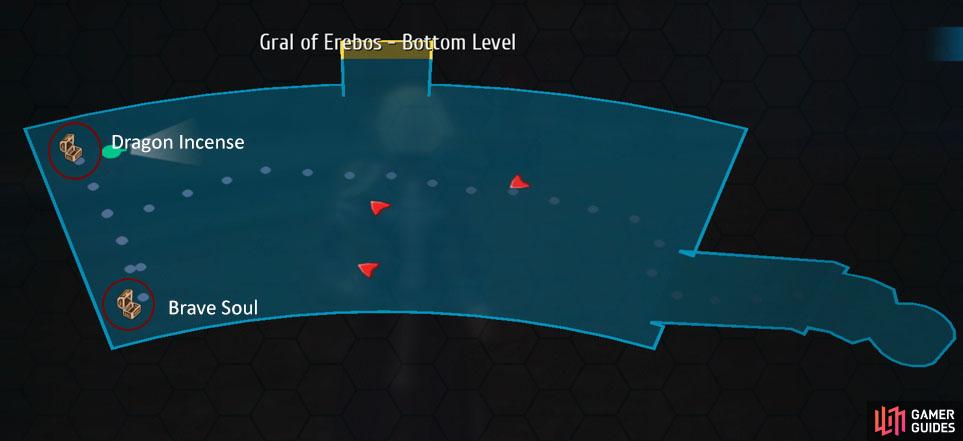
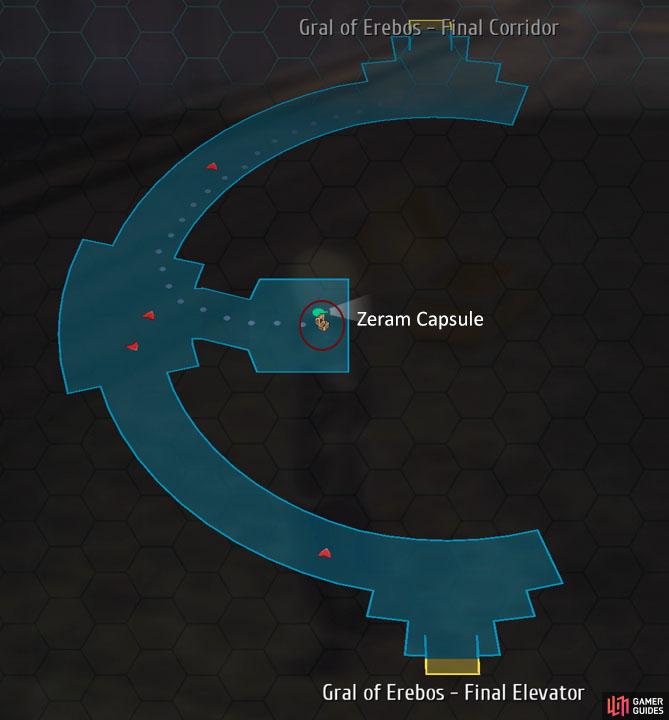
- Explore Gral of Erebos - Final Corridor / Bottom Level

(1 of 2) Final Corridor Map.
Final Corridor Map. (left), Bottom Level Map. (right)
| Enemy | HP | Slash | Thrust | Pierce | Strike | Elemental Efficacy | Item Drop |
|---|---|---|---|---|---|---|---|
| Afterglow | 19740 | ☆☆ | ☆☆ | ☆☆ | ☆ | E - 140, WA - 140, F - 140, WN - 140, TI - 20, SP - 20, MI - 20 | U-Material, S-Tablet |
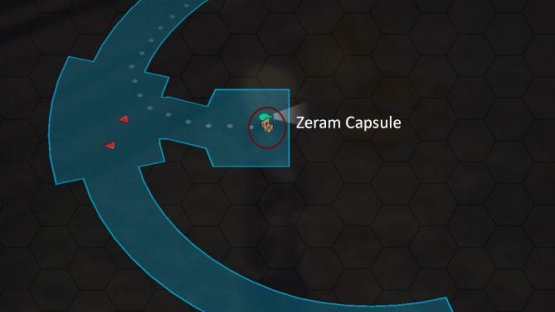
After the battle take the lift down to the bottom of the Gral and then head into the Final Corridor and take another lift down. Here you’ll want to open up the two Chests to acquire a Brave Soul and Dragon Incense, then go through the door and make your way to the center to find the final Chest that possess Zeram Capsule. Now take the final lift down to face the Nameless One.
Boss: Nameless One (Phase 1)
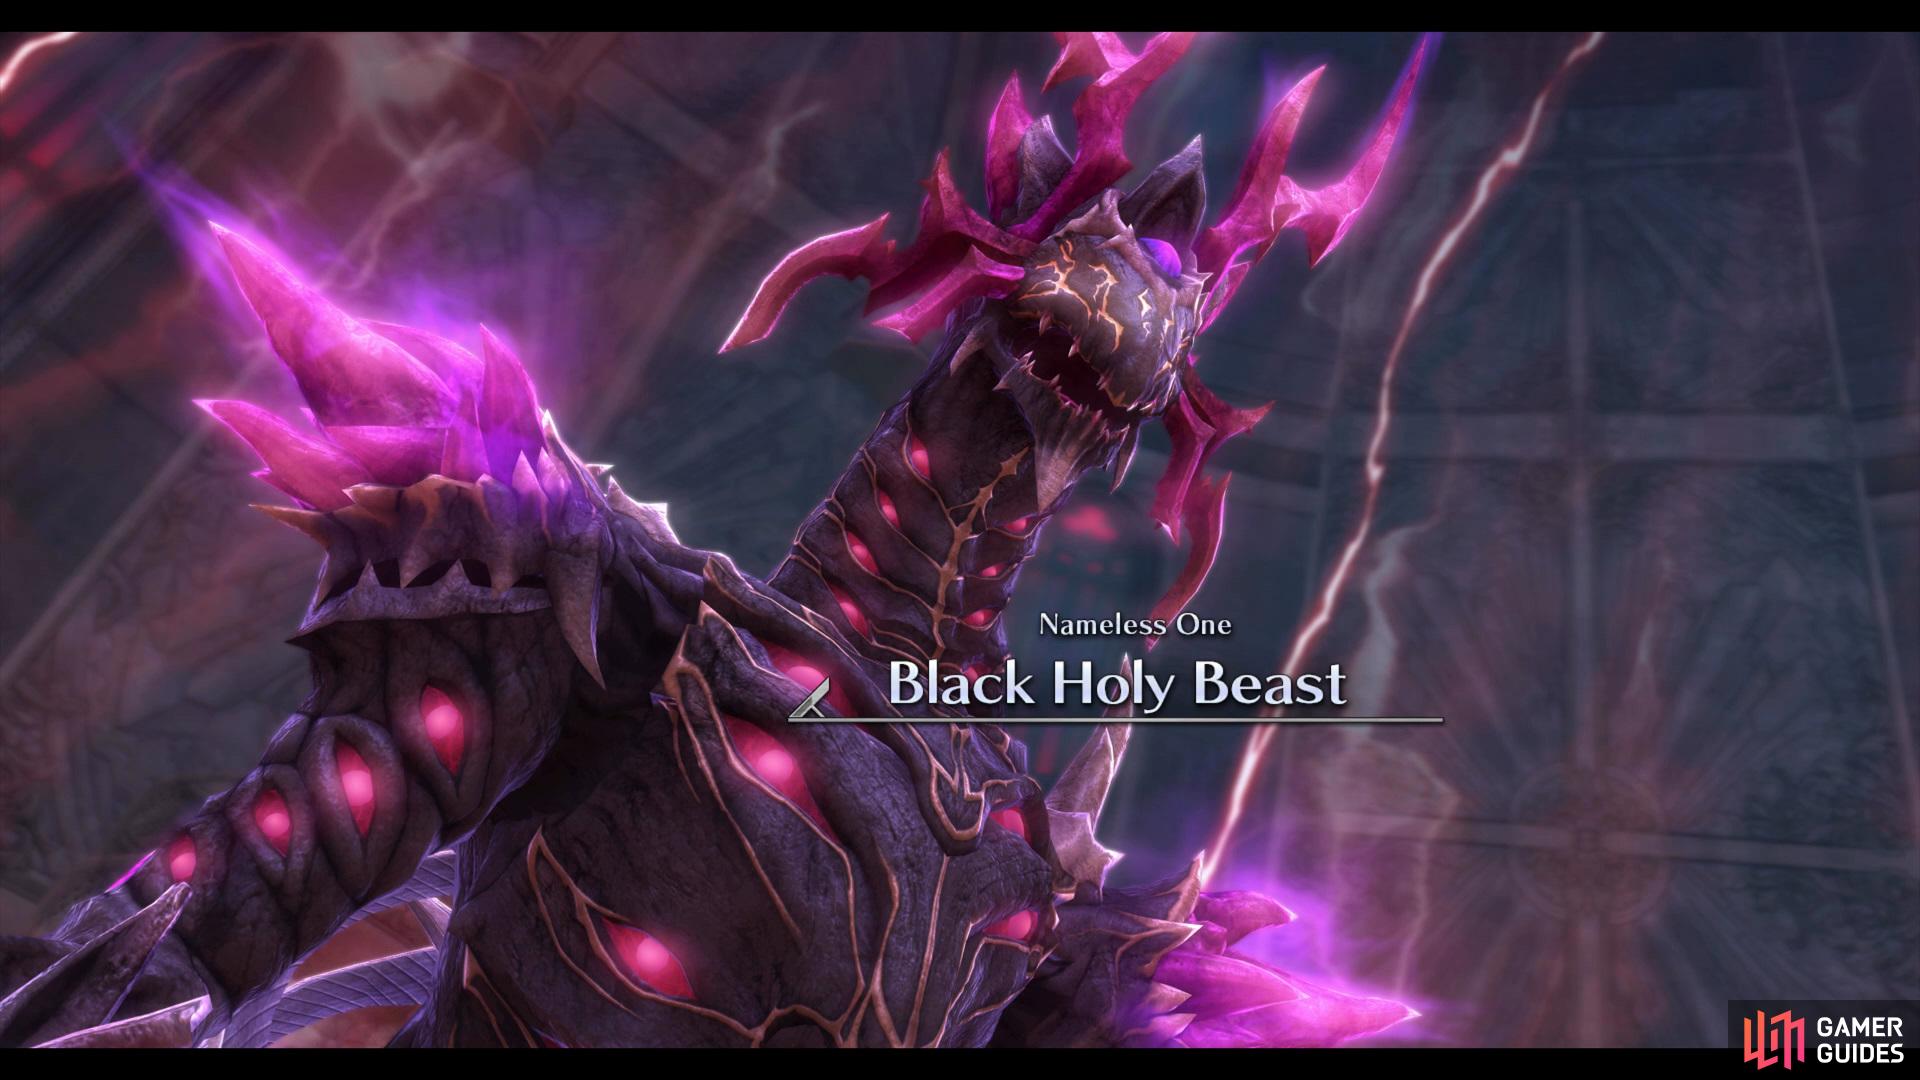
Battle #5: Nameless One
| Enemy | HP | Slash | Thrust | Pierce | Strike | Elemental Efficacy | Item Drop |
|---|---|---|---|---|---|---|---|
| Nameless One | 272017 | ☆ | ☆ | ☆ | ☆ | E - 100, WA - 100, F - 100, WN - 100, TI - 100, SP - 100, MI - 100 | N/A |
Begin the battle by scanning it, then activate Sledgehammer and work on getting into the break status quickly by using an S-Craft and any that have a high break rating. Once you’ve achieved this, activate Wind Blade to put a delay on its turn and then use normal attacks to restore your BP.
Once you’ve gathered five BP you’ll want to use Sledgehammer again and then wait until you have five again to use a burst attack to put it back into the Break Status. Finally, use Wind Blade more to get a few extra attacks and then finish it off with your S-Crafts.
Boss: Nameless One (Phase 2)
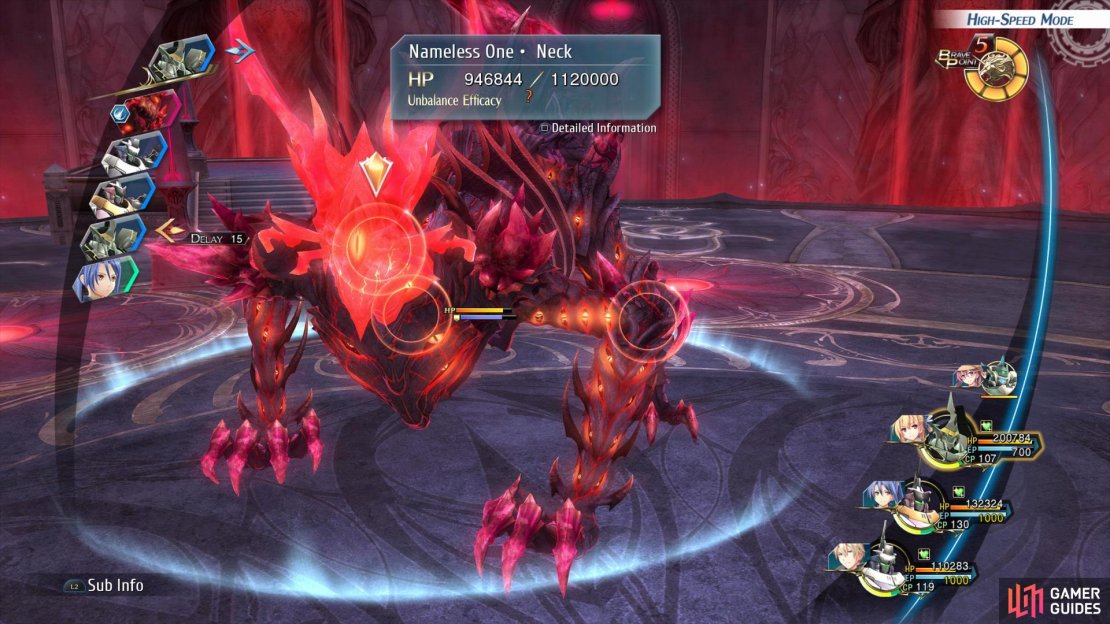

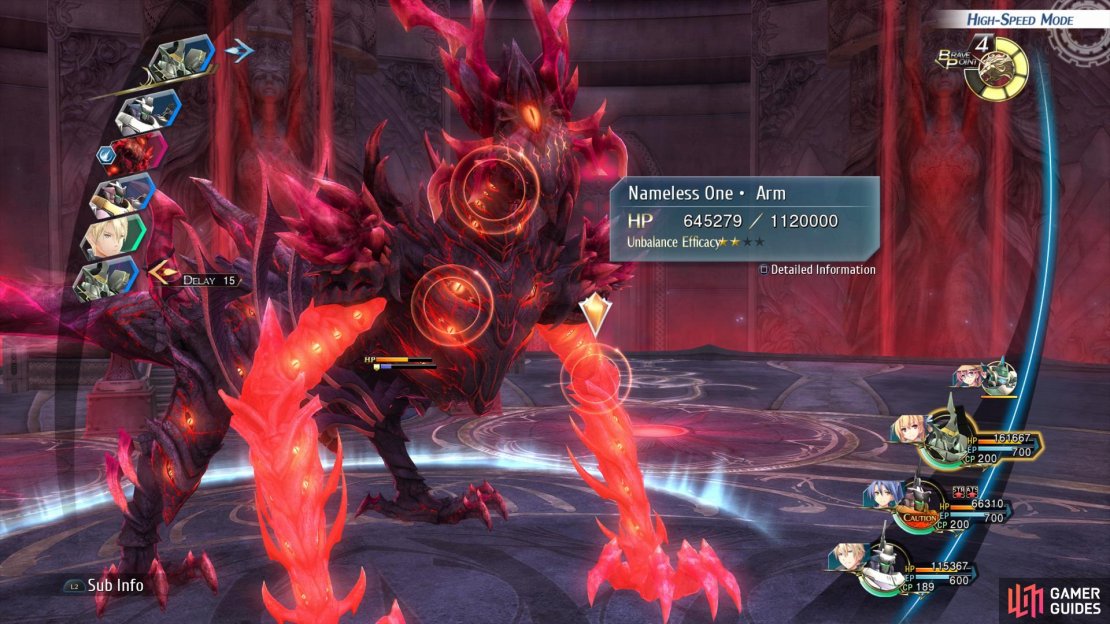
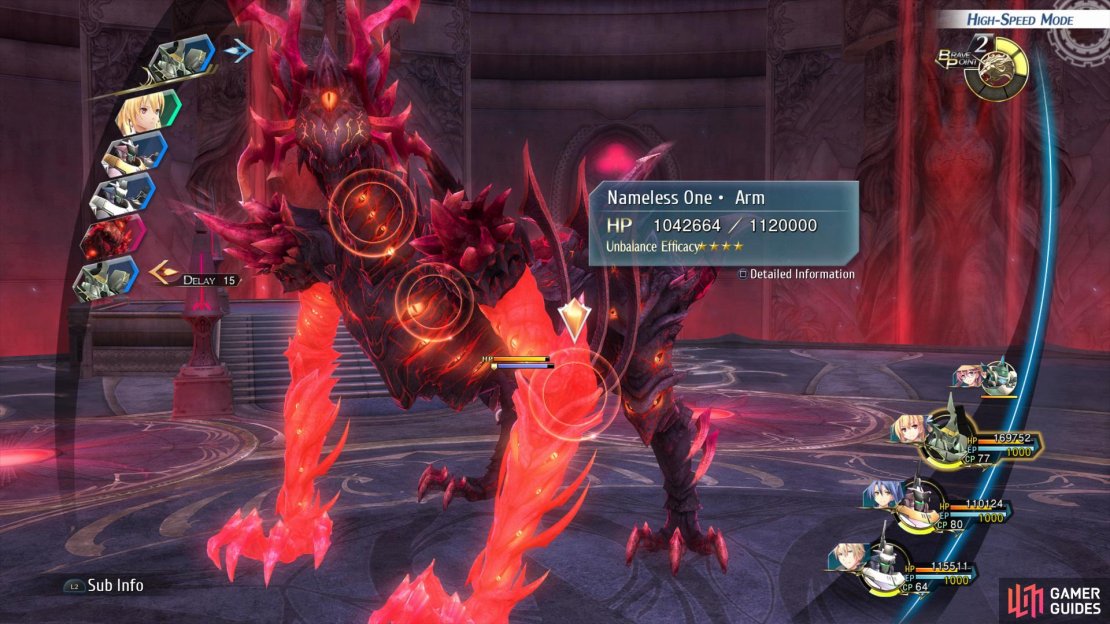
(1 of 4) When the Nameless One lowers his neck with
The second phase of this battle is a Panzer Soldat fight, so you’ll need to hear the following weak spots in order to take it out.
| Enemy | HP | Positions | Neck | Body | Arms |
|---|---|---|---|---|---|
| Nameless One | 1120000 | Normal Stance | ☆☆☆ | ☆☆ | ☆☆☆☆ |
| Charged Stance (Raised Head Targeting Group) | ☆ | ☆☆☆☆ | ☆☆ | ||
| Charged Stance (Glowing Horns) | ☆☆☆☆ | ☆☆ | ☆ | ||
| Charged Stance (Standing to the Right) | ☆ | ☆☆ | ☆☆☆☆ | ||
| Charged Stance (Lowered Head) | ☆☆☆☆ | ☆ | ☆☆ |
-
Normal Stance (Focus on Arm)
-
Charged Stance with head raised targeting everyone (Focus on Body)
-
Charged Stance with glowing horns (Focus on Neck)
-
Charged Stance whilst standing to the right targeting everyone (Focus on Arms)
-
Charged Stance lowered head (Focus on Neck)
After you’ve the cutscenes that take place after the battle you’ll face Nameless One for a final time. All you’ll need to do is hit any spot and then use a finisher to kill him.
Upon defeating him you’ll view some more scenes and Trails of Cold Steel III will finally be finished.


No Comments