

#Key Information
| Side Quests | Client | AP |
|---|---|---|
| E. Crossbell Highway Monster | Crossbell Police | 4 |
| Geofront F Sector Monster | Crossbell Police | 4 |
| Where is my Meowster? (Hidden) | Coppe | 4 |
| Sub Events | Location |
|---|---|
| Radio Story #4 | Patiry - Central Square - Times Department Store |
| Black Records 4 | Ursula Road 2 |
| Landscape Photo #5 | Stargazer Tower Entrance |
| New Character Notes | Location |
|---|---|
| Towa | Derfflinger Car 1 |
| Gustaf | EX Camp |
| Celine | Crossbell City - Central Square - Former SSS Rooftop |
| Becky | Crossbell City - East Street - Business Owner’s Association |
| Kenneth | Speak to Kopan - East Crossbell Highway 3 |
| Items | Location |
|---|---|
| Heartless Edgar - Part 5 (Book) | East Crossbell Highway 3 - Speak to Kopan |
| Double Amino (Fishing Gear) | Speak to Freddy after catching 15 different Types |
| Brown Hair - Rean (Costume) | Crossbell City - Central Square - Former SSS Building |
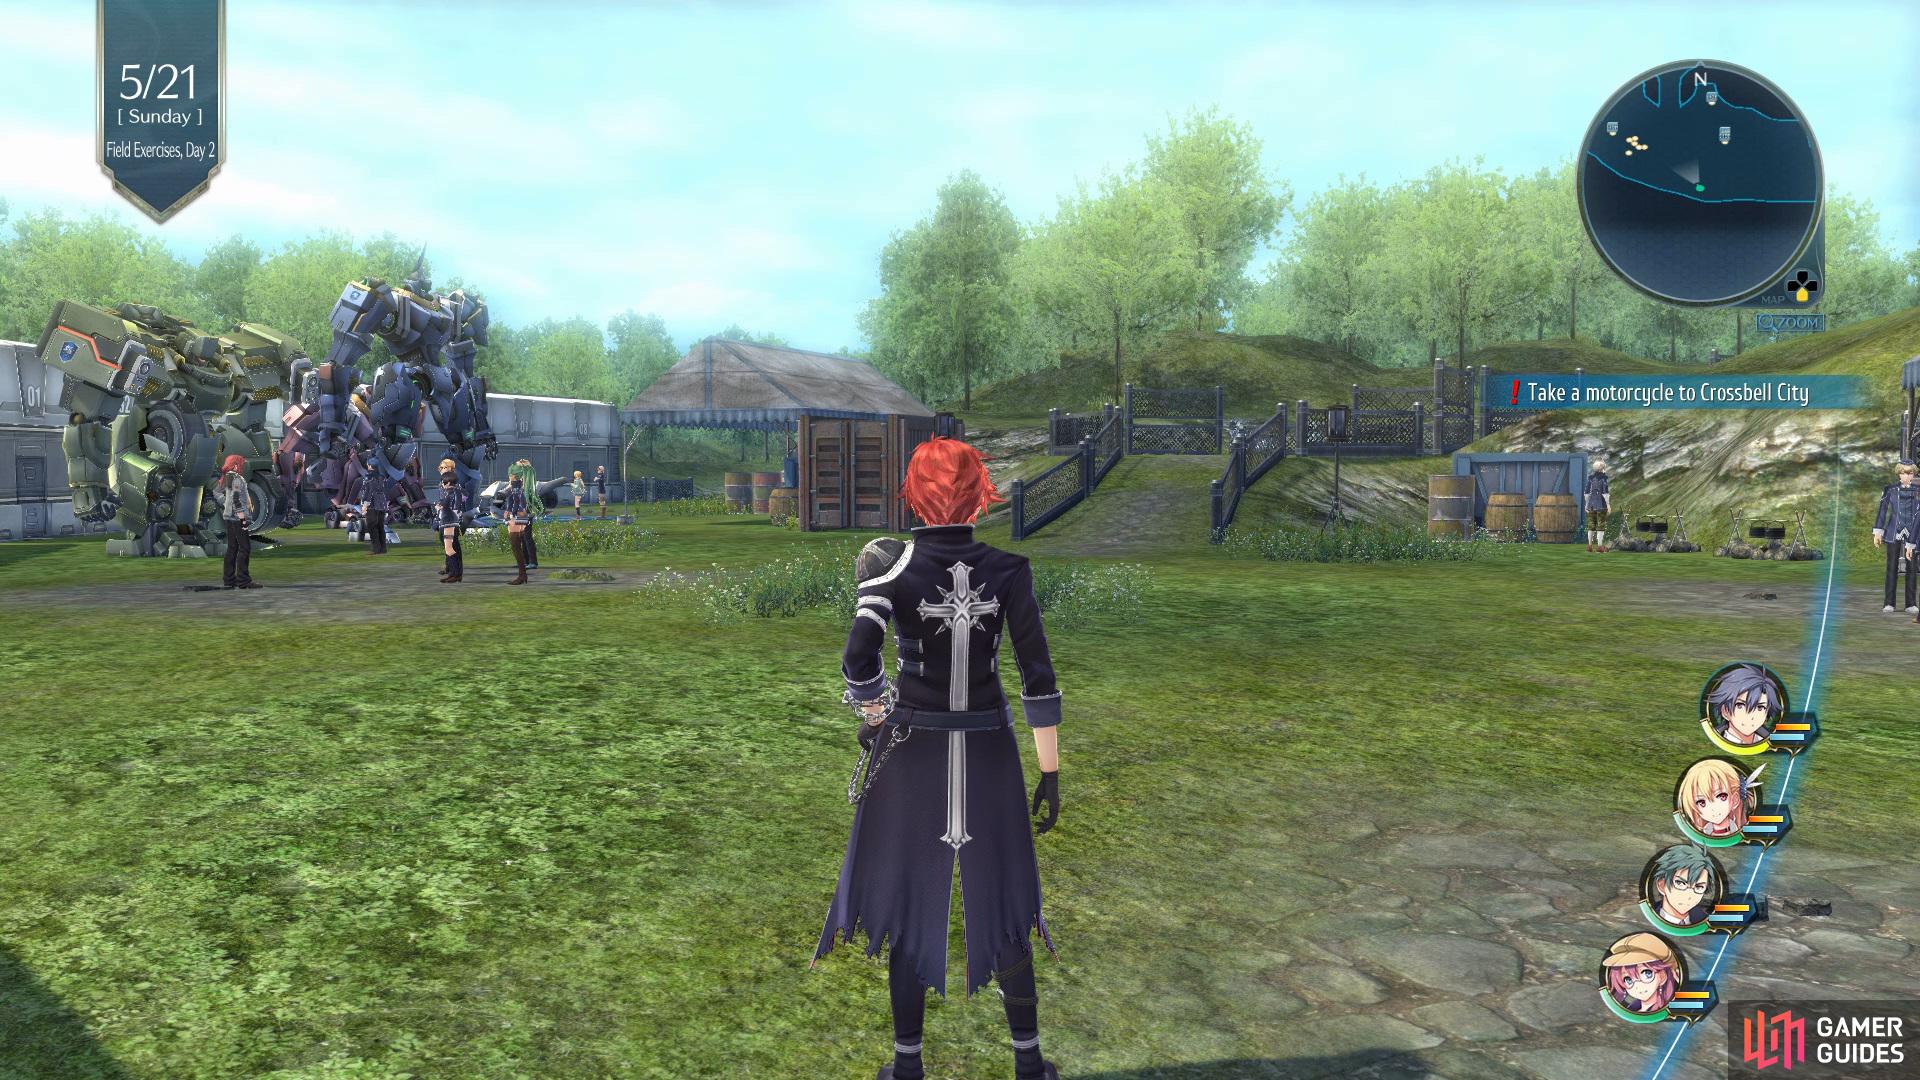
Take a motorcycle to Crossbell City
Once you’ve returned to the EX Camp after an intense battle against Campanella and McBurn, you’ll want to speak with Towa in Car 1 for a Character Note, then pop into 04-C in Car 4 to view an event, now go back out onto the field and talk to Gustaf for another Character Note. Finally, speak with Freddy to acquire the Double Amino Fishing Gear for catching 15 or more Fish, then go up and take the Motorcycles out of the Camp to view a scene.


(1 of 2) Speak with Towa in Car 1 to obtain her Character Note
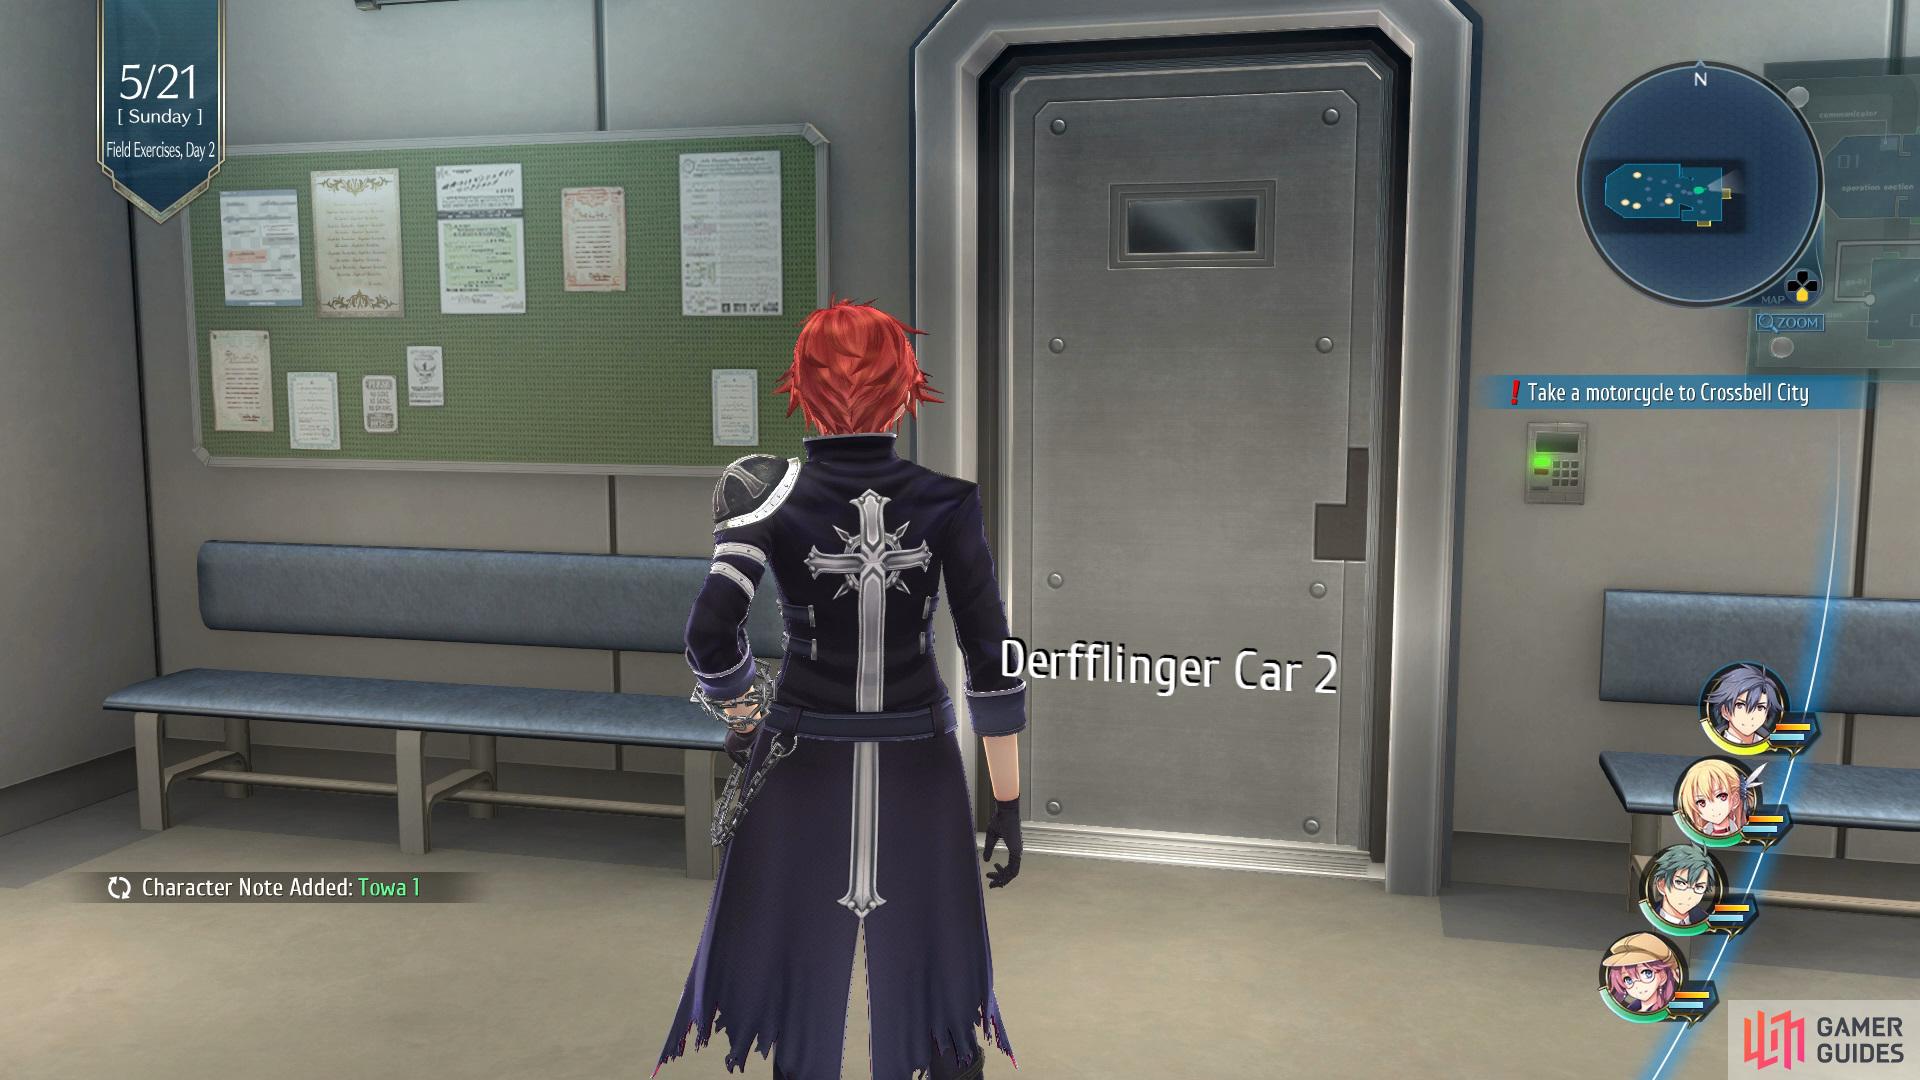
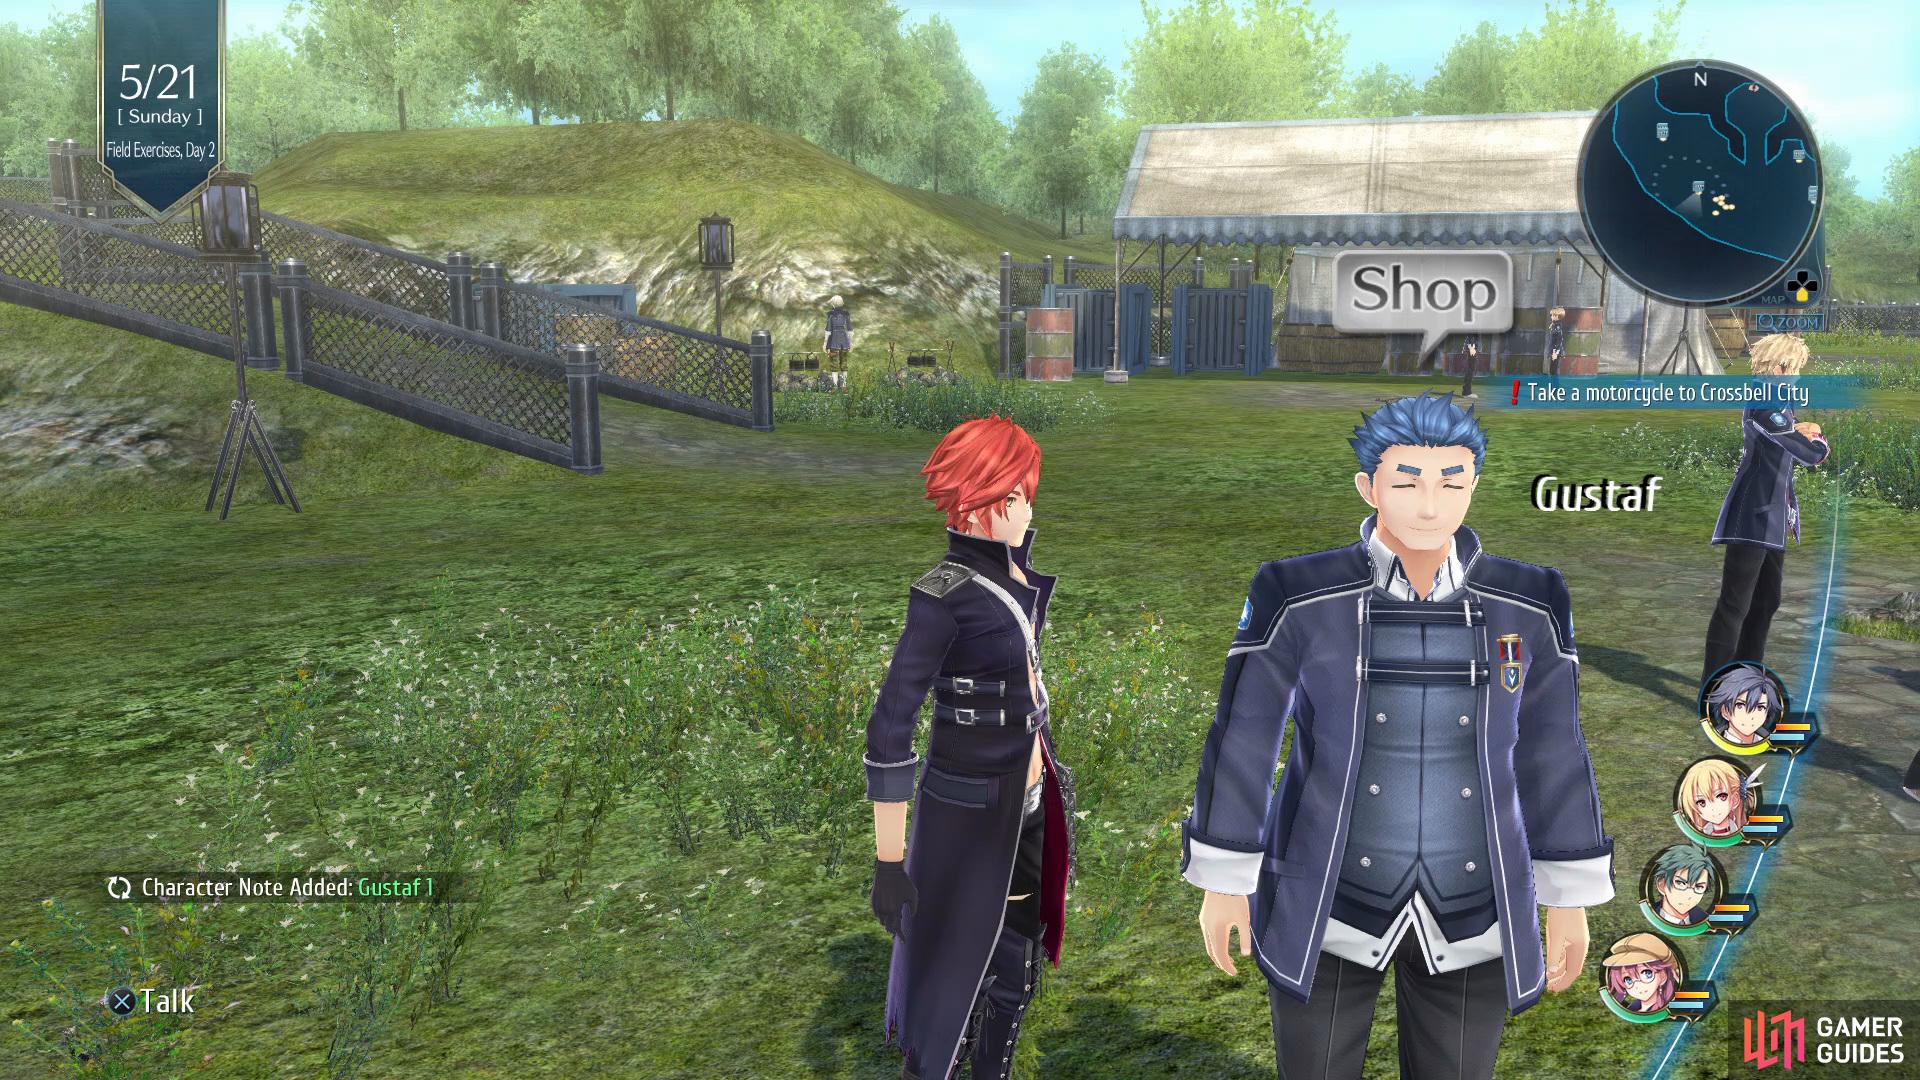
Speak with Towa in Car 1 to obtain her Character Note (left), then head out onto the field to talk with with Gustaf to for his Character Note. (right)
After the conversation with Tio has come to a close, you’ll be given two Quests to accept, East Crossbell Highway Monster and [GeoFront F Block Monster]. Before you leave you’ll want to interact with the computer terminal to speak with Sharon, then examine the desk in the room to the north of 2F, now go up to the 3F and interact with the Mishy. Exit the room and go up to the top floor to find a bunch of boxes, interact with this to obtain Brown Hair - Rean, then go out onto the rooftop and talk to Coppe for a Character Note on Celine.


(1 of 2) Head up to the top floor of the SSS Office and interact with the boxes to acquire Brown Hair for Rean
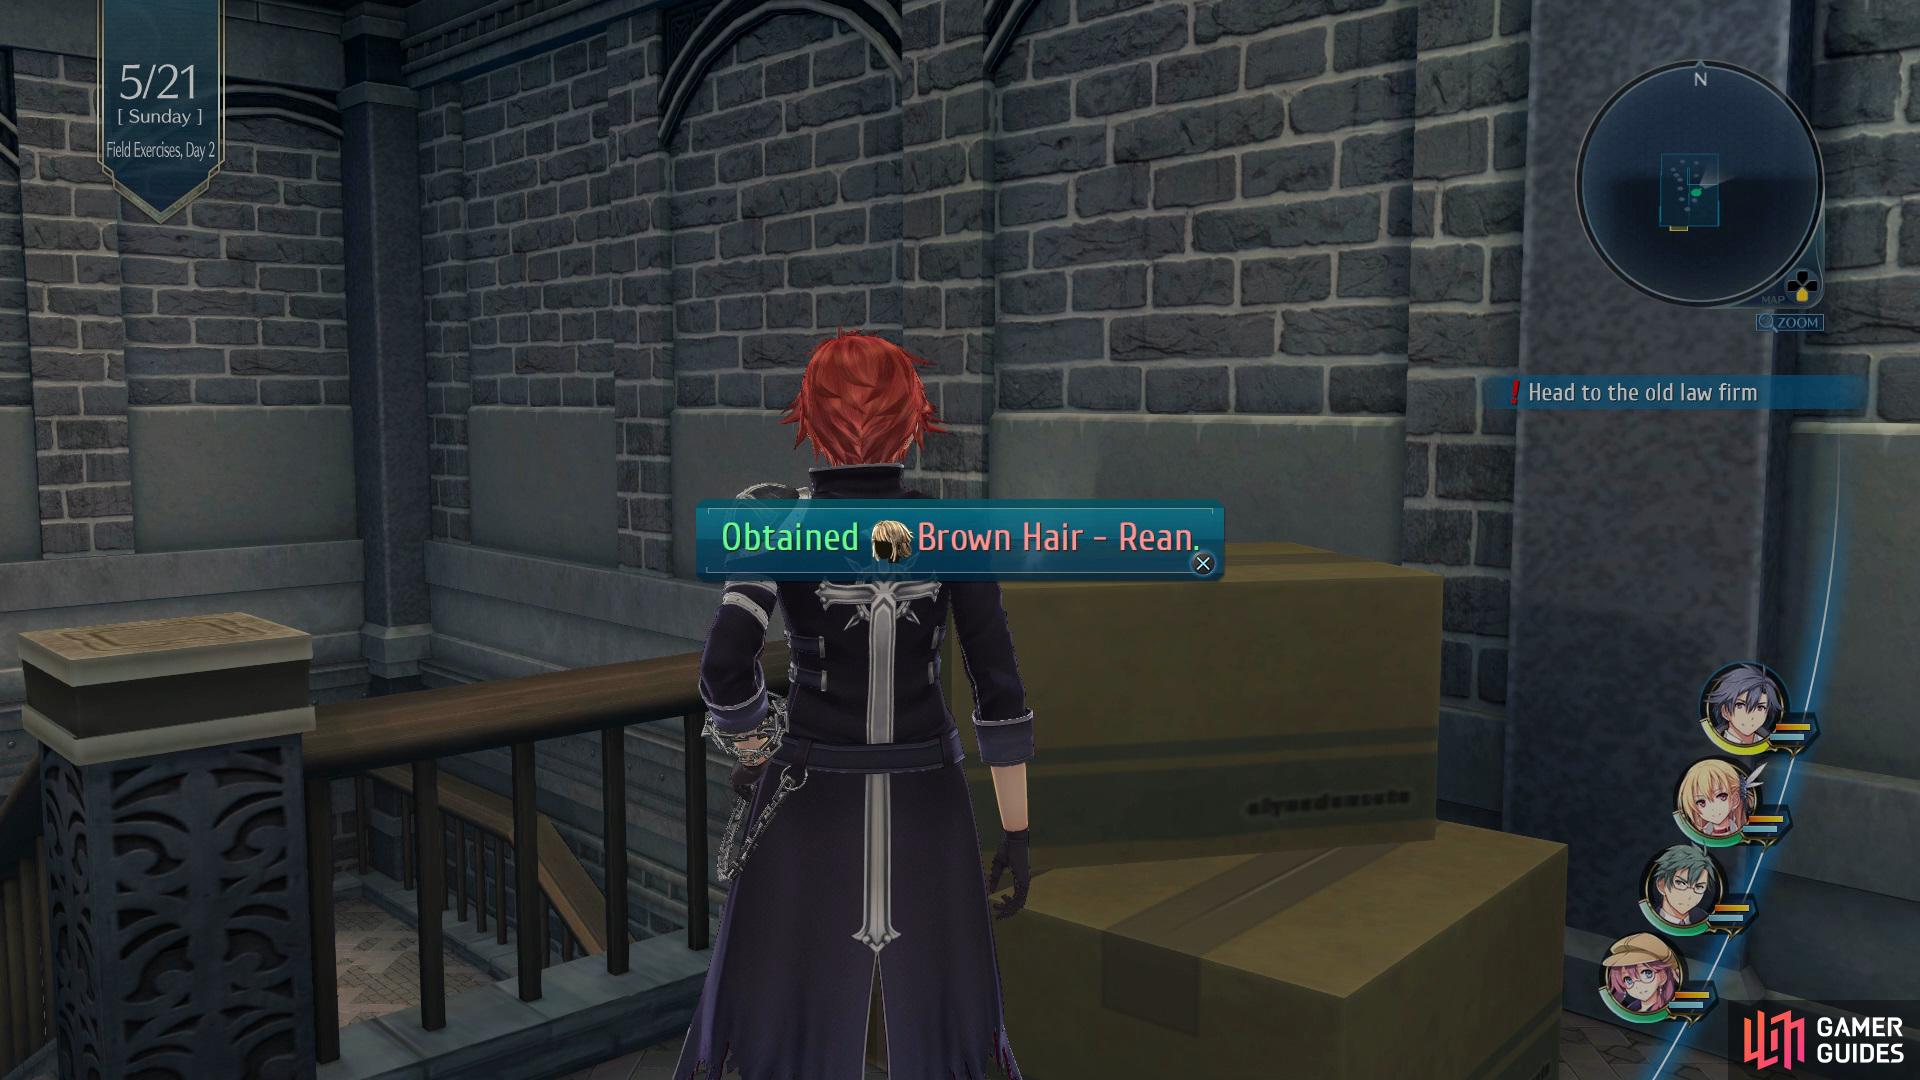
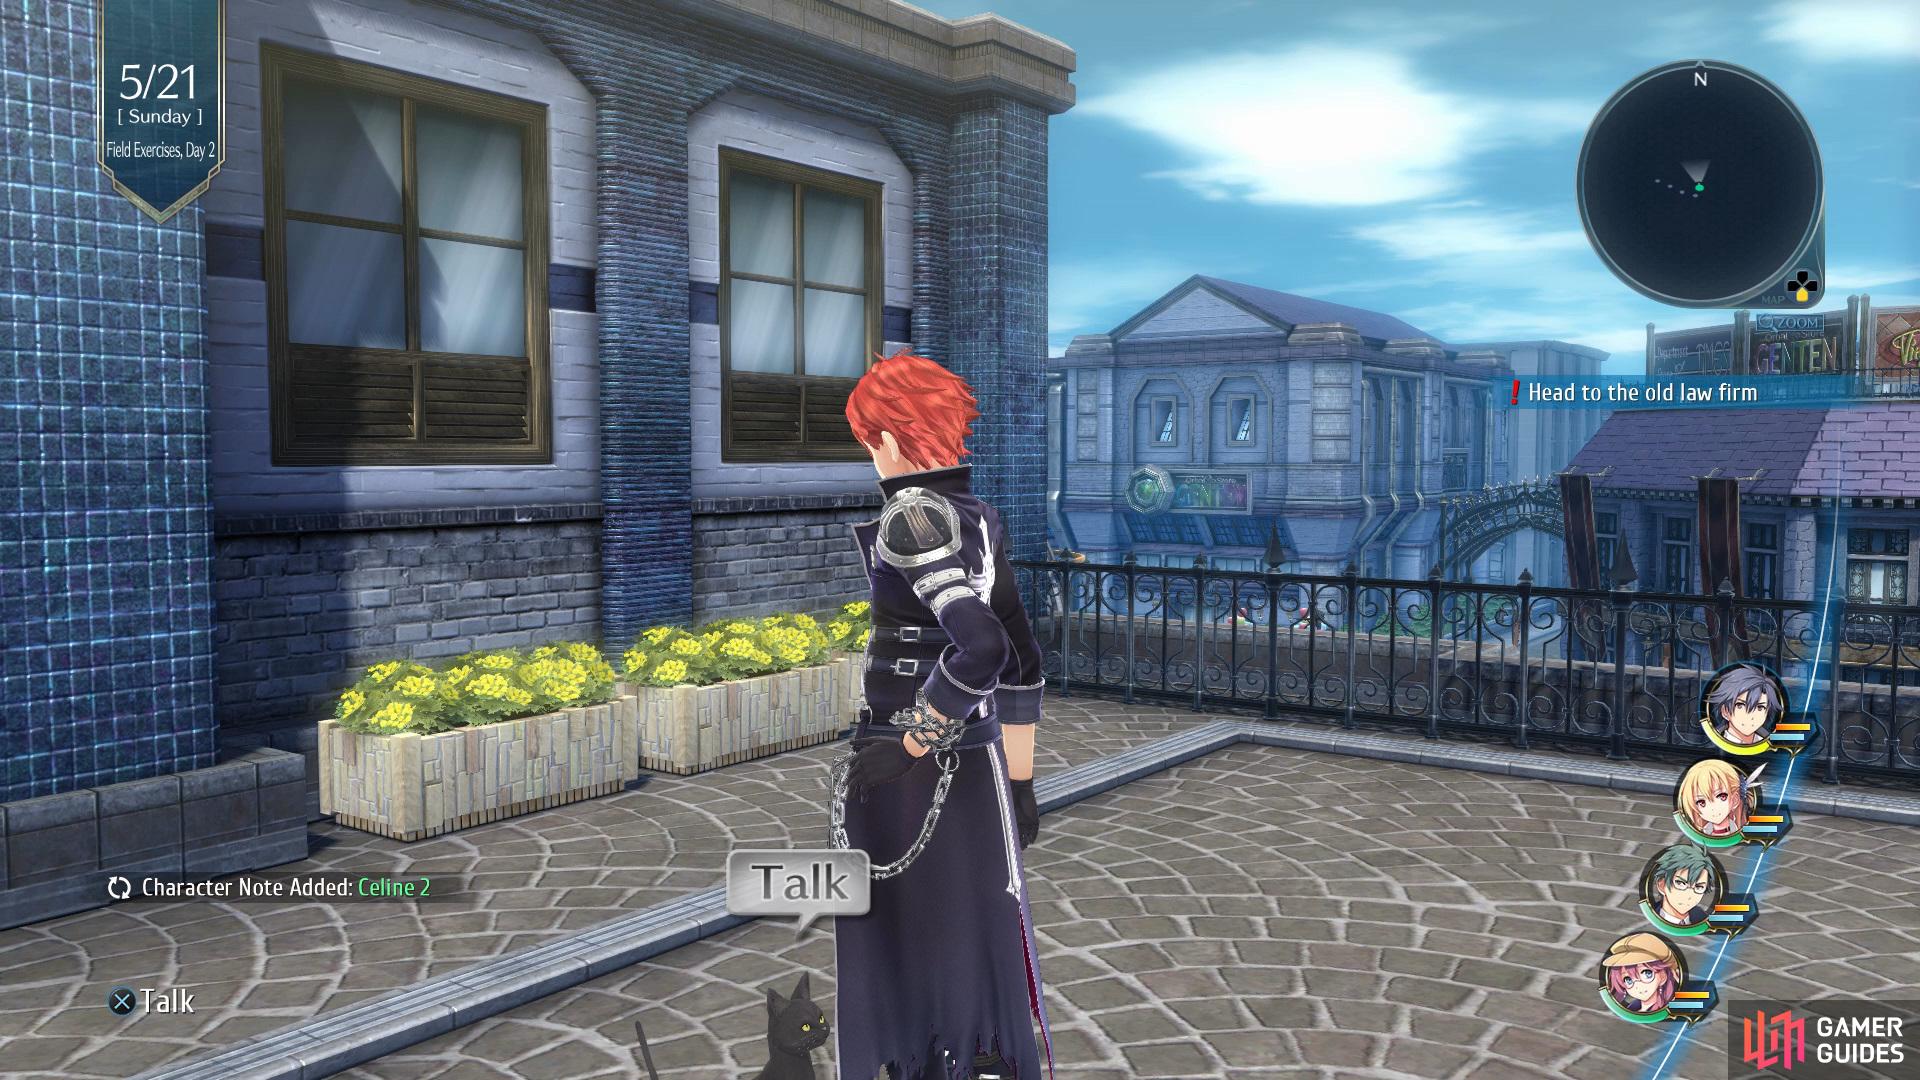
Head up to the top floor of the SSS Office and interact with the boxes to acquire Brown Hair for Rean (left), now go onto the roof and chat to Celine for her Character Note. (right)
Go back out onto the main street, then head into Times Department Store to speak with Patiry for Radio Story #4 to give to Munk that he can put into his Radio Station, now pop into Orchis Tower and walk along the east corridor to view an event with Princess Alfin. Exit the tower and go into Heiyue Trading, Ltd. to view another event, then go into the basement of the Abandoned Law Office in West Street to get into the Geofront B Sector, S-II 1.
Explore Geofront B Sector, S-II 1
| Enemy | HP | Slash | Thrust | Pierce | Strike | Elemental Efficacy | Item Drop |
|---|---|---|---|---|---|---|---|
| Blood Monad | 3698 | ☆☆☆ | ☆☆ | ☆☆☆☆ | N/A | E - 140, WA - 100, F - 120, WN - 80 | Globby Fat, Clear Gelatin |
| Stray Dog | 5711 | ☆☆ | ☆☆☆ | ☆☆ | ☆ | E - 100, WA - 80, F - 150, WN - 120 | Globby Fat, Beast Flesh |
| Ice Condor | 5701 | ☆☆ | ☆☆ | ☆☆☆ | N/A | E - 140, WA - 80, F - 120, WN - 100 | Beast Flesh, U-Material |
| Torso Mk. III | 5698 | ☆ | ☆ | ☆☆ | ☆☆☆☆ | E - 100, WA - 100, F - 100, WN - 100 | EP Charge I, U-Material |
| Guelmar | 9184 | ☆☆☆ | ☆☆ | ☆ | ☆☆☆ | E - 120, WA - 160, F - 100, WN - 60 | Chitinous Shell, Reviving Balm |
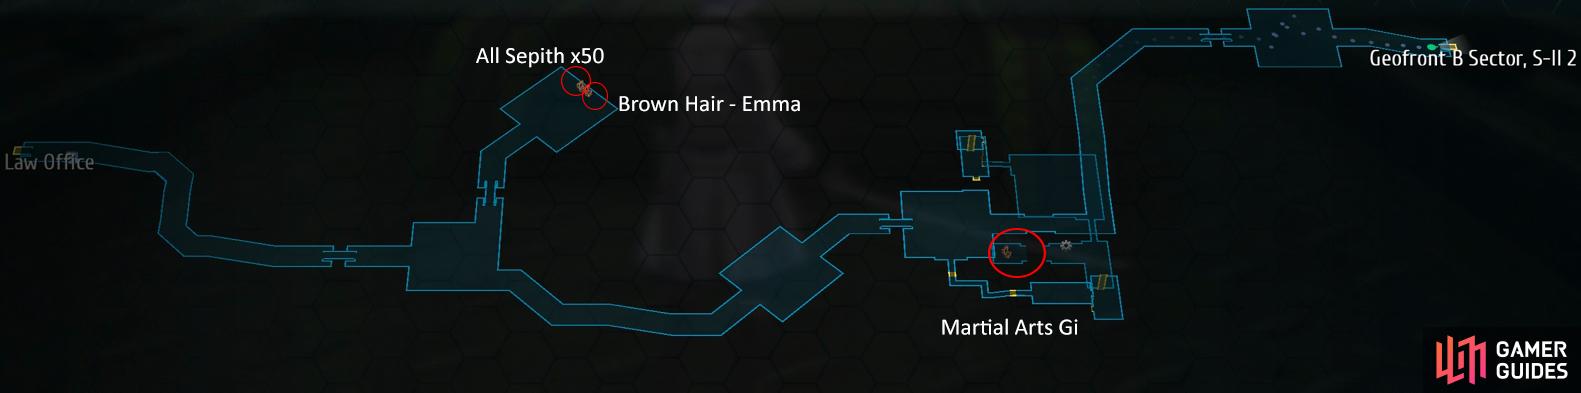
Follow the path along and the go left to find two Chests which contains, Brown Hair - Emma and All Sepith x50, now take the right path until you reach a large open room and then look to your right to find a vent. Head through the vent and interact with the Operating Panel to access the Red Chest which contains a Martial Arts Gi. Use the Operating Panel once more and then climb back up to continue following the path into Geofront B Sector, S-II 2.
Geofront B Sector, S-II 2
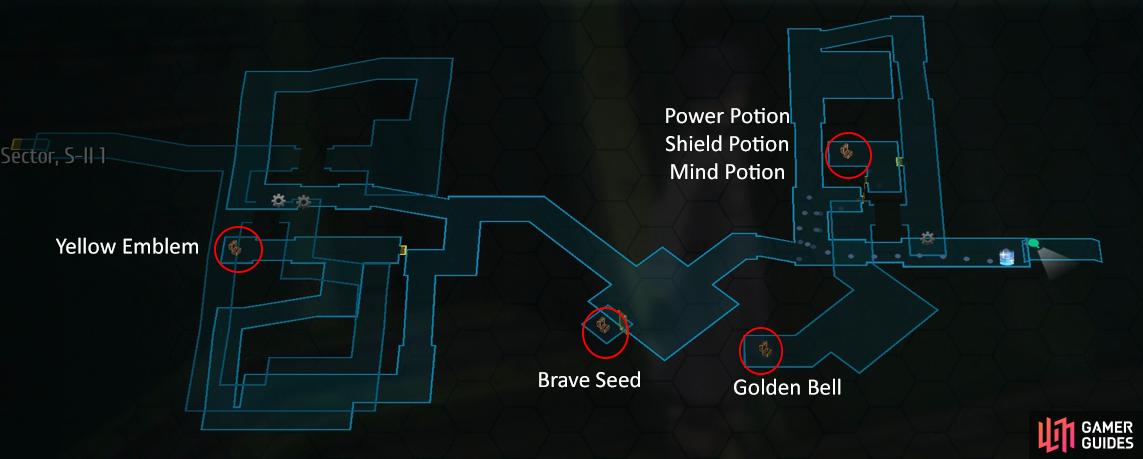
Continue along the path and eventually you’ll reach an Operating Panel, interact with it to activate the bridges and then proceed across. Interact with the second Operating Panel that you’ll come across and then take the right path first to find a Chest with a Yellow Emblem inside, this gives +50 Defense and prevents Seal, Mute, and Stat down. Take the main path into an open room and then climb up the ladder on the right to find another Chest that contains a Brave Seed.
Drop back down and go into the room ahead, here you’ll want to climb up the ladder on the left to find a Chest that contains a Power Potion, Shield Potion, and a Mind Potion, now follow the path on the right to find a Red Chest that contains a Golden Bell, this halves the Delay when using Space Arts. Go back and interact with the Operating Panel, then drop down to enter the final room where you’ll fight Magic Knight Zelsheim
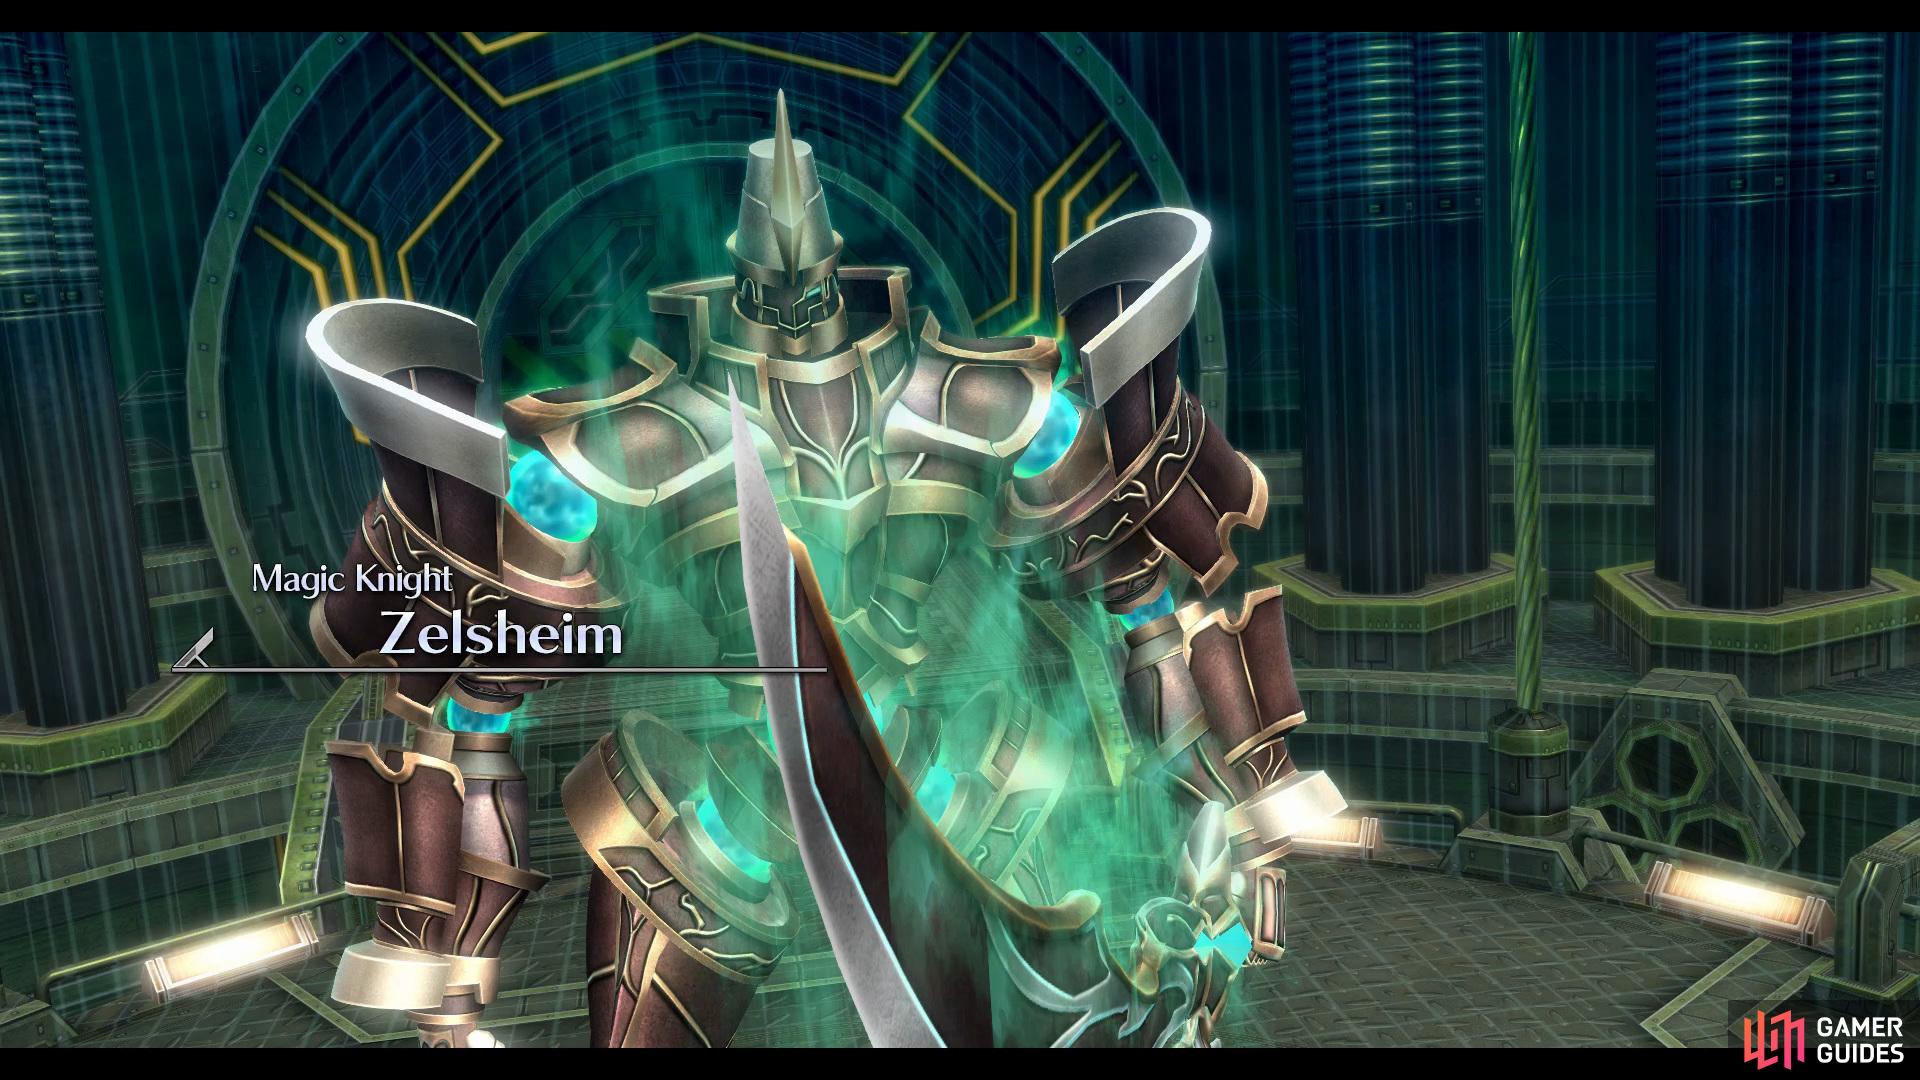
Boss: Magic Knight Zelsheim
| Enemy | HP | Slash | Thrust | Pierce | Strike | Elemental Efficacy | Item Drop |
|---|---|---|---|---|---|---|---|
| Magic Knight Zelsheim | 45170 | ☆☆ | ☆☆ | ☆☆ | ☆☆ | E - 50, WA - 100, F - 150, WN - 100, TI - 100, SP - 80, MI - 120 | Sleep III |
To begin this battle you’ll want to put on the Radical Design Brave Order, this will increase your Break Damage by 150% as well as restoring 30% HP for 12 Rounds, now use any attacks with a high break rating to quickly put the Knight into the Break Status. Once you’ve done that you’ll want to use the Sigma Operation Brave Order to put delay on the Knight and then keep using Normal Attacks until he gets another turn then use your S-Crafts to finish off any remaining HP. Make sure to Impede any attacks he attempts to Charge up as well as using Aeon Shield for Absolute Reflect and to restore your CP.
- Nightmare Strategy
This is one of the more simple boss battles on Nightmare, you have two extremely useful Brave Orders in Radical Design and Sigma Operation. As usual when you have the Old Class VII with you, the key to victory lies with effective use of these. Essentially, think of these two as upgraded versions of Sledgehammer and Wind Blade and apply the same strategy here. Activate Radical Design, break the boss and then switch to Sigma Operation to keep delaying it. With Sigma Operation, your attacks will pack a punch too and if you can get Rean into Spirit Unification, then you’ll have an even easier time. As for Zelsheim, his attacks aren’t too deadly and you can effectively nullify Guardian Howl by using Heavenly Gift for Insight.
Return to the SSS Office


(1 of 2) Go into the Business Owner’s Association and talk to Becky for her Character Note
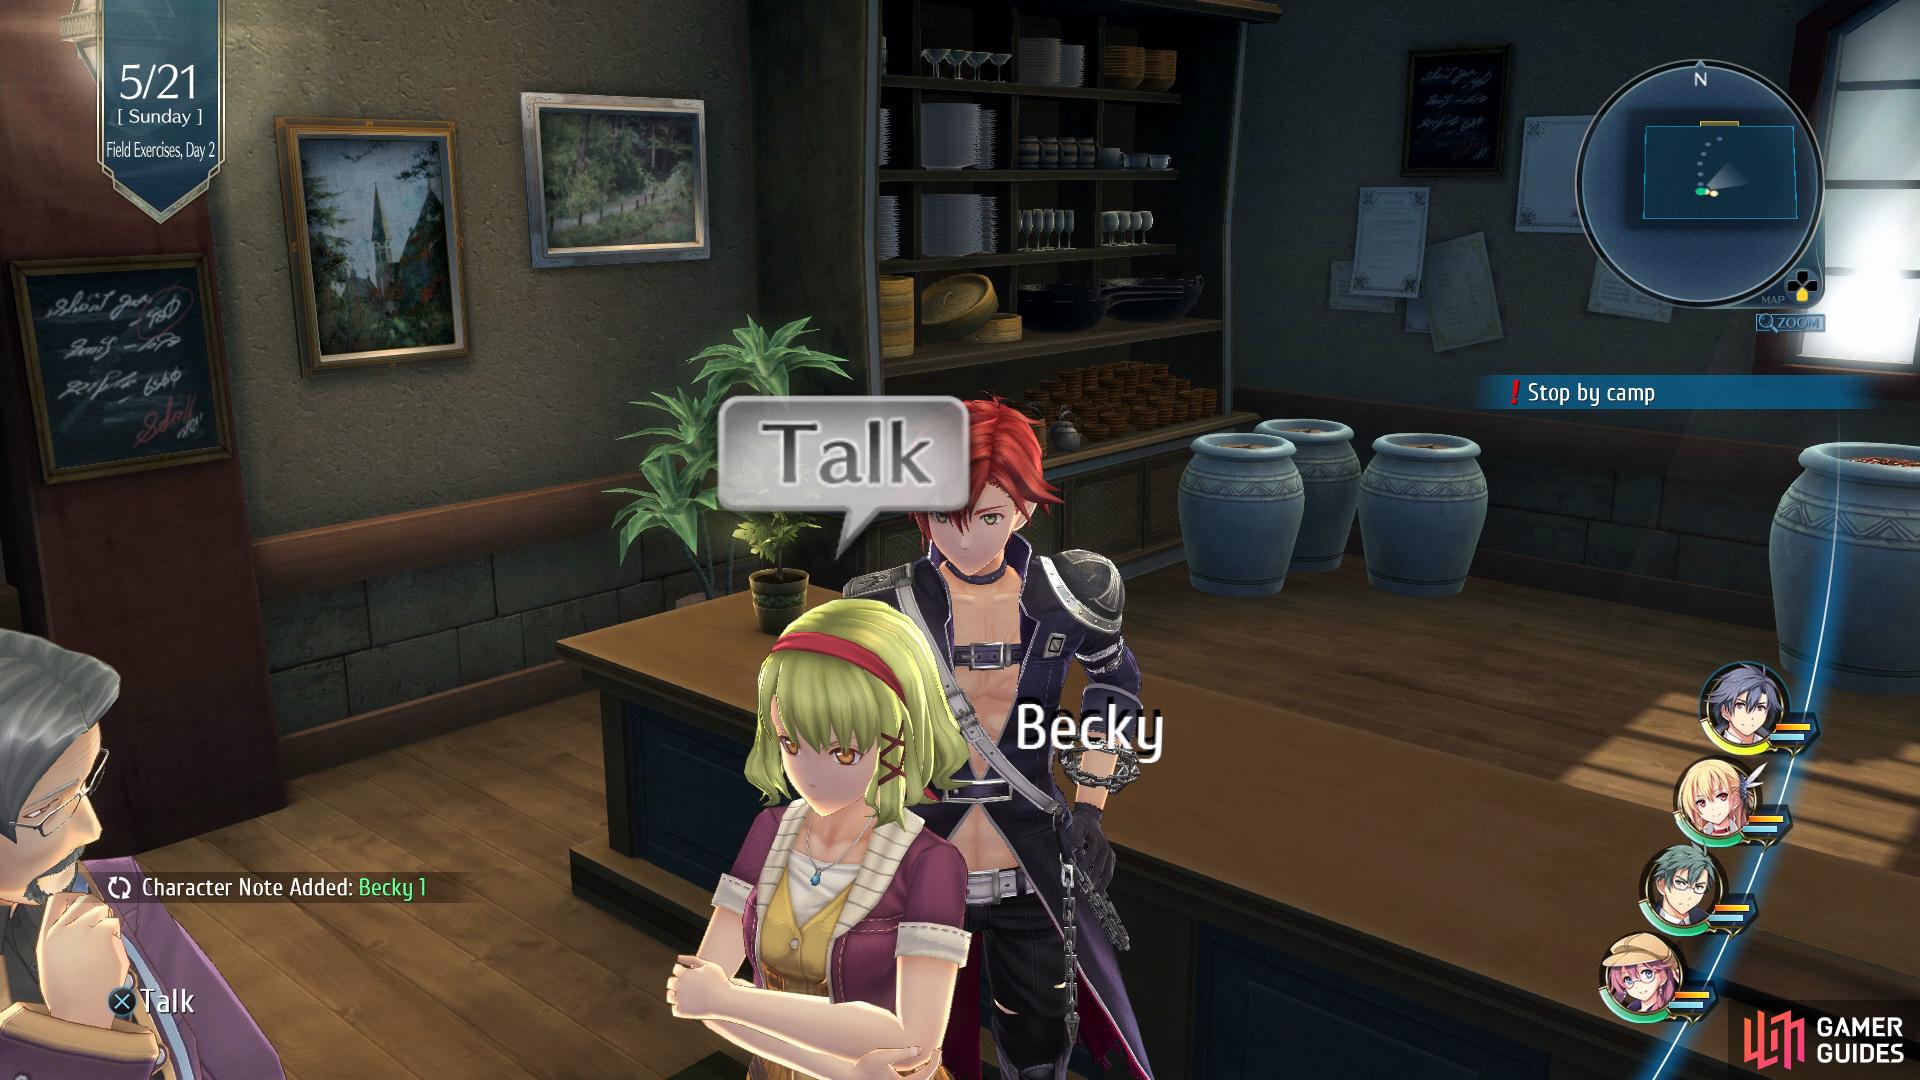
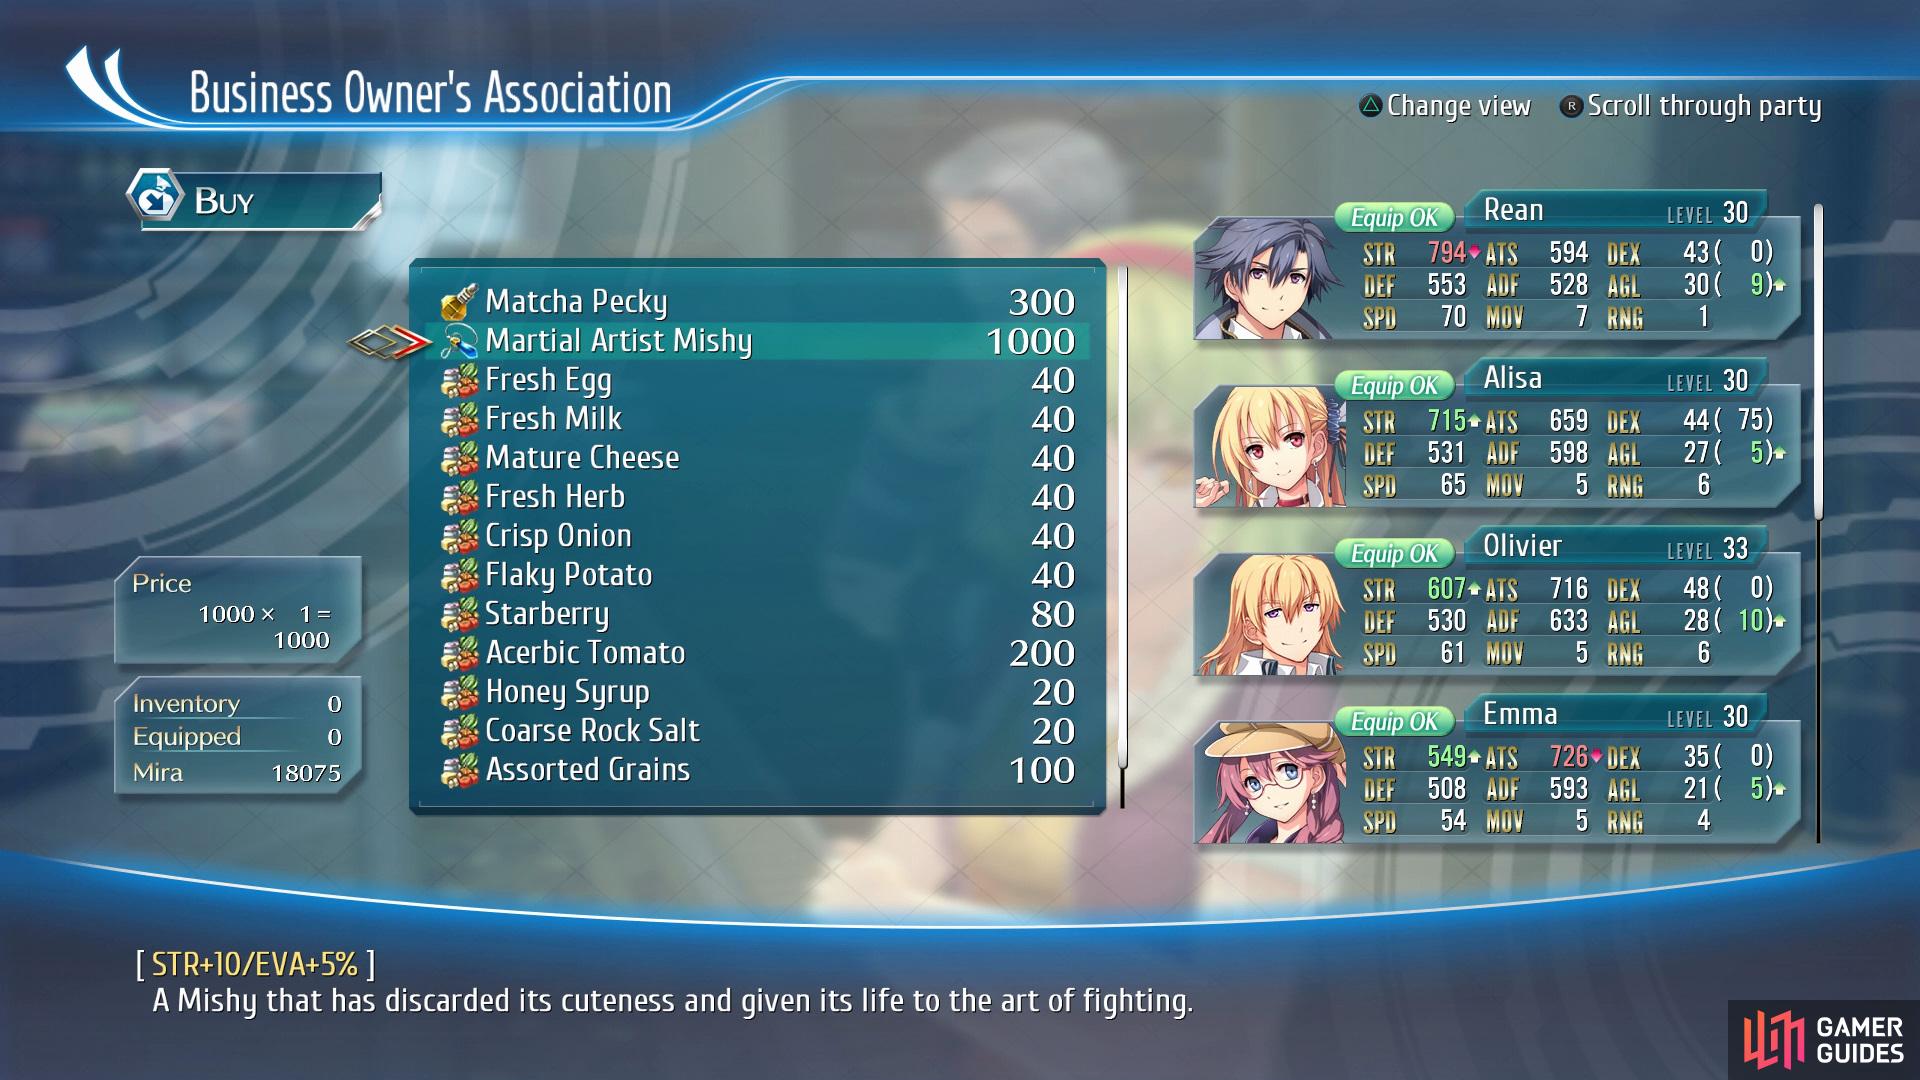
Go into the Business Owner’s Association and talk to Becky for her Character Note (left), then purchase the Martial Artist Mishy before leaving. (right)
Return to Crossbell City to view a scene, then head into the Abandoned Law Office to view another scene, now go into the Business Owner’s Association and speak with Becky for her Character Note. Purchase the Martial Artist Mishy from Becky before leaving, then make your way over to the Orchis Tower Front to view an event, now go into RF, Crossbell Branch to view a cutscene. Finally, head into the Harbor District and accept the Where is My Meowster? Side Quest from Coppe.
Side Quest: Where is My Meowster?
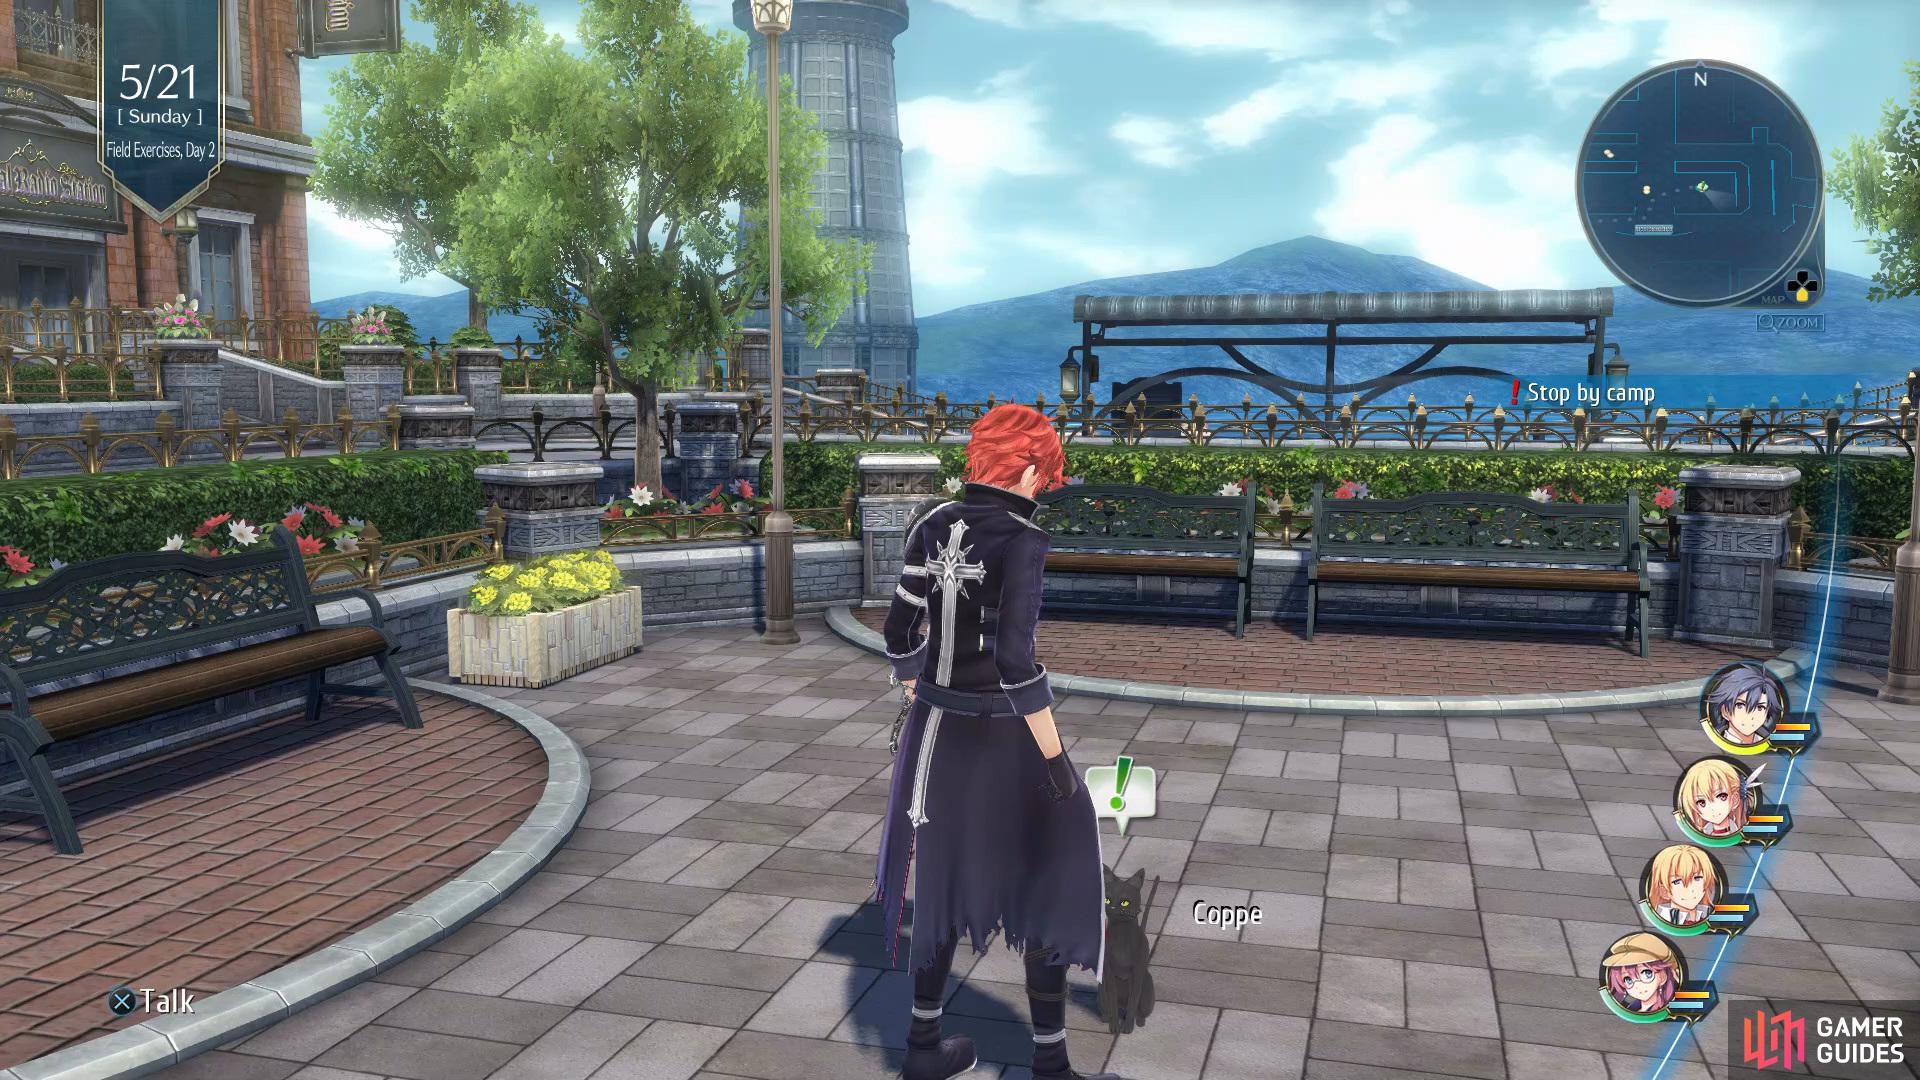
Head into the center of the Harbor to accept this Side Quest from Coppe.
Once you’ve accepted the Quest, head through the West Exit of West Street and examine it, then examine the South Exit of Station Street, now finally examine the East Exit of East Street to view a scene. After the scene has come to a close you’ll want to head into East Crossbell Highway 2 to defeat the three Blade Fangs to complete the Quest. Upon completion you’ll obtain the Prankster Quartz, this gives HP+300 and will give you a 70% chance to make a peculiar dish.
Optional Quest: E. Crosbell Highway Monster
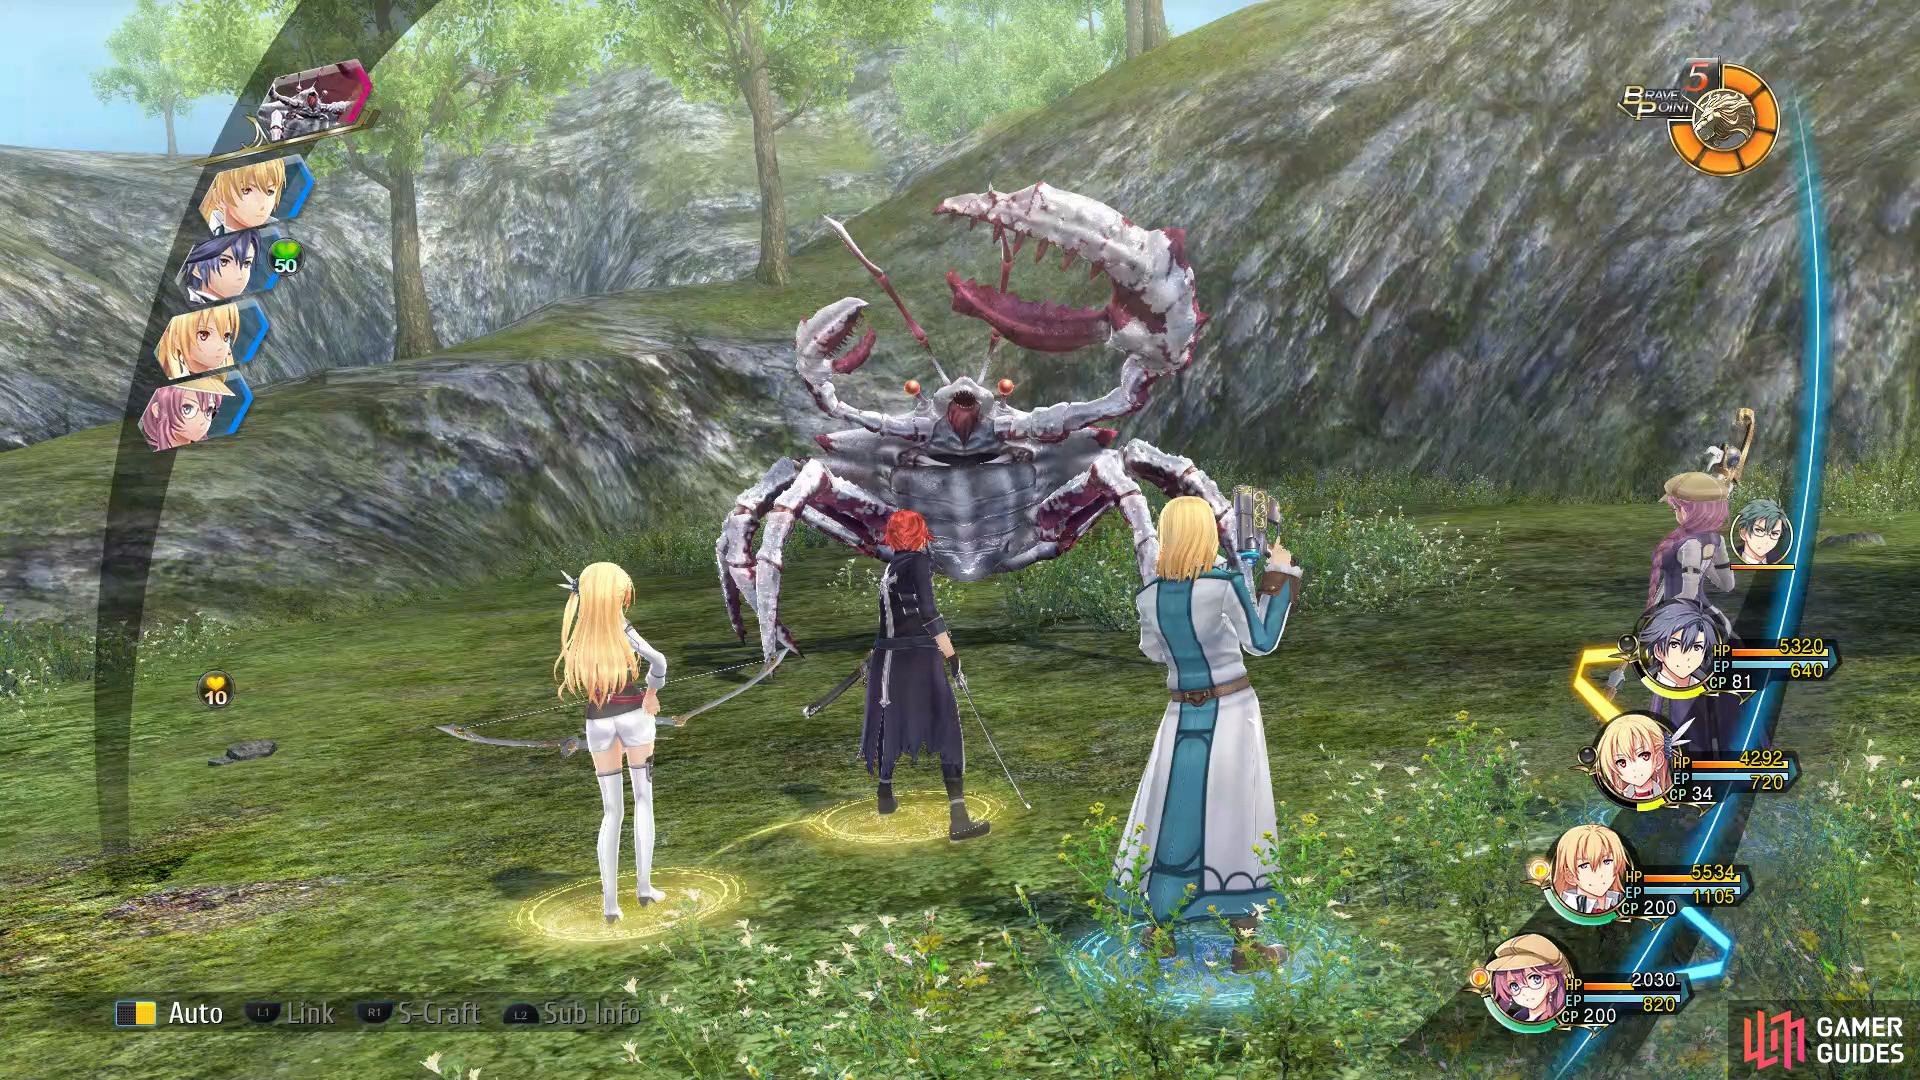
head to the southeast of Crosbell Highway 3 to find the Giga Murder Crab.
Head into East Crossbell Highway 3 and speak with Kopan to acquire the Heartless Edgar - Chapter 5, then go to the southeast part of the area to face the Giga Murder Crab. In order to defeat this enemy you’ll want to make use of two Brave Orders, Radical Design to quickly put the Crab into the Break Status, then Sigma Operation to put delay on the Crabs turn. Try to take as much HP off as possible during this time then finish it off with an S-Craft. Upon defeating the monster you’ll be given Platinum Hair - Alisa.
Optional Quest: GeoFront F Sector Monster
Return to Geofront F Sector - Interior to face the Regenenkopf Type-II.
Fast travel to Geofront F Sector - Interior to face the Regenenkopf Type-II. In order to defeat this monster you’ll want to use the same tactics you used for the Giga Murder Crab battle. Once you’ve defeated it you’ll be given 3000 Mira.
Stop by camp / Head to Stargazer’s Tower


(1 of 2) Head to the Northeast of Ursula Road 2 to find a shiny spot which contains Black Records 2
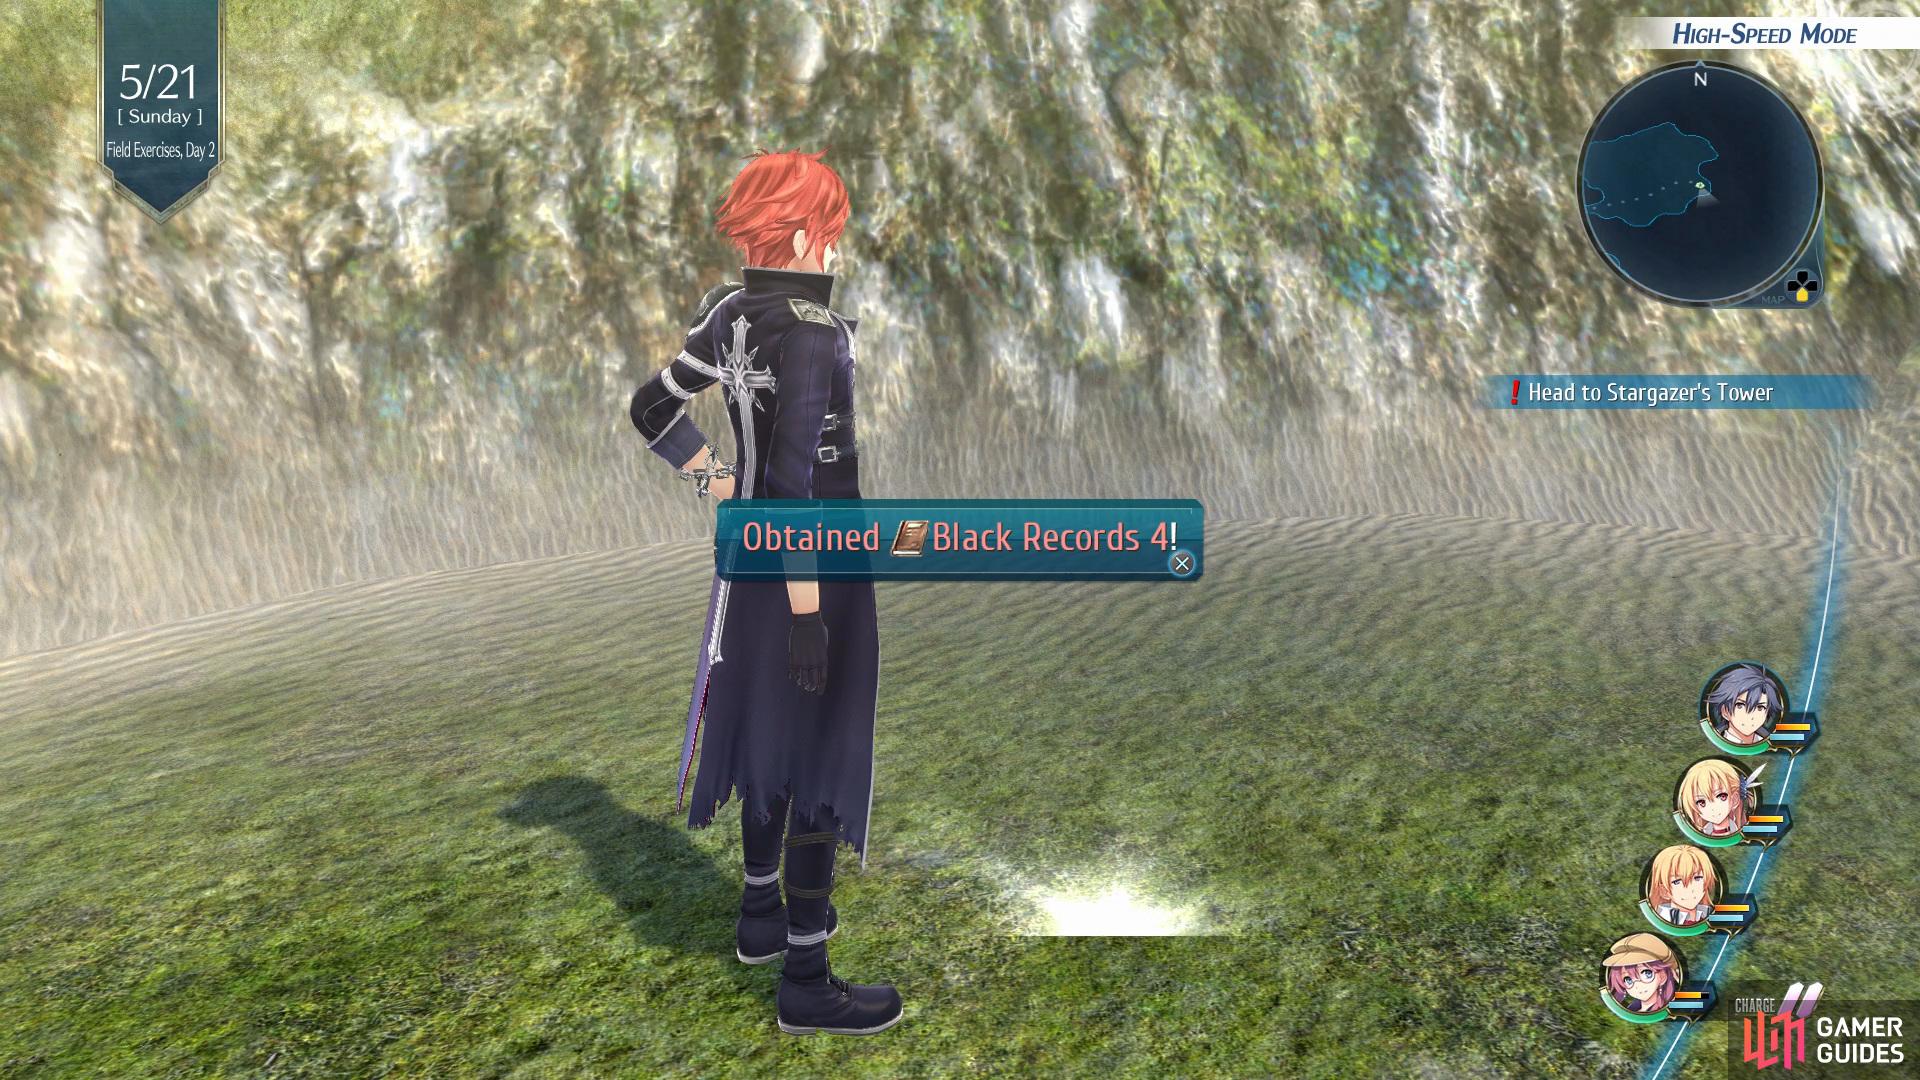
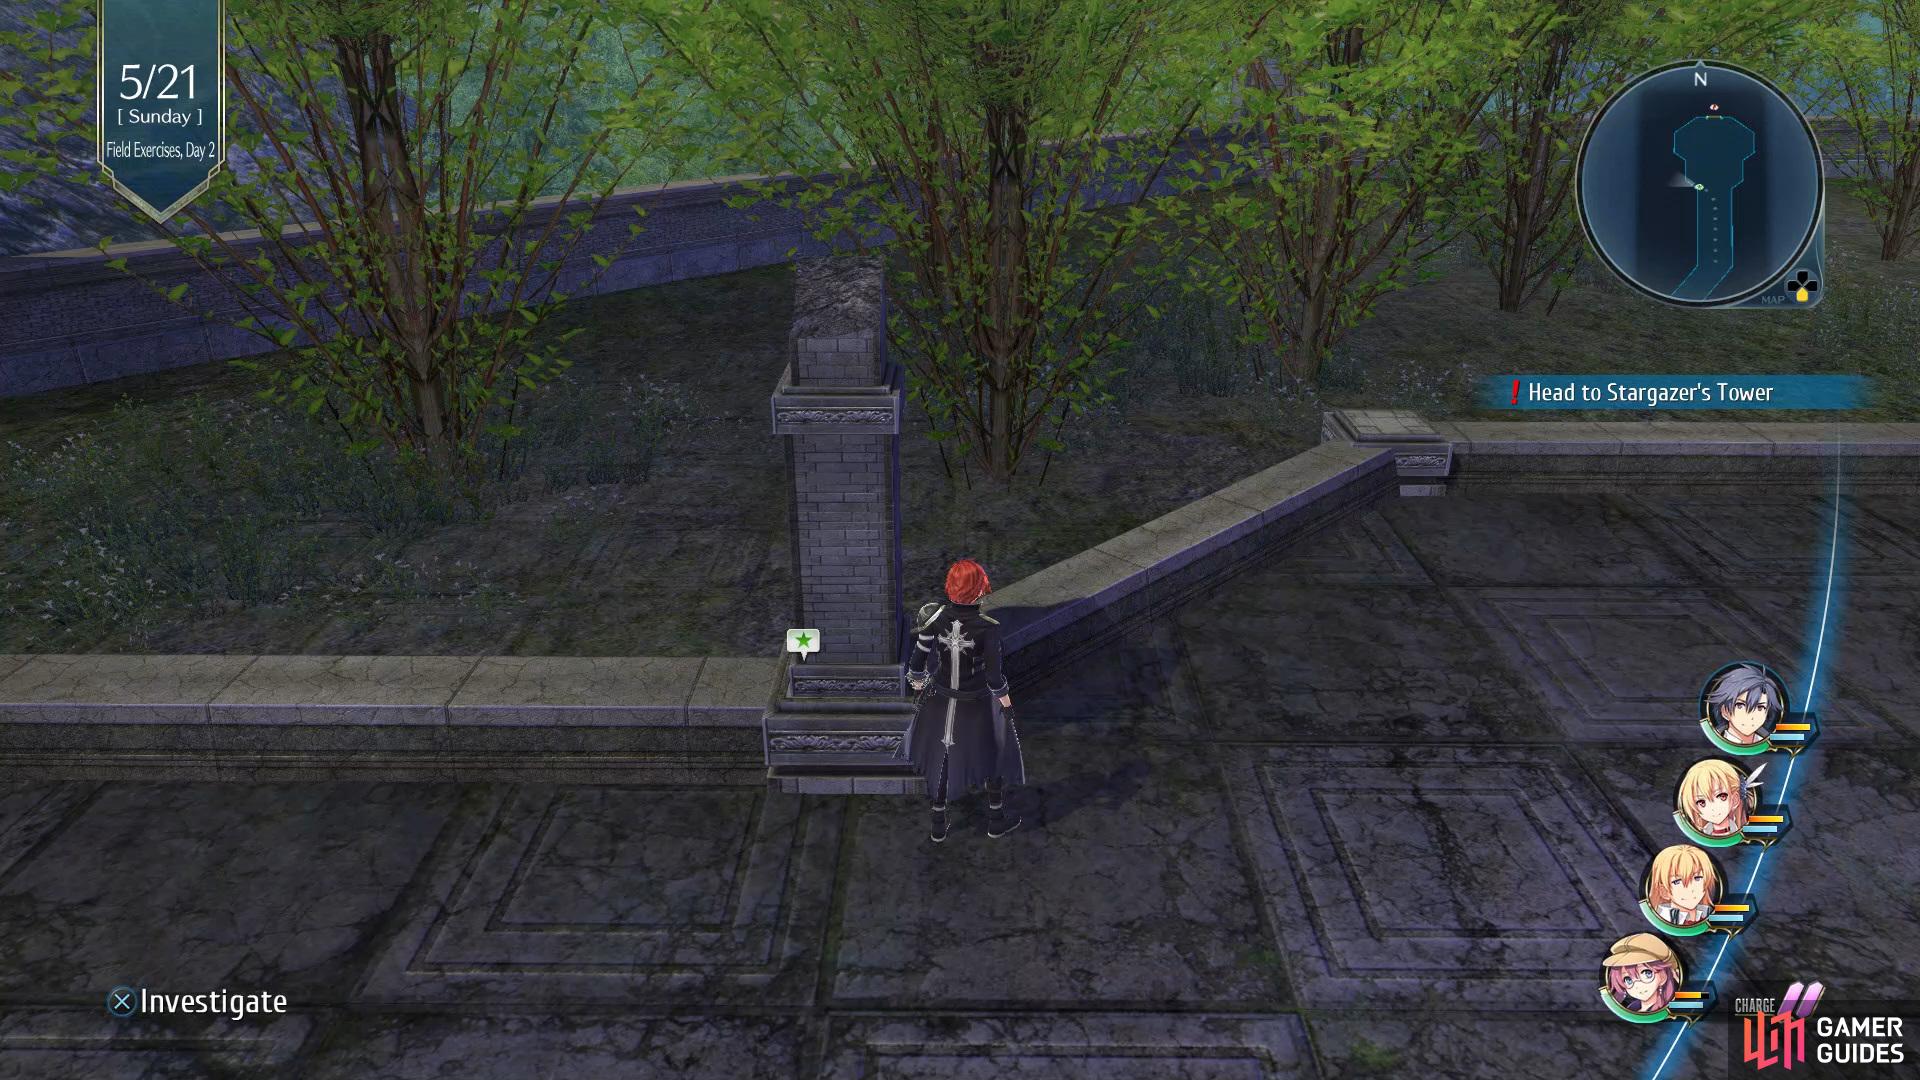
Head to the Northeast of Ursula Road 2 to find a shiny spot which contains Black Records 2 (left), then go to Stargazer’s Tower and interact with the left pillar to find a Landscape Photo. (right)
Go to Station Street and head through the South Exit to return back to the EX Camp. Here you’ll want to investigate room 04-C in Car 4, now take a quick shower to restore your HP, EP, and CP, then go back out onto the field and speak with Musse followed by Ash for two Sub-events. Speak with Stark for 6x Teara Balm, then go into Car 3 and give Sandy the Peach Seeds for 6x Spirit Droplets.
Exit the Camp and go into Ursula Road 2, here you’ll want to make your way to the Northeast section to find a shiny spot, interact with it to obtain Black Records 4, send this to Rosine then take the West Exit into the Stargazer’s Tower. Once you gain control of Rean, interact with the left Pillar for a Landscape Photo, then send it to Vivi via the Arcus II. Finally, head into the tower.
Explore Stargazer’s Tower 1


(1 of 2) Map 1/2
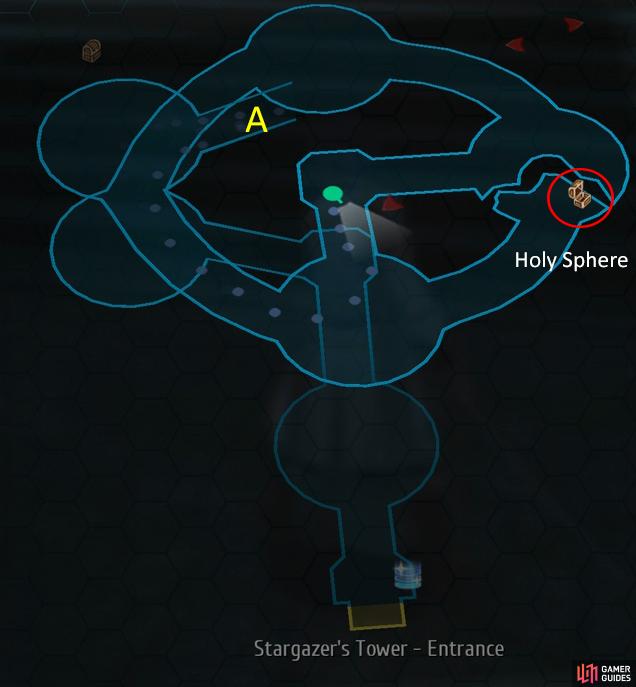
Map 1/2 (left), Map 2/2 (right)
| Enemy | HP | Slash | Thrust | Pierce | Strike | Elemental Efficacy | Item Drop |
|---|---|---|---|---|---|---|---|
| Fyeye | 5889 | ☆☆☆ | ☆☆☆☆ | ☆☆☆ | ☆ | E - 100, WA - 160, F - 120, WN - 80, TI - 100, SP - 80, MI - 140 | Clear Gelatin, Hit 1 |
| Death Slugger | 9187 | ☆☆☆ | ☆ | ☆☆ | ☆☆ | E - 100, WA - 160, F - 120, WN - 80, TI - 100, SP - 80, MI - 140 | Reviving Balm, U-Material |
| Armored Veil | 15279 | ☆☆☆ | ☆ | ☆☆☆ | ☆ | E - 100, WA - 180, F - 120, WN - 60, TI - 80, SP - 160, MI - 120 | Clear Gelatin, Venom Flame |
| Dark Widow | 25179 | ☆☆ | ☆☆☆ | N/A | ☆☆☆ | E - 140, WA - 100, F - 60, WN - 120, TI - 180, SP - 120, MI - 60 | Nightmare II, Speed Breaker II |
| Living Armor | 25175 | ☆ | ☆ | ☆☆ | ☆☆☆☆ | E - 120, WA - 80, F - 100, WN - 160, TI - 140, SP - 100, MI - 80 | Adamantine Shield, Petrify |
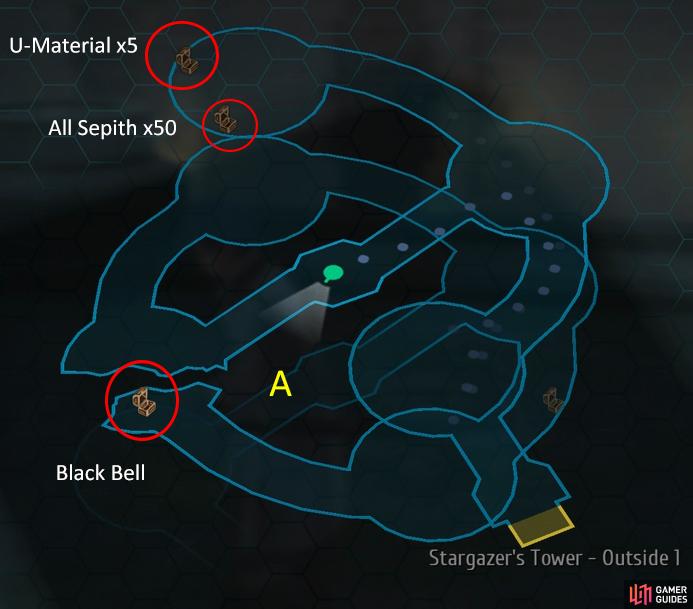
Once you’re inside the Tower’s entrance you’ll want to head through the door ahead to end up in Stargaze’s Tower 1, here you’ll want to follow the path along until you see some stairs leading down to a Red Chest on the left that contains a Holy Sphere, this increases HP by 500 and prevents Deathblow. Go up the stairs on the right, then go up another set on the right to find a Red Chest that contains a Black Bell after taking out a Living Armor.
Continue up the left path and you’ll find two Chests with U-Material x5 and All Sepith x50 inside, now go through the door to Stargazer’s Tower - Outside and head up the stairs into Stargazer’s Tower 2.
- Stargazer’s Tower 2


(1 of 2) Map 1/2
Map 1/2 (left), Map 2/2 (right)
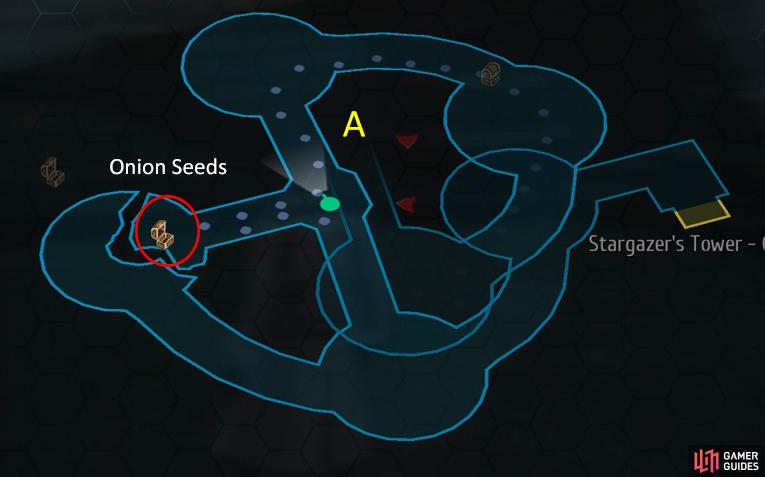
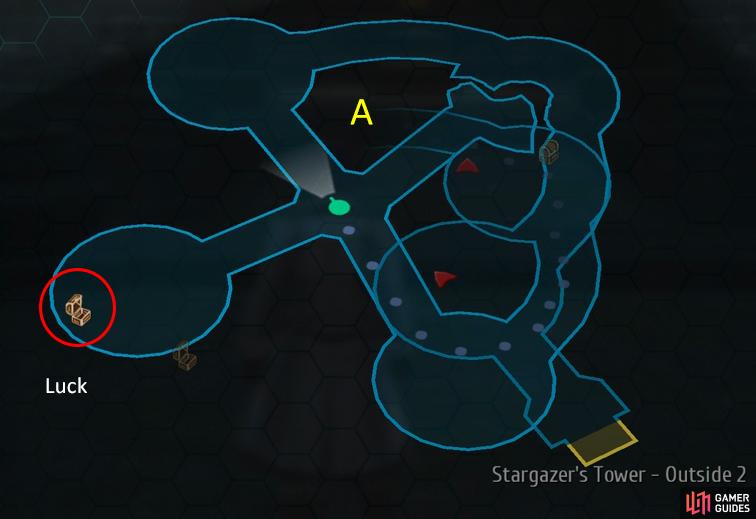
Follow the path straight ahead to find a gimmick, hit this with your weapon to activate a bridge, then head back down and take the stairs up to the left. Take out the enemy then hit the second gimmick to activate another bridge on the left, use this to reach the Chest with Onion Seeds inside. Continue up the stairs until it splits of into three and then go up to the right, take out the enemies and then hit the gimmick to activate two bridges, go back down and open the Chest to obtain the Luck Quartz, this increases your drop rate by 50%. Head up the stairs and go up to Stargazer’s Tower 3.
- Stargazer’s Tower 3
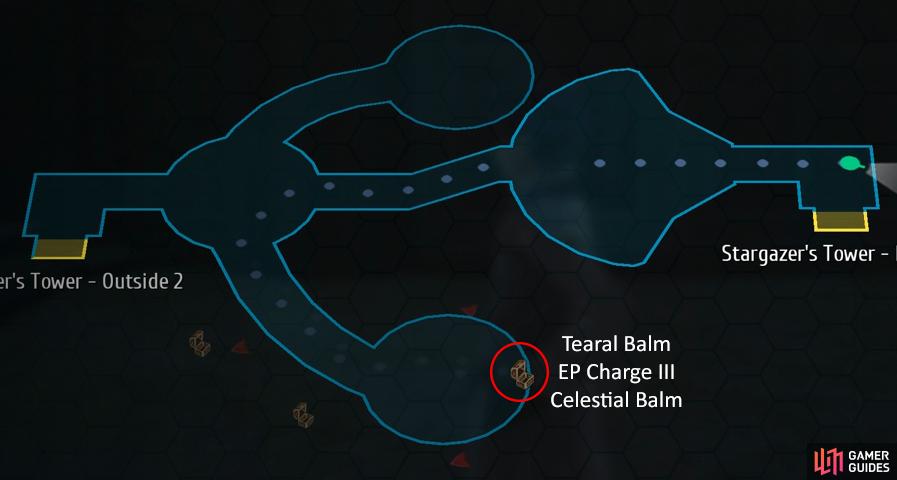
Here you’ll want to take the left path first to hit a gimmick which will activate the bridge, then take the right path to find a Chest with Tearal Balm, EP Charge III, Celestial Balm inside. Finally, go across the bridge to face Raging Armor.
Sub-boss: Raging Armor

| Enemy | HP | Slash | Thrust | Pierce | Strike | Elemental Efficacy | Item Drop |
|---|---|---|---|---|---|---|---|
| Raging Armor | 39939 | ☆ | ☆ | ☆☆ | ☆☆☆☆ | E - 120, WA - 80, F - 100, WN - 160, TI - 140, SP - 100, MI - 80 | Defense 3 |
| Living Armor x2 | 25175 | ☆ | ☆ | ☆☆ | ☆☆☆☆ | E - 120, WA - 80, F - 100, WN - 160, TI - 140, SP - 100, MI - 80 | Adamantine Shield, Petrify |
Begin the battle by using the Iron Will Brave Order to reduce damage taken by 50%, then work on taking out the two Living Armor’s with an S-Craft. Once you’re one on one with the Raging Armor you’ll want to use Radical Design to increase Break Damage by 150%, then work on putting him in the Break Status. Once done, use Sigma Operation to put delay on the boss and then work on dealing as much damage as possible, then use any available S-Crafts to finish him off.
- Nightmare Strategy
With Olivier in your party (at Machias’s expense) you should be still too much of a match for this enemy but you’ll still need to be wary. To begin with, focus your attention on taking out the Living Armors first, they have less HP and as such, will go down with less hassle. The key to victory here is all about delaying the boss as it will hit hard, especially after it boosts it’s strength, make sure you keep your HP above half at all times. The same Brave Orders as before are ideal here, Alisa’s Radical Design to break and then Machias’s Sigma Operation to delay after. Keep Insight on your party via Alisa’s Heavenly Gift Craft and make use of your S-Crafts when the boss is broken.
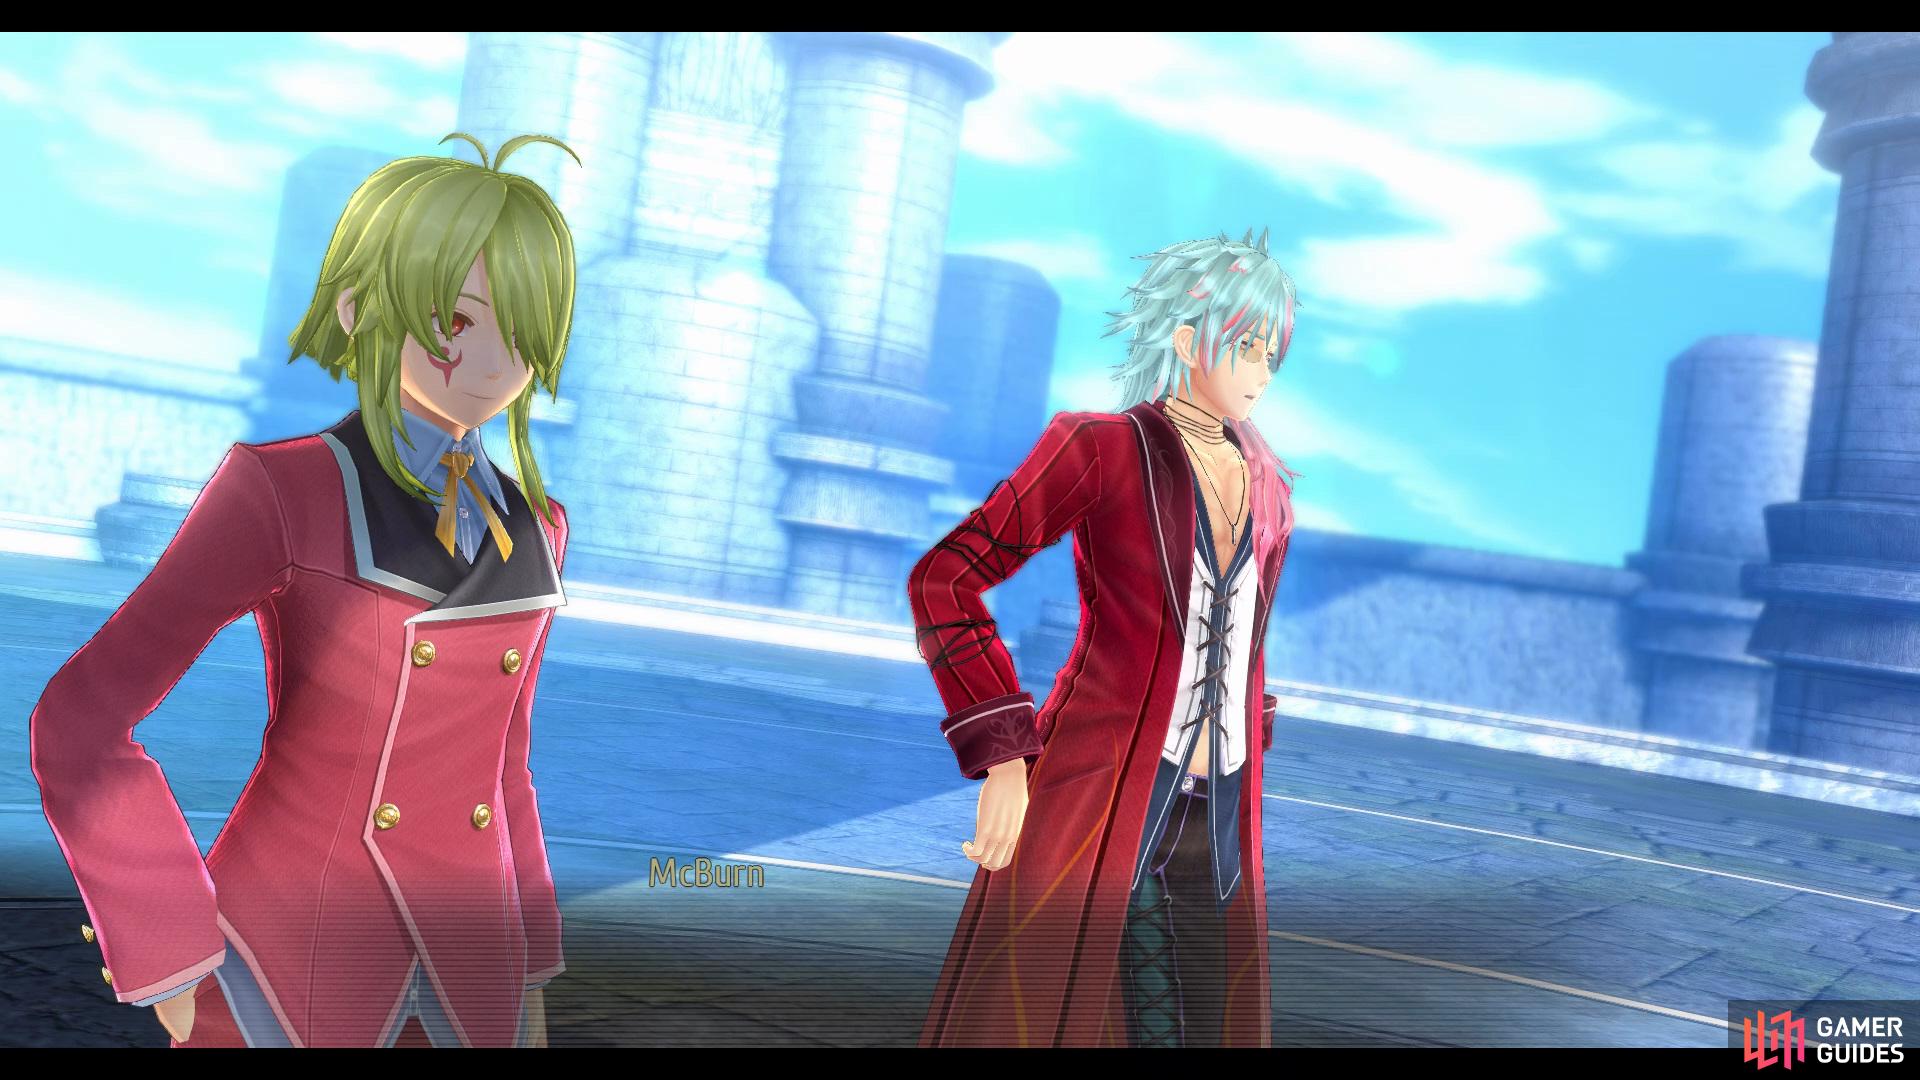
After the fight has been won, head up to the rooftop to face Campanella and Mcburn.
Boss: Campanella and Mcburn
| Enemy | HP | Slash | Thrust | Pierce | Strike | Elemental Efficacy | Item Drop |
|---|---|---|---|---|---|---|---|
| Campanella the Fool | 41100 | ☆☆ | ☆☆ | ☆☆ | ☆☆ | E - 100, WA - 100, F - 100, WN - 100, TI - 100, SP - 100, MI - 100 | N/A |
| McBurn, Almighty Conflagration | 47912 | ☆☆ | ☆☆ | ☆☆ | ☆☆ | E - 80, WA - 80, F - 0, WN - 80, TI - 140, SP - 140, MI - 140 | N/A |
Start the battle with Radical Design to increase your Break Damage, then use any Crafts with a High Break Rating to put them into the Break Status, now activate Sigma Operation to give them a delay, allowing you to deal more damage. Continue attacking them whilst Impeding their attacks and then use any available S-Crafts to finish them off. If you find yourself taking a lot of damage during this battle, you can use Emma’s Serene Blessing Craft to heal the party as well as giving them 40 CP.


(1 of 2) Be ready to heal up your Party when McBurn uses his Hellhound Attack
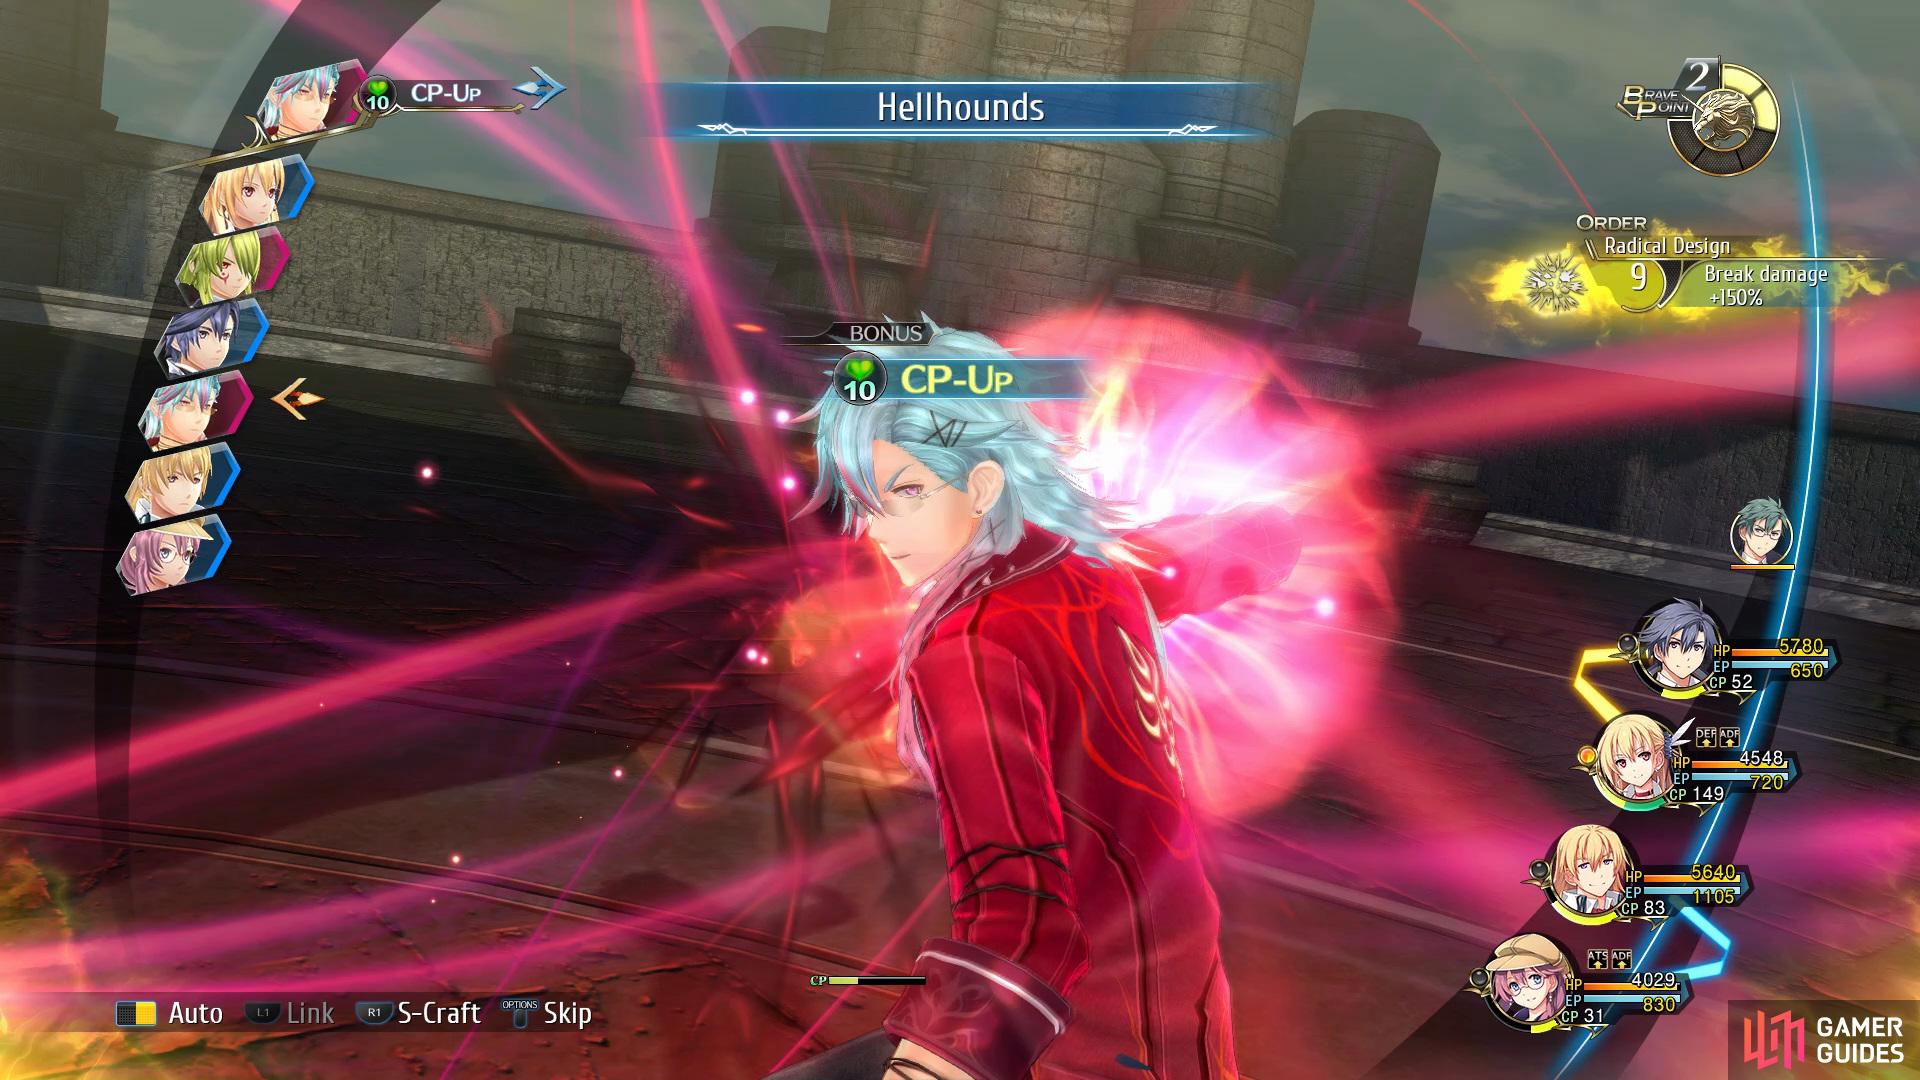
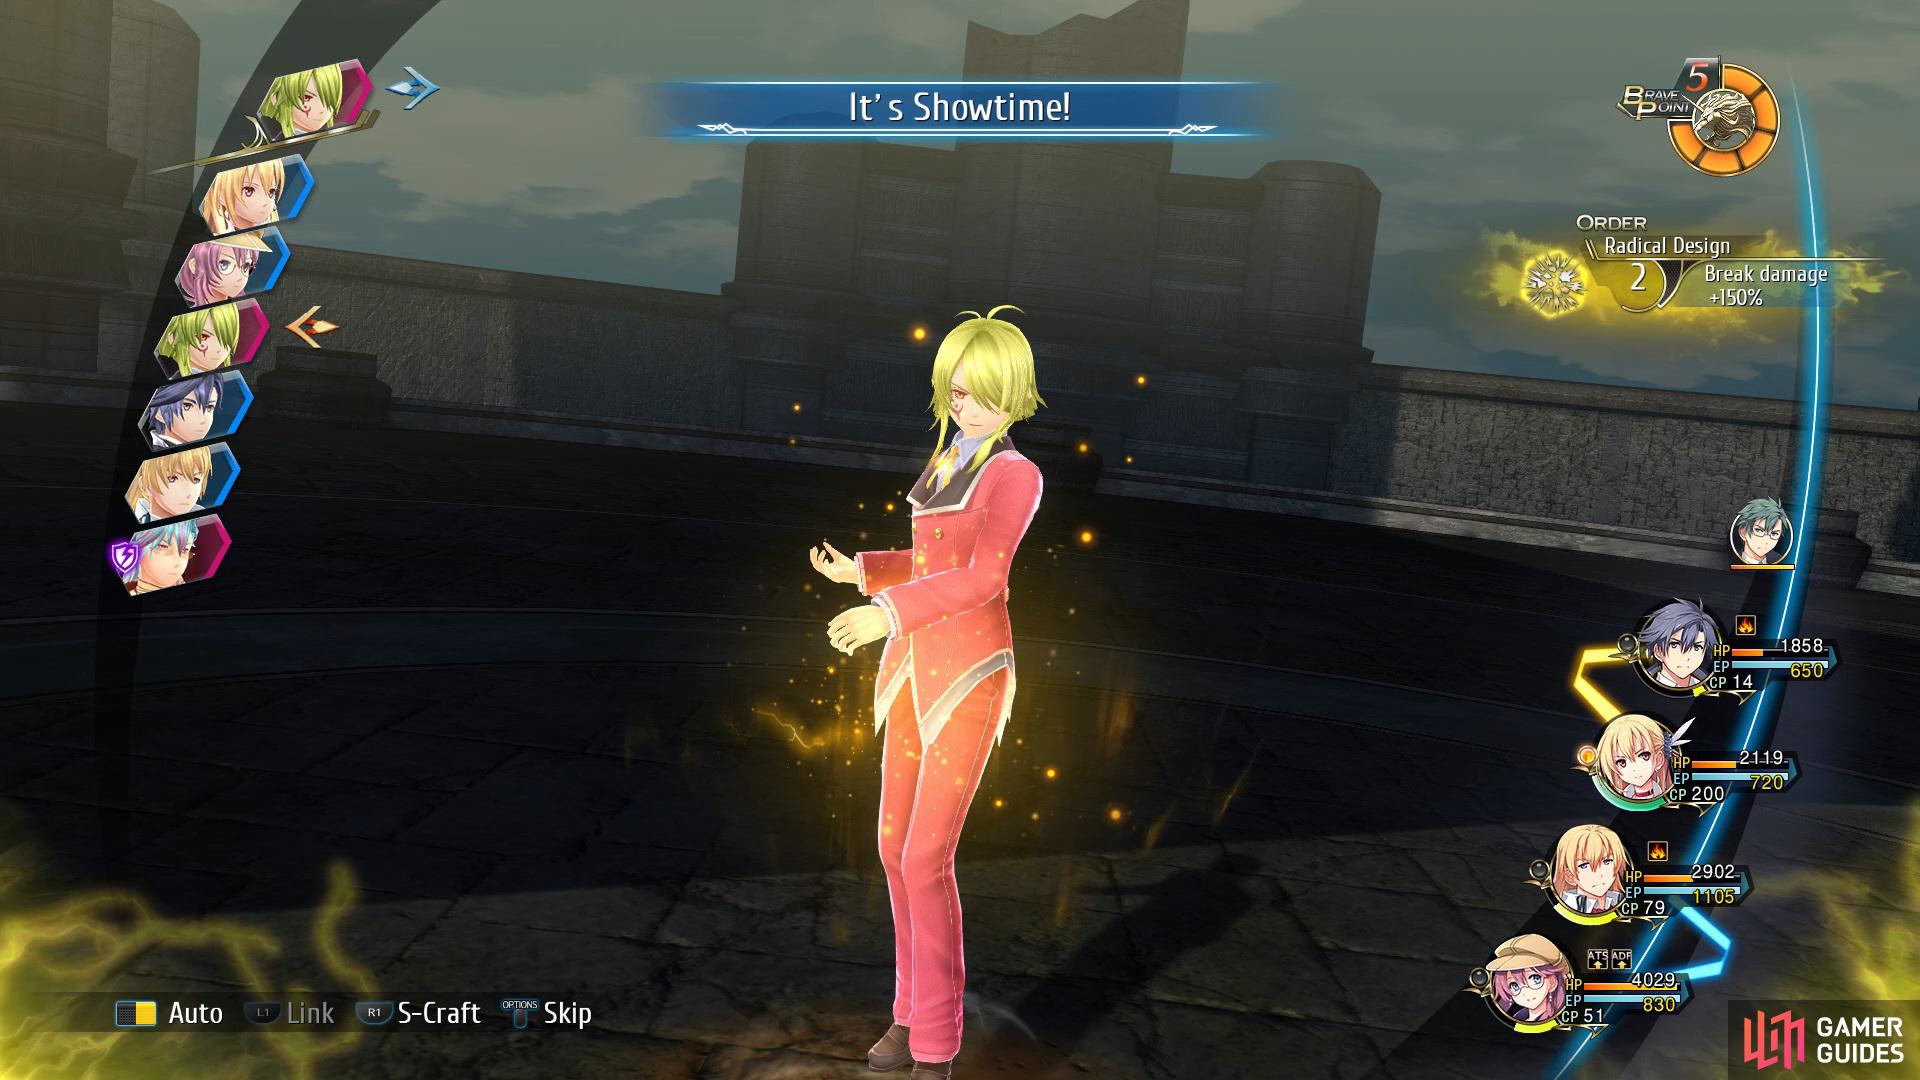
Be ready to heal up your Party when McBurn uses his Hellhound Attack (left), then activate Rean’s Brave Order to reduce damage when Campenella uses his Showtime Skill. (right)
- Nightmare Strategy
With your current party, this battle isn’t as daunting as it may look. Of your two foes, focus on taking down Campanella first due to his lower HP and the fact that he’s easier to break in general. Radical Design is your friend here once again and make use of Crafts with high breaks. Campanella has all of the same attacks he had earlier with the main one to watch out for being Exchange, only use a regular attack when he does this to avoid doing too much damage to your allies. As for McBurn, most of his attacks are magical in nature so you can make it easier for yourself by lowering his ATS with Emma.
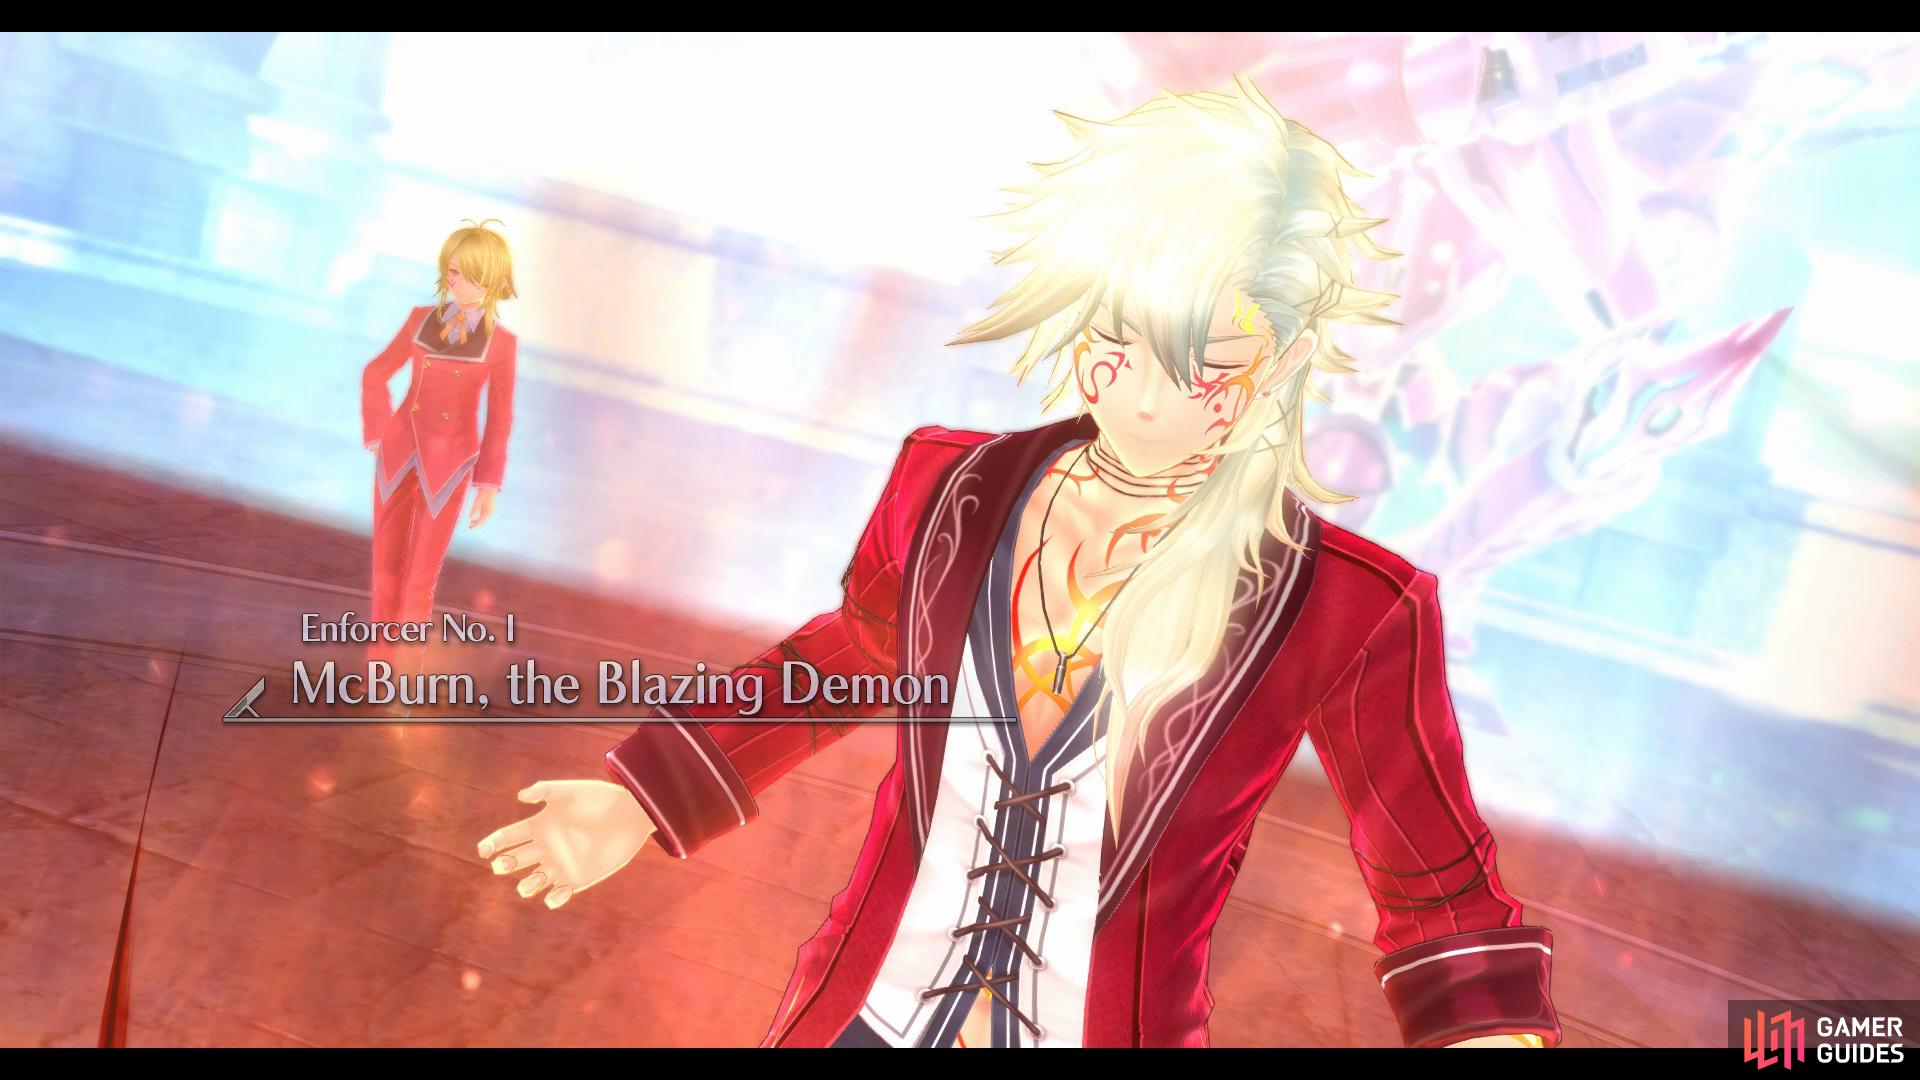
Although you’ve managed to beat both Campanella and McBurn you’ll now go on to face Mcburn, the Blazing Demon, which is McBurn’s much stronger form.
Boss: McBurn, the Blazing Demon
| Enemy | HP | Slash | Thrust | Pierce | Strike | Elemental Efficacy | Item Drop |
|---|---|---|---|---|---|---|---|
| McBurn the Blazing Demon | 71498 | ☆☆ | ☆☆ | ☆☆ | ☆☆ | E - 80, WA - 80, F - 0, WN - 80, TI - 140, SP - 140, MI - 140 | N/A |
During this battle your goal is to get McBurn’s HP down to 30%, luckily, you’ll now be given Rean’s ogre form, Spirit Unification which can be activated when you have 100 CP. If you dont have the available CP, use Emma’s Serene Blessing Craft to give you 40 CP, now activate Radical Design and work towards putting McBurn into the Break Status. Once you’ve managed to get him in the Break Status you’ll want to use Sigma Operation followed by Spirit Unification to enhance your attacks and put delay on the boss. Use this time to deal as much damage as possible to McBurn before his next turn and then use any S-Crafts to finish him off.
- Nightmare Strategy
McBurn is a far deadlier foe here and you’ll need to reduce him to below 30% HP for the bonus AP so you’ll need to be on top of your game. To begin with, Spirit Unification is available again here so be sure to use it before you unleash any of Rean’s S-Crafts for that extra oomph. The biggest change with McBurn is that he can boost his stats and any Burn ailments you suffer cannot be removed dealing extra damage on top of his heavy attacks already. The same tactics as before work well here, better yet, make use of Emma’s S-Craft at 200 CP if you can to get two rounds of reflecting attacks.
With both Campanella and McBurn dealt with, there is still one more opponent you must face, Aion Type B II
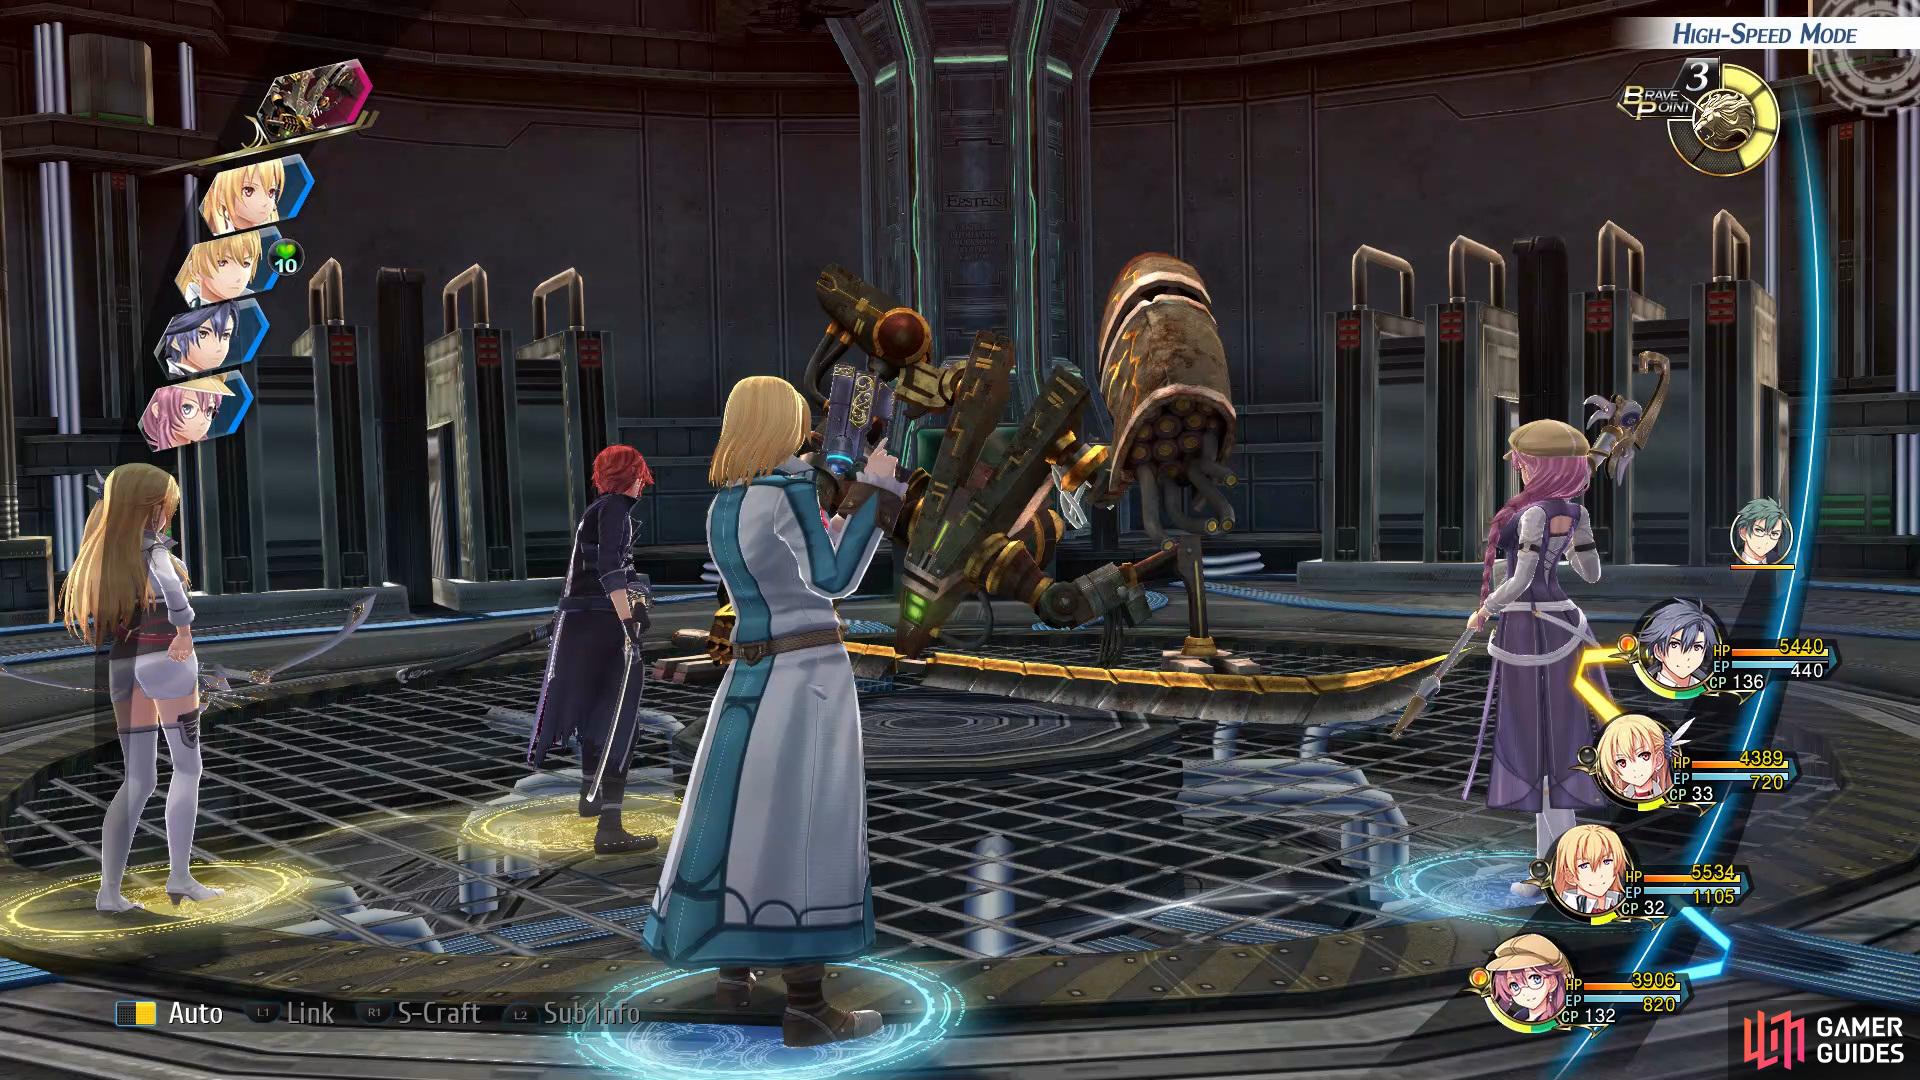
Boss: Aion Type-β II


(1 of 4) Attack the Aion arms when it is in his Normal Stance
| Enemy | HP | Position | Head | Body | Arms |
|---|---|---|---|---|---|
| Aion Type-β II | 292500 | Default | ☆☆ | ☆ | ☆☆☆☆ |
| Arms Crossed | ☆☆☆ | ☆ | ☆☆ | ||
| Hovering | ☆☆ | ☆☆☆ | N/A |
During this battle you’ll want to focus on hitting it’s weak spots in order to build up 5 BP and then perform a Unite Attack, after this you’ll want to build up another 2 BP and use a Finisher. When the Aion Type-β II is in his Normal Stance you’ll want to hit its arms, then when it begins to use its Charged Attacks you’ll need to beware of two stances. One with his arms crossed, which means you’ll need to hit its head and another where he hovers, which means you’ll want to focus on his body. Finally, when the Aion Type-β II begins to start flying you’ll want to use one of Juna’s Gun Crafts to shoot it back down.
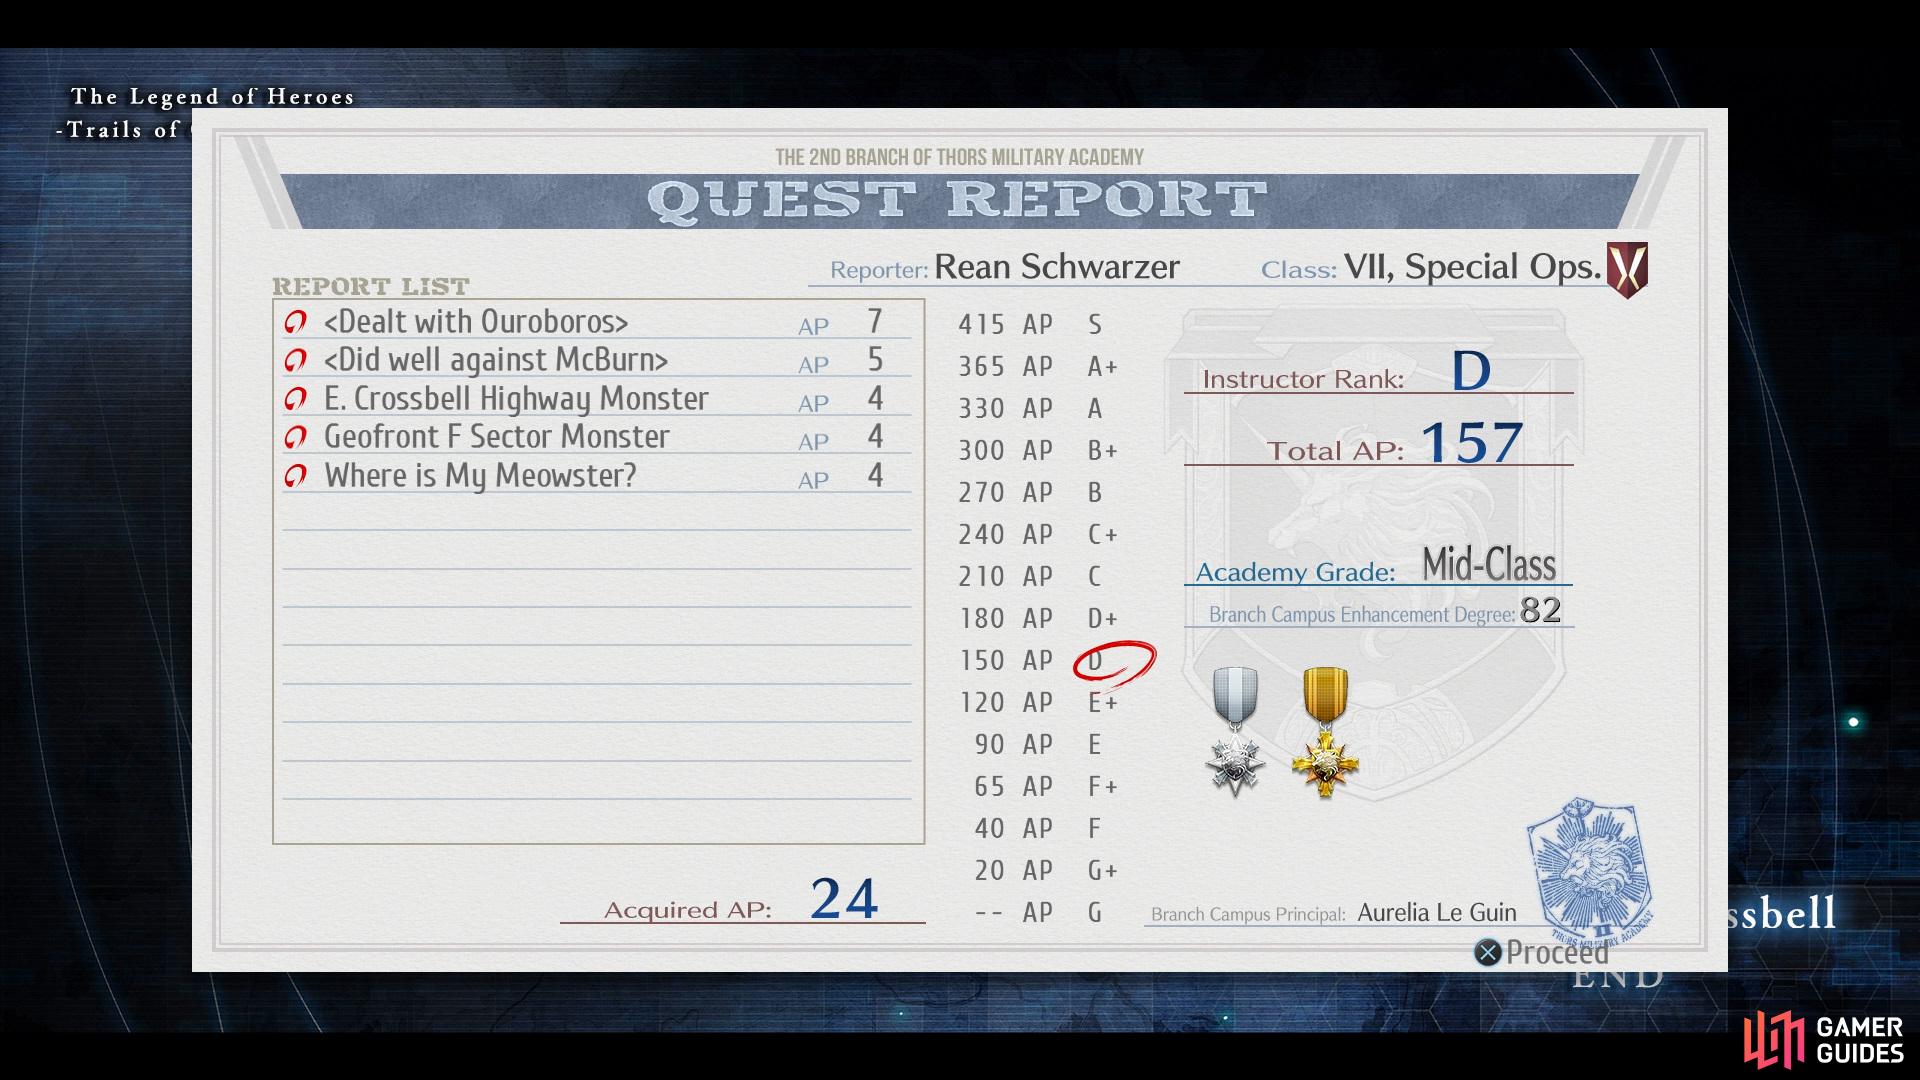
After the battle has been won, a few scenes will play out and you’ll return back to the EX Camp, here you’ll be given the Quest Report.
No Comments