Cab-Gwanath Bluff
| Herbs | Artifacts |
|---|---|
| Mallos | Coded Journal Entry #2 |
| Earthbread | |
| Alfirin | |
| Elgaran | |
| Gwinuial | |
| Naugrimbas | |
| Athelas |
Travel east through Watcher’s Landing to reach the Cab-Gwanath Bluff, the largest, and, in terms of side-missions, the most interesting of the four areas we have left to explore. It also houses the last unclaimed Forge Tower in the game, along the southern end of the level. Strike your hammer to ethereal anvil to earn the “Memories of Eregion” Trophy/Achievement, and reveal the last bit of Nurn.
There are three Legendary Weapon side missions-one for each type of weapon-in the north-eastern end of the level, as well as an Artifact. At the present we can only attempt the Bow Mission “The Spirit of Fire” and the Sword Mission “Bane of Shadow” , as the Dagger Mission “The Darkness Within” requires us to learn the “Brand” Ability. Both of the missions we can complete right now can be pretty easy, depending if you’re willing to clear the northern Stronghold areas of Captains, and how much you’ve leveled/how many Epic Runes you have. If you’re following this guide, completing “The Spirit of Fire” should be the final Bow Mission in the game, hence earning you the final upgrade to your bow, and the Trophy/Achievement “The Maker’s Bow”. Once those are done, search under the ruins near the mission start for “The Darkness Within”, in the north-eastern corner of the area to find the Coded Journal Entry #2 Artifact.
Tol Crossing
| Herbs | Artifacts |
|---|---|
| Blue Milk | Lockbox Key |
Half of this area, as its name might suggest, is a bridge that leads to an Uruk Stronghold, separated into three smaller parts. This area also happens to encompass the southern part of said island. Cross the bridge, at least to the half-way point, marked by a pair of compimentary stone towers built atop a large stone pylons that support the bridge. Climb onto the south-eastern tower, then make your way to the south-eastern-facing side of said tower, and climb down below the bridge, to find the Lockbox Key Artifact between the two tower pylons. Once you’ve made it yours, climb back up onto the bridge and cross it to the north-east to reach the Uruk island Stronghold, where the Sword Mission “They Shall Not Pass” awaits you.
Maw of Hope
| Herbs | Artifacts | Ithildin |
|---|---|---|
| Athelas | Herald’s Scroll | tolo dan nan galad |
| A Elbereth Gilthoniel |
Scale to the top of a large tower (left) to find the “tolo dan nan galad” Ithildin (right).
The Maw of Hope is and oddly-named area, and as the heart of the Uruk island Stronghold, you should expect heavy Uruk resistance, if you don’t stay out of sight. There are two Ithildin and one Artifact here-the first Ithildin is atop the large stone tower just west of the center of the area. Climb to the top of the tower (where a metal brazier is suspended) and walk to the southern end of the tower. The “tolo dan nan galad” Ithildin is on the inside face of the southern wall. Take a zipline to the east to get closer to the next two collectables, which are close to each other. The Herald’s Scroll Artifact is on the ground in a red tent just north of where the zipline will deposit you. Collect it, then climb the modest stone wall north and east of the tent, and drop down to hang around the outside of the wall north-east of the tent to find the “A Elbereth Gilthoniel” Ithildin.
Executioners Watch
| Artifacts | Ithildin |
|---|---|
| Star Chart | Naur an edraith ammen |
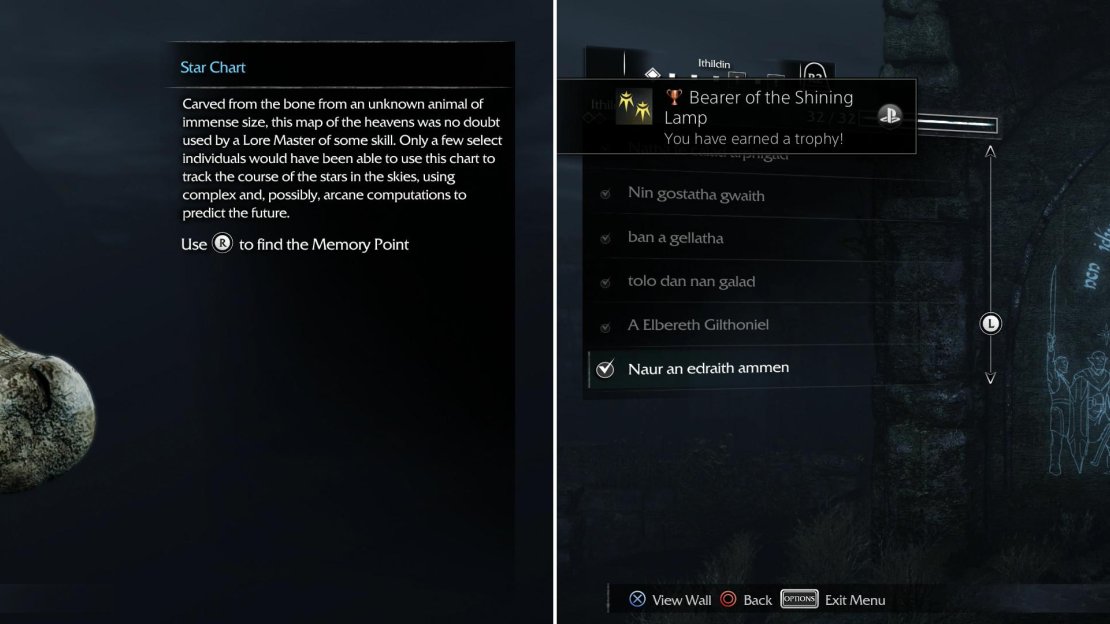
Find the Star Chart Artifact (left) then investigate the “Naur an edraith ammen” Ithildin to finish our collection (right).
The last Ithildin and Artifact in the game are located in this area, but otherwise, expect more of the same. Stronghold. Uruks aplenty. Find the Ithildin in the north-western corner of the area, where a bridge connects the main fort to a smaller, fortified island. The “Naur an edraith ammen” Ithildin is on a wall under the southern side of the bridge. Claiming it will, if you’ve been following this guide, earn you the “Bearer of the Shining Lamp” Trophy/Achievement.
The final Artifact is in the north-eastern corner of this area, again on a small island. This one is missing its bridge, however. You can leap across some stone pillars to reach the island, but drop down to find a rope connecting the smaller island to the north to the larger island to the south. Run north on this rope to reach the smaller island and enter a small room, where you’ll find the Star Chart Artifact. Once you play the memory, which should earn you the “Shadows of the Ancient Past” Trophy/Achievement.




No Comments