
This quest is acquired from Pirates’ Hideout, a cave located in southern Chersonese. It is marked as ‘Ancient Ruins’ on the map, and can be accessed by heading directly south from the Blue Chamber Collective Conflux Path entrance.
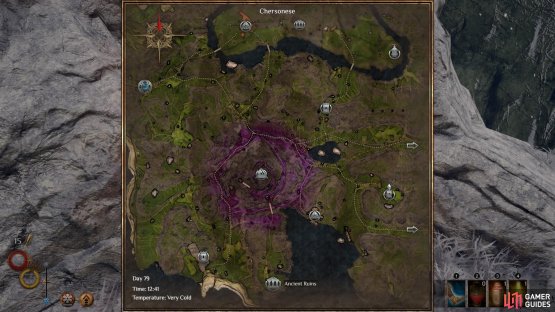

(1 of 2) The location of Pirates’ Hideout on the Chersonese map, marked as ‘Ancient Ruins’ in the south of the region.
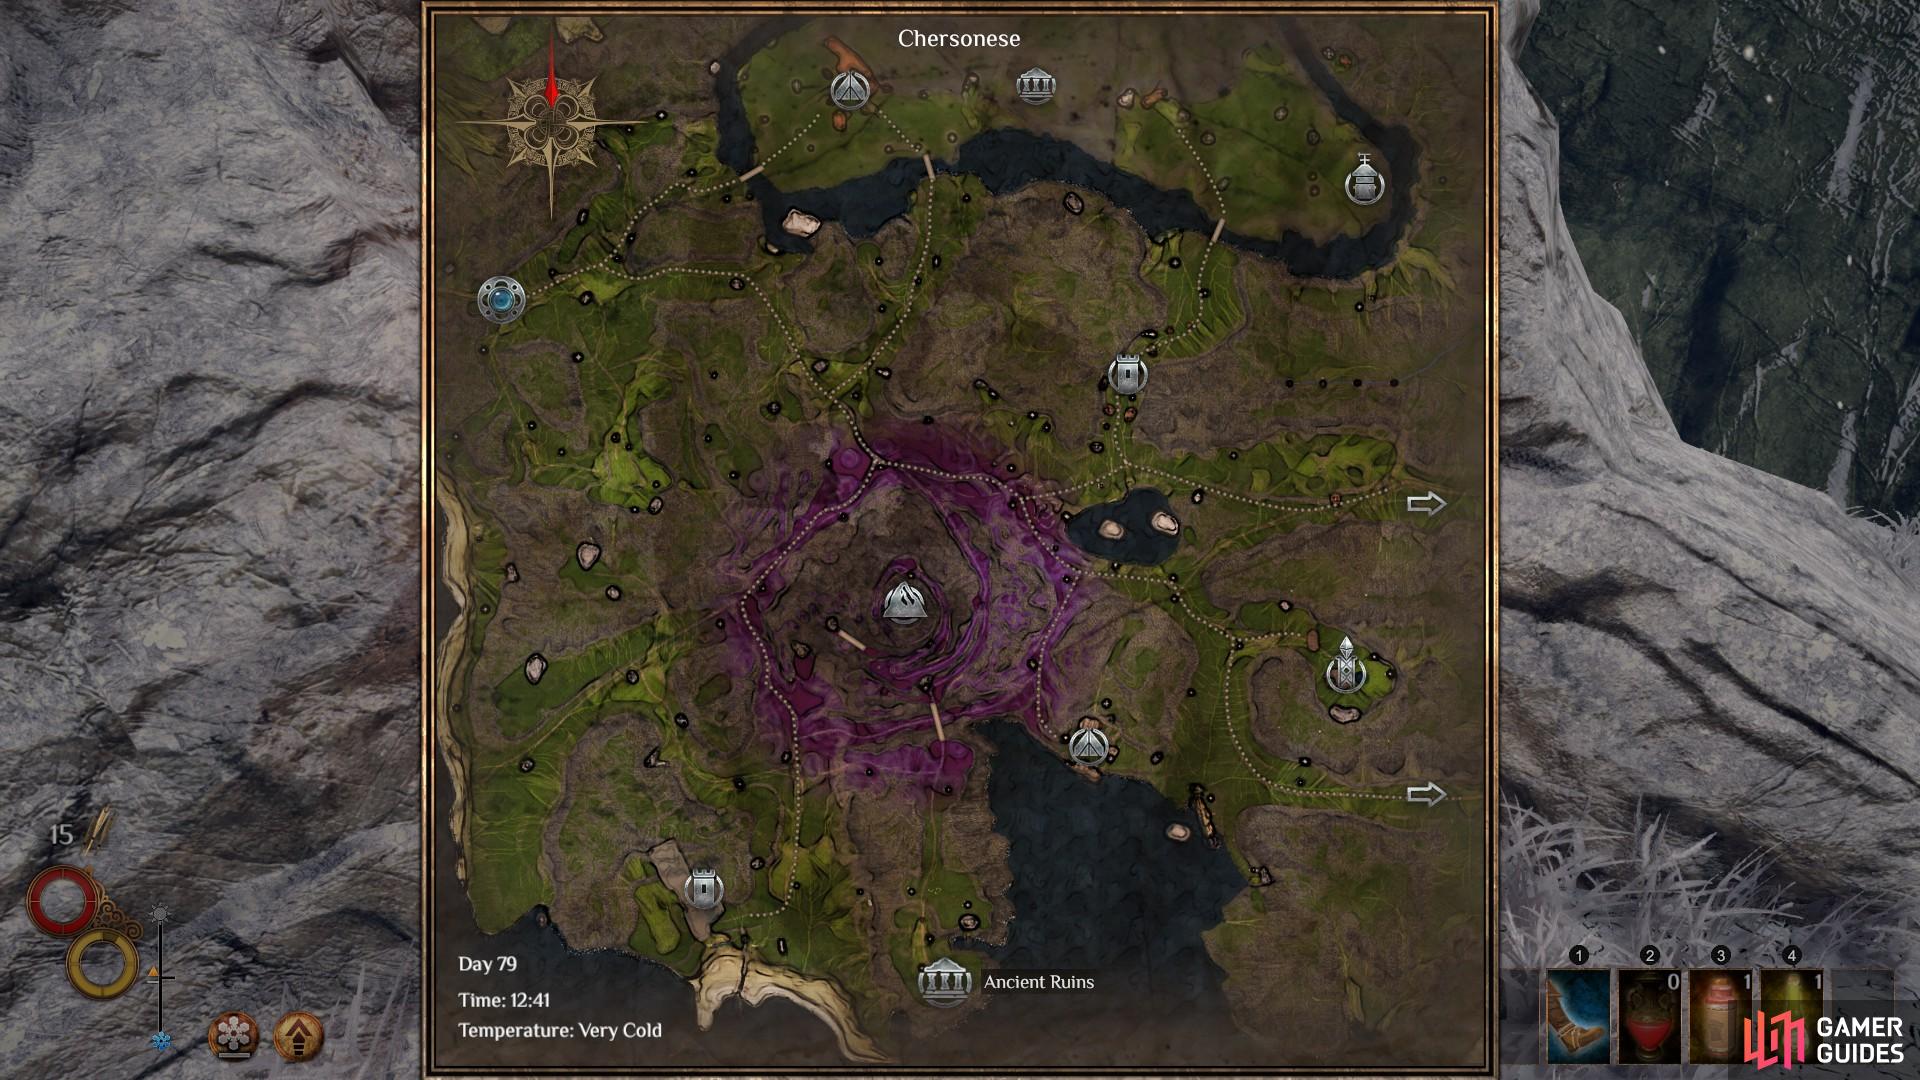

The location of Pirates’ Hideout on the Chersonese map, marked as ‘Ancient Ruins’ in the south of the region. (left), Head over the bridge to the south from the Blue Chamber Collective Conflux Path entrance. Keep going south until the path ends, then turn left over the bridge to the cave entrance. (right)
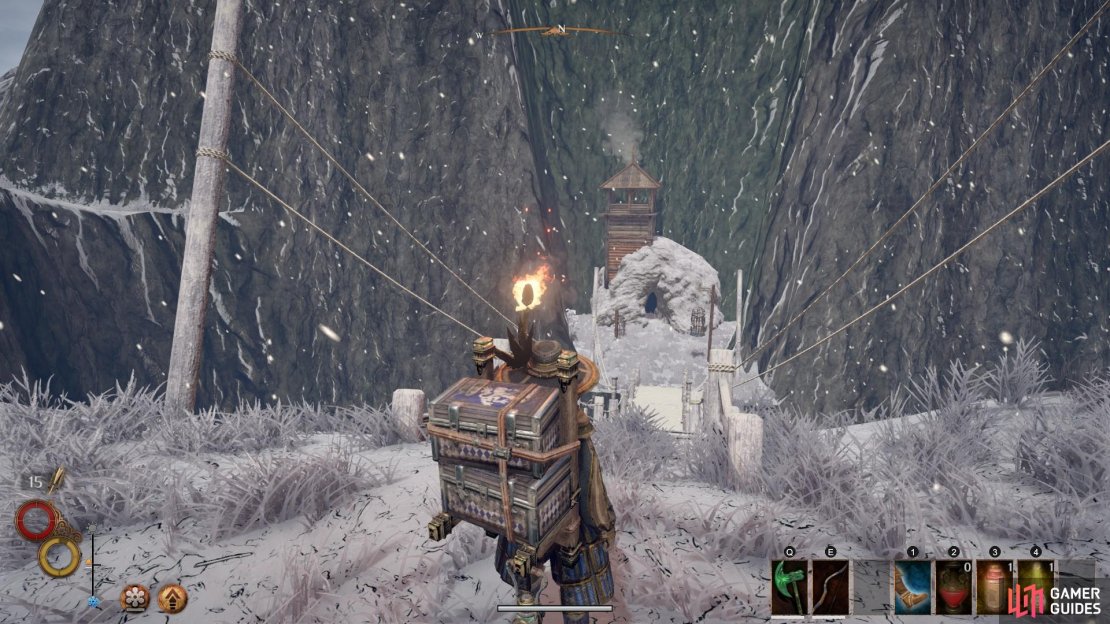
At the end of the path south from the Conflux Path entrance, turn left and cross the bridge into the cave. Within the cave you will encounter a unique mob named ‘Mad Captain’s Bones’. He is relatively easy to defeat, being vulnerable to Ethereal, Lightning, and Fire damage. However, he is entirely resistant to Decay damage and is immune to Poisons and Bleeds. You can use the whole cave to kite and run Mad Captain’s Bones into traps, tripwires or explosive runes. If you have a weapon which inflicts any of the damage types he is vulnerable to, you should be able to chain a series of heavy attacks and defeat him with ease. Be sure to use damage type rags and varnishes where possible.
(1 of 3) The entrance to Pirates’ Hideout in southern Chersonese. You will not be able to access it without crossing the bridge from the Conflux Path.
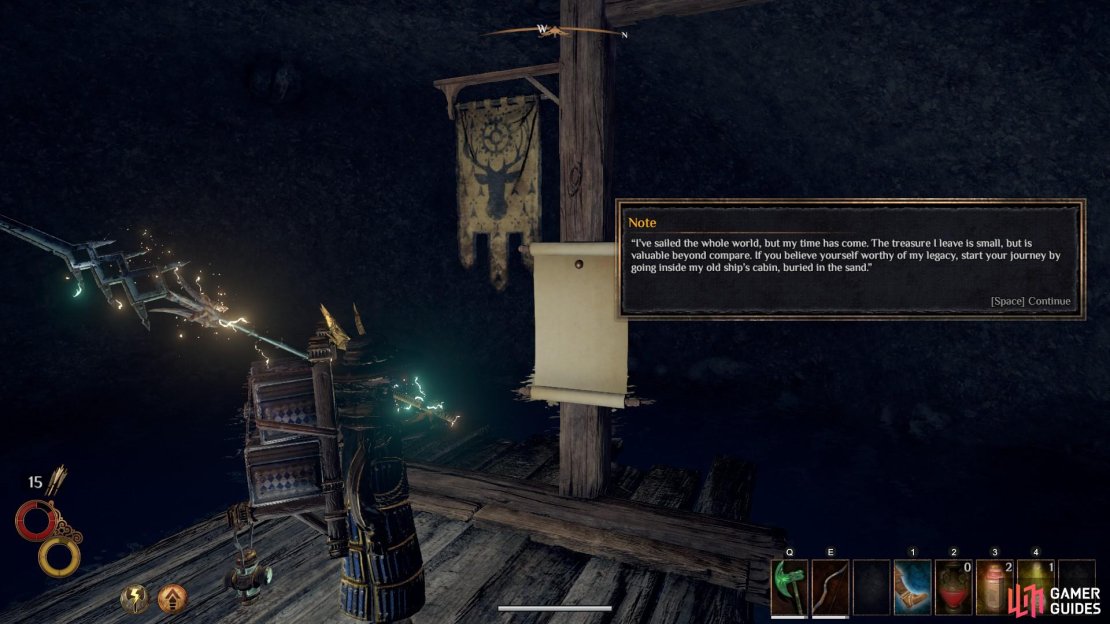
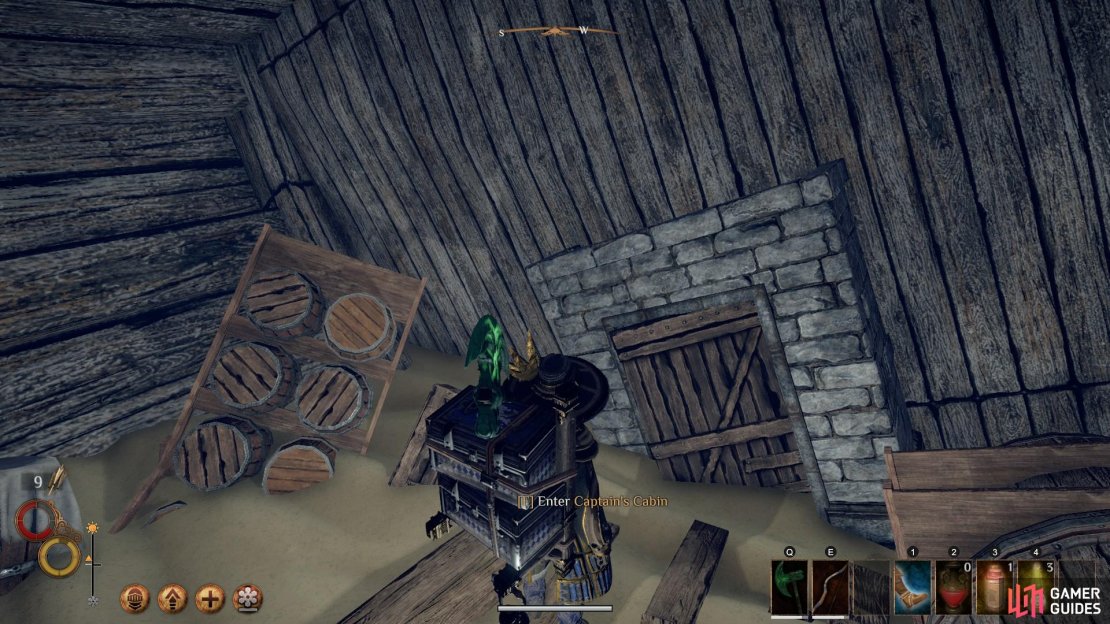
When you have defeated Mad Captain’s Bones, read the note on the post behind where you initally found him. This will activate the quest and provide the first clue of treasure. The first clue indicates that you should travel to the Captain’s Cabin in Abrassar. The cabin can be found at the Parched Shipwrecks, within a ship which is broken in half.
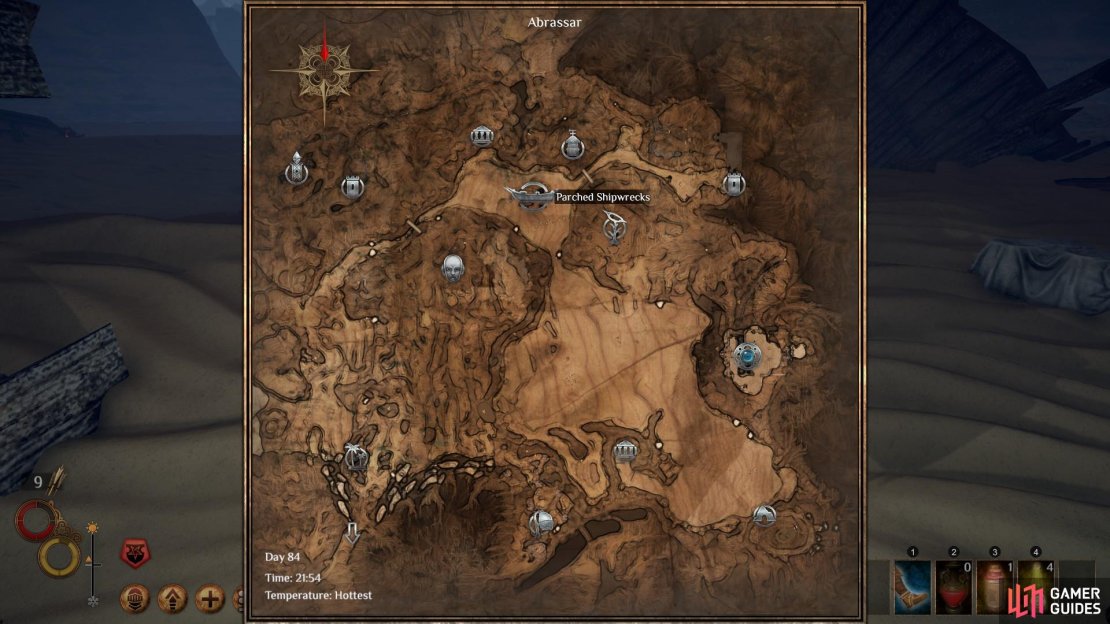

(1 of 4) The location of the Parched Shipwrecks in Abrassar, north west of Levant.
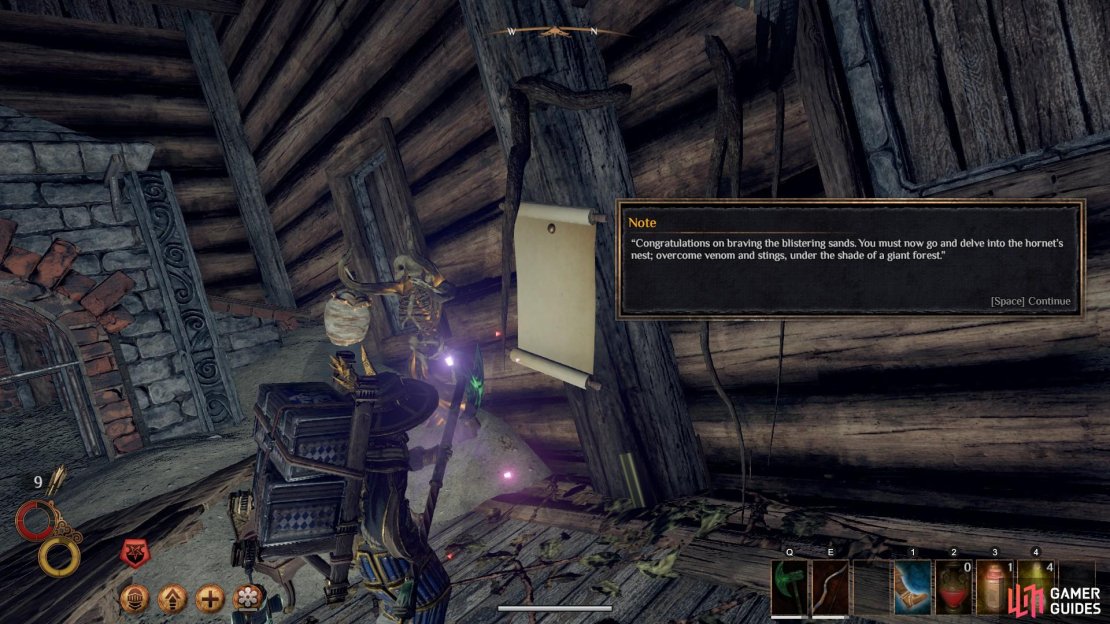
Once you have read the note within the Captain’s Cabin, the quest log will update. The next clue indicates a location near the Colossal Hives in Enmerkar Forest. In particular, you should travel to the northern Colossal Hive (as shown on the map below) and enter the Hive’s Trap, an entrance to which can be found north west of the main entrance to the northern Colossal Hive. Once inside you will have to defeat a Hive Lord. These are relatively slow enemies, but they can hit hard. You should first defeat its minion and then use your superior speed to avoid hits as you wait for an opening. If you have heavy armour you may be slower, but will be able to sustain multiple hits from the Hive Lord without too much trouble.


(1 of 3) The location of the northern Colossal Hive within Enmerkar Forest. Head south from Berg and look to the skies; it is difficult to miss.
The next clue indicates that you should travel to the Hallowed Marsh. In particular, you need to reach Steakosaur’s Burrow, an unmarked location which can be found north west of the Spire of Light. Just head west over two stone bridges from the bridge at the north western exit from the Spire of Light. At the end of the second bridge, look north west and you will see the burrow. Once inside you will find two Stekosaurs. They are common throughout Hallowed Marsh and shouldn’t cause you too much trouble. If you find yourself in a tight spot, exit the burrow and recuperate before returning to the fight. Once both Stekosaurs are dead, read the note within the burrow for the final location.


(1 of 2) The location of the Steakosaur’s Burrow in Hallowed Marsh, found north west of the Spire of Light.
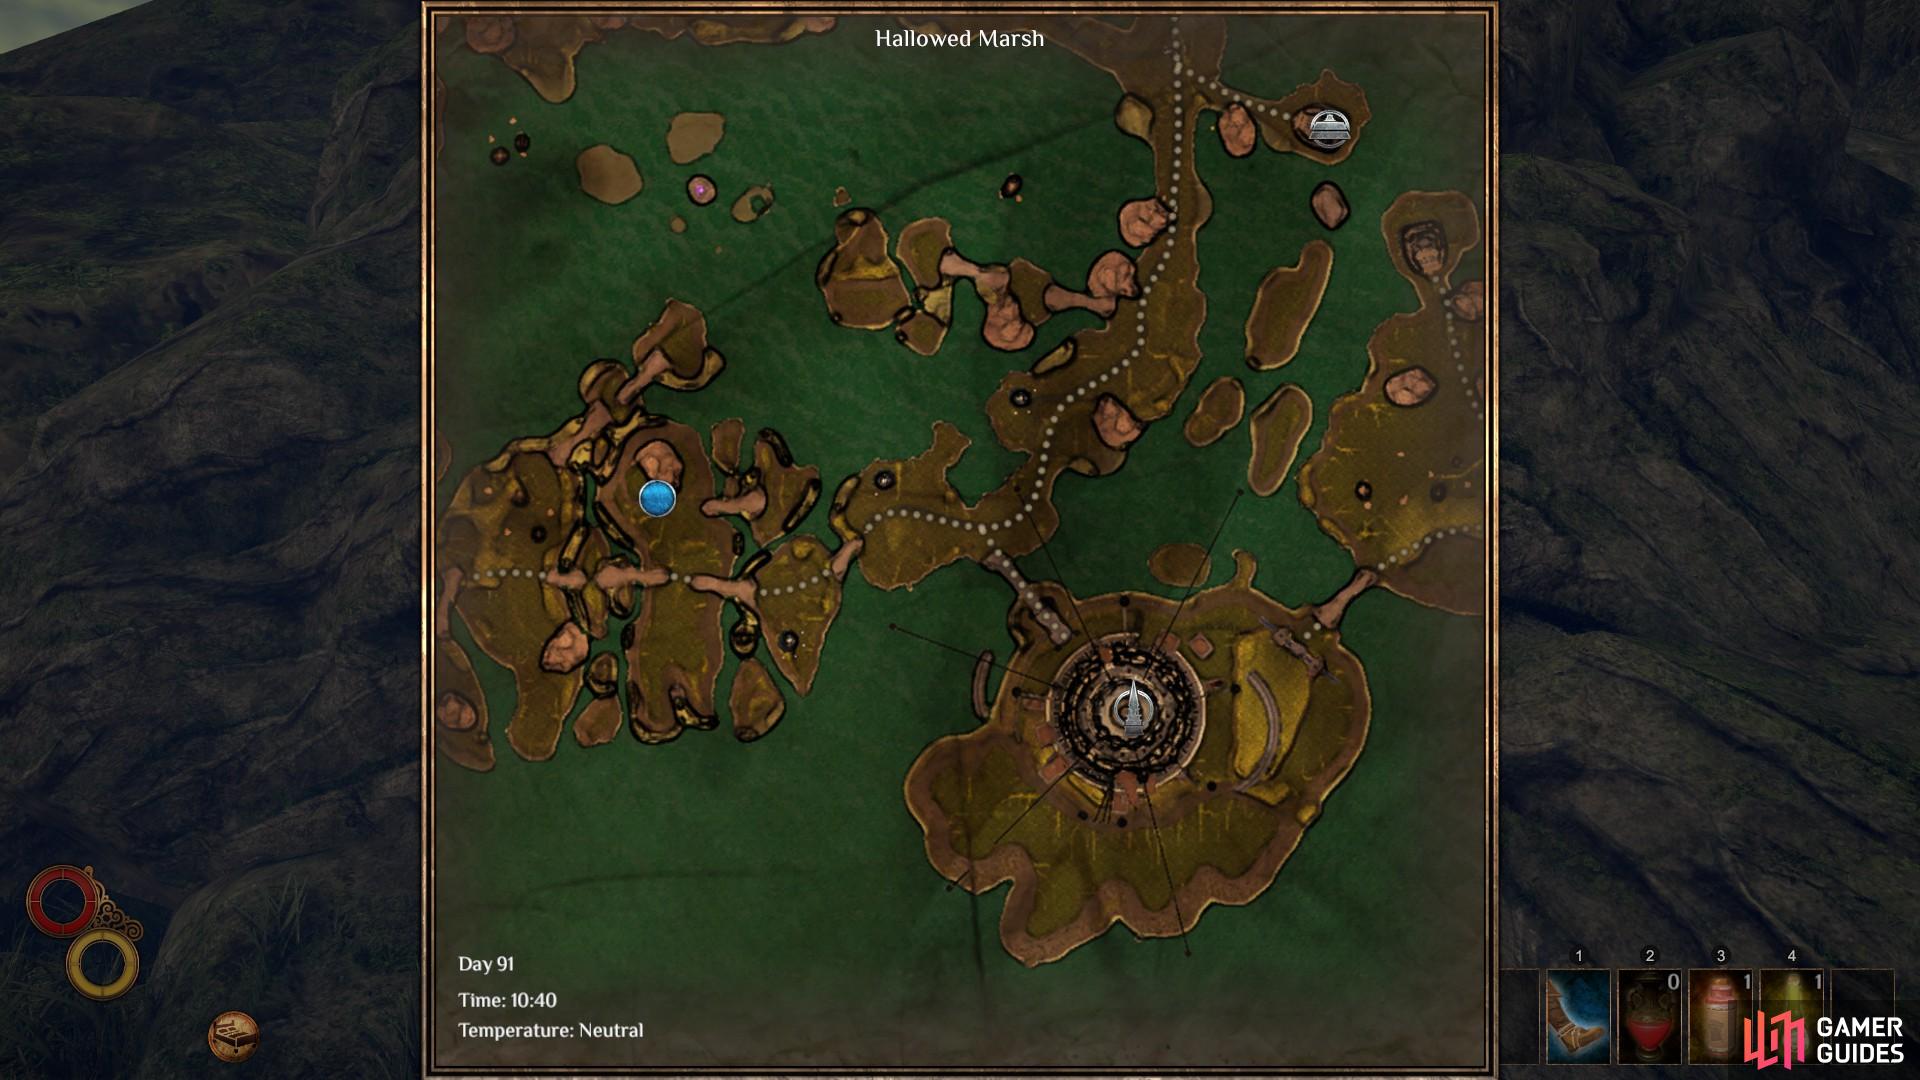
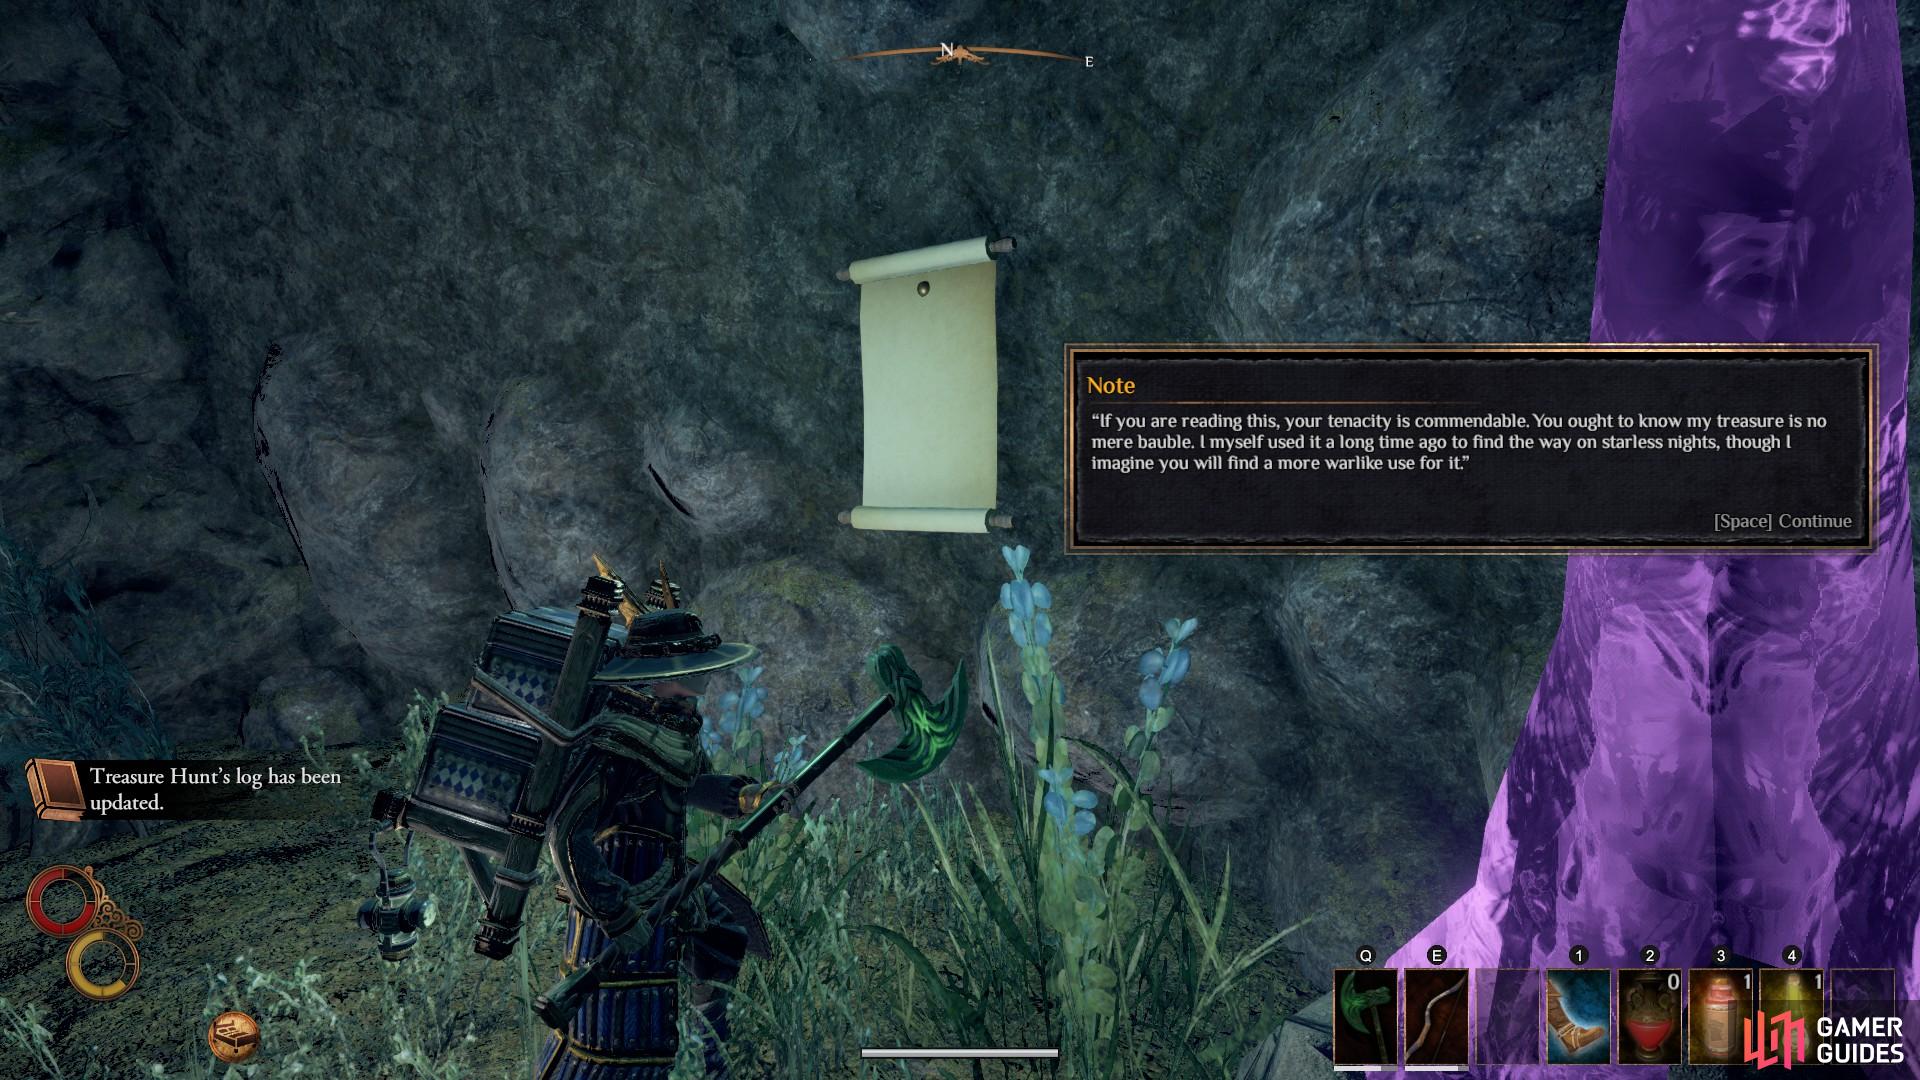
The location of the Steakosaur’s Burrow in Hallowed Marsh, found north west of the Spire of Light. (left), Once you have defeated both Seakosaurs, be sure to read the note within the burrow before leaving. (right)
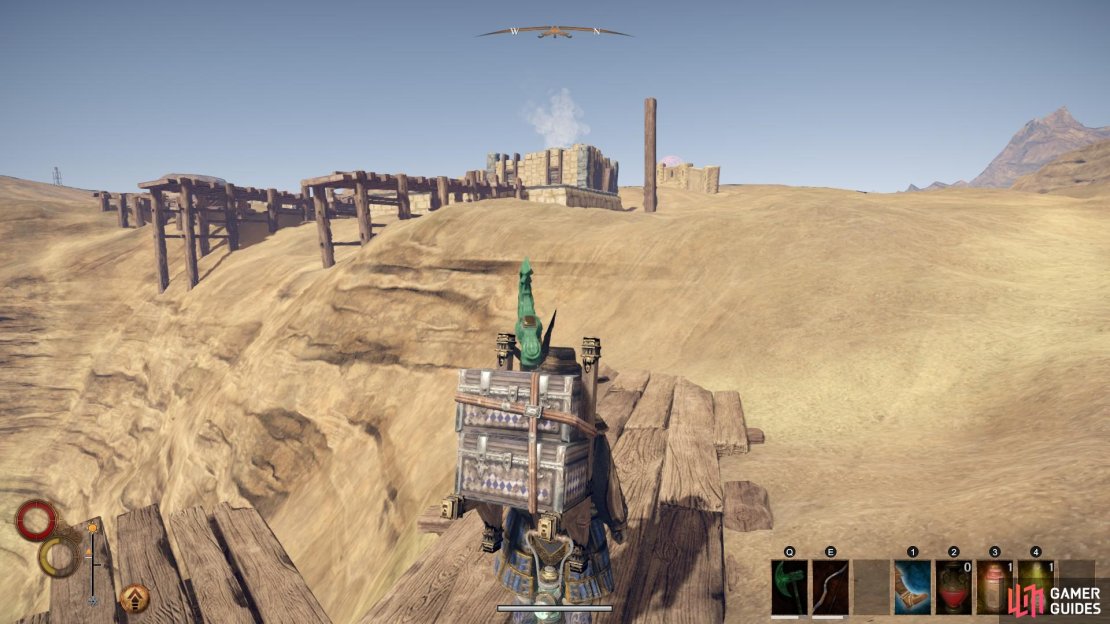
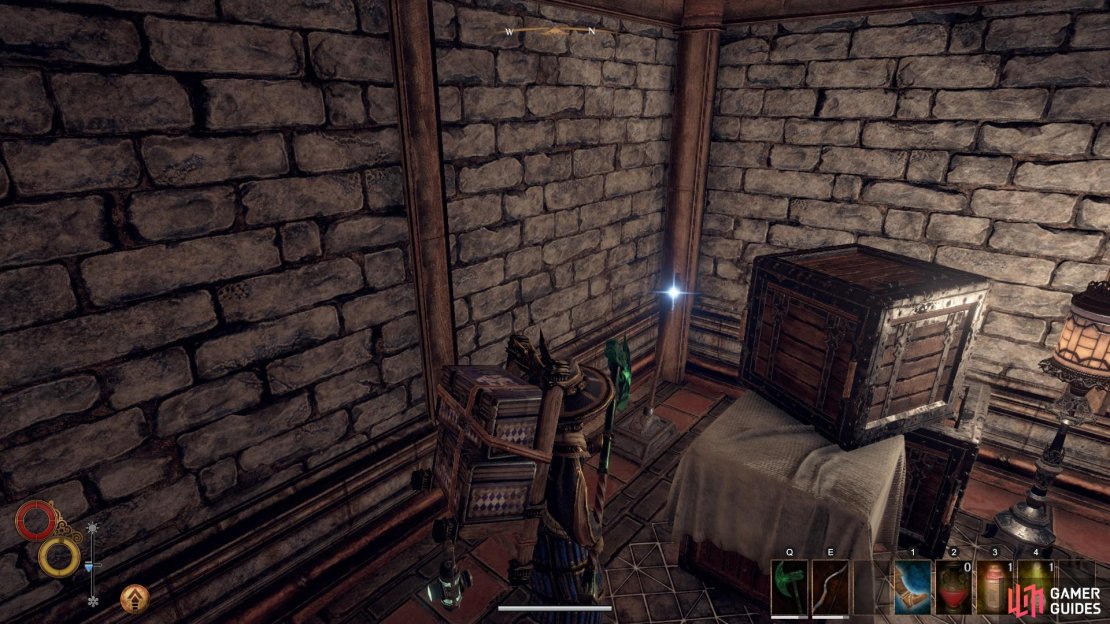
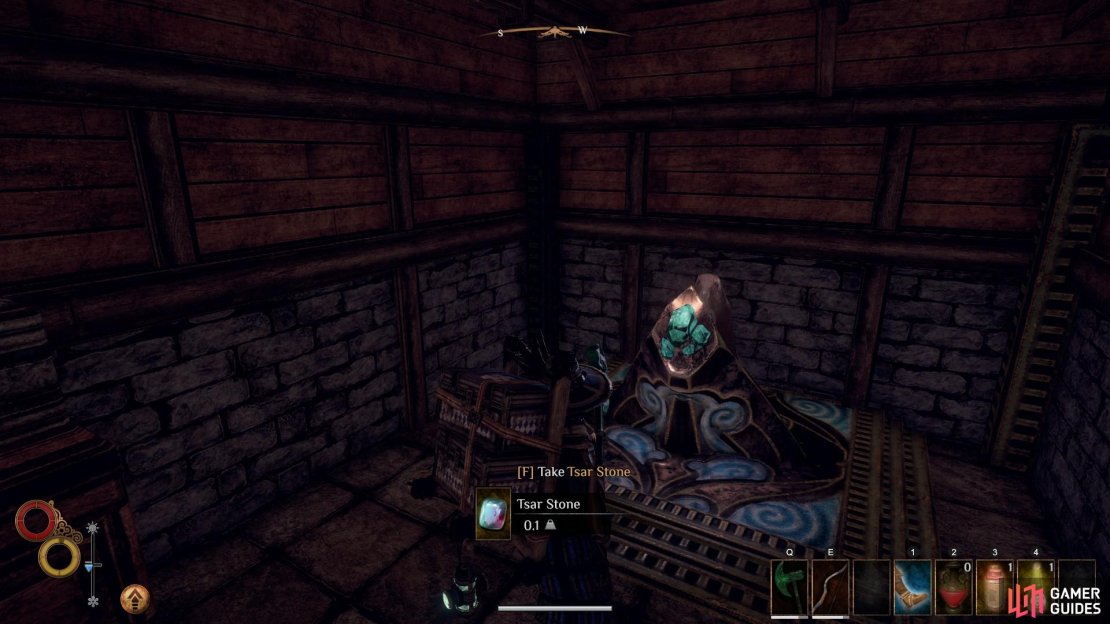
The final instruction is more clear; you should travel to the Abandoned Docks in Abrassar. At the docks you will find an entrance to the Dock’s Storage, within which can be found the treasure. To reach the docks, head north west from Levant and continue north west beyond the Walled Garden. You come come across a bridge. Cross it and then head directly west along the cliff edge, leading to a wooden platform. Follow the wooden platform to the docks. The entrance to Dock’s Storage is marked by a building with smoke emitting from it. Once inside, go down the first set of stairs and then up the second set to the north. To the right of the chest behind some boxes, you will find the lever. Pull the lever to open a small storage space at the bottom of the stairs where the treasure can be found; a Tsar Stone.
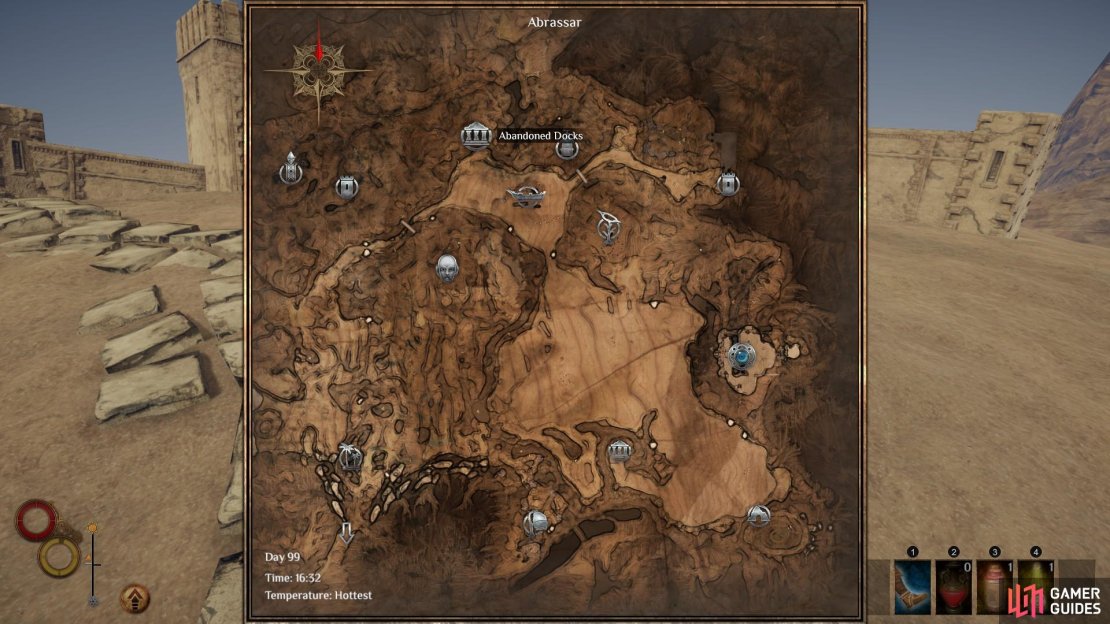
(1 of 4) The location of the Abandoned Docks, north west of Levant in the region of Abrassar.
No Comments