
This quest can be acquired from Mofat in the city of Monsoon. Mofat is marked in the south west of the city on the map of Monsoon. The quest can be acquired in two other ways; if you leave Monsoon without speaking with Mofat, a guard will prompt you to visit him. It is also acquired when you encounter missionaries on the Pilgrim road from Chersonese to Monsoon. If you acquire the quest in this way, you will need to visit Mofat in Monsoon and speak with him to progress further.
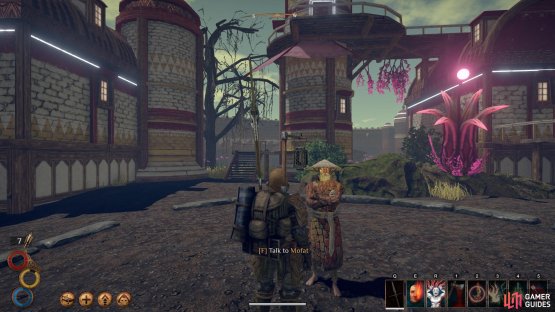
(1 of 2) Speak with Mofat to initiate the quest.

Speak with Mofat to initiate the quest. (left), Mofat can be found in the south west corner of the city of Monsoon. (right)
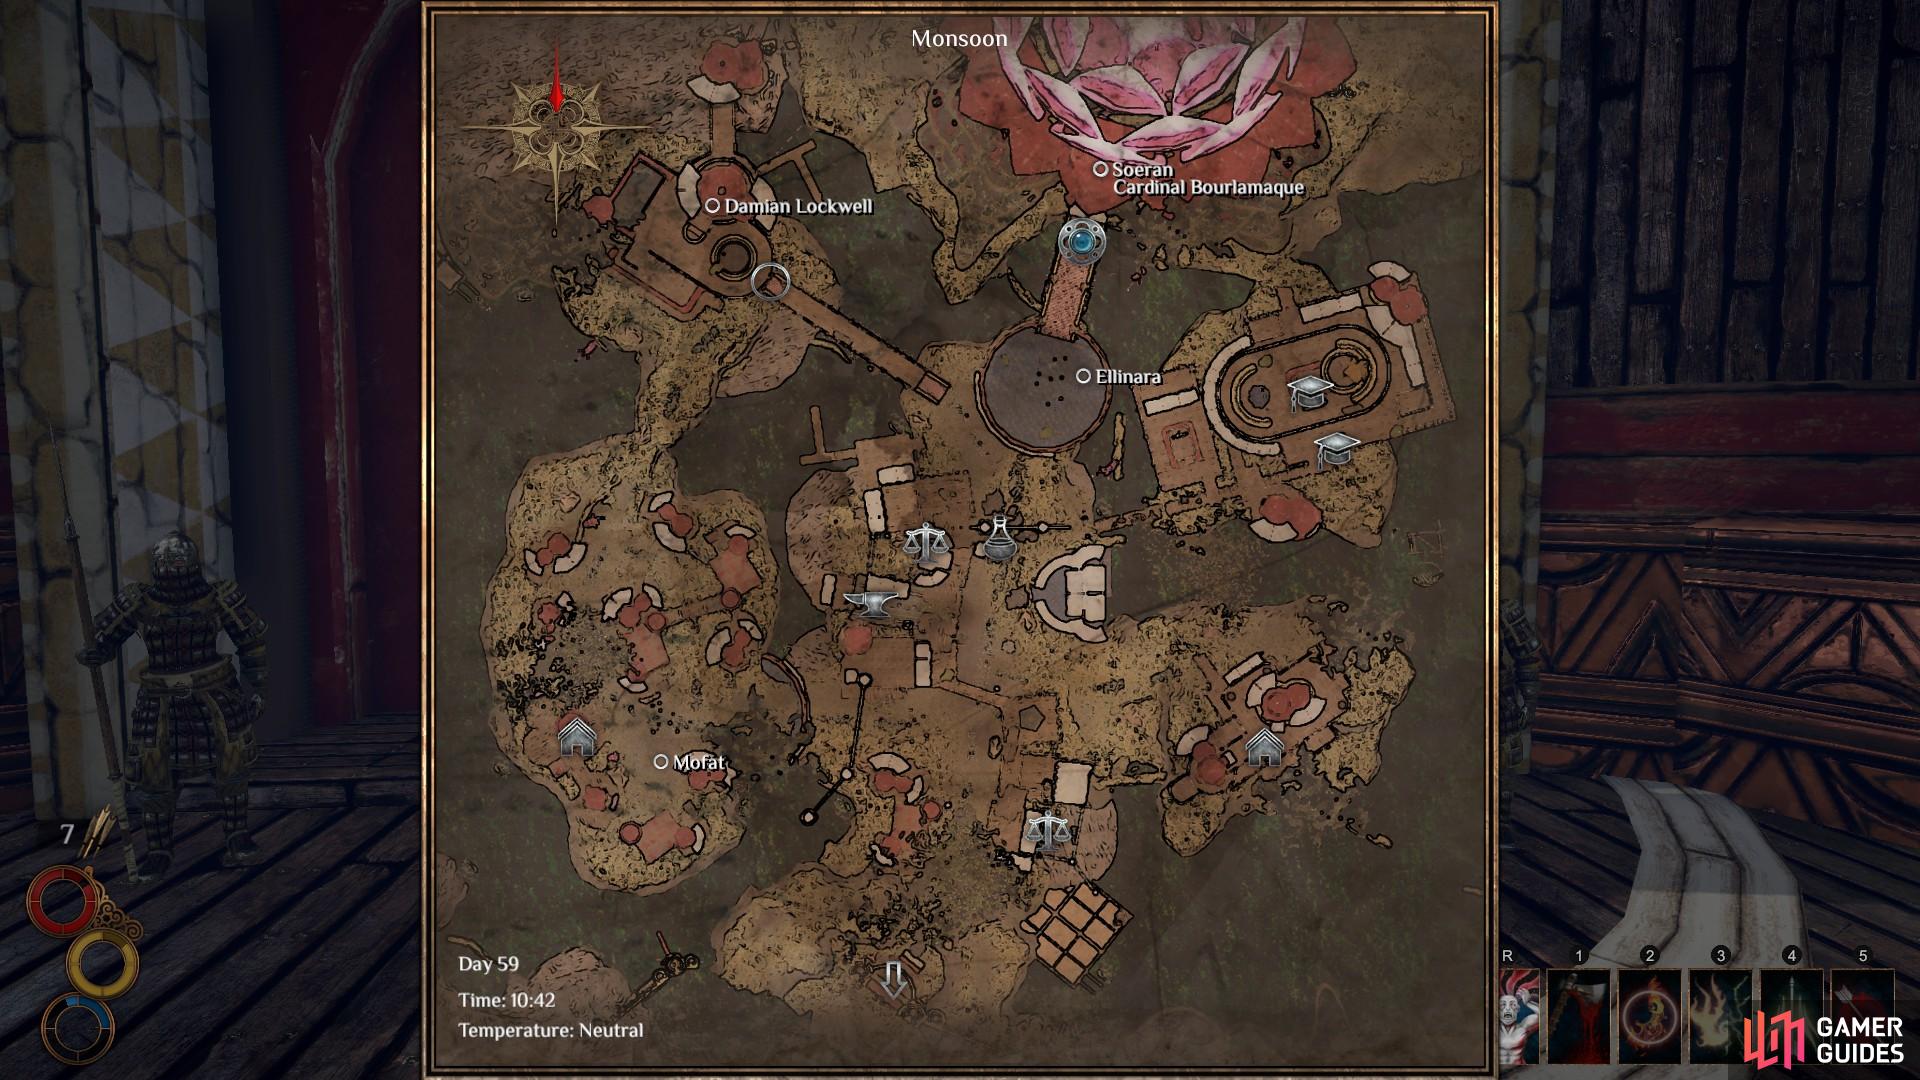
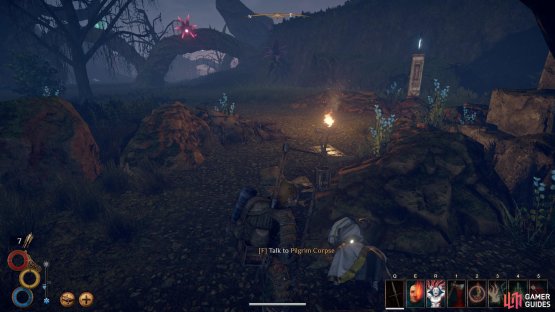
If you haven’t already picked up the quest from along the Pilgrim’s road, the nearest location to Monsoon where you will find the white-clad missionaries is marked on the map below. Follow the road south from Monsoon and, when in doubt, look for the Pilgrim pillars marked by an illuminated star. As you come across the pillar marked below you will see a campfire to your right. Go to it and you will find the body of a missionary on the floor. Interact with it and then return to Mofat in Monsoon.

(1 of 2) The deceased pilgrim can be found along the Pilgrim Road, south of Monsoon.
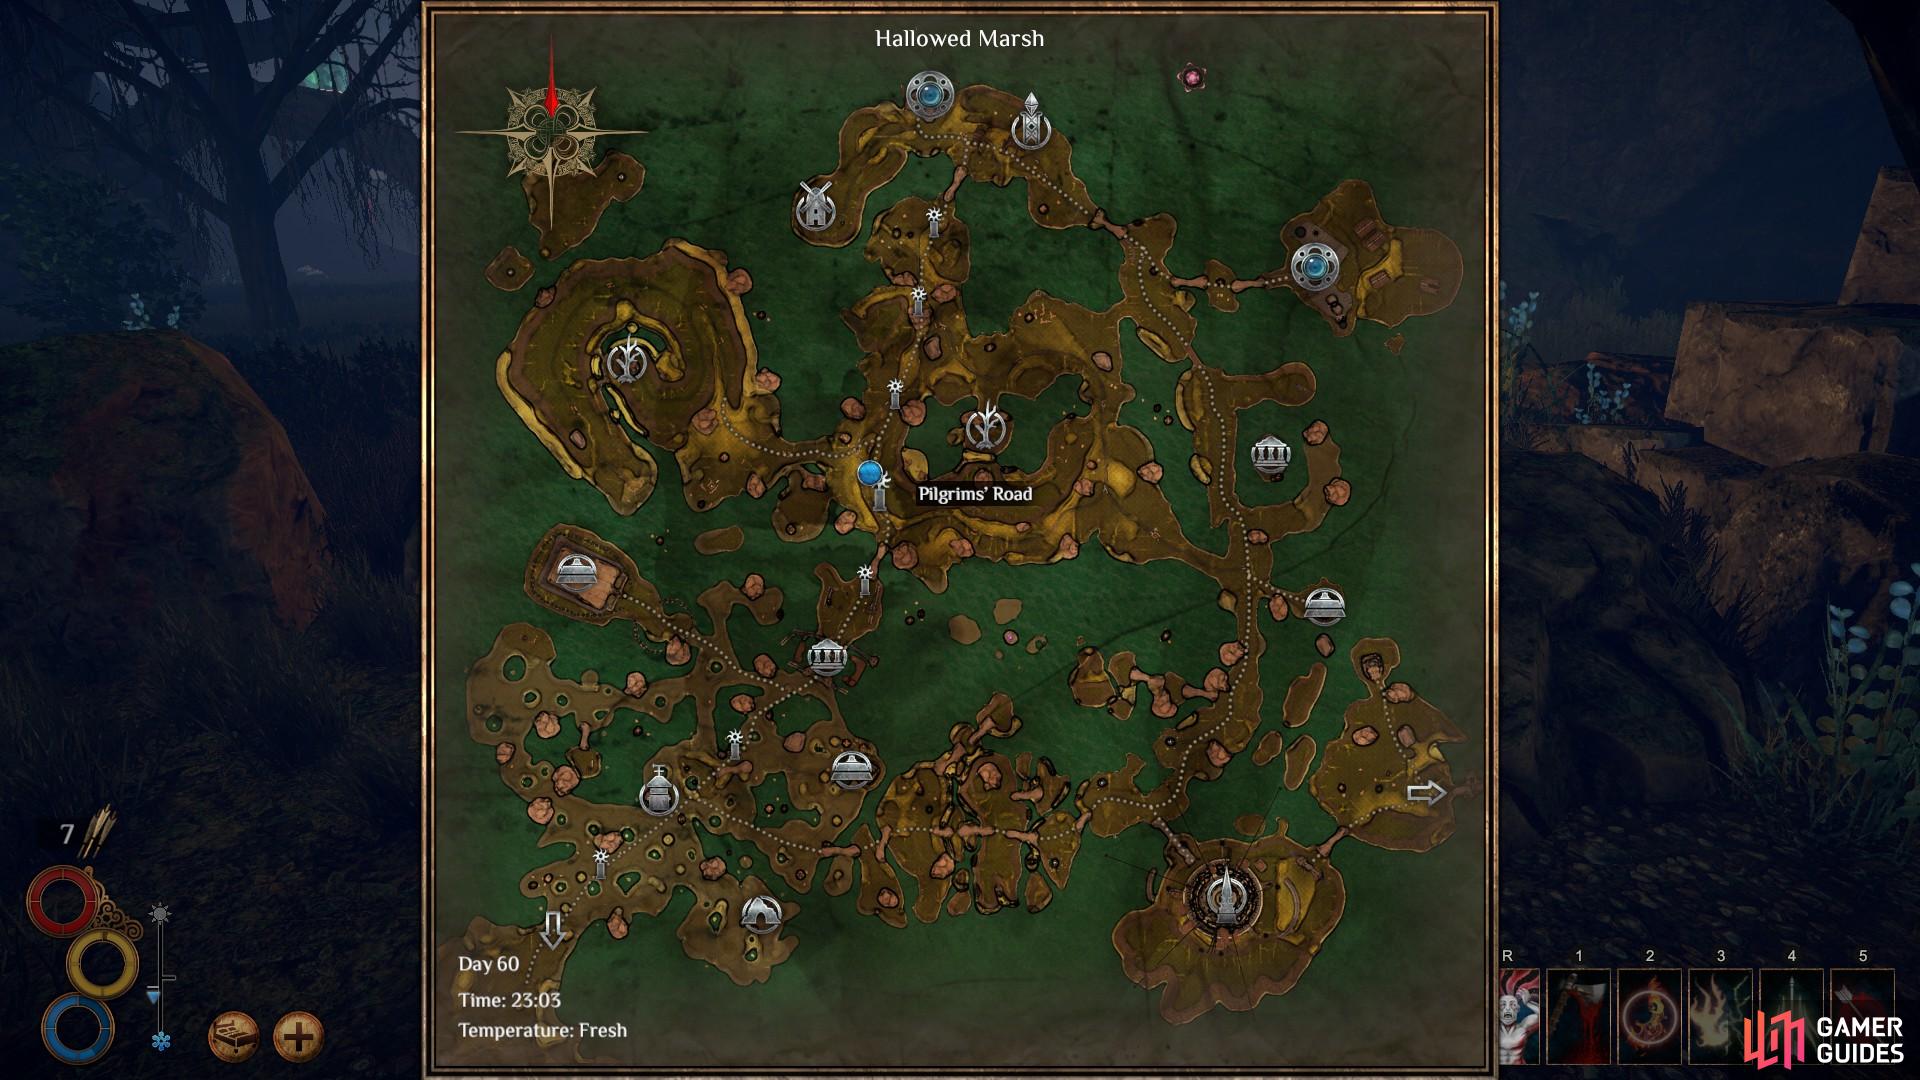

The deceased pilgrim can be found along the Pilgrim Road, south of Monsoon. (left), Look out for a campfire at the side of the road. You will find a deceased white-clad pilgrim nearby. (right)
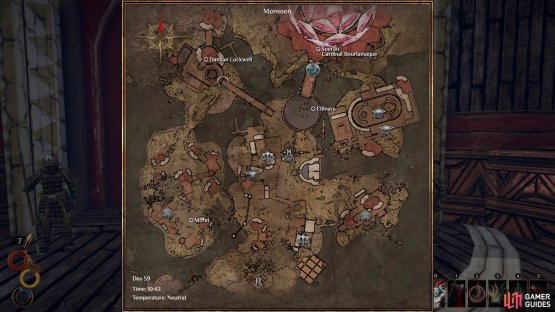
After speaking with Mofat about your findings, he will ask you to speak with Alemmon, the Philosopher Trainer in Monsoon. He can be found in the north east of the city, as shown on the map below. Just head east from Mofat and then north along the main path in the city heading toward Elatt’s Temple. Just before you reach the archway leading to the temple, turn east, walk over the wooden bridge and up the stairs, at the top of which you will find Alemmon.
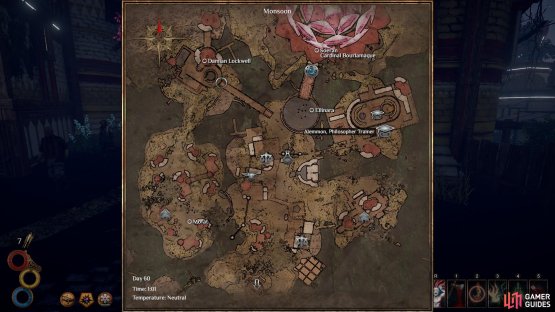
(1 of 2) The location of Alemmon on the city of Monsoon map.
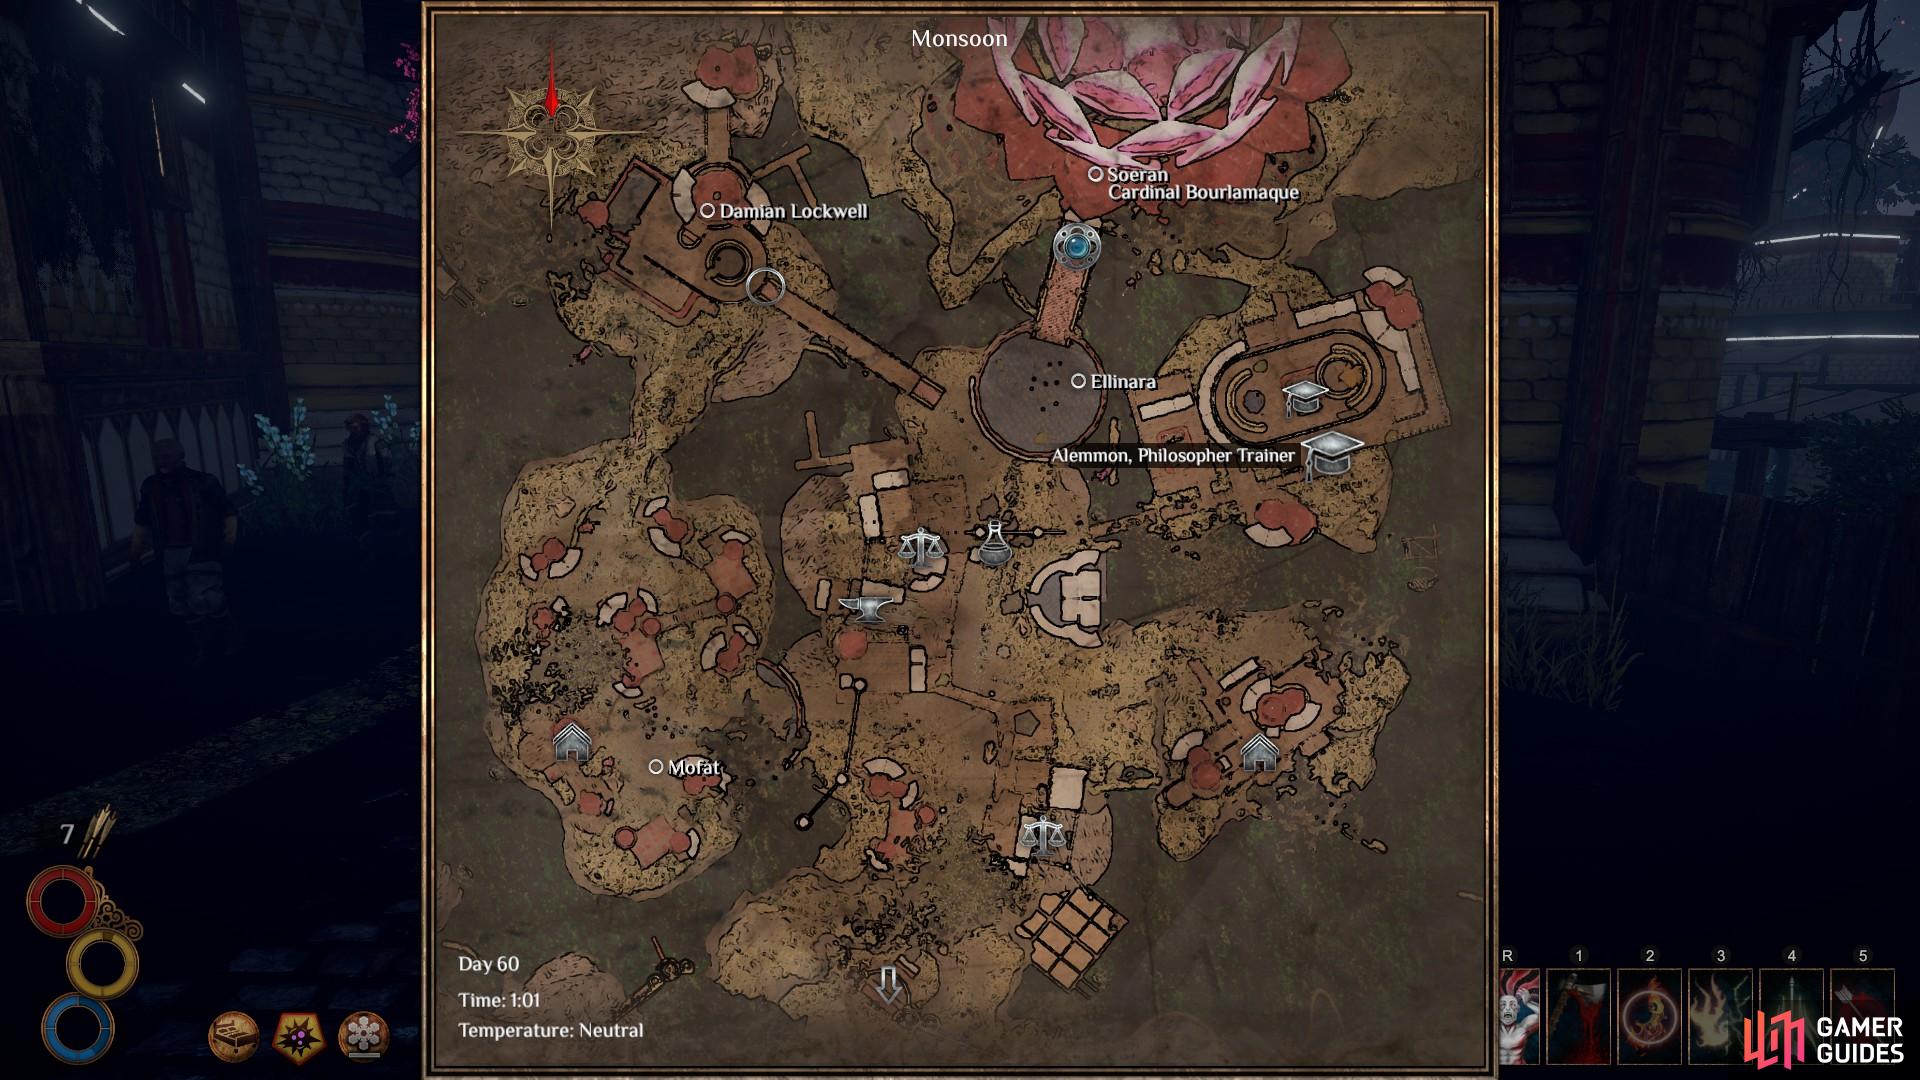
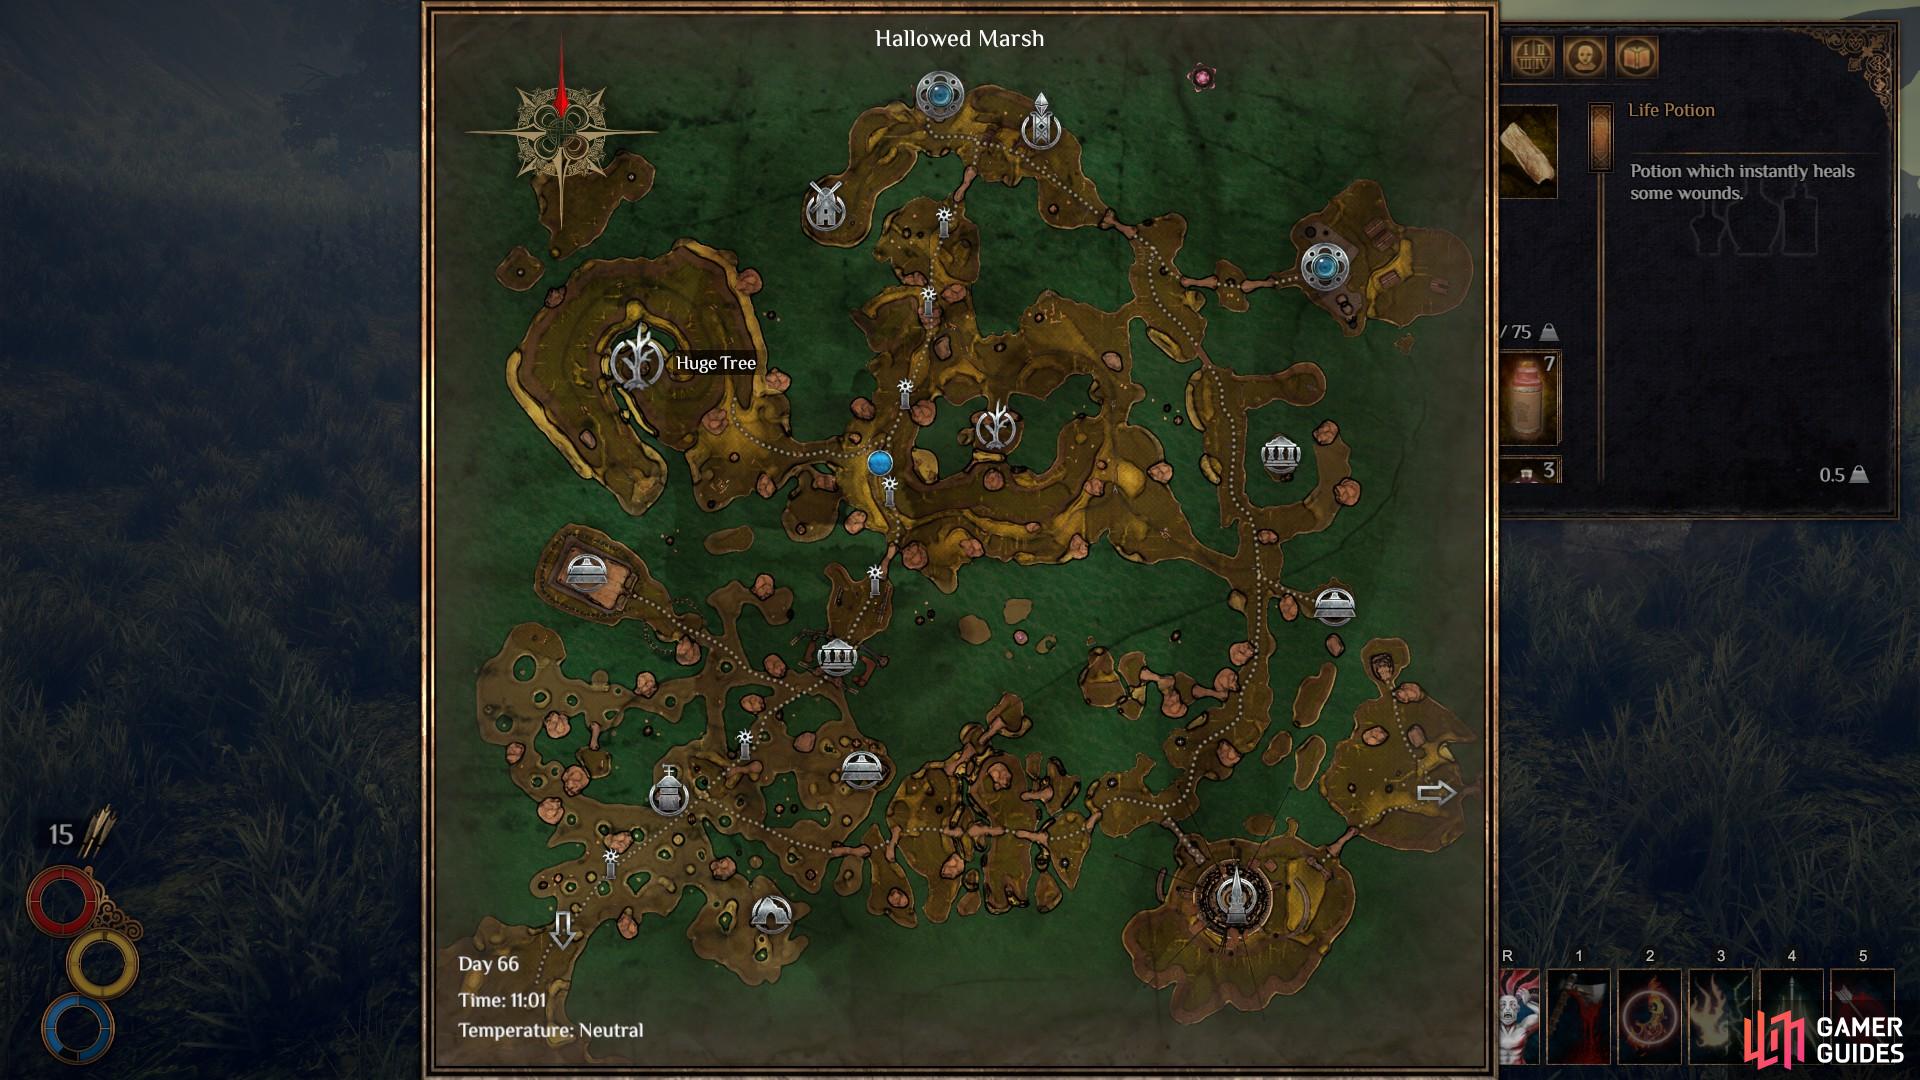
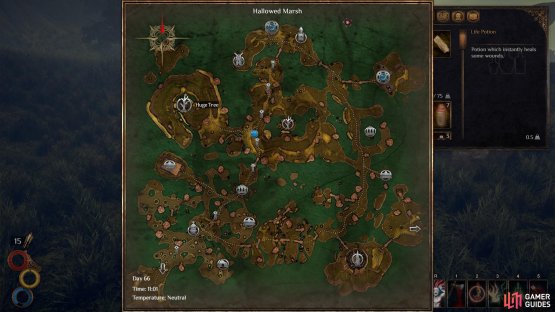
The location of Alemmon on the city of Monsoon map. (left), The location of the Huge Tree in the west of the Hallowed Marsh, where the Dead Roots dungeon can be found. (right)
Once you’ve spoken with Alemmon you will have been informed about where to find the bandits. They have taken up camp in Dead Roots, a dungeon west of the campsite where you found the missionary. Dead Roots is marked as ‘Huge Tree’ on the Hallowed Marsh map, and can be accessed either from its base or from the top. The top entrance is faster, so we shall proceed with that in mind.
Head south along the Pilgrim road from Monsoon. When you reach the pillar beside the campfire, turn directly west and follow the path through the entwined tree trunks. The path will eventually bend north as you ascend the hill. At this point you will encounter some bandits, though they shouldn’t pose much of a threat. At the top of the hill, turn west. You will see the tree in the distance and the path to it from here.
Once inside Dead Roots, you will need to find ‘several pieces of evidence’. This comprises four notes which contain incriminating evidence. While only three notes are required to complete the quest, finding all four will provide you with the Dead Roots Key. The key can be used to access some otherwise hidden loot. More information on this will be detailed below.
When you enter Dead Roots, head north over the first bridge and down some wooden stairs. In front of you, to the west, you will see some bushes. Behind the bushes you will find an Immaculate. It will be hostile, so be prepared for a fight. It only has one swift attack which consists of two slashes. The slashes have a long reach, so it is best to preserve your stamina and try to use a weapon with a lot of reach to counter as you evade incoming attacks. Alternatively you can use a bow or magic to slow the Immaculate and kite it around the room. Try to avoid leaving the room as you may pull an Ice Witch or Bandit. However, if you’re lucky the Immaculate will fight the additional mobs, giving you some time to recuperate.
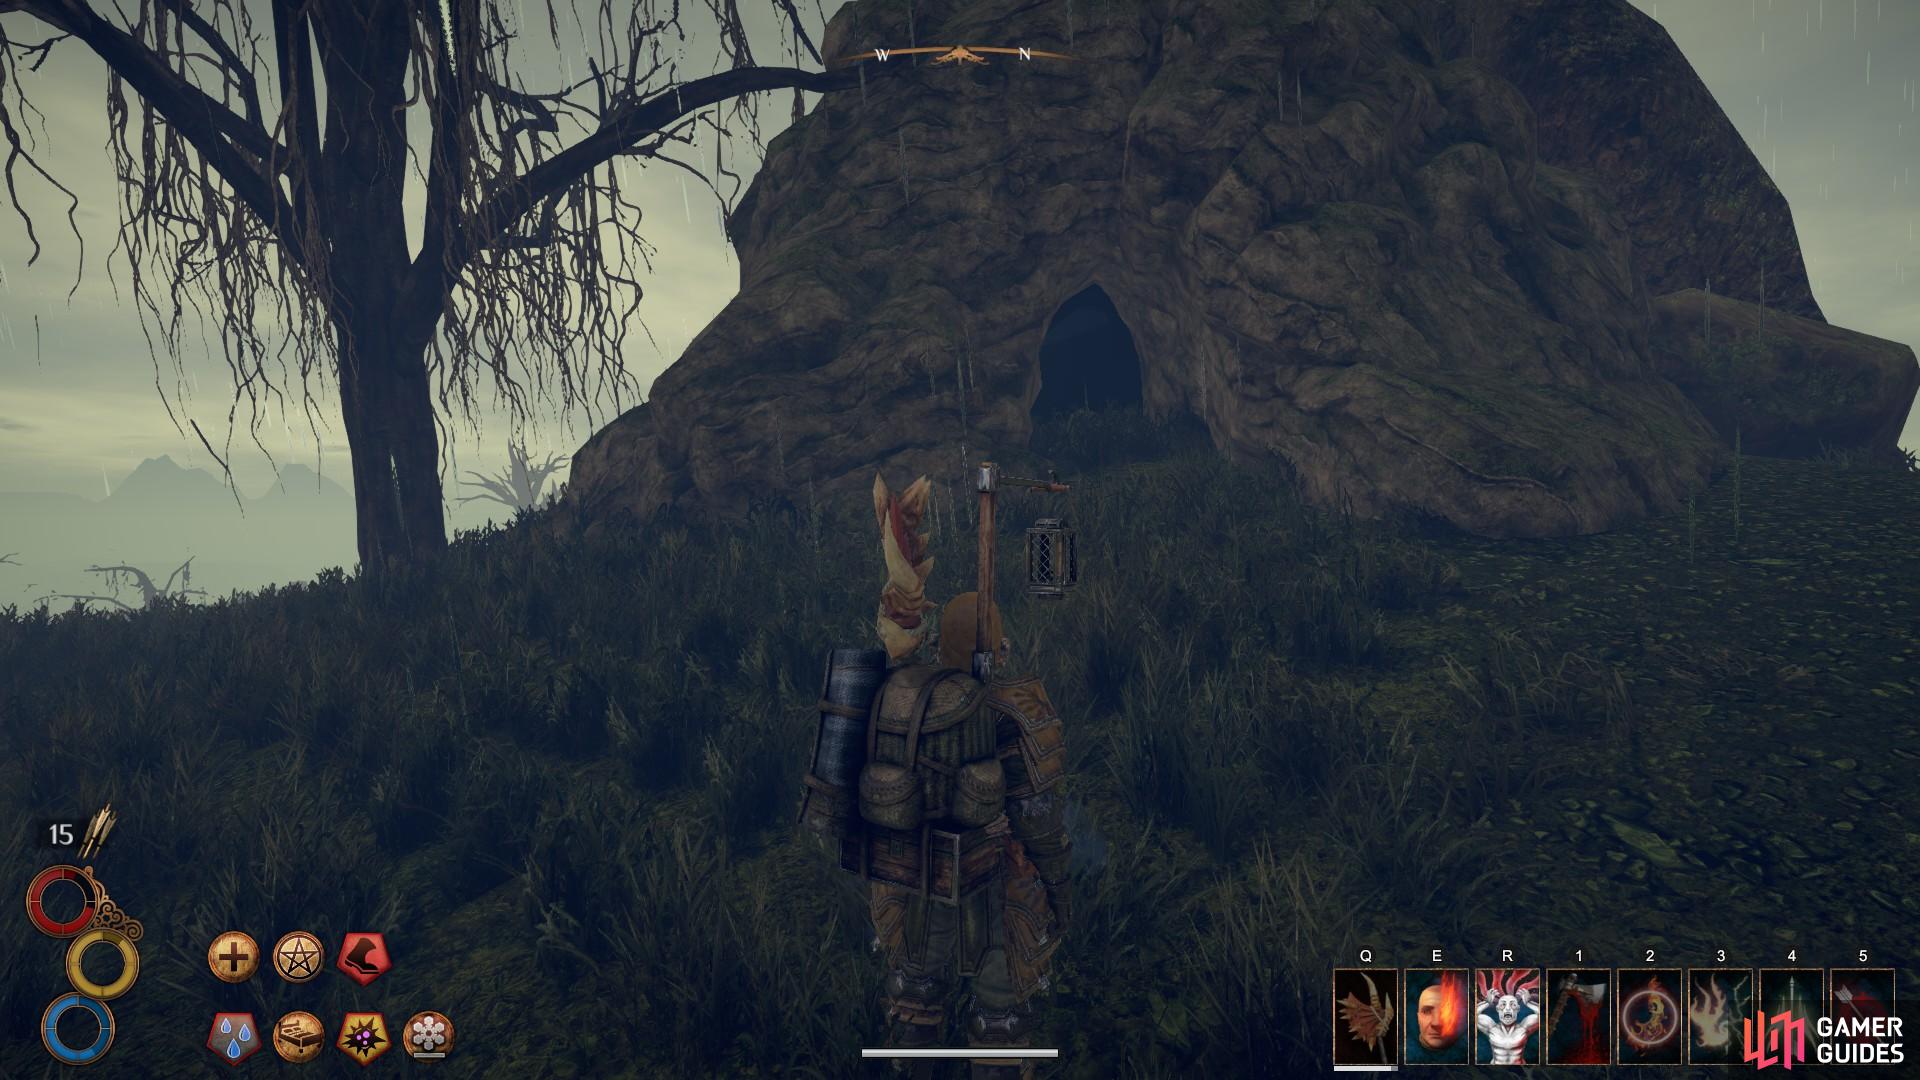
The entrance to Dead Roots, marked by a small dying tree to its left. Not to be mistaken with the Huge Tree at the centre of the map.
When the Immaculate is dead you will be able to loot the contents of the room. You will find a junk pile and a soldier’s corpse containing randomly generated loot. In addition, you can find a luxury tent on the floor and, most importantly, one of the essential quest notes on the table. This will be a good opportunity to use your new tent for a swift recovery of health, stamina and mana if necessary before you move on. When ready, head back beyond the bushes and turn south downward into the dungeon. The route is rather linear but you can explore each room for junk piles and other loot along the way.

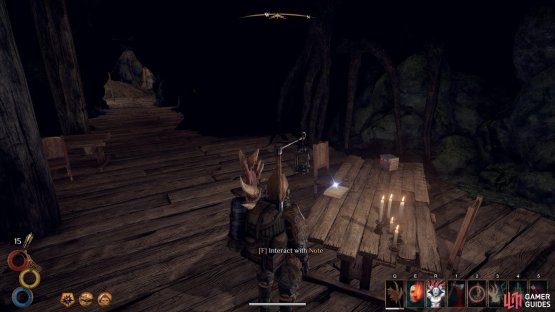
(1 of 2) The second note within the Dead Roots dungeon, beside some iron cages.


The second note within the Dead Roots dungeon, beside some iron cages. (left), The third note within the Dead Roots dungeon, found on a table near the location of the Marsh Captain. (right)
A few sets of stairs and a couple of bandit fights later, you will find yourself in a room with two large metal cages to your left. Next to them is a table, containing the second note. Interact with it to pick it up and move on downward into the dungeon. The third note can be found on a table at the bottom of the stairs in the room directly below. From here you can continue west into the dungeon. In this main room you will find the Marsh Captain. He has swift attacks which deal significant damage. If you are having difficulty dealing with him, use the large table where you found the third note to create a barrier as you recover stamina.
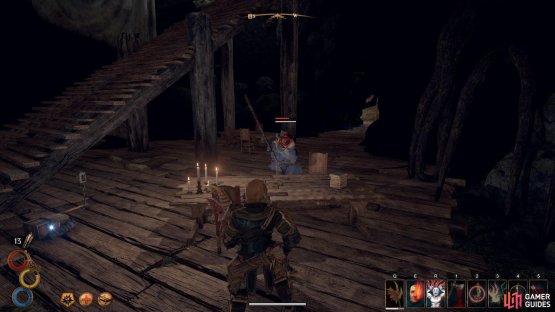
(1 of 2) Use the table to create a barrier between yourself and the Marsh Captain if things get tricky.
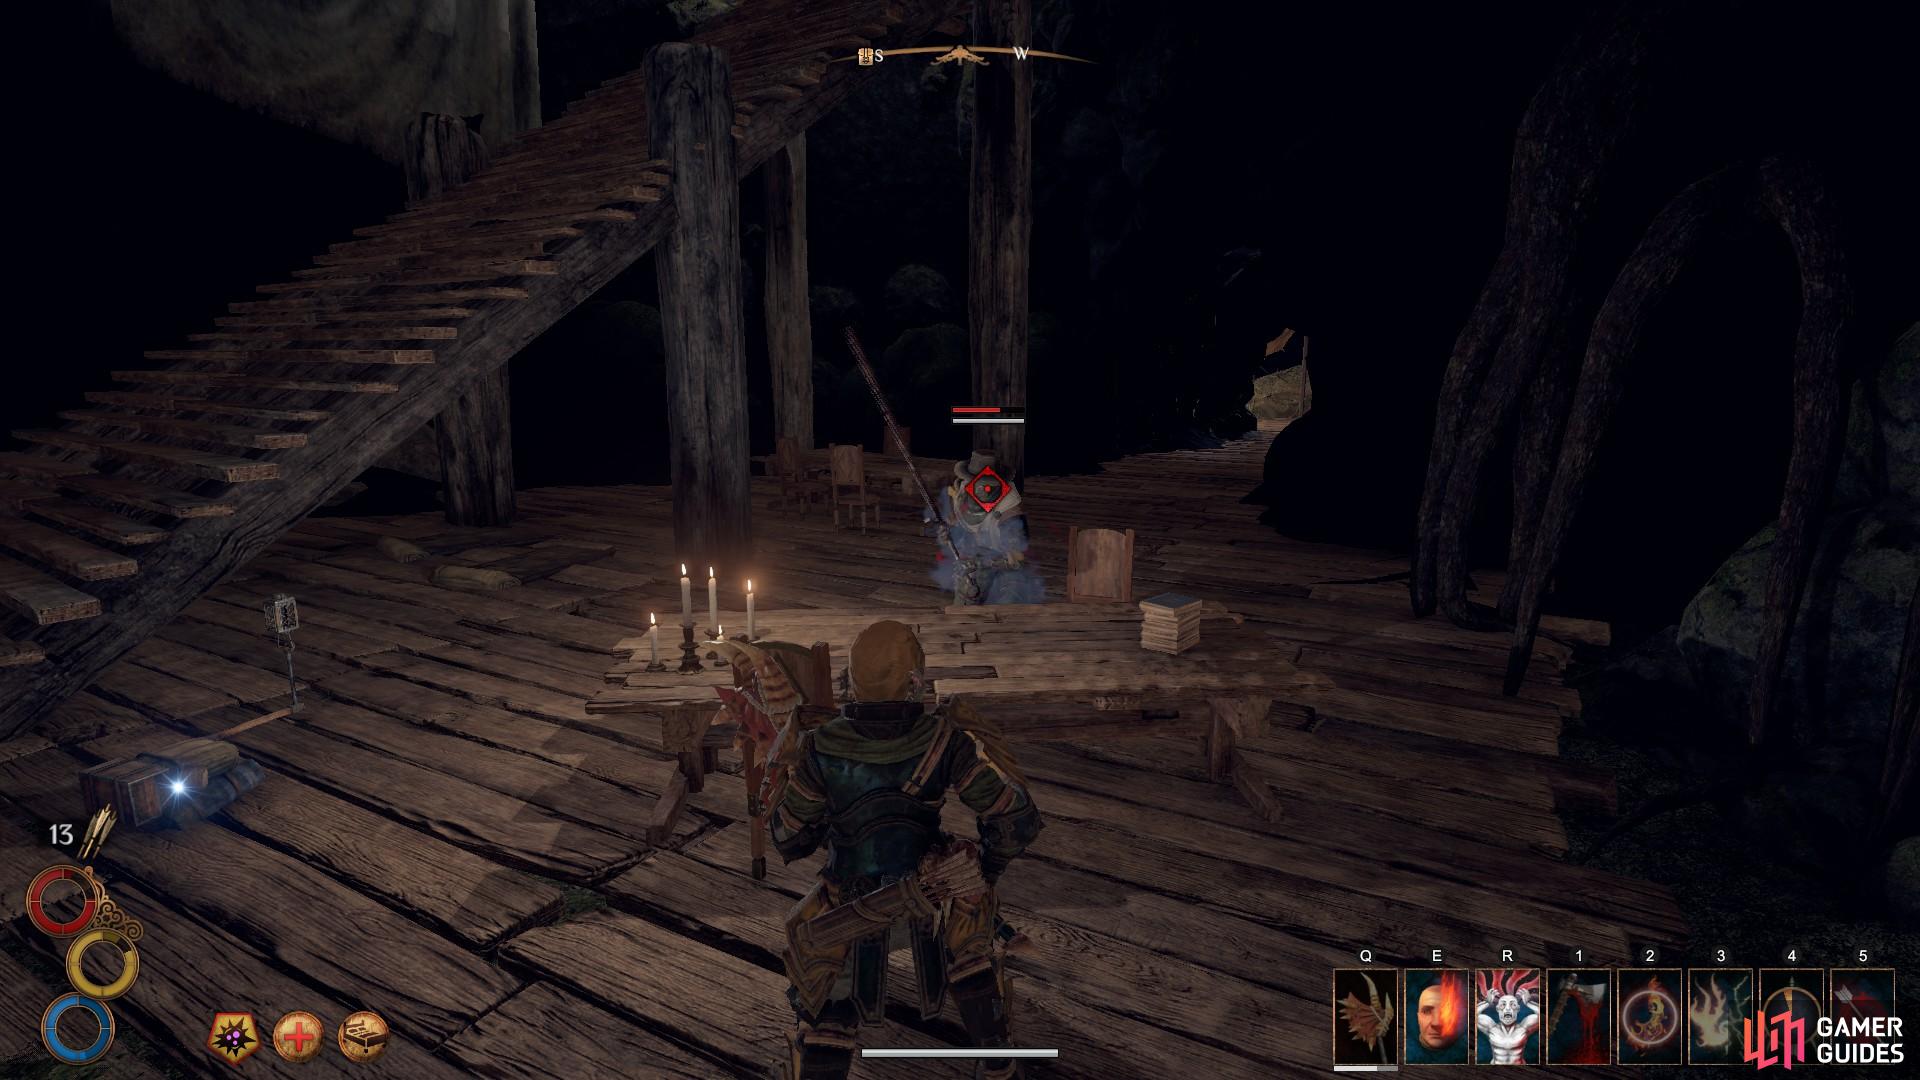

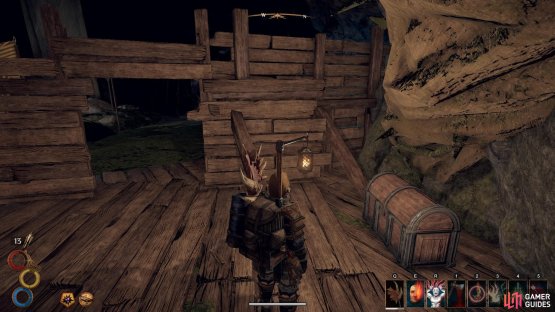
Use the table to create a barrier between yourself and the Marsh Captain if things get tricky. (left), Be sure to loot the chest to your right on the wooden bridge. (right)
When the captain is dead, be sure not to miss the chest of loot to your right as you cross the bridge, as shown above. You will also find a worker’s corpse in the room where the captain was found roaming. Once you’ve looted everything, head south down a tunnel further into the dungeon. The final note will be on a table to your right as you exit the tunnel, along with a key to the Dead Tree in the room above. At this point you can choose to continue down into the dungeon until you come to an exit. However, if you go back up the tunnel from where you came and to the Dead Tree door, you will have the opportunity to acquire some unique loot.

(1 of 2) The fourth note can be found on some boxes beneath the area where you encountered the Marsh Captain.

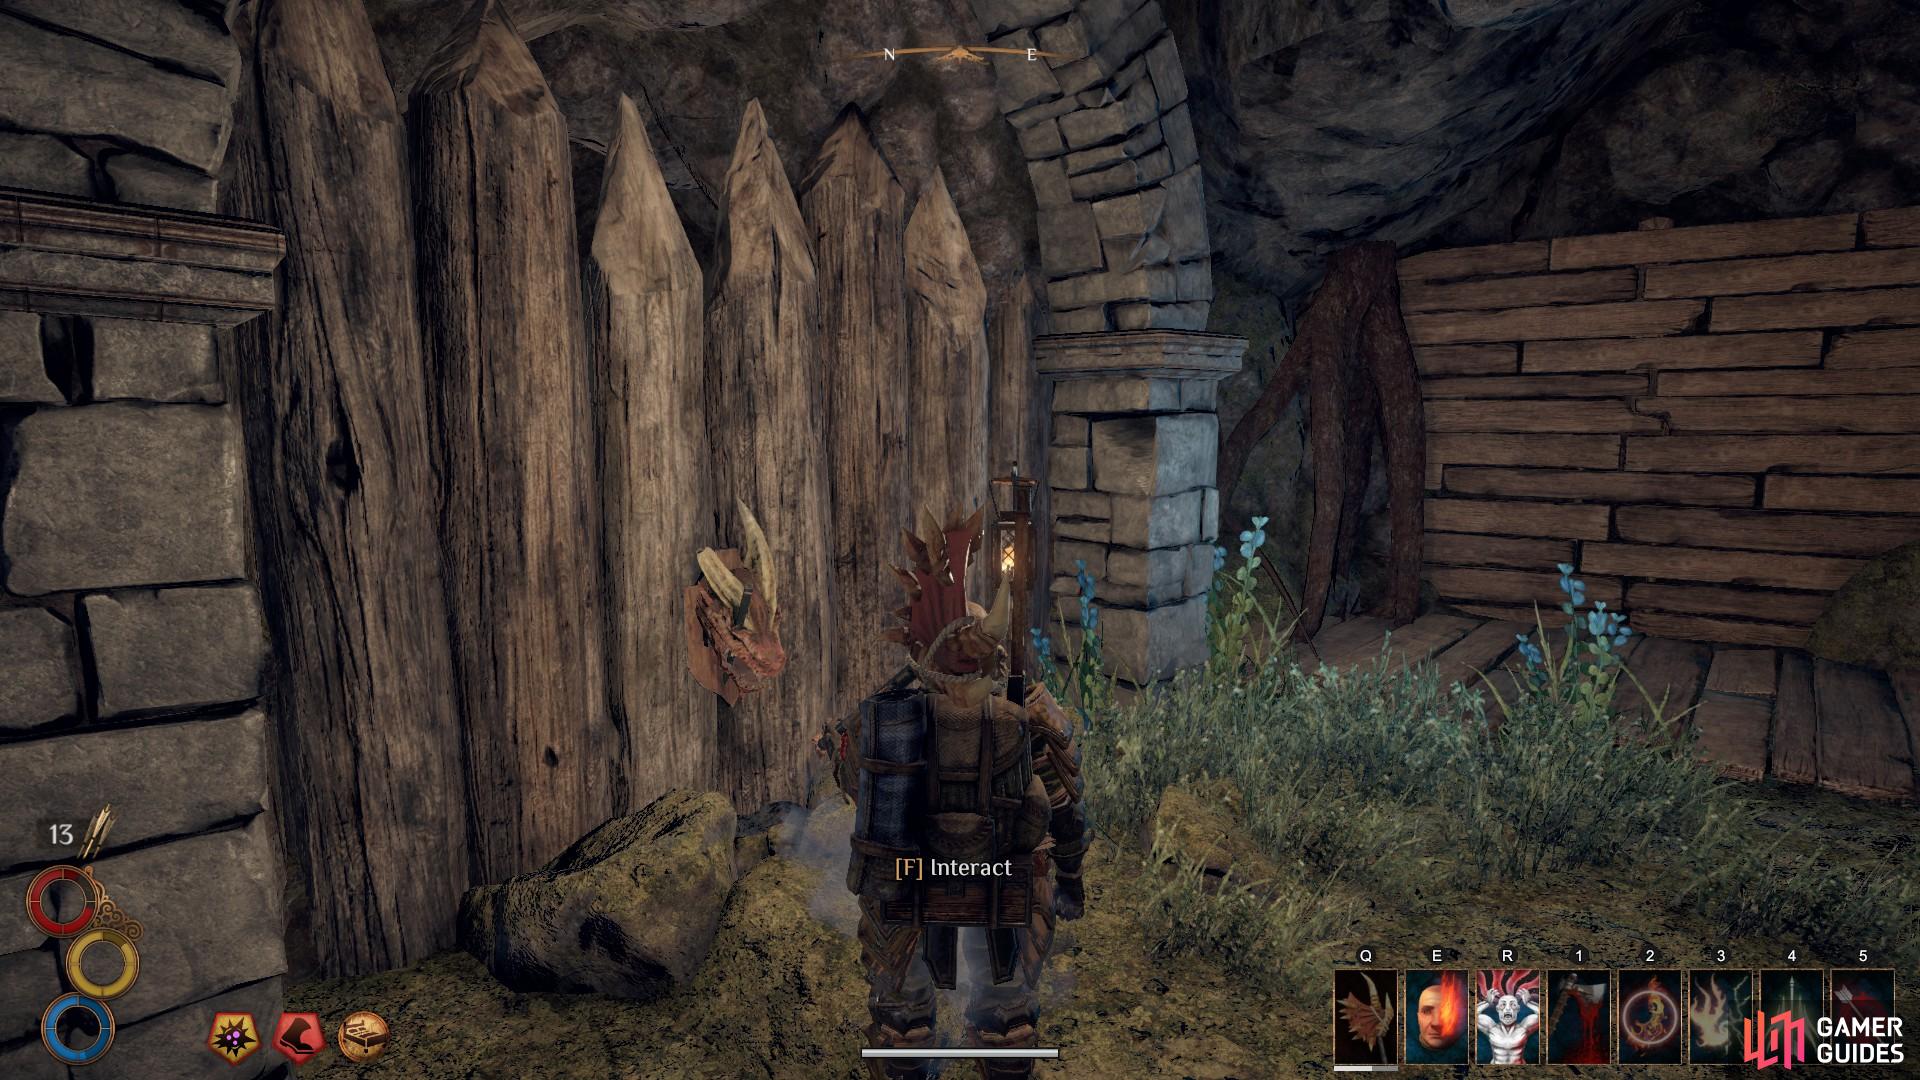
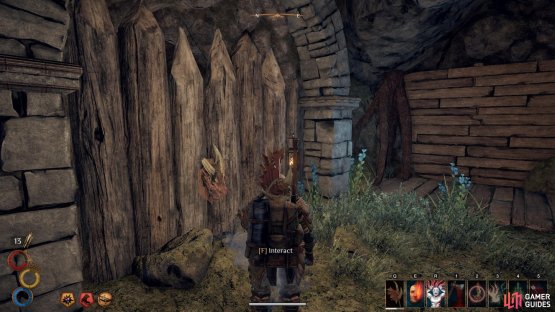
The fourth note can be found on some boxes beneath the area where you encountered the Marsh Captain. (left), Go back to where you killed the Marsh Captain and use the key to open the door to Dead Tree dungeon. (right)
When you’re ready to enter Dead Tree, open the door by clicking on the reptilian head. You will then have access to a small area which leads to the Dead Tree entrance. At this point you should use any buffs that you want to utilise during the fight. Note that the Immaculate is vulnerable to lightning damage, so if you have any skills which deal it you should focus on using them. Alternatively you can use a lightning rag to rub on your weapon to inflict an amount of lightning damage with each strike.
When you enter the Dead Tree you will be able to see the Immaculate and Illumination Horror waiting on a stone platform. If you wait at the entrance the Immaculate should approach you first. Wait for this and then run passed it. Take the opportunity to nuke the Illumination Horror to avoid its magic during the fight with the Immaculate. You can then kite the immaculate around the stone platform while being careful to avoid its swift slashes. As always, stamina preservation is key; take your time and don’t panic dodge too much. Running to the side of an attack is just as efficient to avoid it.
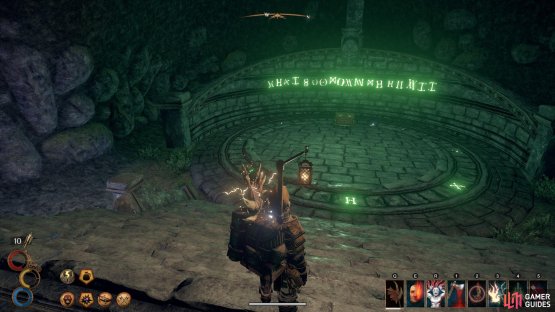

(1 of 2) The stone platform where you will find the Immaculate and the Illumination Horror waiting.

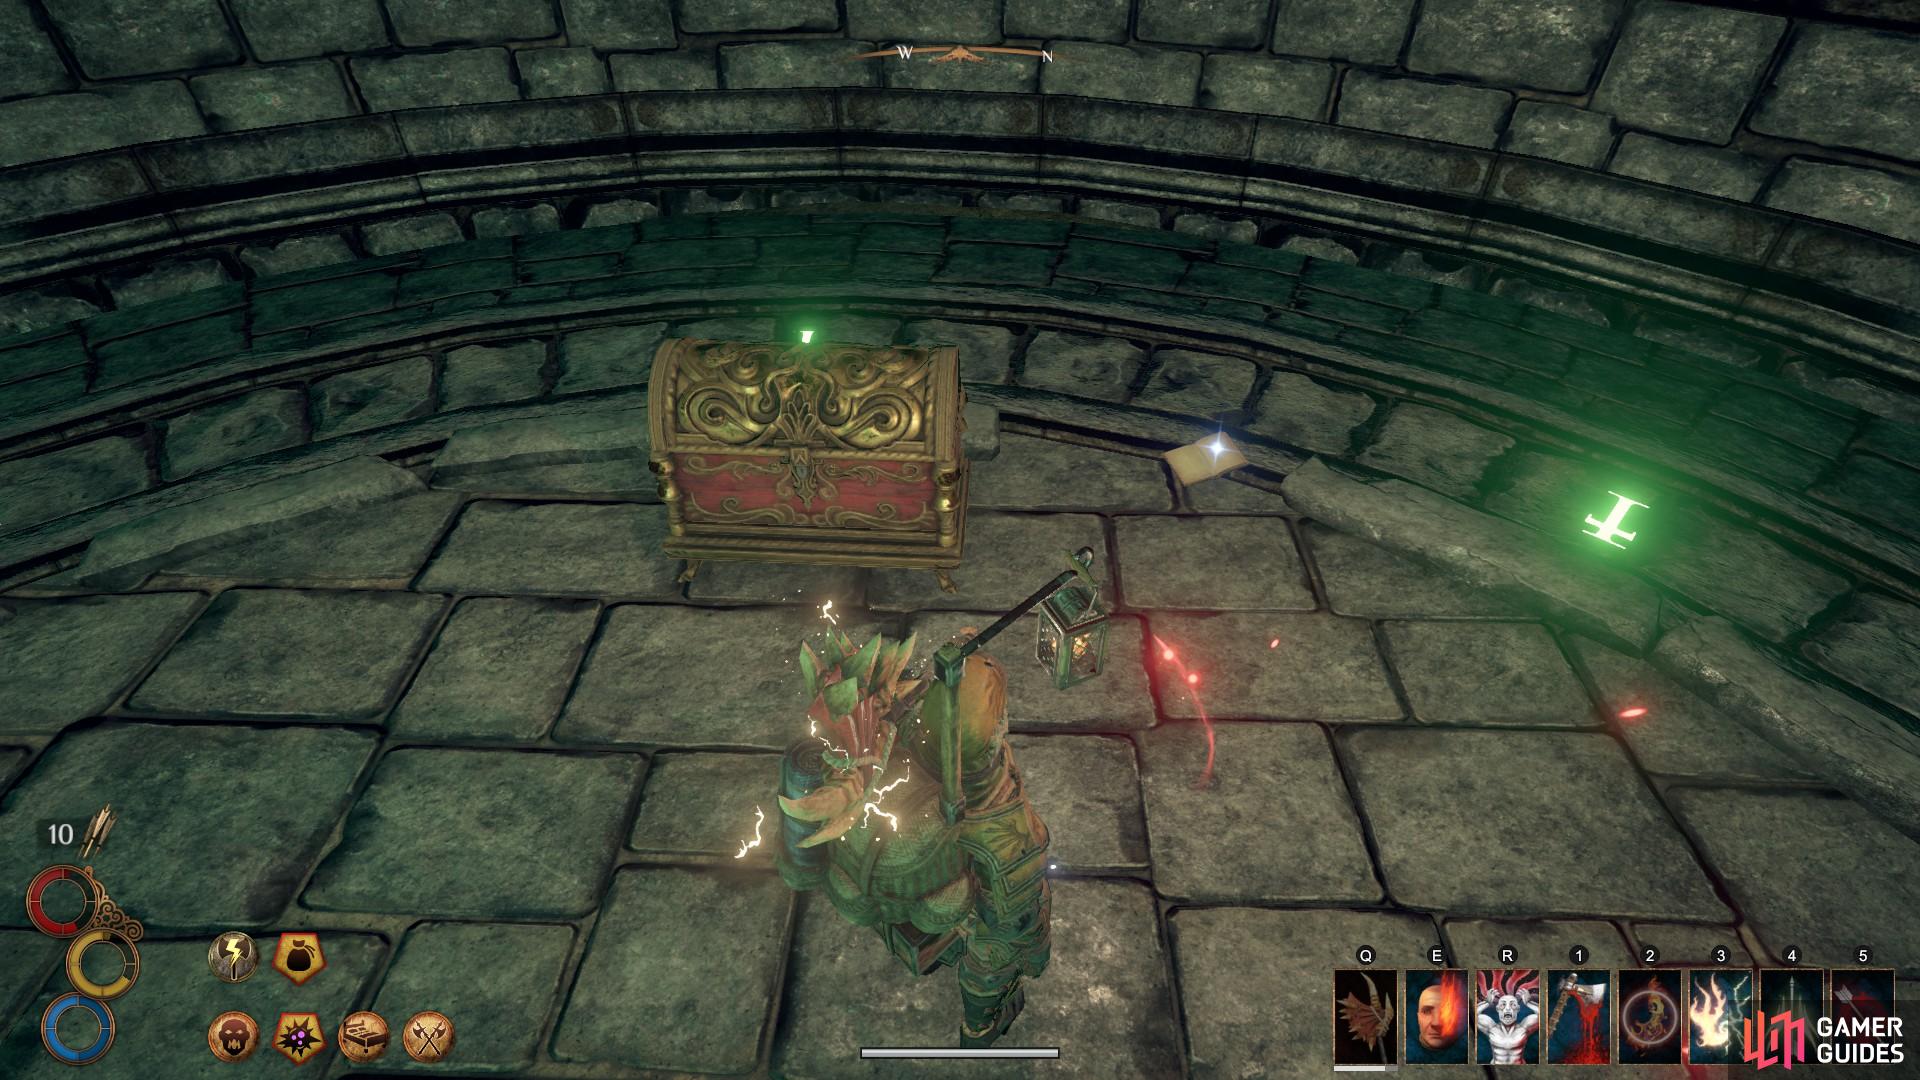
The stone platform where you will find the Immaculate and the Illumination Horror waiting. (left), Be sure to read the note beside the Ornate Chest once the Immaculate and Illumination Horror are defeated. (right)
When both Immaculate and Illumination Horror are dead, loot the ornate chest and inspect the note beside it. This will provide you with incriminating evidence against a specific person dwelling in Berg; Jager Sullivan. Now that you have all the evidence you need, exit the Dead Tree and head back down into the deepest depths of the Dead Roots dungeon, at the end of which you will find an exit to the Hallowed Marsh. You will find yourself at the foot of the hill on which the tree grows. Loot the box on the hill directly in front of you and then head north west along the grassy path, leading to the Pilgrim road. From here you can make your way directly north to Monsoon.
When you enter the city of Monsoon you will be prompted by one of the guards to speak with Damian Lockwell and inform him about what has transpired. You will find Lockwell in the north west of the city map, within City Hall. Just turn left from the approach to Elatt’s temple and cross the bridge. Once inside, enter the room through the first door on your right. Informing Lockwell of the danger ensures that Monsoon will be protected and completes the optional objective.
At this point you should make your way to the city of Berg in the Enmerkar Forest to warn someone in a position of authority. You can warn one of five people for the following rewards:
-
Rissa Aberdeen: Writ of Tribal Favour and 25 silver.
-
Sagard Battleborn: 50 silver. In addition, Blue Chamber faction players will not need to convince Sagard during their final quest.
-
Mathias: 25 silver and 1 Palladium Scrap. In addition, Mathias opens a small merchant stall which the player can use.
-
Cyril Turnbull: A Trader Backpack and 75 silver.
-
Jager Sullivan: 3 Hackmanite Crystals and 100 silver.
Speaking to anyone other than Jager will result in him being removed from the city, thereby protecting it from destruction. If you choose not to speak with Mathias, he will never open a merchant stall. Note that Mathias is not shown on the city map, but he can be found outside the Blue Chamber speaking with two of his kinsfolk.
After warning someone in a position of authority, the quest will complete.
No Comments