
This quest begins immediately after Sand Corsairs, the second quest in the Heroic Kingdom of Levant faction questline. After 3 days, speak with Queen Calixa within the Heroes’ Palace of Levant.
When you first speak with Queen Calixa after 3 days have passed, she will ask you to complete the events of the quest Blood Under the Sun if you haven’t already done so. If you don’t want to do this, you can choose to ignore Blood Under the Sun and automatically complete it without success. Once Queen Calixa has informed you of the situation, you will need to make your way to the city of Monsoon in the Hallowed Marsh region.
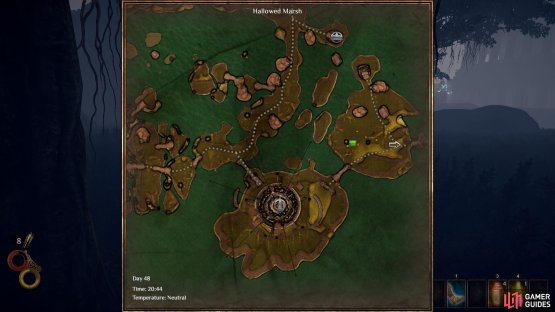
To get to Monsoon, first travel to the Enmerkar Forest region by heading south west from Levant. Be sure to have at least 7 travel rations (4 to Enmerkar Forest and 3 to Hallowed Marsh) in your inventory to make the journey. Once in Enmerkar Forest, take the road north west and follow it until it splits. At this point, head north west again and follow the main road as it bends northward, leading to the Hallowed Marsh.
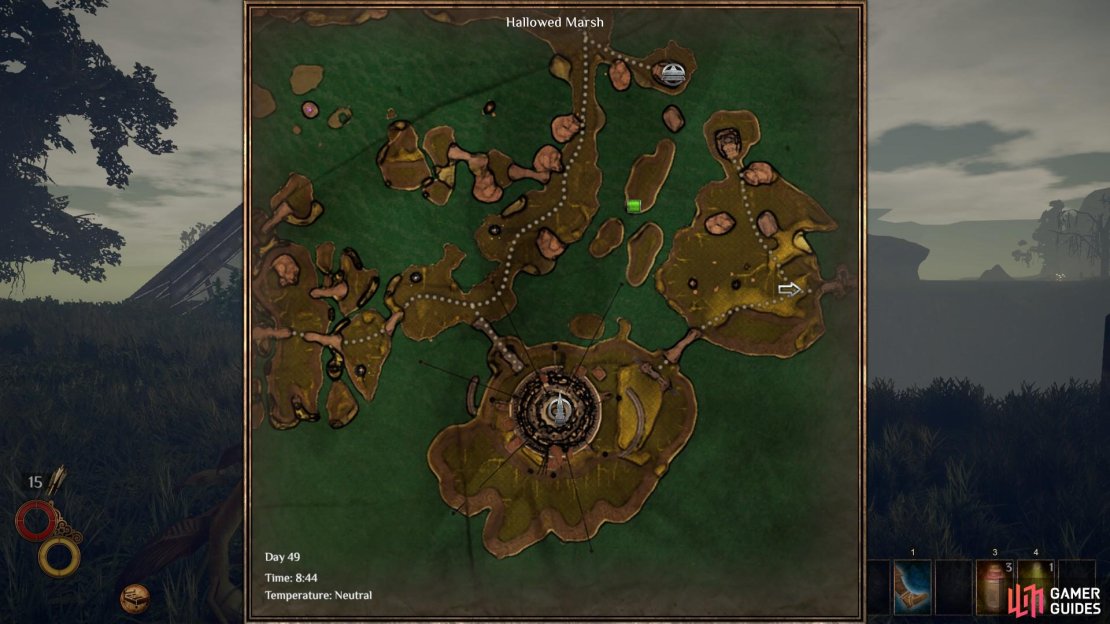
Once you’re in the Hallowed Marsh, take a moment to explore the island that you find yourself in. As you will need 5 Marshmelon and 1 Phytosaur Horn for the upcoming quest, you can save yourself time by collecting them before visiting Monsoon. You will find a Marshmelon to your west on this first island, as shown below.
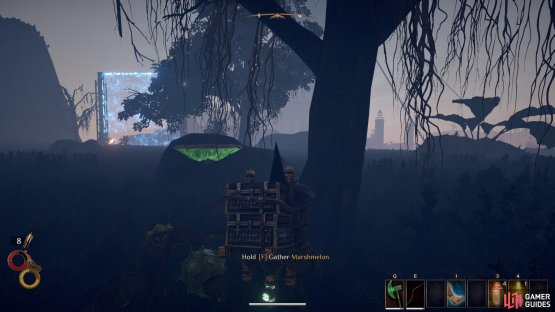
(1 of 2) The location of the first Marshmelon as you enter Hallowed Marsh from Enmerkar Forest.

The location of the first Marshmelon as you enter Hallowed Marsh from Enmerkar Forest. (left), A first person visual of where to find the Marshmelon in relation to the bridge barrier to the Spire of Light. (right)
To ensure safe passage to the other islands, it is recommended that you work your way through the Ziggurat Passage, the entrance to which can be found to the north. A brief guide through the dungeon can be found here, as part of the Blue Chamber Collective faction questline. Be sure to loot every chest, cache and corpse within the Ziggurat Passage for the chance of finding Marshmelons. Within the passage you will also find a Phytosaur, from which you can extract a Phytosaur Horn for the upcoming objective.
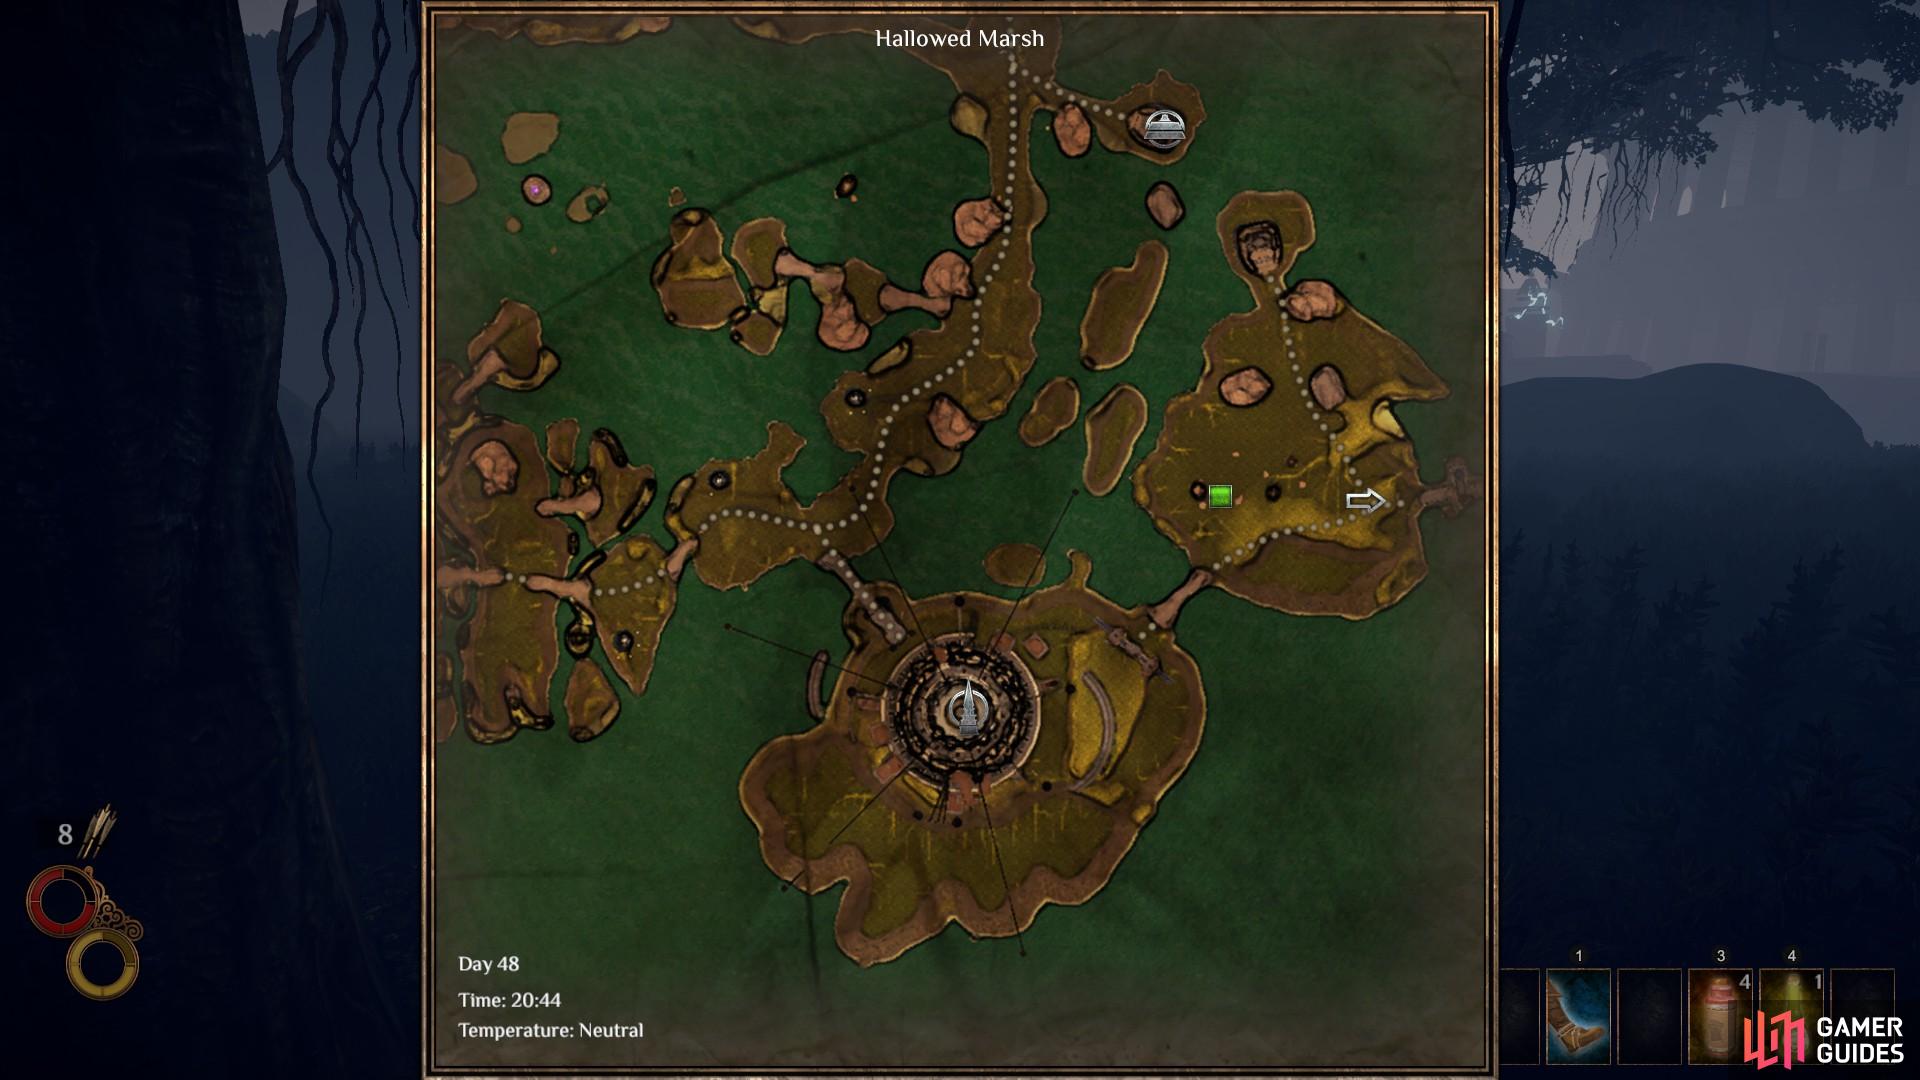
When you’ve completed the necessary steps within Ziggurat Passage to open the bridge which connects the first island to the others heading west, you will find a Marshmelon at the end of the first bridge, as shown below. Now continue over the second bridge and head directly north as soon as you get to the other side. From here you can follow the main road as it bends north west toward the city of Monsoon. When you reach the bridge to Giants’ Village, you will find four Marshmelon spawn points nearby, as shown on the map below.
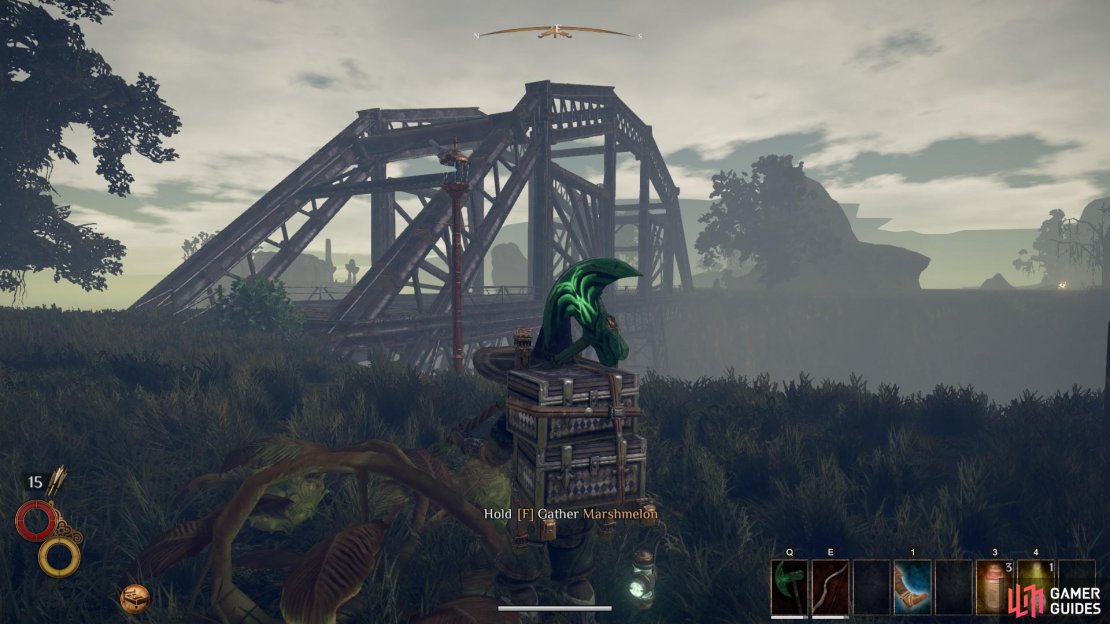
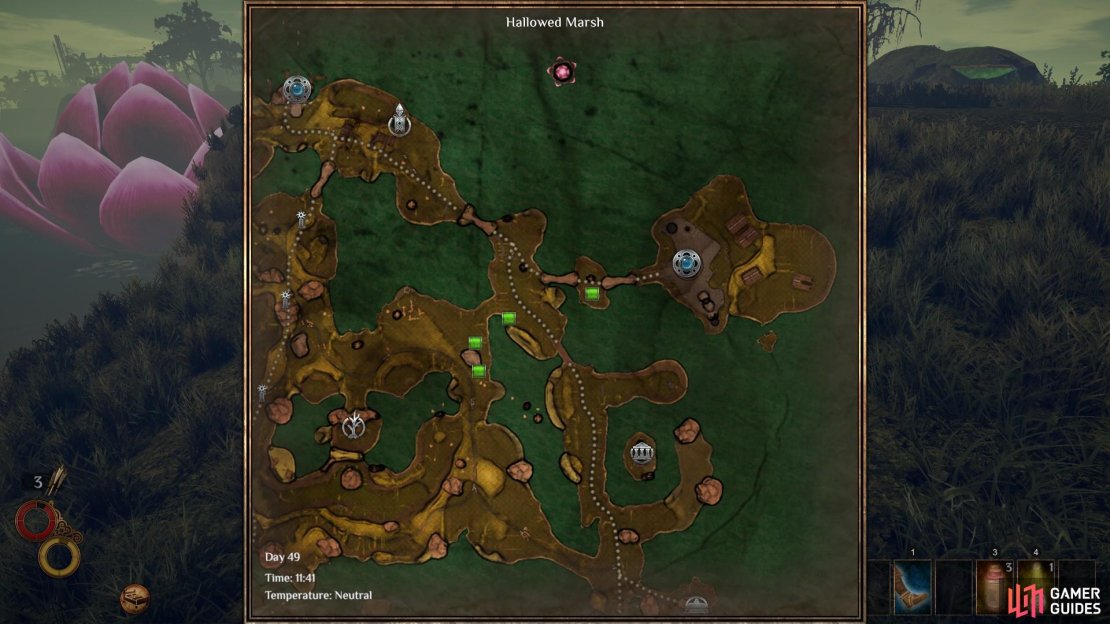
(1 of 3) A first person perspective of the location of the second Marshmelon spawn in relation to the bridge.
Now that you have all 5 Marshmelons, continue along the road to the north west until you reach the docks of Monsoon. From here you can take a boat to the city. Once inside, take the path north and you will find Laine the Alchemist to your left. Speak with him and select “I’m here to talk about Levant’s food shortage”. Provide Laine with the Phytosaur Horn and Marshmelons and then rest for 12 hours before speaking with him again. Note that the quest log won’t update, but so long as you have waited 12 hours you will be able to speak with Laine agian and proceed with the next task.


(1 of 2) Speak with Laine the Alchemist to hand in 5 Marshmelons and 1 Phytosaur Horn.
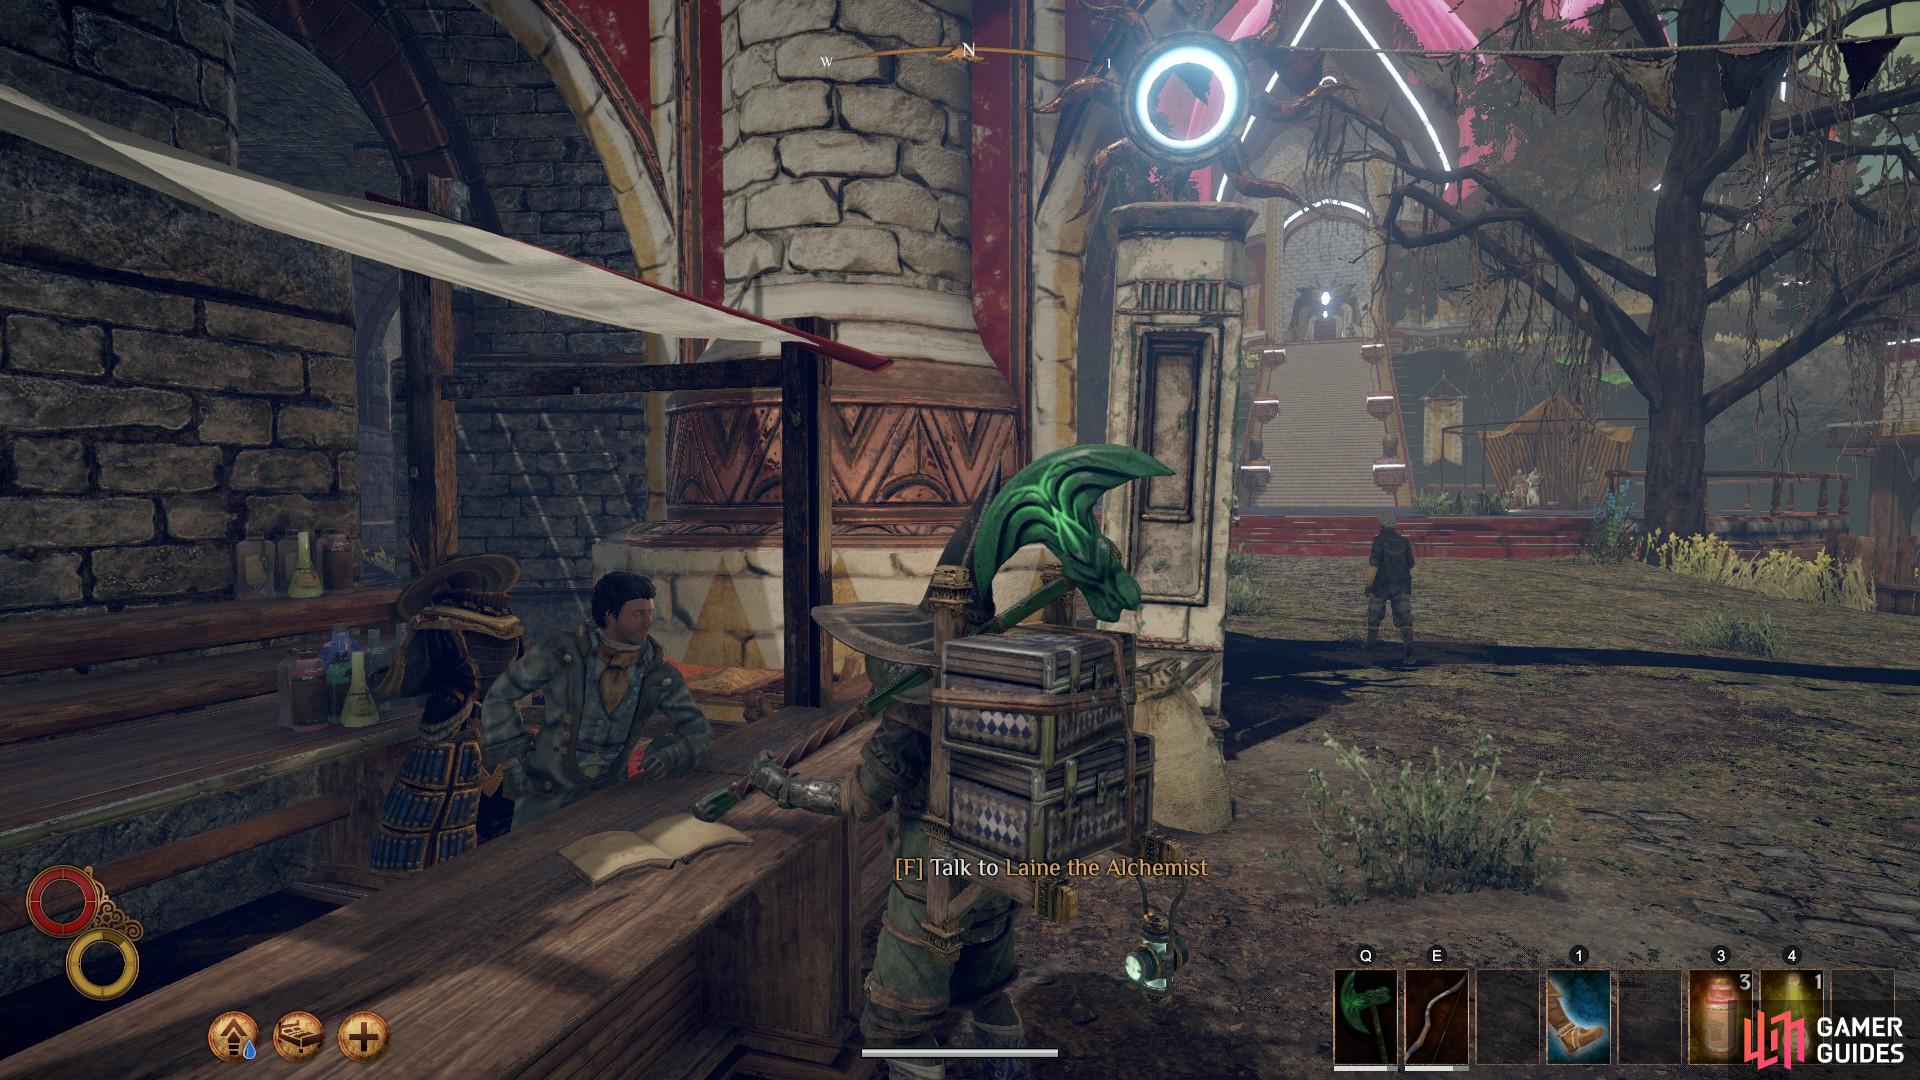

Speak with Laine the Alchemist to hand in 5 Marshmelons and 1 Phytosaur Horn. (left), After waiting 12 hours from speaking with Laine the Alchemist, speak with the Soroborean Caravanner. (right)
Once you have received your reward from Laine, speak with the Soroborean Caravanner nearby, to the south west. Select “I need to talk to you about ending the famine in Levant”. The Caravanner will task you with obtaining the Ornate Granite Tablet from the Spire of Light dungeon. To reach the Spire of Light, take the road south east from Monsoon and follow it until you reach the bridge to the dungeon. Upon entering, you will encounter two Golden Minions. These are fairly powerful mobs which are immune to both poison and bleeding, but vulnerable to Ethereal and Decay damage. Aside from their basic attacks, they have one powerful area of effect lightning attack which inflicts significant lightning damage and a debuff of -25% lightning resistance.
With both Golden Minions dead, the first thing you should do is walk down the stairs immediately adjacent to the entrance and pull the lever in the centre of the room, as shown below. Once the lever is pulled, two other mobs will spawn on the stairs; another Golden Minion and a Golden Sepcter. They have the same immunities and resistances as the minions, but with additional skills. Those with cannons are able to fire lightning blasts which can trace your movement for a short period of time. Use physical barriers to block these attacks and retaliate immediately after they have been executed. Cannon specters also fire a lightning area of effect blast which deals damage over time, so be sure to avoid this when executed. Those with blades have only basic attacks, but they are swift and deal significant damage.
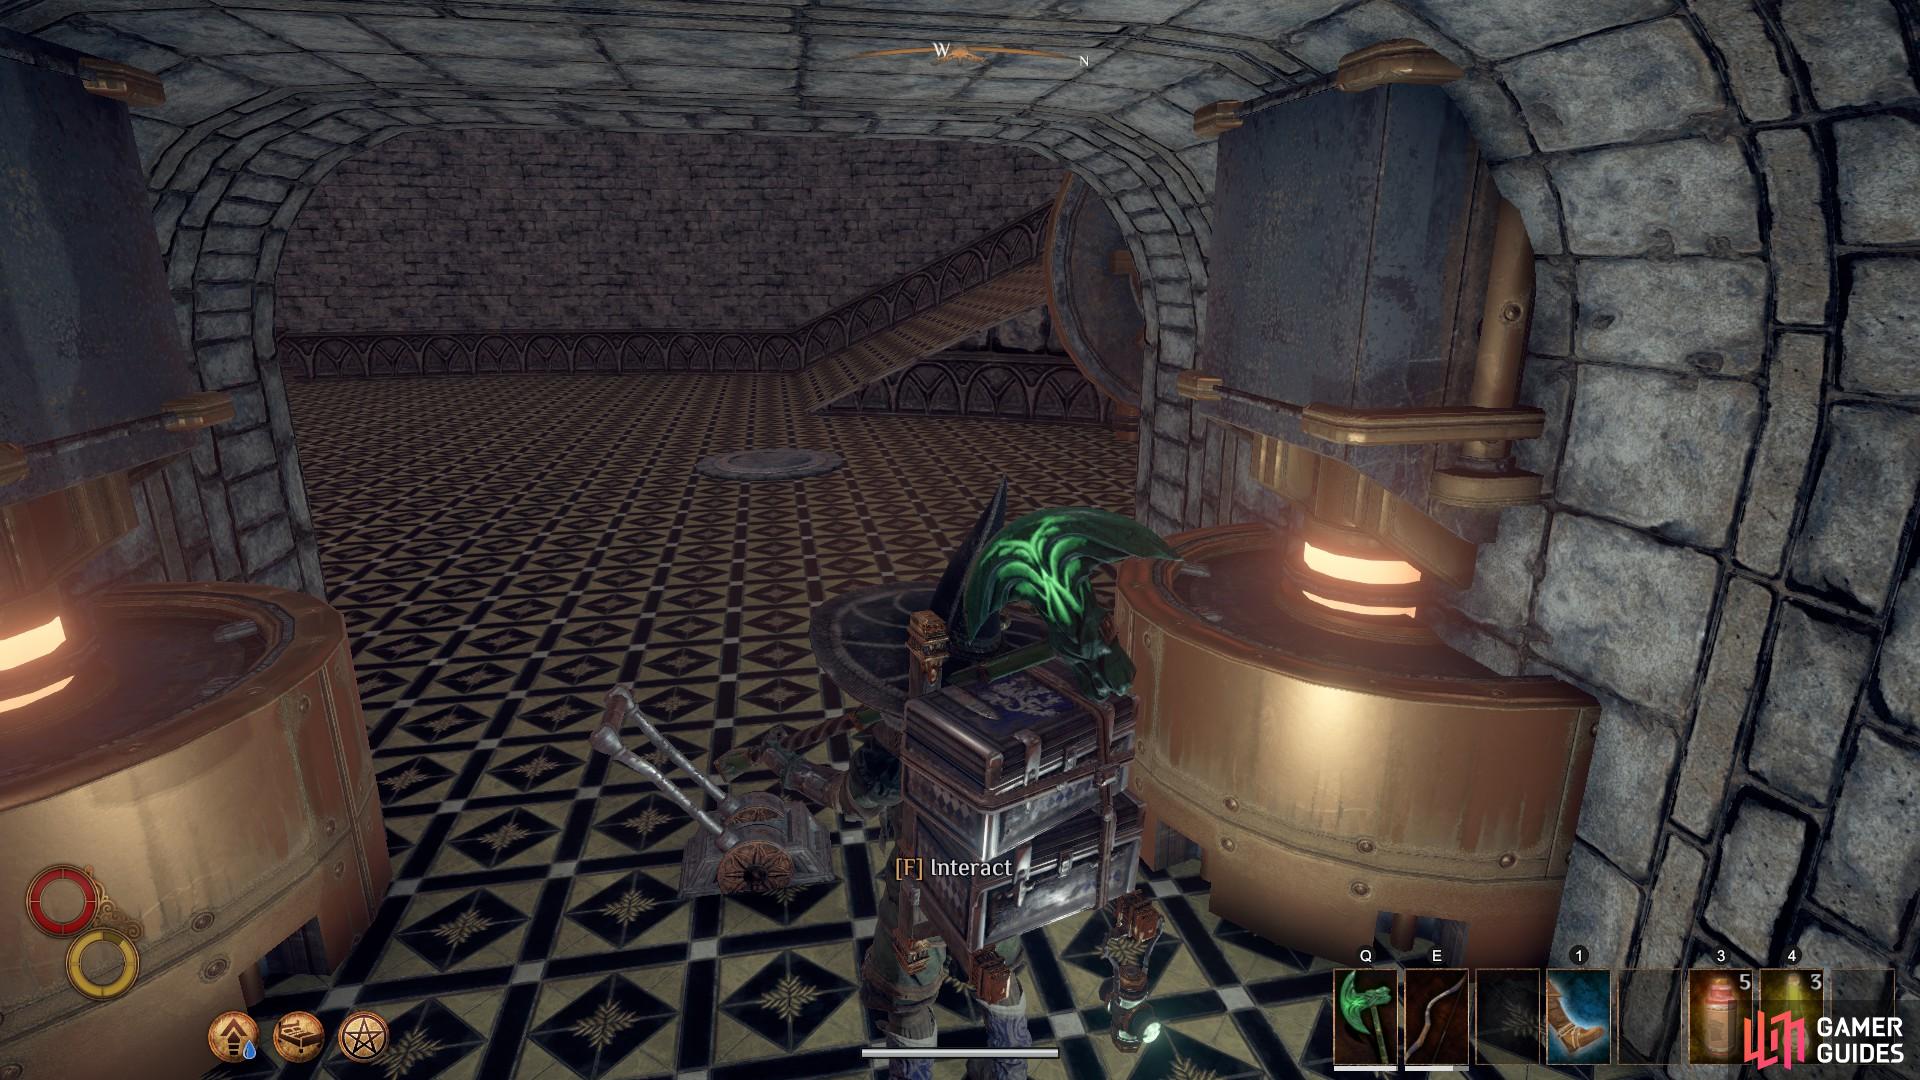
After dealing with the mobs in the first section of the Spire of Light, go down the stairs and pull the lever in the centre of the room.
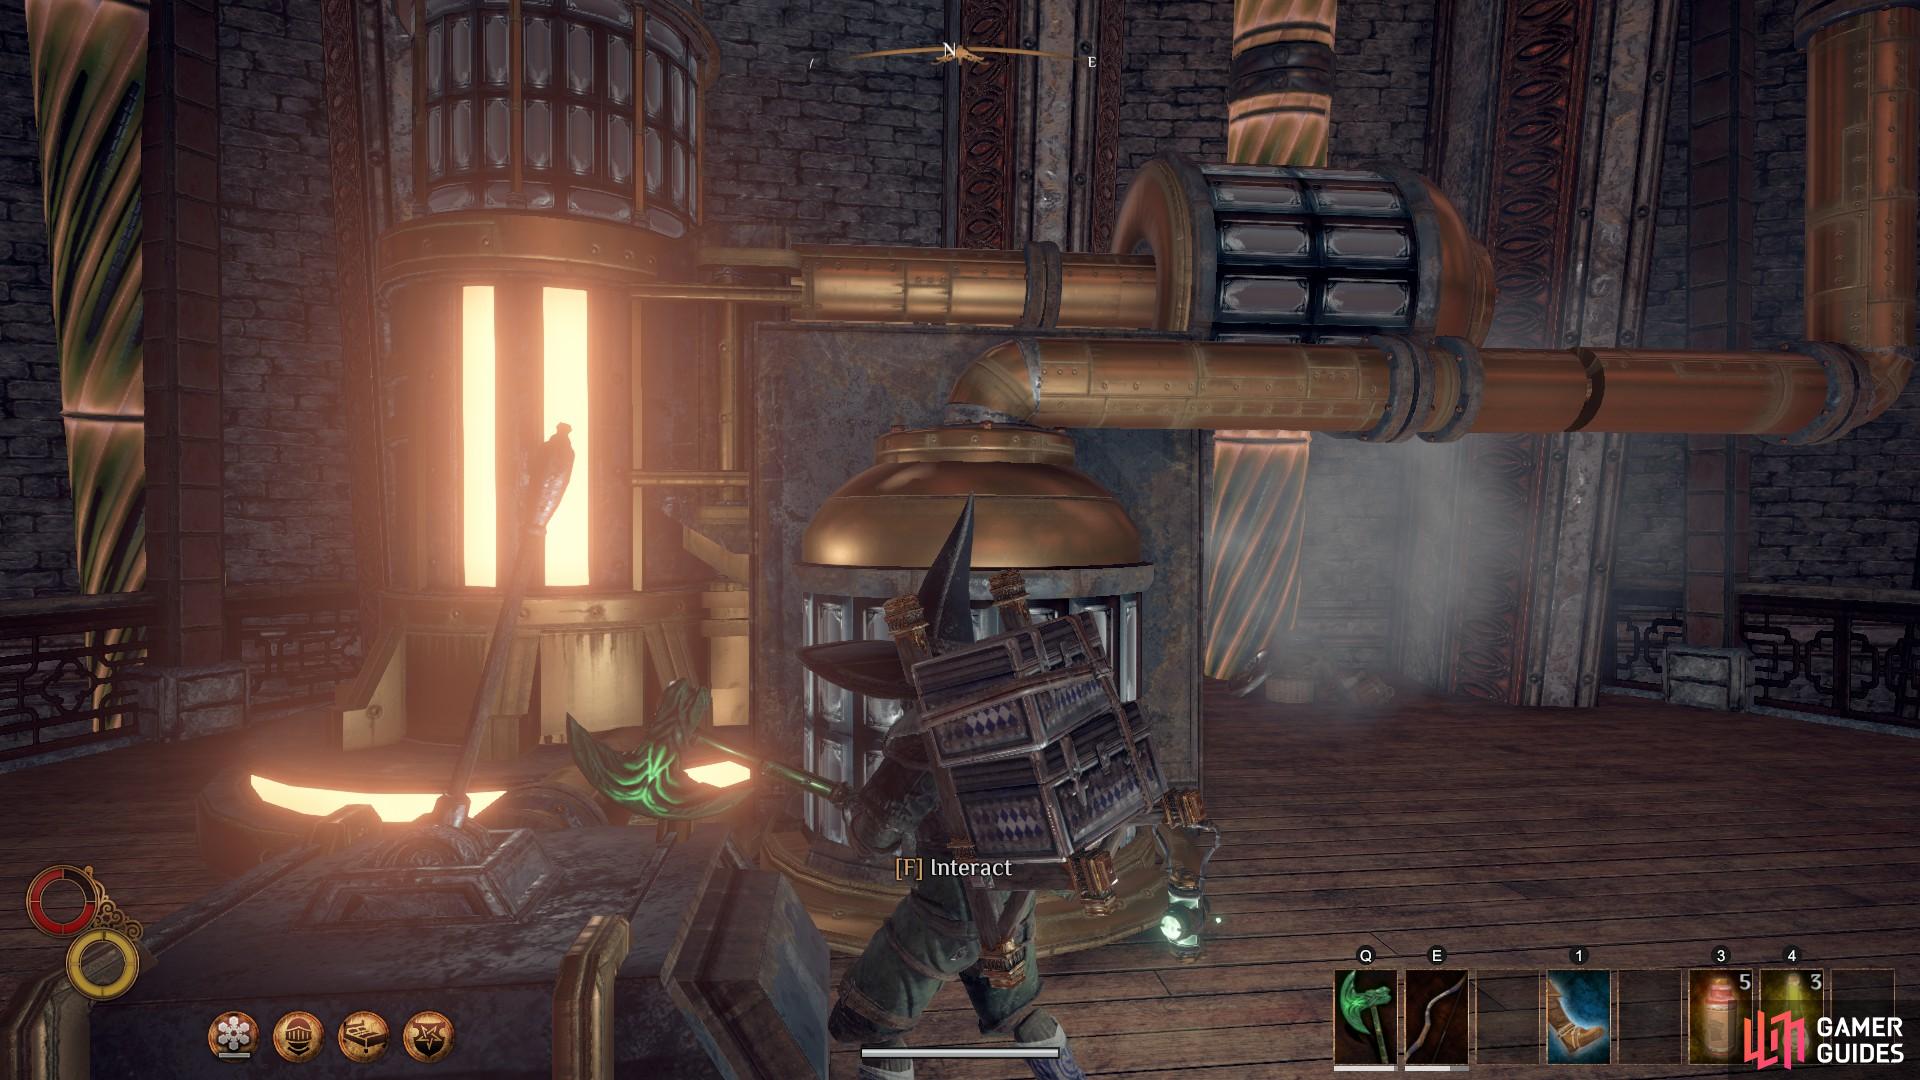
When all mobs in this first room have been defeated, make your way up the stairs to a wooden platform at the top. The stairs lead only one way and you cannot progress before pulling another lever, so don’t worry about going the wrong way. When you reach the wooden platform, pull the lever to the right of the mechanism in its centre. Now pull the lever in the centre of the platform.


(1 of 2) Pull the second lever to the right of the platform first.

Pull the second lever to the right of the platform first. (left), After you’ve pulled the second lever, pull the third on the main platform. (right)
At this point you can go back down the stairs, two stairways down, until you reach the blue orb that you saw on the way up. You will notice that you can now enter it and interact with it. Before you interact with it, make sure that you are prepared for combat; you will be teleported to another platform where some Golden Minions and Specters will be waiting. Be sure to loot the chest behind the orb before you go. Once you’ve dealt with the mobs, pull the lever behind the blue orb that you teleported to and loot the nearby junk pile. You can now cross the bridge to the north and interact with the orb to teleport again.
Whether you fight the Light Mender or not, once you’ve pulled the lever behind the throne, make your way back downstairs using the nearby orb to teleport. You will now see the Ornate Granite Tablet accessible. Take it and then head back to Monsoon. If you don’t have at least 300 silver and didn’t choose the dialogue option “The best kind of favor. The kind we get to decide on whenever we need it.” during the negotiation with Clayton during the Sand Corsairs quest, you should make use of the journey by acquiring enough resources to pay the Caravanner 300 silver.
When you’re back in Monsoon, pay the Caravanner 300 silver and the quest log will update. You can now return to Queen Calixa in Levant to complete the quest.
No Comments