Stalker 2: Heart of Chornobyl is a very large and difficult game, and as such, you’re going to need every bit of help you can get to even the odds in your favor. One of the most important pieces of equipment you’ll come across while exploring The Zone are Artifacts, items that have been warped by Anomalies found in the harsh conditions that permeates Chornobyl. Keep reading to learn how you can find them and how they work.
Artifacts play a large role in Stalker 2.
Table of Contents
If you want to jump to a specific section, click on the links below.
| Quickjump |
|---|
| How to Find Artifacts |
| Discovering Anomalies |
| Using the Detector |
| Using Bolts and Looting the Artifacts |
| Positive and Negative Effects of Artifacts |
| Using Artifacts to Trade |
How to Find Artifacts
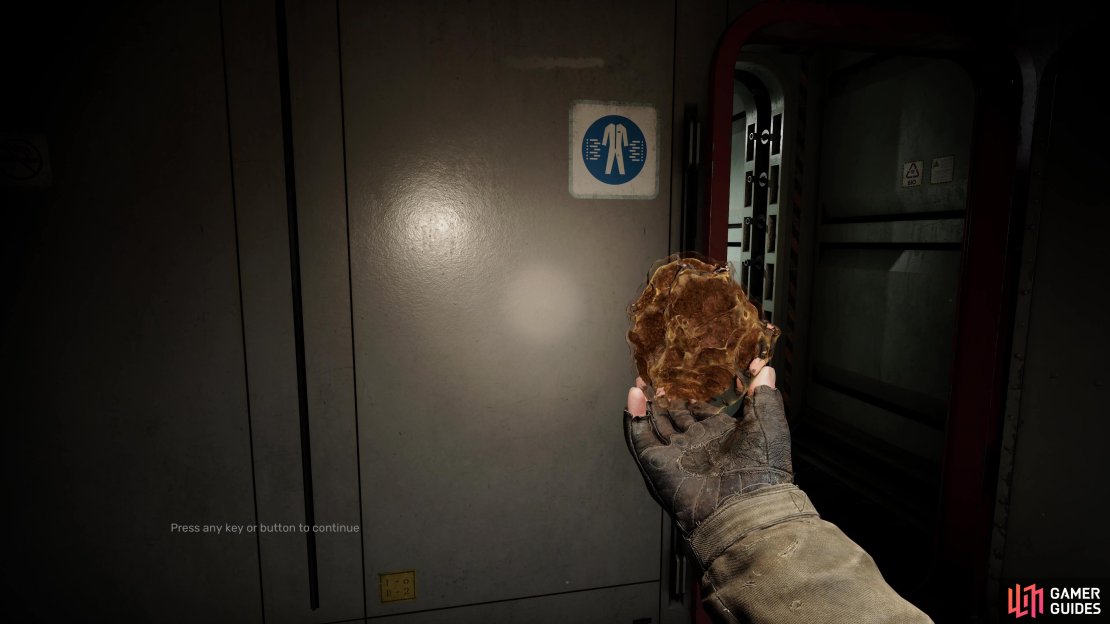
Before you even take the time to consider what Artifacts do, you’ll want to get your hands on a few so you can compare what they do and the process of obtaining them. Fortunately, during the opening mission of Stalker 2, you’ll have to obtain the first Artifact as part of your objective. After leaving the Scientists’ Bunker, you’ll be directed to the nearby Acidic Anomaly to test out your new Detector. Keep it out, get close, and eventually you’ll find that an Artifact appears, that’s the long and short of it, but there’s much more to it.
First, let’s take a look at the three key steps of finding Artifacts:
- Discover an Anomaly
- Use your Detector to locate where the irregularity is at its highest
- Use Bolts to trigger nearby Anomalies
- Carefully look around for the Artifact to appear
In theory, this sounds rather simple, but in practice, you will have to be very careful when going hunting for these Artifacts.
Discovering Anomalies
Perhaps the toughest step of them all, even though you’ll find Anomalies all over The Zone. You’ll need to find an Anomaly that can host an Artifact, and that’s where your Detector comes in, as you explore the various regions of The Zone, you’ll spot different types of Anomalies, and Artifacts are obtained from a pool of items that belongs to each type.
These types are Acid, Gravitational, Thermal, Electro, ![]() Whirlwind, Gas, and Vortex, and their effect on the environment can be rather harmless, to incredibly deadly. Once you’ve located one of these Anomalies, get your Bolts ready (by using the Equipment Wheel or pressing the key it’s bound to) and your Detector primed.
Whirlwind, Gas, and Vortex, and their effect on the environment can be rather harmless, to incredibly deadly. Once you’ve located one of these Anomalies, get your Bolts ready (by using the Equipment Wheel or pressing the key it’s bound to) and your Detector primed.
(1 of 2) You will get the first Detector in Stalker 2 during the first mission.
You will get the first Detector in Stalker 2 during the first mission. (left), When the light is blinking rapidly, you’ll be able to discover an Artifact. (right)
Using the Detector
Just like above, you can get your first Detector during Stalker 2’s opening mission, and once equipped, will have two main effects. The first, when not in your hand, is that it will act as a Geiger Counter and Anomaly Detector, beeping as you get close to either high Radiation or an Anomaly.
Once you’re at an Anomaly, pull out the Detector and you’ll be able to see (or hear, depending on the Detector) whether an Artifact can be found at this Anomaly. The most basic Detector will have a light in the center that blinks with increasing frequency as you get closer to an Artifact. This is the best way to determine the precise location of an Artifact and the more valuable the Detector, the more effective it is.
Using Bolts and Looting the Artifacts
Once you’re in an Anomaly and you know that an Artifact is there, thanks to your Detector, you’ll want to pull out your Bolts and start tossing them at the nearby Anomalies. Artifacts are formed by being in contact with the specific Anomalies that you come across, so triggering them to activate (while you’re in a safe location of course) will help to form them.
The process, then, is to use the Detector to get to the point where the light blinks the most, then toss your Bolts around at the nearby Anomalies. If you’re fortunate, you should hear the sound of the Artifact being formed, you can then look closely around for the Artifact and loot it (these can be hard to spot still).
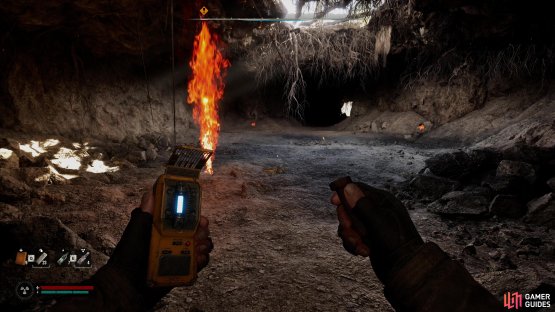
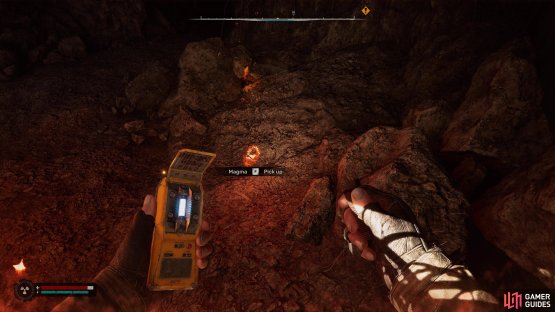
(1 of 2) The Magnetic Cave in the Lesser Zone is a Thermal Anomaly so use your Bolts to trigger them.
The Magnetic Cave in the Lesser Zone is a Thermal Anomaly so use your Bolts to trigger them. (left), Then with your Detector, you can find the Artifact. (right)
Positive and Negative Effects of Artifacts
So now that you’ve got your hands on an Artifact, you may be tempted to equip it straight away. If you look at your Suits that you wear, you’ll see slots that indicate the Belt, where you can attach these Artifacts. You’ll only be able to slot one in to begin with, but as you get better Suits or upgrade them, you’ll notice you have more slots.
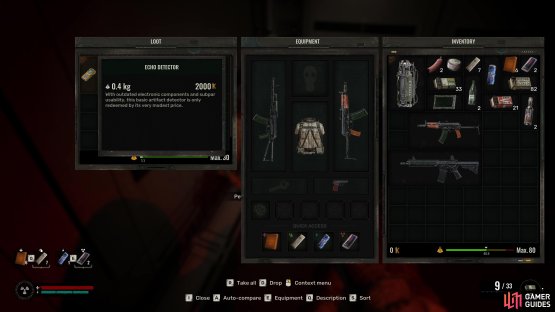
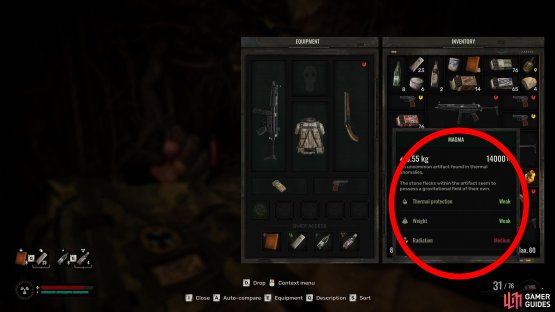
Still, be sure to take a look at your Artifact carefully before you equip it as most Artifacts, save for truly rare ones, will always offer both a positive and negative effect when equipped. This can be determined by looking at the green and red text when reading the description. As you may expect, green means you’ll be getting a positive effect while red will mean it will be negative. Equipping Artifacts, then, mean you’ll need to see if you can live with the negative effect (often Radiation).
Let’s take a look at an early Artifact you can obtain in Stalker 2, the ![]() Magma Artifact, which can be found in Thermal Anomalies, such as the Magnetic Cave in the
Magma Artifact, which can be found in Thermal Anomalies, such as the Magnetic Cave in the ![]() Lesser Zone region. This will offer Weak positive protection to your Thermal resistance and a Weak gain in your Weight Limit. At the same time, you’ll suffer a Medium penalty to your Radiation protection, this is quite a big trade-off in the early stages of the game and something you’ll have to consider very seriously.
Lesser Zone region. This will offer Weak positive protection to your Thermal resistance and a Weak gain in your Weight Limit. At the same time, you’ll suffer a Medium penalty to your Radiation protection, this is quite a big trade-off in the early stages of the game and something you’ll have to consider very seriously.
(1 of 2) Most Artifacts will give positive (green text) and negative (red text) effects.
Most Artifacts will give positive (green text) and negative (red text) effects. (left), You can also trade unwanted Artifacts for a lot of Coupons. (right)
Using Artifacts to Trade
Of course, Artifacts have far more use than just equipping them, especially if you feel the trade-off is too great that you’ll never use it. Rather than having it simply sit in your inventory or stash, you can instead trade it for Coupons (K) at a nearby Merchant. Everybody in The Zone is looking to get their hands on Artifacts, but they’re not all willing to brave the dangers to get them, this is where you come in.
Artifacts often fetch a tidy sum of Coupons (the main currency of The Zone) and as such, are an excellent destination for unwanted Artifacts. Alternatively, some people will offer missions that task you with sourcing a specific Artifact in a given region in exchange for a nice payout. In Zalissya Bar in the Lesser Zone, you’ll find the bartender can hand out such requests, and he’ll often ask for a specific type (such as Whirlwind or Thermal).
There you have it; you now know how you can get your hands on Artifacts in Stalker 2: ![]() Heart of Chornobyl, how to use them, and how you can make some cold hard cash for selling them. This is just the beginning though, there’s much more to learn about Artifacts, come back later for a list of every Artifact you can find in the game.
Heart of Chornobyl, how to use them, and how you can make some cold hard cash for selling them. This is just the beginning though, there’s much more to learn about Artifacts, come back later for a list of every Artifact you can find in the game.






No Comments