
| Quest Info |
|---|
| Objective: Complete the assignment |
| Reward Money: 3240z |
| Time Limit: 50 min. |
| Conditions: HR 3 or higher |
| Failure Conditions: Time Expires / Faint 3 Times |
| Other Monsters: Apceros / Kestodon / Gajau / Noios |
Accept this assignment at a Quest Board, eat some grub, then head off to the Wildspire Waste. From the Southwest Camp head east and search a raised slab of stone to find some footprints, then follow the Scoutflies southeast to find another cluster of tracks, these ones turning east into the swamp.
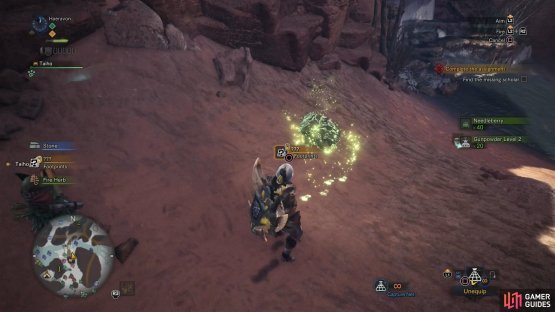

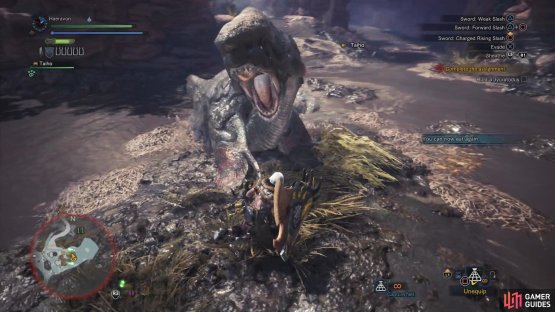
(1 of 2) Search for signs of the missing researcher


Search for signs of the missing researcher (left), and as you search you’ll also come across some mysterious spikes… (right)
Enter the swamp and, while the Scoutflies continue to lead you east, The Handler will draw your attention north. Search a tree near the waterfall to find some “Old Splintered Thorns”… evidence of some beast? Whatever the cause, continue following the Scoutflies east, deeper into the swamp, stopping to investigate more thorns and tracks as you come across them. Eventually you’ll find the scholar stranded on a small, muddy island, accompanied by the corpse of a Barroth. Obviously in distress, it seems a more dangerous monster dwells in this swamp, and that monster doesn’t wait long to show itself…
Hunt - Jyuratodus
| Elements (Dry) | . |
|---|---|
| Fire | * |
| Water | X |
| Thunder | * * * |
| Ice | * |
| Dragon | * |
| Elements (Mud) | . |
|---|---|
| Poison | X |
| Sleep | * * * |
| Paralysis | X |
| Blast | * |
| Stun | * |
| Ailments | . |
|---|---|
| Poison | * * |
| Sleep | * |
| Paralysis | * * |
| Blast | * |
| Stun | * * * |
This massive mudskipper-mimic monster is the first Piscine Wyvern you’ve faced thus far, and shares many similarities with the Barroth. First, it prefers to dwell in swamps (it’s lair is AREA 10), but unlike the Barroth, it doesn’t flirt with dryer climates. It will, however, coat itself in mud, having a similar armoring effect as that of the Barroth, albeit much weaker and more easily removed with water elemental attacks and Watermoss. Just because the two live in the same area doesn’t mean they’re friends, however, and if you can - perhaps in future quests - lure the Barroth and the Jyuratodus together, you can witness a good, old-fashioned territorial dispute.
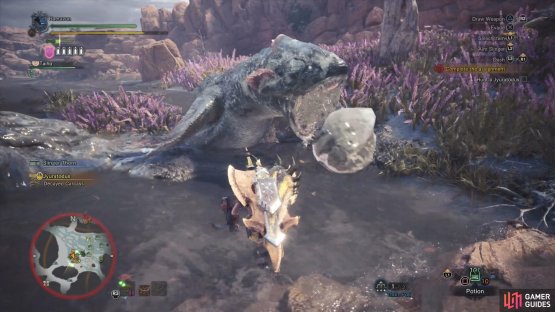
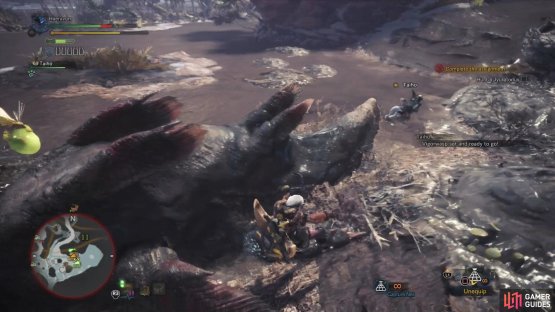
(1 of 2) The Jyuratodus can spit globs of viscous mud, which will hinder you if you fall into it


The Jyuratodus can spit globs of viscous mud, which will hinder you if you fall into it (left), Even in its native element, the Jyuratodus is a large, slow target - a perfect target for heavy attacks (right)
Fortunately, the Jyuratodus isn’t quite as aggressive as the Barroth, and it’s movements and attacks are somewhat slower and more predictable. If you happen to use the Charge Blade, you’ll find this foe easier to hit and more susceptible to the stun ailment. Characters with faster weapons may need to stay on their toes more and be less aggressive. The Jyuratodus makes up for its lack of gusto with… viscous mud. A character caught in the Jyuratodus’s mud will find their mobility greatly impeded, leaving themselves vulnerable to abuse. If that’s not bad enough, the Jyuratodus’s mud can, like the Barroth’s, cause Waterblight.
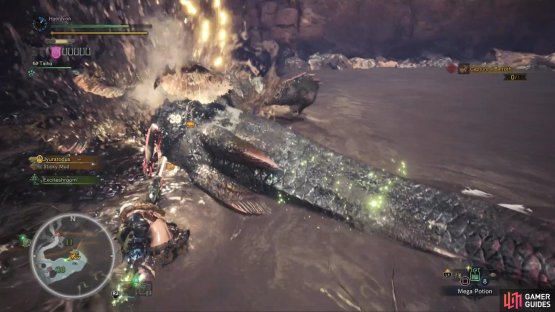
(1 of 2) The Jyuratodus will attack with bites


The Jyuratodus will attack with bites (left), and more frequently with slithering “charge” attacks (right)
For all that, Jyuratodus’s attacks lack variety, largely consisting of lunges, bites, tail sweeps and charges (although its charges are slower, more wiggly affairs). It can also spit gobs of mud out, and will usually spit three times in succession when it rears its head. What aids Jyuratodus, despite its lack of offensive diversity and relatively sluggish movements is the terrain. Being somewhat deep water, you’ll find yourself hindered quite a bit unless you have access to armor with the Aquatic Expert skill, which you can get by crafting Gajau Boots, or a Jyura Helm. In the absence of either, try to stick to what land you can, as it’ll help your mobility. Unfortunately, while the Jyuratodus will not abandon its watery home, it’s not hindered like you as, as it can, if it feels pressured, stand up on its fins and walk about (and attack) awkwardly from this posture.
The head, tail, body, and rear fins are all breakable, but only the head and tail are especially vulnerable to attack. Despite this, the safest, easiest target is its flank, and you shouldn’t feel compelled to go after more elusive targets when, in this case, carving its side up will work just fine. The Jyuratodus is resistant to the fire and thunder elements when covered in mud, and weak to water. Without a mud coat, the Jyuratodus talks paltry damage from fire, a great deal of damage from thunder, and is resistant to water. Ice and dragon elemental attacks find little purchase with it either way. It’s not terrible susceptible to sleep or blast ailments, but is highly vulnerable to stun.
| Carves | Frequency |
|---|---|
| Jyuratodus Scale | * * * * * |
| Jyuratodus Shell | * * * * |
| Jyuratodus Fang | * * * |
| Jyuratodus Fin | * * * * |
| Rewards | Frequency |
|---|---|
| Jyuratodus Shell | * * * * |
| Jyuratodus Scale | * * * * |
| Jyuratodus Fang | * * * |
| Jyuratodus Fin | * * |
| Monster Bone M | * * * |
| Aqua Sac | * * * |
Kill and carve the Jyuratodus, and afterwards you’ll find yourself back at Astera, as usual. It seems that the work you’ve been doing hasn’t been fruitless, as the researchers have been able to gain enough intel on Zorah Magdaros to predict its next move, and the Commander has a mind to capture it. How do you capture a monster the size of a mountain? Well, the name of its location might provide a hint; the Great Ravine. Unfortunately, a dangerous monster roams close to Astera, and diverting much of Astera’s manpower to the task of trapping Zorah Magdaros could leave the city vulnerable… unless some hunters were to take care of this monster, that is. That, then, is your next job - defeat the Anjanath prowling around in the Ancient Forest!
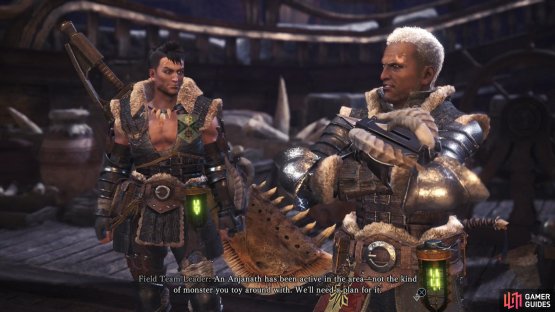
(1 of 2) Before you go after Zorah Magdaros, you’ll have to hunt an Anjanath in the nearby Ancient Forest


Before you go after Zorah Magdaros, you’ll have to hunt an Anjanath in the nearby Ancient Forest (left), The Chief Botanist also requests that you hunt a Tobi-Kadachi, which is hindering his research (right)
Hunter Tools Thwarted
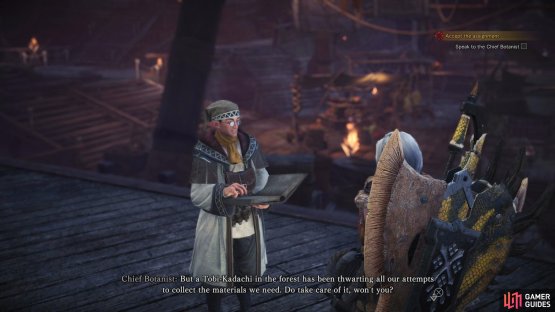
Before you’re allowed to embark, however, you’ll need to chat with the Chief Botanist. Seems they’re having trouble in Botanical Research - a Tobi-Kadachi has apparently been thwarting all their attempts to develop new hunter tools by preventing them from gathering materials. To whet your appetite, he’ll give you the Ghillie Mantle and promise more tools if you can help them out. This will post the quest Flying Sparks: Tobi-Kadachi, for you to peruse at your leisure. It’ll be listed after the two previously-obtained optional quests, below.
To equip hunter tools, simply go to any Item Box and pick the “Change Equipment” option. The Ghillie Mantle will be automatically equipped for you, so no worries.
No Comments