| Quest Info |
|---|
| Objective: Deliver 20 Gourmet Shroomcaps |
| Reward Money: 720z |
| Time Limit: 50 min. |
| Conditions: None |
| Failure Conditions: Time Expires / Faint 3 Times |
| Other Monsters: Aptonoth / Jagras / Mernos |
Maps, Monsters and Materials
You’ve completed one quest, but likely haven’t spent much time out in the field as of yet, which is where all the interesting bits of gameplay occur! There’s a lot to do while you’re deployed besides what’s strictly part of a quest’s objective, namely hunting, gathering, exploring and researching.
You should already know some of the basics, like the fact that you have the ability to fast travel to various discovered camps on a map, that every quest gives you a variety of items to freely expend, which are found in the Supply Box in camp, and that as you explore, new sections of the map will be revealed and The Handler will mark points of interest (resources, research spots and monsters) on your mini-map Let’s build off that.
Concerning the map, each are is split into numbered sections, which are incredibly useful in terms of navigation, and will be used throughout this walkthrough in addition to the compass. These numbered sections appear on both the full map and mini-map, but you must enter an area before the section will be revealed, and likewise, points of interest will not be marked unless you’ve gotten close enough to spot them. Get out there and get exploring!
Of course, there are hazards to exploring. Assuming, for sake of argument, you’re following this guide’s suggestion and using the quest Fungal Flexin’ in the Ancient Forest as your venue for putting the advice offered in this section to the test, you’ll encounter a variety of monsters as you explore. These include the docile Aptonoth, the more combative Jagras and Kestodon, as well as the larger, more dangerous Great Jagras and Pukei Pukei. Generally most monsters will leave you well enough alone if you keep a moderate distance, but inclinations vary considerably, and once you’ve raised the ire of a monster, you’ll either have to fight or flee.
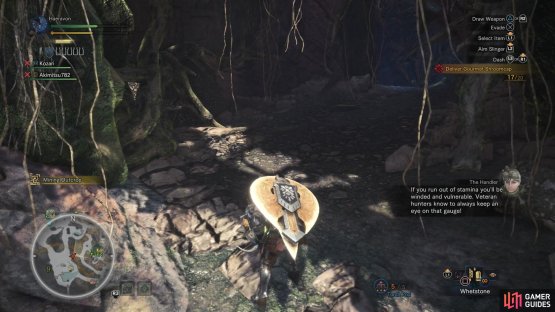
When actively under threat, the edge of the mini-map will glow red, and while most monsters will attack you fiercely when you’re nearby, many are quite territorial, allowing you to flee if you set your mind to it. Just watch your Stamina, as expending all of your Stamina will result in slower recovery as compared to taking a pause before your Stamina is fully depleted. Also remember you can hide in foliage by pressing [X]/[A].
For the sake of argument, it’ll be assumed you’re not picking a fight with big monsters just yet. They’ll be covered when you’re actively tasked with hunting them down. You do, however, need to research big monsters, and the best way to learn about big monsters usually involves being near them, or at least in the areas they frequent. If you see a monster you can research, keep an eye out for Scoutflies, which will guide you to signs of its passage (scrape marks, tracks, sheddings, etc.) Anyways, with that out of the way, let’s go looking for some mushrooms!
(1 of 2) Be mindful of your Stamina bar while exploring - let it deplete and you’ll be incapacitated for a while
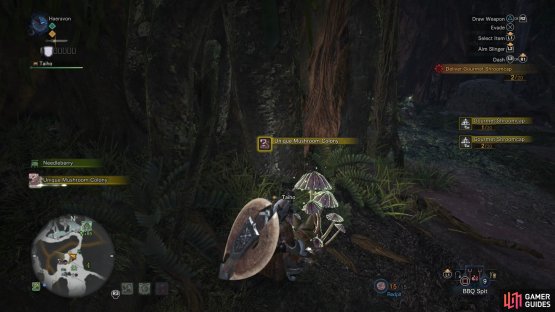
Be mindful of your Stamina bar while exploring - let it deplete and you’ll be incapacitated for a while (left), You can harvest Gourmet Shroomcaps from Unique Mushroom Colonies (right)
Hunting Mushrooms
A simple gathering mission, your task is to collect twenty Gourmet Shroomcaps. For missions like this, you do not need to do extra busy-work to complete your task; when you harvest the correct material, it’ll be counted towards the objective total, and won’t take up inventory space. You don’t even need to deliver it yourself.
That said, while the objective is simple enough in theory, this is also a fine opportunity to do some exploration, harvest materials, and do some hunting. Aptonoth will readily yield meat if hunted, and won’t fight back, but other small game - namely Jagras and Kestodon will. As long as you claim the First-aid Meds you’re allotted, you shouldn’t have to expend any of your own healing items, even with fairly sloppy play.
The Ancient Forest is home to larger, more dangerous monsters, however, including the Pukei Pukei - a flying beast that frequents AREA 4, along the southeastern edge of the Ancient Forest - and the Great Jagras, who can also be found nearby in AREA 3 and AREA 4. You should avoid conflict with either of them, but neither are terribly aggressive, if you avoid getting too close or staying near them too long, and both will readily leave signs of their activity, which you can research.
Unfortunately, the mushrooms you’re looking for can be found most easily along the northwestern edge of AREA 4, so if you spot any large monsters in the vicinity, be wary of them, and if they attack, flee. There are three Unique Mushroom Colonies you can find, each of which have a good chance of dropping a Gourmet Shroomcap, and each can be harvested multiple times. Once all three have been expended, busy yourself elsewhere for a few minutes, return, and they should have respawned. Once you have twenty, you’re good to go.


No Comments