Once you’re back in Astera, you’ll have a brief moment to bask in your post-quest glow. It won’t last long, however, as the Commander will recognize the change in the Jagras’ behavior, and identify the cause as Zorah Magdaros making landfall. Unfortunately, they’re not the only beasts acting up, as a horde of Kestodons have become unruly as of late, as well. Another task for an aspiring new hunter, eh?
Before you can get back to the field, however, others demand your attention in Astera, namely the Smithy, but there are several exclamation points for you to investigate. No point in not attending to any of those right now.
Speak to the Smithy
Return to the Workshop and talk to the Second Fleet Master - the man operating the conveyor belt - and now that you have materials for him to work with, he’s all too happy to chat with you. He’ll reiterate his purpose; on hunts you’ll collect materials from monsters, and with those materials, he’ll craft you new arms and armor. Best of all, he’ll give you some basic materials as a welcome present!
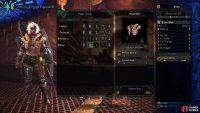
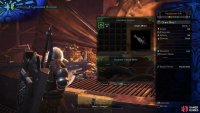
With that out of the way, you’ll have the Workshop’s full list of functions open to you. You can now choose the “Forge Equipment” option to create new arms and armor out of materials you possess. The “Upgrade Equipment” option allows you to expend materials (various ores and monster materials for weapons, Armor Spheres for armor) on improving weapons and armor. Keep in mind that while upgrading armor is rather straight-forward, weapons have upgrade trees, where the type of weapon you end up with may vary depending on what path you choose to take. This process is completely reversible, however, and materials will be refunded if you downgrade (and the Zenny cost involved is relatively trivial), so never be afraid to upgrade!
The “Forge Palico Equipment” should be pretty self-explanatory; expend materials, Research Points and Zenny to upgrade your Palico’s weapon, helmet and armor. The “Customize Bowgun” option allows you to modify your Bowgun weapons, which upgrade differently than normal weapons. For Bowguns, you add mods to them. Different mods add different effects, and identical mods stack. The rarity of the Bowgun determines how many mods can be installed. Finally, you have the “Manage Kinsects” option, where you can purchase or nurture Kinsects. While Insect Glaives can be crafted, you upgrade the weapon indirectly, by acquiring different sorts of Kinsects and nurturing them, although in effect the “nurturing” menu takes you to an upgrade tree similar to those of other weapons.
(1 of 2) At the Workshop you can craft and upgrade armor
At the Workshop you can craft and upgrade armor (left), as well as manage weapons in a variety of ways. (right)
Buy a new weapon if you haven’t, and upgrade it if you wish, then head outside and turn north to find a seated “Airship Engineer” at a table, who will tell you of the fate of the Third Fleet’s scholars and his ambitions to rescue them… largely by using the same methods that got them stranded in the first place! Oh well. Something to keep in mind for later.
Ecological Research
Your next objective is to talk to The Handler, but before that, you may as well chat with some other folks around Astera. After the Airship Engineer, your next conversation should be with the Chief Ecologist, who can be found at the Ecological Research station along the western end of Astera, just north of the Provisions Stockpile.
Talk to him and he’ll tell you about Research Points. Basically, when you do missions, follow Scoutflies to tracks and other points of interest, from which you’ll learn intel on monsters. As you collect this data, the researchers back in Astera will analyze it, progressing your Research Level on various monsters and providing useful tips. Be sure to keep it in mind as you complete missions and return to the Ecological Research station at regular intervals.
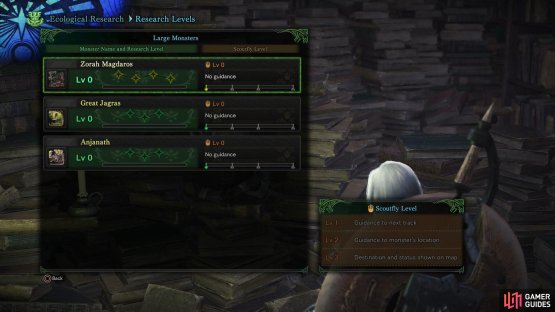
Go head and talk to the Chief Ecologist and pick the option “Research Levels” to view any research on monsters you currently have. For each monster you have a “Research Level” and a “Scoutfly Level”, the functions of which might not seem readily apparent, but are quite different. Research Levels are relatively simple, when you find evidence of a monster’s passage in the field and investigate them, you’ll gain research points. Gain enough research points and your Research Level will increase, denoted by the stars above the progress bar next to the level indicator. Once you’ve gained a level, you’ll get the passive bonuses appropriate for such familiarity, often including a bonus to your Scoutfly leveling speed.
Scoutfly Levels increase much the same way, but gains made in this area are not permanent, and will degrade over time if you’re not hunting that monster. The amount your Scoutfly Level for a particular monster will degrade is denoted by red arrows on the progress bar. As you increase your Scoutfly Level by gaining research points, you’ll be rewarded with guidance aids, courtesy of Scoutflies, starting with showing you the monster’s next track, then advancing to guiding you to the monster’s location and finally, at level three, showing you the monster’s destination and status on the map. If you plan to hunt a specific monster regularly, it pays to continue to research that particular monster in order to make your hunt easier, but again… if you don’t use it, you’ll lose it.
Simply put, your Research Level represents the sum of generalized monster intel you’ve obtained and shared with the ecological researchers at Astera, whereas the Scoutfly level represents a hunter’s short-term memory of the behavior of a specific monster in an environment.
The Gathering Hub (Online Play)
Next head to the Lift and talk to the Squad Manager, who will tell you that the Gathering Hub - the Celestial Pursuit - is now open. This is an online hub where you can join squads (groups of sixteen players, you can be part of up to eight squads) which will help organize online gameplay sessions. Online content will largely be left to your own discretion, but advancing in Monster Hunter World is far less tedious and easier with friends!
Aside from the Squad Manager, who allows you to create, join and customize squads, you’ll find the Quest Counter and Arena Counter attendants, who allow you to join and host online quests (it’s the same interface as if you talked to The Handler or used a Quest Board), or challenge arena trials. Online quests are more or less the same as the single player variants, but arena quests have specific conditions, including fixed equipment sets, and the goal is to kill monsters faster than other players.
There’s a catch when it comes to online play. If you haven’t seen the cutscenes in a particular assignment, other players cannot join you until you do. This generally means that you can’t play with your friends until you’ve seen the story-related content in an assignment, but they can join afterwards… usually when the fight with something big and nasty begins. Most quests in Monster Hunter World are actually segmented, albeit relatively seamlessly, with a story/exploration quest preceding a hunt after a new monster has been introduced. If you want to play with friends, complete the former on your own, then when the monster appears and you get the quest requiring you to deal with them, start that quest and send out an SOS Flare (covered in detail later, when you can actually use it). It’s not an ideal bit of game design, but… it is what it is.
Online play, while needlessly complex and restricted, can also be a double-edged sword when it comes to difficulty. Playing with friends is fun and good and all, and having hunters with different weapons working in coordination to hunt a monster is, at its best, intensely satisfying. But if somebody joins your game, every monster will get buffed and with two players you won’t be able to use any Grimalkynes, and with three or more you won’t be able to keep your Palico. The buff monsters get seems static no matter how many other hunters are with you, and this buff does not go away if another player drops or withdraws, potentially sticking you with a much harder monster and no extra damage output. Also, the total number of times you can be carted before failing the mission is shared between all hunters, so you’re only as good as your weakest link. Generally, with the difficulty scaling, the ease of completing quests can be arranged in the following order:
| Game Difficulty | . |
|---|---|
| Easiest | Solo (with Palico and Tailraiders |
| Easier | Four-player online |
| Harder | Three-player online |
| Hardest | Two-player online (with Palicos) |
(1 of 2) Investigating monster tracks will increase your Research Level for said monster, giving you a variety of Scoutfly bonuses and bestiary information
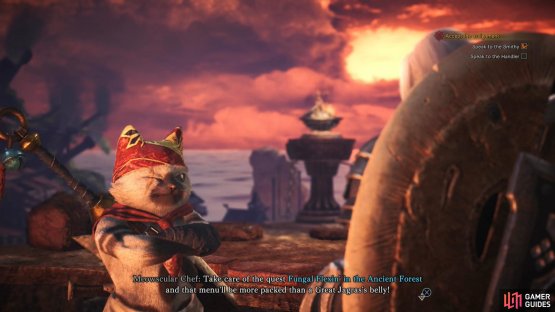
Investigating monster tracks will increase your Research Level for said monster, giving you a variety of Scoutfly bonuses and bestiary information (left), Talk to the Meowscular Chef to pick up the quest Fungal Flexin’ in the Forest (right)
Once you’re done with the Gathering Hub, ride the Lift to the Canteen and talk to the Meowscular Chef, who will chat with you about upgrading the Canteen’s ingredients. To do so, you’ll need to complete the quest Fungal Flexin’ in the Ancient Forest, which will now be added to the Quest Board.
The Kestodon Conundrum
With all the new business in Astera wrapped up, it’s finally time to report in to The Handler, who will tell us about the Kestodon troubles the Commander mentioned. This adds the quest A Kestodon Kerfuffle to the Quest Board, and more importantly, allows us to actually use the Quest Boards scattered throughout town instead of having to talk to The Handler and get quests from the Quest Counter all the time. As she points out, the quests are the same, so it’s really just a matter of convenience.
Anyways, you have two new quests you can pursue, so all you need to do is pick which one you’re going to do, get yourself a meal, and get on with it! Continue on with Fungal Flexin’ in the Ancient Forest, as it’s a relatively simple mission that’ll give you an opportunity to learn some more gameplay basics, which will be covered in that quest.



No Comments