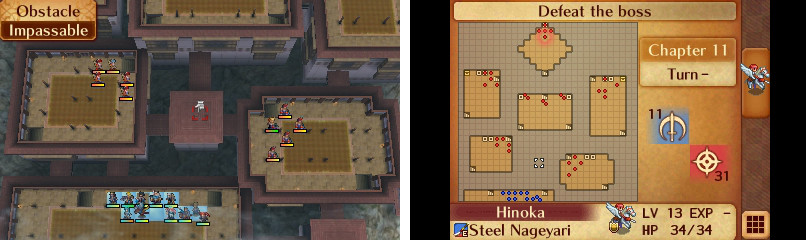
Map of Chapter 11
| Location | Objective |
|---|---|
| Sevenfold Sanctuary | Defeat the boss. |
| Enemies Present |
|---|
| Oni Savage |
| Archer |
| Diviner |
| Monk |
| Ninja |
| Samurai |
| Sky Knight |
| Shrine Maiden |
Compared to the frantic Chapter 10, this chapter can be taken much more slowly. Your goal is to fight your way up the building using the stairs until you reach Hinoka at the top. Once you defeat her, the battle is over.
Before we start our climb, there’s a few things to know about the staircases. Going through them will not use up the unit’s turn: they can still move once in the new level with however many spaces they have left , use items, attack, etc. (this is why you’ll notice sometimes when you take the stairs, your character can only move one or two spaces away from the stairs)
You can also move between staircases as much as you like as long as the character on top of it still has their turn. This can be incredibly useful if you need to scout out enemies to check your damage. The last thing to know is that if a staircase is blocked by another unit, the stairs cannot be entered. You’ll have to wait until that unit is moved before you can move your next one through.
This map is divided into left and right paths. You will want to send a healer with each group to make sure each is healthy. Also, some of the **** normal enemies in this map have skills to watch out for. The archers in the first left room have the Counter skill, so you want to engage from range if you can, or defeat them with one powerful hit so Counter does not trigger. The Diviners in the second right room all have Miracle, which may leave them alive with 1 HP, at a small chance. This will probably trigger the one time you needed a kill to keep your characters alive. The Ninjas in the second left room have the Lunge skill, which switches place with the unit it battles. The AI will abuse it accordingly, by Lunging on one character repeatedly, until they end up alone in the center of the area, vulnerable.
The first set of rooms host the Archers, led by Setsuna, and the Oni Savages, led by Rinkah. These enemies will only move to attack you if you are in their range, so you can take your time using a tanky character to lure them out and pick them off a couple at a time. Keep in mind that the Archers have Counter , so make sure to attack them from range or defeat them with one strong close range attack!
The second set of rooms are guarded by Azama and Kaze. You will want to plan more carefully for these floors. Azama holds a Hexing Rod , which halves the maximum HP of anyone he hits with it for the rest of the battle. This staff has three uses, so he has three chances to hit your characters with it! A good way to counter this is to move a sacrificial unit into the space where his staff can reach, but the Diviners cannot. In Kaze’s room, the trouble lies with the unnamed Ninjas: Each one of them has Lunge , which they will use to switch places with your unit and move them closer to the center! Combined with the Shuriken debuffs, you could find yourself in a pinch if you don’t use a very tanky character to take their hits.
It’s important to keep in mind that in these two rooms, all the unnamed enemies will move to attack you if you are in even one of their range. Be prepared to take them all down quickly!
In the paired Samurai room, having strong defensive units team up is a good option to take their hits and defeat them with any remaining units. Position your units around the staircase so you can rush the Samurai after they move into your range.
Once the Samurai are defeated, you can take your time to move Niles around to open the two Chests. The left chest holds a Spirit Dust , while the right chest hold an Enfeeble Staff .
Now, all the enemies in this room will not move to attack us: they are there to support Hinoka. If you have a character strong enough to fend of Hinoka’s dual attacks, you can actually grind a bit EXP battling Hinoka since the Shrine Maiden will continuously heal Hinoka. This can be very useful to gain good experience and support levels. If you are in Normal Mode, Battle Saves will make this grinding much less punishing if something goes wrong. One thing to note while you engage Hinoka is that she has the Winged Shield ability, which protects her from bonus damage such as arrows, which are normally powerful against flying units. Regardless, your units should be strong enough to finish her off whenever you please.
After the fight, enjoy the many scenes. Once they are finished, you acquire a new character for your army: the Ninja Kaze.
No Comments