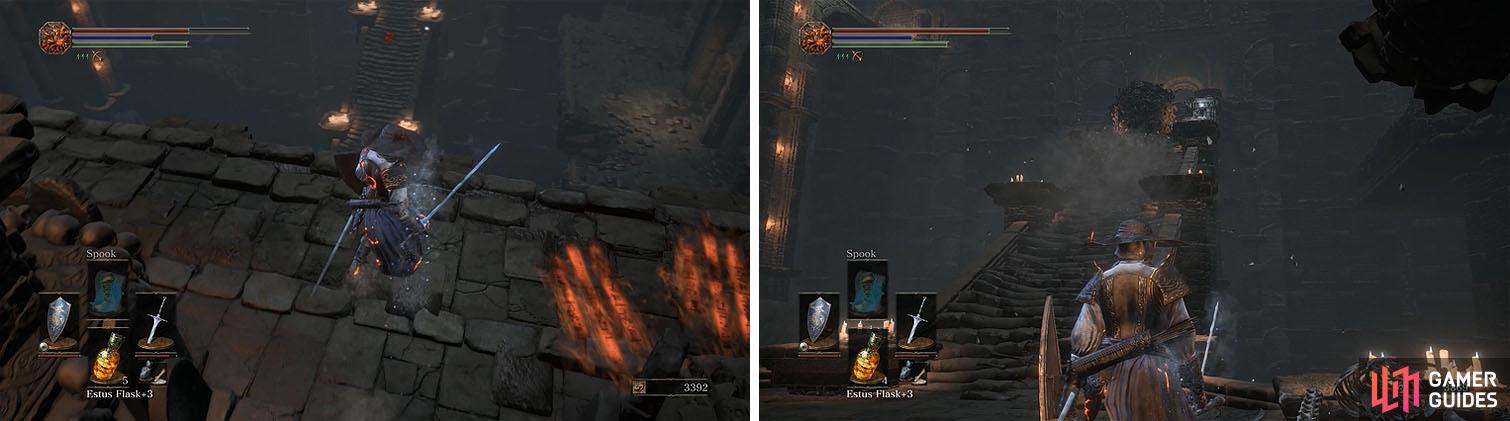
Head back into Firelink Shrine and travel via the bonfire to the Abyss Watchers, exiting the stairs behind the altar in the boss arena to reach the Catacombs.
Head toward the columns and turn left as a Skeleton Soldier with white eyes forms straight ahead. The white eyes indicate that the skeleton won’t die after defeating it the first time and will instead respawn, leaving itself open to a backstab if you wait for it to reform.

Enter the tunnel behind the Abyss Watchers bonfire to enter the catacombs (left). Note the white eyes of any skeletons, which means they will respawn (right).
Collect the Carthus Rouge x2 and look across the bridge to spot a larger Skeleton Swordsman.
These enemies are fast and dangerous, using long combos and ranged daggers that leave you with very little opportunity to strike back. Block initial attacks with your shield and then strike back with as much stamina as you can, backing off and raising your shield again.
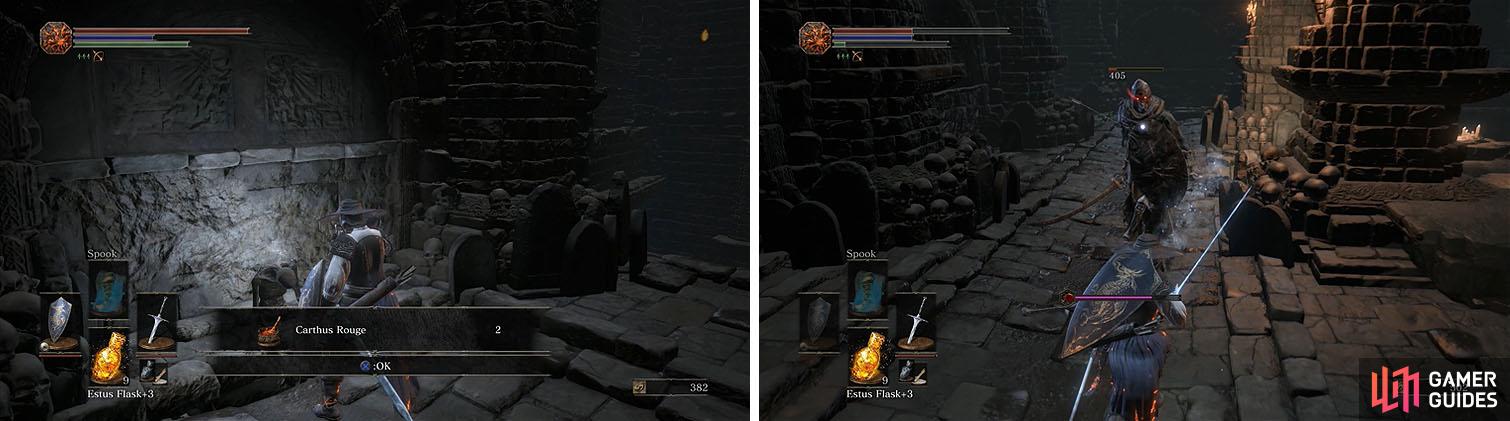
Grab the Carthus Rouge in the corner and then fight the Skeleton Swordsman.
Cross the bridge and kill the two Skeleton Soldiers on the other side and then head straight toward the stairs to kill another Skeleton Soldier. There are some Skeleton Soldiers and an archer on the upper level that can be a nuisance and then head back down the stairs and check the lower level.
There are two Skeleton Swordsmen and two more Skeleton Soldiers that’ll form on the stairs, so use ranged attacks to pull the Swordsmen to the upper level where you can safely use the columns to block their attacks.
Take care of the skeleton archer upstairs (left) and then use ranged attacks on each of the Skeleton Swordsmen from the lower level (right).
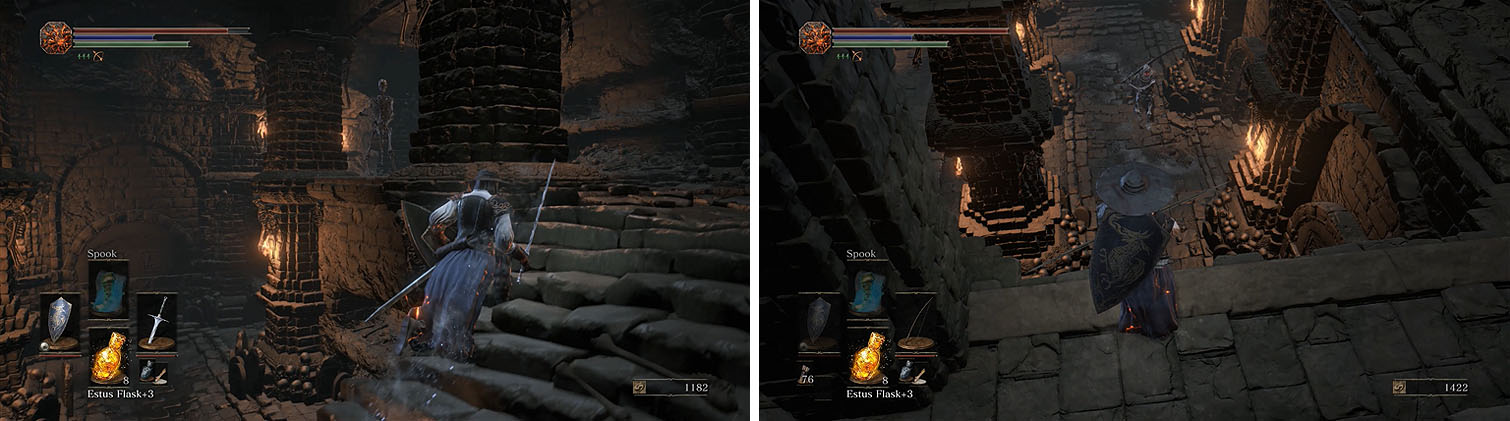
Check the corner for Titanite Shard x2 and then take the arch leading into a tunnel, instead of down a staircase, to be ambushed by four Skeleton Soldiers. Back up into the tunnel to bottleneck them so that you don’t get surrounded and then follow the stairs down.
Here you’ll find Anri of Astora , who will mention that Horace has gone missing. You can now exit the other side of the tunnel and kill the Crystal Lizard for a Twinkling Titanite and grab the Bloodred Moss Clump x3 .
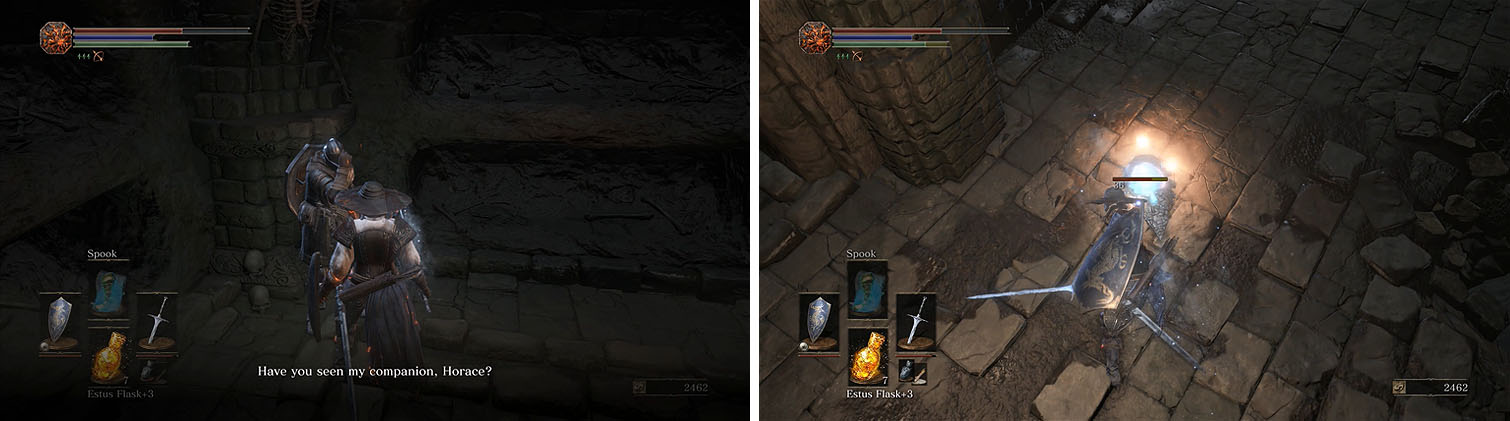
Speak with Anri and then exit the tunnel and kill the Crystal Lizard nearby.
Backtrack through the tunnel and upstairs, to the area where you killed the skeleton archer, and turn right to head down a side path with more Skeleton Soldiers and a Soul of a Nameless Soldier .
Head back toward the stairs and continue around the area until you can turn right, but watch out for the button in the floor that triggers a fire arrow trap. Slide down the ladder to find a Soul of a Nameless Soldier and continue to the next room, attacking the Skeleton Swordsman hiding on the left.
Once the skeleton is dead, collect the Sharp Gem and then turn right and attack the wall near the corner to reveal a hidden path. Defeat the double spawning Skeleton Soldier and the skeleton archer and then pick up the Carthus Pyromancy Tome .
Watch out for the Skeleton Swordsman on the left and then strike the wall to reveal a hidden path with the Pyromancy Tome.
Head back through the tunnel and turn right to end up near the beginning of the area.
Return to the entrance of the catacombs and follow the ledge with columns to find a shortcut that drops you on to a ledge above the large staircase. Drop down a few levels while killing the archers and then use ranged attacks to deal with the two Skeleton Soldiers at the base of the staircase.
You can now drop down, but make sure to stand on one side of the platform to avoid the skeleton ball that rolls up and down the large staircase.
The shortcut will land you at the base of the large staircase with the ball trap.
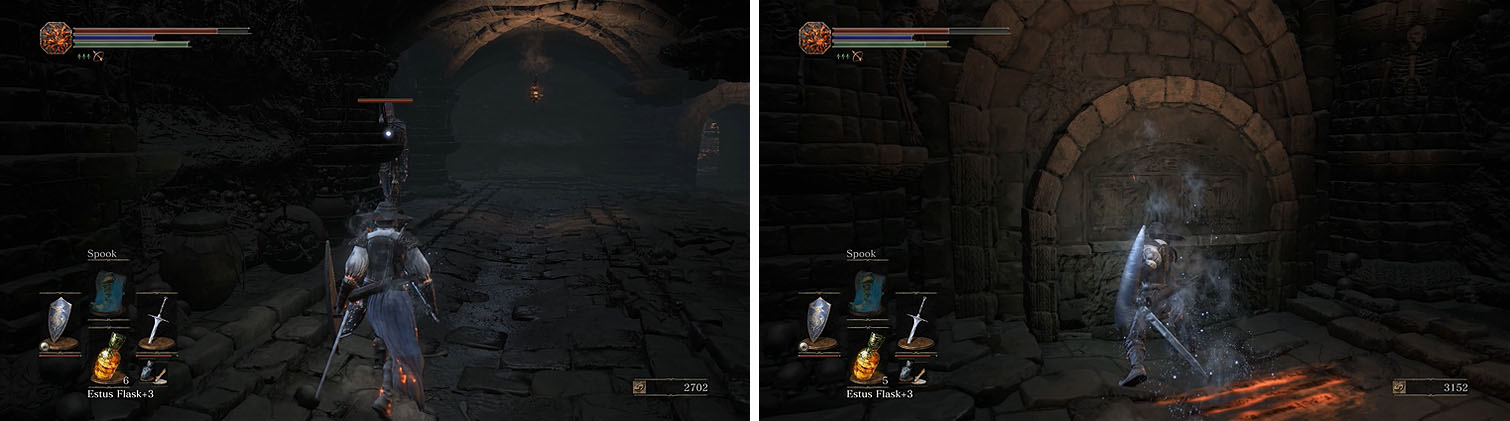
Wait for the skeleton ball to pass you on its way up the stairs and then follow it up to grab the Ember and then make your way back down and through the arch. Turn around and kill the non-aggressive skeleton with a hat on the other side of the arch and then wait for the skeleton ball to return and hit the bars, exploding to drop an Undead Bone Shard .
Around the corner is some more Skeleton Soldiers, one of which tosses a pot that explodes to release a dark orb, and then carefully wade through the pots that includes some traps to find a Carthus Milkring .
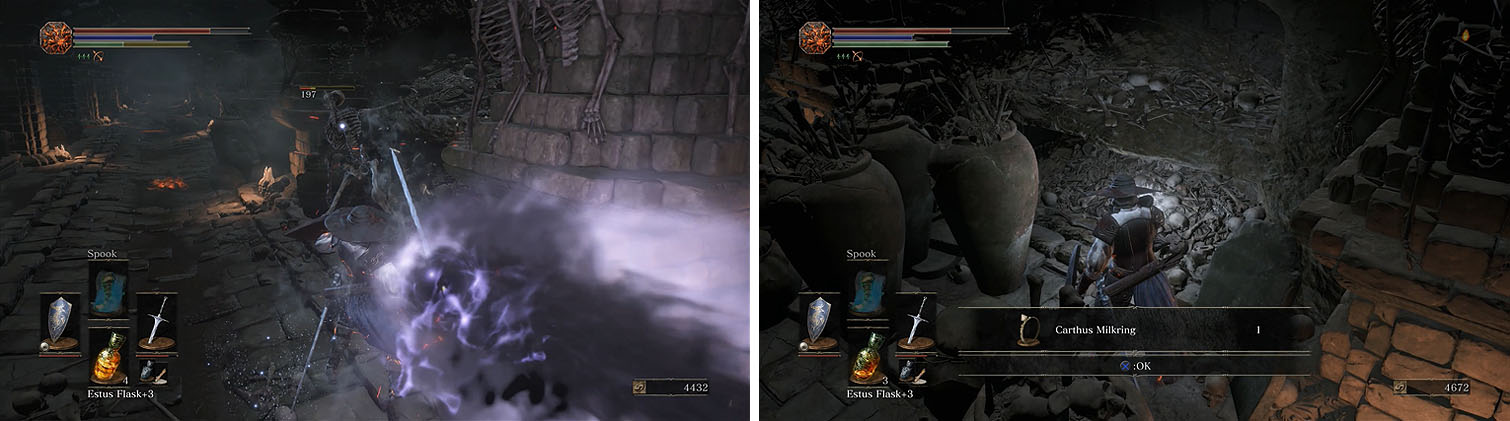
Watch out for the dark orbs that are thrown by the skeleton (left) and then wade through the pots, some of which also release these orbs, to get the ring (right).
Note the trap on the floor as you continue into the next room, which can be used if you lure the Skeleton Swordsman into the arrows. Follow the path to a hall that has two more Skeleton Swordsmen and another trap, next to the Large Soul of an Unknown Traveler , and use the trap to help defeat the enemies.
Grab the Ember at the end of the hall, but don’t fall down the hole in the floor, and then enter the side tunnel and wait for the skeleton ball to pass. Collect the Large Titanite Shard on the left and then activate the bonfire.
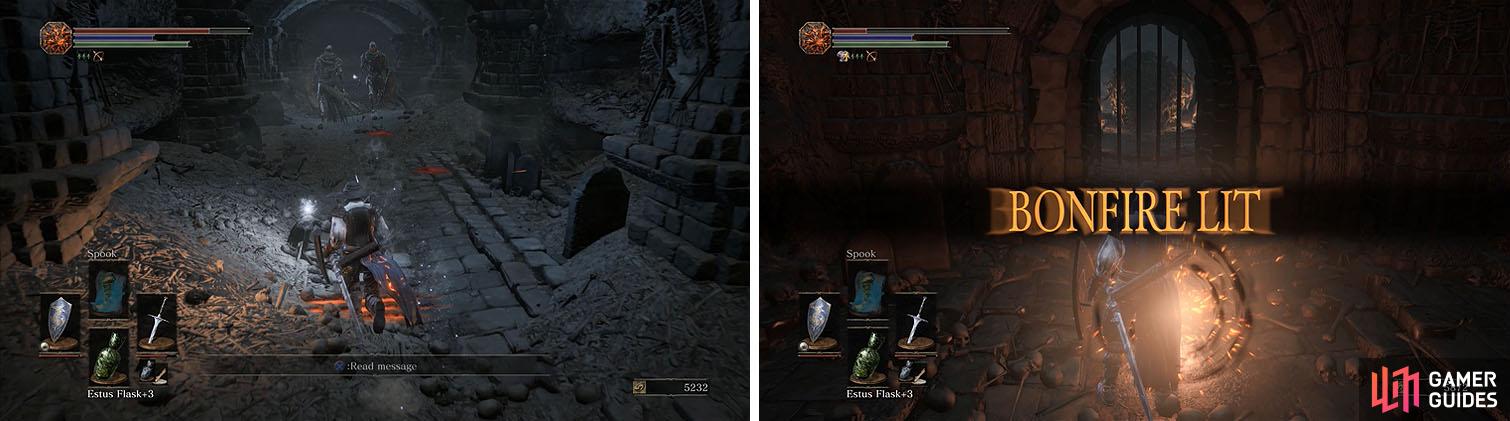
Be careful when fighting both of the Skeleton Swordsmen in the hall (left). Make sure to activate the bonfire near the ball trap (right).
Head down the stairs when it’s safe and then roll out before fighting the Hound-rats below. There is a Large Hound-rat in the corner of the area that you’ll want to kill before you enter the arch on the opposite side of the room to find an Ember .
Dark Spirit Knight Slayer Tsorig will invade once you reach the back of the hall if you’re embered. This tough enemy uses a greatsword and greatshield to do devastating damage with high poise that makes it hard to interrupt him, but you can still lure him into the skeleton ball trap to knock him off his feet ( “My thanks!” gesture and Knight Slayer’s Ring ).
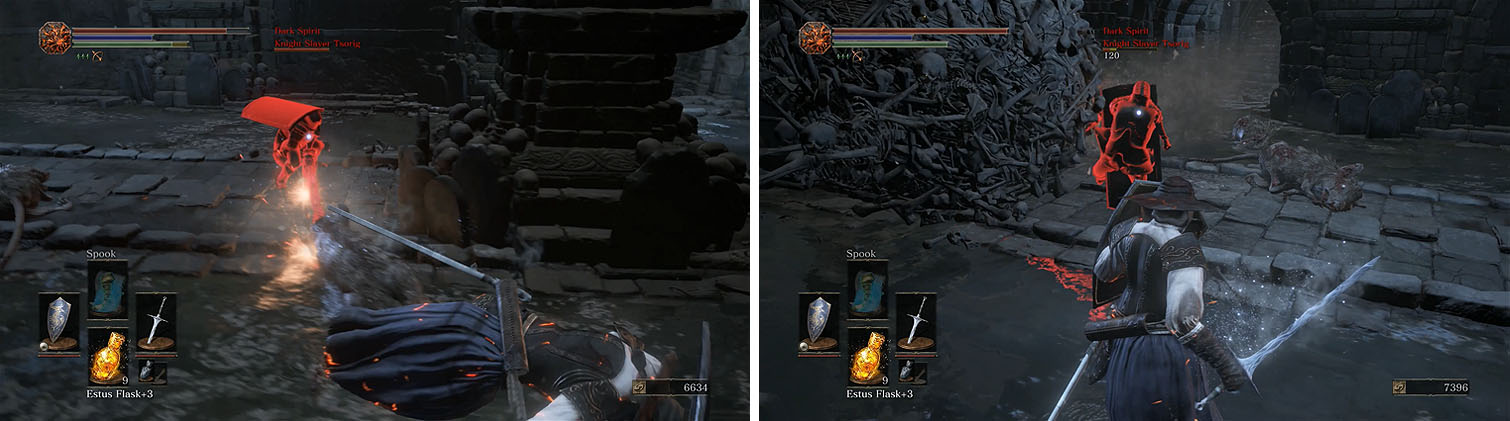
Tsorig uses deadly heavy attacks, so feel free to lure him into the skeleton ball.
The long tunnel with columns contains a bunch of Writhing Rotten Flesh on the ceiling, as well as Skeleton Wheels. Run through a part of the tunnel to make the Rotten Flesh fall from above or attack them on the ceiling and then grab the Titanite Shard x2 .
The Skeleton Wheels straight ahead rush in an attempt to plow you over, so roll past them and then strike when they turn around. You can now follow the path to a dead end with the Carthus Bloodring and more Writhing Rotten Flesh on the ceiling.

Avoid the Rotten Flesh that fall from the ceiling and collect the Carthus Bloodring.
Backtrack to the skeleton ball trap to grab the Titanite Shard x2 by a pillar and then defeat the Skeleton Swordsman at the end of the tunnel.
The wall on the right between the last two columns can be struck to reveal a hidden path with a set of stairs, but be careful since there is a Skeleton Swordsman waiting for you. You can then grab the Grave Warden’s Ashes from the corner and the Large Titanite Shard down the hall and then pull the Skeleton Swordsman down the hall, since there is another one with a greatbow around the corner.
Make sure to collect the Carthus Rouge x3 before you head back downstairs and then take the last tunnel.
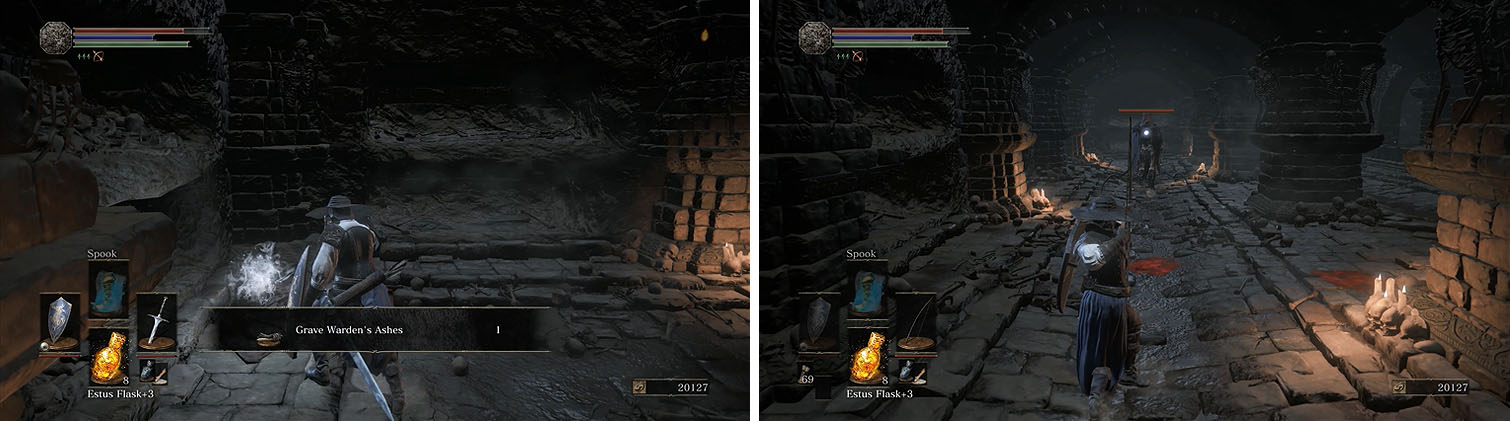
Collect the ashes at the top of the stairs (left) and then head down the hall to pull the Skeleton Swordsman (right).
There is a Crystal Lizard straight ahead, but striking it from behind will cause it to run away straight into a Skeleton Swordsman. Run slightly past the lizard and then turn around to cause the lizard to run backwards ( Fire Gem ).
Continue forward and kick the swordsman off the cliff and collect the Yellow Bug Pellet x3 . You can now through the arch and defeat the two Skeleton Soldiers to grab the Large Soul of a Nameless Soldier and Black Bug Pellet x2 .
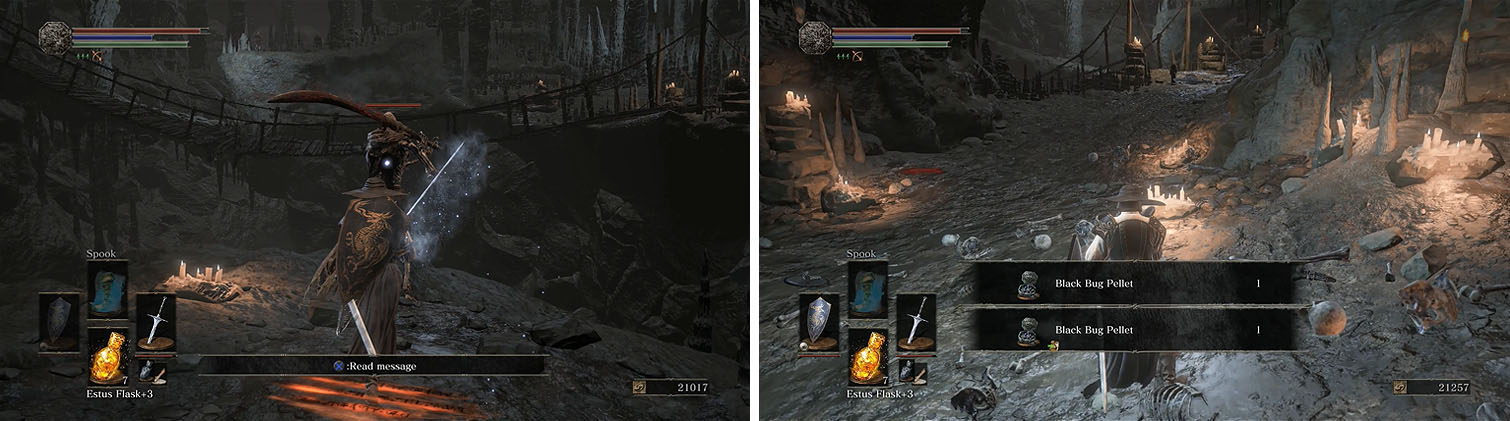
Sneak up behind the Skeleton Swordsman (left) and then enter the cavern for multiple treasure items (right).
Rush across the suspended bridge and turn around to spot a ton of skeletons heading your way and then strike the bridge to cause it to collapse. This will create a ladder to Smouldering Lake, but ignore it for now and continue to the boss arena.
No Comments