
Blades of Fire is a massive adventure full of many secrets and collectibles, such as unlocking new Forger’s Scrolls, Seneschals for more parts, and of course items that will boost the effectiveness of Aran through various Criptex. The ![]() Forge Criptex are important to find if you wish to get the most out of any weapons you create, so keep reading to learn where to find all 14 Forge Criptex in the game.
Forge Criptex are important to find if you wish to get the most out of any weapons you create, so keep reading to learn where to find all 14 Forge Criptex in the game.
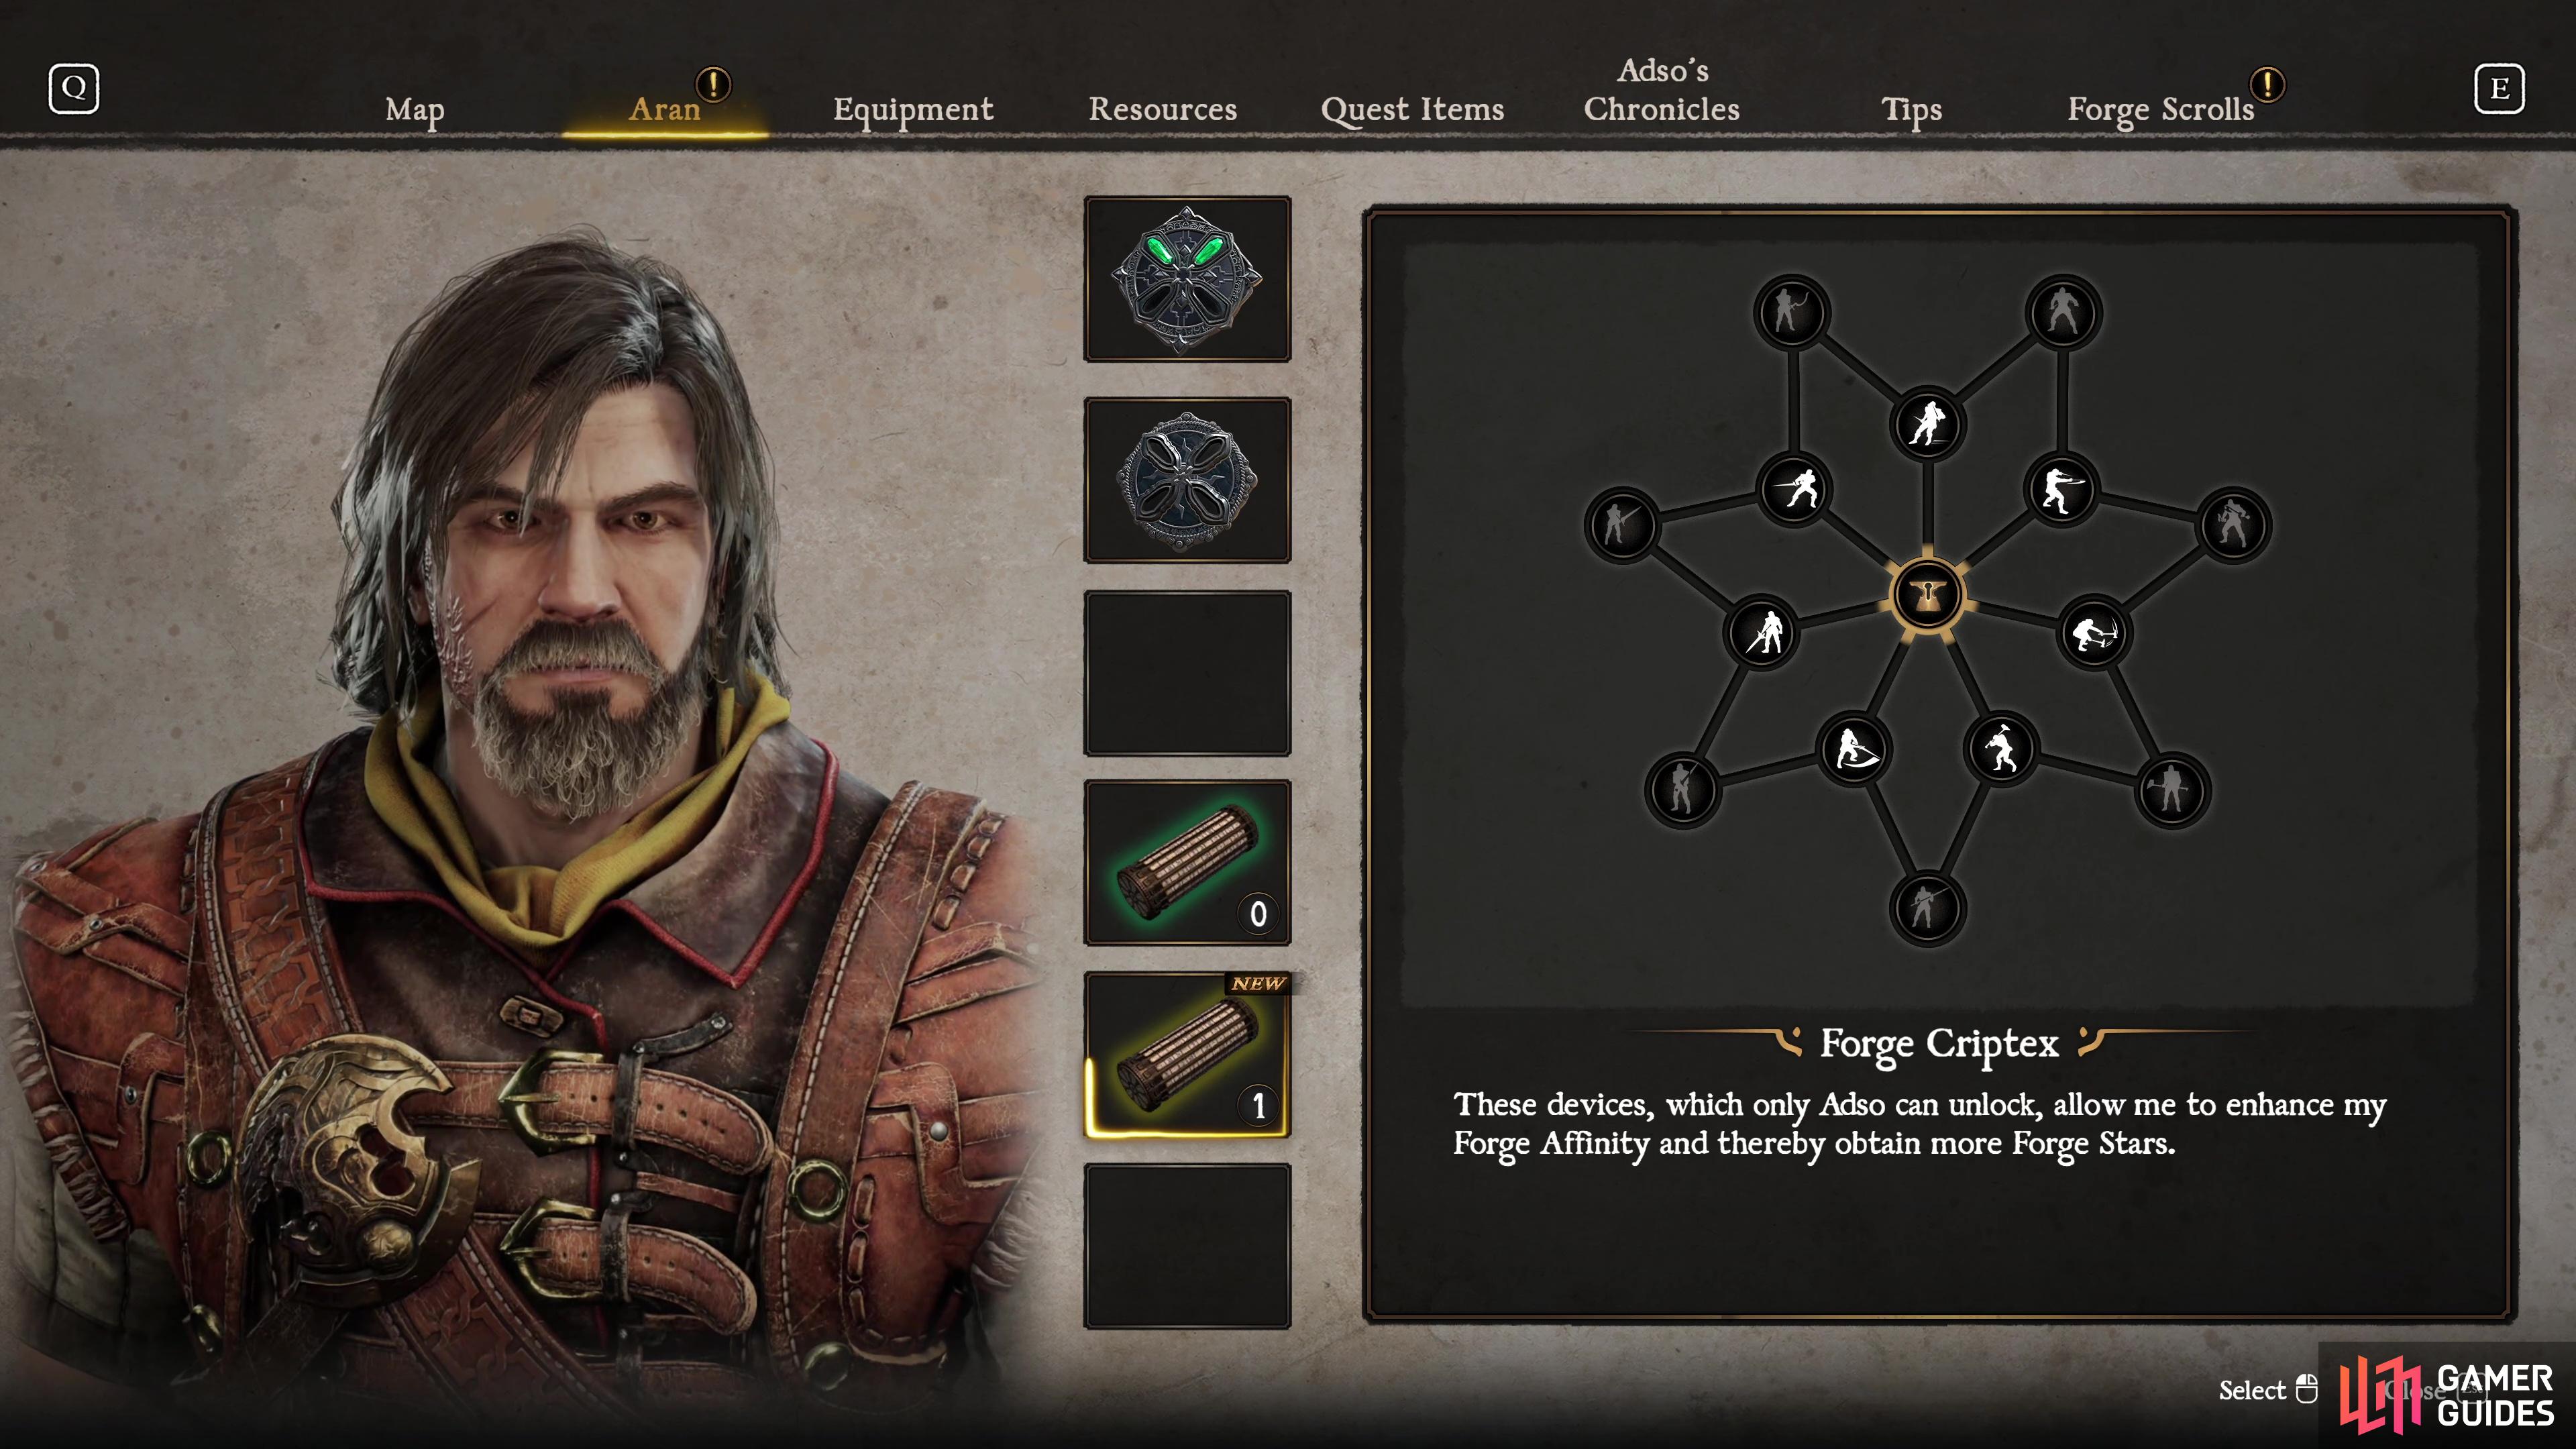
Forge Criptex in Blades of Fire will add the potential for additional Forge Stars to weapons you create.
Table of Contents
If you want to jump to a specific section, click on the links below.
What Are Forge Criptex?
As you explore the opening area of Besacaar Hamlet in Blades of Fire, you’ll come across your first Forge Criptex if you explore every nook and cranny. This will open a new part of the Aran menu, where you’ll be able to allocate a point on this tree. Essentially, depending on where you put the points, you’ll add an additional possible Forge Star when creating a weapon of that school, up to a possible max of seven Forge Stars. This becomes incredibly important in the later stages of the adventure where you’re using rare resources for a new weapon.
We’d recommend that you focus on Swords, Polearms, and Greatswords to begin with, as they’re the weapons you’ll find the most of in the early stages of the adventure. Daggers come a lot later, and you won’t get your first Saber until near the later stages of the game’s first massive chapter.
Where to Find Every Forge Criptex
As mentioned at the top, there are total of 14 Forge Criptex in Blades of Fire, and you’ll always find them in a chest, similar to the ones that often house Life and ![]() Stamina Gems. The table below will show you where to find every one at a glance, with more information below that:
Stamina Gems. The table below will show you where to find every one at a glance, with more information below that:
| Number | Location | Map Marker |
|---|---|---|
| 1 | Besacaar Hamlet - Aran & Asdo’s Camp | Map Marker |
| 2 | Map Marker | |
| 3 | Map Marker | |
| 4 | Map Marker | |
| 5 | Map Marker | |
| 6 | Map Marker | |
| 7 | Map Marker | |
| 8 | Map Marker | |
| 9 | Tok’s Kingdom - |
– |
| 10 | Tok’s Kingdom - The Eigon’s Abbey | – |
| 11 | Tok’s Kingdom - |
– |
| 12 | Tok’s Kingdom - |
– |
| 13 | Tok’s Kingdom - |
– |
| 14 | ? | – |
Forge Criptex 1: Besacaar Hamlet - Aran & Asdo’s Camp
Go to the southern house in the main part of the Hamlet and you’ll find a wall you can break through to get inside. Once there, take the ladder down to find a chest with this Criptex inside.
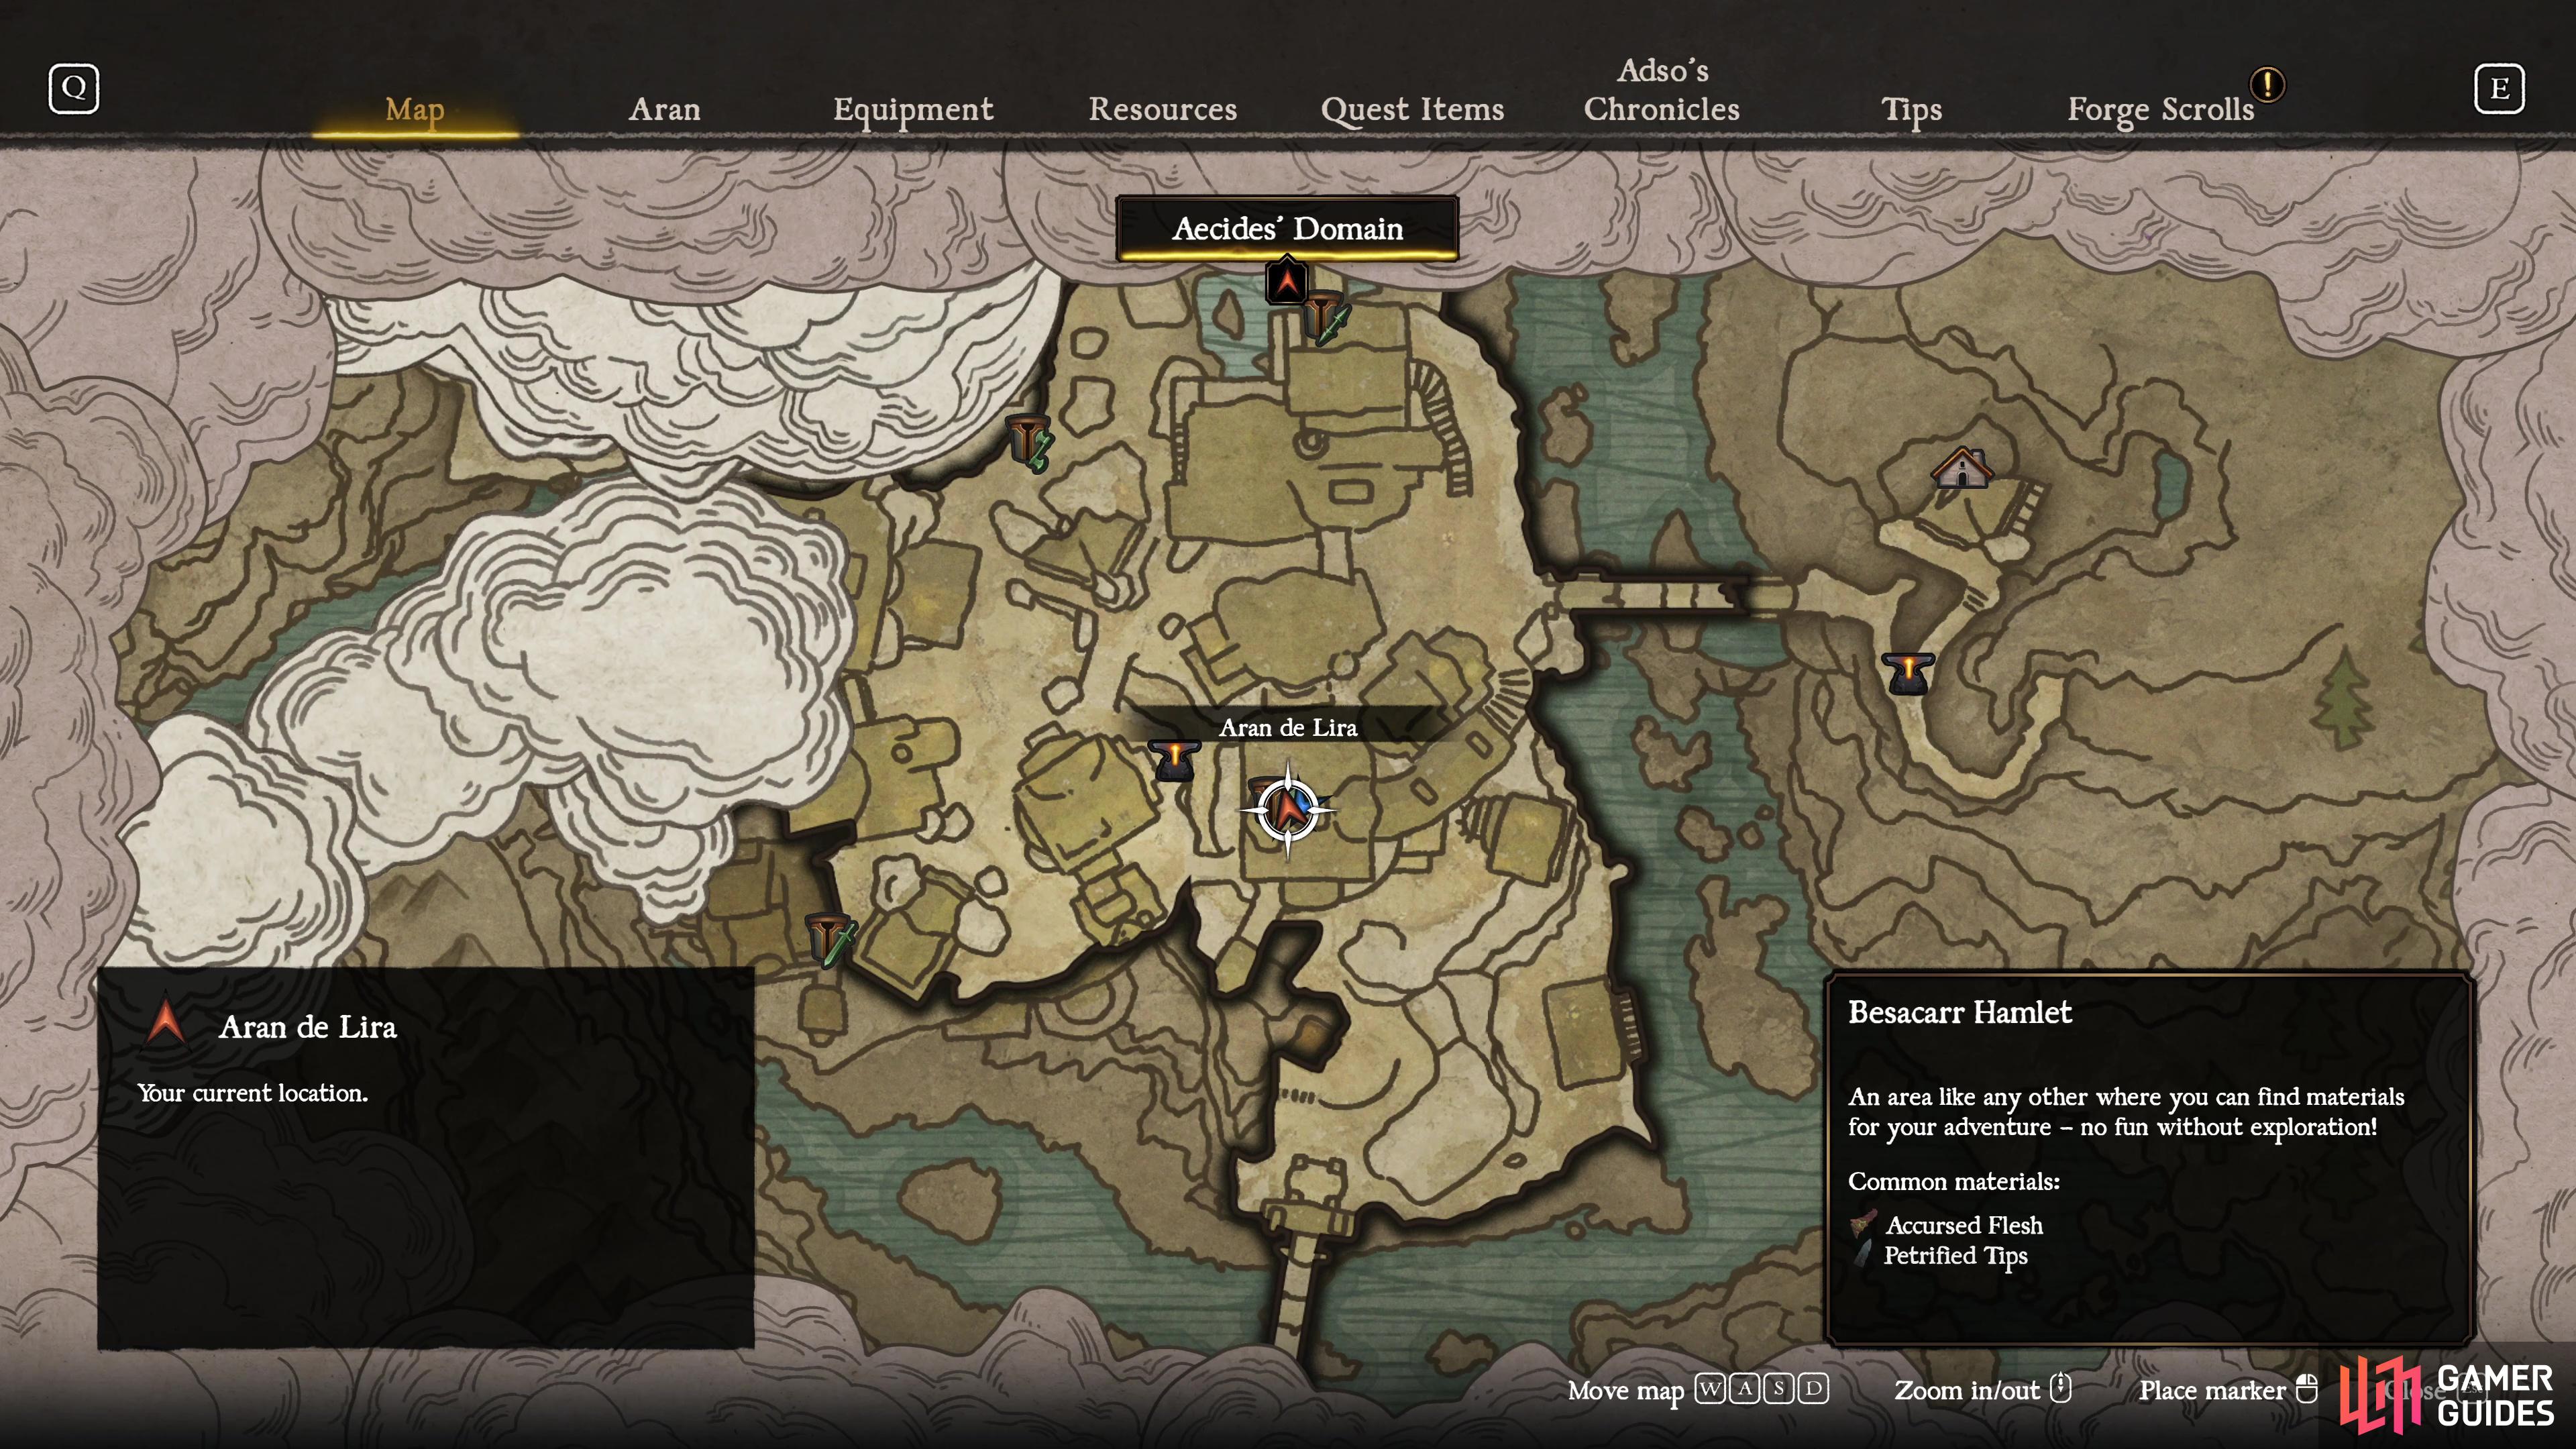

(1 of 2) Head to this house in Besacaar Hamlet and break through the wall to get inside.

Head to this house in Besacaar Hamlet and break through the wall to get inside. (left), Then take the ladder down to reach this chest. (right)
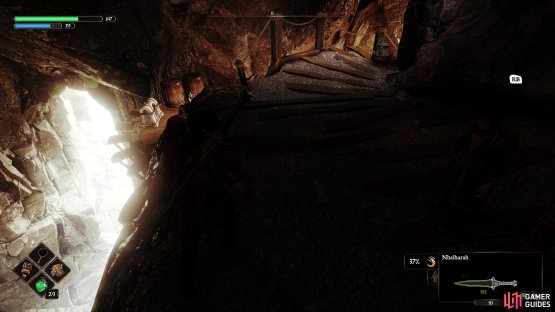
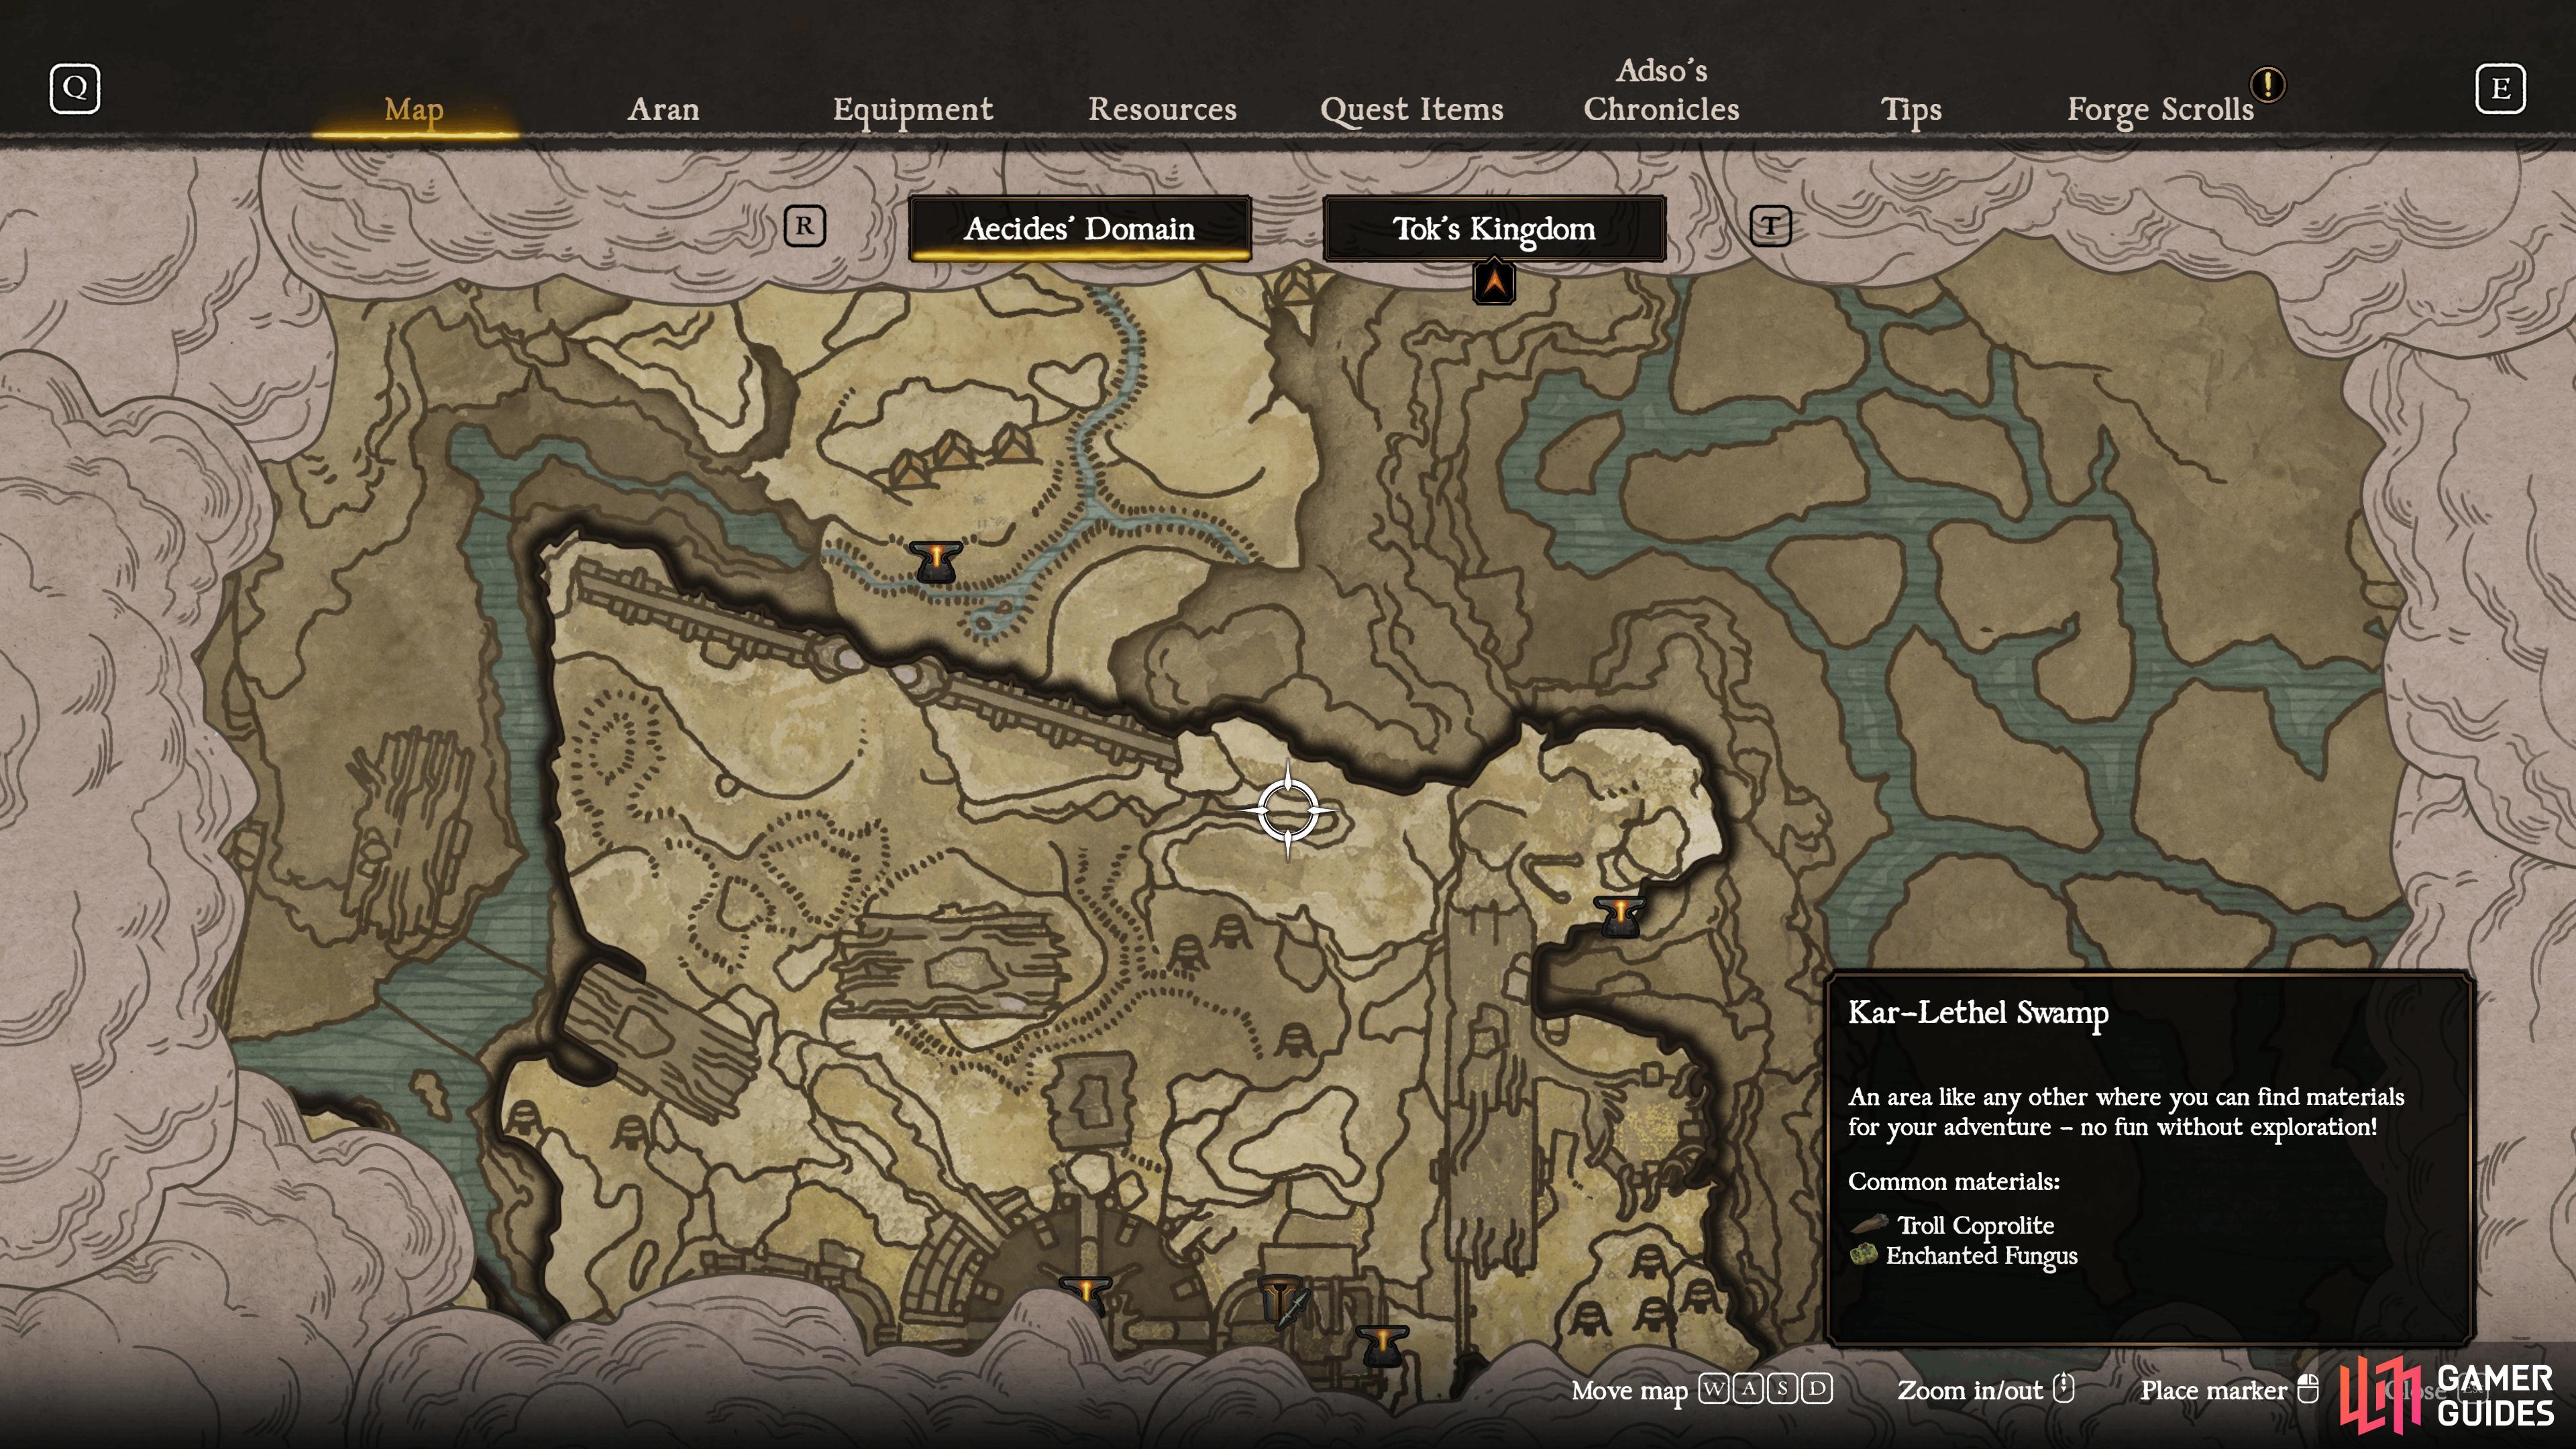
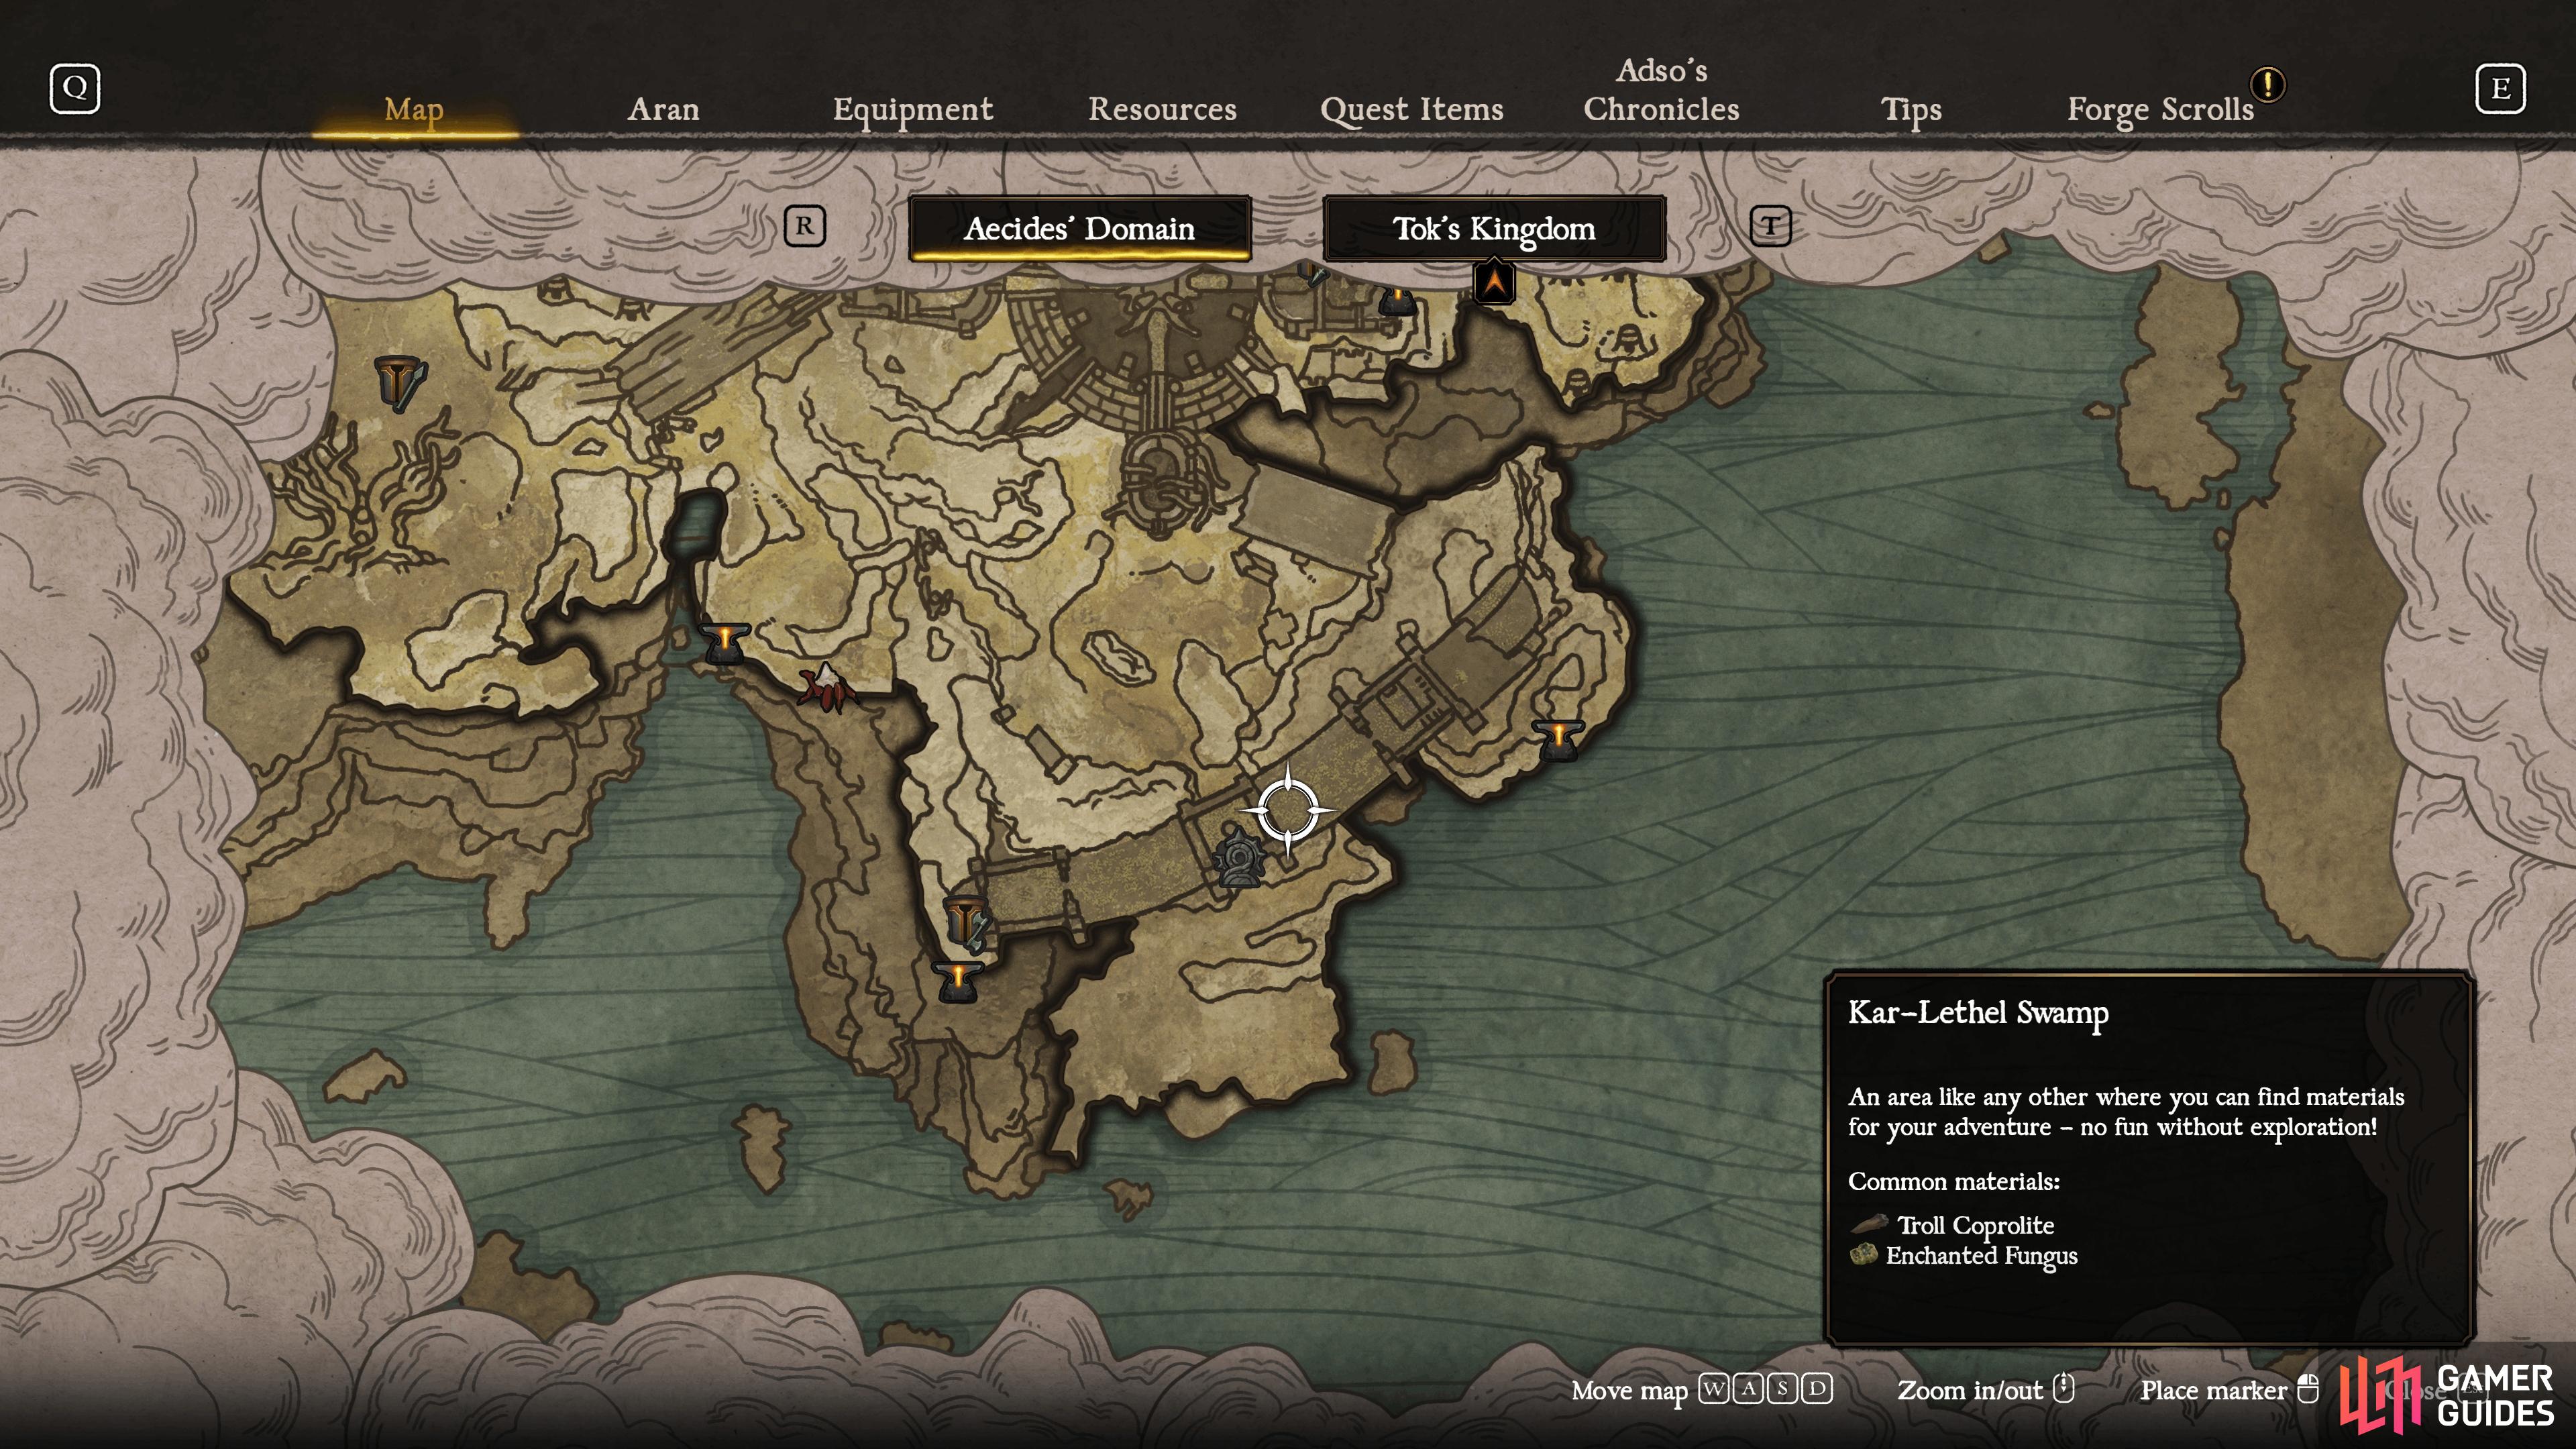
Forge Criptex 2: Kar-Lethel Swamp - Coastal Watchtower
After entering ![]() Kar-Lethel Swamp, hug the left wall and look for a path leading east through the rocks, just past where you get ambushed by
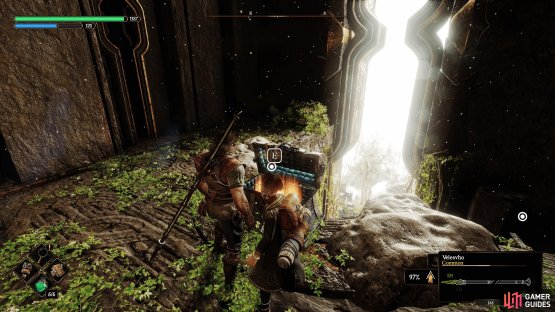
Kar-Lethel Swamp, hug the left wall and look for a path leading east through the rocks, just past where you get ambushed by ![]() Vexers. When you find a cave entrance, you’ll see the chest on the level below you. Take the tunnel to the left and follow it round, then very carefully drop down from the ledge above to reach the chest.
Vexers. When you find a cave entrance, you’ll see the chest on the level below you. Take the tunnel to the left and follow it round, then very carefully drop down from the ledge above to reach the chest.
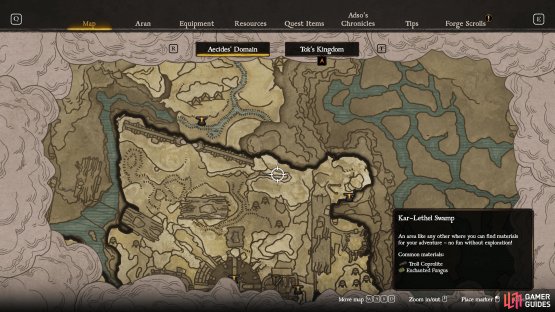
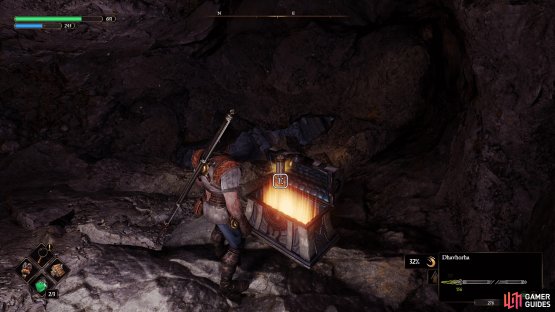
(1 of 2) Head to the cave section of the Kar-Lethel Swamp in the northeast.
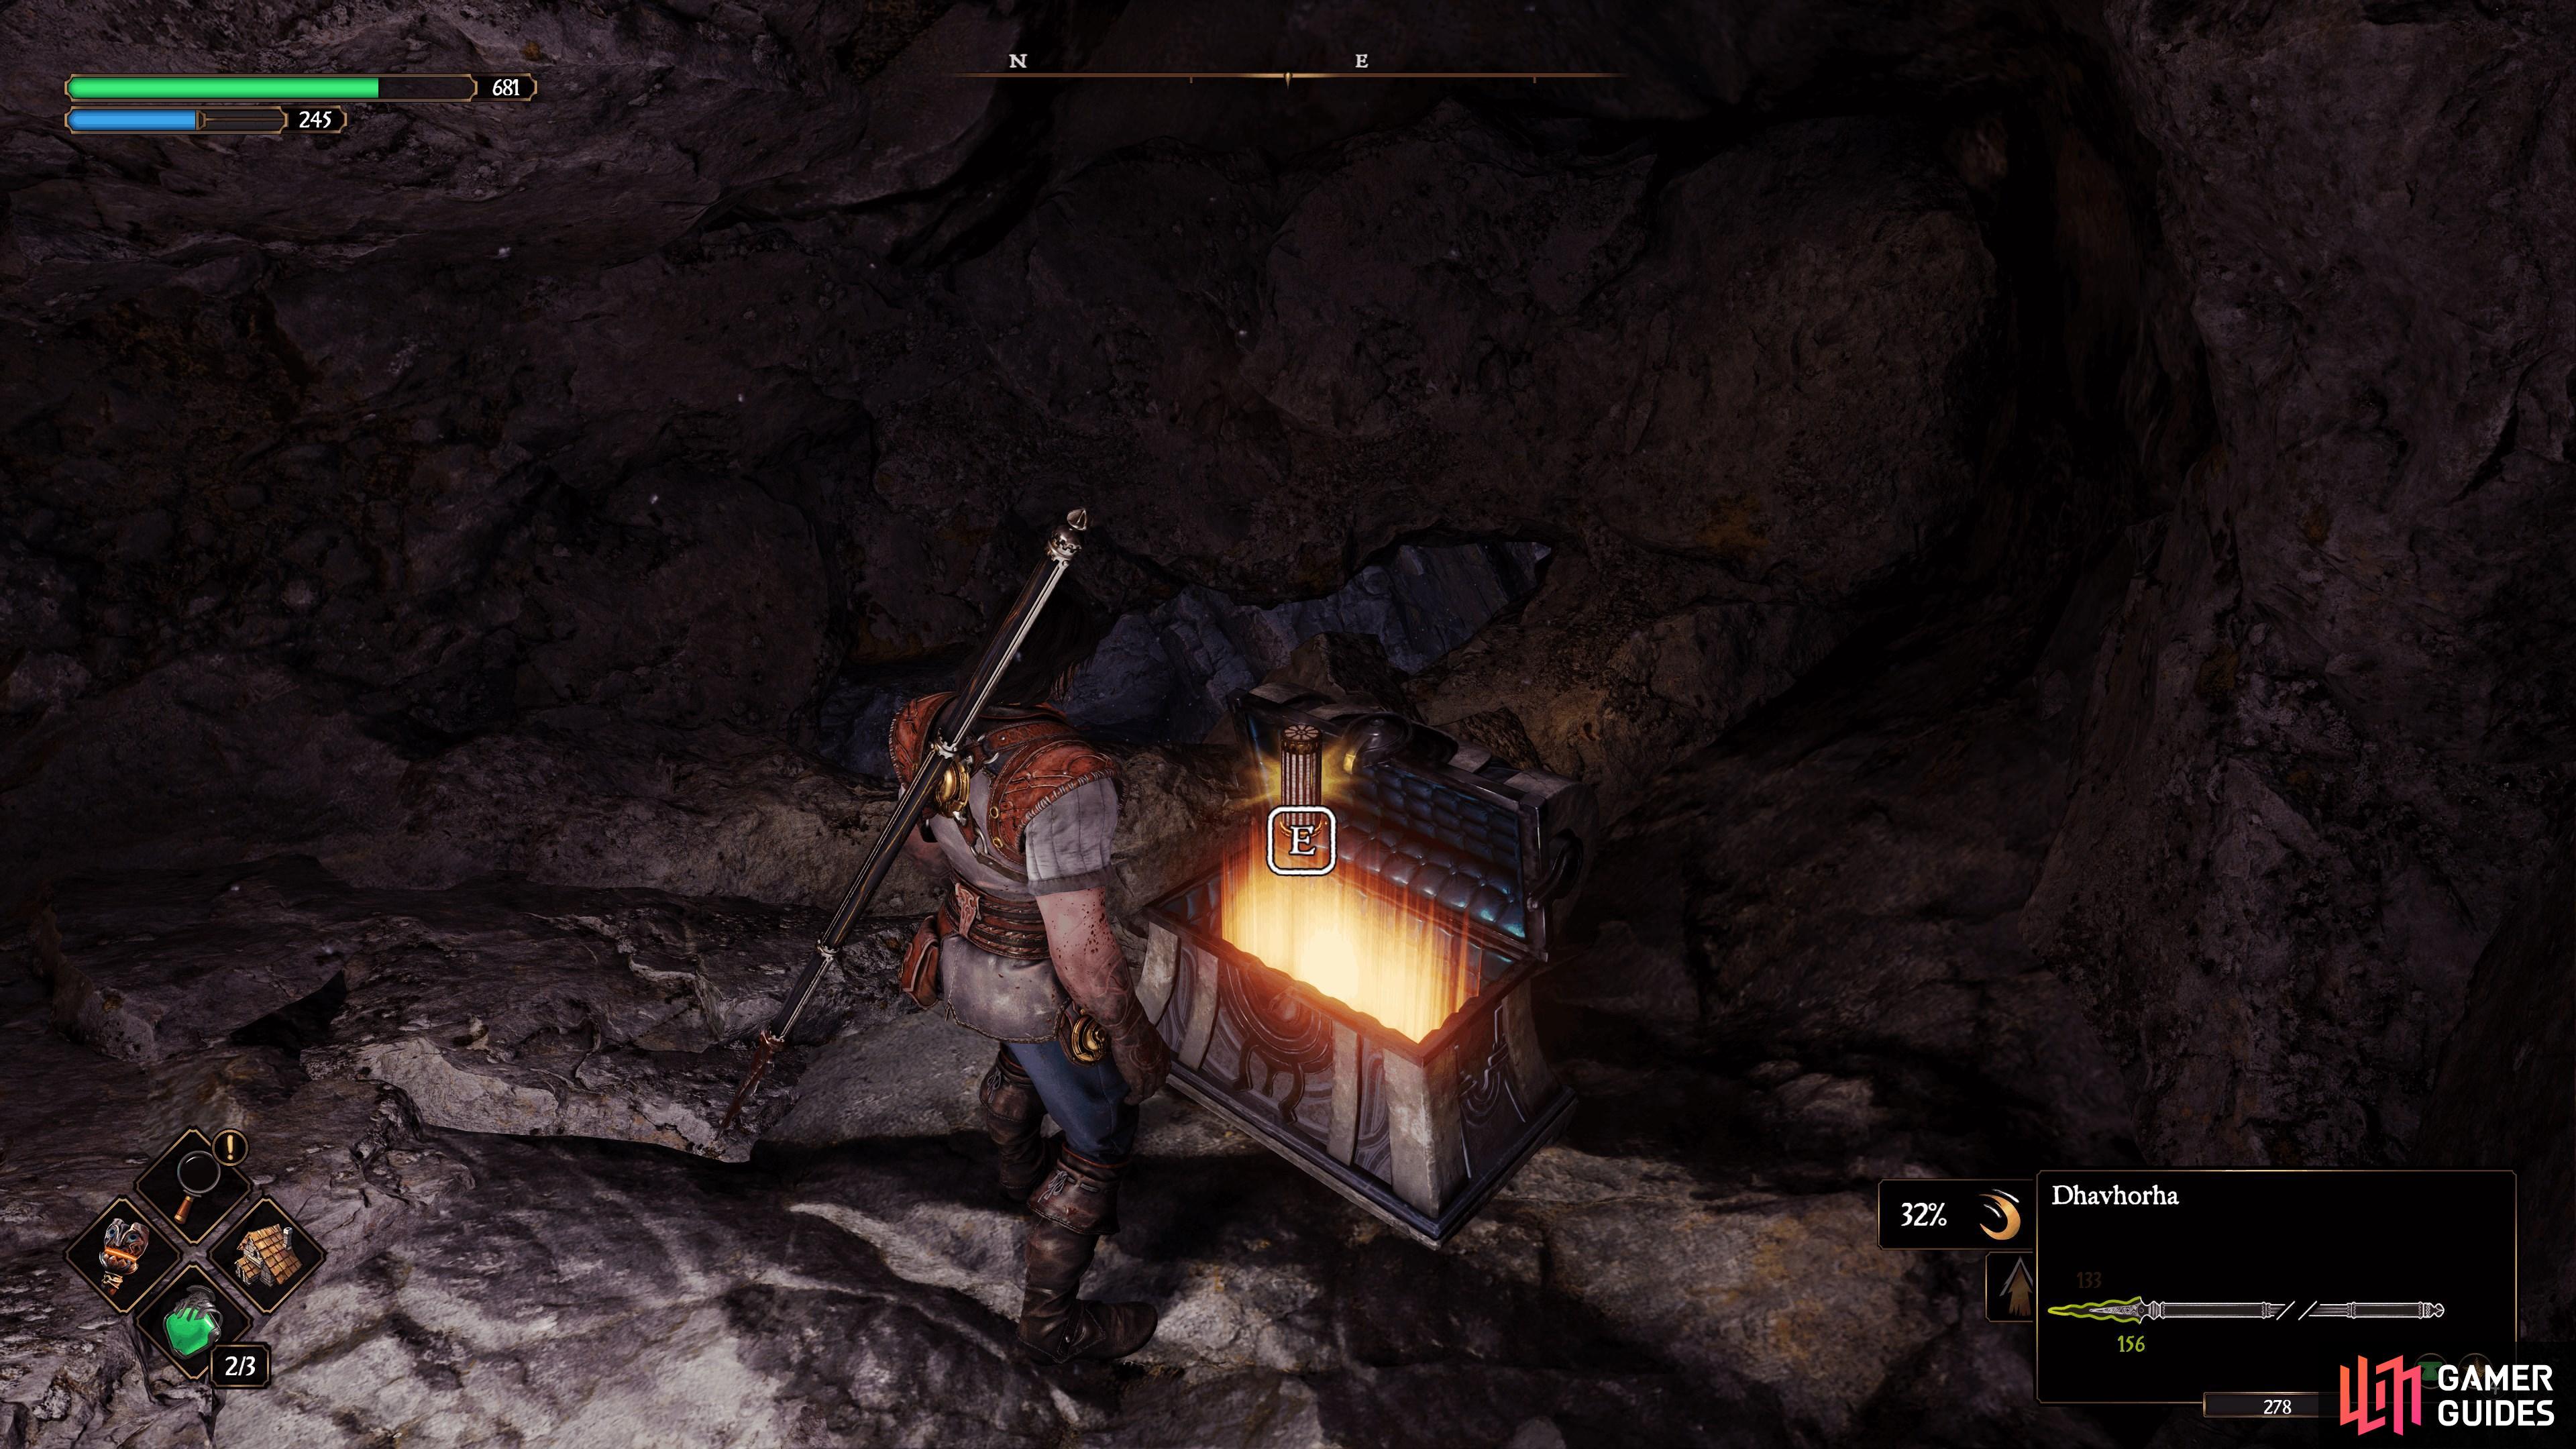
Head to the cave section of the Kar-Lethel Swamp in the northeast. (left), Then carefully drop down to the ledge that houses this Forge Criptex. (right)
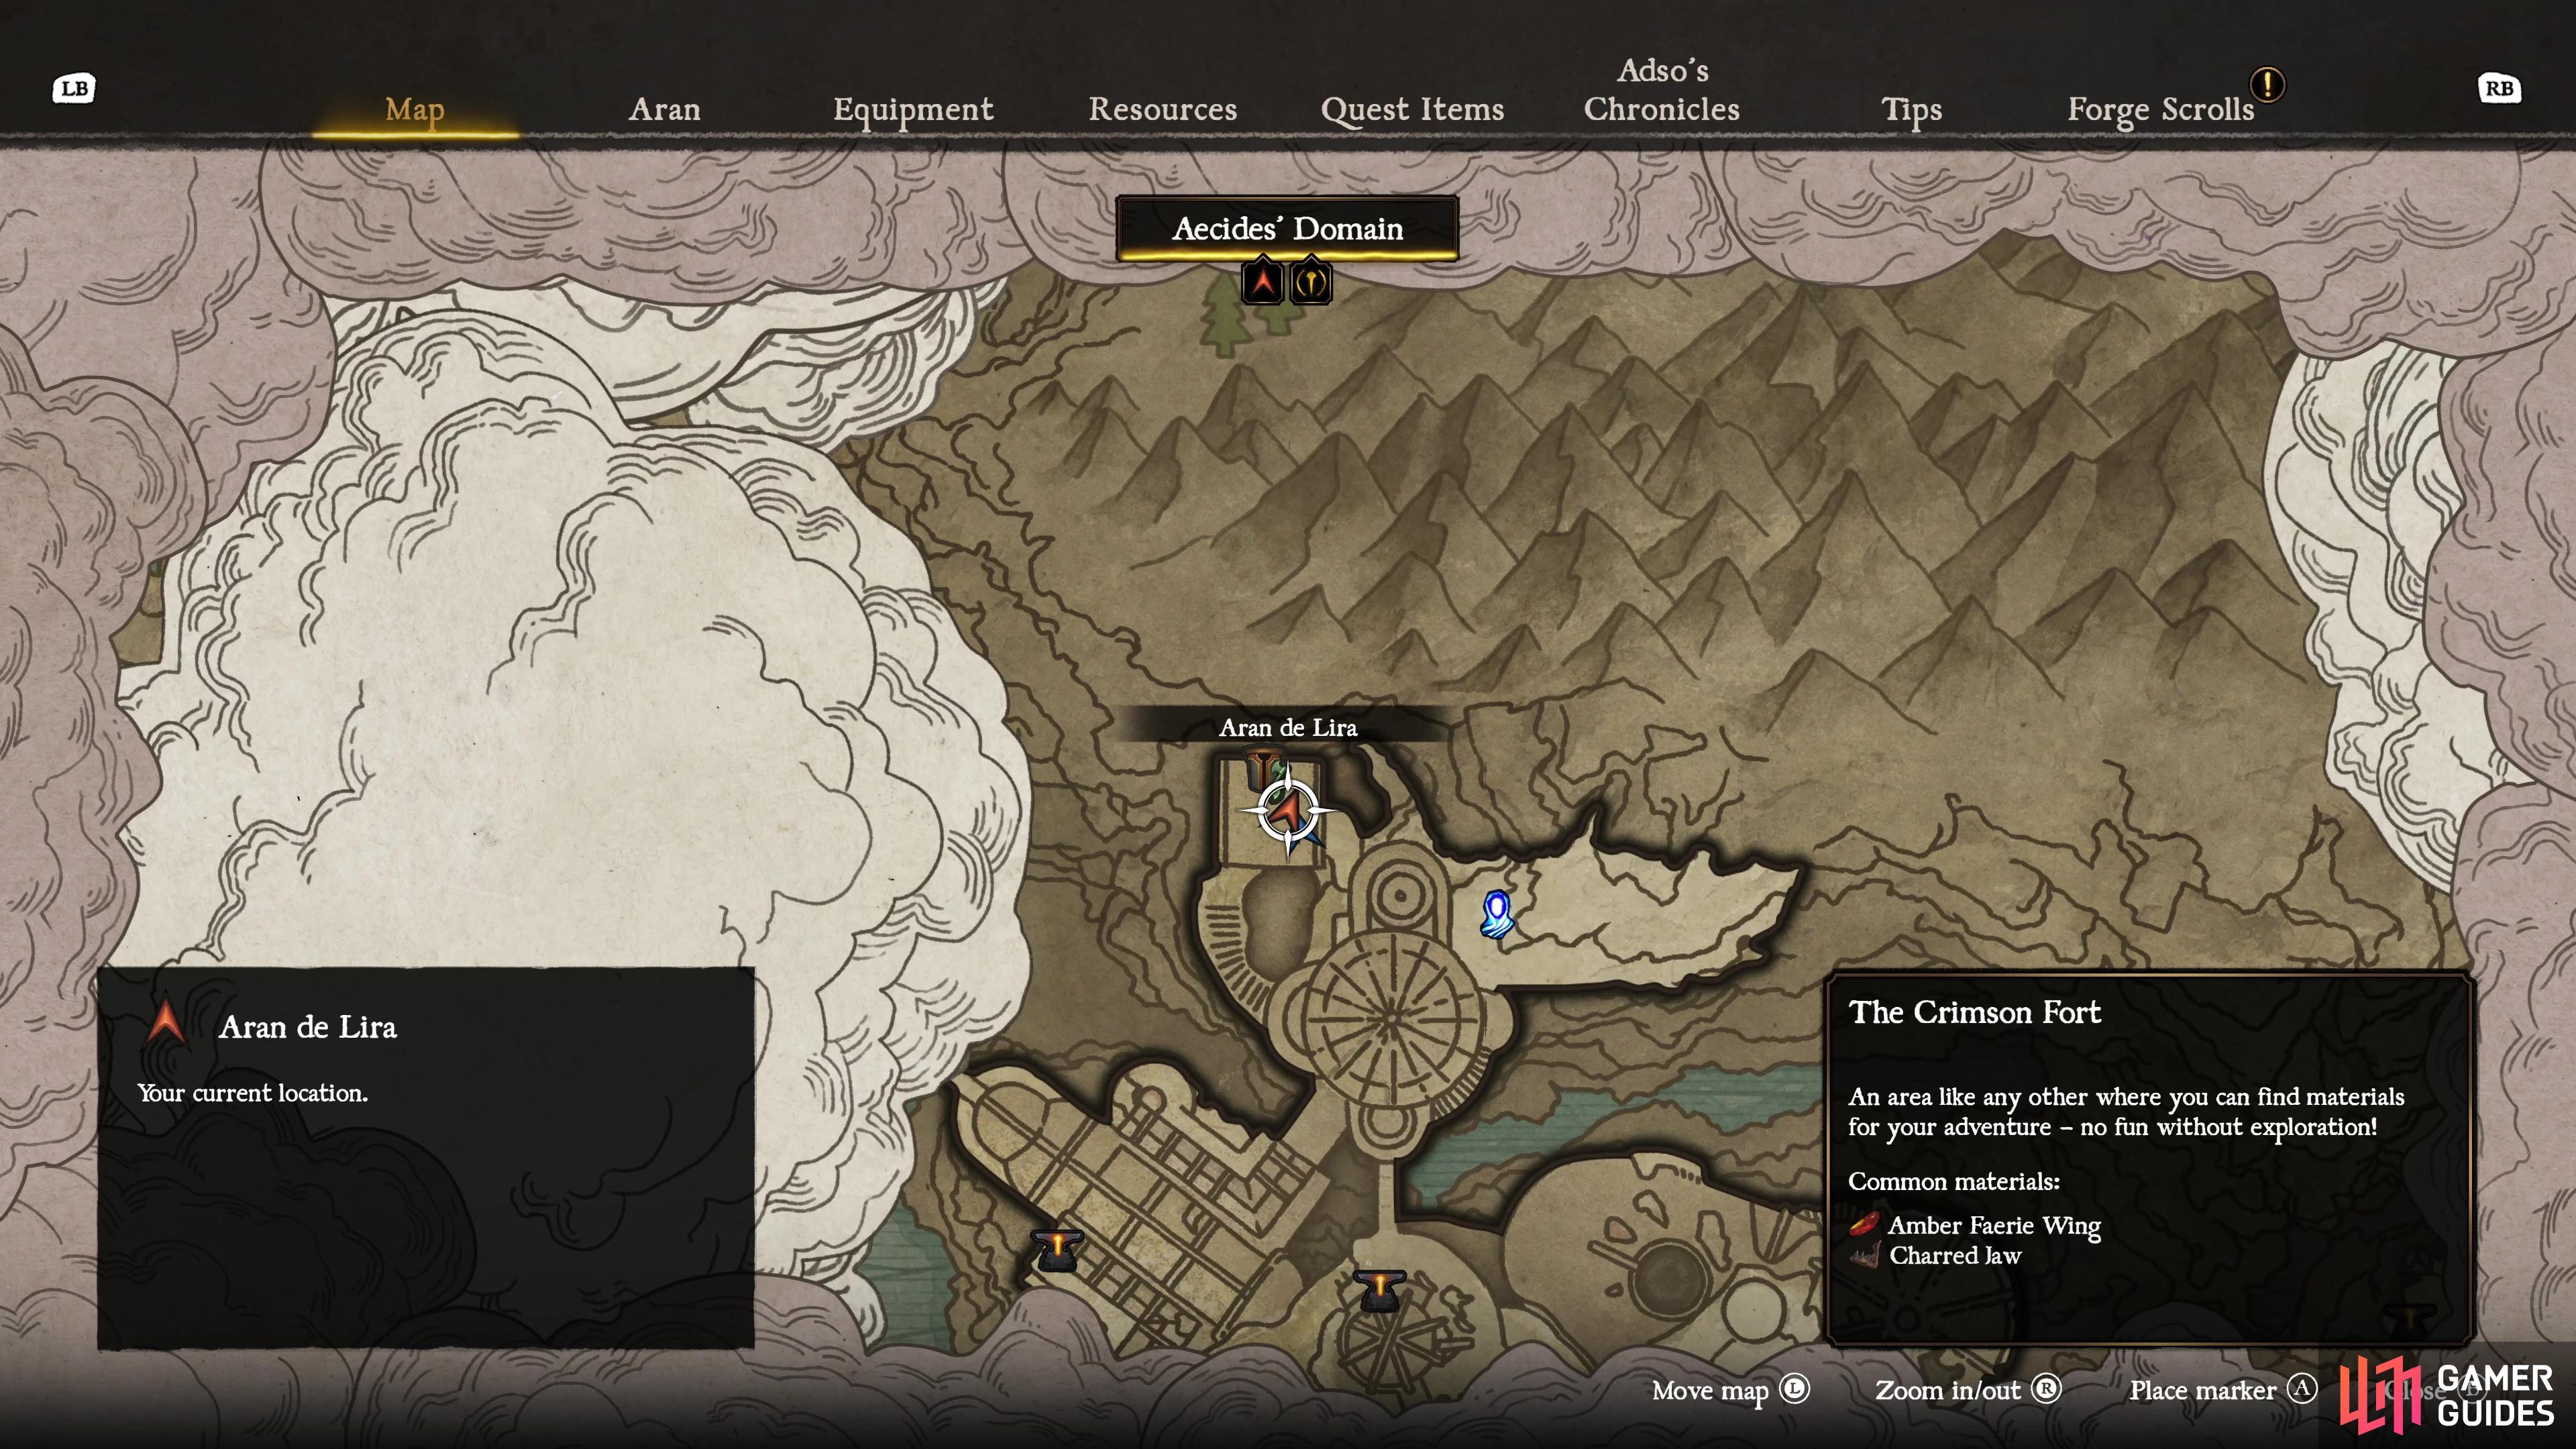
Forge Criptex 3: The Crimson Fort - Library Tower
Make your way to the bottom floor of the Library Tower and drop down where the Forger’s Totem is to find the chest nearby.

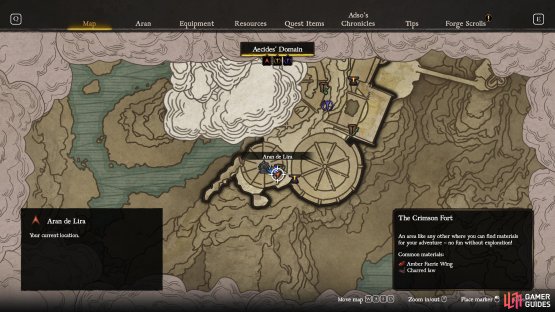
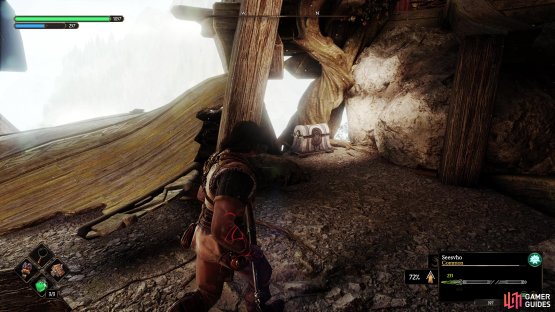
(1 of 2) Head to the Library Tower anvil in the Crimson Fort.

Head to the Library Tower anvil in the Crimson Fort. (left), Then drop to the bottom near the Forger’s Totem to find this Forge Criptex. (right)
Forge Criptex 4: The Crimson Fort - Eagles Bridge
Go across the bridge here and over to the other side of the room where you will find a gap you can leap across, this leads to a locked door with this chest.


(1 of 2) Make your way over the bridge at the Eagles Bridge anvil in The Crimson Fort.
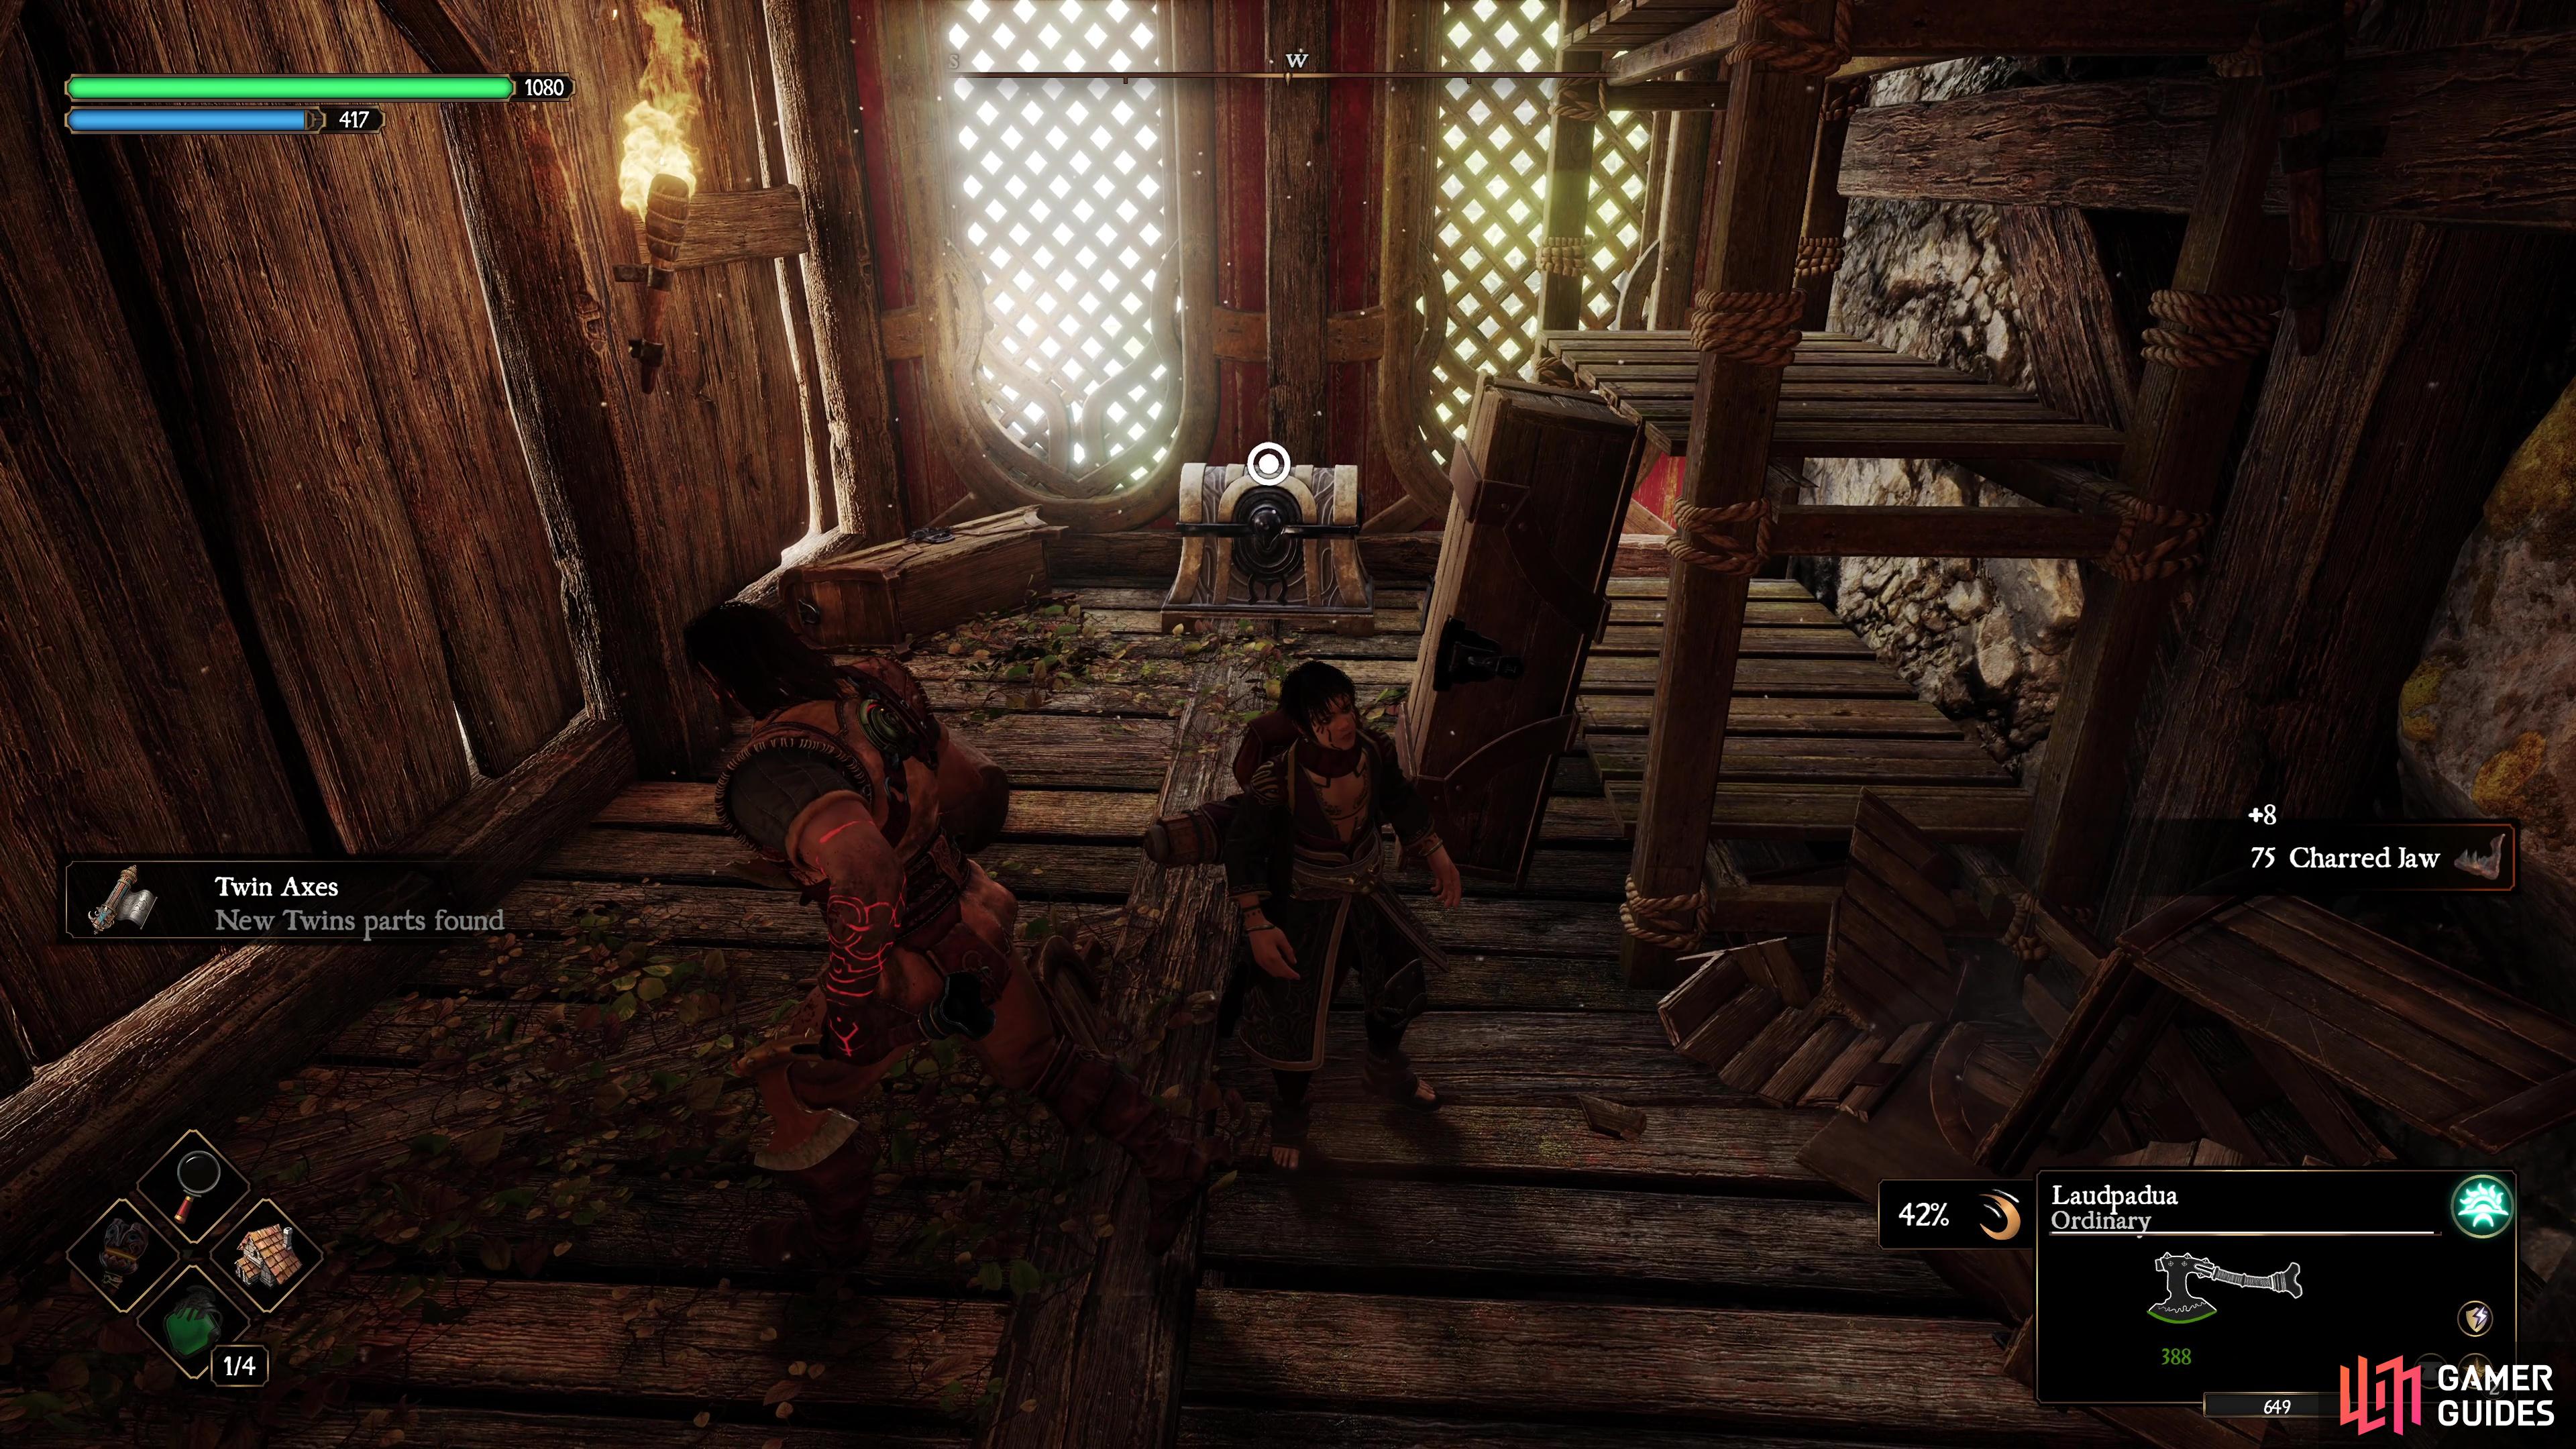
Make your way over the bridge at the Eagles Bridge anvil in The Crimson Fort. (left), Jump across the gap on the upper floor to the north to find a locked room containing this Forge Criptex. (right)
Forge Criptex 5: Doyen Graves - Three Towers
Found at the top of the northern tower. Start by climbing the rope just outside on the walkway leading to the eastern tower, then turn right at the top and climb the ladder, shimmy along the wall, then smash the barrel blocking the path at the end. Finally, hop over the gap to open the chest.
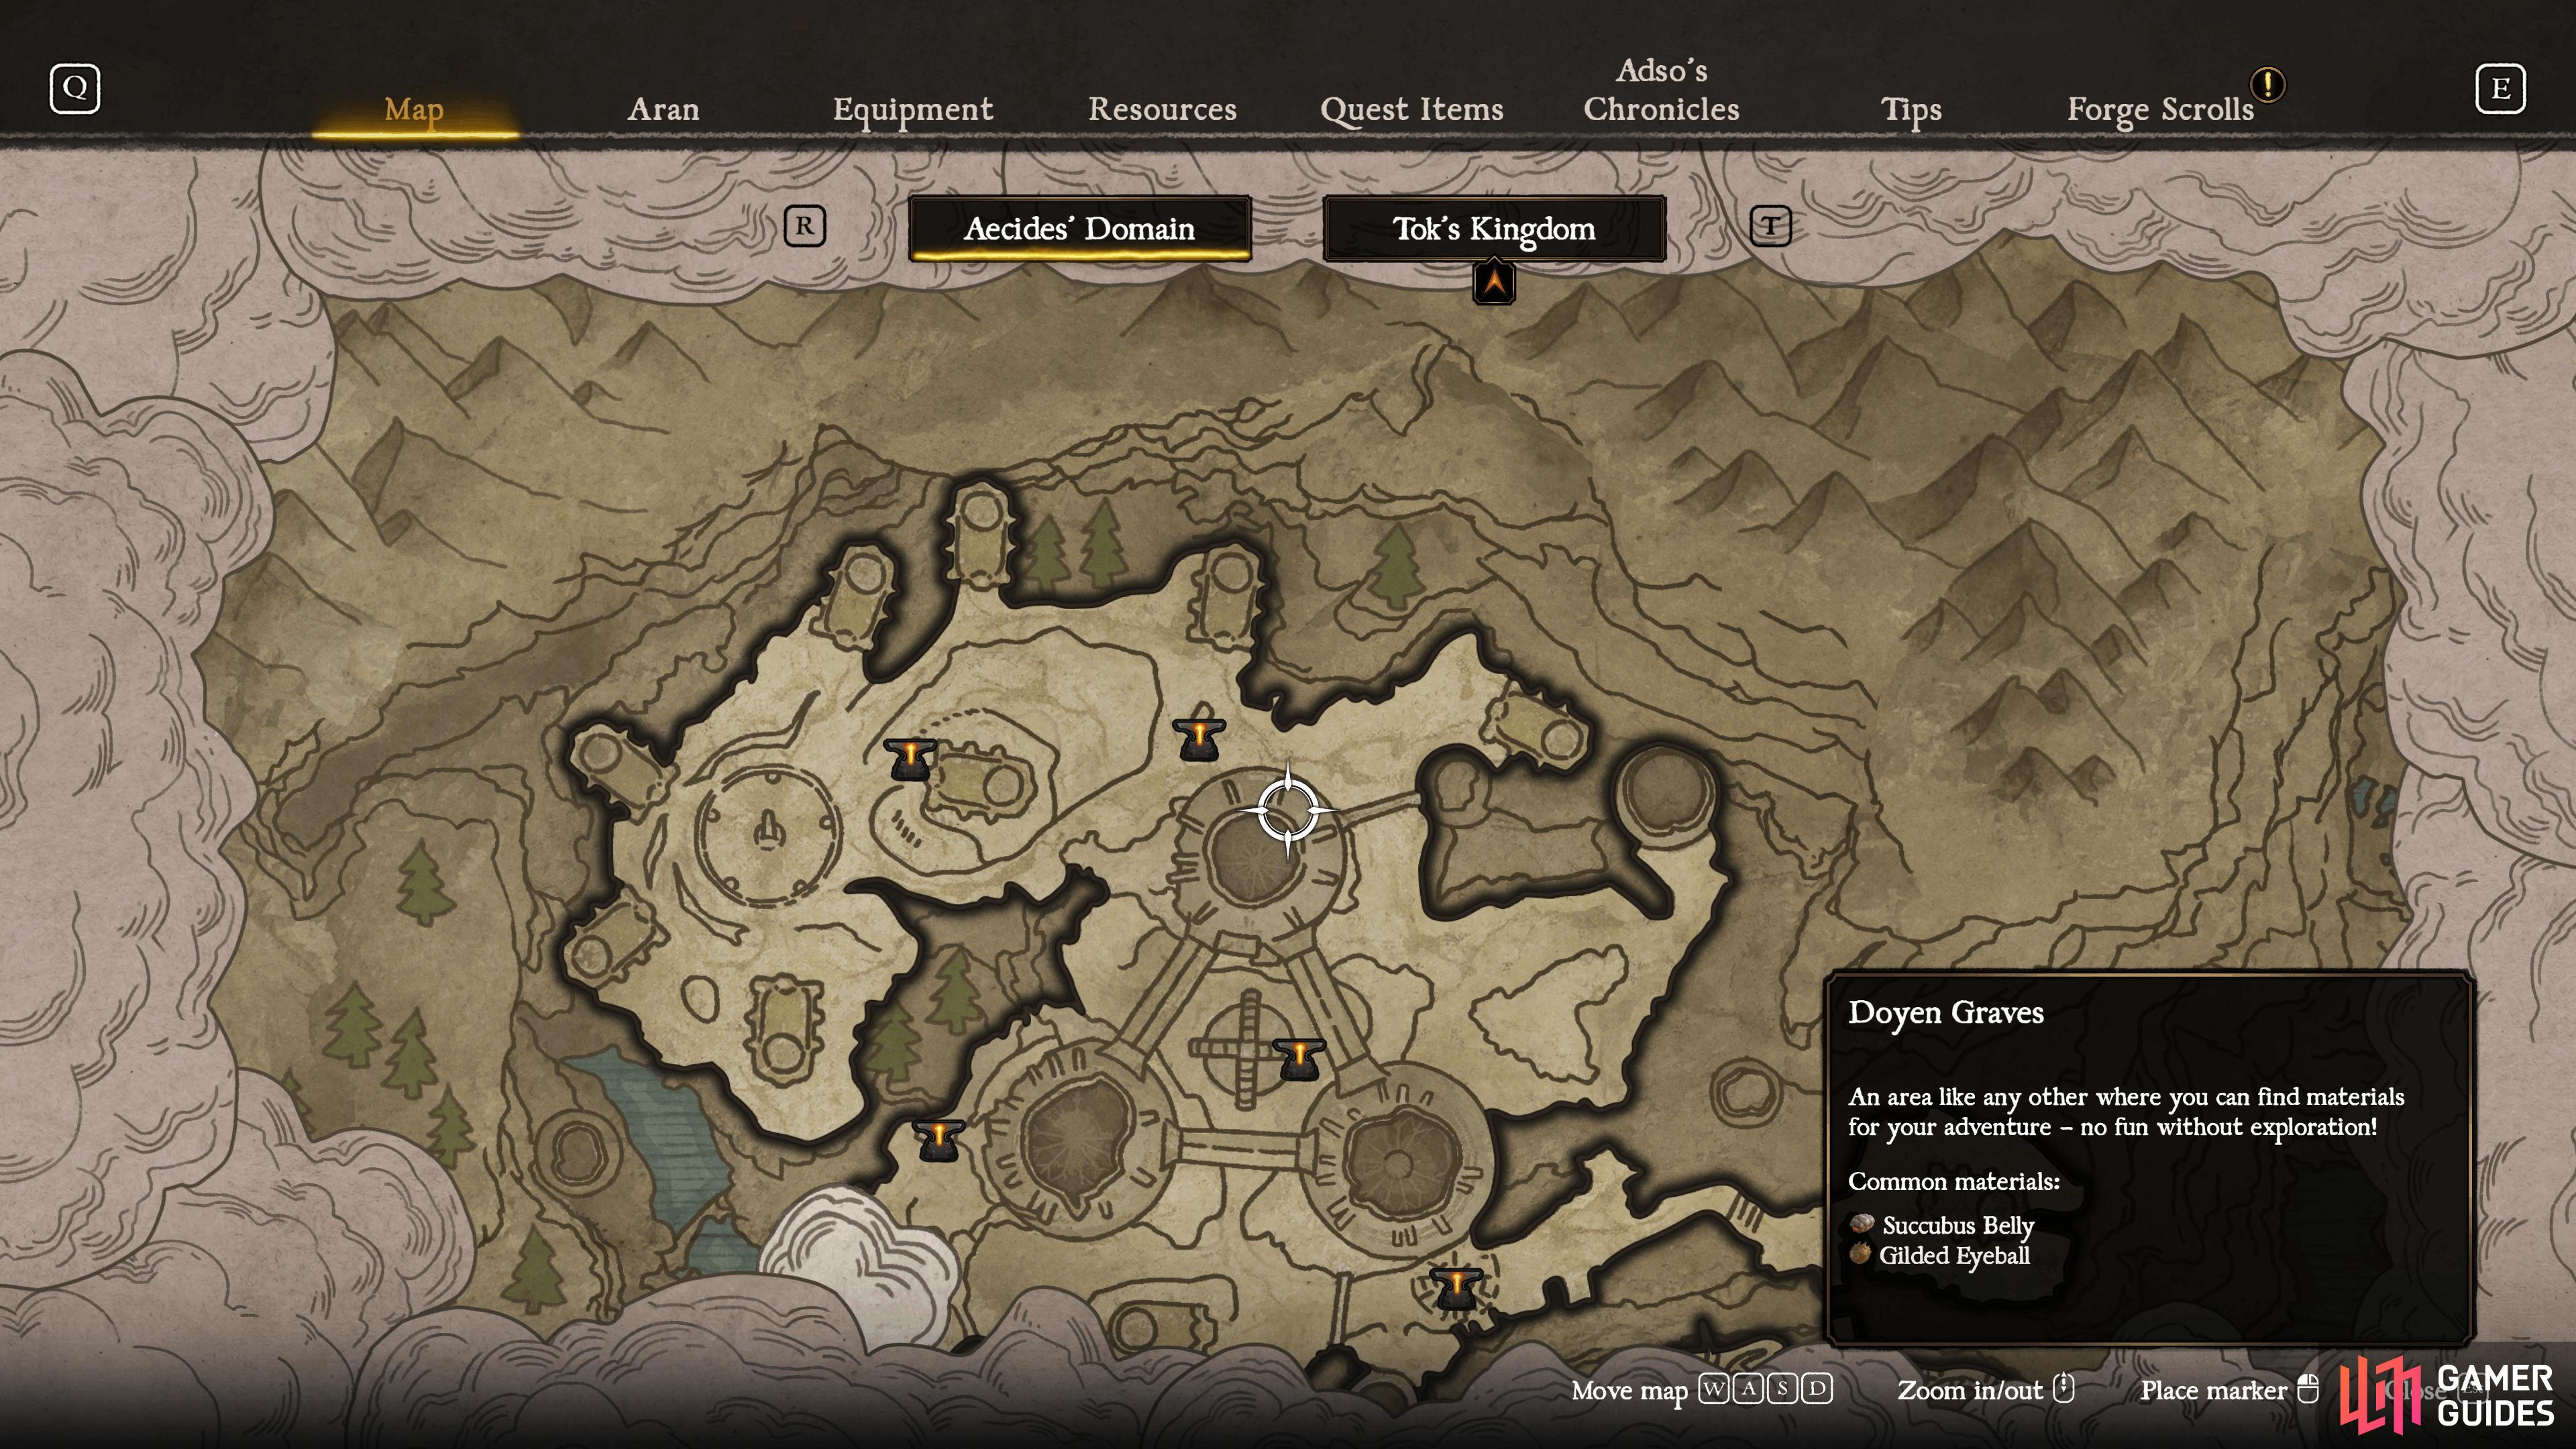
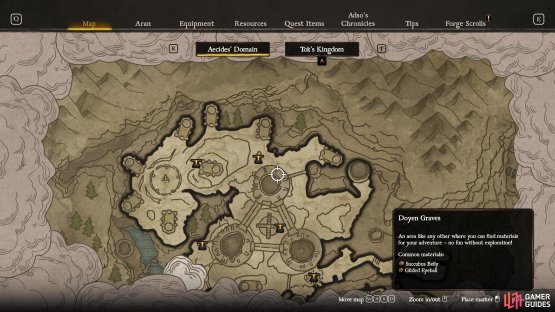

(1 of 2) You’ll need to make your way to the upper floors of the Doryen Graves’ northern tower.
You’ll need to make your way to the upper floors of the Doryen Graves’ northern tower. (left), Follow the path and leap the gap to reach this Forge Criptex. (right)
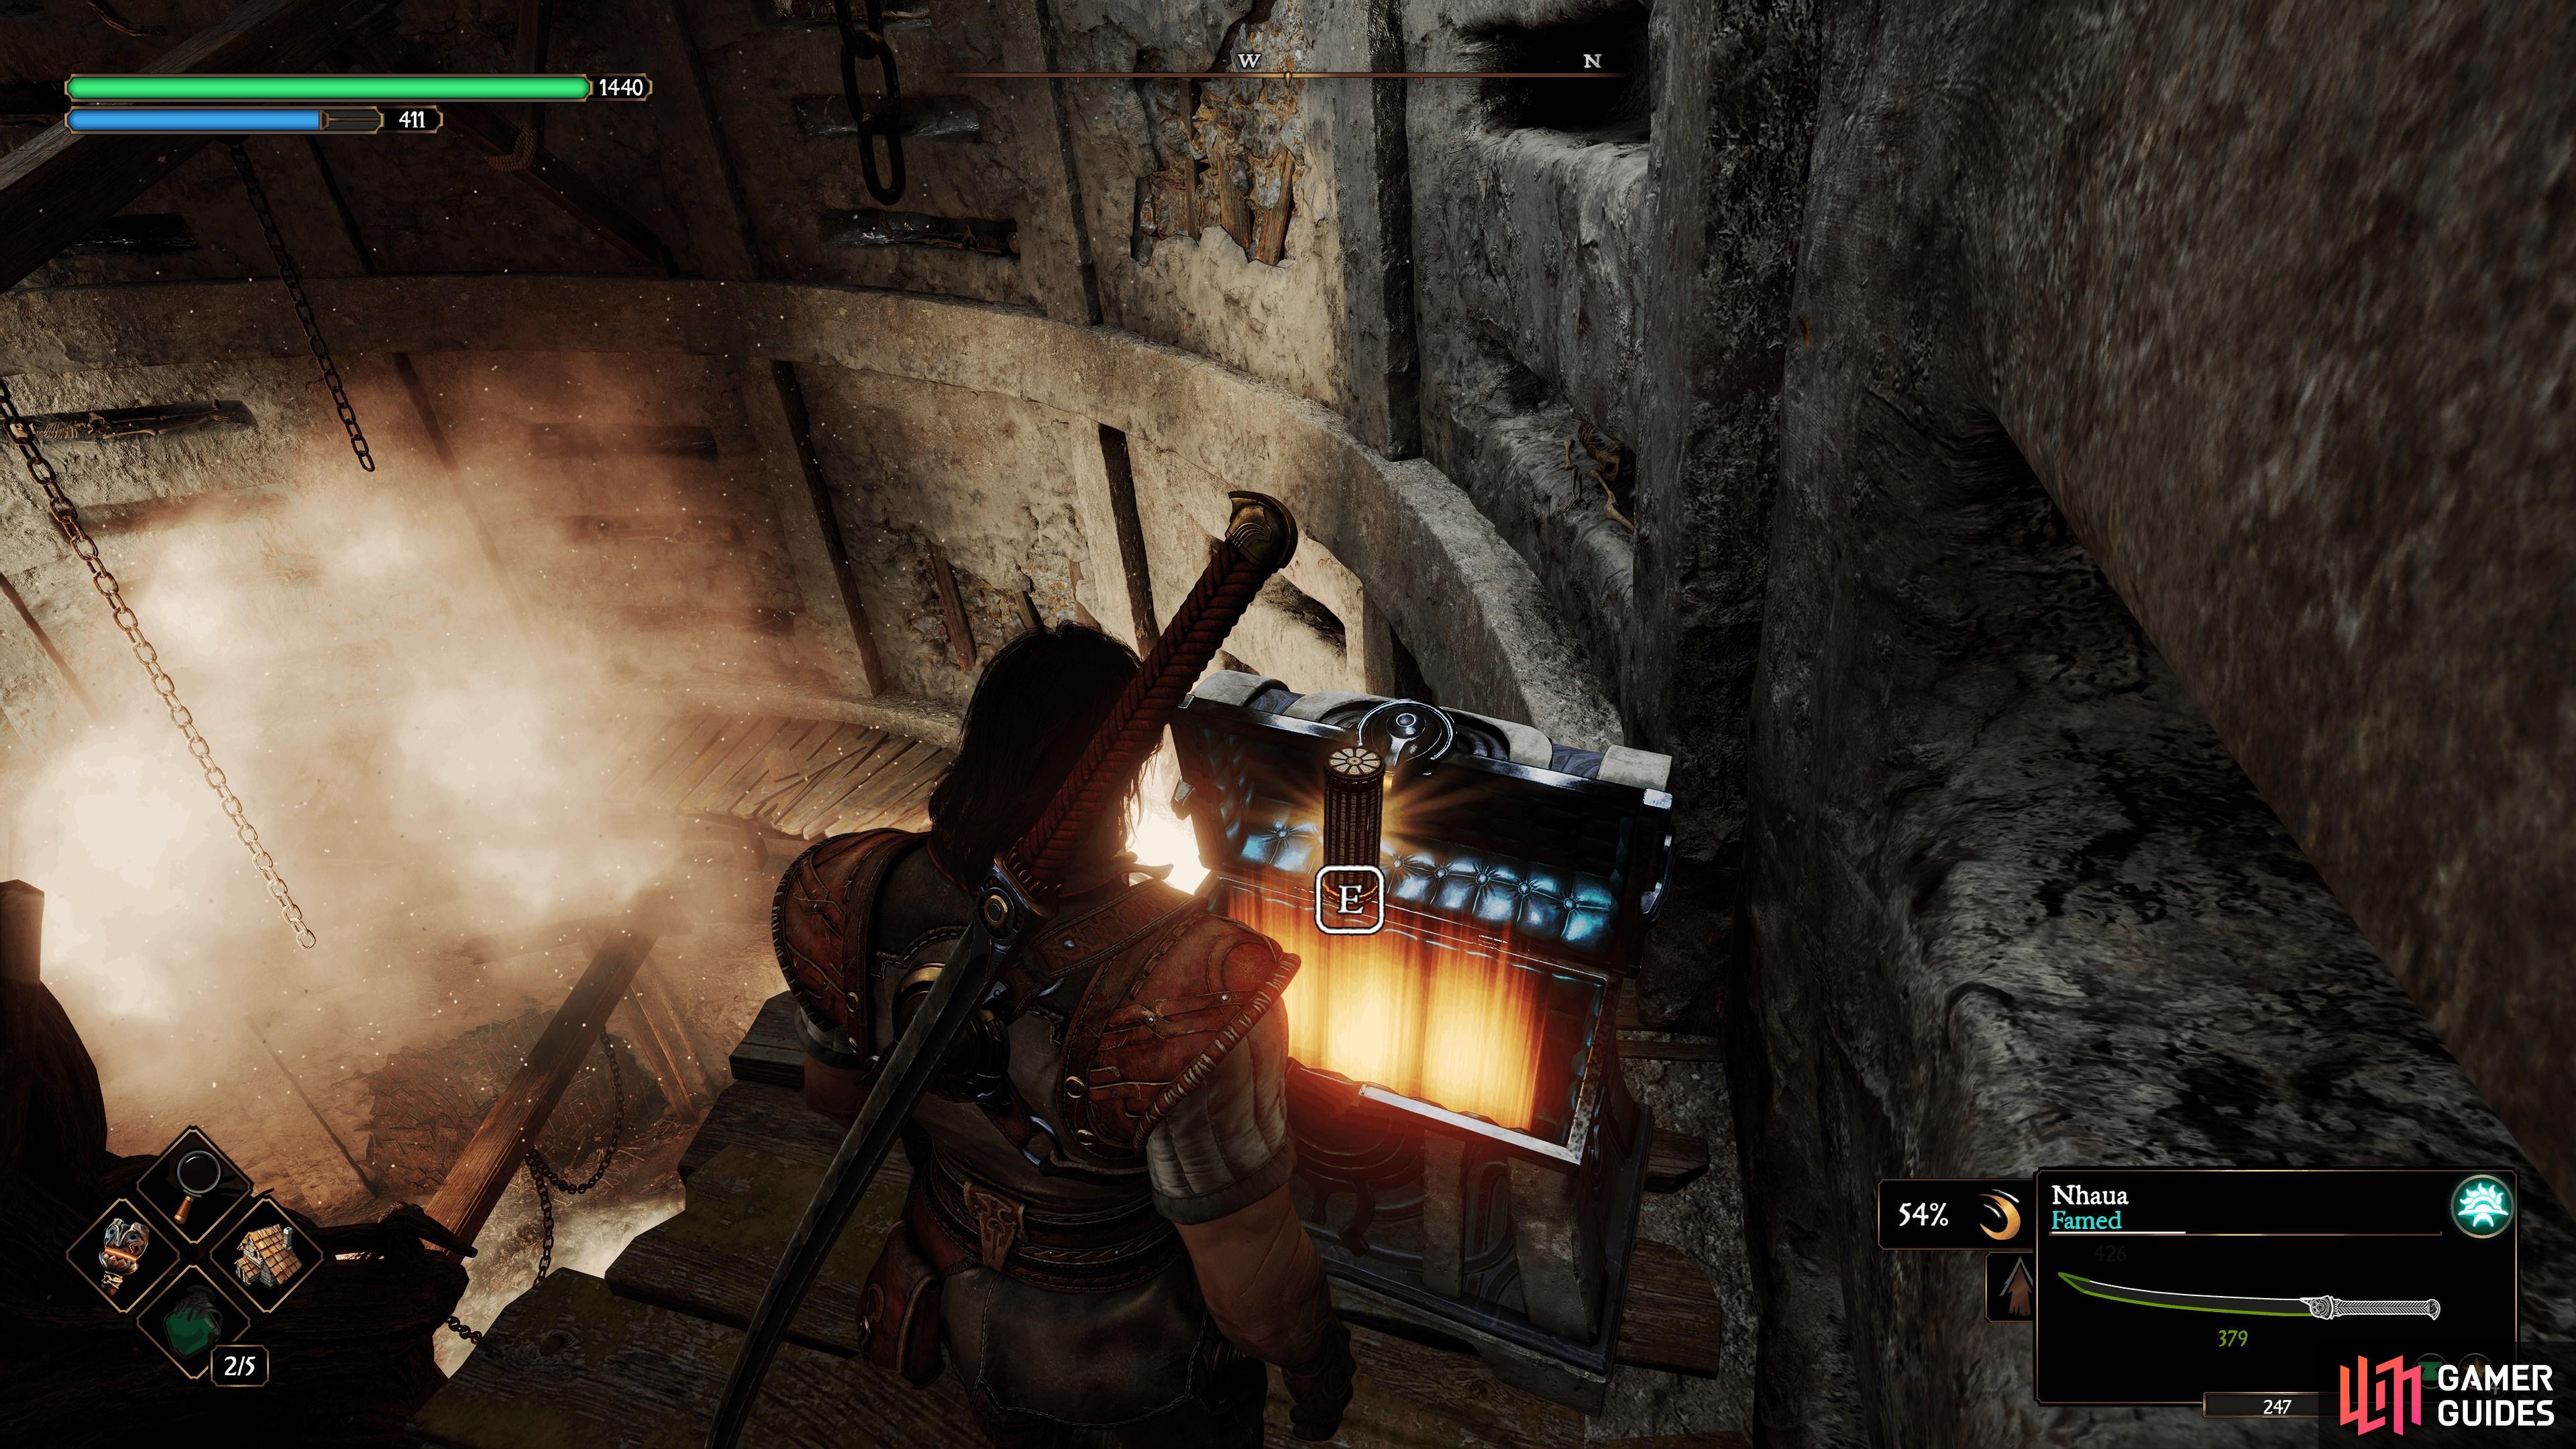
Forge Criptex 6: Doyen Graves - Valley of the Mausoleums
This is a rather simple one to find, from the Valley of the Mausoleums anvil, make your way over to the southwest mausoleum to locate the chest with this Forge Criptex.
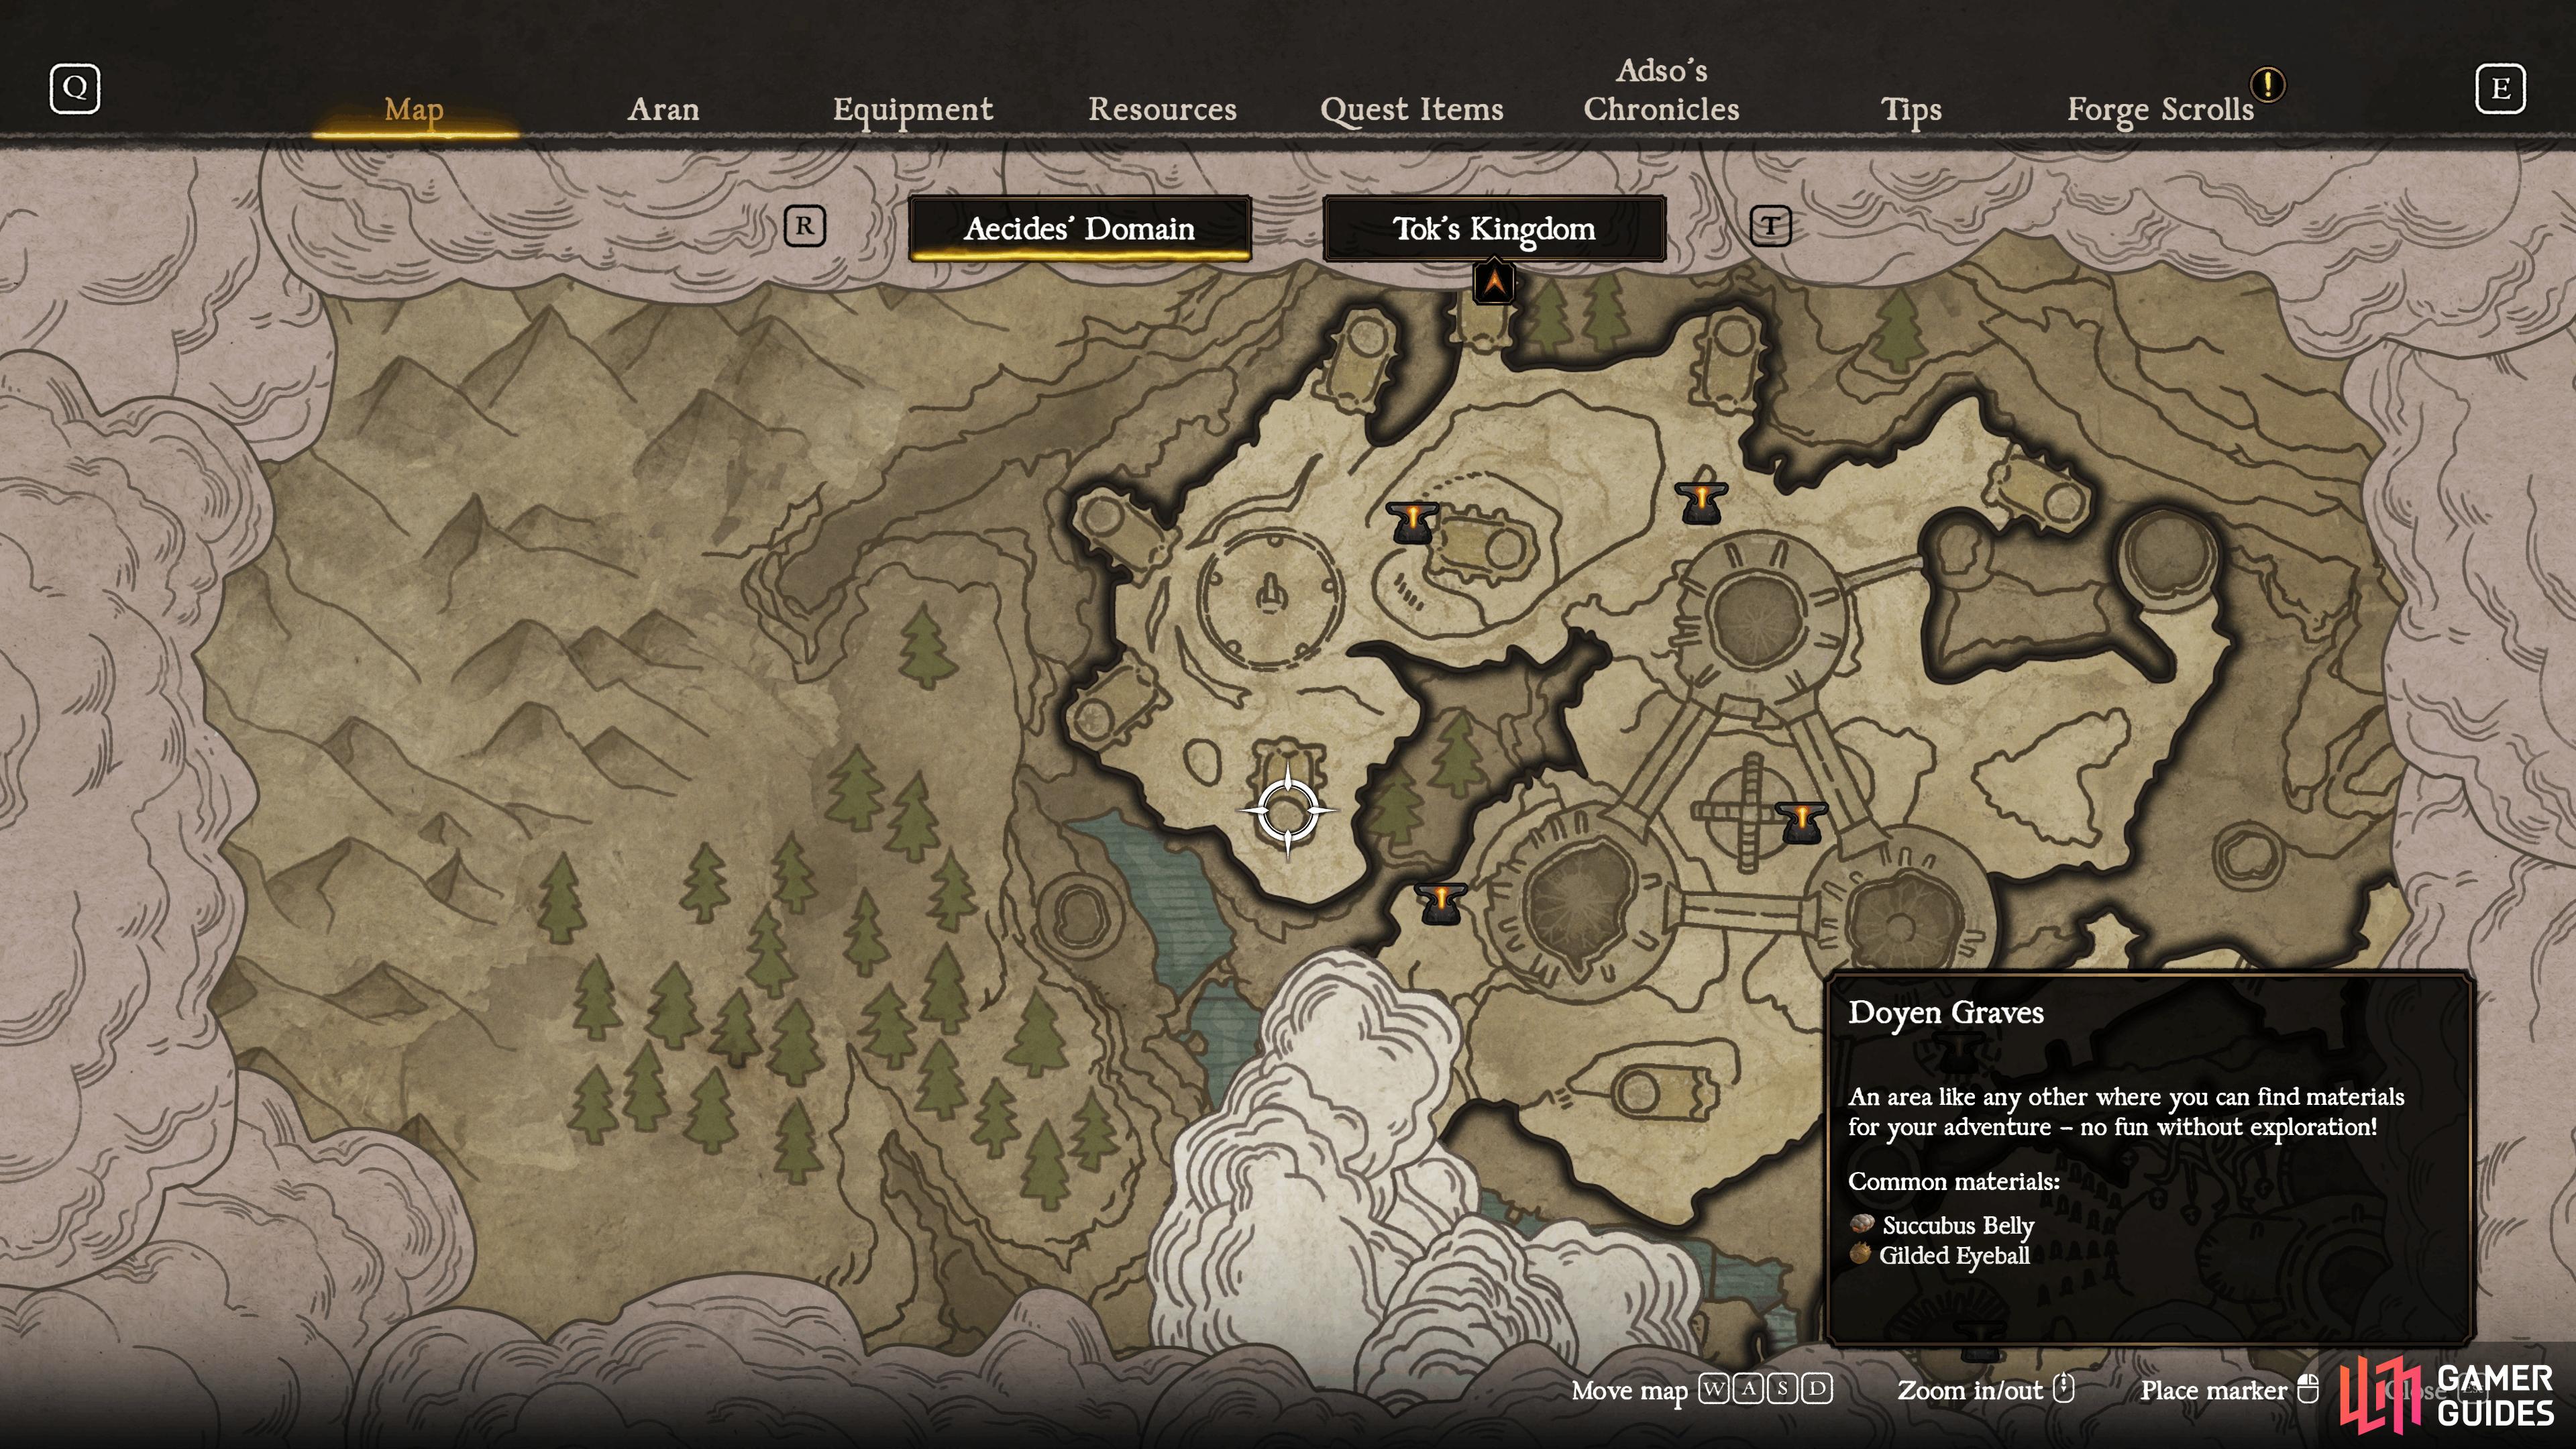

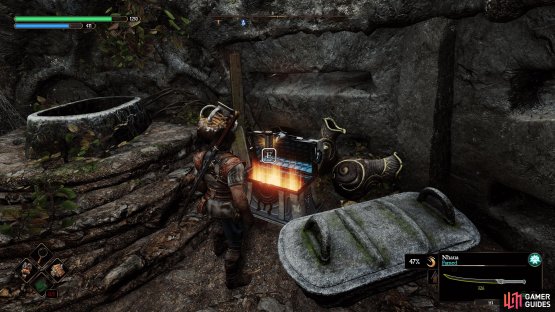
(1 of 2) Head to the Valley of Mausoleums in the Doyen Graves.

Head to the Valley of Mausoleums in the Doyen Graves. (left), Then make your way to the southwest mausoleum to find this Forge Criptex. (right)
Forge Criptex 7: Kar-Lethel Swamp - Coastal Wall
Once you get to the bottom to the south of the swamp (near where Glinda can land), go east and shimmy around, then go back in to the wall to the west and up the rope to find the chest.

(1 of 2) Make your way to the southern parts of the Kar-Lethel Swamp.
Make your way to the southern parts of the Kar-Lethel Swamp. (left), Follow the beach to the east and shimmy across, then go through to the wall on your left and up a rope. (right)
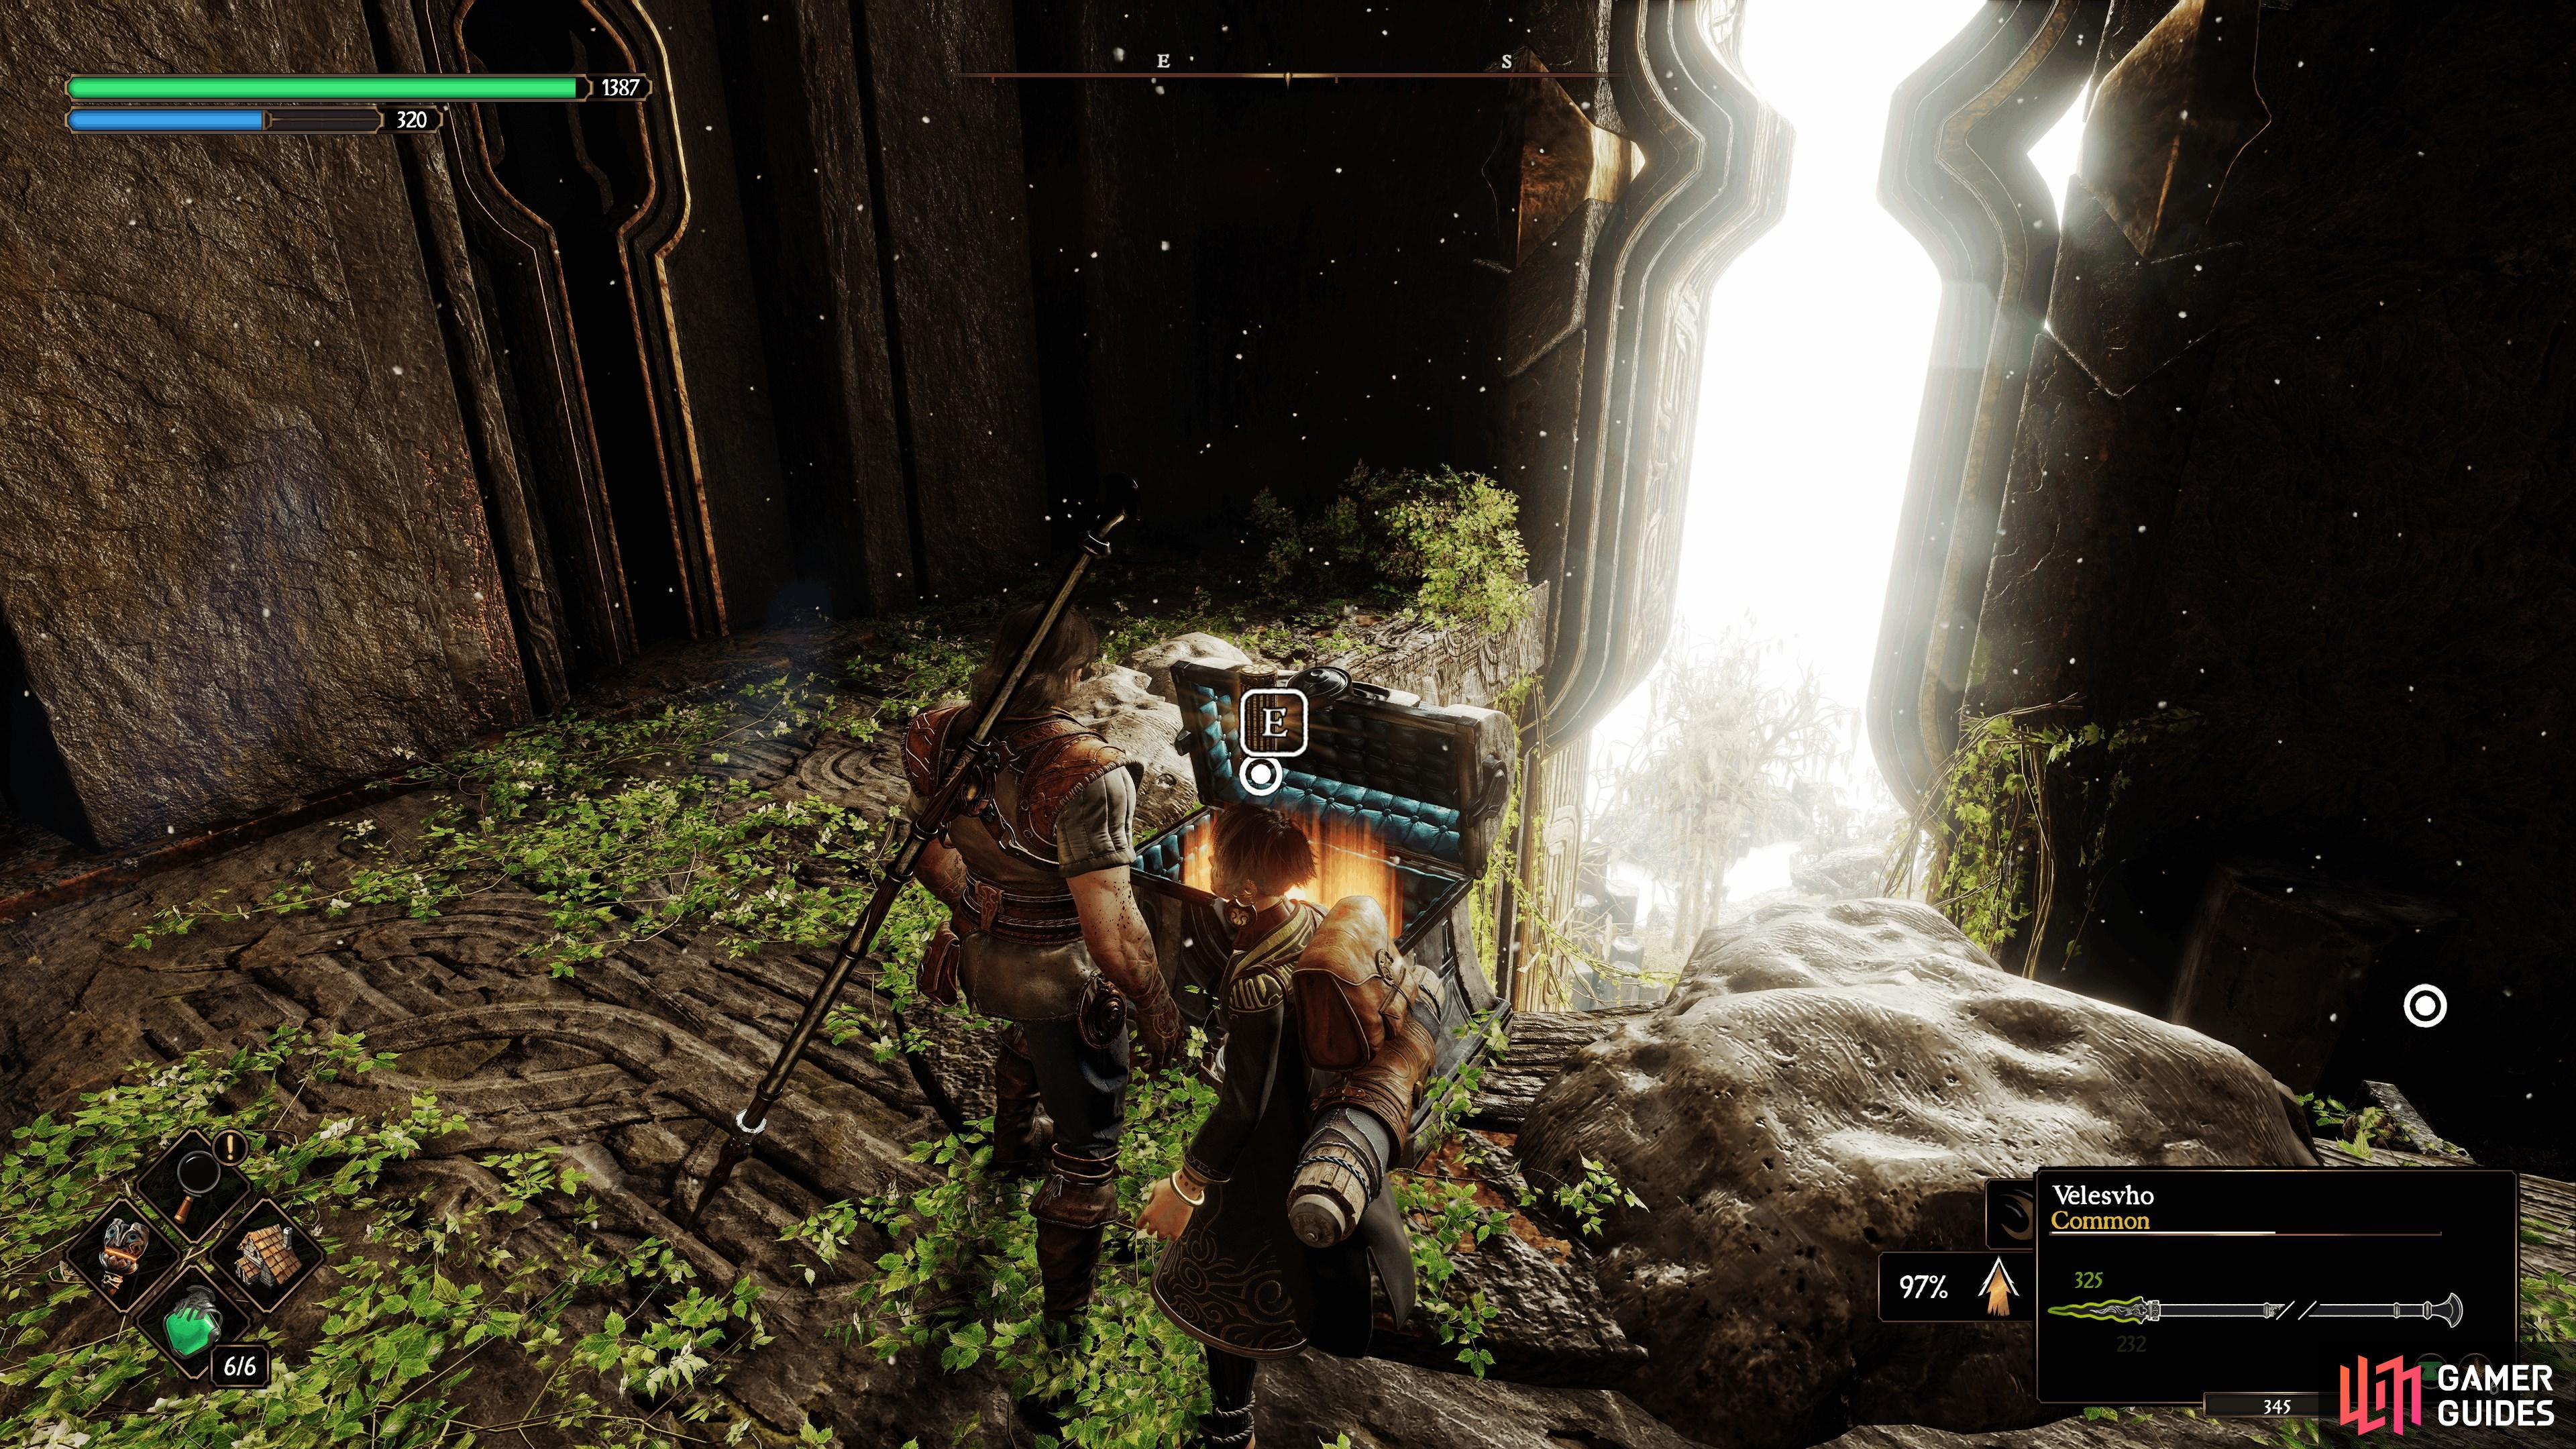
Forge Criptex 8: The Iron Castle - Castle Entrance
After making your way up the southeast tower, you’ll be on the wall with three soldiers. In the corner near where you came up from is a hole you can drop into where the chest can be found.
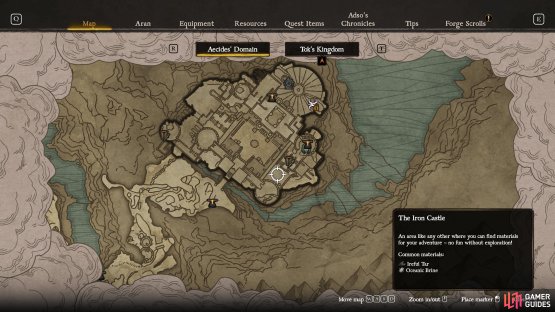
(1 of 2) Make your way to the Iron Castle’s southeast tower.
Make your way to the Iron Castle’s southeast tower. (left), Then look for a hole to drop into near where you came up from to find the Forge Criptex. (right)
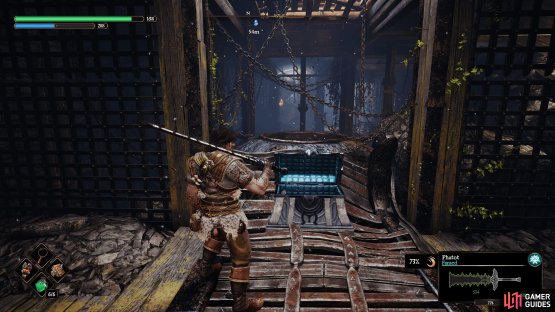
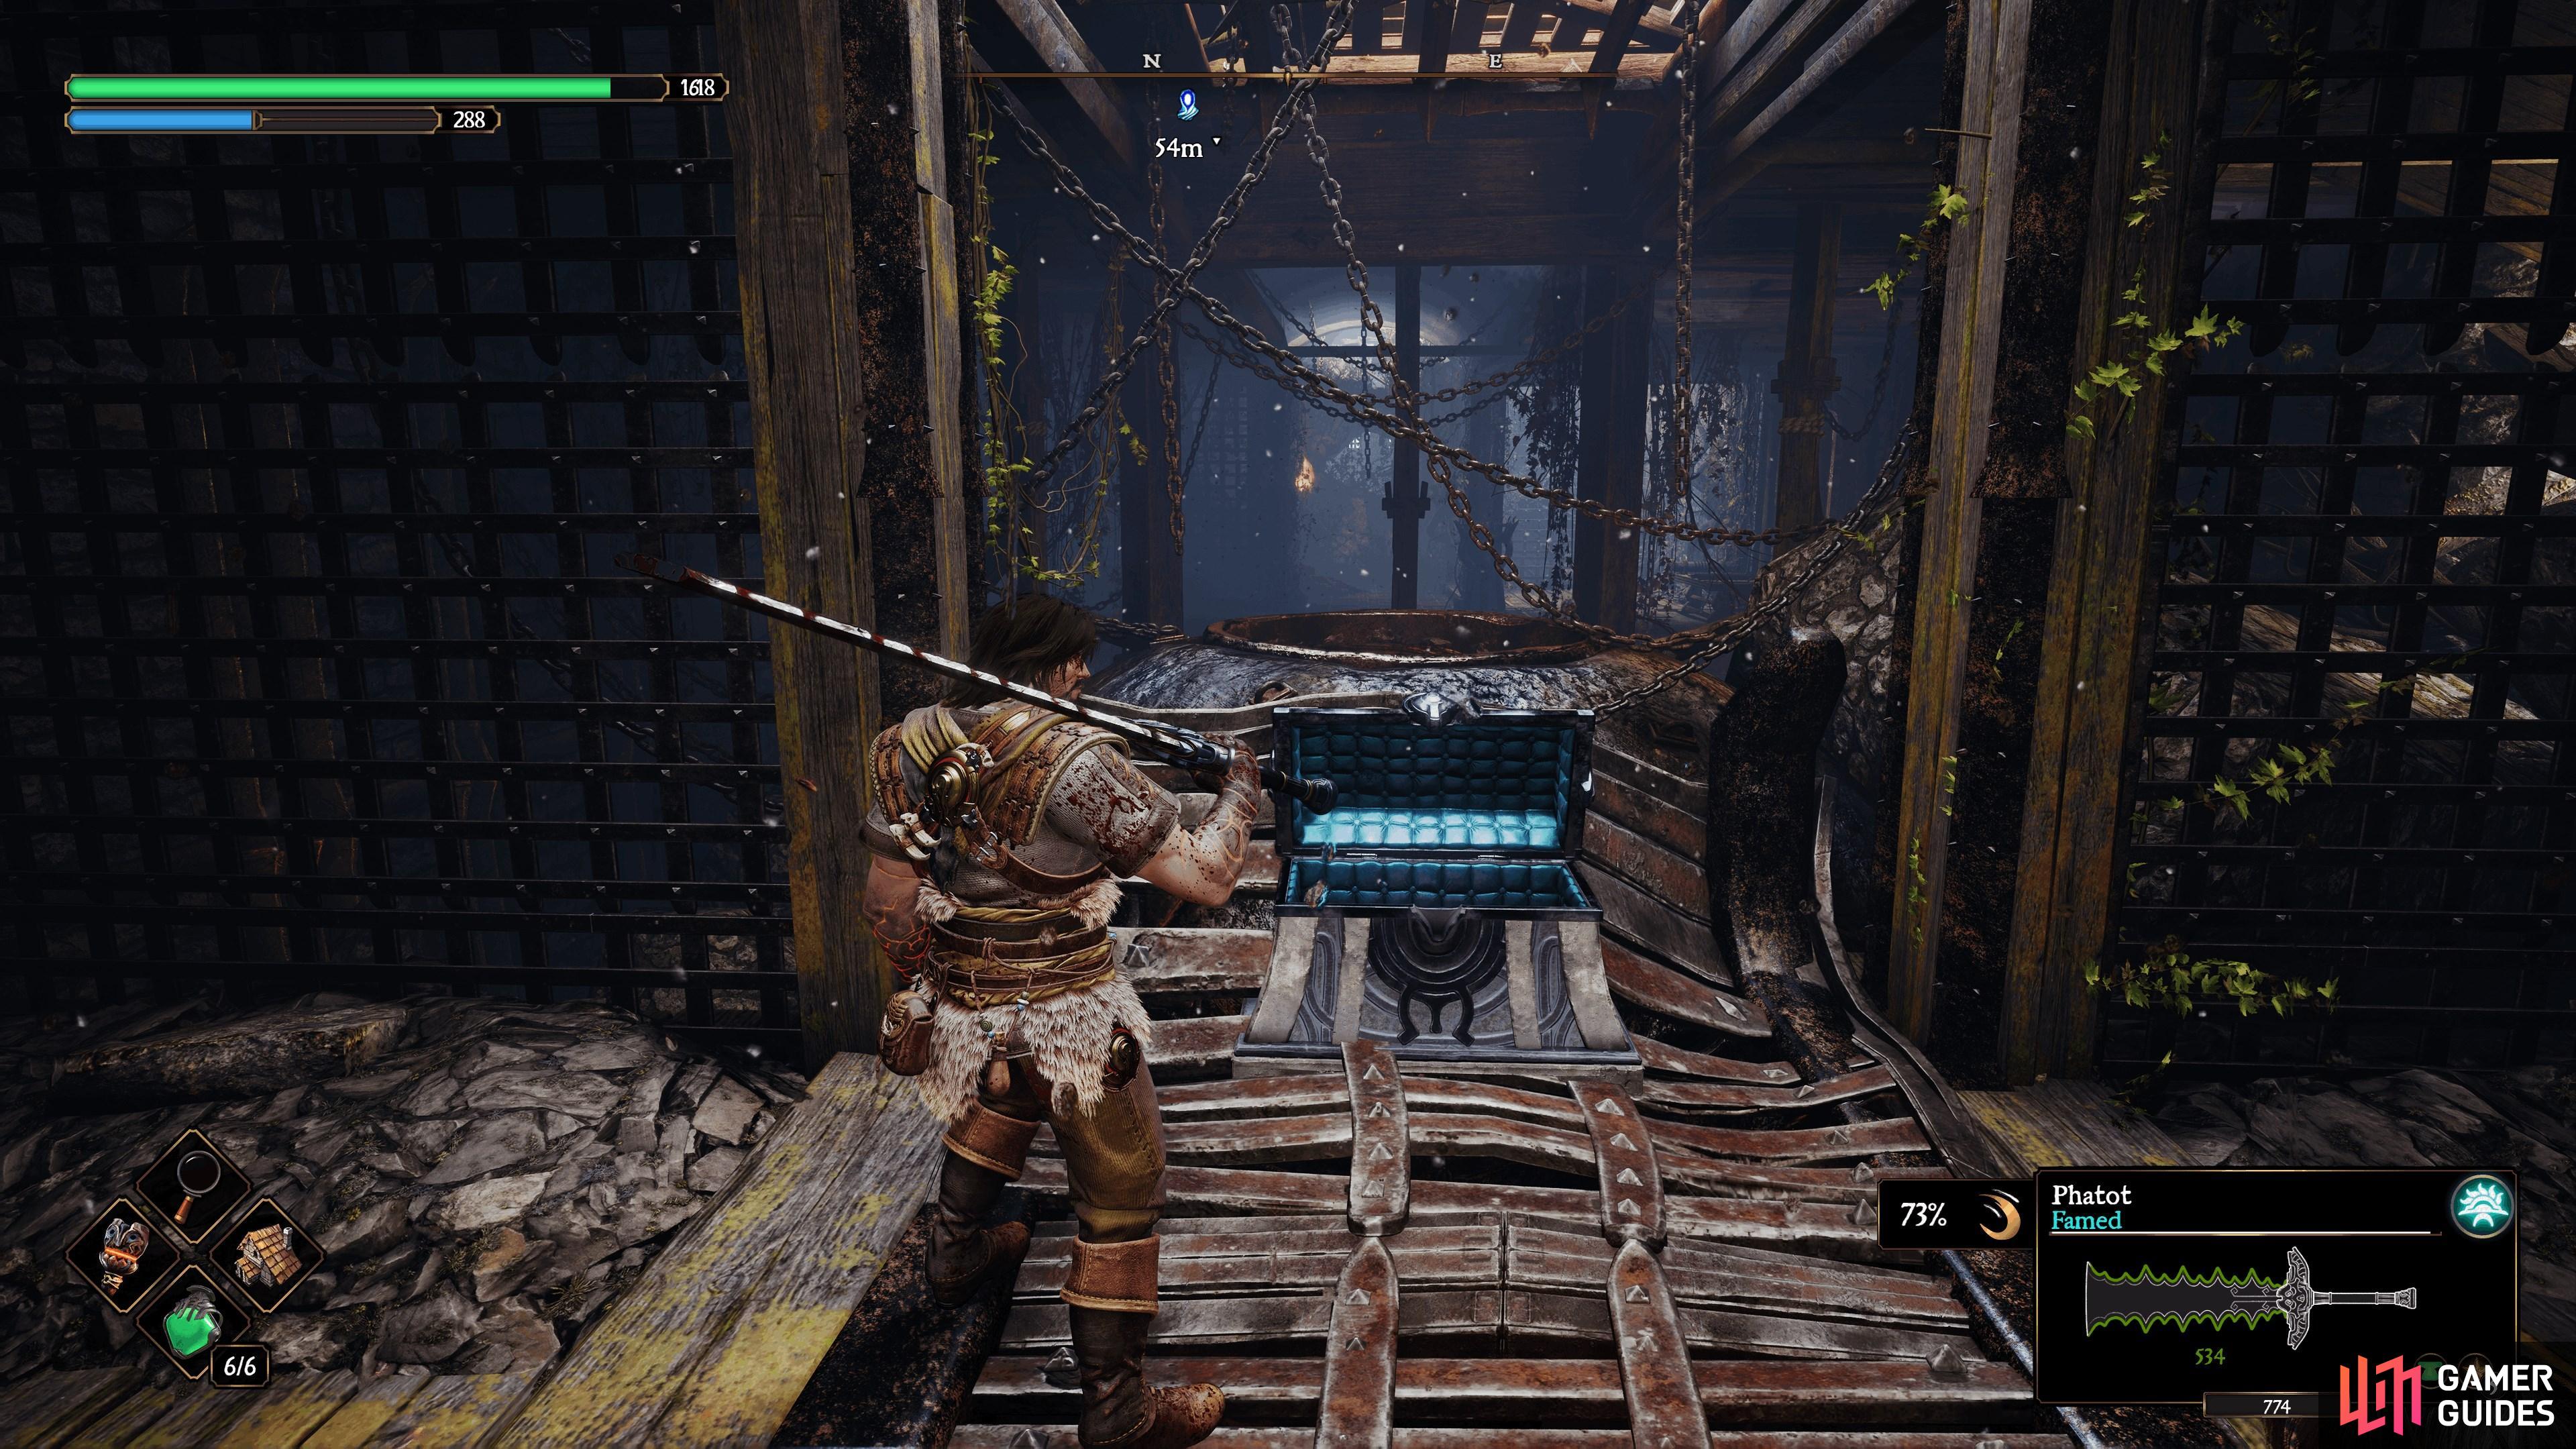
Forge Criptex 9: Tok’s Kingdom - Central Hiss Hall
A simple one to find, make your way to the ![]() Central Hiss Hall (via
Central Hiss Hall (via ![]() Northern Hiss City) and go outside the eastern exit, near the anvil.
Northern Hiss City) and go outside the eastern exit, near the anvil.

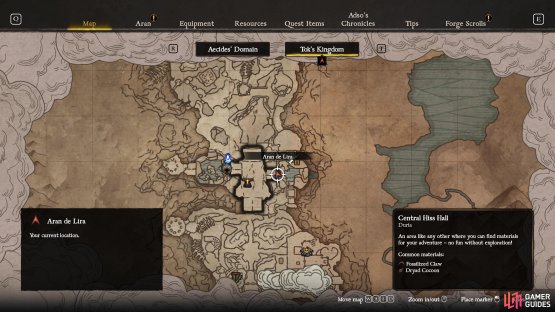

(1 of 2) Make your way to the Central Hiss Hall in Tok’s Kingdom.
Make your way to the Central Hiss Hall in Tok’s Kingdom. (left), Then exit through the eastern door to find this Forge Criptex on the balcony. (right)
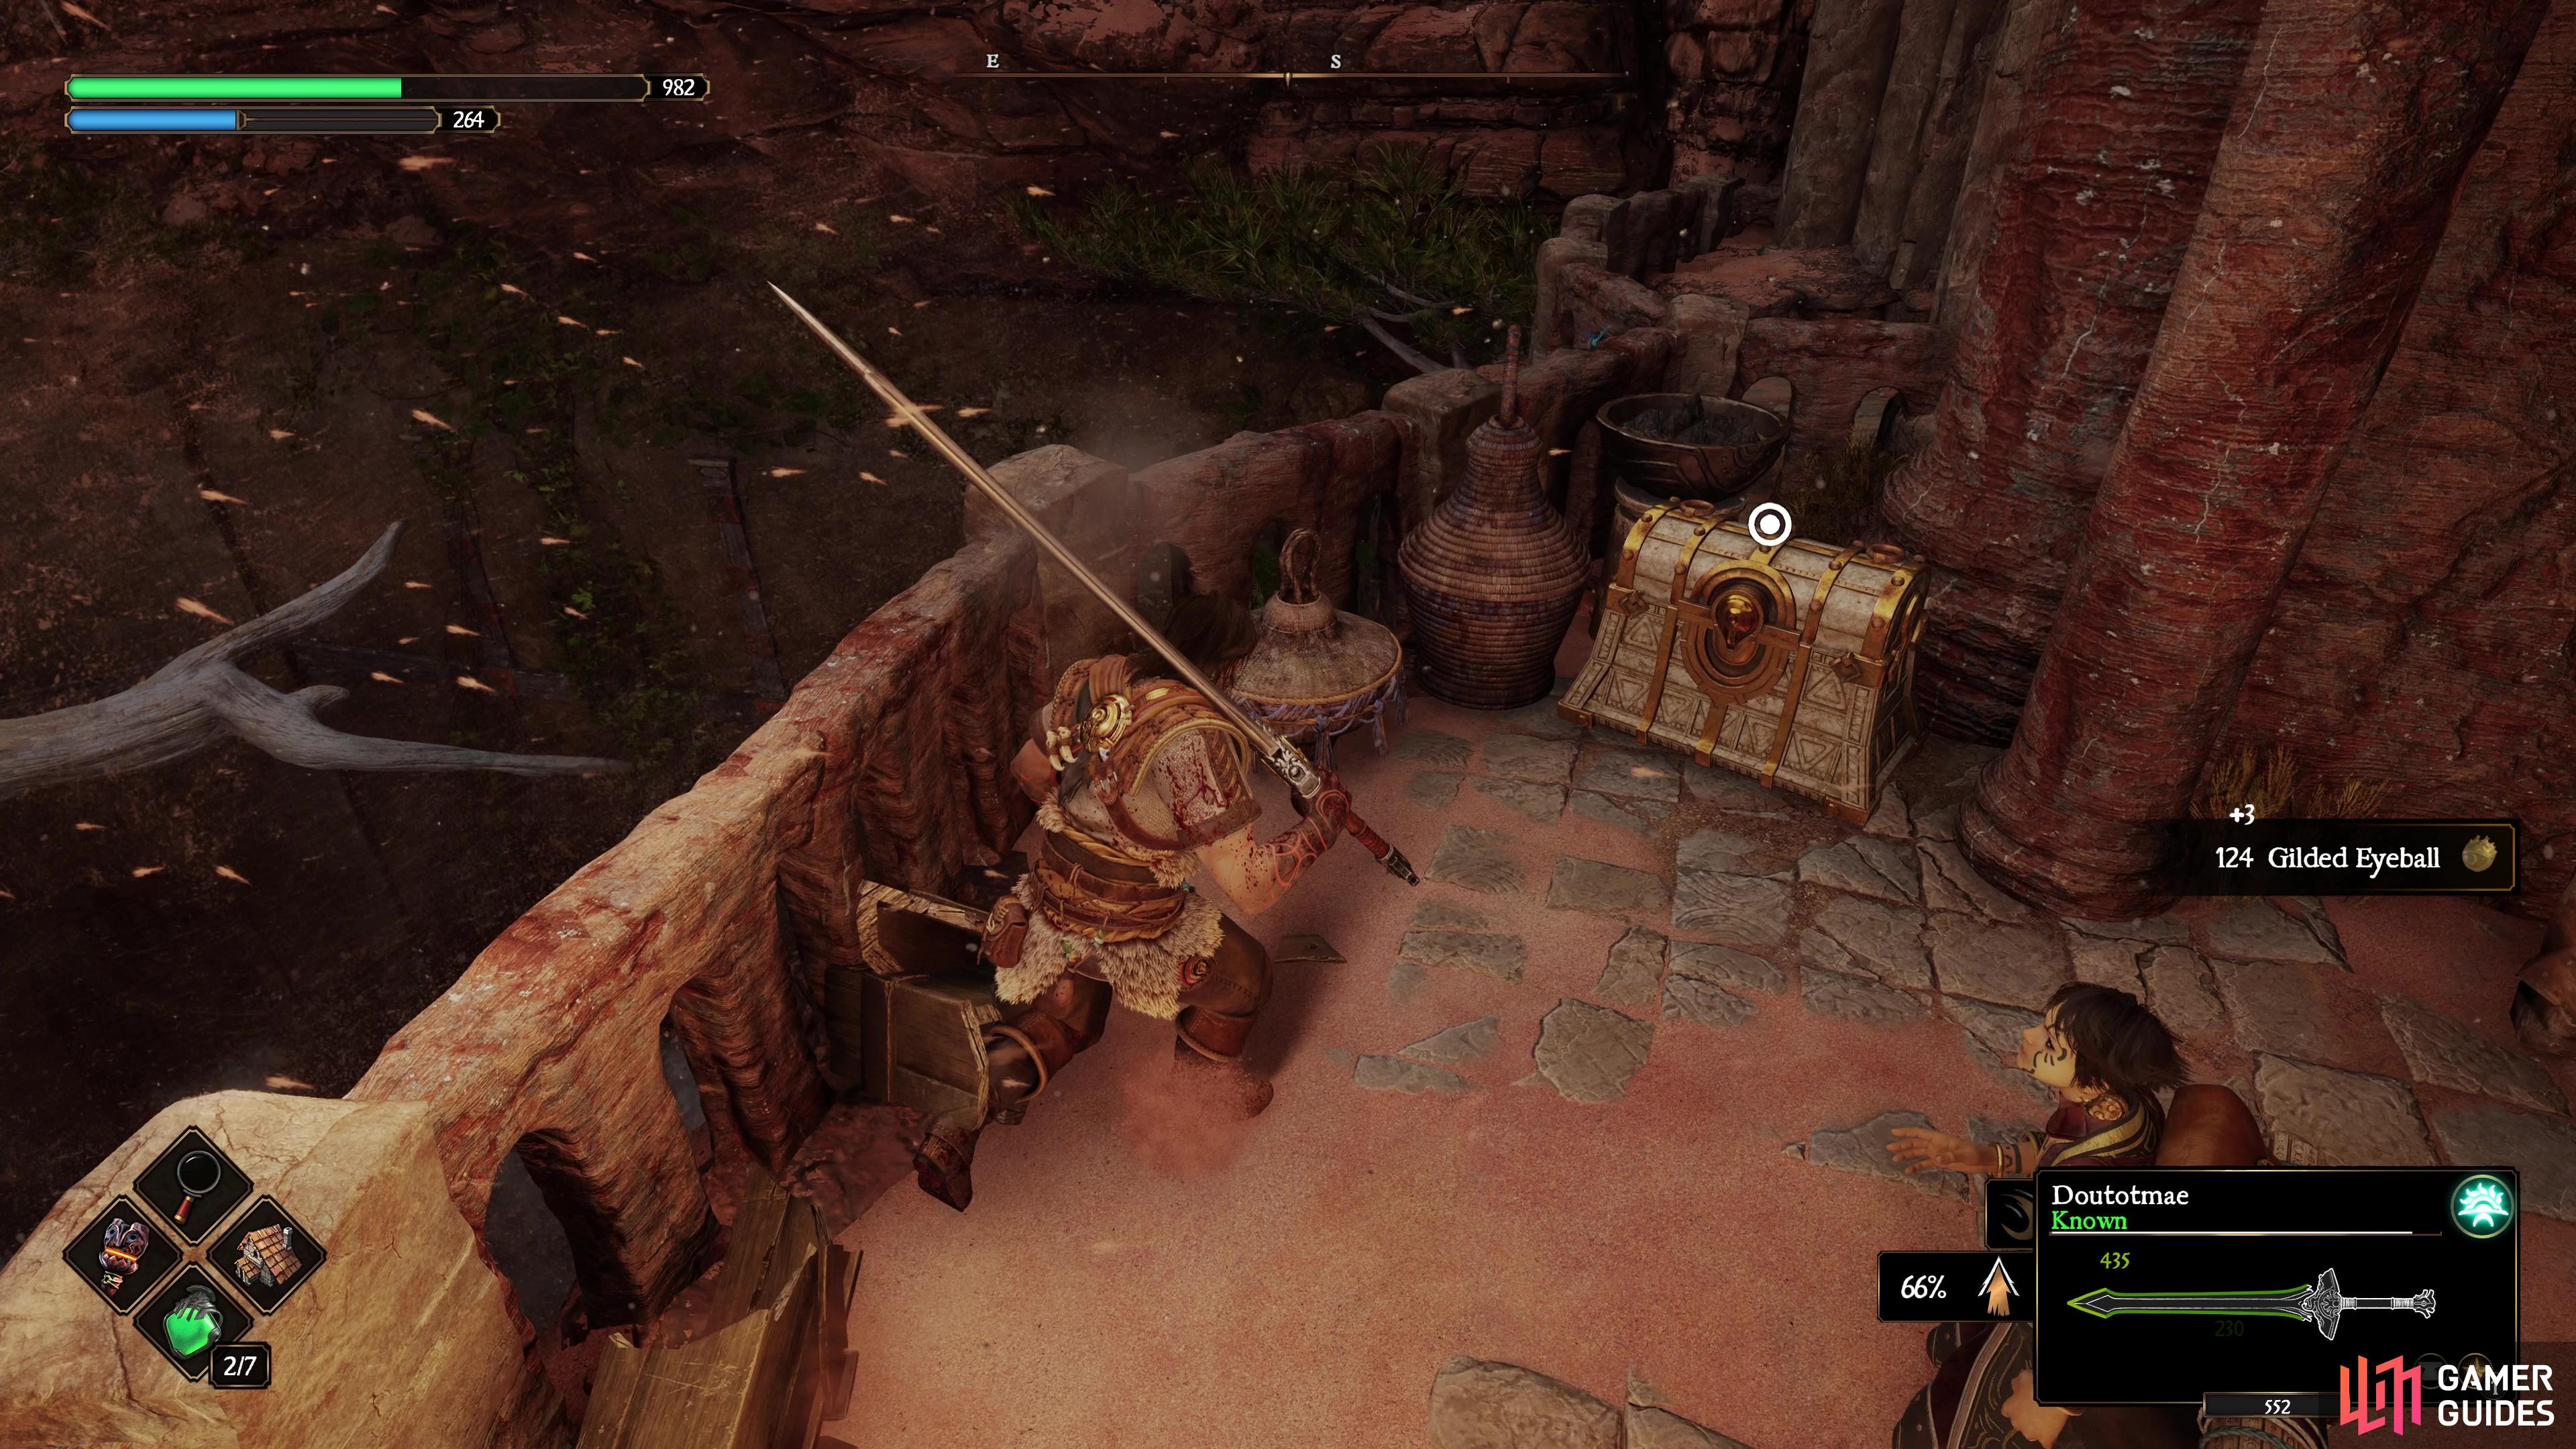
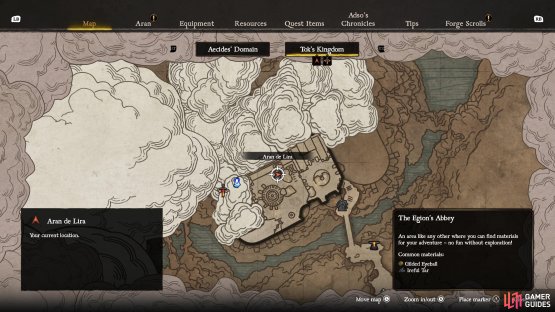
Forge Criptex 10: Tok’s Kingdom - The Eigon’s Abbey
From the southeast entrance of the abbey (via ![]() The Abbey Gorge), go through the gap to reach the western part of the courtyard and the chest is near the northern wall.
The Abbey Gorge), go through the gap to reach the western part of the courtyard and the chest is near the northern wall.

(1 of 2) Make your way to The Eigon’s Abbey’s western courtyard.
Make your way to The Eigon’s Abbey’s western courtyard. (left), Then look along the northern wall to find the Forge Criptex. (right)
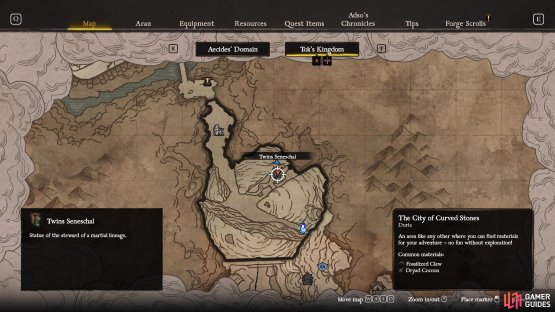
Forge Criptex 11: Tok’s Kingdom - The City of Curved Stones
This chest can be found in the northeast corner of the area, accessed by going through the Light Rune area near Aran & Adso’s Camp and taking a right at Tok. In the next area, go to the end of the path (past the skeletons) and follow the path past the building to your right. You’ll come to an intersection going forward or right, so go forward into the building to find an ![]() Athanatoi Shaman. The chest is on the same floor as the Shaman.
Athanatoi Shaman. The chest is on the same floor as the Shaman.

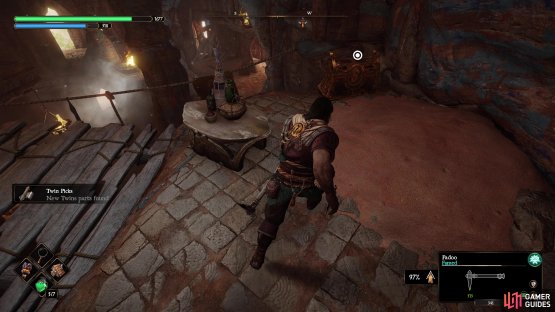
(1 of 2) You need to use the Light Rune to reach the upper levels of The City of Curved Stones.

You need to use the Light Rune to reach the upper levels of The City of Curved Stones. (left), Follow the path until you find the Athanatoi Shaman that guards this Forge Criptex. (right)
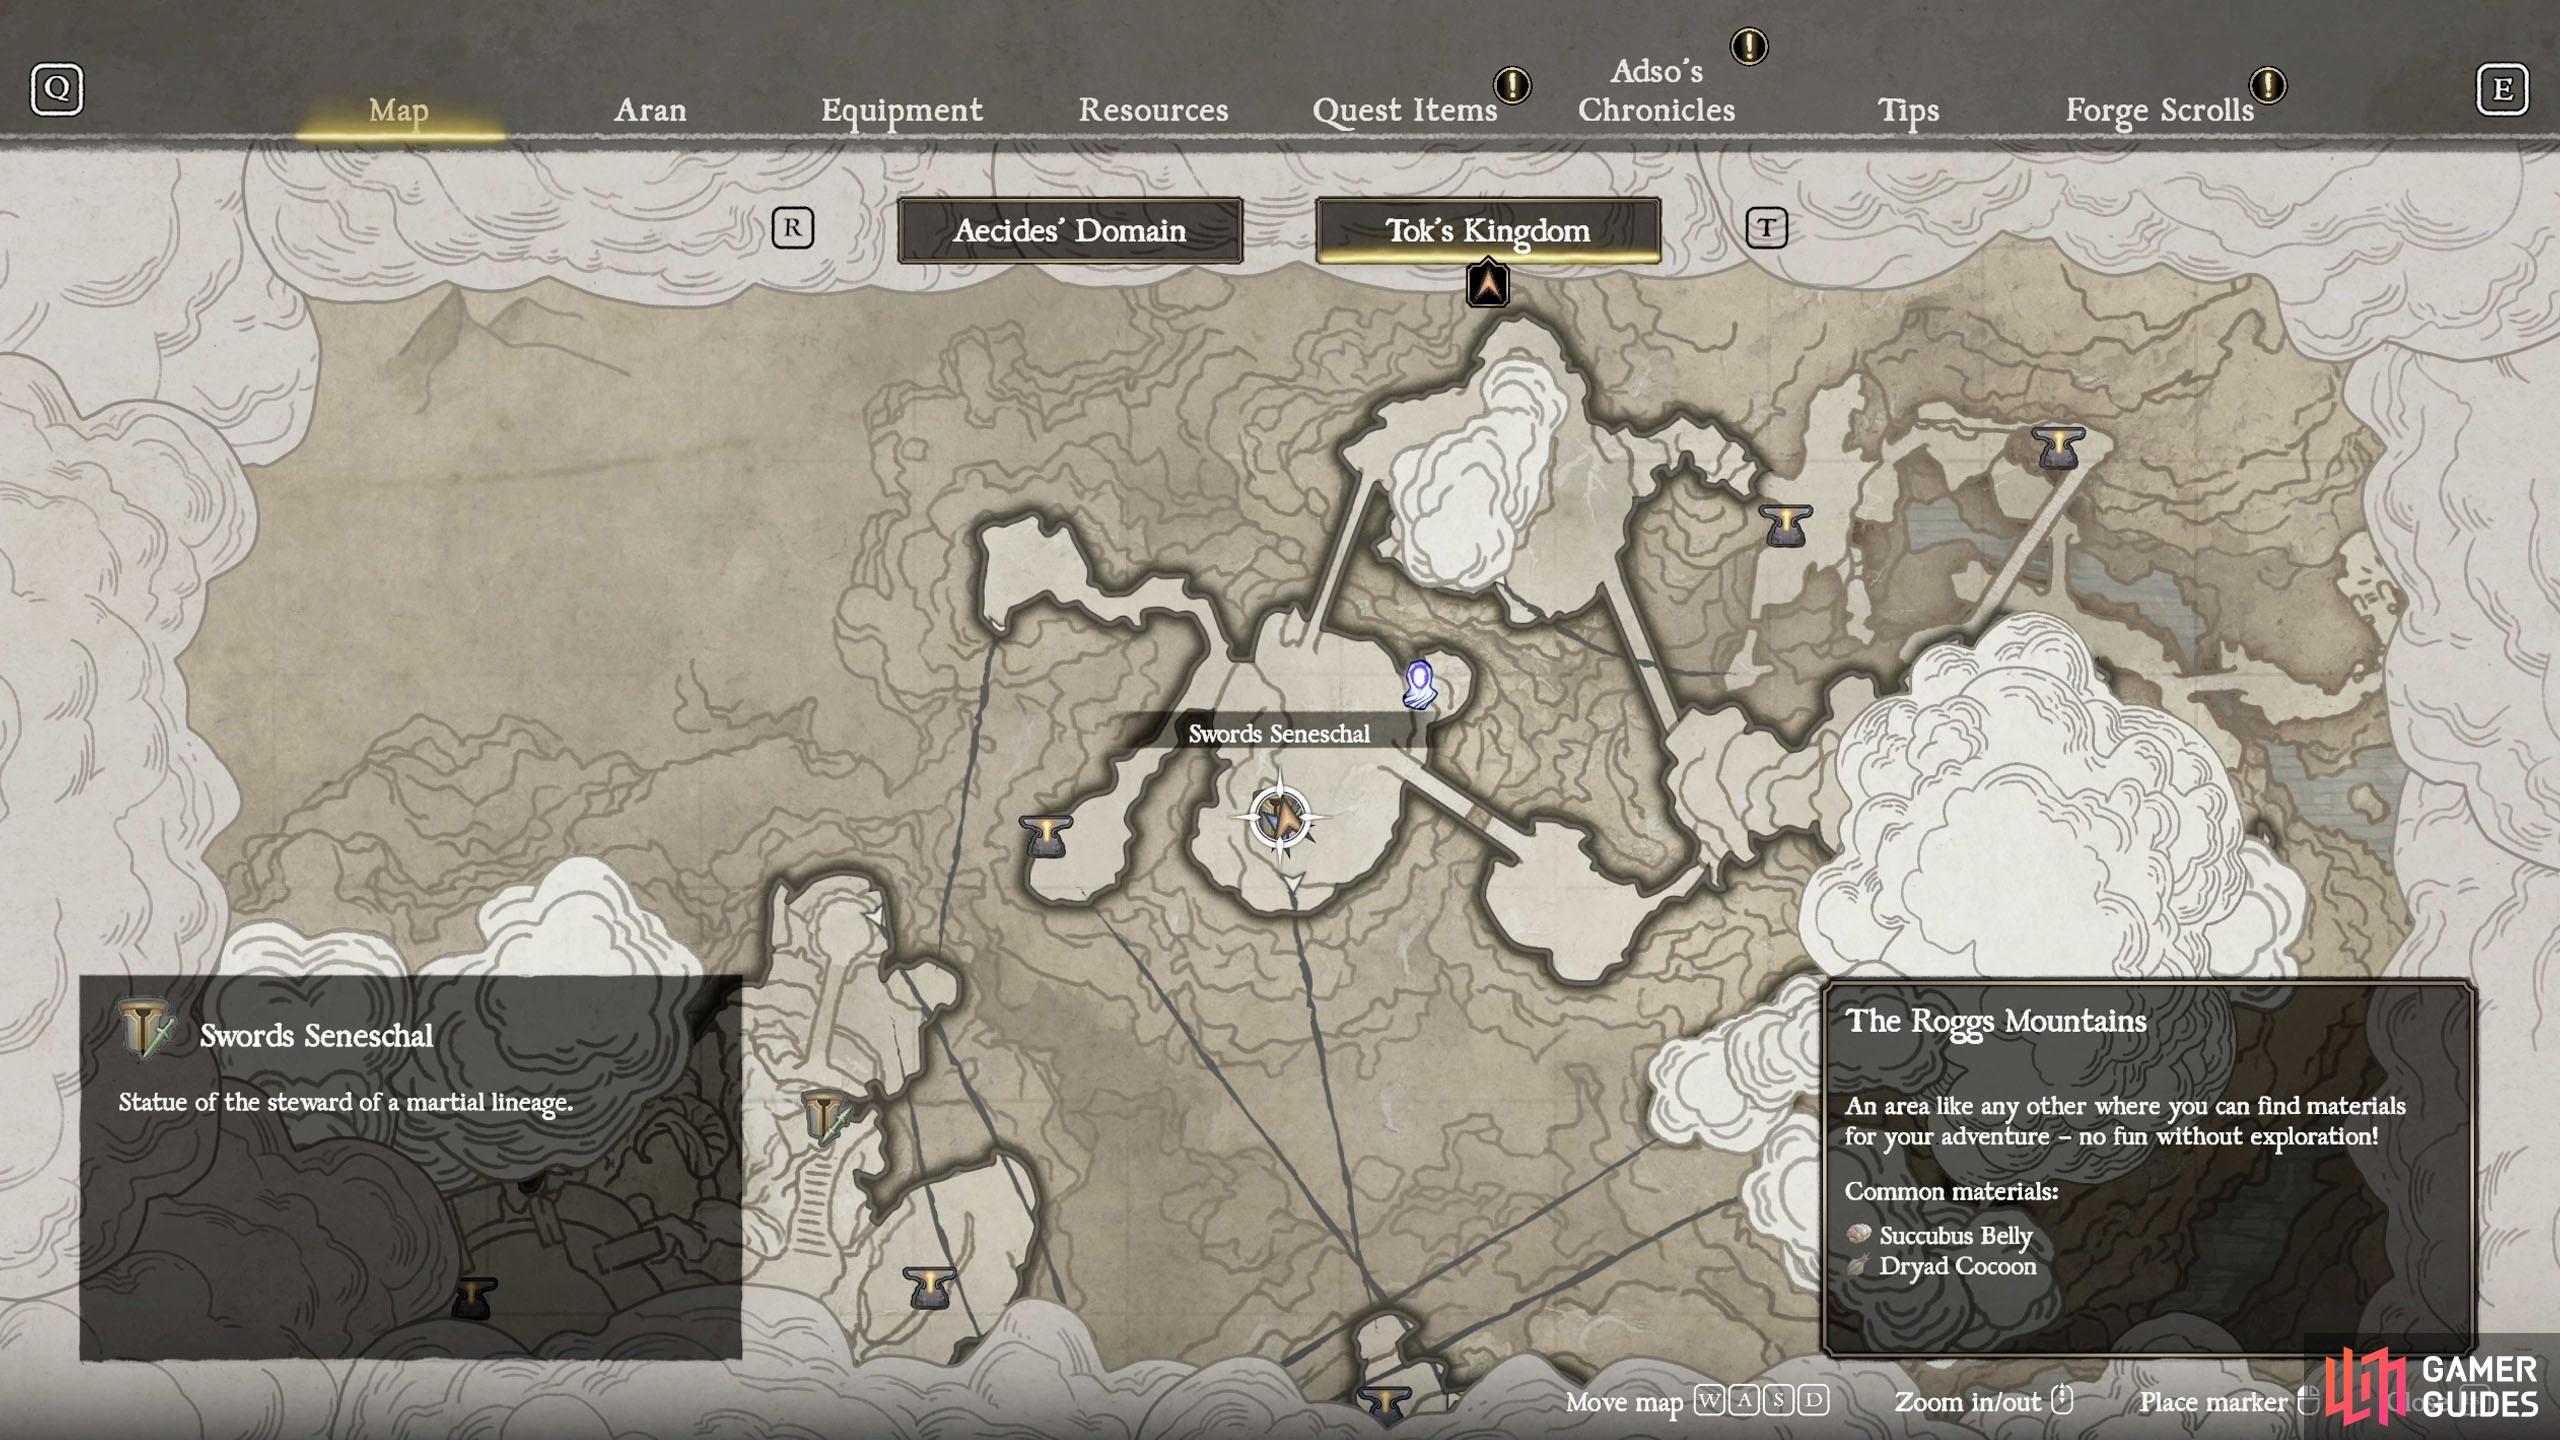
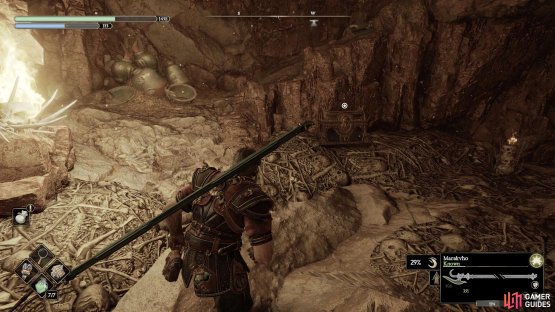
Forge Criptex 12: Tok’s Kingdom - The Roggs Mountains - Morlock’s Abyss
Just before you reach this anvil, there’s a Hurmuz statue that you need to interact with, the ![]() Forger Sentinels can then be found in the area just to the north of the anvil. Return to the statue after powering the medallion to create a hole in the wall that leads to this chest.
Forger Sentinels can then be found in the area just to the north of the anvil. Return to the statue after powering the medallion to create a hole in the wall that leads to this chest.
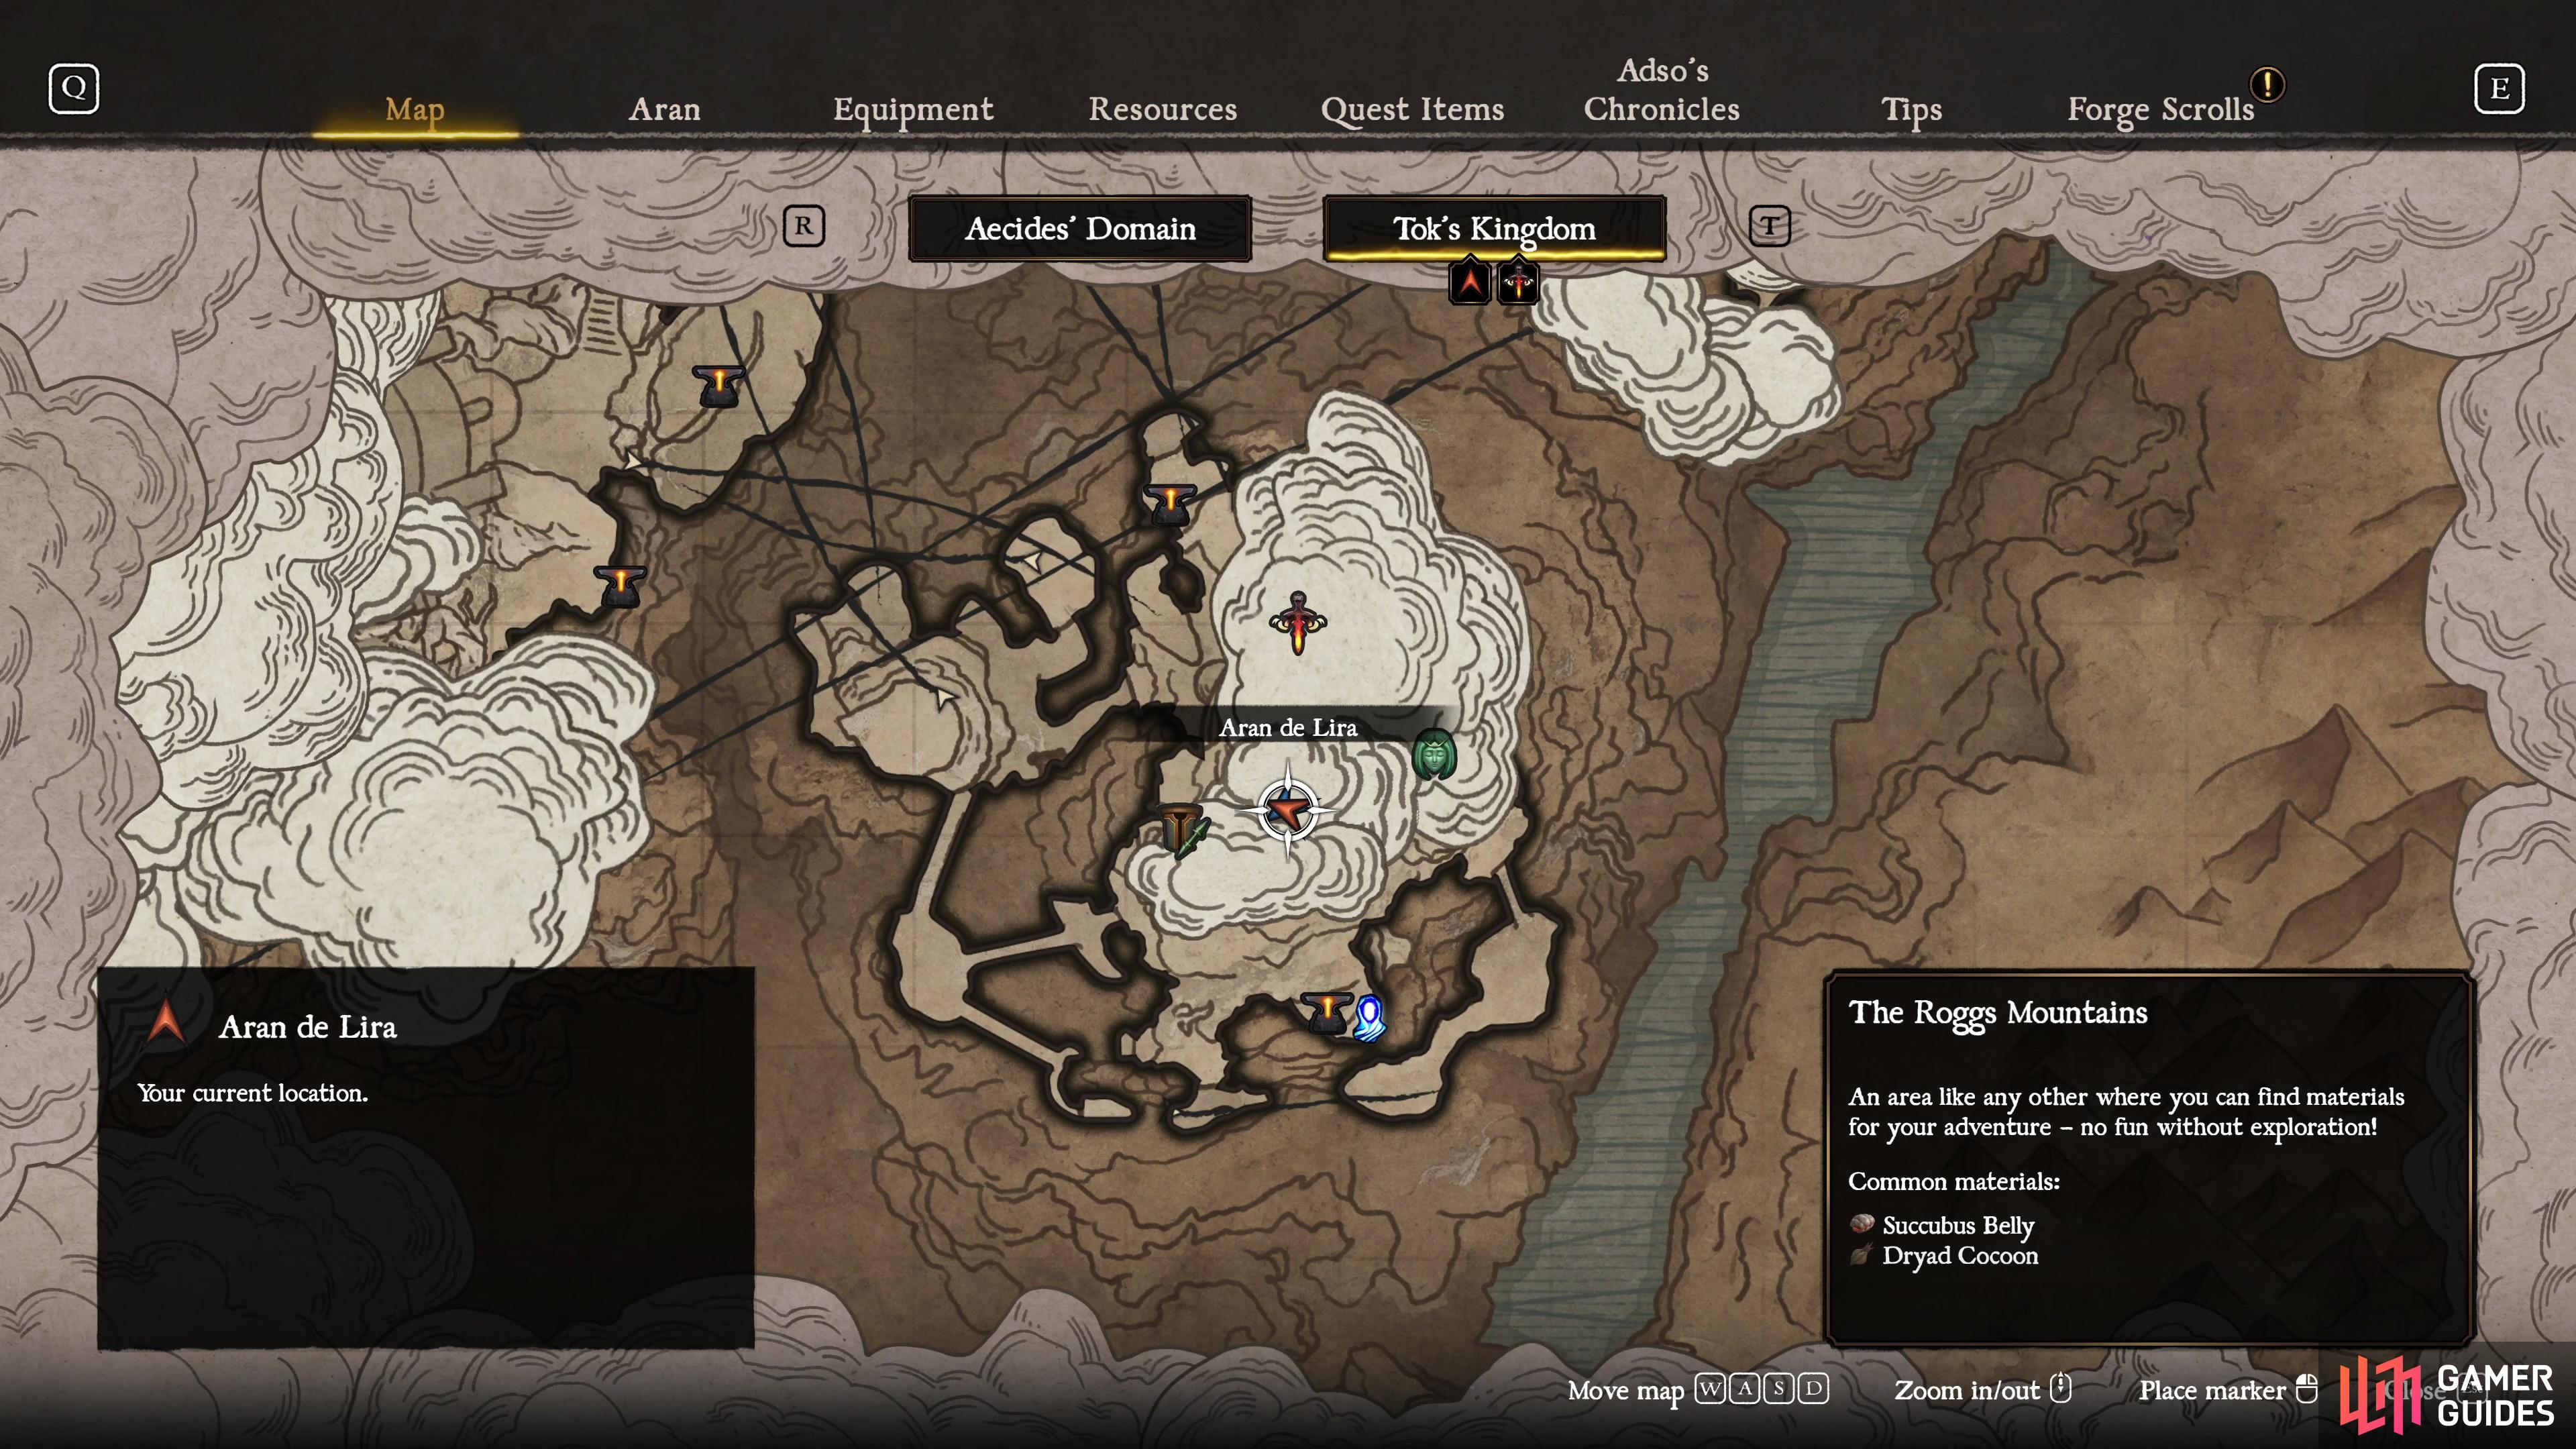

(1 of 2) Make your way to the Morlock’s Abyss anvil in the Roggs Mountains.

Make your way to the Morlock’s Abyss anvil in the Roggs Mountains. (left), Power up the medallion and use it on the statue to blow a hole in the wall leading to this Forge Criptex. (right)
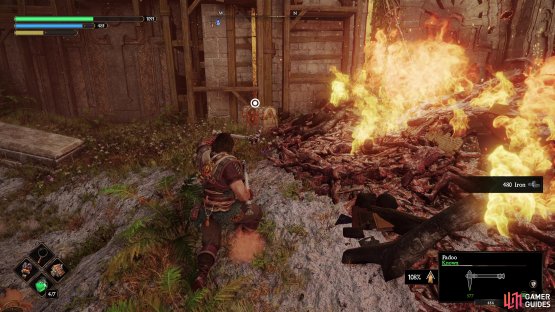
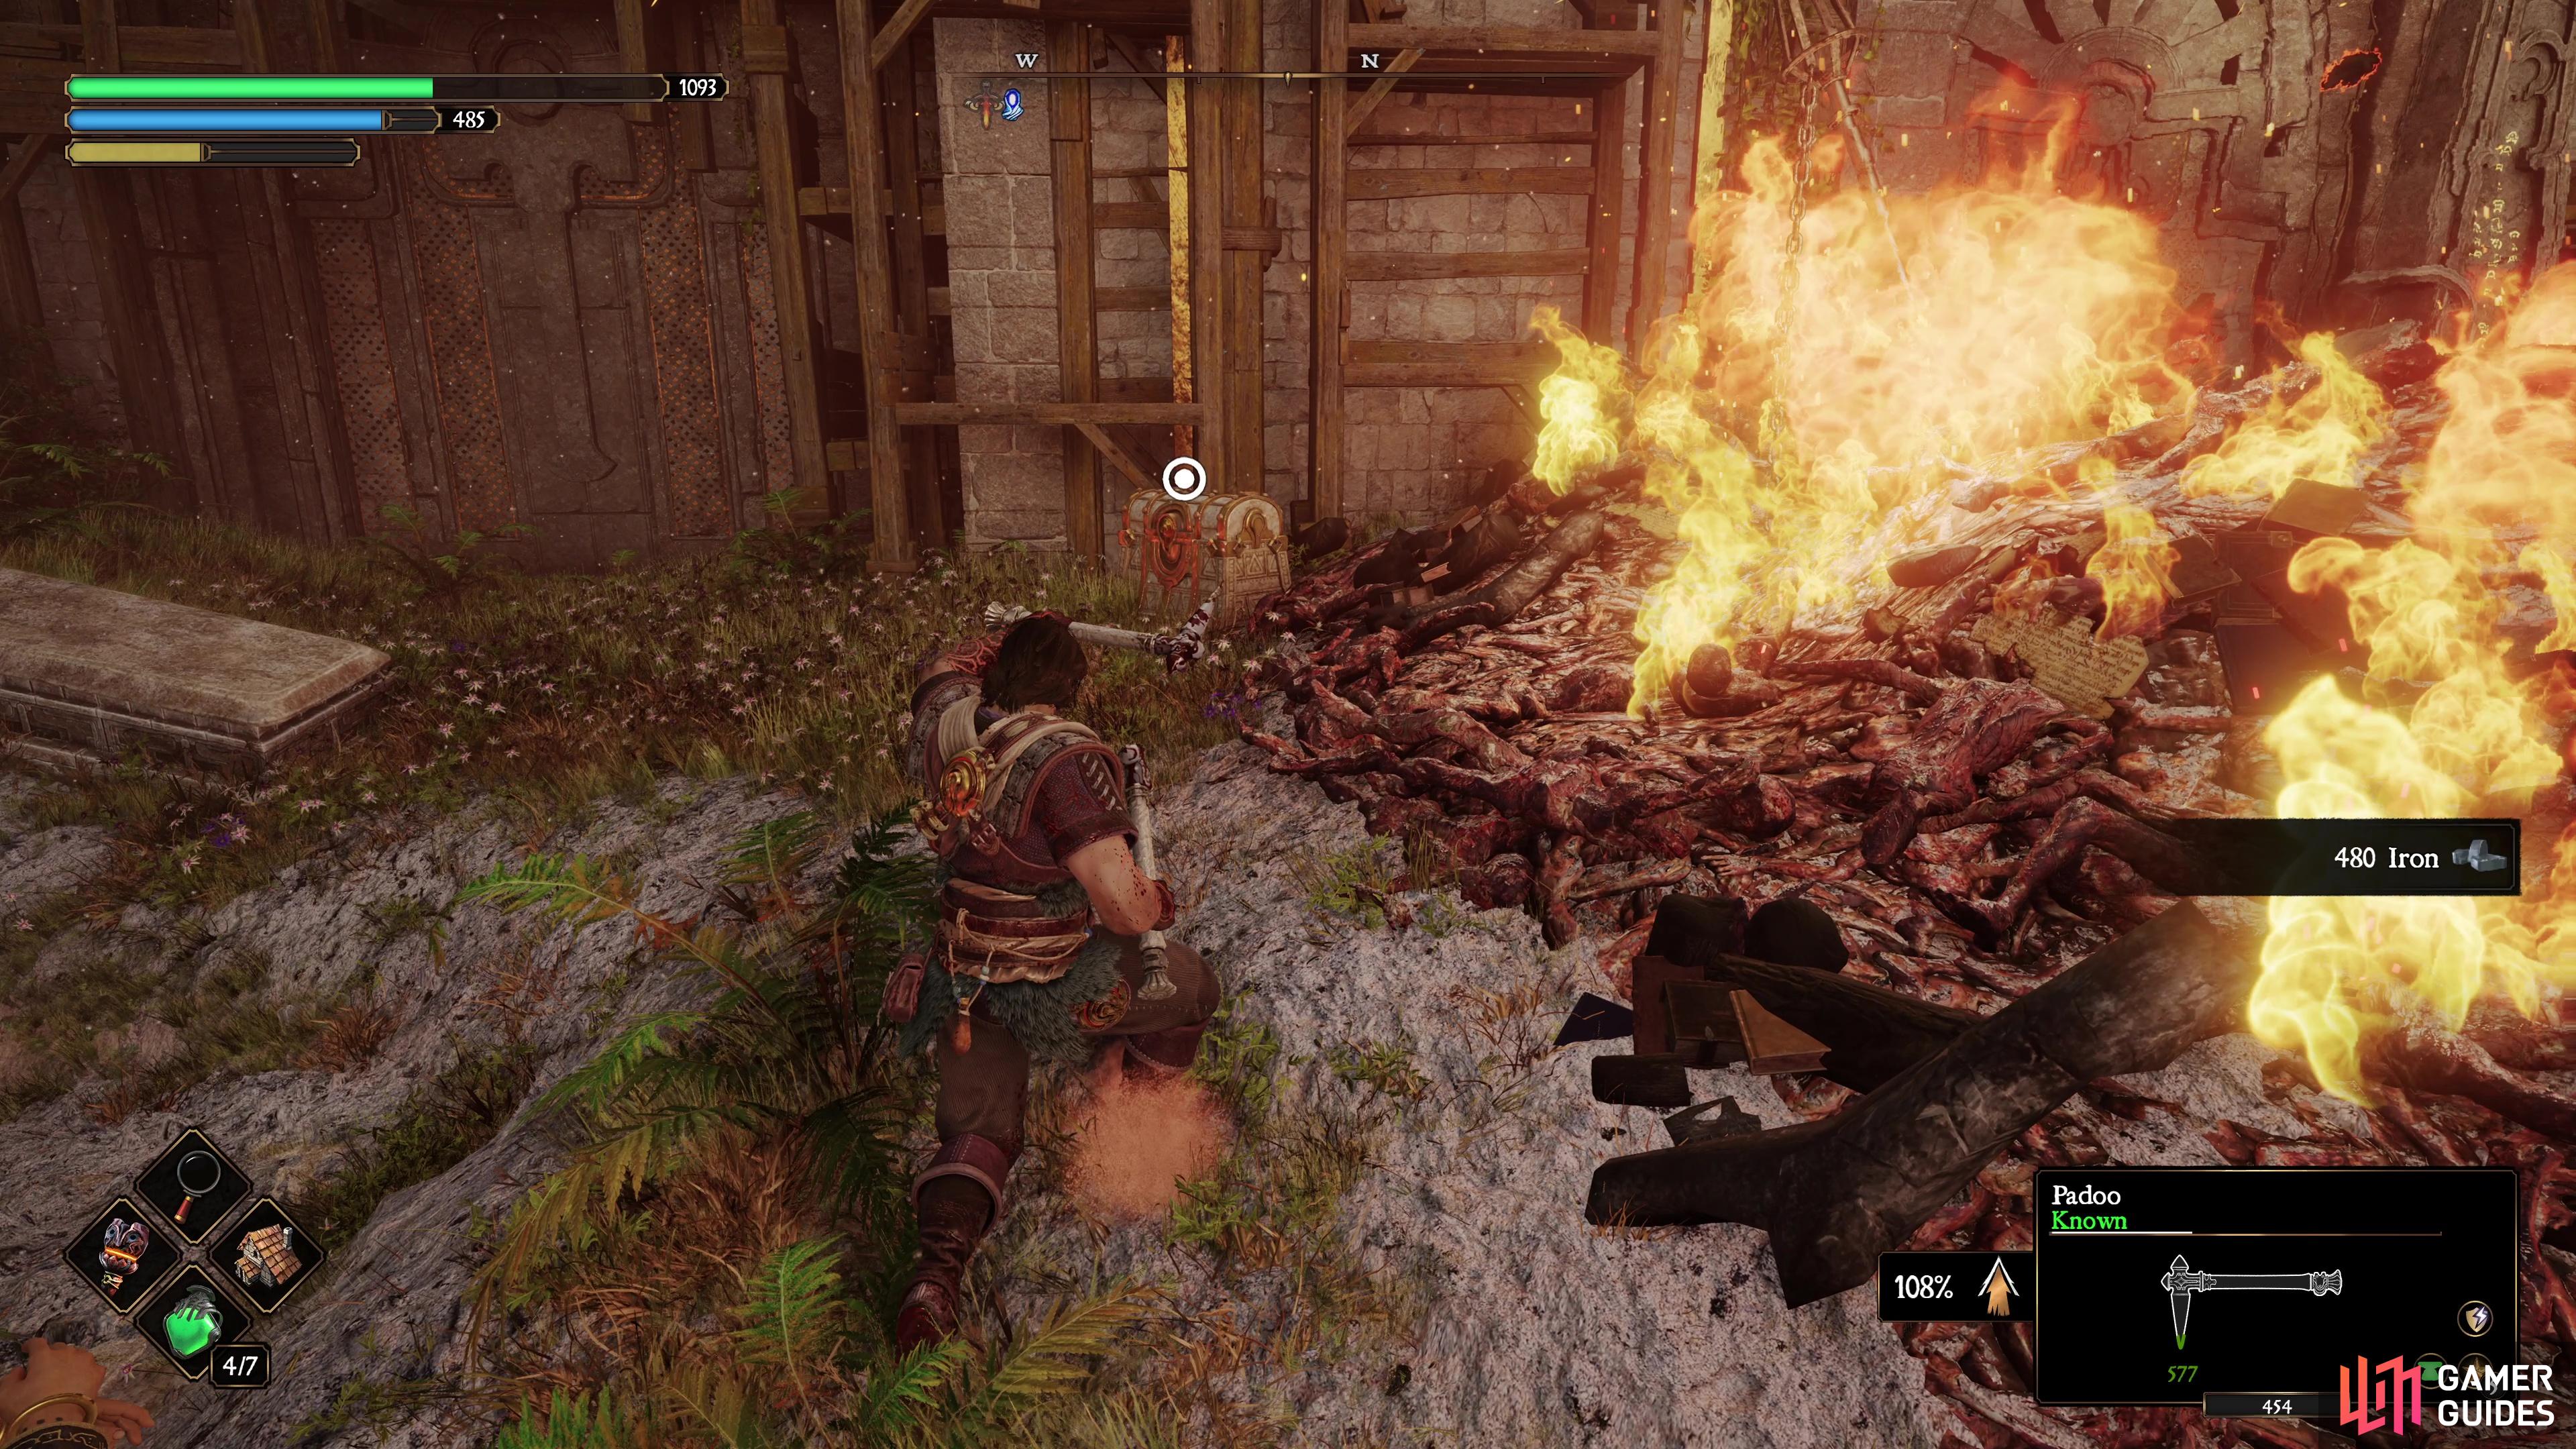
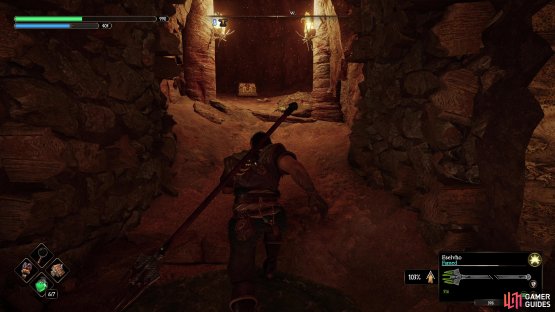
Forge Criptex 13: Tok’s Kingdom - The Roggs Mountains - Koko’s Hollow
Follow the path up from the forge and enter the lair. Defeat the Rokk Boss over the boarded-up hole, and he’ll fall into the pit. You need to go down here for the story, however, there is a crack in the wall in this Light Rune area, and it’ll lead to a chest containing the Criptex.
(1 of 2) Make your way to Koko’s Hollow at The Roggs Mountains.

Make your way to Koko’s Hollow at The Roggs Mountains. (left), After falling down the hole, go through the Light Rune area to find this Forge Criptex. (right)
There you have it; you now know how to find all 14 Forge Criptex in Blades of Fire so that you can forge any weapon with the maximum of seven Forge Stars, giving them a life that will last for a long time.
No Comments