
You will enter battle well armed and armored, as befits one of the God-Emperor’s angels. The enemies of humanity are endless, however, and at some point you’ll need to scavenge the battlefield to fuel your continued offensive. There are numerous pickups in Space Marine 2, including ammo, health, armor, dataslates and more, and in this page we’ll cover each type of pickup and discuss what, exactly, each one does and how to make the best use of them.
Page Breakdown
| Quick Search |
|---|
| Weapons and Grenades |
| Ammo Box |
| Ammo Cache |
| Armour Boost |
| Medicae Stimm |
| Guardian Relic |
| Armoury Data |
| Dataslate |
Weapons and Grenades
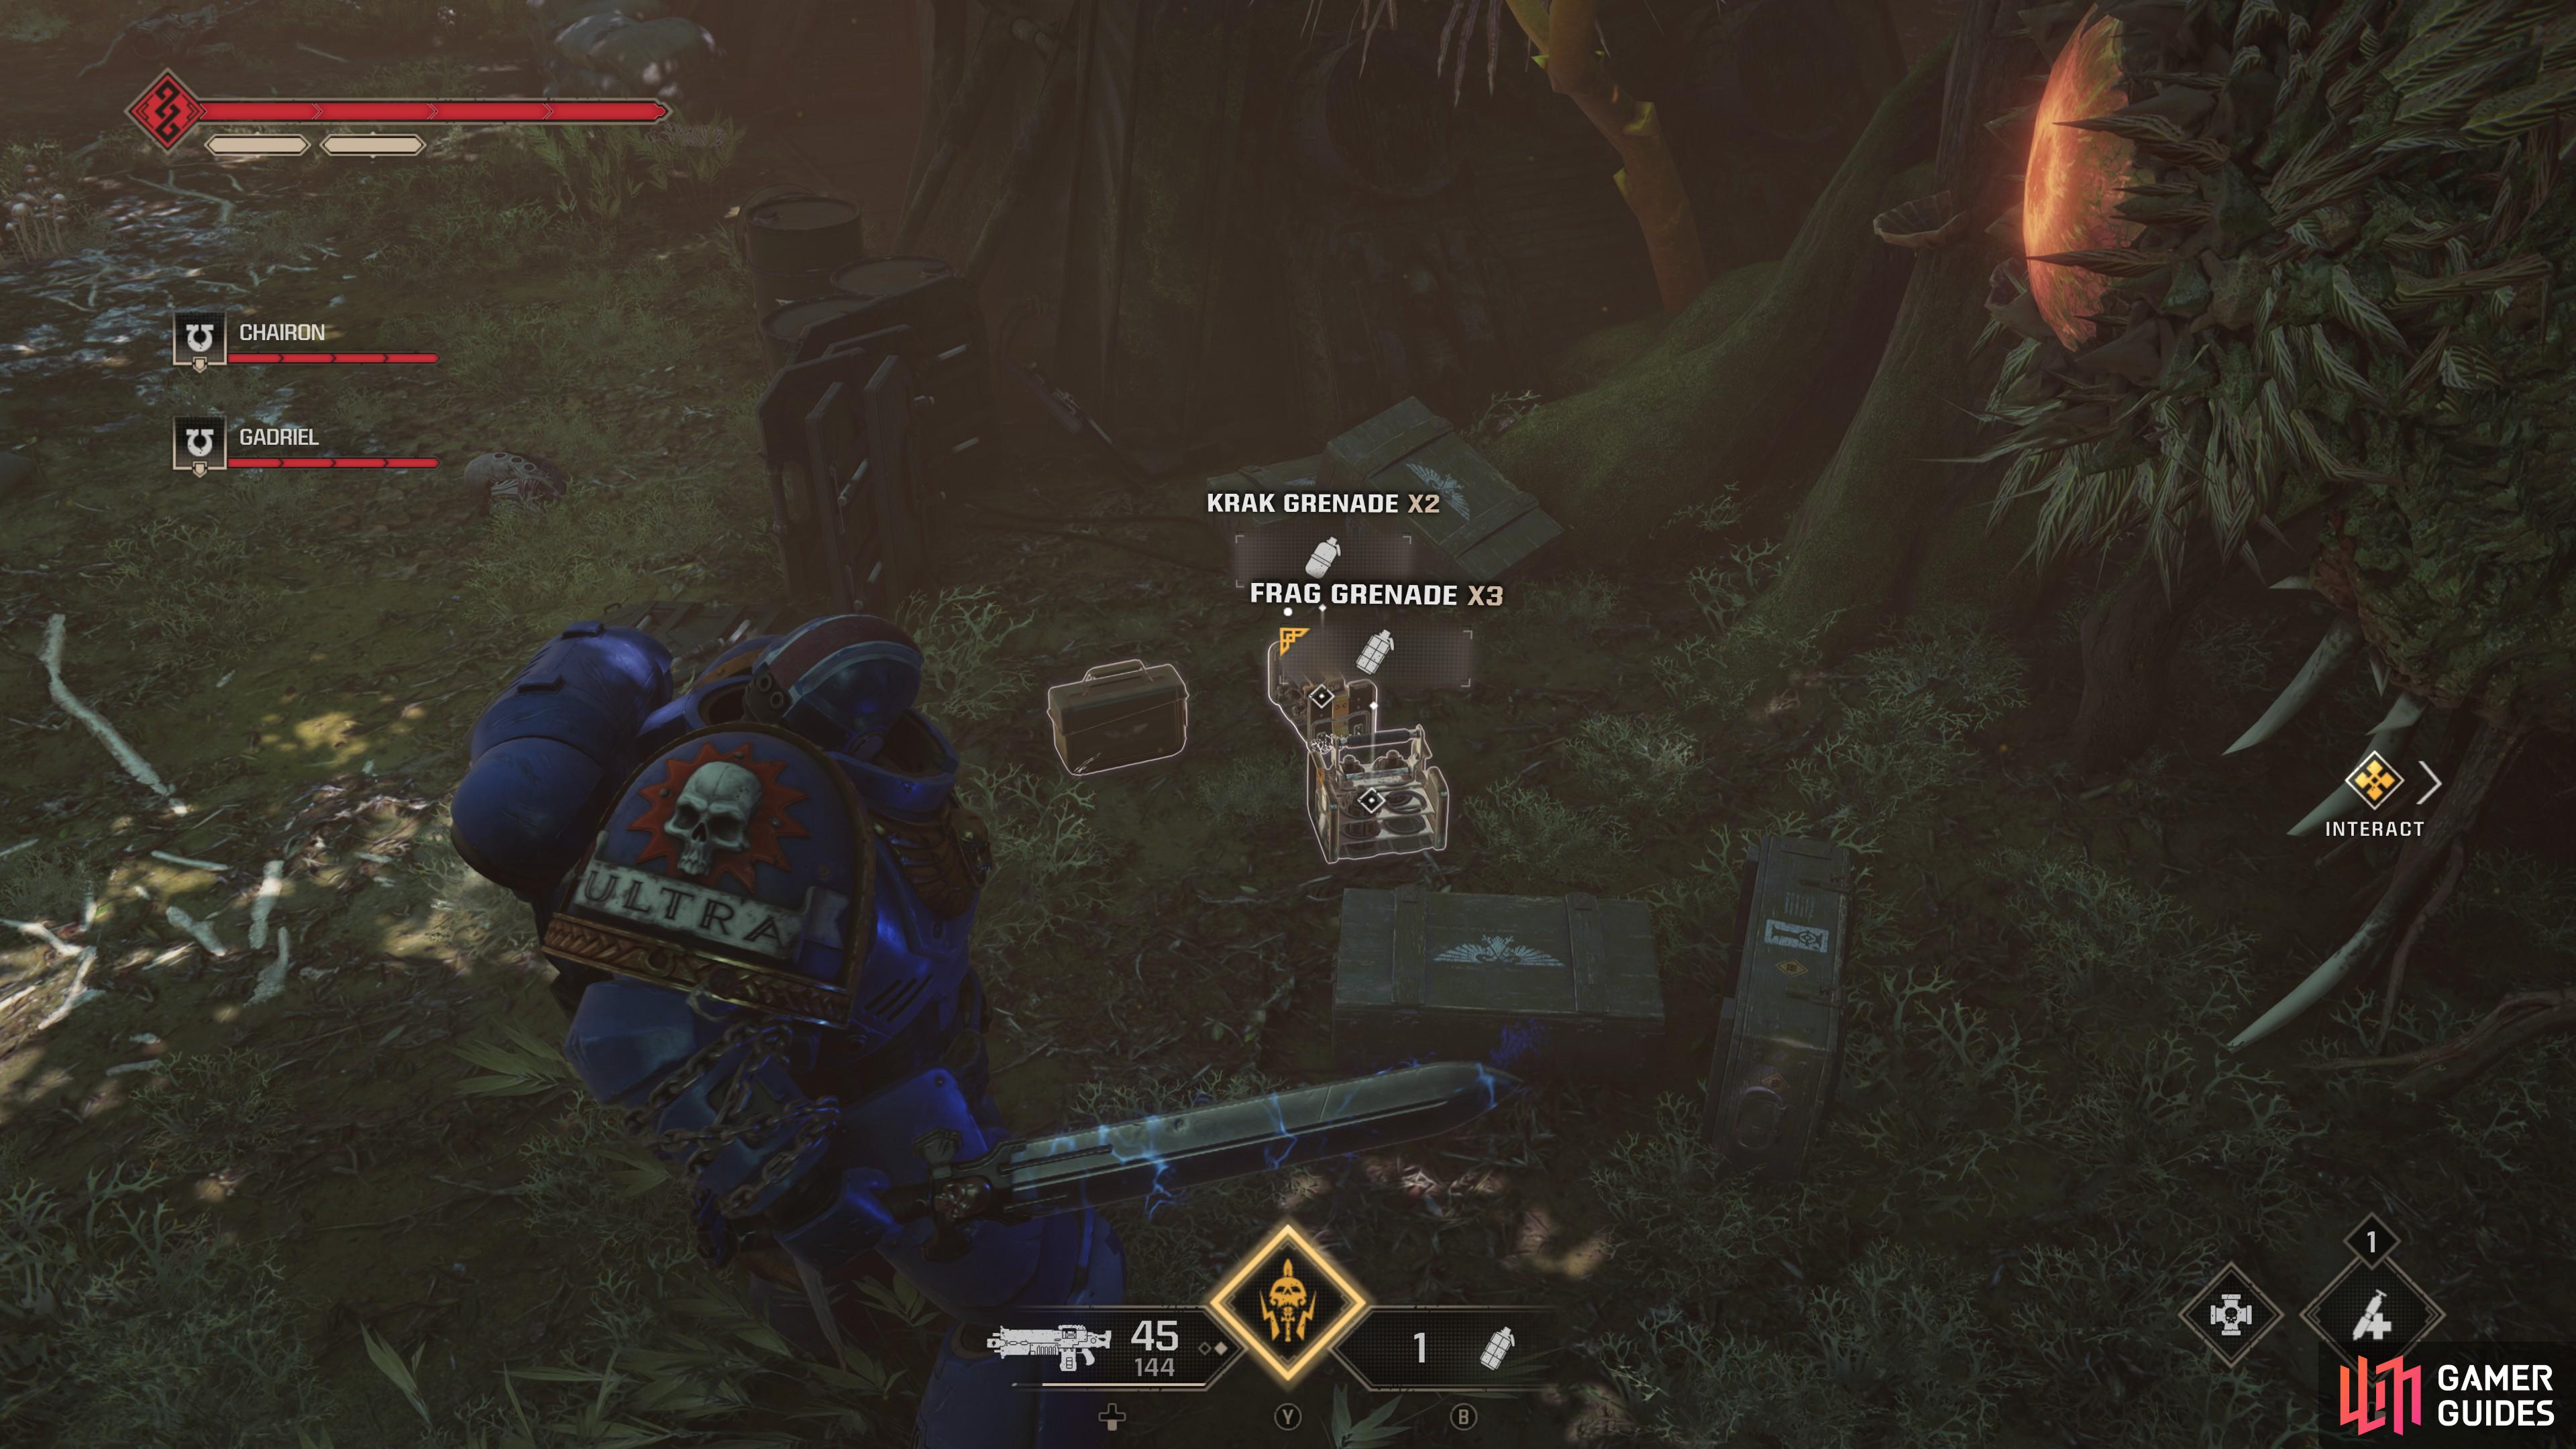
Pretty standard stuff, you find a new weapon or some grenades out and about and you can swap it out for whatever you currently have equipped. In the campaign you have access to three types of weapons: Primary Weapons, Secondary Weapons and Melee Weapons, and you can have one item from each category equipped. Newly picked up weapons and grenades will have full ammo for its type, and discarded weapons will replace the newly picked up one, and can be collected later provided you don’t get checkpointed out of reach.
Heavy weapons (Heavy Bolters, Multi-Meltas, etc.) occupy a nebulous category in campaign game mode and are equipped as a tertiary ranged weapon option. While a heavy weapon is equipped you won’t be able to use any other weapons unless you swap to them by pressing  , which will drop the heavy weapon. In campaign mode, heavy weapons have finite ammo and cannot be replenished - once you’ve used all their ammo they’re useless and will be discarded.
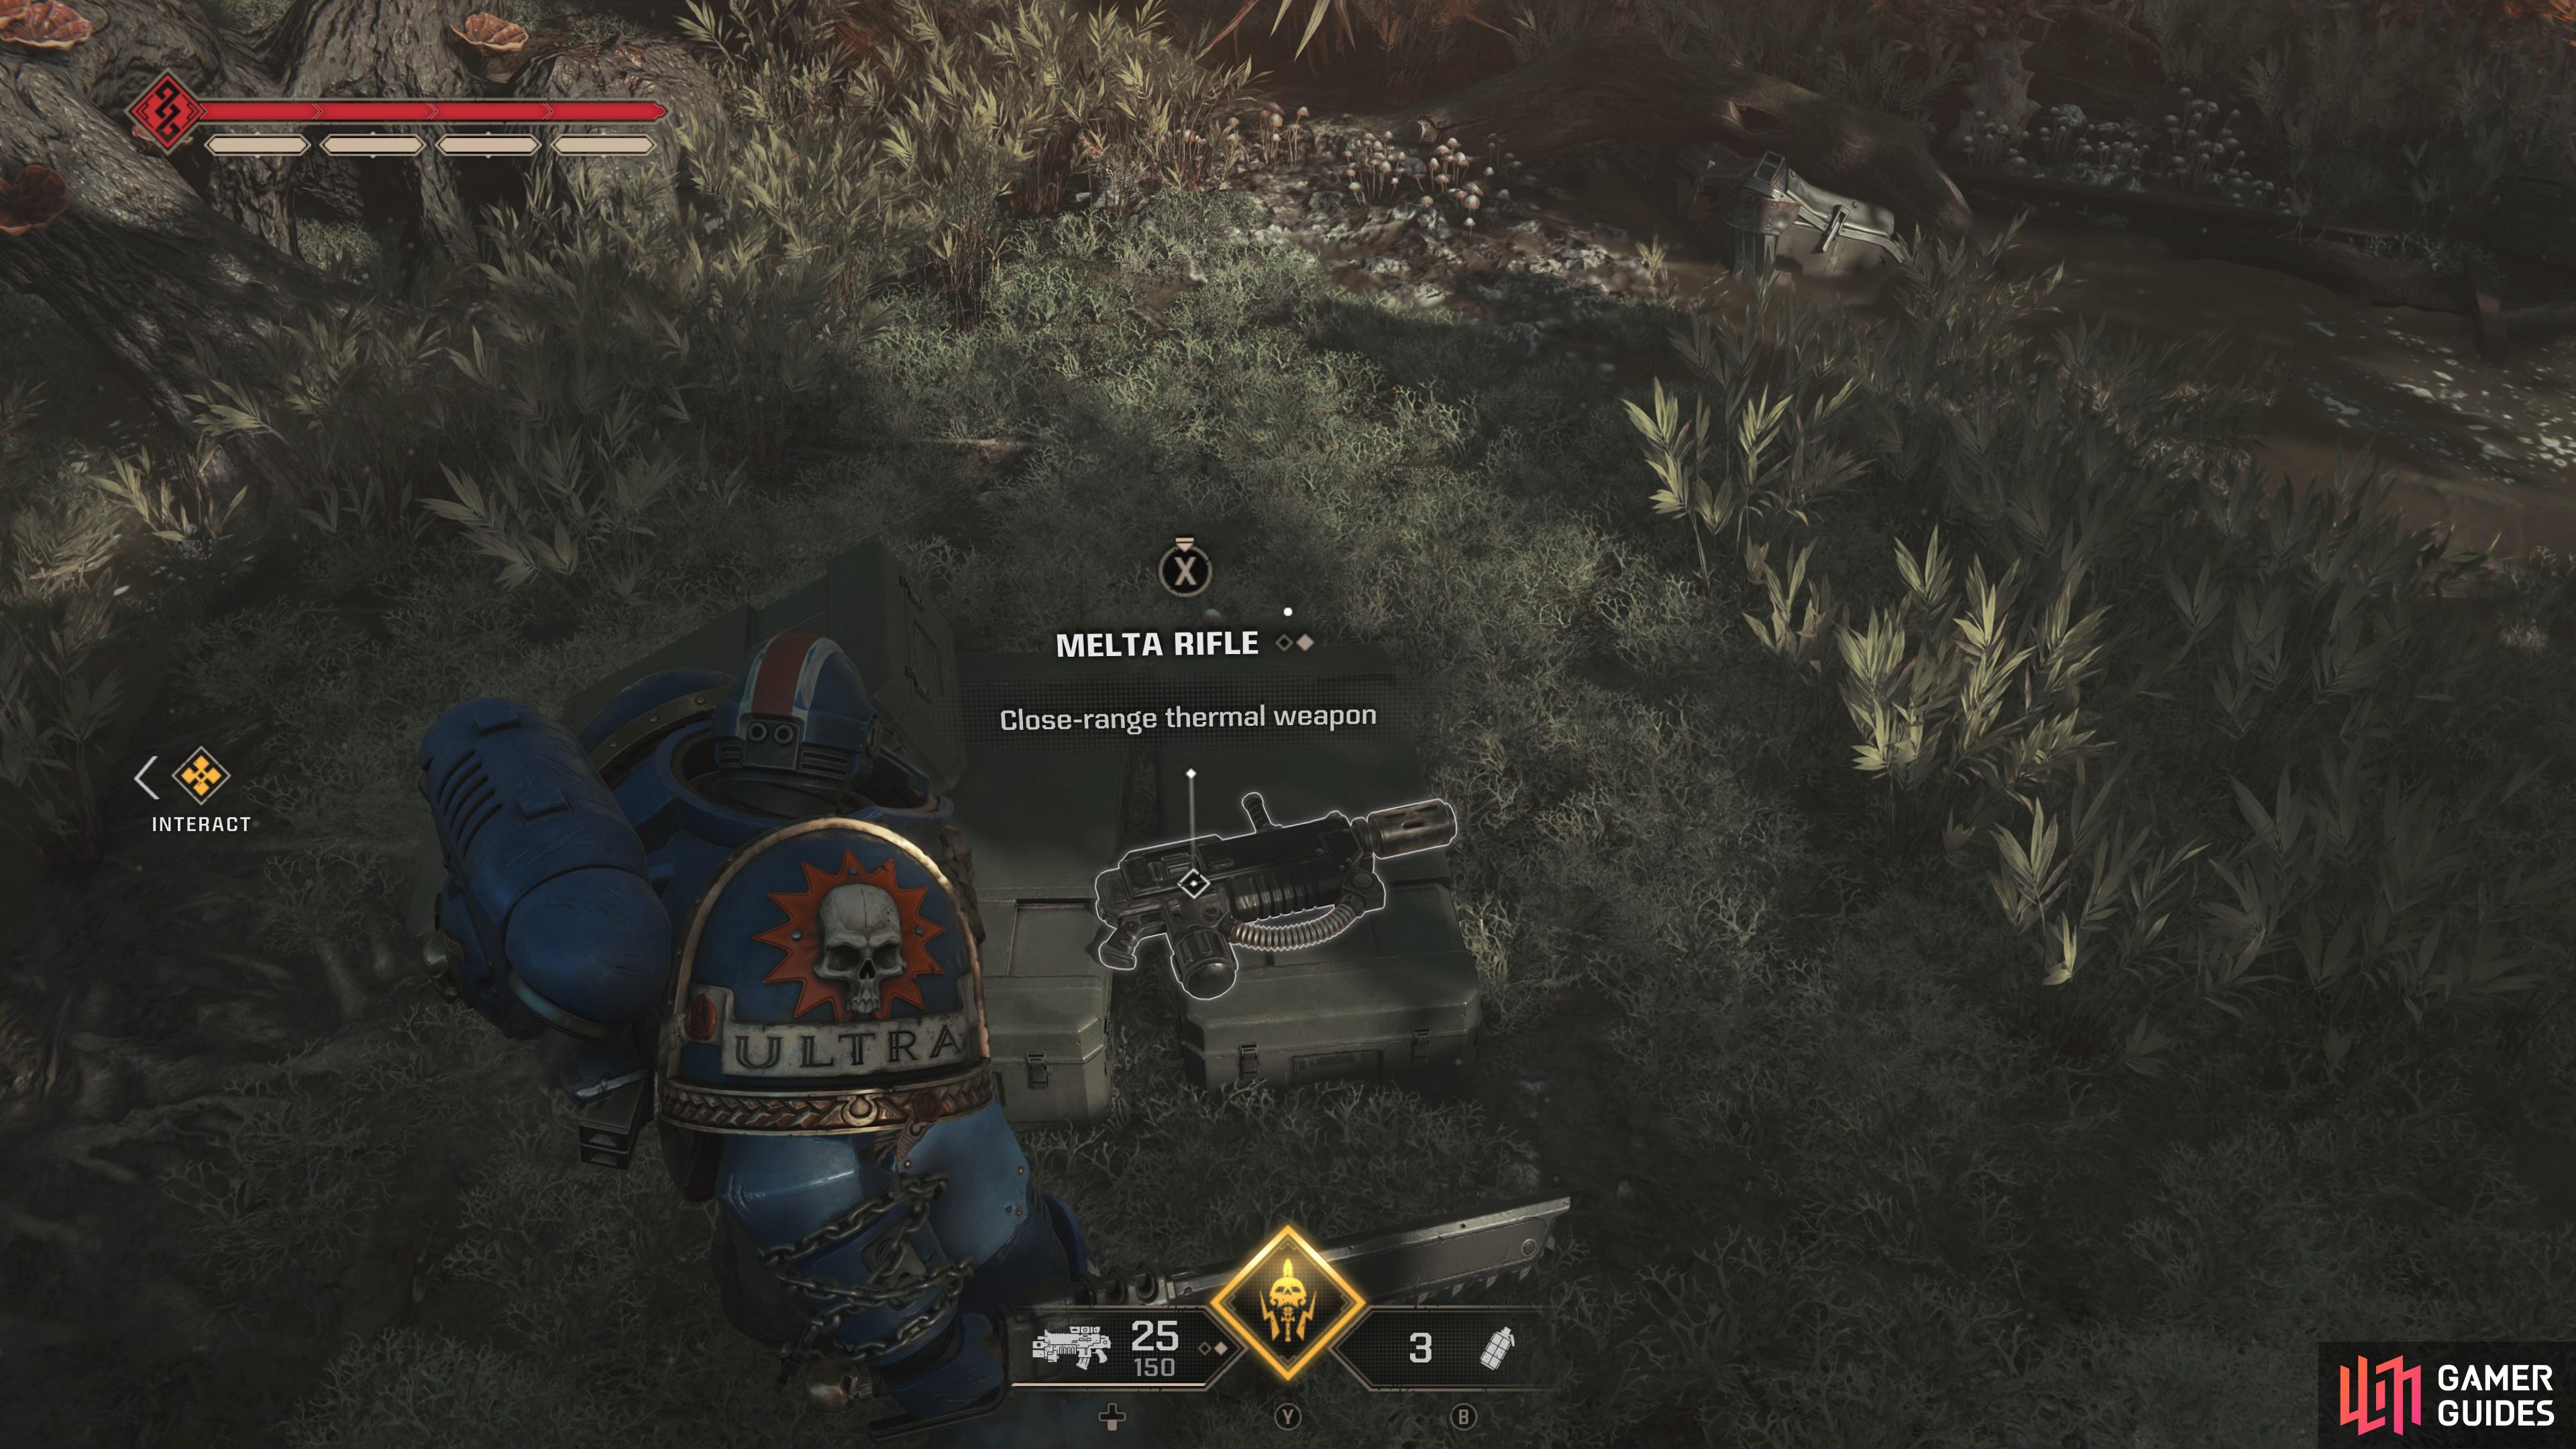

(1 of 3) In Campaign mode you’ll often find weapons lying about, waiting to be put to use in the God-Emperor’s name.
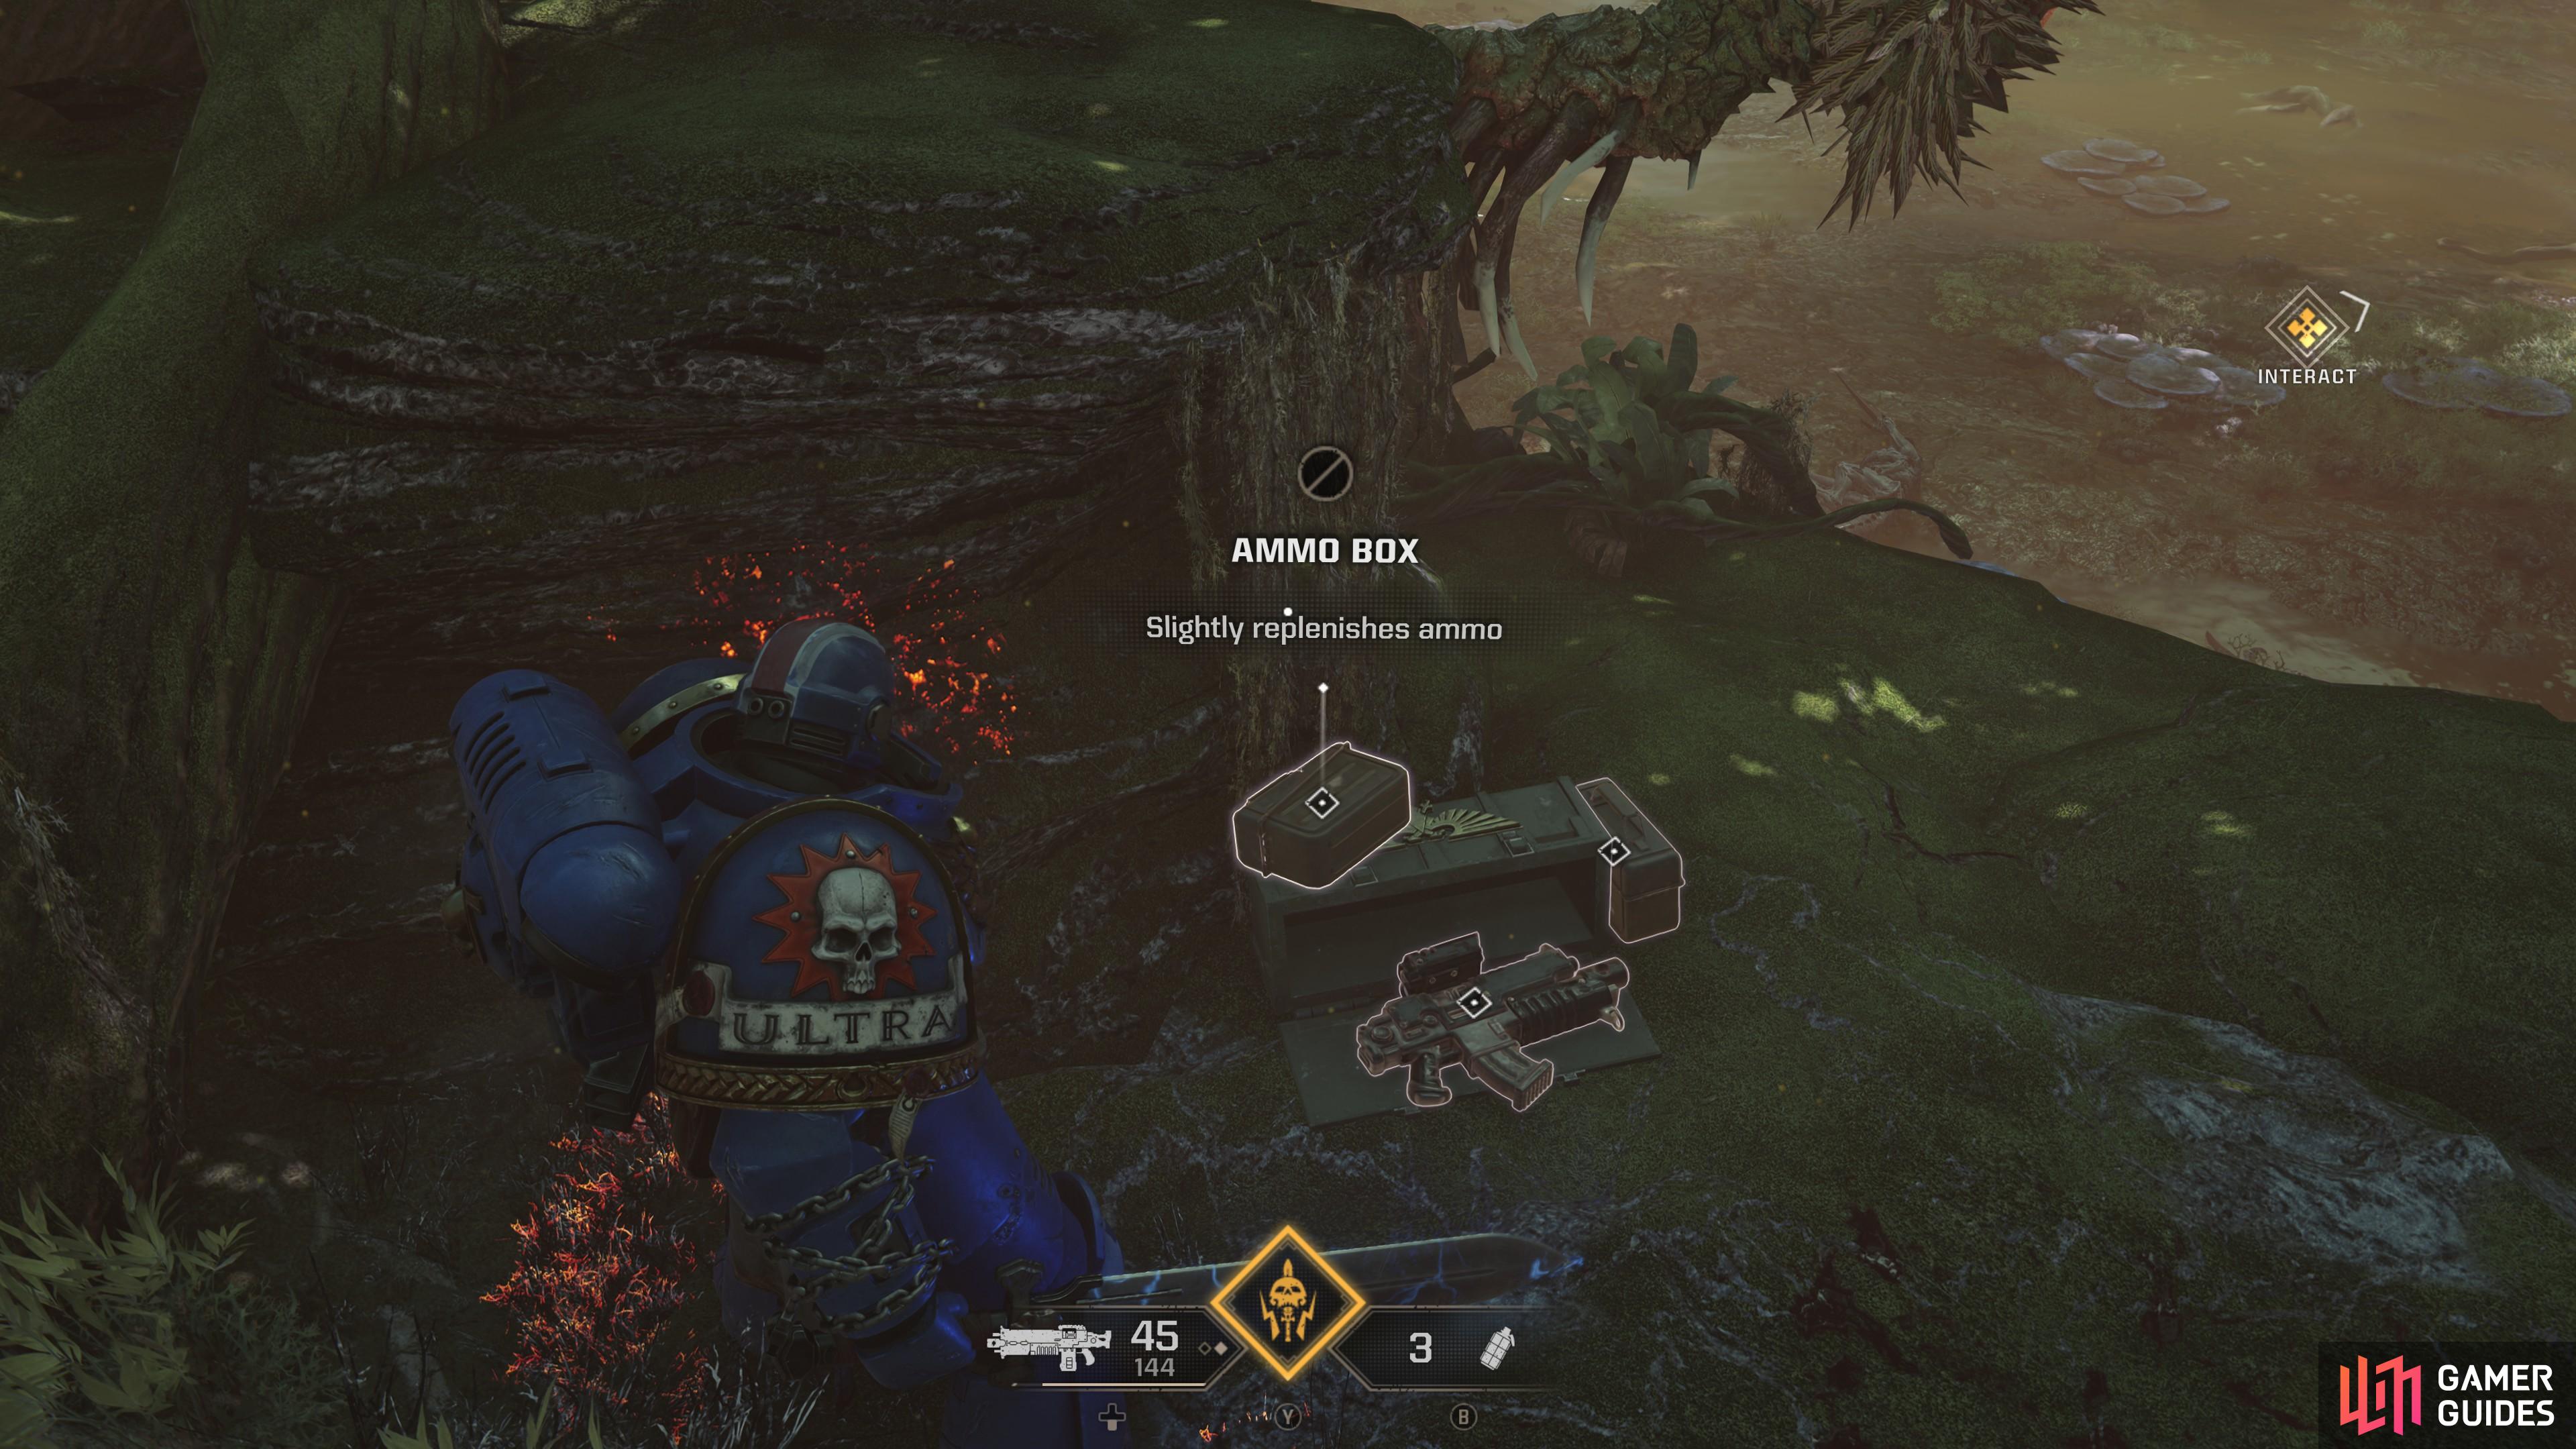
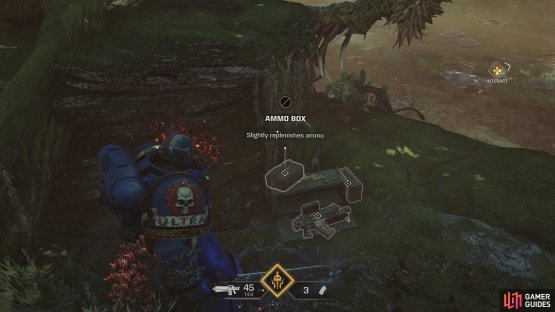
Ammo Box
Easily the most common pickup in the game, Ammo Boxes refill the ammo of most weapons a moderate amount, the only weapons being excluded are heavy weapons (Heavy Bolters, Multi-Meltas, etc) in campaign mode, which have a finite ammo count. Ammo Boxes do not replenish equipped grenades, but they do replenish the grenades fired by the Bolt Rifle with Grenade Launcher weapon. The amount of ammo replenished varies by the weapon’s maximum ammo count, but it generally takes a little over four Ammo Boxes to fully replenish a weapon in Easy or Normal difficulty and five Ammo Boxes to fully refill a weapon on Veteran and Angel of Death difficulties. In [Operations Mode] significantly fewer Ammo Box spawns on higher difficulties, forcing you to rely on your upgraded weapons and perks to keep you firing.


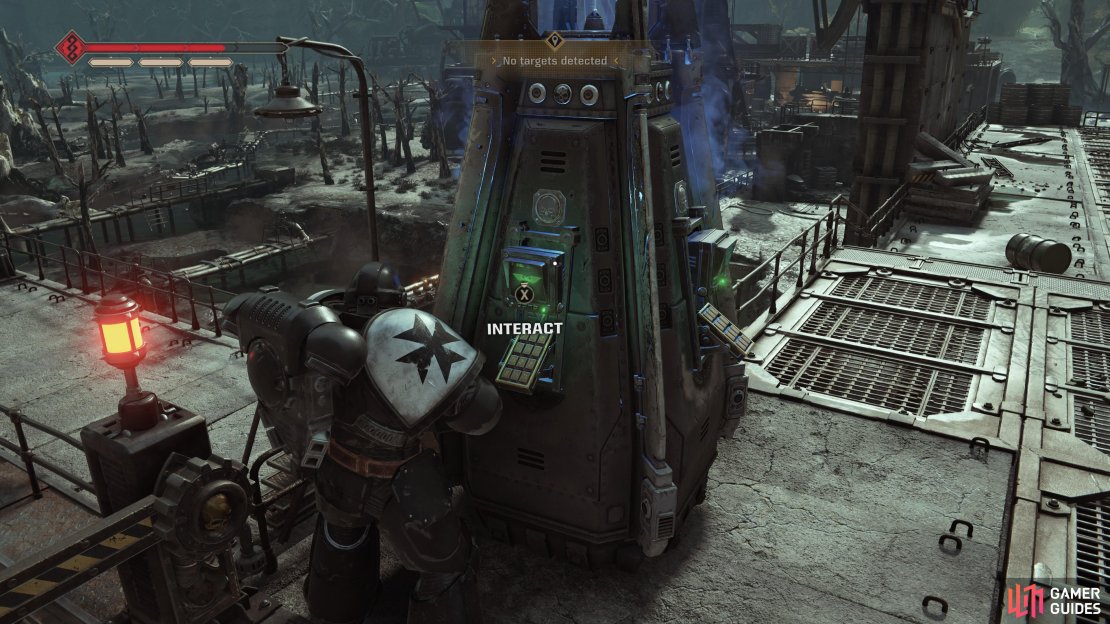
(1 of 2) Keep an eye out for crates,
Keep an eye out for crates, (left), as these can be smashed to reveal pickups - usually Ammo Boxes and Grenades, but Medicae Stimms and Armour Boosts are also possible. (right)
Ammo Cache
Similar to an Ammo Box (see above), but Ammo Caches fully replenish all equipped weapons and can be used as many times as you wish. You’ll usually see these at the start of checkpoints or before or during large battles. It takes a moment to use an Ammo Cache, balancing the infinite ammo they yield with the need to leave yourself vulnerable long enough to obtain it. Otherwise, the same restrictions apply in that Ammo Caches do not replenish grenades or heavy weapons (in campaign mode).

(1 of 2) Ammo Boxes will give you a moderate amount of ammo,
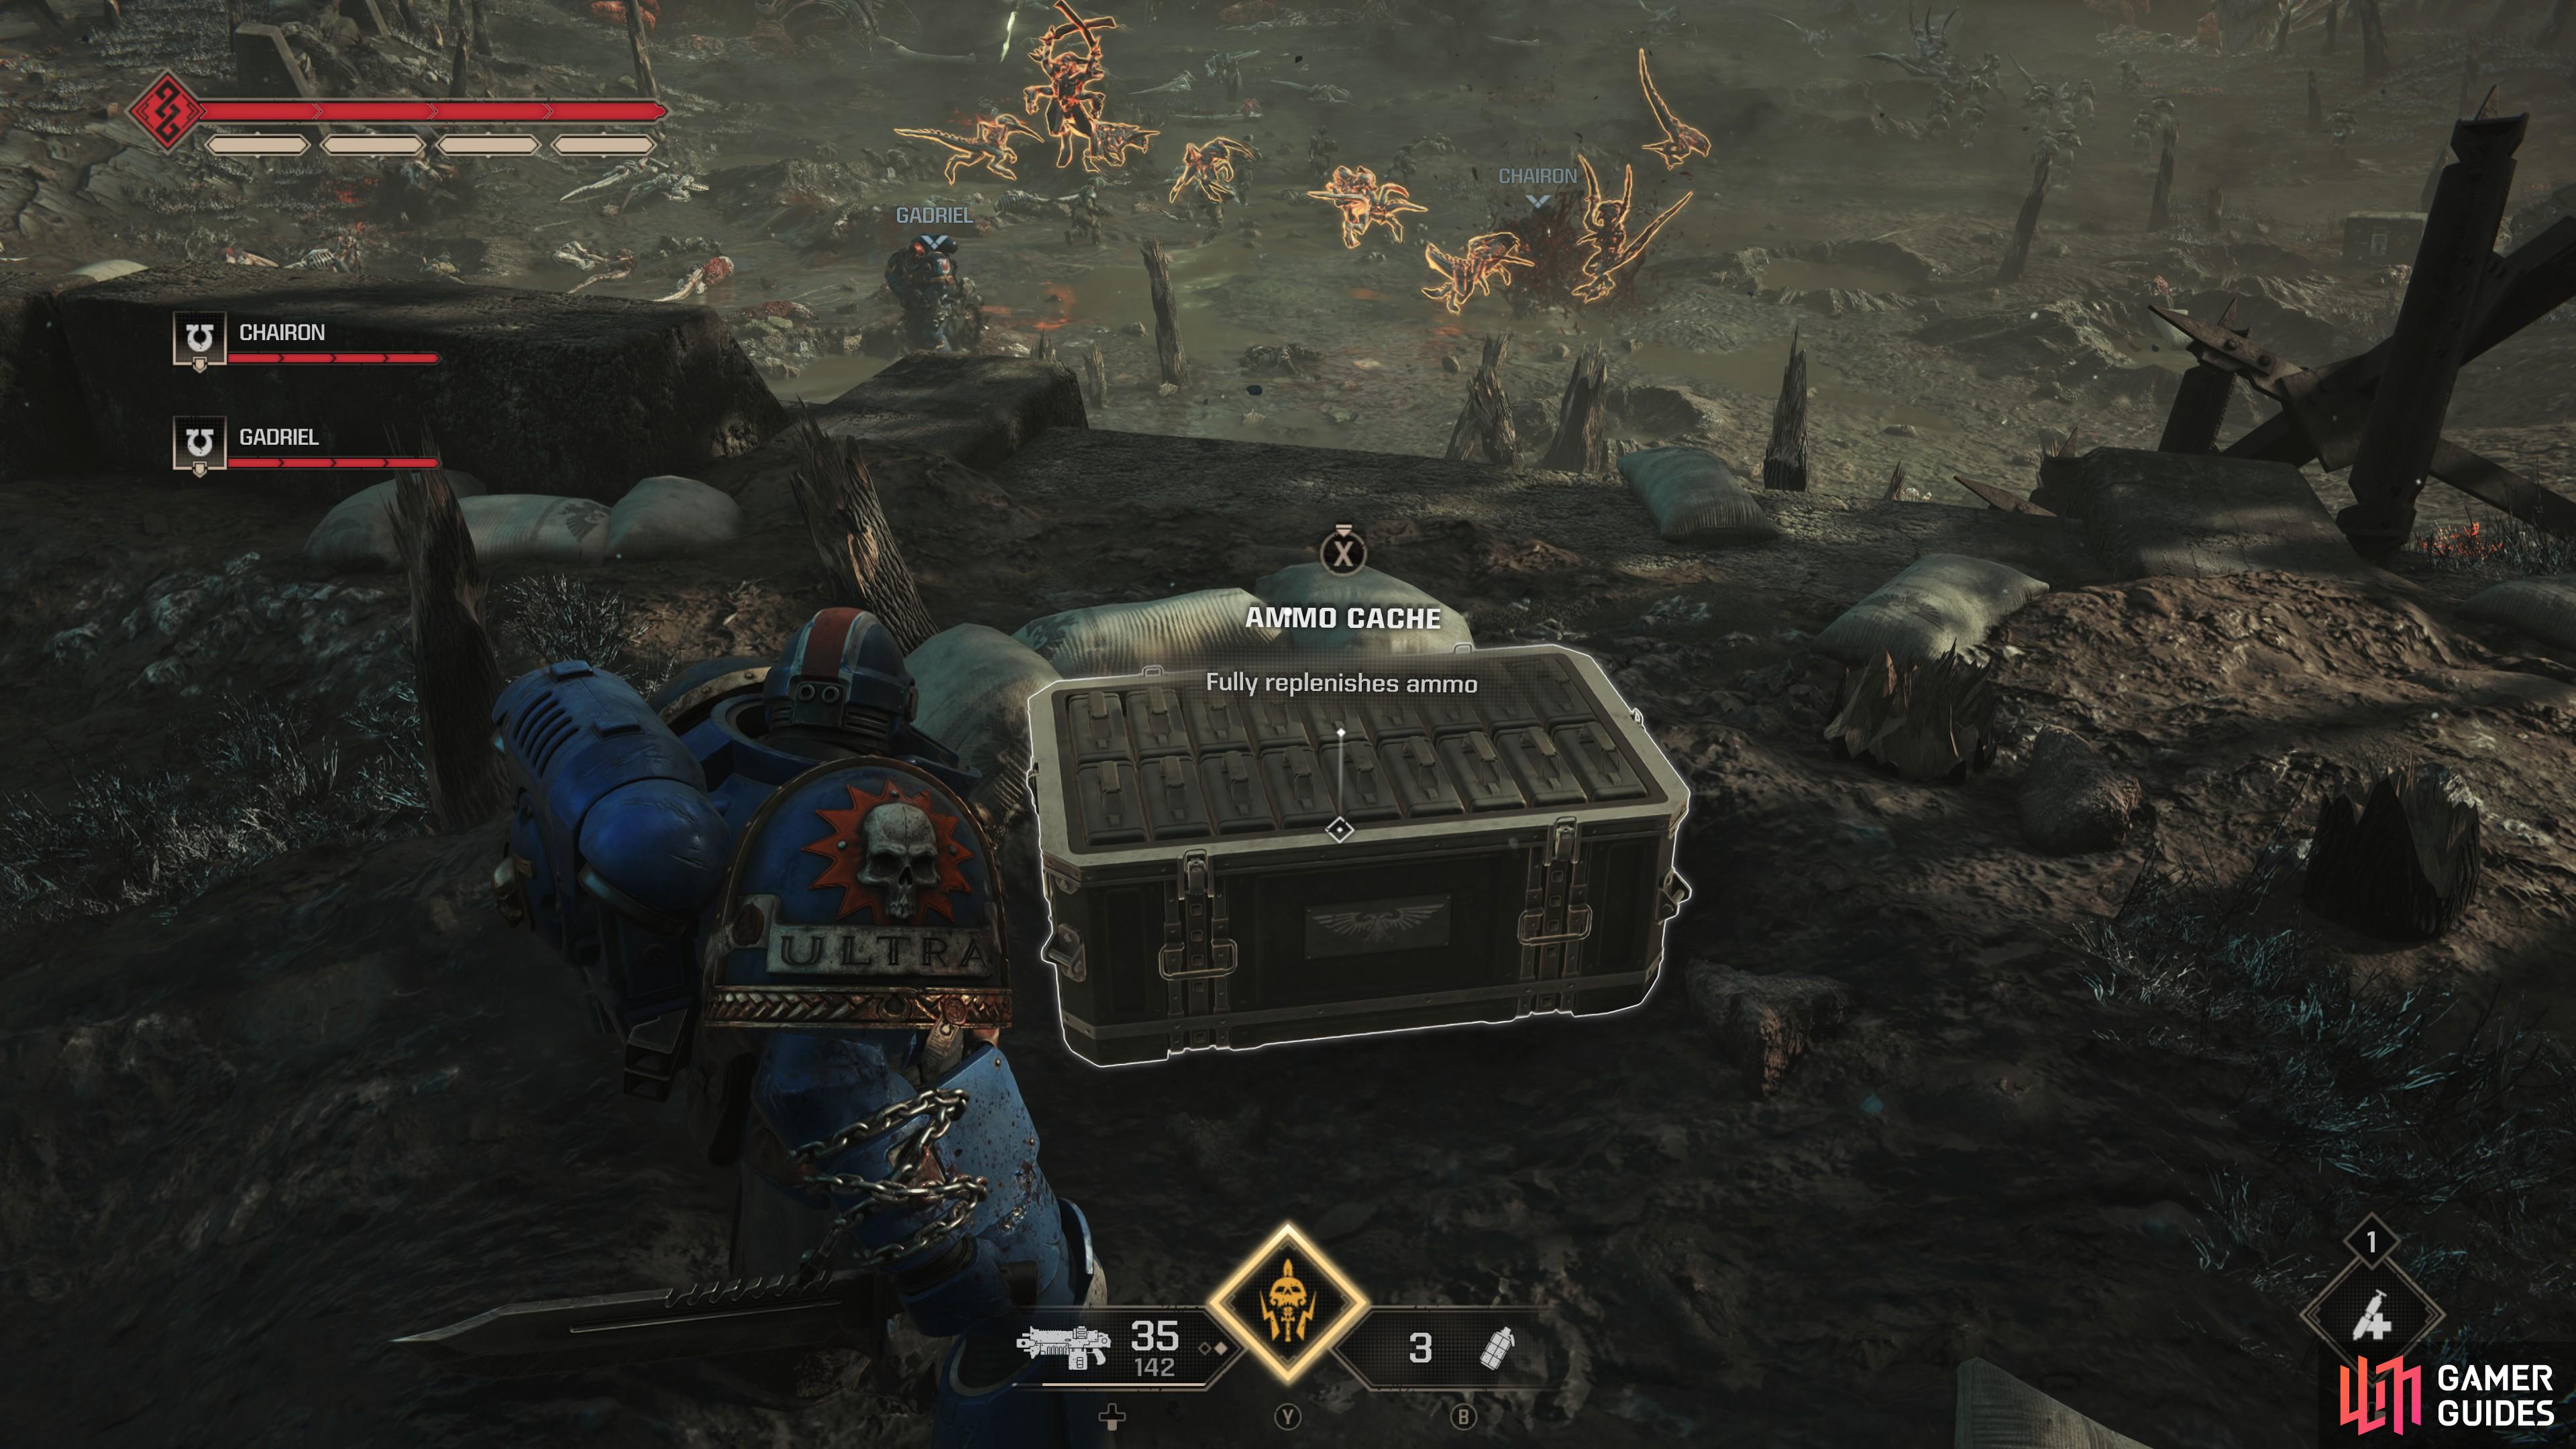
Ammo Boxes will give you a moderate amount of ammo, (left), while Ammo Caches will fully replenish all your ammo and can be used an infinite number of times. (right)
Armour Boost
Mostly confined to Operations mode, these pickups immediately kickstart Armour Regeneration and give you an extra Armour bar. This Armour bar is temporary, however - it will never regenerate and once depleted it’s gone forever. You’ll often find them in destructible crates, and they’re most useful as pickups within combat, but grabbing one so you’ll have an extra Armour bar for your next fight is a nice, if fleeting, boost.
Medicae Stimm
The proverbial “first aid kit”, Medicae Stimms will replenish your Health instantly when used (press  ). The amount of healing they yield varies by difficulty, restoring two Health segments on lower difficulties and less on higher ones. Up to two Medicae Stimms can be held at a time. While the impulse to panic heal can be strong, dealing damage to enemies - especially by scoring executions - should be your preferred tactic in the heat of battle. Enemies can deplete your Health surprisingly quickly on all difficulties and the time spent fumbling around for reactive healing will likely end up gone again anyways. The best time to use Medicae Stimms are when the window to recover Contested Health has ended, usually between battles, waves or attacks.
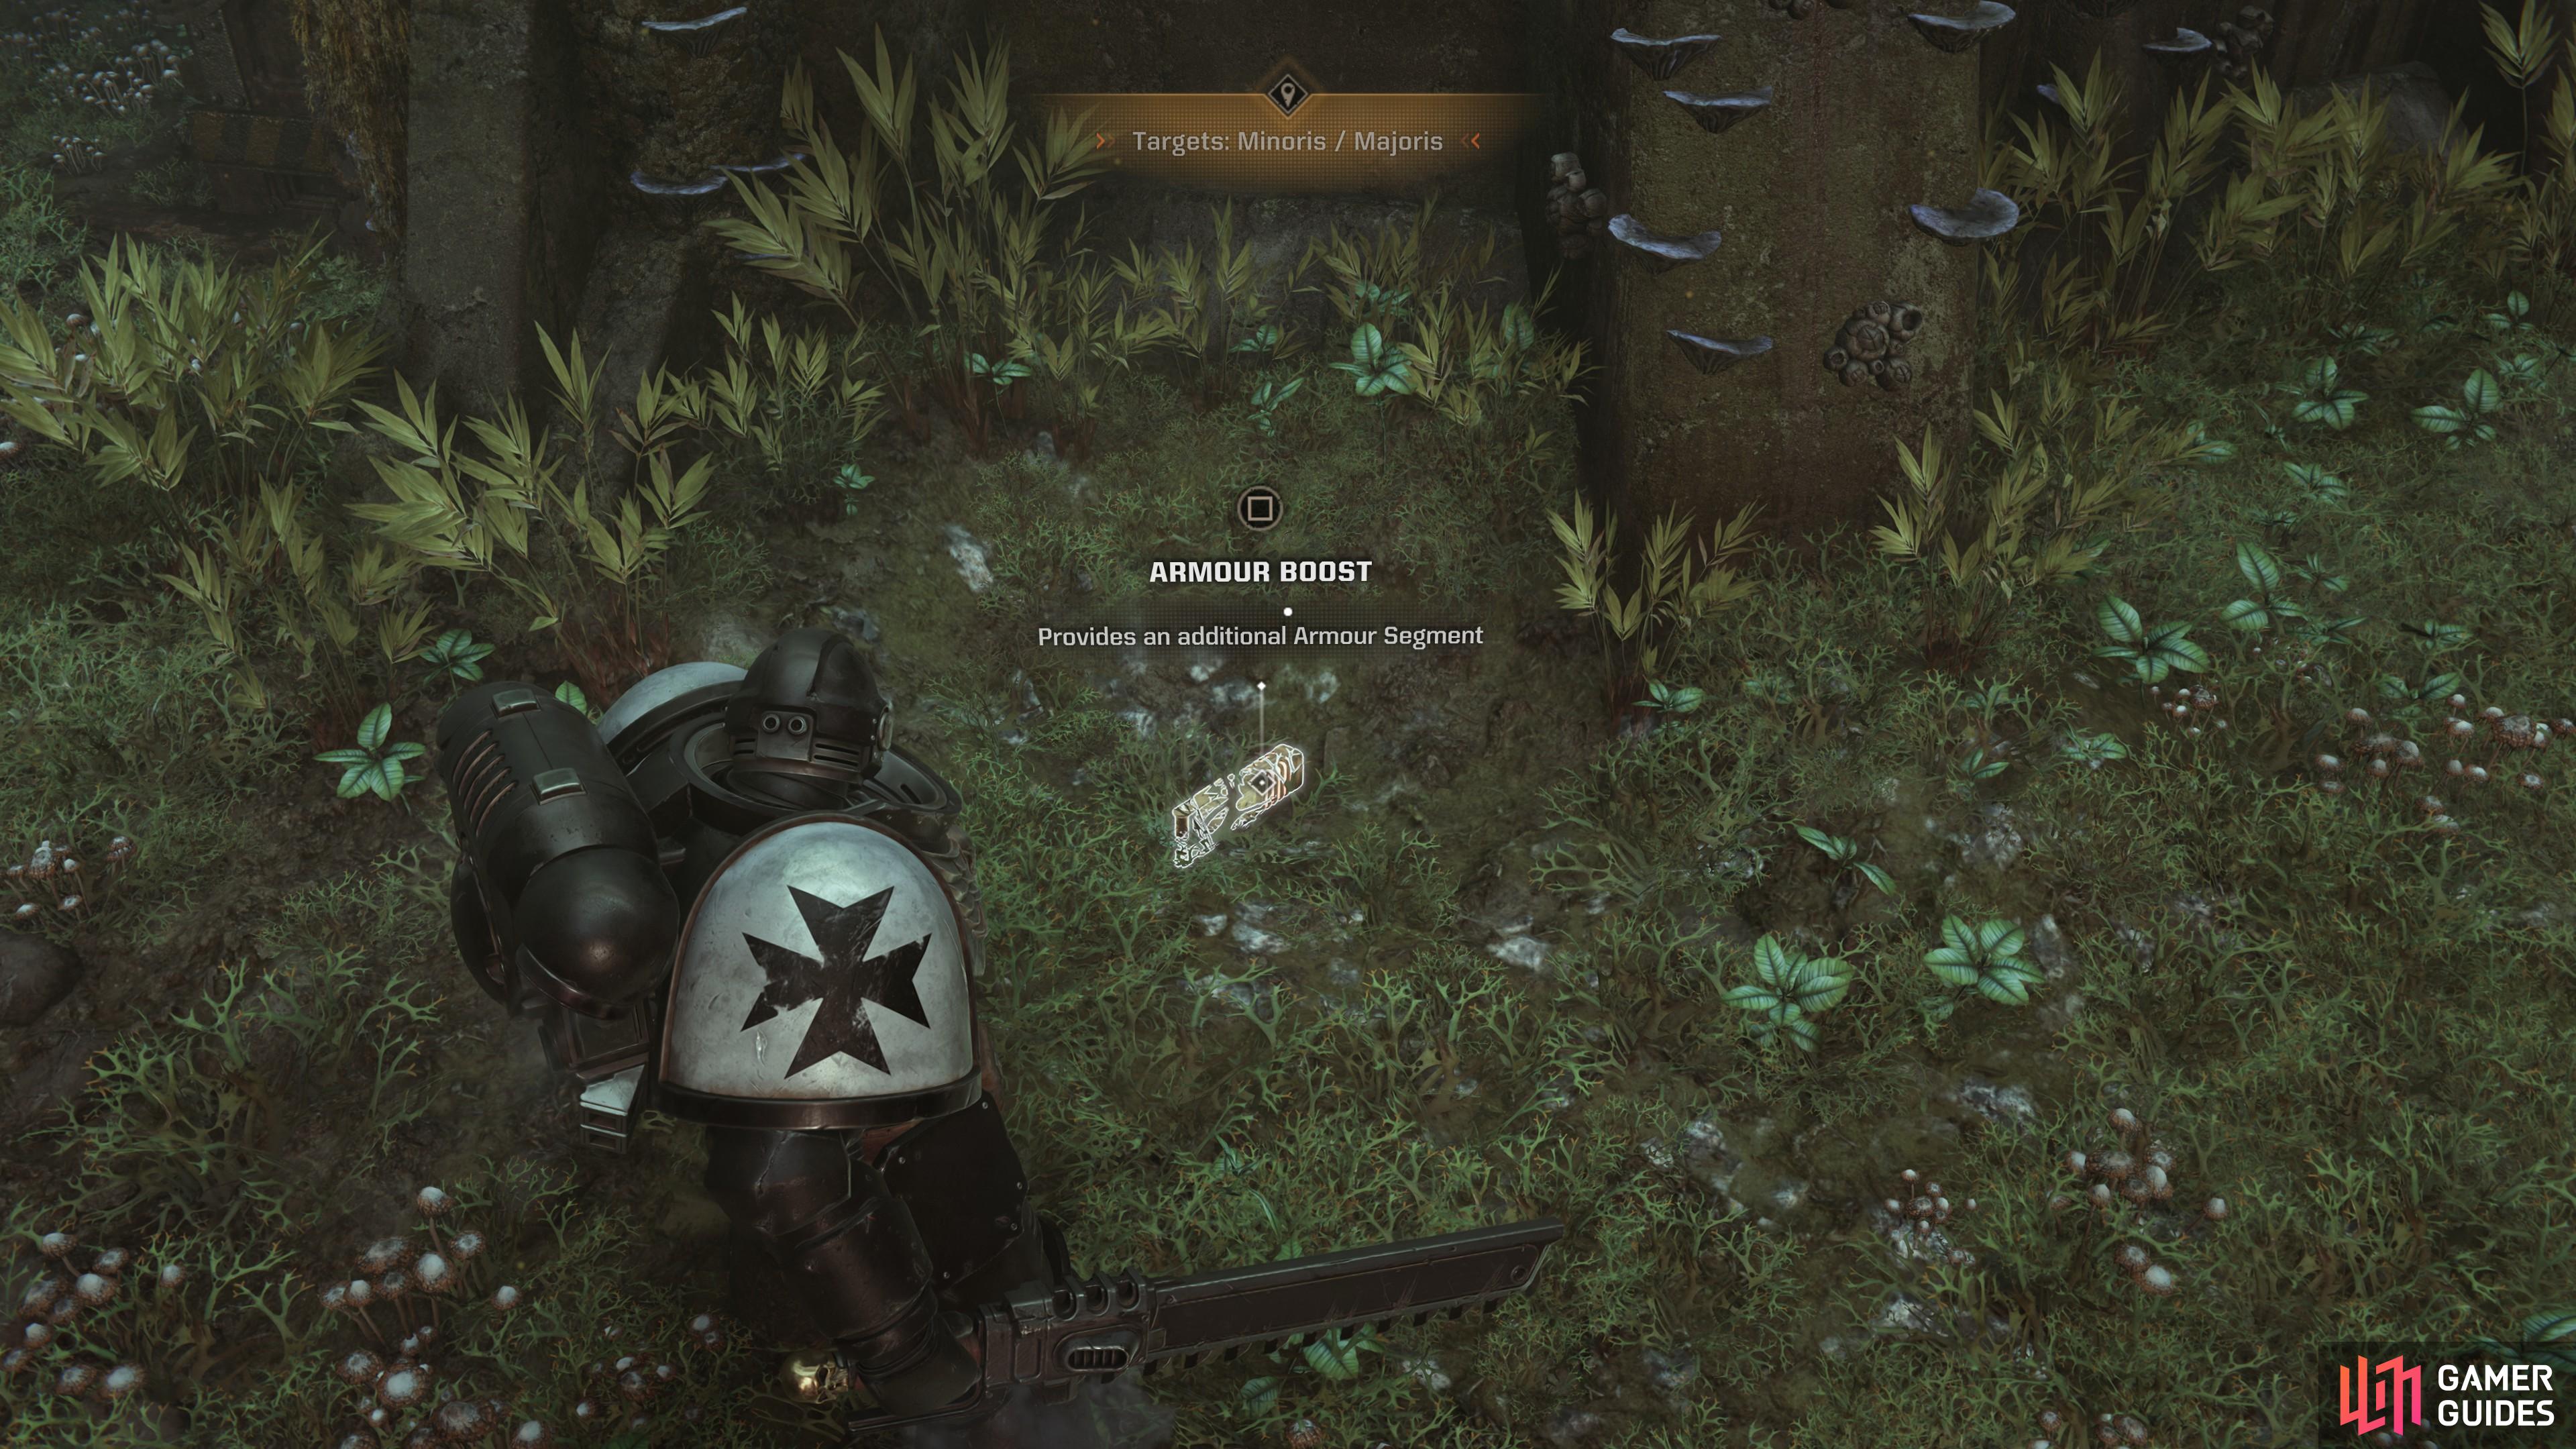

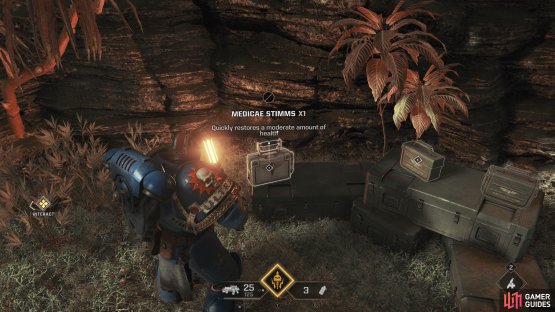
(1 of 2) Armour Boosts - largely confined to Operations mode - will kickstart your Armour regeneration and give you an extra Armour bar… until it’s depleted.
Armour Boosts - largely confined to Operations mode - will kickstart your Armour regeneration and give you an extra Armour bar… until it’s depleted. (left), Medicae Stimms will replenish your Health by an amount varying by difficulty. (right)
Guardian Relic
The game’s ultimate safety net, this artifact will allow you to revive yourself if you’re incapacitated while also curing any Mortal Wounds you may have sustained.in the process. Always nice to have one on-hand, just in case your companions can’t get to you in time. You can only carry one of these at a time.
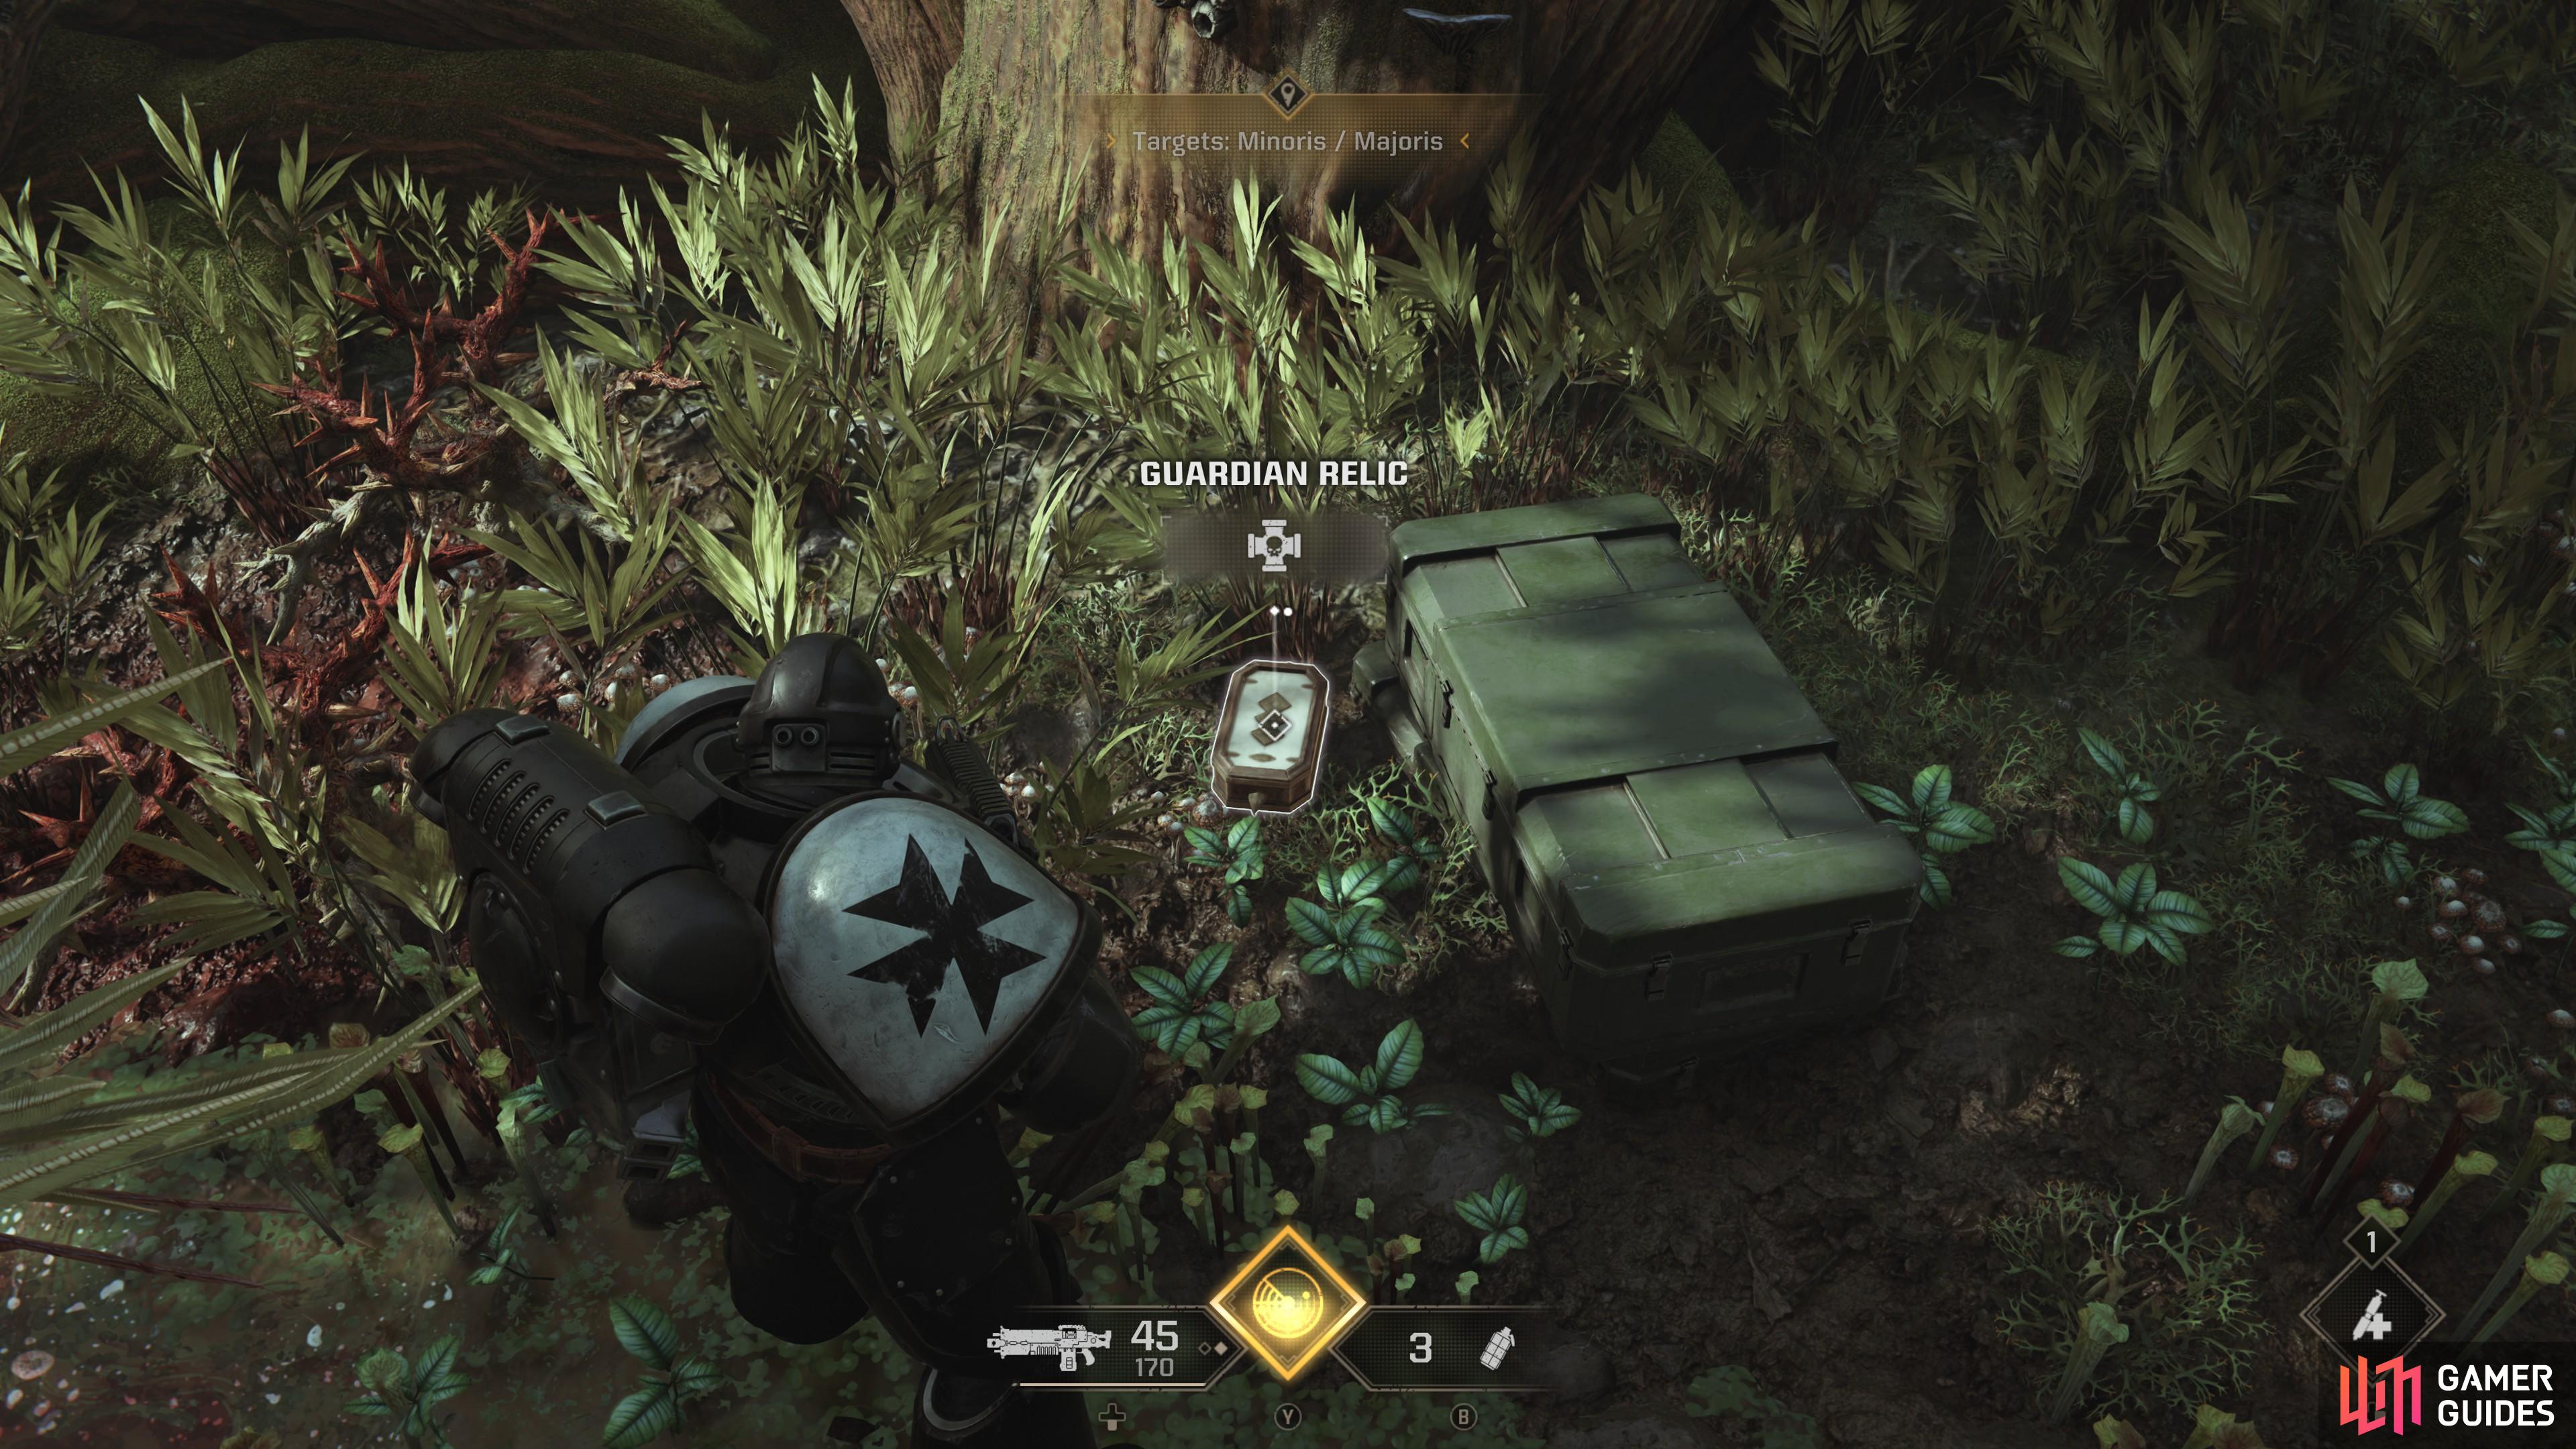
Guardian Relics will allow you to revive yourself when incapacitated and will prevent you from accumulating a Mortal Wound.
Armoury Data
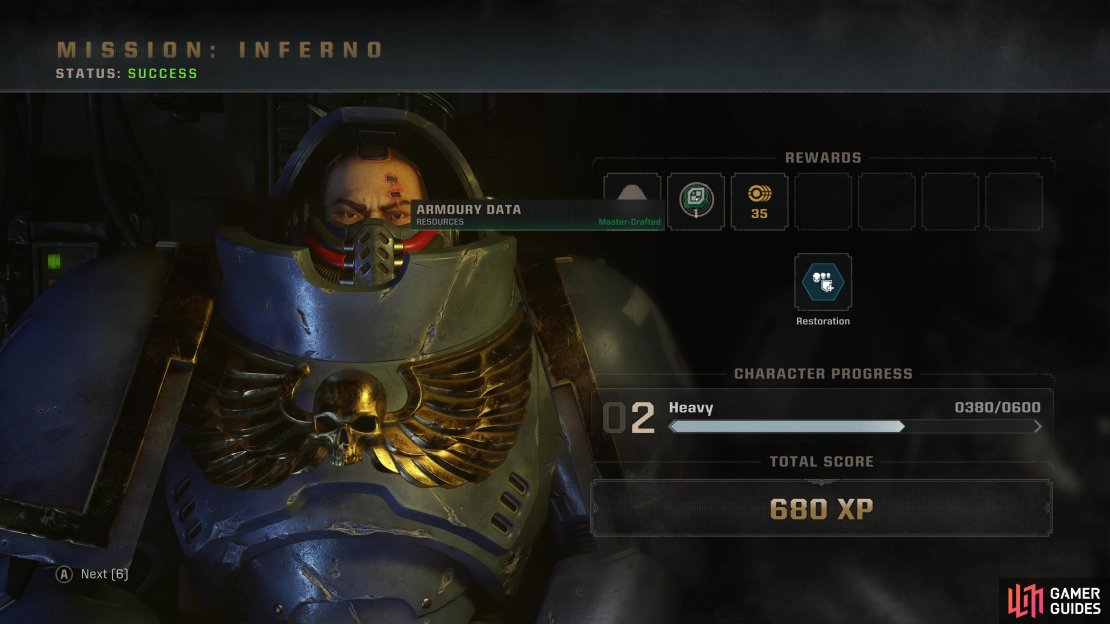
Exclusive to Operations mode, you can find these Servo-Skulls floating around in out-of-the-way locations. Interact with them and they’ll yield Armoury Data, which is used to unlock higher-tier weapon variants via the Armoury on the Battle Barge. Depending on the difficulty selected for the mission, you will either get Master-Crafted, Artificer or Relic quality Armoury Data, which is required to unlock weapon variants or obtain Mastery Points for weapons of the same quality. Simply put, you’ll need to find these to upgrade your gear in Operations mode.

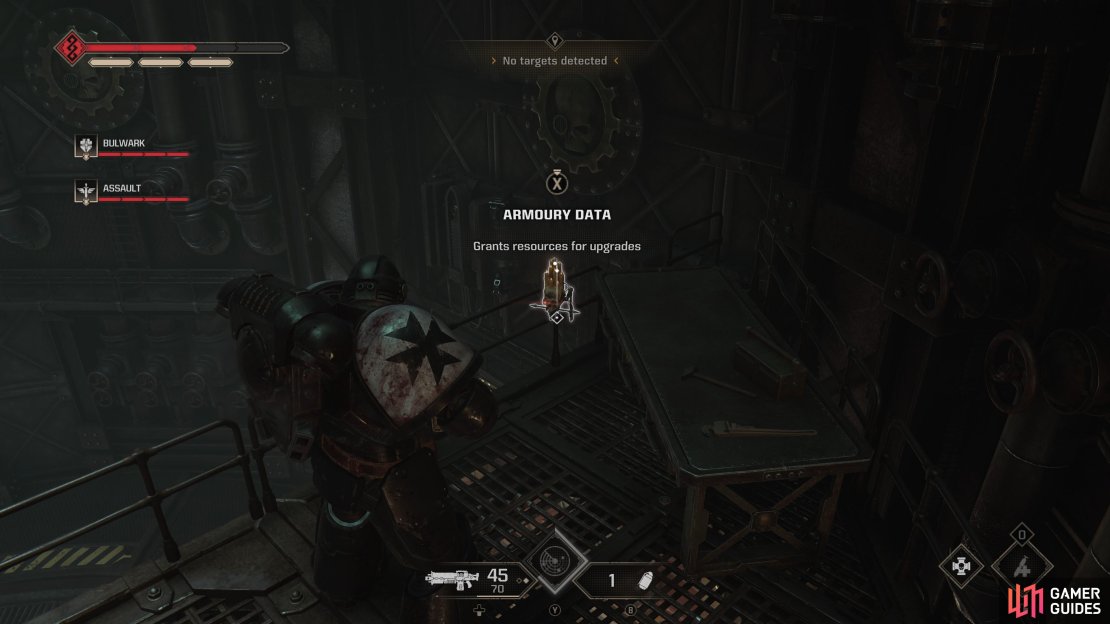
(1 of 3) Find Servo-Skulls containing Armoury Data during Operations Mode missions,
Dataslate
The game’s sole collectible, when you find a Dataslate you’ll get an audio recording providing some background story/lore. There’s absolutely no gameplay benefit to finding these, but if you find all of them you’ll unlock the Data Mining achievement. Dataslates are usually placed in out-of-the-way areas and can be spotted at a distance by the green glow they emit - be sure to search the perimeter of every area and you should find most of them. You can find Dataslates in both Campaign mode and Operations mode, and you can check your progress via the Dataslate Repository menu aboard the Battle Barge.
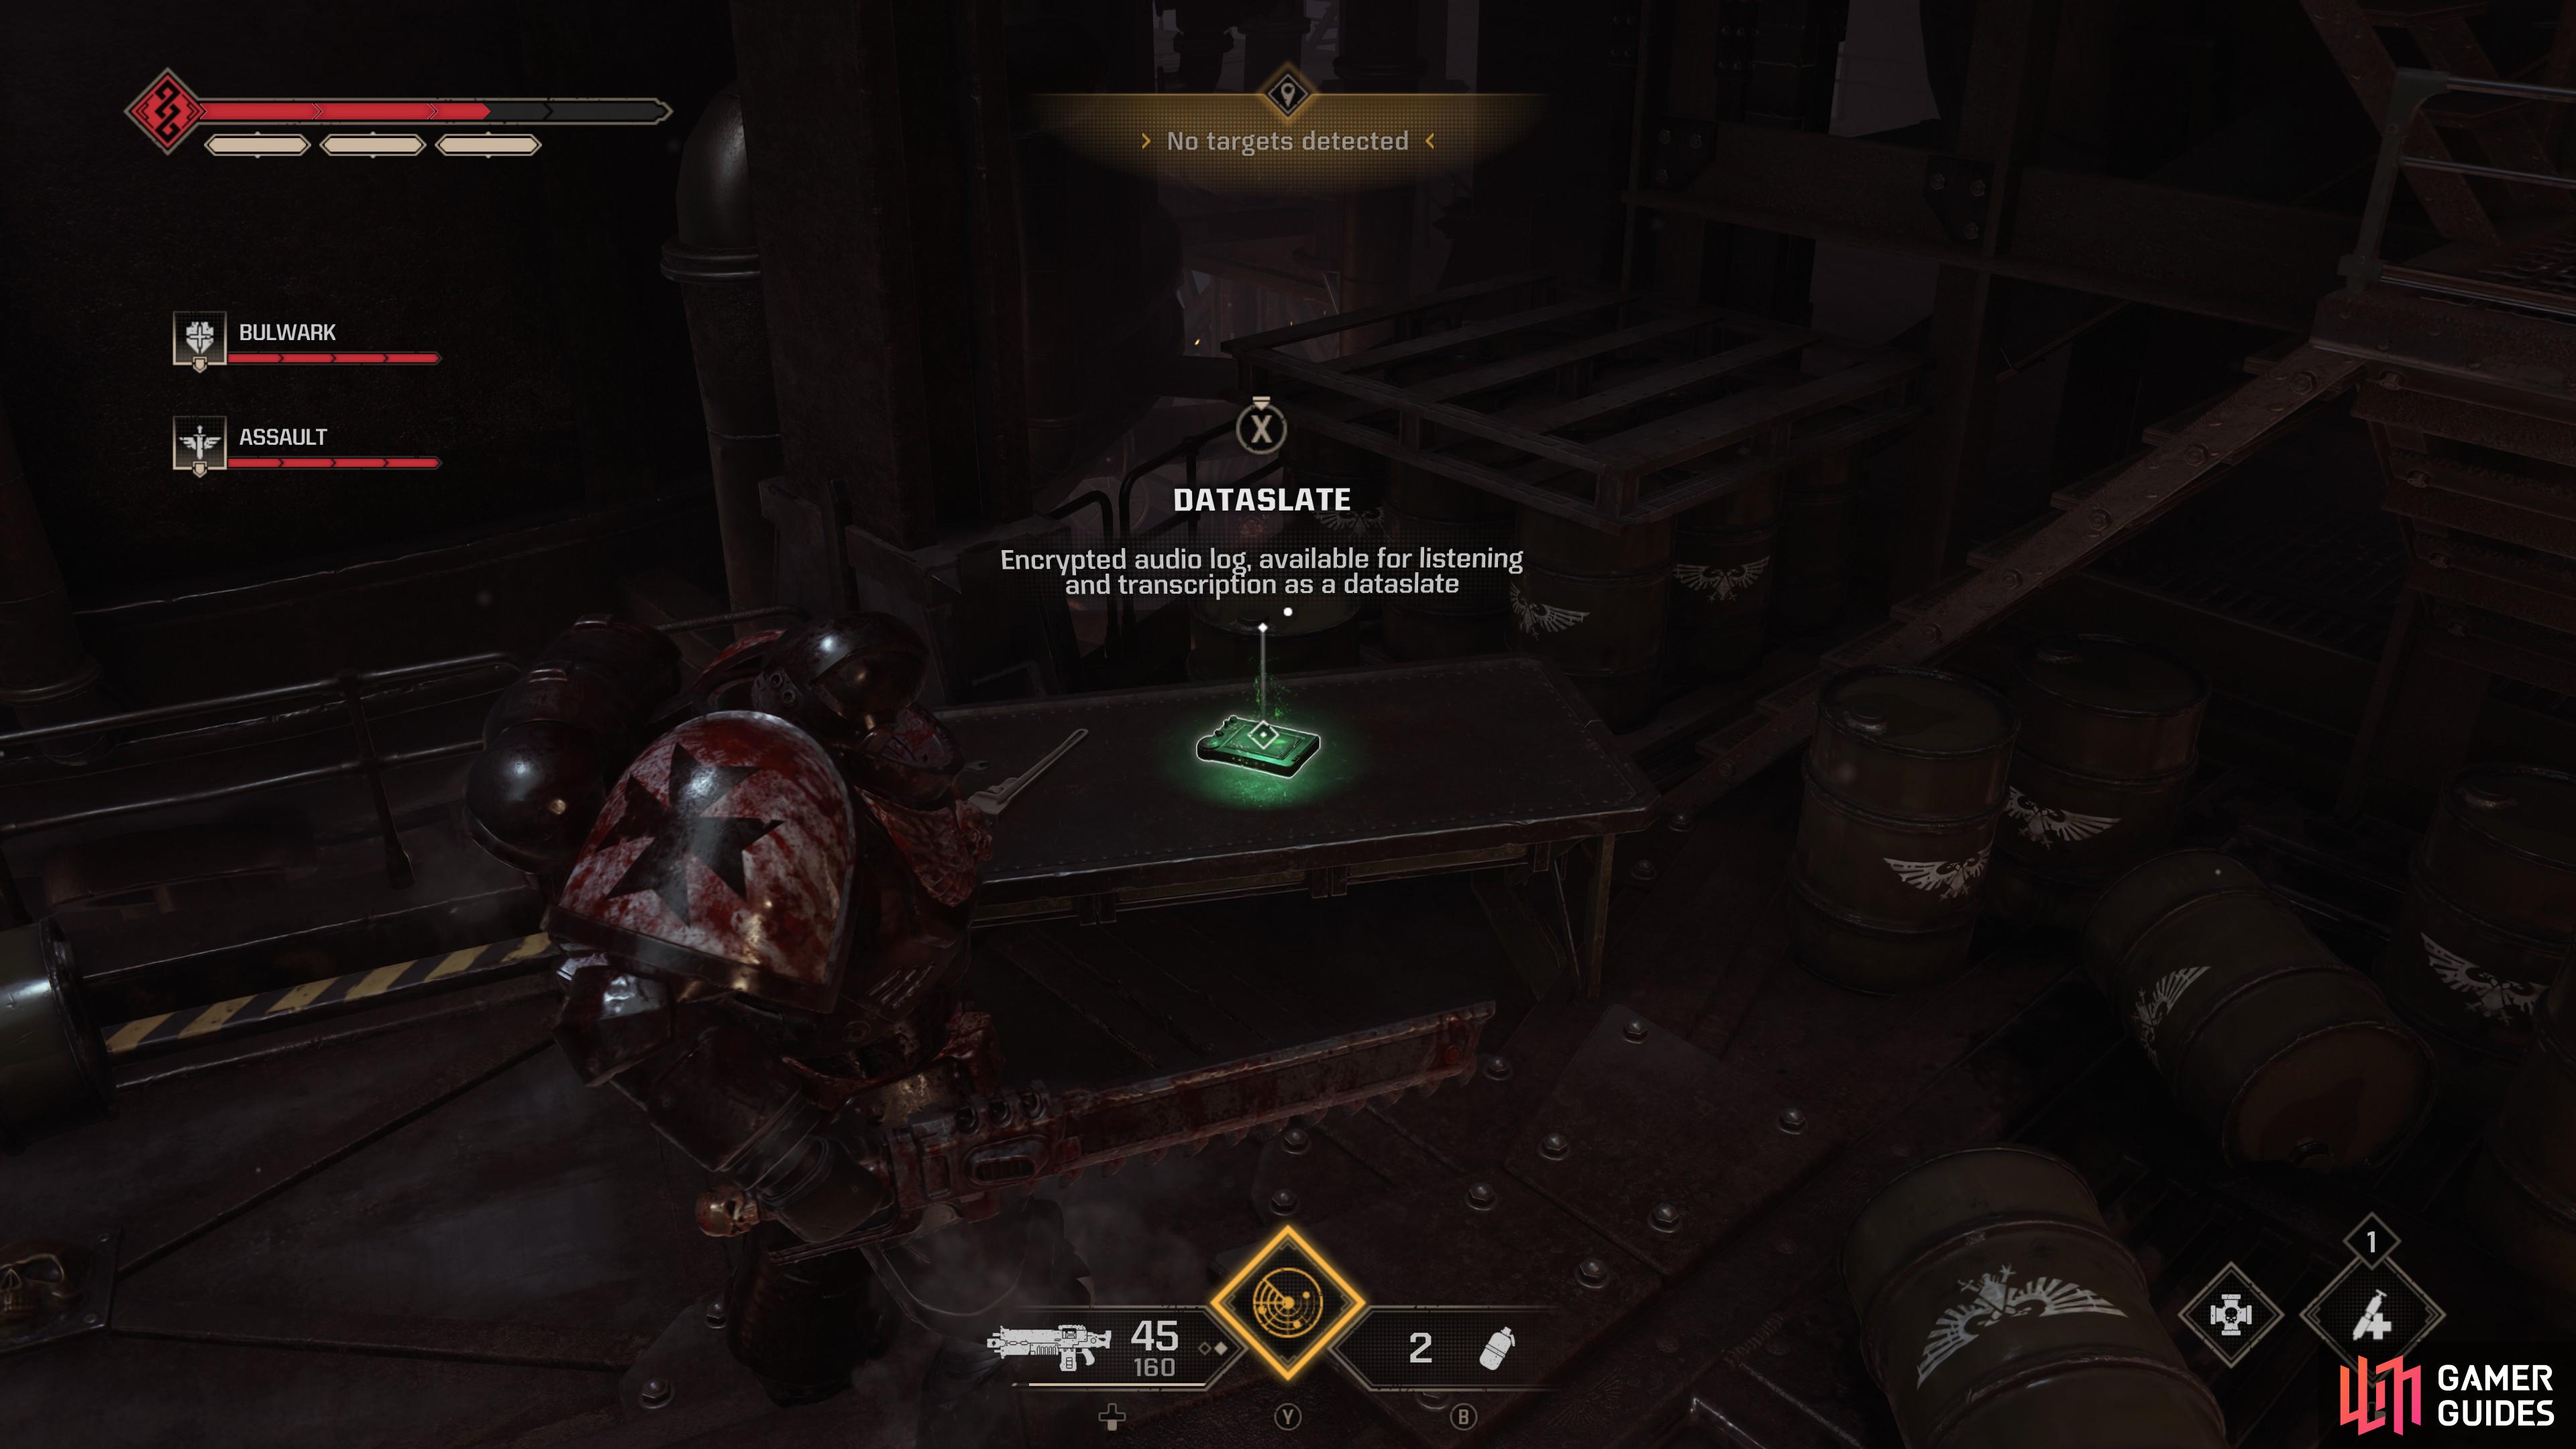
Dataslates are collectibles found in both Campaign Mode and Operations Mode.
No Comments