
Despite what the party says, you don’t need to do anything with Akash, so it’s finally time to head to the Last Lands. It’s fairly easy to spot, as it’s within the Fridging Mountain Range area and it’s only accessible by airship (it’s basically a floating island). Land anywhere in front of the castle structure and go inside, where there will be a short scene before you can move freely.
Last Lands
| Enemies |
|---|
| **Digi Deermon*** , Dinotaurus, Hellviper, Heroniel, Lesser Deermon, Lupara, Mountain Shroomback, **Stoniel*** |
*Digi Deermon and Stoniel are Spritnite-Eaten monsters
As soon as you enter, go right at the first chance you get and then south to spot a chest ( Elixir x5 ). You’ll want to be careful in this first area, as there are Spritnite-Eaten monsters in the northeast and northwest corners (they are similar to the other monsters here). Now, go up the center and before you pass through the arch into another area, go west and check in between the houses to your south (before reaching the northwest corner) to spot a locked chest, containing the Masayume .
Pass through to the north to spot a dinosaur-looking enemy sitting in the middle of the big area. This is the Dinotaurus and although it’s not too beefy, it can be particularly annoying. The reason why is because it will always cast Meteo right before it dies, causing some decent damage to your entire party, so make sure everyone’s health is full before you kill it.
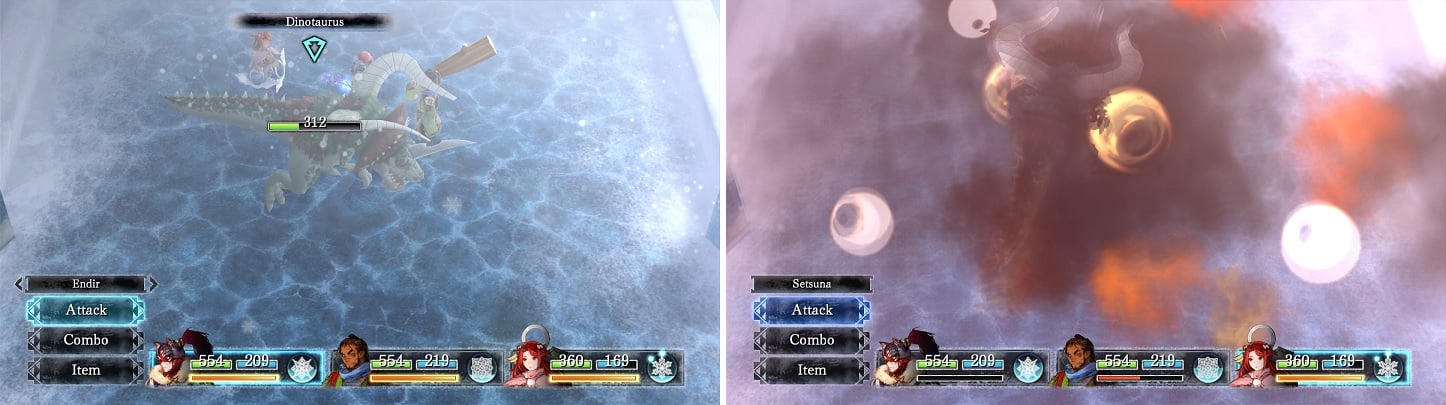
Watch when you defeat the Dinotaurus, as it will use Meteo as a last resort.
Enter the double doors to the north to go into the castle, where there will be some stairs ahead of you. Ignore them for now and go down the hallway to the right to find a chest at the end of it ( Soul Breaker Talisman ). Climb the stairs and pass through the next set of doors to go up some more stairs. After moving to the north, you will be able to go either west or east, so go east for now to find another chest ( Blood Rod ).
Return to the previous room and go west this time, following the path ahead of you until you come to another set of stairs leading up. Ignore it real quick and enter the room to the north of the stairs for another chest, containing another weapon for Kir ( Chronos Staff ). Climb the stairs and on this floor, just head west until you come to a room with a chest ( Elemental Soul Talisman ) and two Hellvipers. Return to the room prior to this and head north to find another split.
If you go west, you’ll see some stairs, so take them and move to the south to find a room with a locked chest, which contains Endir’s Rainbow weapon . On the previous floor, take the eastern path back at the split and when you start going north, you will see a chest at the north end of that room ( Paries Spritnite ). Keep going on this path to reach some more stairs, so take them to the next floor. On this floor, follow the path to the east and it will eventually lead to another split.
Go south here to come to a room with a chest, containing the Nirvanan Blade for Nidr. Back at the split, going west will bring you to a save point and more stairs. Heal up and save, then take the stairs to reach the next boss, who is a familiar face.
BOSS - Reaper (4)
This is your final encounter with the Reaper and he has certainly upgraded himself to being a tough challenge, unless your characters are powered up. He has a few new moves in his arsenal, one of which can absolutely devastate characters. One of his new moves is called Black Hole and it doesn’t seem to be much different than Demi, as it still moves your characters closer together and it deals an okay amount of damage.
Cursed Slash still has a chance to inflict Sap and Helix Slash/Dark Mist aren’t really much of a threat anymore. The biggest problem will come from Dark Matter, if he can manage to get it off on you. It only hits one character, but it’s highly likely that the character hit will be downed from the attack, as it deals massive damage. Overall, though, if your characters can quickly take him down, there will be nothing to worry about.
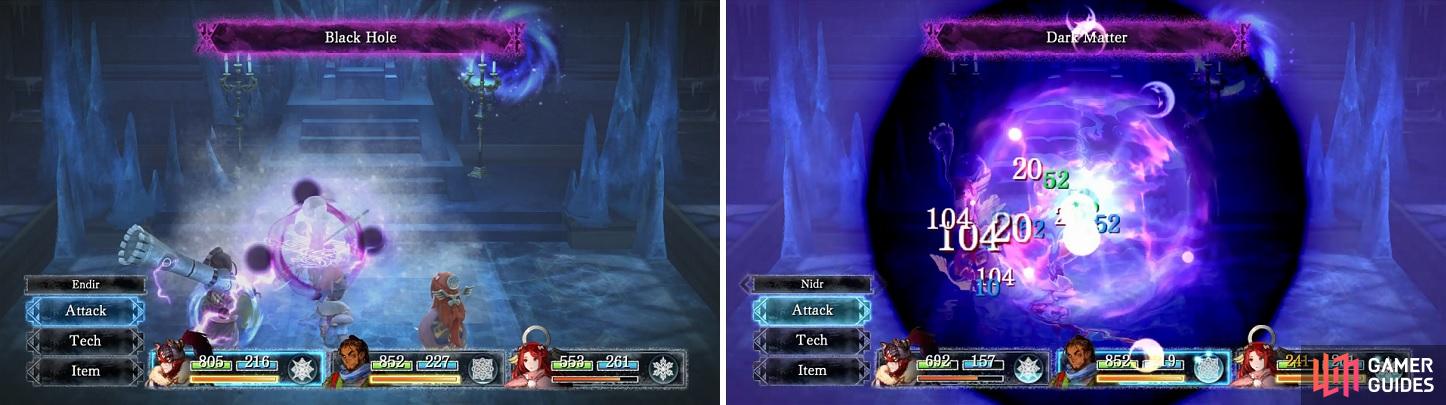
Black Hole (left) is similar to Demi. Dark Matter (right) is a very powerful single-target skill.
The Reaper is finally done, or so it seems, as he transforms into another form, so get ready for another boss fight!
BOSS - Dysphormic Monster
This is certainly a step up in difficulty from the previous boss, as you are now fighting against a dragon. You don’t get healed up from the last fight, so the beginning could be rough as you try to recover, which should be your first priority if Reaper was rough to you. This boss is certainly a bit meatier, in terms of defense, so unless you’re overpowered, then you’ll need to be extra careful in the fight.
The Dysphormic Monster has a fairly wide array of attacks in his disposal, the first of which you might see is Dragonical Tail. He’ll sweep his tail across the ground, hitting all of your characters for fairly big damage. He still has Demi available to use, so you know what to expect there. Dragonic Breath is similar to Dragonic Tail, only in that it will hit your entire party for about the same damage.
There’s nothing special that this boss can do, in terms of ailments or mechanics, so it’s mostly a matter of keeping your characters above 250 or so HP at all times. This will cover your characters in case the boss gets a critical on his tail move. Once the boss reaches 50% HP or so, there will be a hidden boost that happens, with two of his moves being upgraded. Demi will become Demi II and Dragonic Breath will change into Dragonic Rage. Nothing is different about them, other than being slightly more powerful. Make sure your characters have full health whenever you defeat him, as he will use Dragnarok as a last resort before perishing.
Characters like Setsuna are ideal in this battle, since she should have access to Cure II by now, allowing you to easily heal your party. Aeterna is another good choice, as Dream Shatterer can inflict some ailments. Likewise, Blowbeat with Endir and Nidr will also work in dealing out status ailments. Also, note that there’s no worries about having to finish off the boss via any other means, since he only drops a normal item.

Setsuna’s Cure II (left) will heal pretty much every attack. Make sure you’re fully healed when you defeat the boss, as it will use Dragnarok (right).
Well, that’s it for Reaper, so when you’re ready, use the portal to come to another area.
Frozen Land
| Enemies |
|---|
| Arch Deermon, Cave Shroomback, Condoriel, Dinotaurus Giganteus, Dinotaurus Magnus, Greater Deermon, Peacockiel |
There’s really only one path you can follow at the beginning, so do just that until you can hit a switch on a pedestal to raise a bridge, like in previous ruins. Cross over the bridge and you will come to a minor split, so take the western branch to find a chest at the end ( Moonstone Talisman ). Continue north and then west again to spot one of those dinosaur enemies, only this one is a bit stronger. The same rule still applies, as it will cast Meteo upon death, so make sure your characters aren’t hurting before that happens.
After defeating it, there will be a locked chest waiting for you at the end of the northern path ( Megalixir x3 ). Now, keep going east and you will happen upon a portal to the next area. In this new area, follow the path to the east and head south when you can, where there will be another chest guarded by a dinosaur enemy ( Damascus x5 ). Continue to the north and before you go west, you’ll find a locked chest to your north ( Hero’s Heart Talisman ).
As you go west, hit the switch on the pedestal before moving to the south, as you will need the bridge to get further into the dungeon. However, that one bridge is only a single part of two needed, so follow the path south and around to eventually find another pedestal. You can now cross that newly formed bridge to the north, leading you to another portal to a new area. Keep going into this new area until you find another pedestal.
Hitting the switch here will make an L-shaped bridge turn. Push the switch three times to grab the chest on the left ( Crystal x3 ), then push the same switch three more times to be able to access the right pedestal. From here, you can hit that one three times to access the chest to the north ( Timeforger ). Proceed back to the little area just east of the eastern pedestal and go north to encounter a stronger dinosaur and another locked chest ( Orichalcum x3 ).
Follow the eastern path all the way to find another portal. You’ll encounter some new enemies here and the path is linear, so follow it until you see a pedestal. Hit this switch three times to get the chest to the north ( Happiness Shard Talisman ), then hit the same switch three more times to access the bottom portion. There’s another pedestal here, so move the platforms until it lines up with the bottom and middle sections.
To your right, you will see yet another pedestal, so push the switch to get the chest ( Megalixir ), then hit it two more to connect the middle and upper paths. Cross the bridge to spot another dinosaur, then three more together to your east, who are guarding a chest ( Frog Squash Spritnite ). If you continue to your west, there will be a few more dinosaurs and then a portal to another area. There will be a save point here, so heal up and walk to the big area to come upon the plot twist of the game’s story…as well as a boss!
BOSS - Time Judge
The Time Judge can be a difficult boss if you aren’t prepared, as she does have a few skills that can quickly bring down characters, plus the addition of skills like Slow, Haste and Stop that will make sure she gets in a lot more actions than you do. Time Judge has three physical attacks, two of which only hit a single character (Sweeping Slash and Stab). Her other physical attack, called Spinning Slash, will hit the entire party, although it seems like she doesn’t use this right away (possibly a threshold where she’ll start using it).
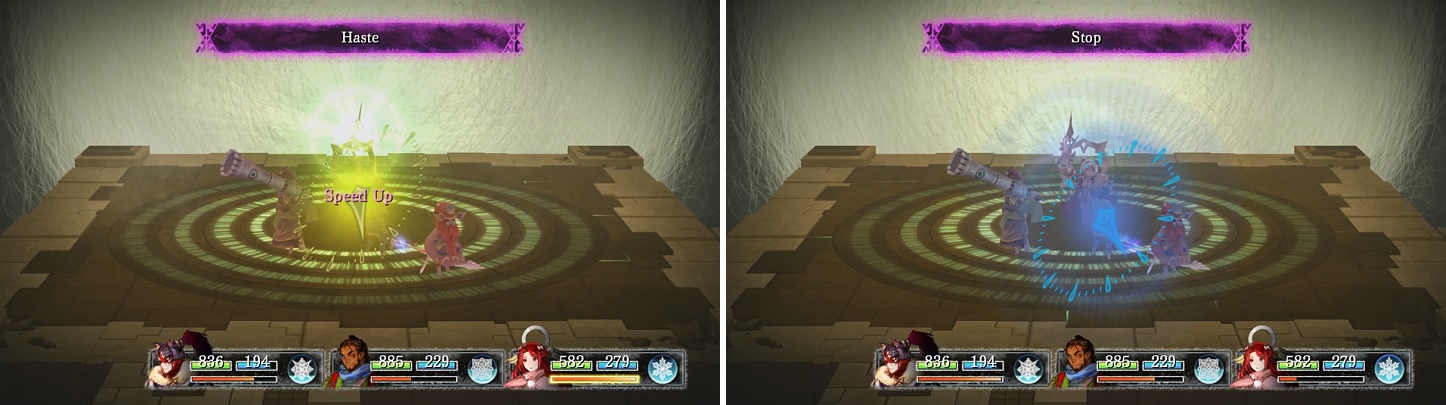
Time Judge using Haste (left) on herself and Slow/Stop (right) on your characters can make for a very bad time.
In addition to her physical attacks, Time Judge has a few magical ones that will do more damage than the physical ones. While Comet only hits a single character, it does so up to three times, with each hit being around 100 damage. Although you might go through the battle without seeing it, she also has access to Meteo, with it doing around 180-200 damage to the entire party. Once her health gets below a certain threshold, she will begin using Shooting Star, which is similar to Meteo in terms of damage.
As already mentioned in the first paragraph, Time Judge has Slow, Stop and Haste all in her repertoire and she isn’t afraid of using any of them. Haste on herself can be a huge problem, as she will just pump out attacks quite quickly. Combine this with Slow or Stop on any of your party members and depending on her attacks, she could wipe out your characters in an instant. A health supply of Panaceas will help in removing Slow and Stop and if you use Kir, Dispel will be beneficial in getting rid of Haste on Time Judge.
Setsuna is likely one of the more important characters to have in the battle, despite the Time Judge not being vulnerable to her light techs. However, Cure II and Inspire (use Momentum to make it last longer) will go a long way in helping to bring the boss’ health down. Combine Inspire with Endir’s Battlecry, and even attacks like Radiance will shave off a large amount of HP. Other characters with high HP, like Nidr or Julienne will also be a great help in the battle.
After the Time Judge has been shown your strength, she will bring back a certain someone and they will join your party. A bridge will appear that will lead you to the final boss, but you can also find a portal to the right. This portal will bring you back to the beginning of the Last Lands (with another portal bringing you back to this spot), where you are free to explore the world. It is at this point that the character sidequests become unlocked, with each one rewarding you with a powerful Spritnite. However, it might be a wiser choice to go after the final boss first, as some things unlock that will be beneficial in the sidequests.
No Comments