
Finding a Cure for Dragonrot
If, by now, you’ve encountered Dragonrot for the first time, you’ll wake up at the Dilapidated Temple. Speak to the Sculptor to discover the extent of his illness and then head outside to exhaust Emma of all her dialogue possibilities. Sit down at the nearby Idol and choose to rest, this refreshes the area and acts the same as traveling elsewhere and returning.
This time, you’ll find Emma in the Temple with the Sculptor and upon speaking with her, discover that she needs a blood sample from another inflicted with Dragonrot. Travel back to the Outskirts Wall - Stairway Idol in Ashina Outskirts and head back to where the old lady was ringing a bell. You’ll notice that she’s inflicted with the curse and will be able to obtain a Dragonrot Blood Sample from her.
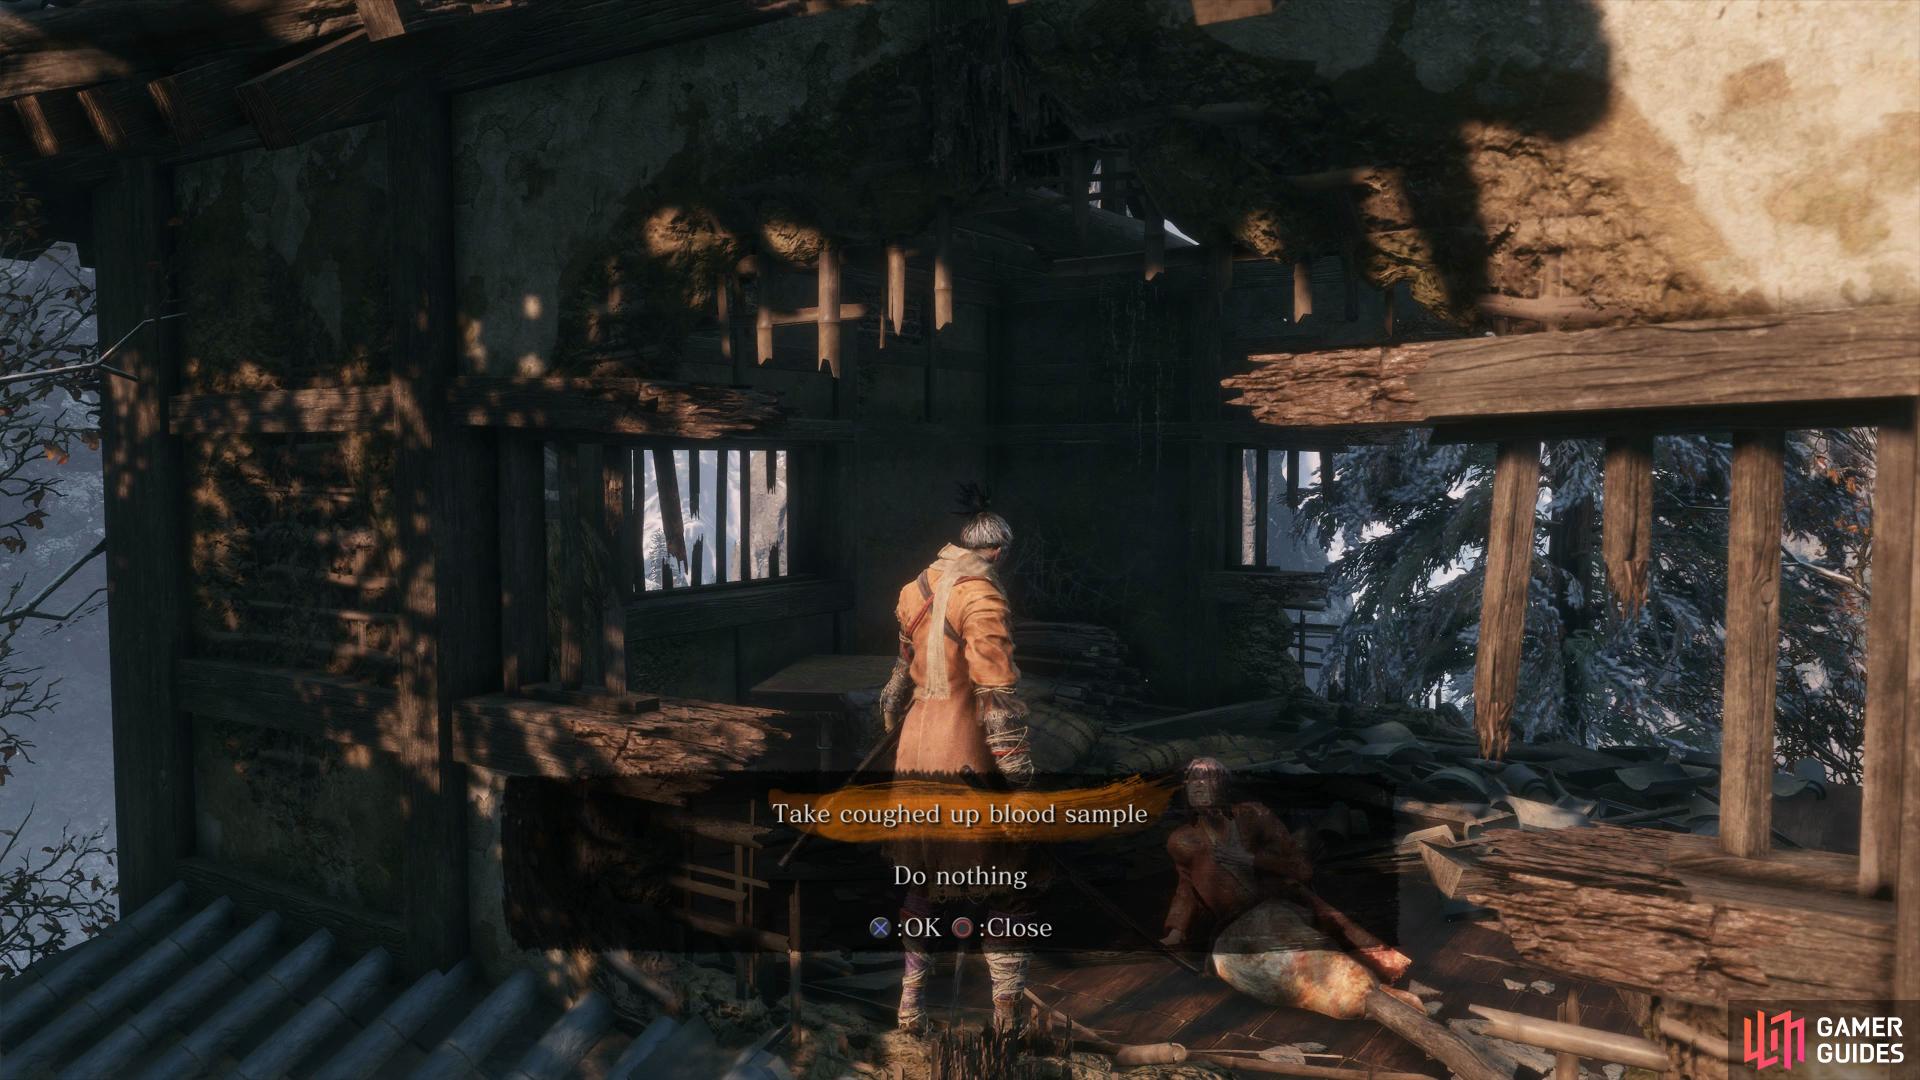
Head to the old woman ringing the bell to retrieve a Blood Sample.
Return to the Emma at the Dilapidated Temple and hand over your newly acquired sample, she’ll remark that she has enough to create a cure. Once again, rest at the nearby Idol and speak to Emma again to obtain a Dragon’s Blood Droplet and a Recovery Charm. The Dragon’s Blood Droplet can be used at an Idol to purge all of the Dragonrot in the World however note that there are a limited amount of them in the game so it would be wise to wait until you have at least four patients that are in need of it before using it. For now, go ahead and use the first one you got, the Sculptor is the last person you want inflicted with Dragonrot.
Speak to Emma once more to obtain Ashina Sake, an item to be handed over to the Sculptor. Oblige and hand it over to the Sculptor to gain more insight into both Emma and the Sculptor’s past. You’ll come across more Sake throughout your journey and you can hand these over to certain NPCs for more lore. With that excursion out of the way, head back to the Idol and travel back to the Outskirts Wall - Stairway Idol.
Outskirts Wall - Stairway
Drop down below and head over to Anayama once again to discover that he now has wares for sale.
| Item (Quantity) | Cost (Sen) |
|---|---|
| Pellet (2) | 50 |
| Ceramic Shard (8) | 20 |
| Fistful of Ash (6) | 30 |
| Light Coin Purse (5) | 110 |
| Phantom Kunai (1) | 3000 |
The high ticket item here is obviously the Phantom Kunai, this is an upgrade material for the Loaded Shuriken but it will be some time before you’ll be anywhere close to the upgrade so ignore this until a later time. The Light Coin Purses are of interest though, you’re about to face your real challenge and if you should die, you’ll lose half of your Sen. By paying a 10 Sen premimum per purse, you can technically bank your current Sen by converting it to these purses to use when you come across an item you wish to purchase. Go ahead and convert as much of your money now so that you’re prepared for the challenge ahead.
Anayama will also update his quest line at this point, mentioning that he wishes for you to discover what the Ashina Samurai are looking to purchase. You’ll need to Eavesdrop on a certain Samurai a bit later so keep this in the back of your head. Return to the Idol once again and check that you have both the Firecrackers and Flame Vent along with the Grappling Hook Attack skill from the Prosthetic Arts tree. If you have Oil in your inventory, assign it to a quick slot also for easy access.
Grapple to the nearby roof down the path and Eavesdrop on the Samurai to gain a hint about the beast up ahead and then take the two of them out. Head to the left of them after to find a Pellet and then make sure you have the Flame Vent equipped. Up ahead at the top of your stairs, your first real battle awaits.
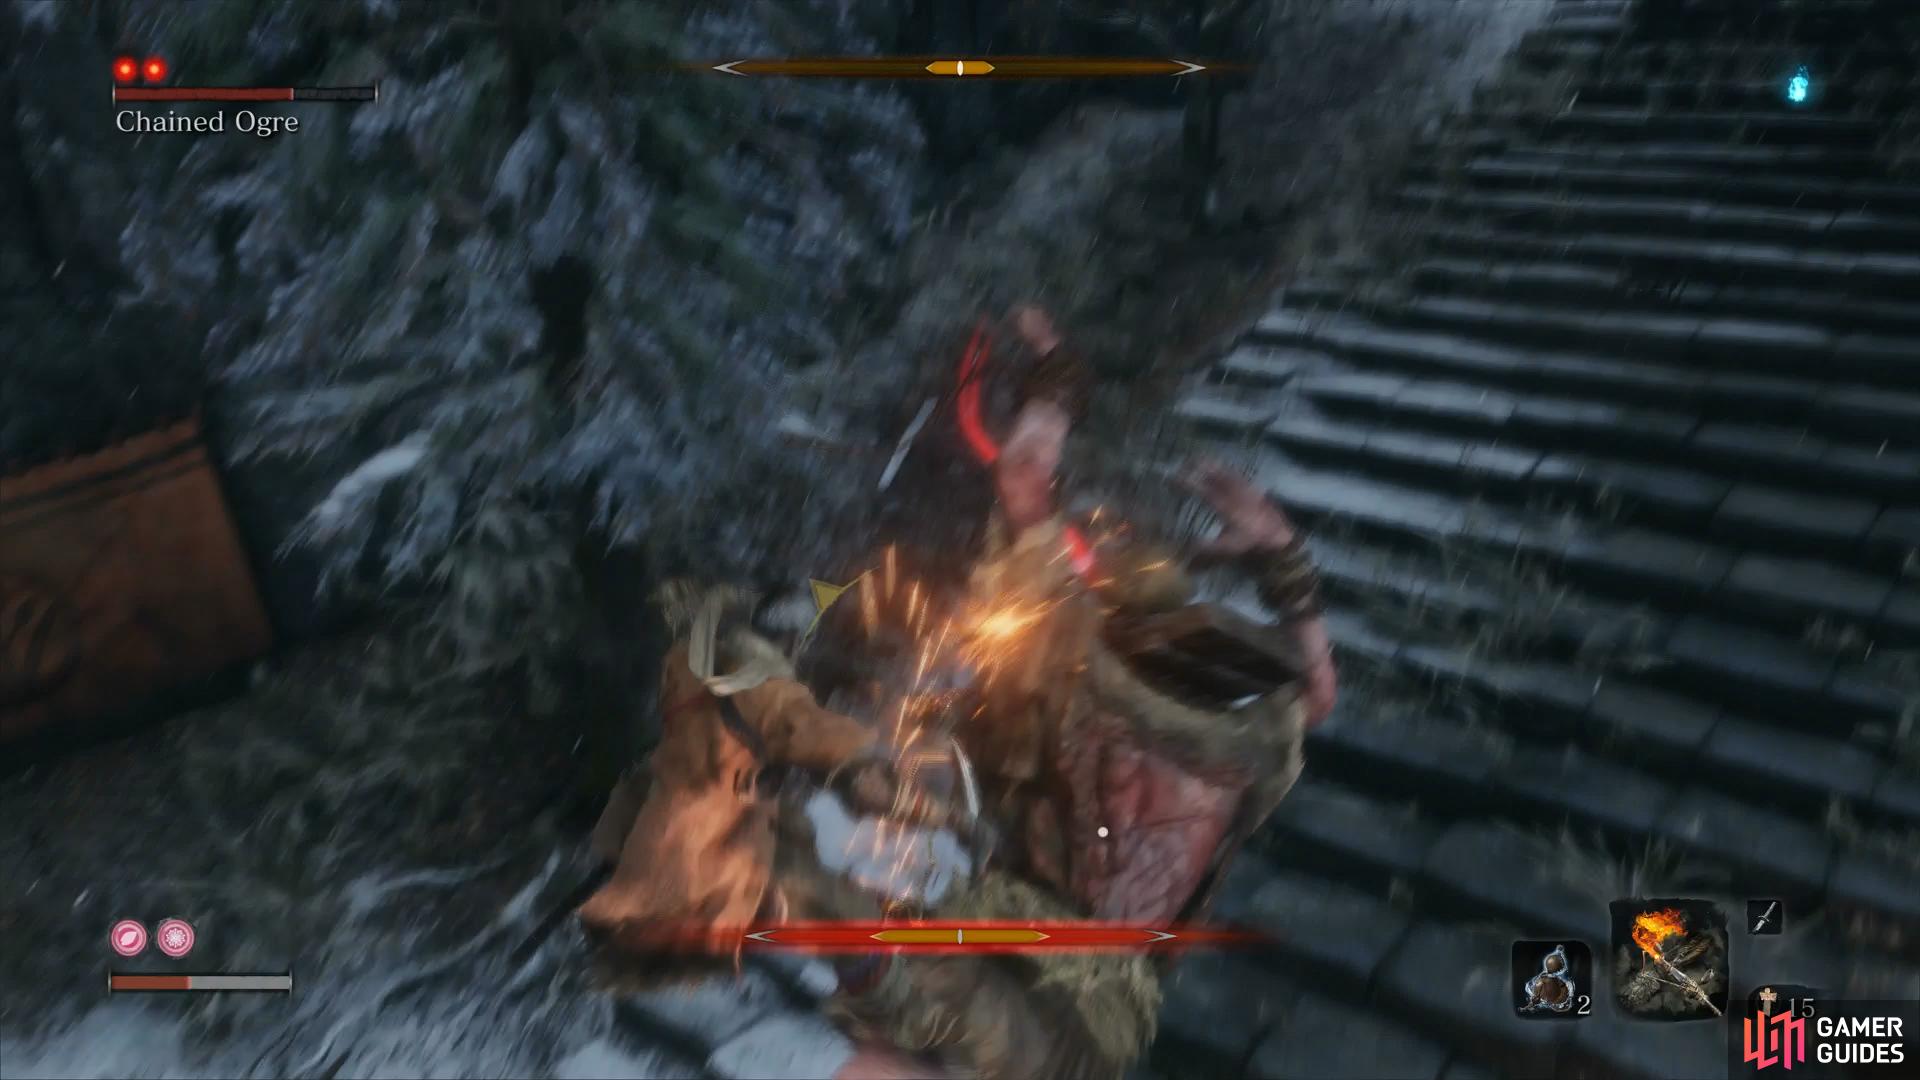
Mini-boss: Chained Ogre
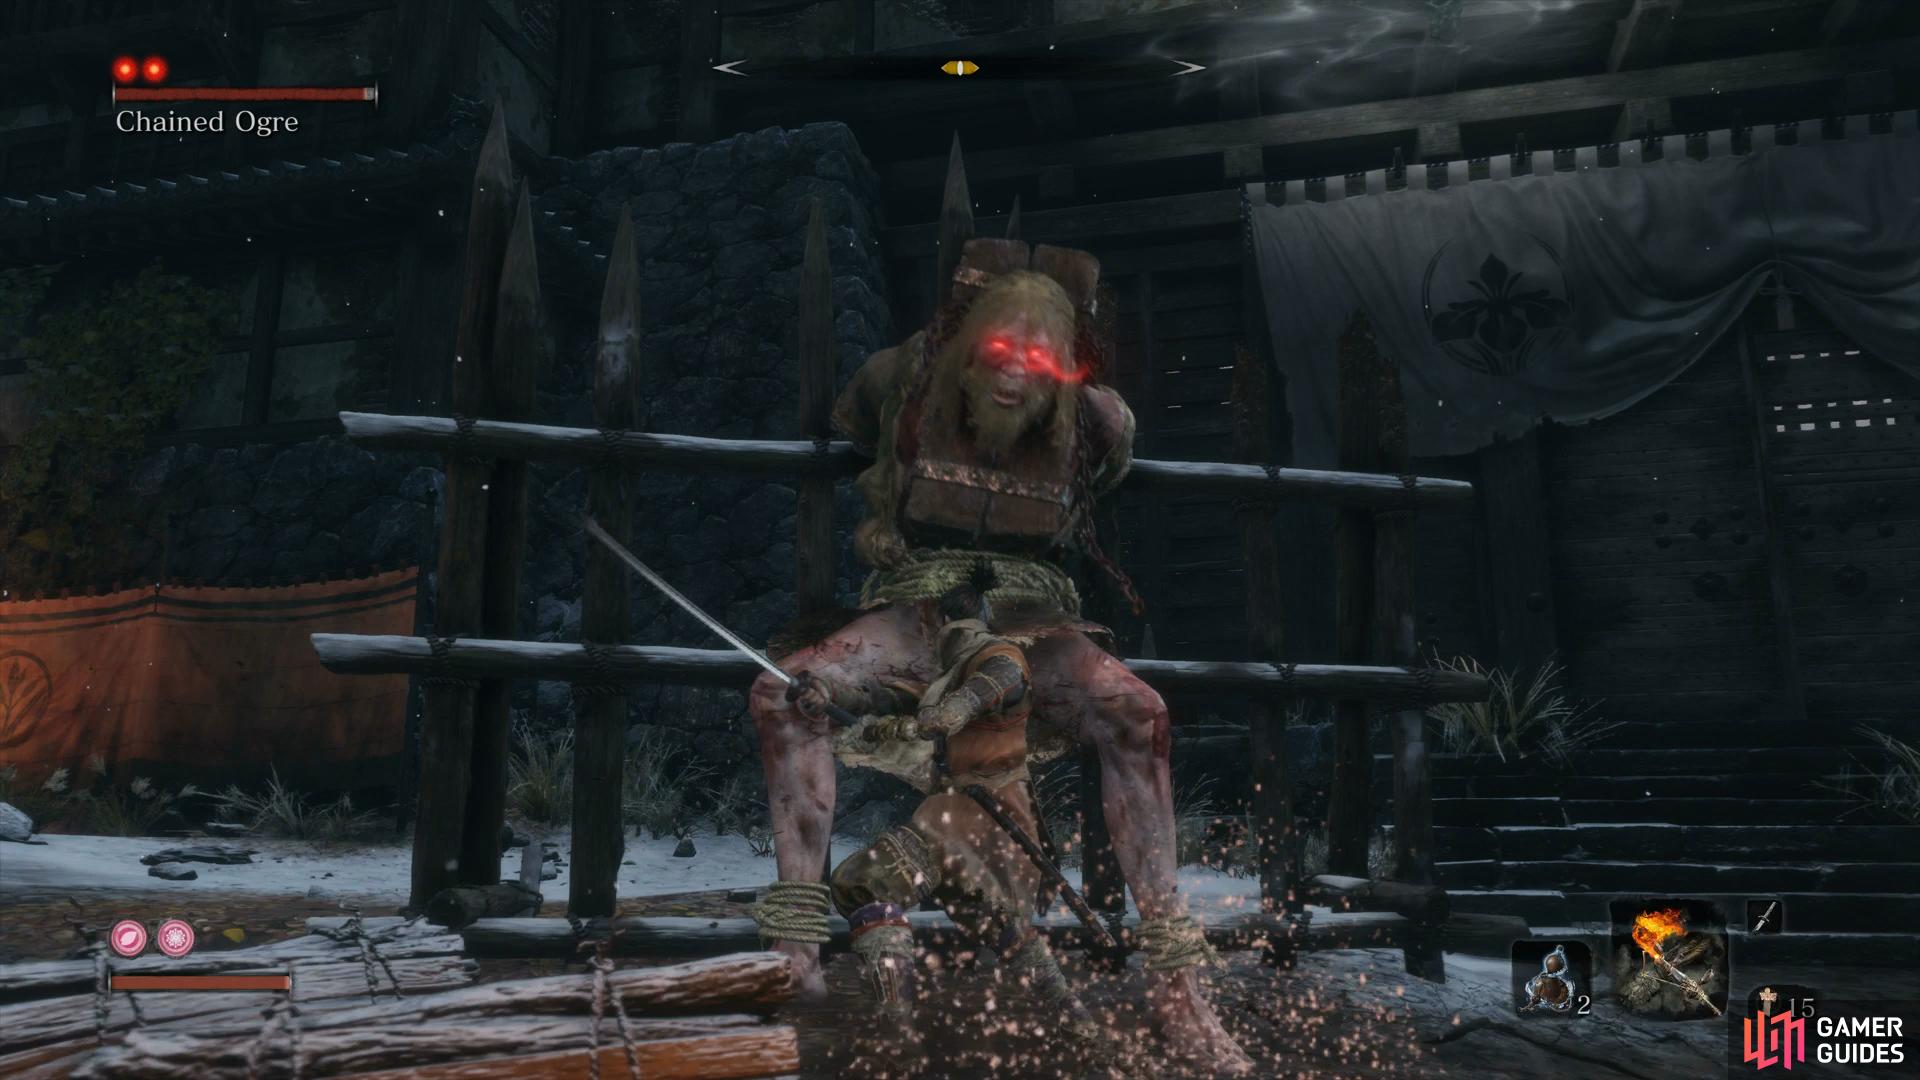
At the top of the stairs, an Ogre stands chained to a wooden fence and, as you approach it, will break free. Like all Mini-bosses, the Chained Ogre has two Circles for you to deplete and will be by far the toughest boss you’ve encountered. This is not helped by the fact that your arena that your fighting in is not very open although do note that you have some branches around you that you can grapple to if you want a breather or to use a Healing Gourd.
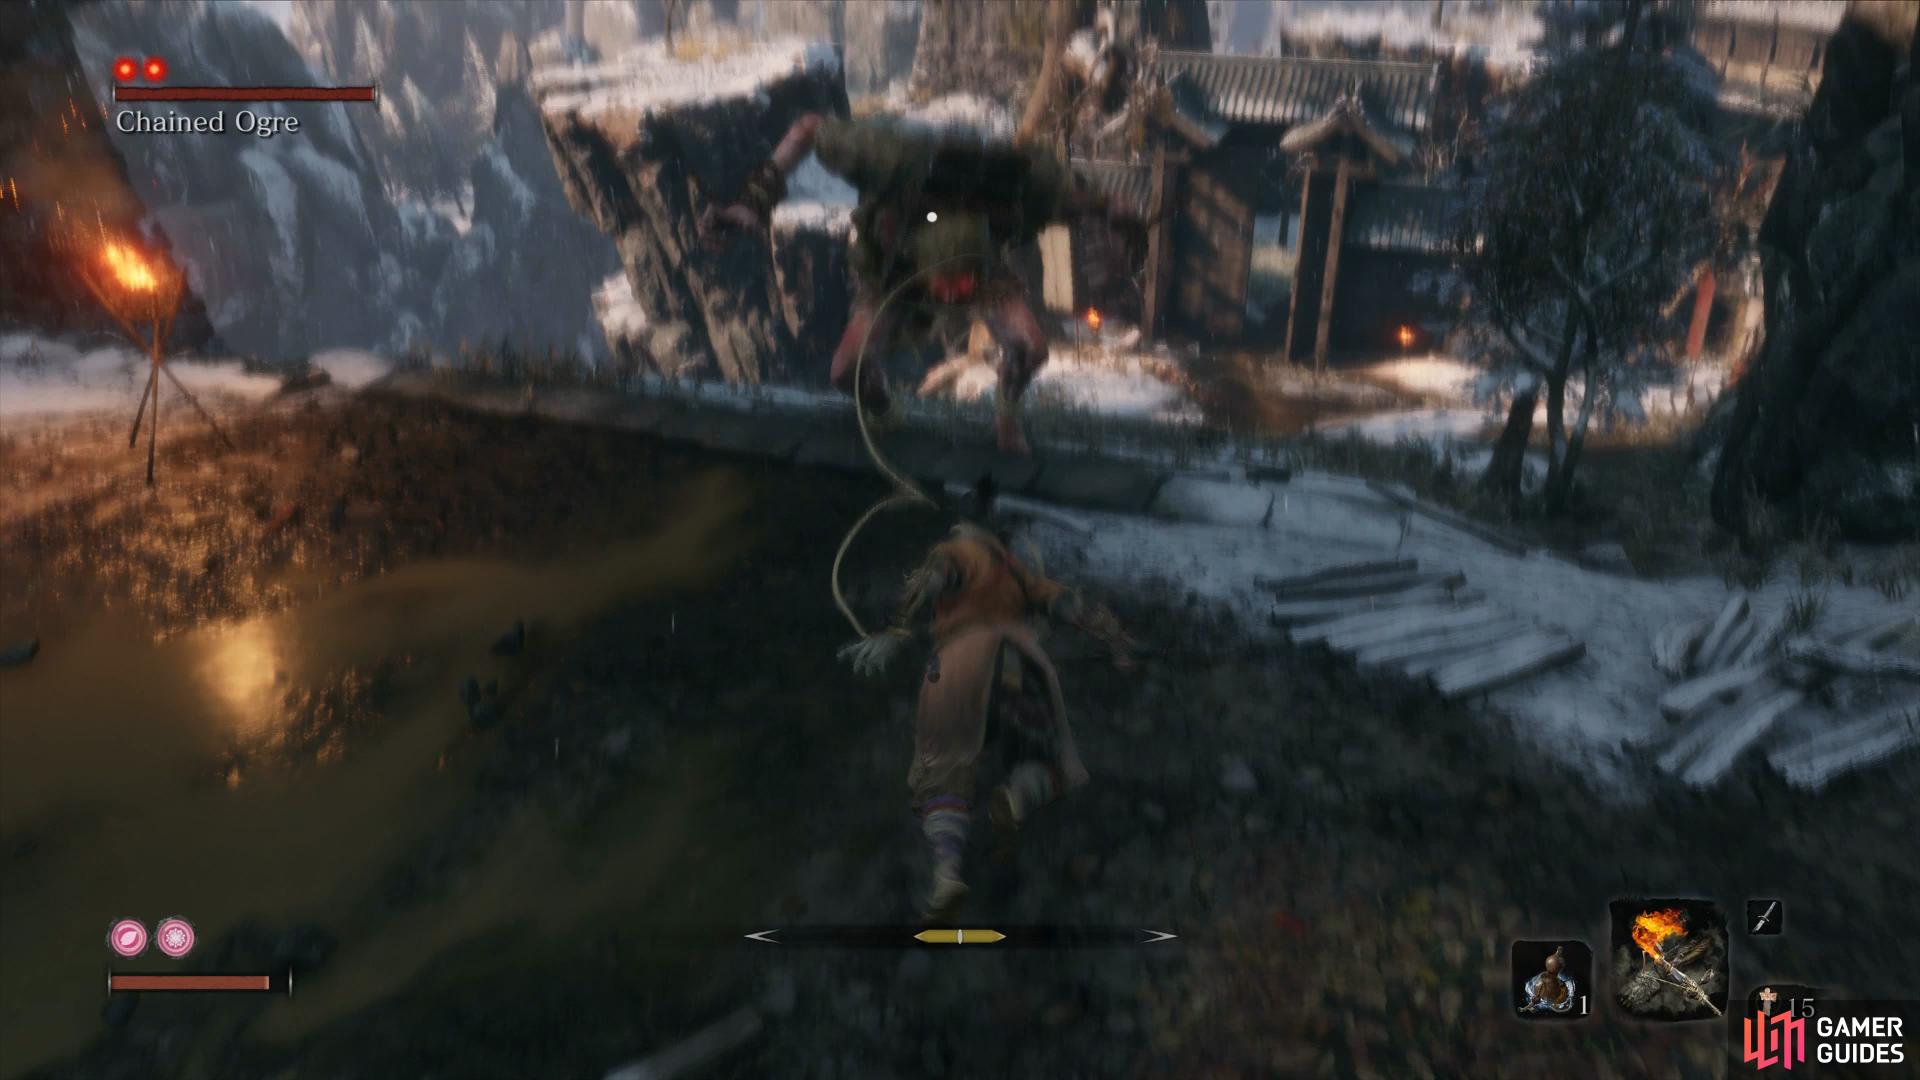
The Chained Ogre has several nasty attacks for you to deal with, even if he doesn’t possess a weapon of his own. The first, and most important, is his Grab Perilous Attack which, should you be caught by, will either leave you on low health or kill you outright. As such, avoid this attack at all costs, should you see the Symbol appear, jump backwards as far as possible to avoid the attack. This does however give you a grapple point around his neck following the attack, use the Grappling Hook Attack skill to launch over and score a few easy hits before retreating to safety.
On top of this, he has several other nasty attacks that can hit you from a great range, the most deadly being his Drop Kick. When he lurches forward, this is a clear sign he’s about to do a Drop Kick on you so jump or dodge to the side to avoid the attack and create an opening. Additionally, he can fall backwards to deal large damage to you along with a Kick Combo that can be avoided by simply moving out of the range of it.


(1 of 2) If you see the Ogre lurch forward like this
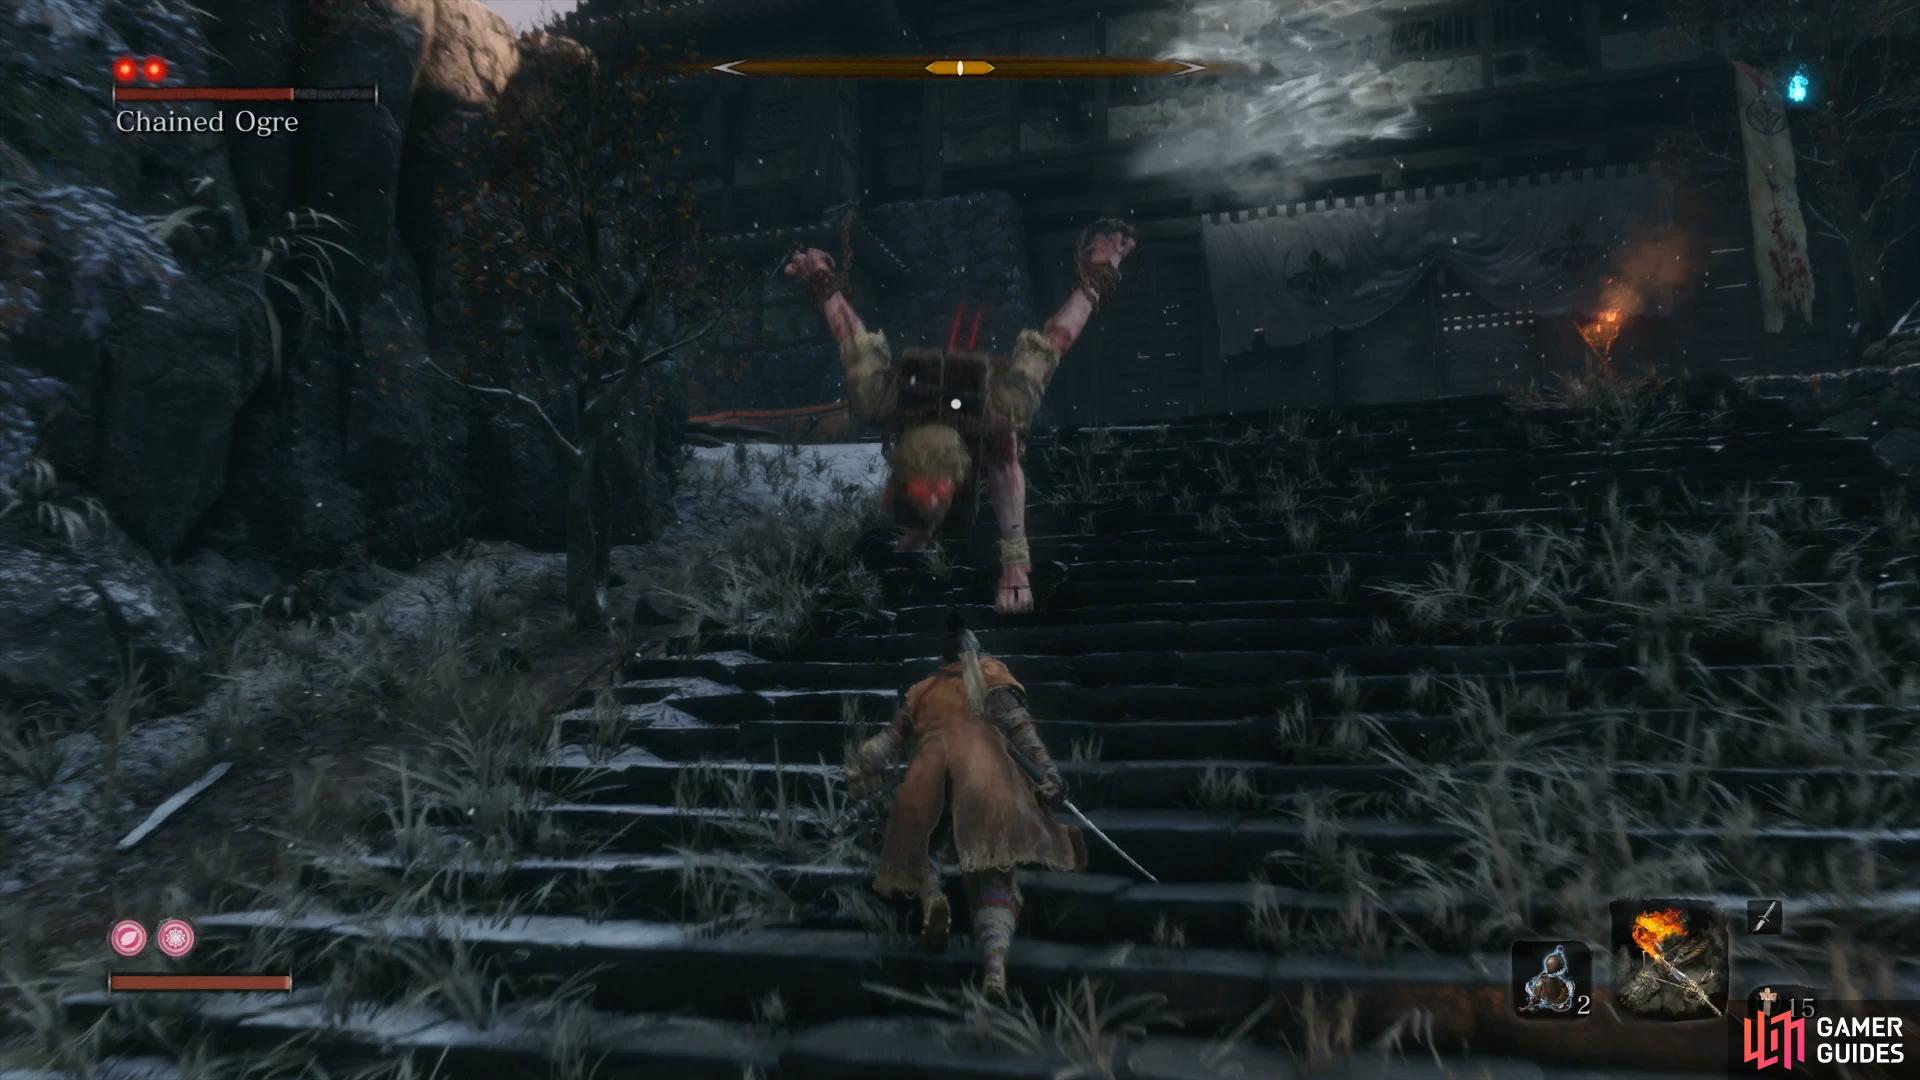
If you see the Ogre lurch forward like this (left), a Drop Kick will follow that is devastating if caught by. (right)
As for damaging the brute, you may recall the tip you heard earlier about enemies with Red Eyes. You can toss Oil at the Chained Ogre and follow this up with the Flame Vent to not only deal huge damage but to also prevent him from attacking for a short while, allowing you to score some free hits. Likewise, the Firecrackers are as useful as ever, allowing you to also stun the boss momentarily and allow for some follow up strikes. Regardless of the way you stun him, strike the Ogre no more than three times before retreating to safety to avoid his follow up grab.
By far the safest and easiest method of dealing with the Chained Ogre however is the grapple method. Bait the Ogre into going for a grab and retreat out of the range of it to be presented with the opportunity to grapple over to him. This will allow you to score at least two, maybe three strikes before retreating again. This method will take longer to put the beast out of it’s misery however it is the safest and if you combine the Flame Vent or Firecrackers into the battle, will speed things up. For victory here, you’ll obtain another Prayer Bead and the Shinobi Medicine Rank 1 skill which will increase how much you’re healed for when using recovery items.


(1 of 2) The grapple attack is the safest way to tackle the Ogre
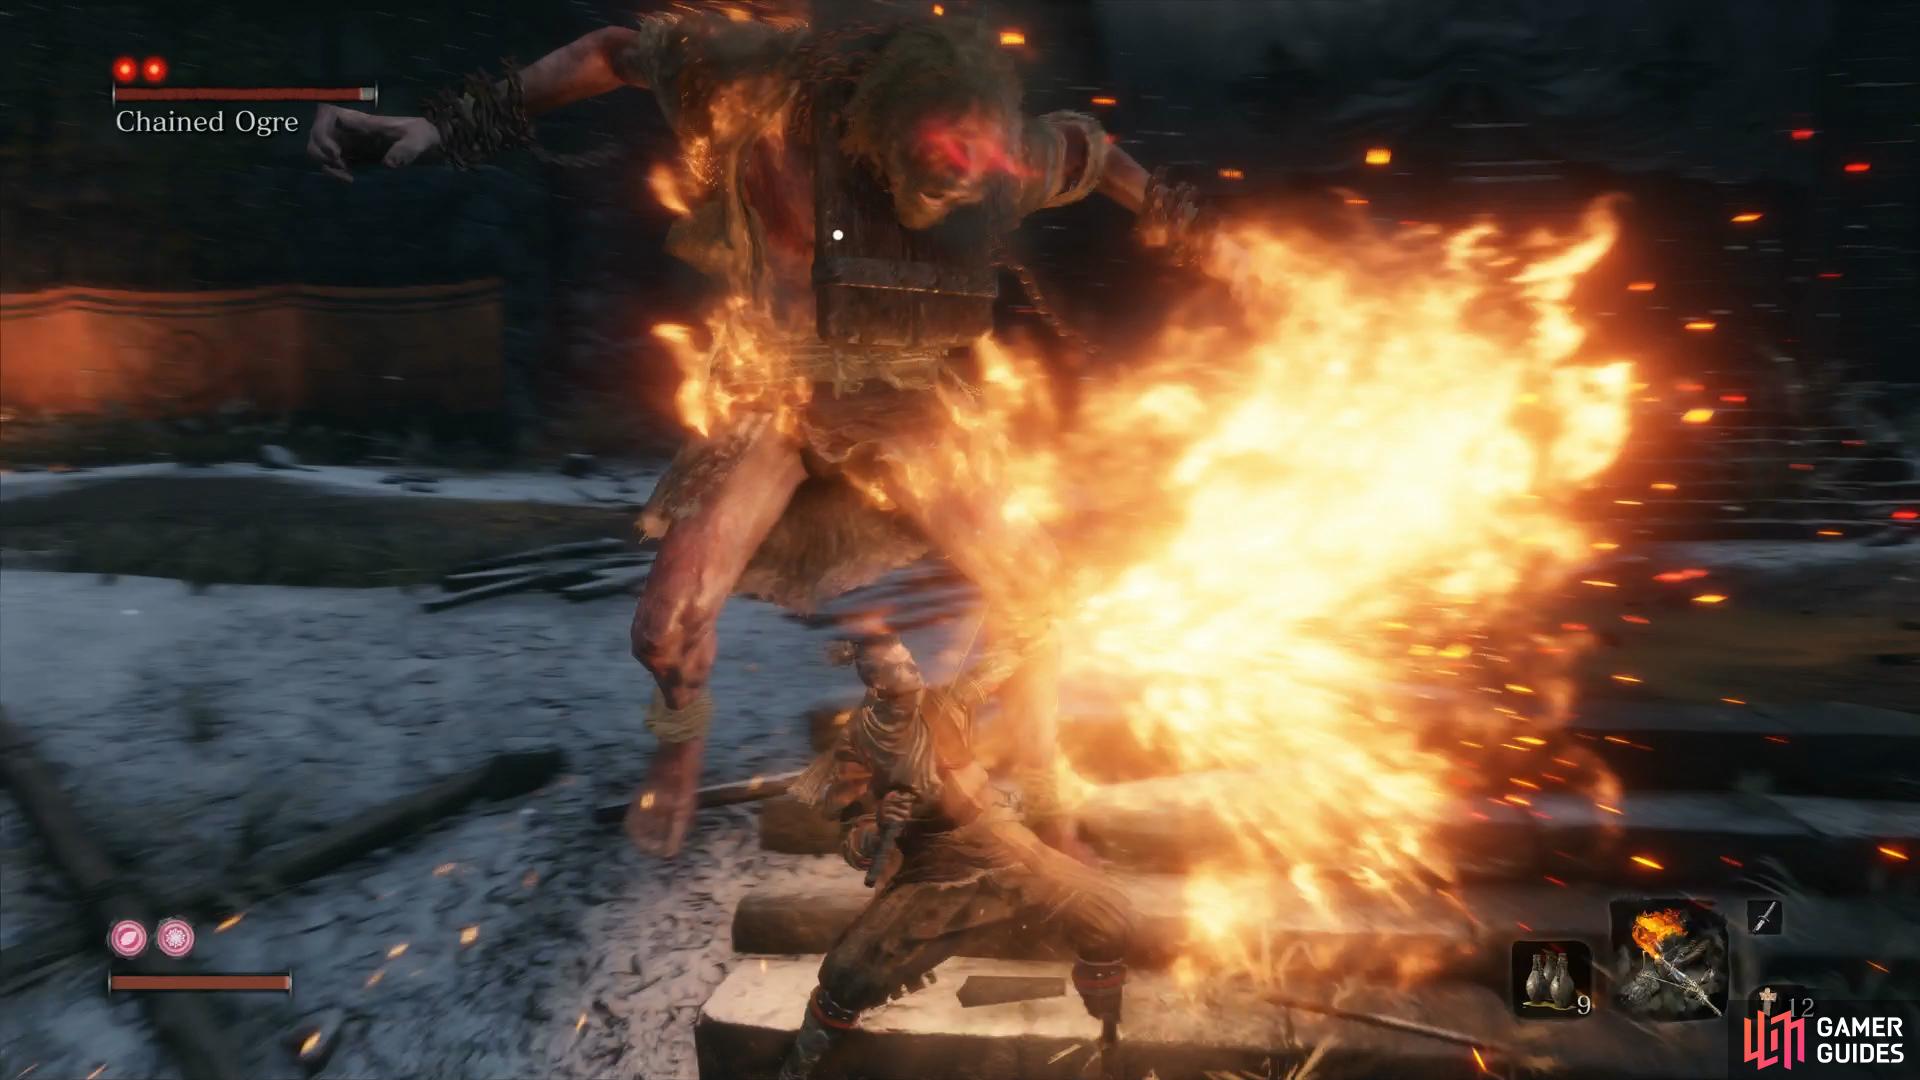
The grapple attack is the safest way to tackle the Ogre (left), while the Flame Vent will leave it stunned and allow for at least seven strikes. (right)
With the way forward now clear, make your way back to where the Chained Ogre was held and search up the hill to the left of this to find another Samurai and a Mibu Balloon of Wealth. Grapple up to the opening and snag the Nightjar Monocular, an item you can use to scope out areas. To the right of this is a locked door however to the left of that is your next Gourd Seed and some Ceramic Shards. Take this time to head back to the Idol and hand over the Gourd Seed to Emma to boost your Healing Gourds to three now.
Return to where you found the Gourd Seed and look out to the area in front of you, yet another Mini-boss awaits in the courtyard.
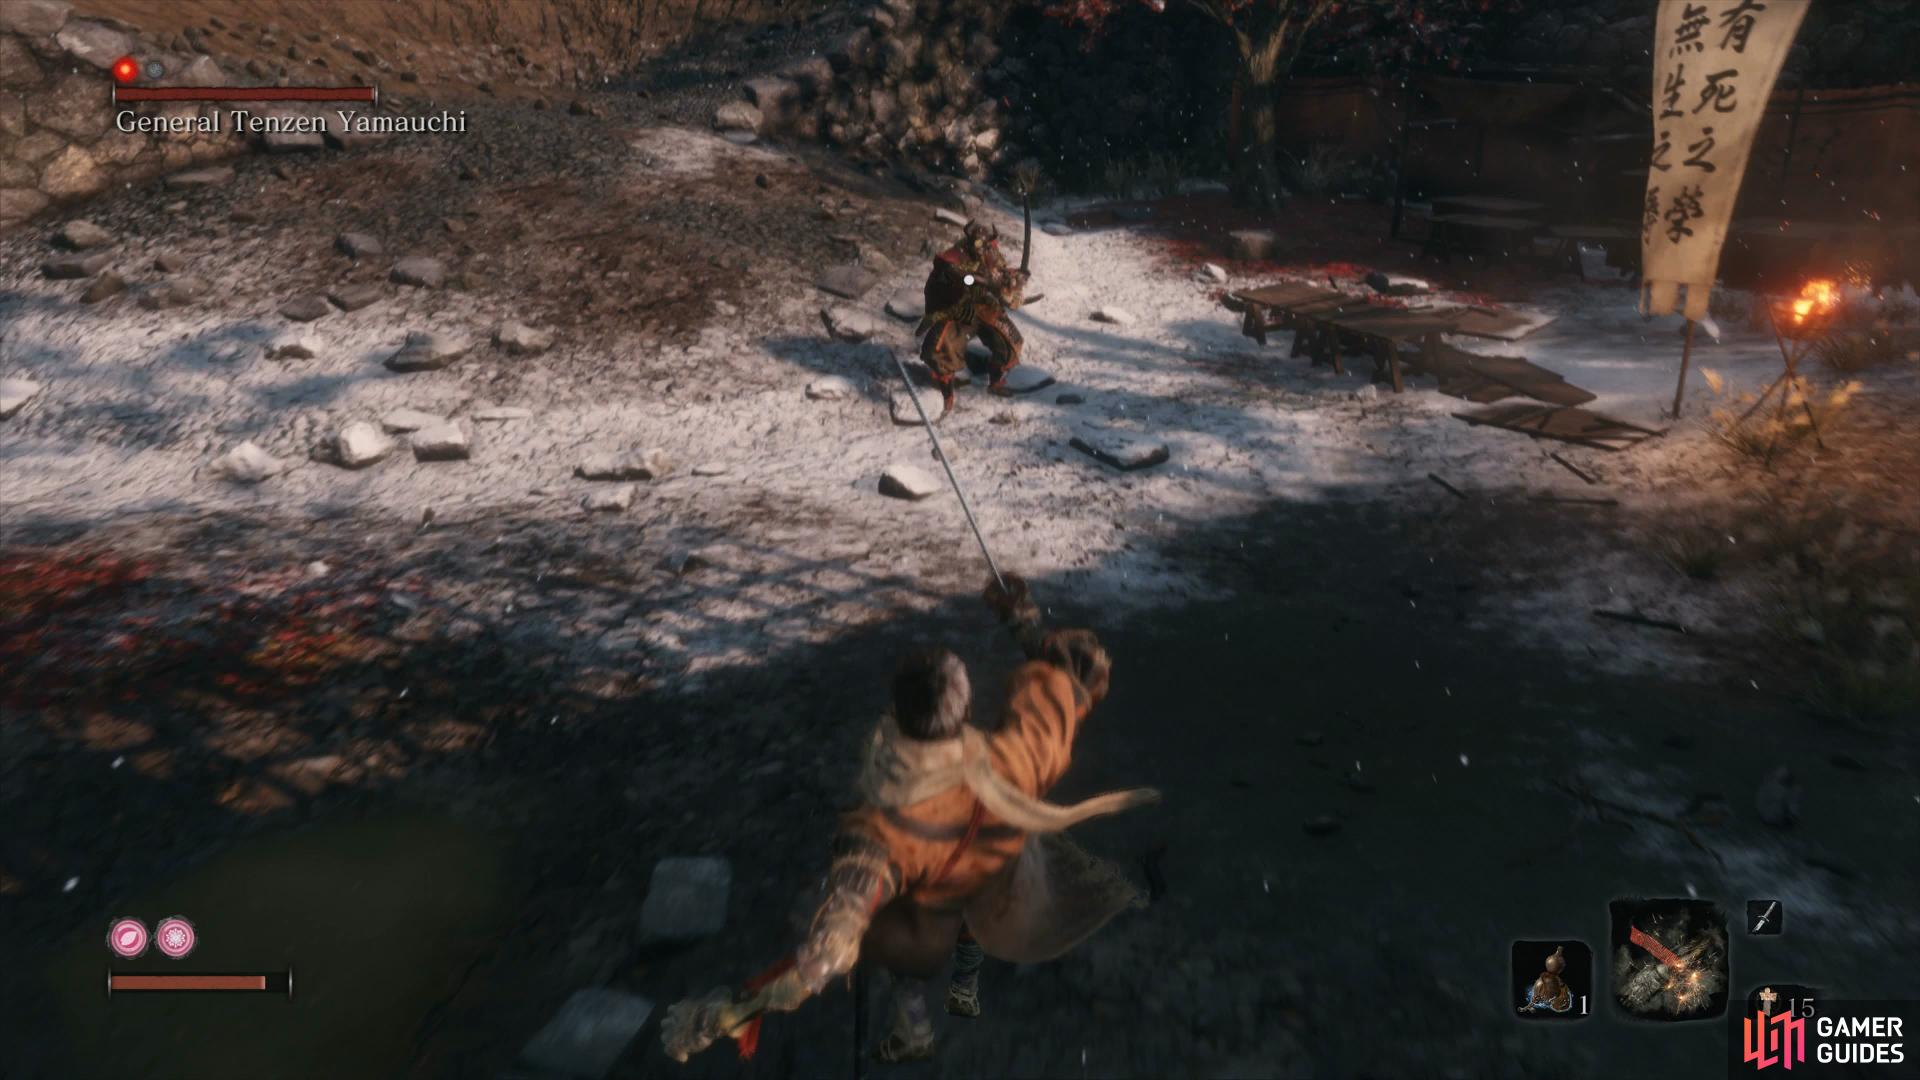
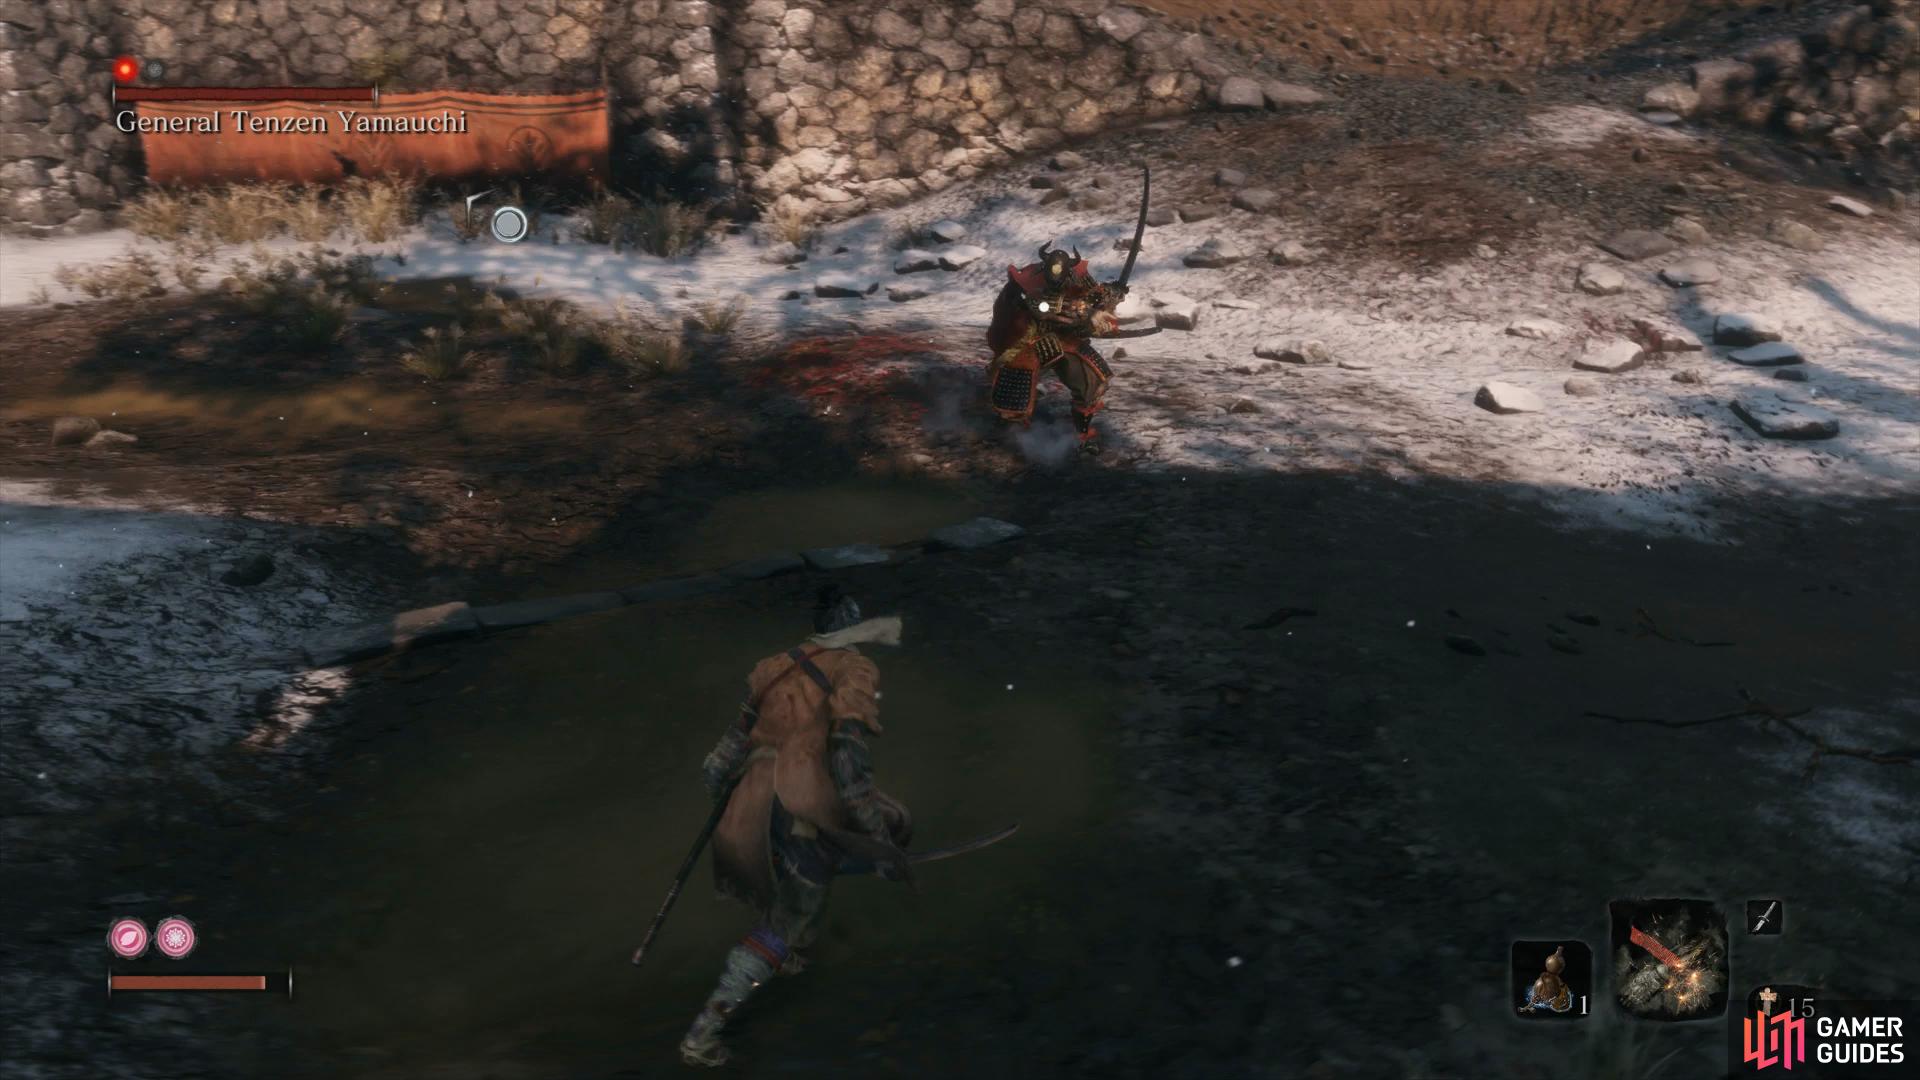
Mini-boss: General Tenzen Yamauchi
To begin with, Tenzen is surrounded by many guards in the area and should you challenge him without dealing with them first, will most certainly spell your doom. Begin your culling by heading out the left hole of the roof you’re in and making your way through the long grass to the left to dispatch the first Samurai when he’s isolated.
Shortly after this, another Samurai will pass by, take him out and then dash out of the area to where you defeated the Chained Ogre so that you’re not up against all of the other enemies. When you return, head through the middle hole on the roof and grapple to a branch, entering stealth as soon as you land to hide in the long grass. If you do alert the group, drop down to the side of the long grass and wait out the alert status.
From here, head around the back of the wall and grapple up to find another guard waiting to be backstabbed before picking off the Rifleman and the other two guards at the back here. This will leave you with the General and one other guard below and you’ll want to Air Deathblow the other guard before resetting the General’s alert status.
The General himself is very tough and for that reason alone, you’ll want to make sure you wait for him to walk past and start the battle with a Deathblow. His neutral stance is to hold his Katana above his head, which he’ll then bring down on top of you as part of his normal combo, all of these hits can be deflected. If he put’s the sword to his left, then he’ll charge you and attempt to do a Rising Slice, jump away from him in this situation.


(1 of 2) Stay away from Tenzen when his sword is to his left
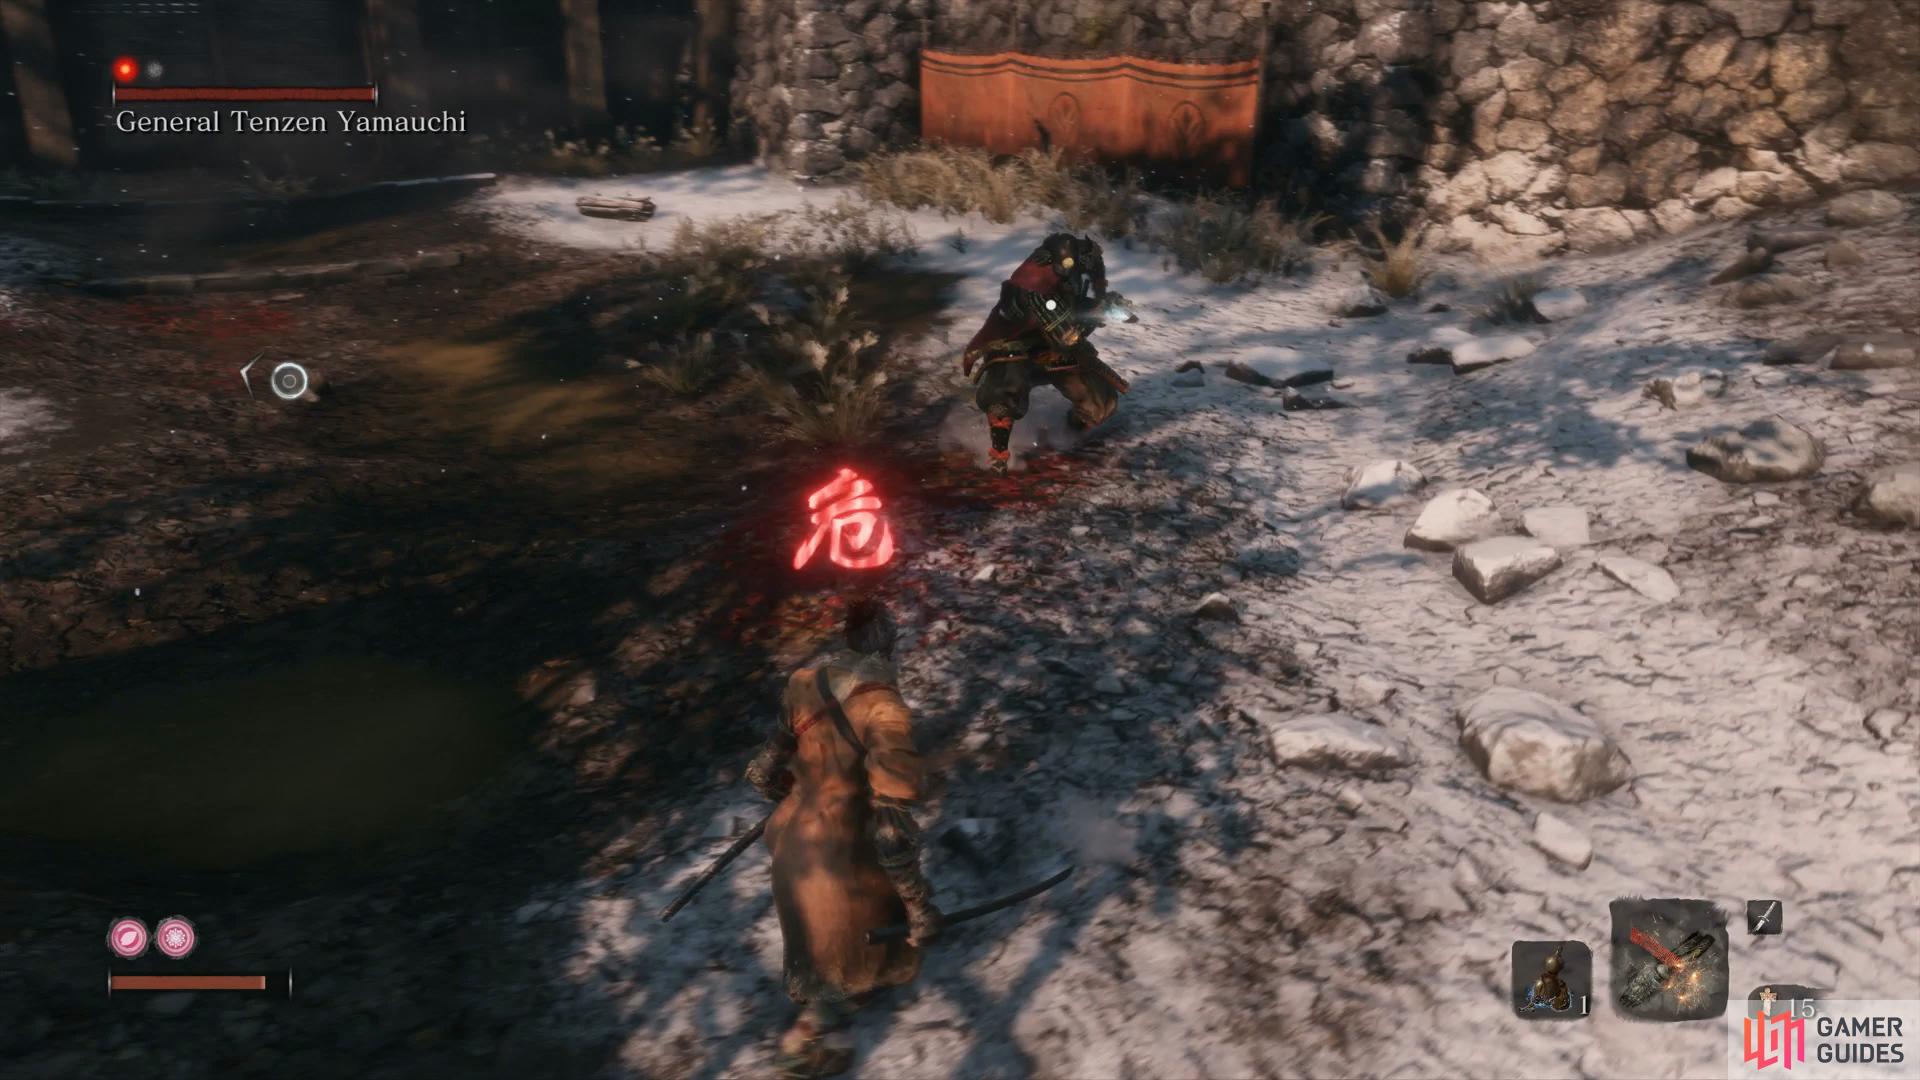
Stay away from Tenzen when his sword is to his left (left), aim to Mikari Counter his Thrust attack. (right)
Tenzen also has two Perilous Attacks, the first is a sweep that you’ll want to resist the urge to go in for a Jump Kick and just jump away while the second is a Thrust. This is the one you’re looking for because if your timing is good, you can perform a Mikari Counter for large posture damage.
Don’t neglect your Shinobi Tools here also, the Firecrackers will allow you to stun him for a short period of time and score some free hits before getting away from his follow up. So long as you watch out for when his Katana is to his left and back away, you shouldn’t have too many problems with Tenzen if you’re one on one. Your reward for this difficult encounter is another Prayer Bead which, if you’ve been following this walkthrough, should be your fourth. You can head to an Idol now and use them to increase your maximum Vitality and Posture.
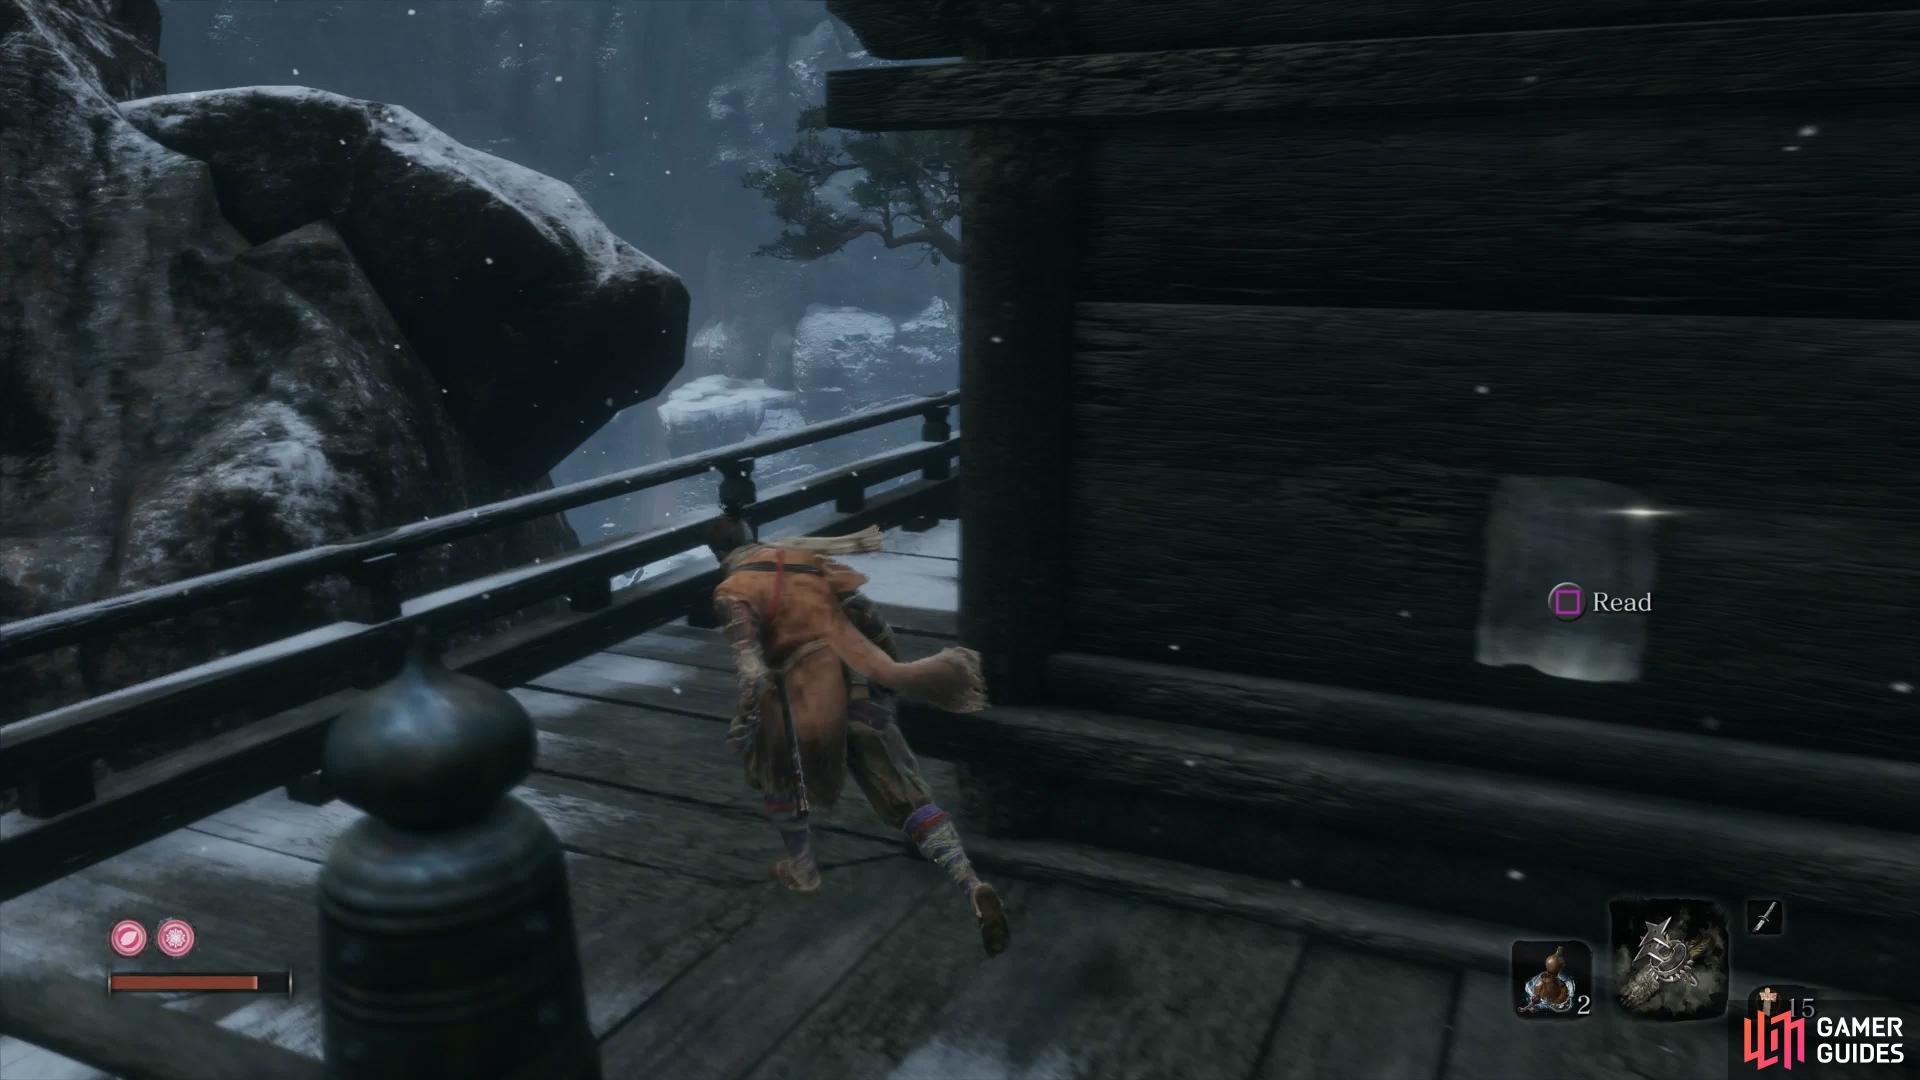
Search behind the General to pocket some Scrap Iron and then head out the right door to find some Divine Confetti nearby to the right. This item will coat your sword with a divine blessing and increase the damage you do to Apparition based enemies, save these for now as they come in limited supply until late in the game. Just past this is a broken bridge with a warning posted on the side of the shrine, heed this warning as the enemy at the end of this path is a Mini-boss you won’t be able to take down for now.
Pay attention to the note and avoid this path for now.
Instead, head forward and behind where the General was stationed to find a broken bridge, to the left of this is a path you can drop down to. Search under the broken bridge to find some more Pellets and then drop down to your next Sculptor’s Idol.
Underbridge Valley
The path ends here so you’ll need to make use of Wolf’s Grappling Hook to advance down the frosty cliffside. Drop down to the ledge below you and the wind will pick up so advance the only way you can and at the end of the path you’ll be taught the ins and outs of how to Mid-air grapple, a tactic i’m sure has already been put to use.
Go ahead and grapple across the ravine and once you reach the end of the next ledge, a Giant Serpent slithers into view. Hug the edge of the wall and when it looks away, grapple across and take crouch in the long grass to avoid it’s gazing eye. Your next destination is across the ravine again, wait for the Giant Serpent to raise it’s head and then grapple across the ravine before making a dash to the cave for a moment’s reprieve.
Drop down the other side of the cave and then wait for the Giant Serpent to look to the left before jumping across the gap and taking cover in the long grass once more. Follow the trail up and to another wall, wait for the Serpent to pass and shimmy across to the other side. You’ll see a palanquin just up ahead, wait until the coast is clear and then make a dash for it.

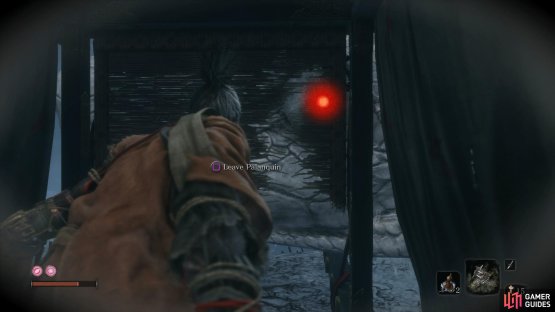
(1 of 2) Wait for the Giant Serpent to look away before using the grapple point

Wait for the Giant Serpent to look away before using the grapple point (left), wait until you see the Deathblow icon to strike a blow. (right)
Staying within the confines of the palanquin, wait for the cuious Serpent to bring it’s eye close to you and, once you see the Deathblow icon, stab the eye to cause the Serpent to writhe about in pain. This is your cue to quickly exit the palanquin and run up the nearby hill to your right (the top of the wall you shimmied across a moment ago) to snag a Snap Seed. Quickly turn around and run the other direction and use the grapple points to reach a cave and safety from your pursuer.
Make your way out of the cave and across the ravine once again and use a few more grapple points to reach an outside wall. Head to the left along the wall first to pocket an Ako’s Sugar and then return to the right to grapple up to the next Sculptor’s Idol along with a Gachiin’s Sugar.
Ashina Castle Gate Fortress
To the immediate right of this Idol, you’ll find a Rat (small humanoid enemies) that you can take out to obtain a Herb Catalogue Scrap, just be weary of the Rat’s ability to poison.
Grapple up to the nearby tower and Eavesdrop on the men below to gather more vital intelligence. Take this time to survey the area ahead, you’ll notice two guards and a Giant in the main courtyard while along the sides you’ll find one guard close to your current position, another that patrols and a Marksman in the ruined house.
To begin with, perform an Air Deathblow on the nearby guard to your left and then jump back over the wall to avoid alerting the Marksman. By this time, the Giant should be close by, wait for it to turn it’s back and take it out before hiding behind the wall to avoid the gaze of the Marksman once more. Head around the outside of the wall to the left now and wait for the patrolman to go back around the corner. This gives you a prime opportunity to climb up and sneak behind the Marksman to take him out. Quickly drop down and take out the patrolman from behind.

(1 of 2) Strike from behind once the Giant Man walks your way

Strike from behind once the Giant Man walks your way (left), then take out the Marksman in the ruined house. (right)
This leaves you with just the two guards in the center, take them out anyway you please and then begin looting the area in peace. You’ll find an Ungo’s Sugar behind the ruined house while some Ceramic Shards sit just in front of the entrance of it. Head inside and you’ll find some Mibu Balloons of Wealth along with a Heavy Coin Purse. Head to the platform to the right of the ruined house to find another memory of the Divine Heir’s.
Ignore this entrance however and take the stairs up to the right and Eavesdrop on the grieving man to discover gunpowder affected his now deceased horse. Put him out of his misery and then grab the Fistful of Ash by the tree before heading up the stairs to find some Pellets and a locked door. One last guard remains in the area and you can dispatch him easily by performing an Air Deathblow.
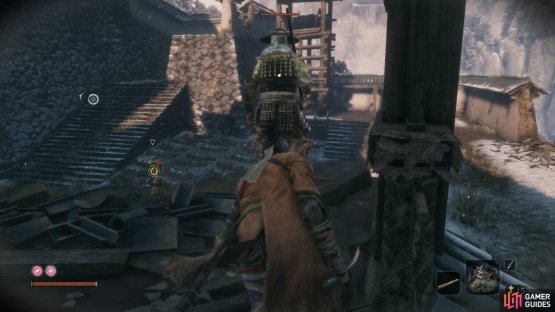
Your next destination lies in the battlefield over the rooftops to your right but before you head there, consider recovering at the Idol should you need to replenish your Healing Gourds. As soon as you land in the battlefield, the game’s first boss awaits and you’ll want to ensure you have the Firecrackers equipped along with having learnt the Grappling Hook Attack skills. Once you have these, you can simply grapple across the rooftops to avoid the enemies and drop down to the battlefield ahead.
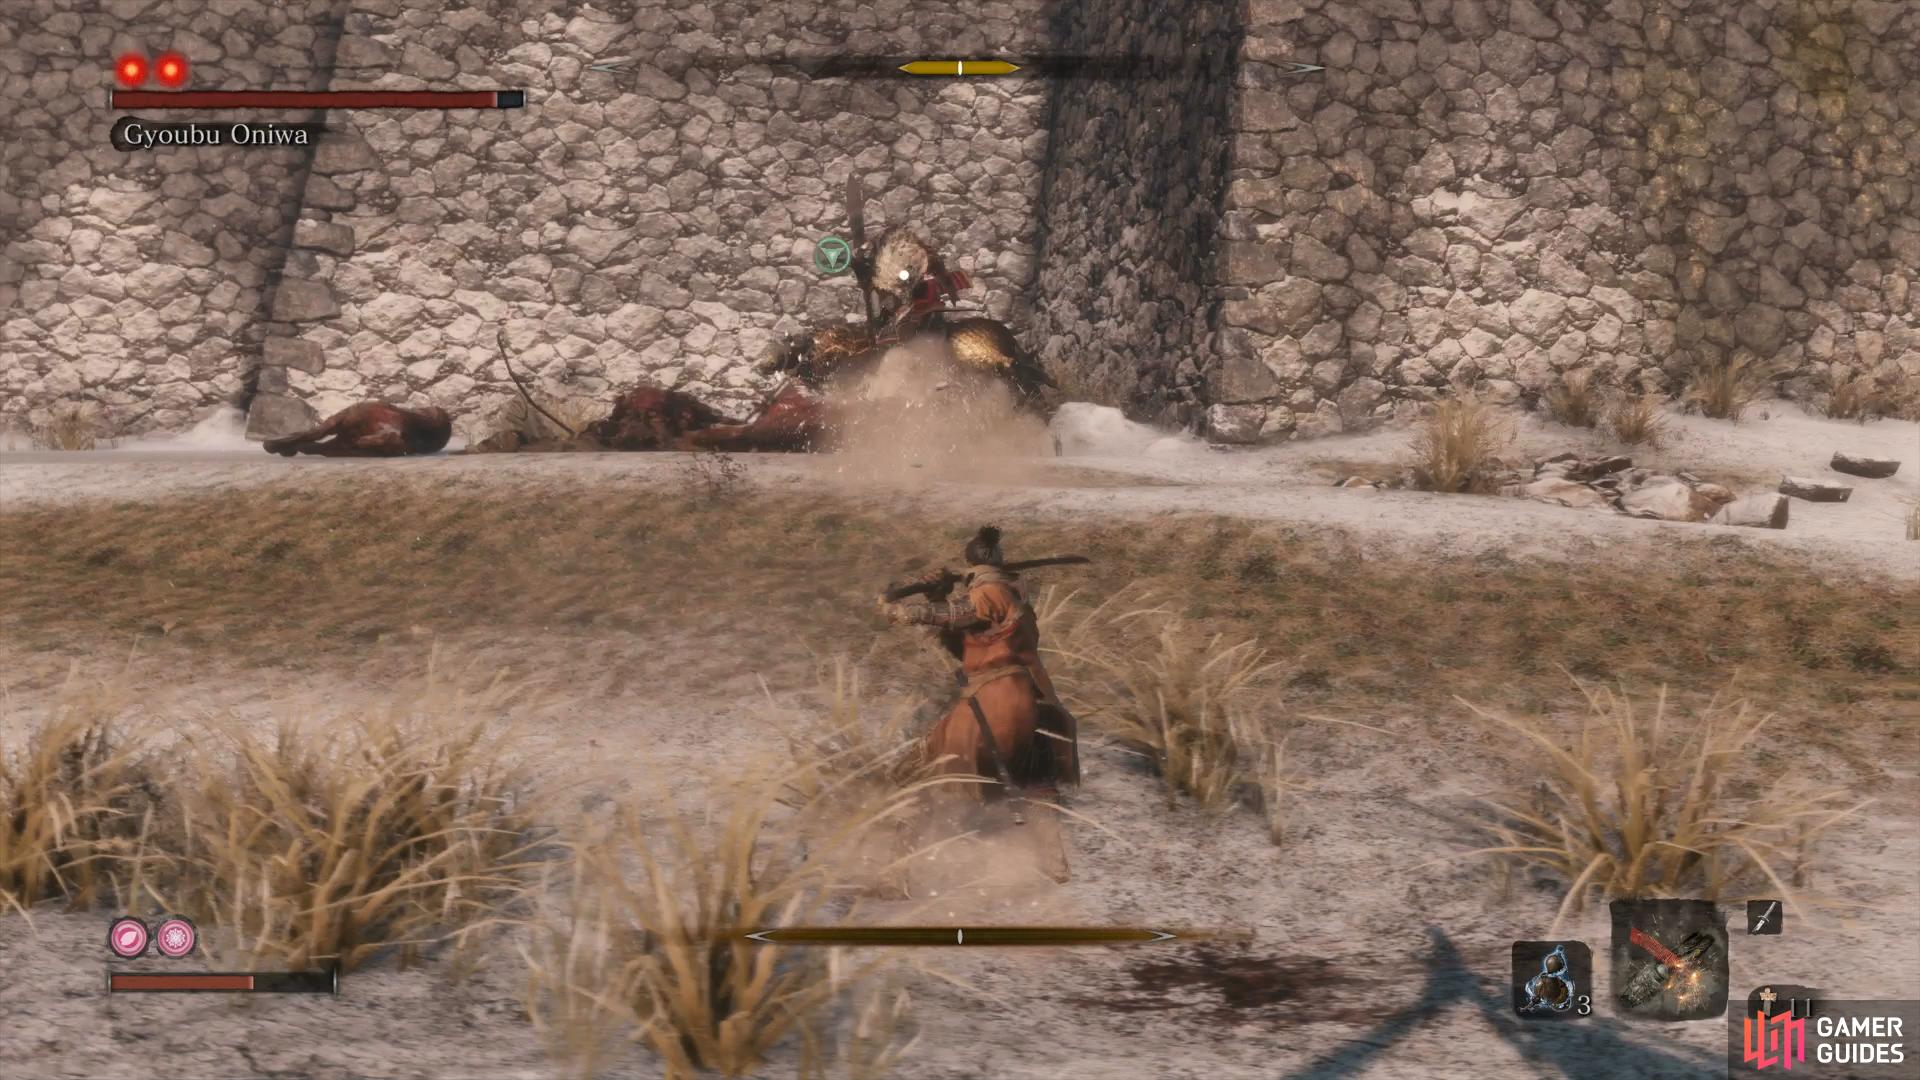
Boss: Gyoubu Oniwa
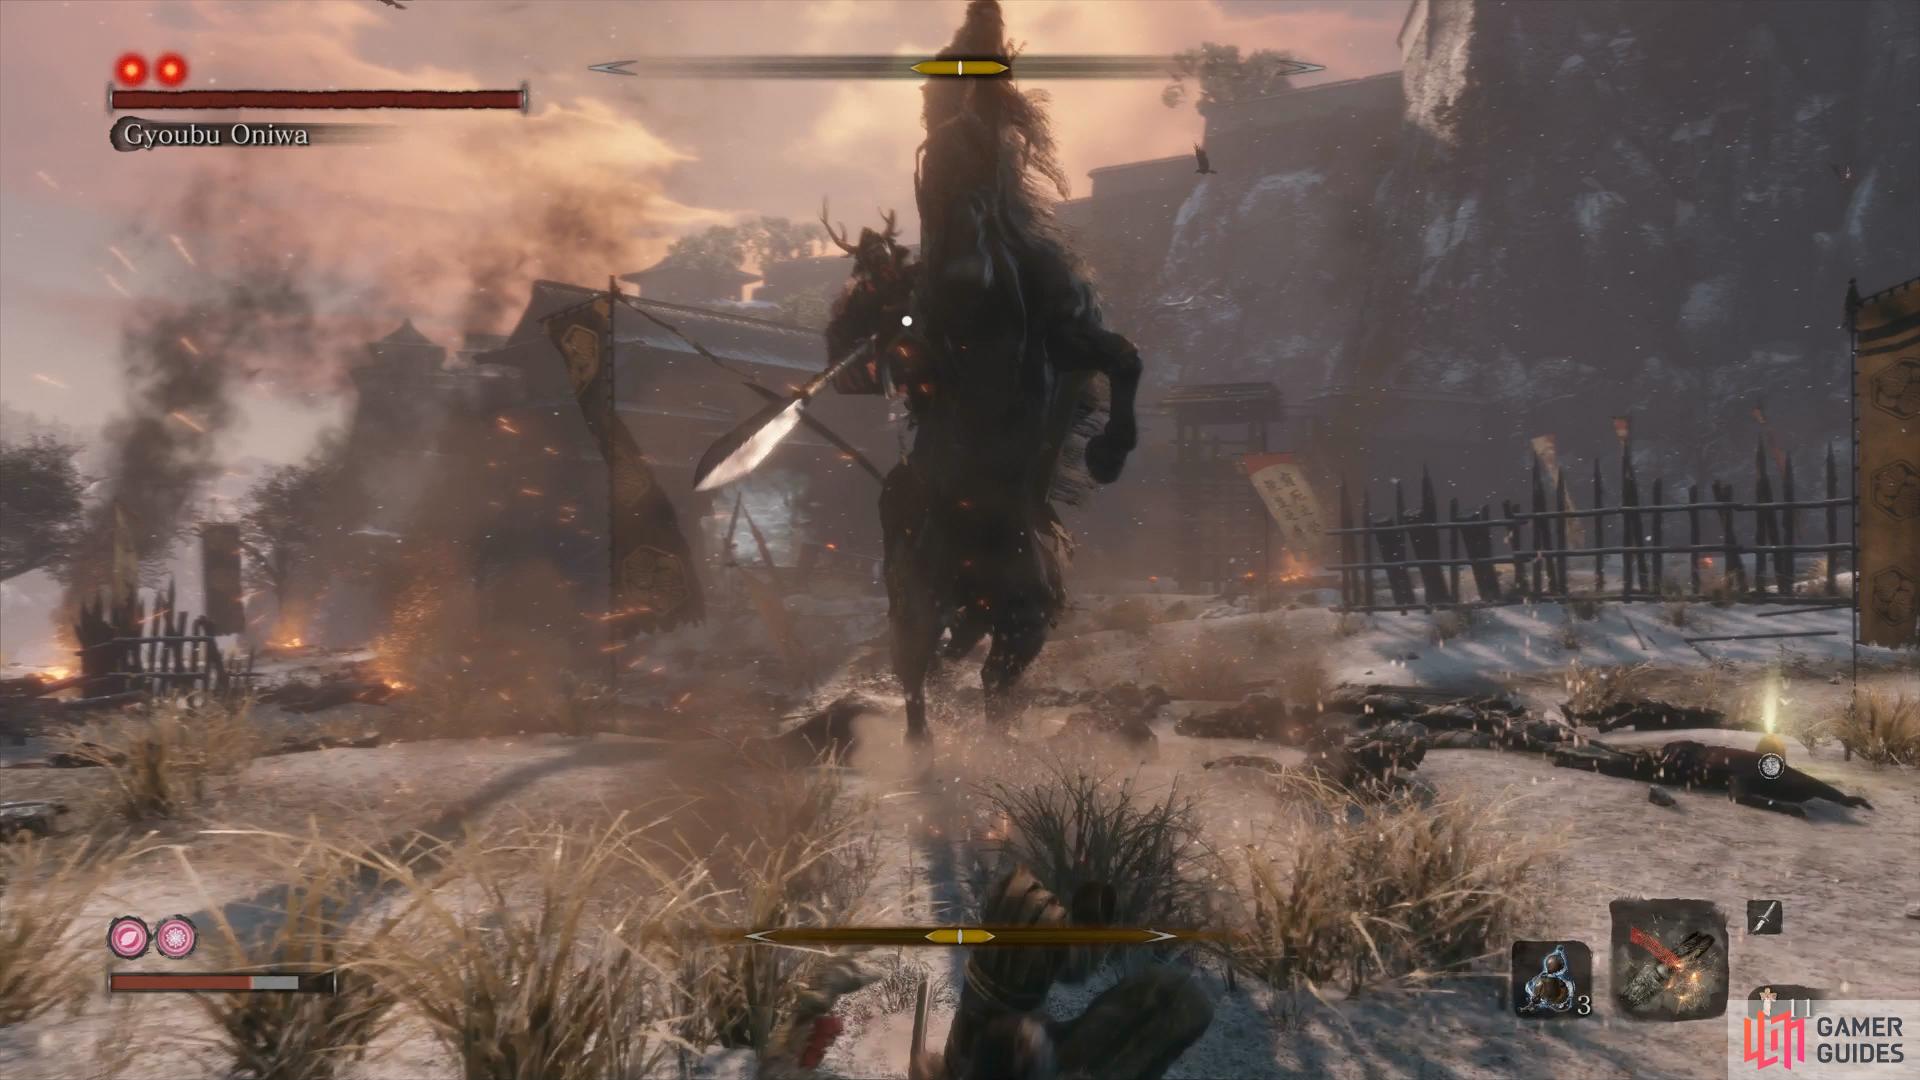
Gyoubu makes a rather dramatic entrance as he comes storming in, horseback and spear in hand. As you may expect from the arena for the battle and the fact that he’s on a horse, your opponent has the advantage over mobility and range. Gyoubu serves as the first boss battle of Sekiro and as such, you won’t be able to make use of escaping to recover or scoring an easy Deathblow before the battle begins.
Gyoubu attacks with sweeping spear combos that can and should be deflected, for this reason, you’ll want to stick close to Gyoubu, preferably around the back legs of the horse. At certain times, Gyoubu will break rank and ride away from you before dashing in with a hard to deflect combo. You can avoid this by waiting for the grapple symbol to appear when he’s away from you and then making use if it to launch yourself over and score some attacks in the process.


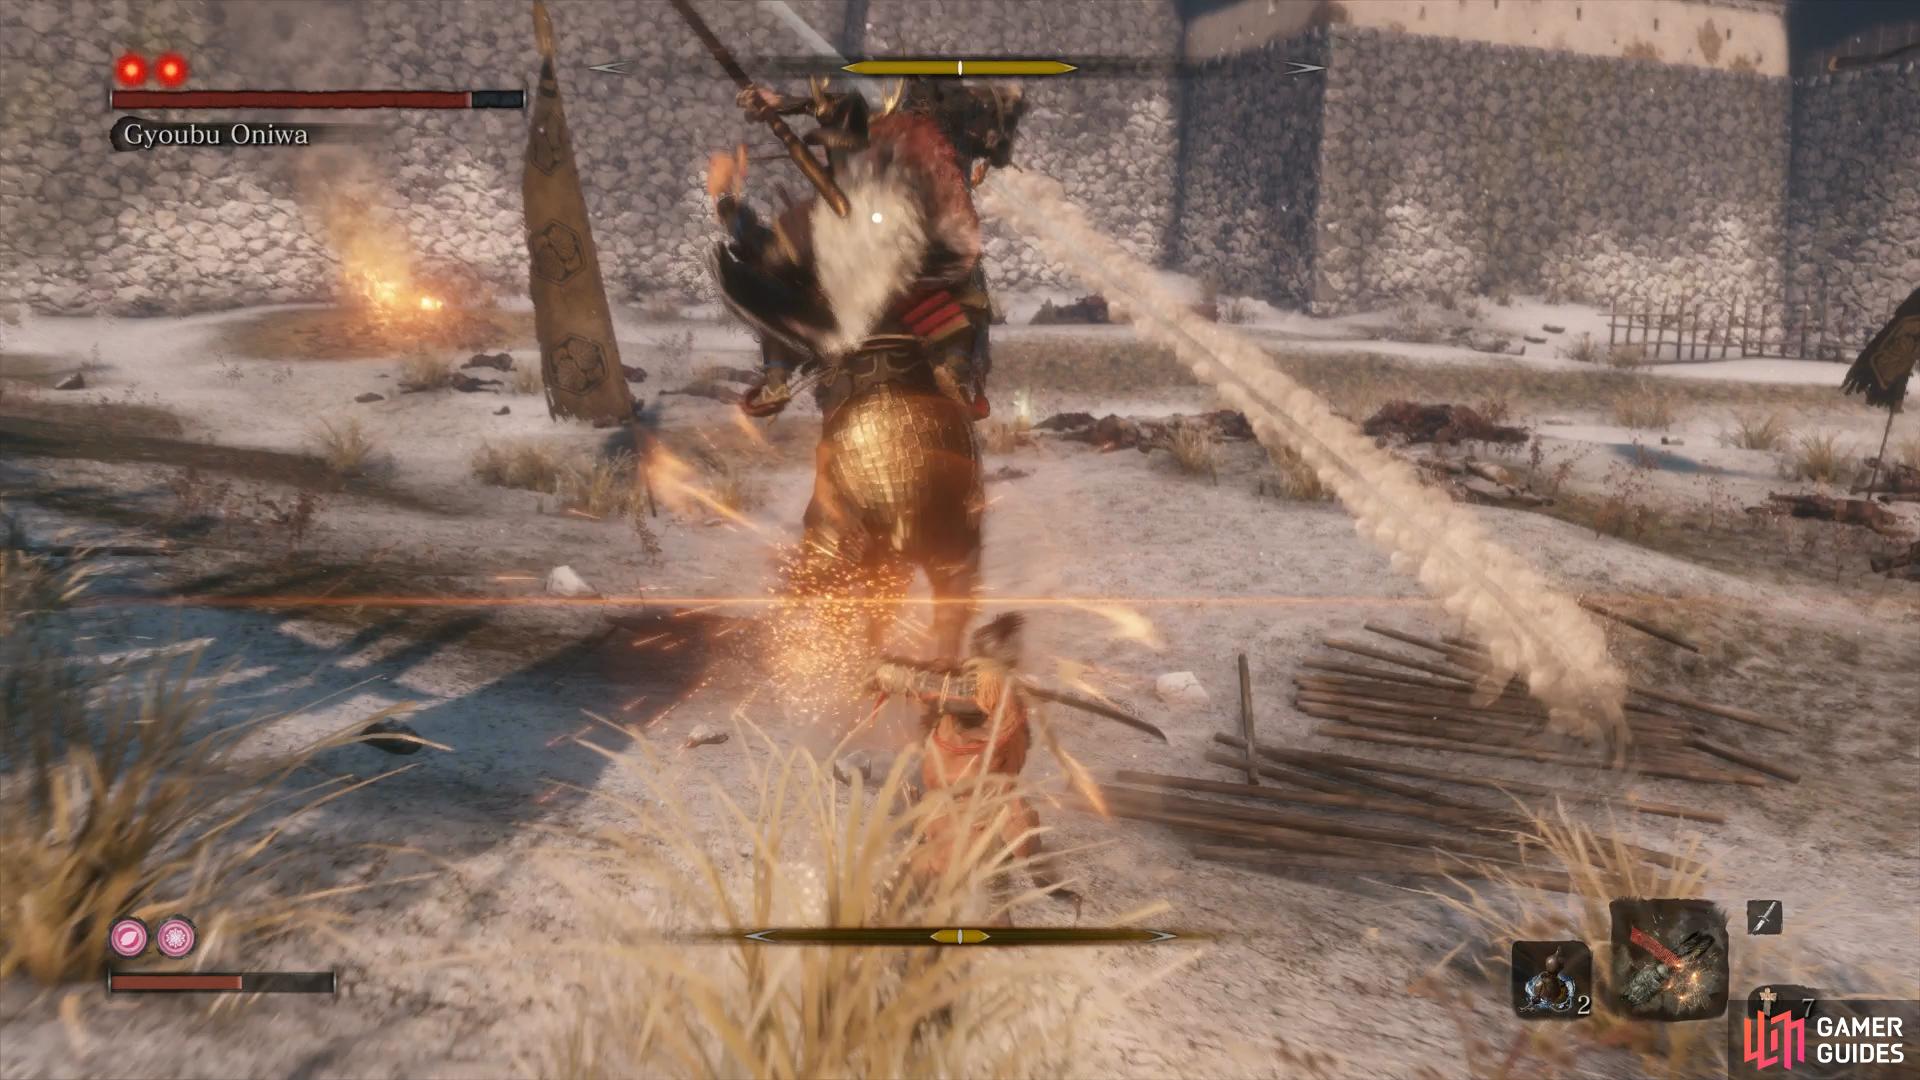
(1 of 2) Grapple over whenever you spot the symbol

Grapple over whenever you spot the symbol (left), Firecrackers are extremely effective against him. (right)
Like all beasts and, as you overheard recently, Gyoubu’s horse is very weak to the Firecrackers that you should have equipped. Wait for Gyoubu to approach and then unleash them to deal large posture damage and leave the horse reeling, allowing you time to score multiple strikes on Gyoubu. This is far and away the most proficient way in dealing with Gyoubu, as you nullify most of his dangerous attacks.
Do keep an eye on your health and don’t let it drop too low while at the same time, not wasting your Healing Gourd. If you feel you can make use of a Pellet instead to recover some lost health, do so and save your Gourd for when you take some heavy damage. Your main objective here should be posture breaking Gyoubu and going for the Deathblow, rather than his vitality. With constant deflects and making use of the Firecrackers, you can build his posture gauge up quickly. Try to avoid getting into a running match with Gyoubu, he has the advantage and you’ll almost always take heavy damage from the encounter unless you’re a master at deflecting.


(1 of 2) Aim to Deflect Gyoubu to quickly build up the posture gauge
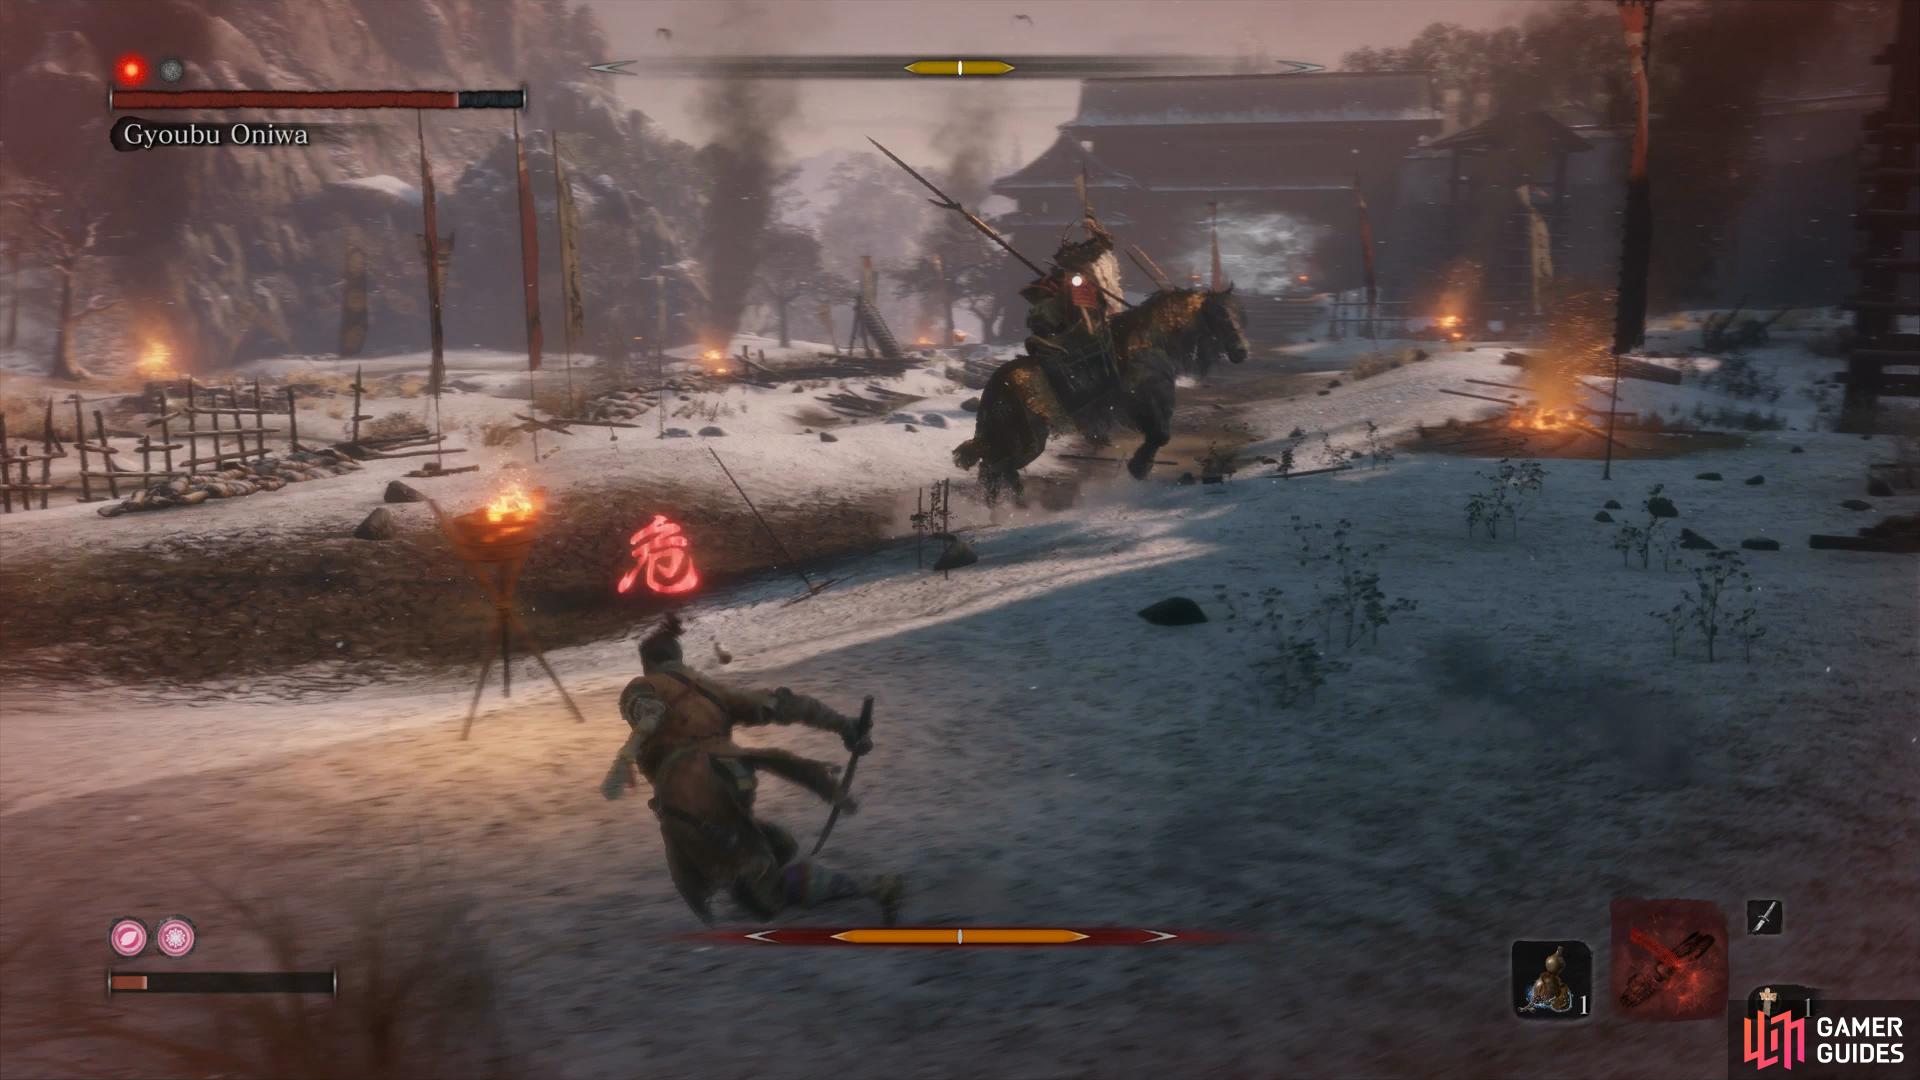
Aim to Deflect Gyoubu to quickly build up the posture gauge (left), get back to avoid the Perilous attack and grapple in straight after. (right)
Be aware of his Perilous Attack as he’ll attempt to thrust into the ground and you can avoid it by jumping to either side. Finally, keep an eye for when Gyoubu begins swinging his spear around in a large circle, this is your cue to use the grappling hook to latch on to him and score more easy attacks. Keep an eye on your surroundings and don’t fight him close to a wall, focus on deflections and eventually Gyoubu will go down after a special finisher.


Your reward for slaying Gyoubu is Memory: Gyoubu Oniwa, the Mechanical Barrel and 1000 Exp. The Memory can be used at any Sculptor’s Idol to permanently increase the Attack Power of Wolf while the Mechanical Barrel is an item of great interest to the Sculptor himself. Ignore the desire to proceed to the next area however as there are still one or two things to take care of in the Outskirts.
Head up the stairs opposite the Idol and head to the right of the open door to find some Ceramic Shards along with the Battlefield Memorial Mob.
| Item (Quantity) | Cost (Sen) |
|---|---|
| Dragon’s Blood Droplet (1) | 180 |
| Antidote Powder (3) | 30 |
| Fistful of Ash (12) | 30 |
| Light Coin Purse (3) | 110 |
| Heavy Coin Purse (2) | 550 |
| Robert’s Firecrackers (1) | 500 |
| Gourd Seed (1) | 1000 |
The first item you should purchase is the Gourd Seed, use any Coin Purses you may need to and be sure you don’t leave without the Gourd Seed. After that, consider purchasing the Dragon’s Blood Droplet for times when you may find multiple people with Dragonrot at once.
Return to the doorway you just passed up and speak to the Tengu inside to meet the Tengu of Ashina. Agree to take him up on his offer to hunt Rats to obtain the Rat Description memo detailing on your targets (the small humanoid creatures you’ve already seen about). You’ll be coming across these Rats later so for now, put this task on the backburner and pocket the nearby Pellets before opening the shortcut back to the previous Idol.
Speak to the old lady near the door you opened and then return to the main room where the Tengu of Ashina is. Climb the stairs and use the grapple point to reach some beams, walking along them to find another you can climb up to. At the very top, you’ll discover a chest waiting to be opened containing a Prayer Bead.


(1 of 2) Grapple up to the roof of this building
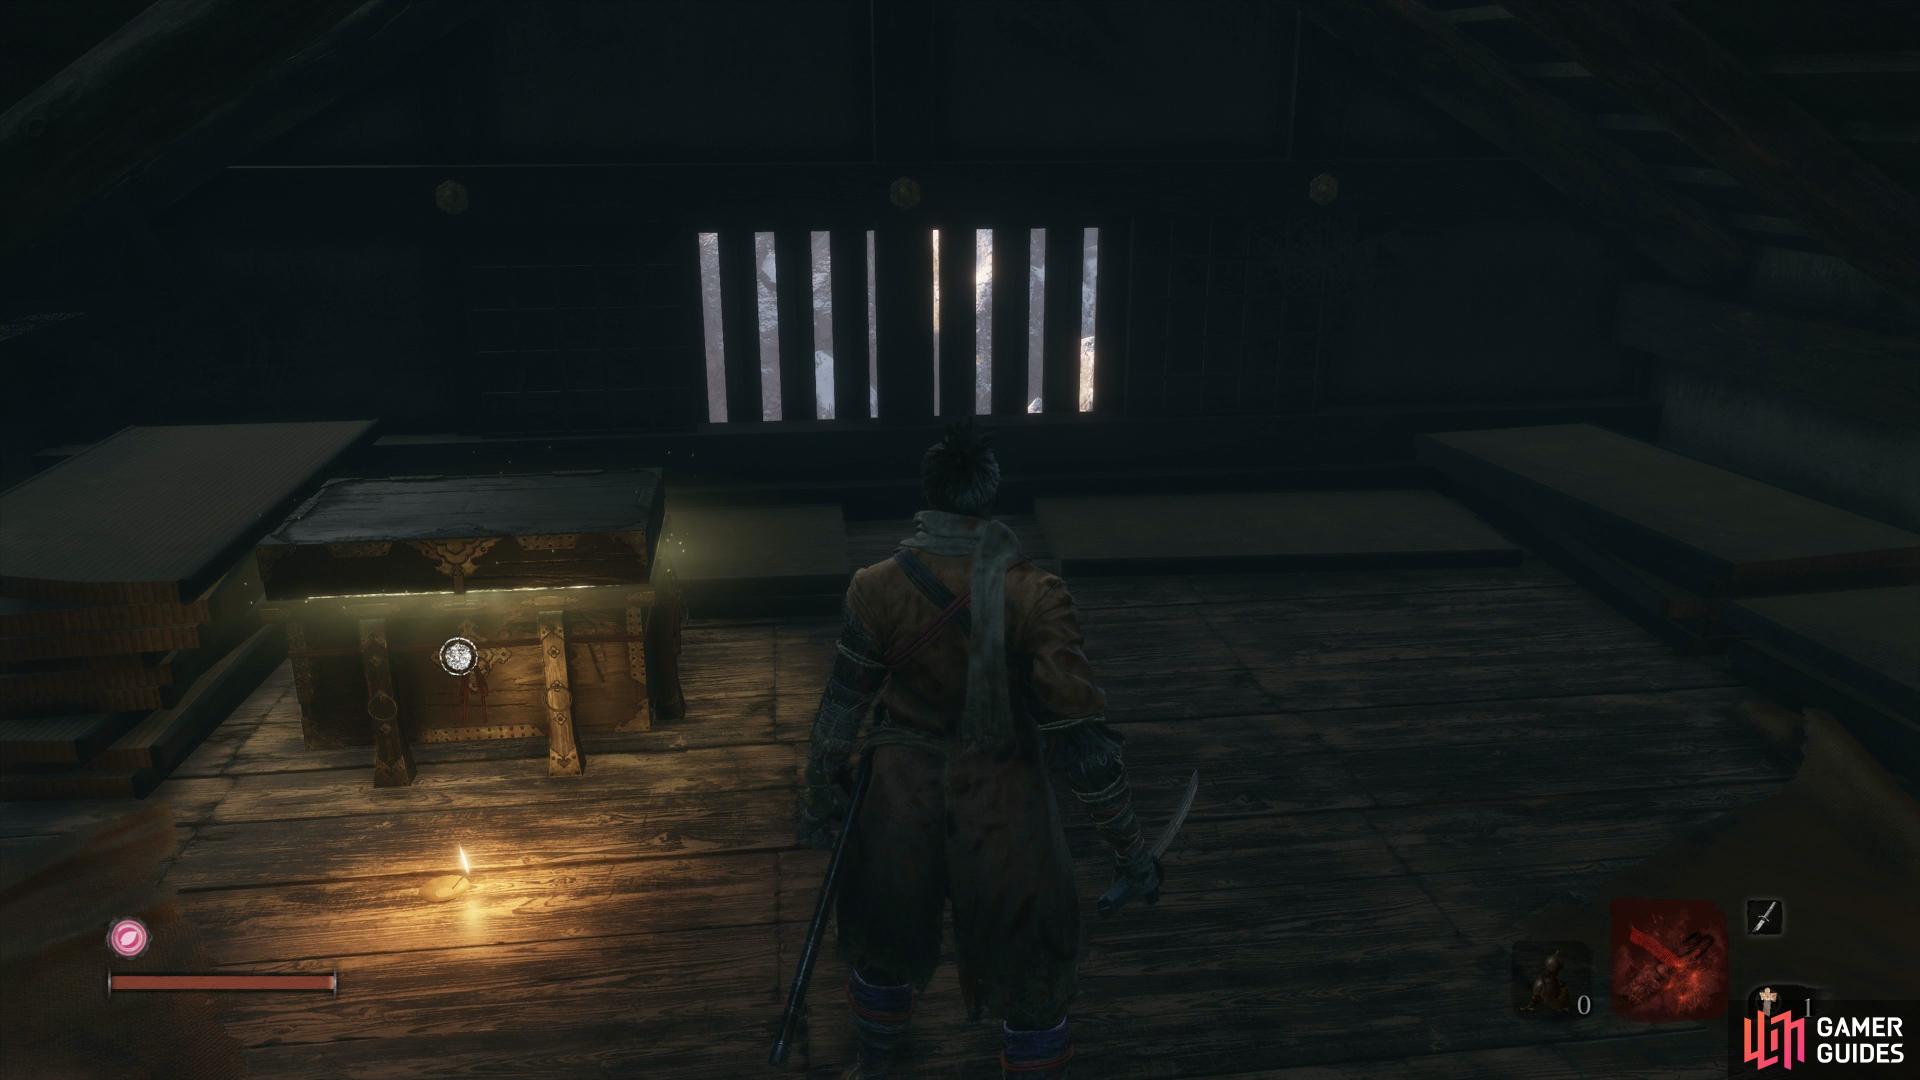
Grapple up to the roof of this building (left), to find a chest housing another Prayer Bead. (right)
Return to an Idol and travel back to the Dilapidated Temple to hand over the Gourd Seed to Emma, boosting your Healing Gourd to four uses. Head into the Temple itself and present the Mechanical Barrel to the Sculptor to unlock the ability to upgrade your Shinobi Tools. Using materials you find out in the world, such as Scrap Iron and Black Gunpowder, you can unlock new variants of the Shinobi Tools, giving them useful and more deadly properties.
It’s time to return to the Hirata Estates and finish exploring the area, if you’ve already taken care of this area then skip ahead to [Ashina Castle], the next location in your search for the Divine Heir.

No Comments