
You can unlock three secret companions in Rogue Trader: ![]() Calligos Winterscale, Incendia Chorda, and Uralon. Acquiring these companions involves meeting specific requirements such as being a high rank of one of the convictions, with Uralon requiring you to be Heretical. Obtaining Uralon, or any secret companion for that matter, will also reward you with a trophy/achievement. Regarding Uralon, you must progress through a quest that spans the entire game, starting at Chapter 1. Are you ready to join the side of chaos, lose half your party, and go against humanity for Uralon? Is he worth it? Well, read on to find out what you must do to unlock the secret companion.
Calligos Winterscale, Incendia Chorda, and Uralon. Acquiring these companions involves meeting specific requirements such as being a high rank of one of the convictions, with Uralon requiring you to be Heretical. Obtaining Uralon, or any secret companion for that matter, will also reward you with a trophy/achievement. Regarding Uralon, you must progress through a quest that spans the entire game, starting at Chapter 1. Are you ready to join the side of chaos, lose half your party, and go against humanity for Uralon? Is he worth it? Well, read on to find out what you must do to unlock the secret companion.
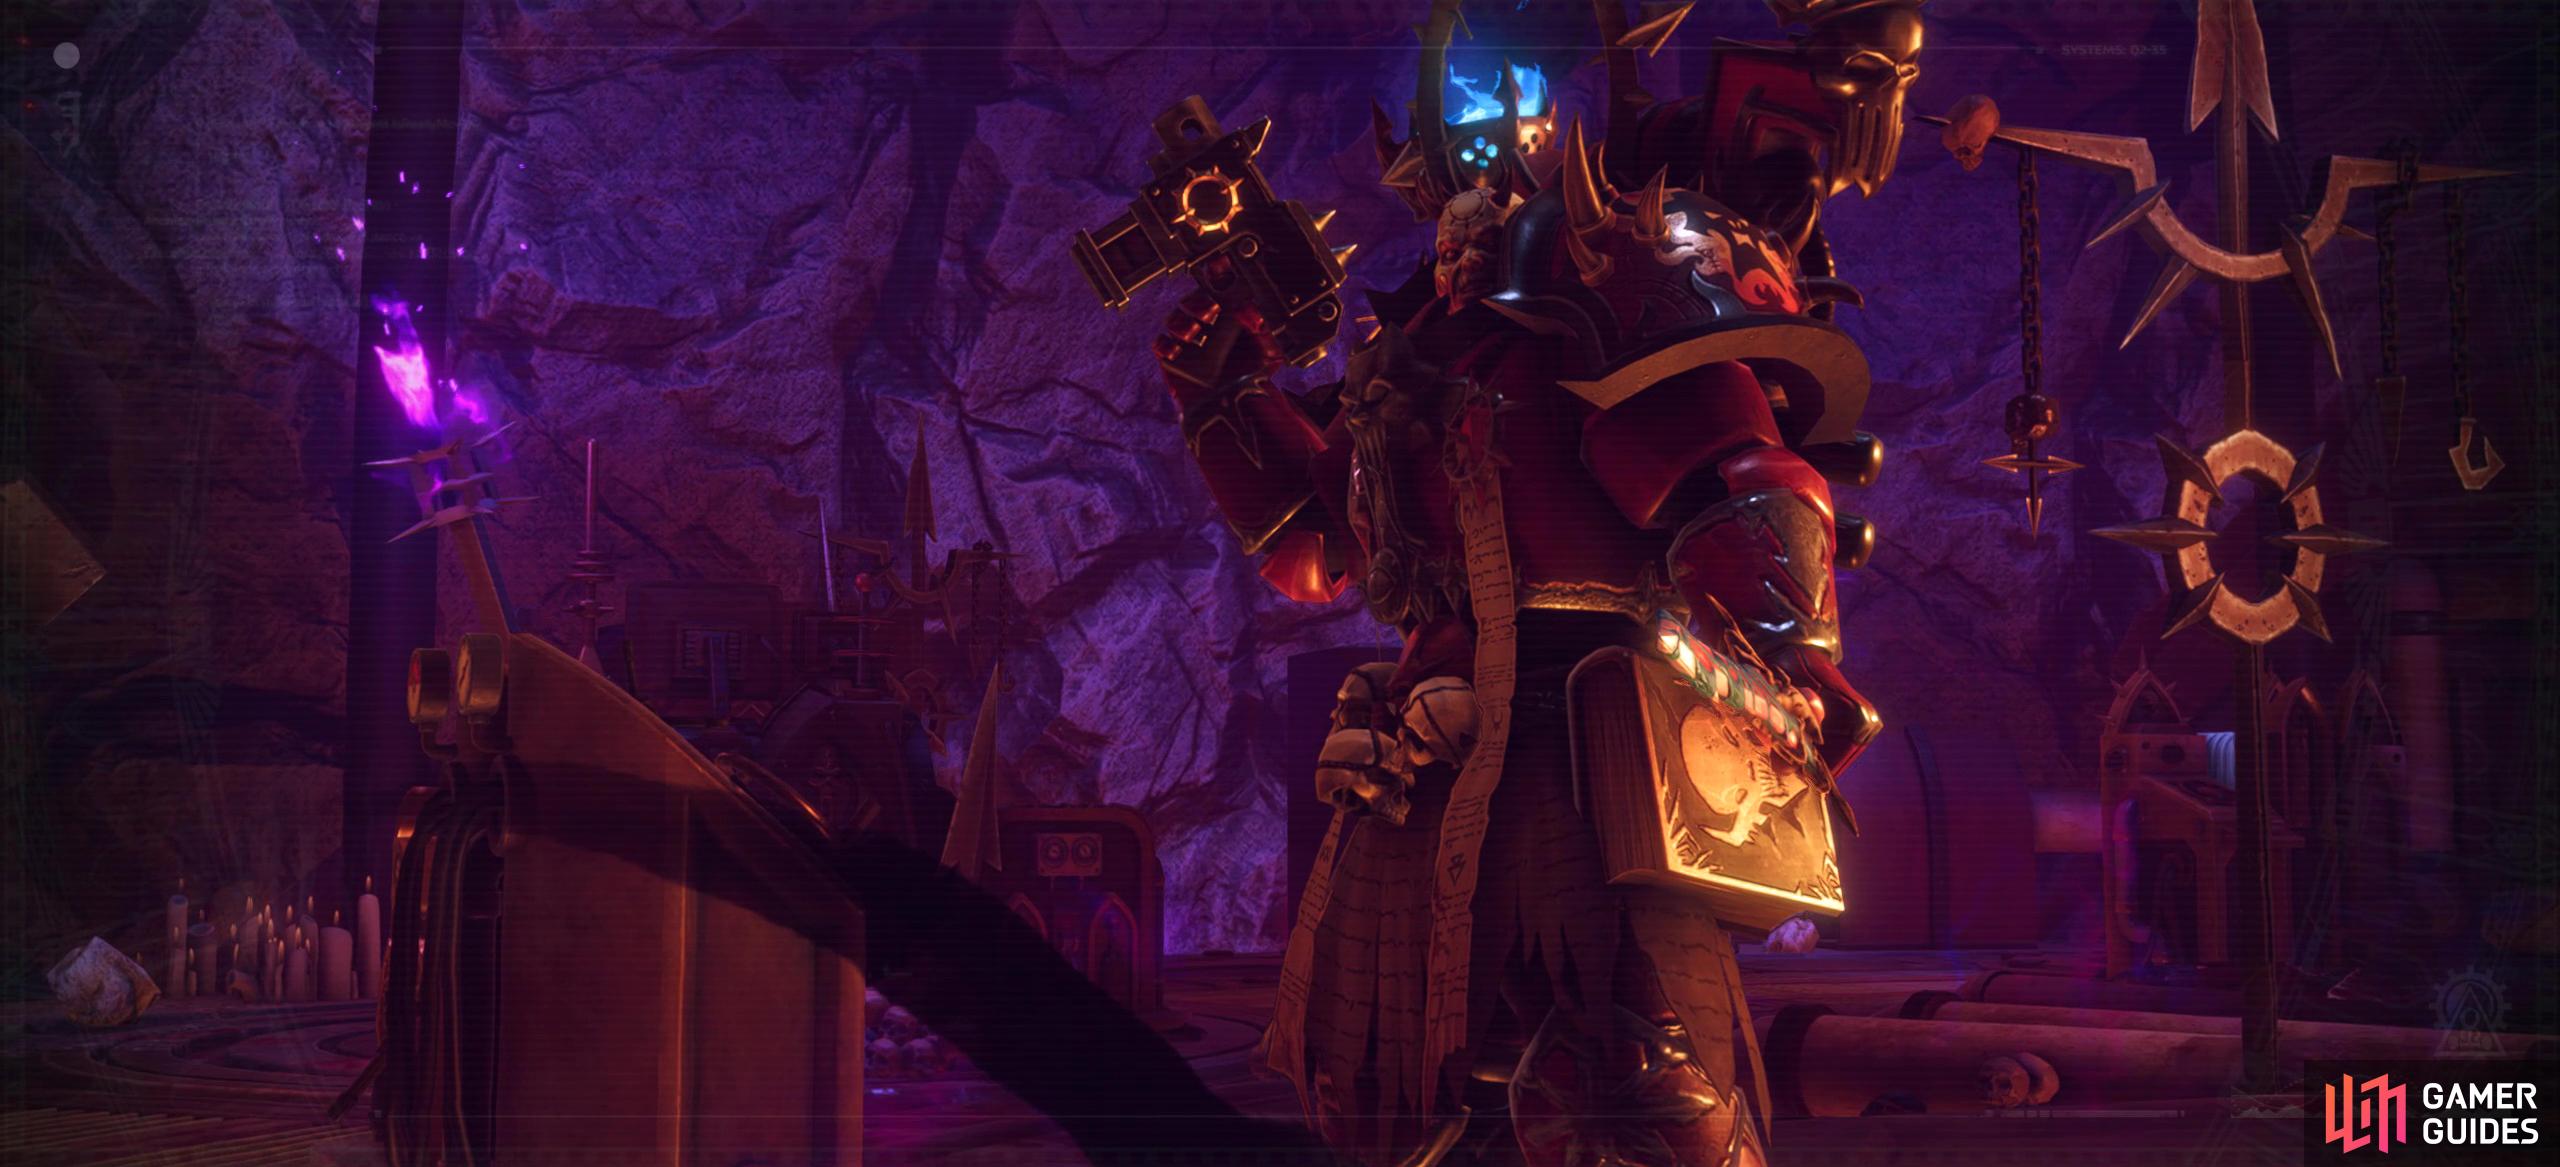
Uralon is one of three secret companions in Rogue Trader.
Unlocking Uralon - The Call of the Edge
One of the first things you need to do is be of Heretical conviction. Every time you see a choice for Heretical, choose it, as the quest for obtaining Uralon updates when you reach a new Heretical rank as well as when you progress through the game. The quest you’ll be following is called “The Call of the Edge” which appears under “other” quests in the journal.
Find the Second Sword Shard
The first objective of the quest is to “Find the second sword shard”. You’ll begin to find out about the shards before that, with the first time being near Theodora’s corpse in the Prologue, although it’s not needed for the quest. However, by continuing through the game until you reach the Electrodynamic Cenobium in Chapter 1, you’ll find “Aurora”, and once you’ve defeated them at the end of the area, you’ll get a few options. Pass the [Lore] Xenos check, which is imperative for the quest, as it will give you the following conviction choice. Select the [Heretical] [Surreptitiously take the sword shard] option, which will begin the quest
Now, progress through the game, where you’ll get a couple of interactions regarding the blade fragment, which you can read about in our Blade Fragment Choice Guide, but the next thing you’ll need to do is “Become a god to your subjects”.


(1 of 3) At the end of the “Aurora” boss fight, pass the Lore Xenos check.
Become a God to Your Subjects
Toward the end of Chapter 2, Uralon will talk to you and tempt you to join his side. If you didn’t take the sword shard in step one, you won’t have the option to select the Heretical option. Select [Heretical] “I am willing to give the Warrant to you in exchange for the blessing of your masters“ to continue along the path of chaos. Keep selecting Heretical choices as you progress through the game, and by the end of Chapter 3, your rank will have risen enough to appease this objective.
Retain the Sword Shards for the Future
Throughout your journey, there will be multiple occasions where you’ll be asked to get rid of the blade fragments/sword shards. Whatever you do, keep hold of them as they are pivotal to getting Uralon. When you reach Heretical — Votary (Rank 3), you’ll get an altar on your voidship. If you reach this rank in chapter 3, you’ll need to get through the chapter to regain access to the ship, where the altar resides.

(1 of 2) This choice won’t appear if you didn’t take the shard earlier.
This choice won’t appear if you didn’t take the shard earlier. (left), Reach the third rank of Heretical to continue on with the quest. (right)
Take the Sword Shards to the Altar of Chaos
Once you have access, head to your chambers on the ship (opposite the map table). In your chambers, go to your bedroom to find a hidden door on the wall nearest to the windows. Inside this secret room is the altar. Offer a prayer, place both shards upon the altar, and you’ll speak to the shards who appear to be Vog and Haik, the first and Second Dawn. Ask them any questions if you want more lore, and then ask them what you should do next, where they’ll tell you that the third dawn is still shrouded in darkness and that you can find it on a metal world. You’ll get more options to select from which will give you a better idea of what’s going on, and when you’re ready, select “Enough. Let the Weaver’s will be done. I shall see to it.”


(1 of 2) The Altar of Chaos is in the secret room next to your bed in your chambers.
The Altar of Chaos is in the secret room next to your bed in your chambers. (left), Place the shards on the altar, and pray to the Chaos God. Select “What shall I do next?” to continue the quest. (right)
Wait For Fate to Lead You to the “Iron World”.
Although this objective is vague, you need to progress the game through to the end of Chapter 4 where Calcazar will send you to Eufrates II. At this point, if you’re Heretical, Yrliet, ![]() Argenta, and
Argenta, and ![]() Ulfar will leave your party for good. You can repent your sins to Calcazar which will put your conviction back at neutral resulting in them staying, but you won’t be able to get Uralon, so the choice is yours.
Ulfar will leave your party for good. You can repent your sins to Calcazar which will put your conviction back at neutral resulting in them staying, but you won’t be able to get Uralon, so the choice is yours.
Head to Eufrates II in the Emperor’s Palm system (near Cranach), and when you can, enter the Machine Cathedral. As soon as you enter the area, you’ll get a scene with Uralon and an old acquaintance. During this scene, the game acts like you’re not becoming a part of Chaos yourself, so play along with it while going through the dialogue, and finally send the Space Wolves (or Opticon-22) to deal with him.


(1 of 2) The “Iron World” Eufrates II can be found in the Emperor’s Palm system, which is on the west side of the Koronus, near Cranach.
The “Iron World” Eufrates II can be found in the Emperor’s Palm system, which is on the west side of the Koronus, near Cranach. (left), The planet itself is on the west side of the system. (right)
Speak the Forbidden Name to Uralon the Cruel
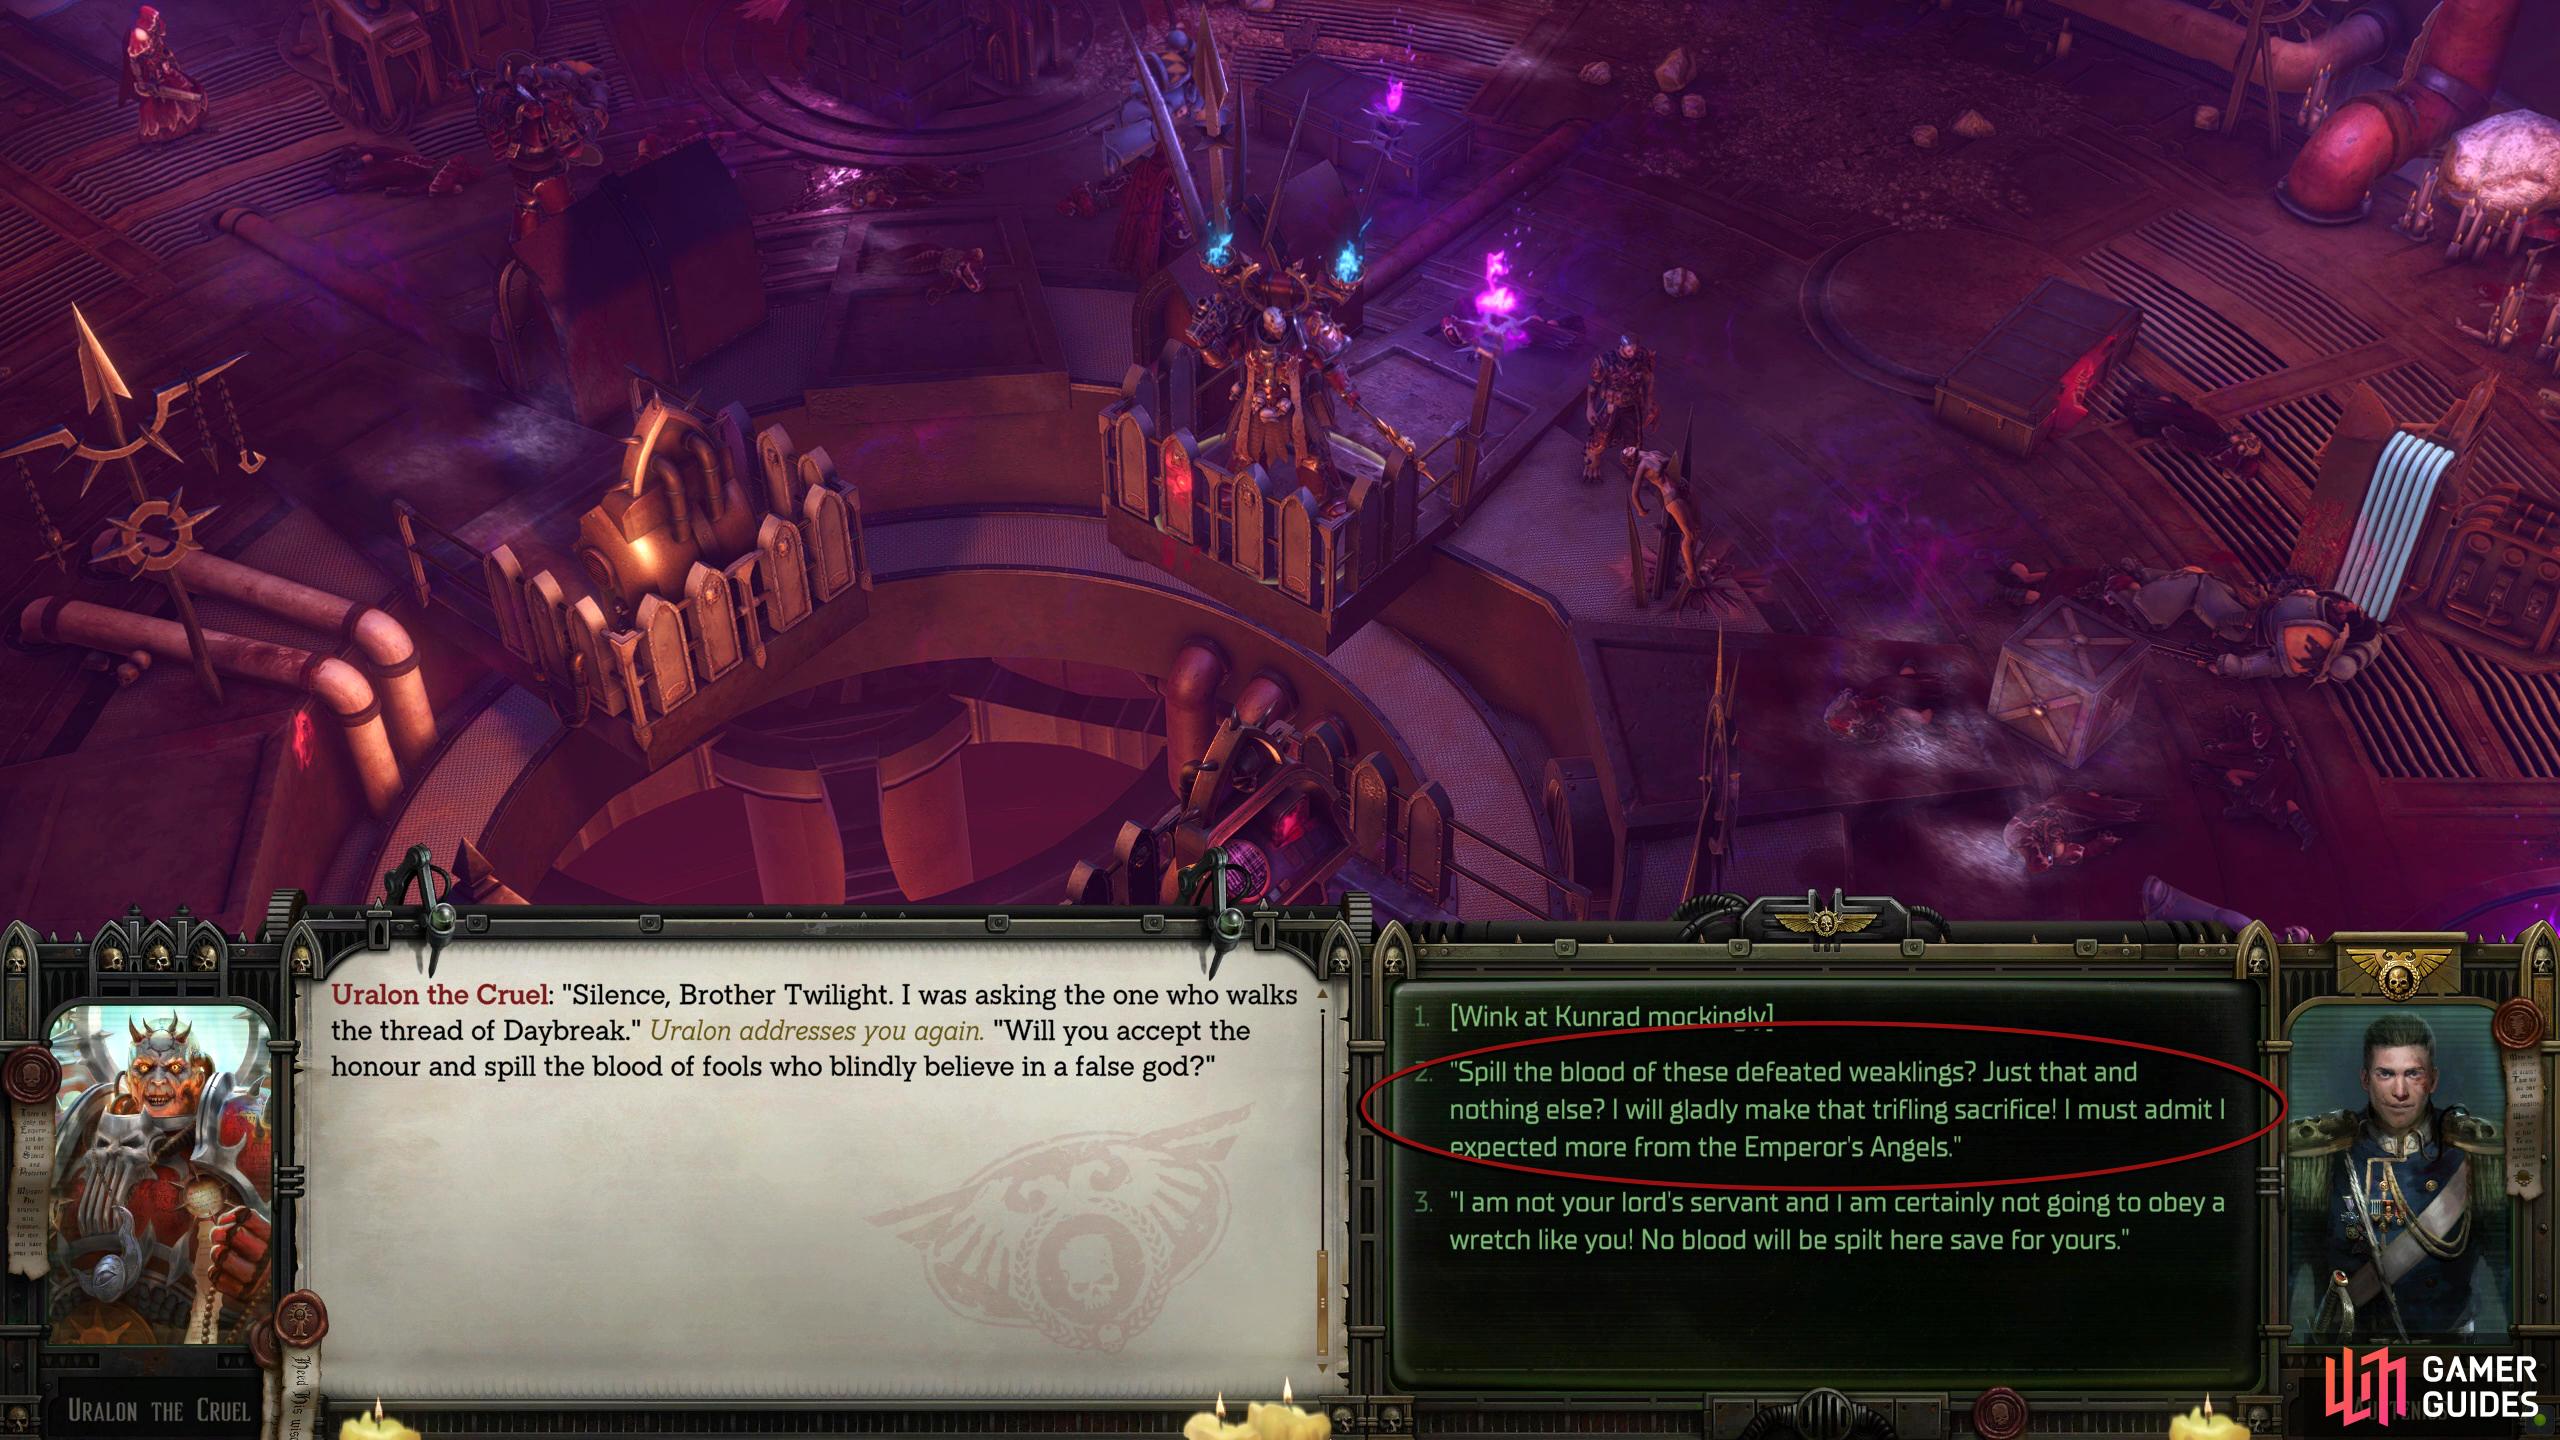
This will give you a large dungeon to get through with lots of difficult battles, while also updating the main quest “The Siege” to “Reach Uralon”. Get through the dungeon, and when you reach Uralon, you’ll get a short scene before another important choice comes your way: Uralon will ask you to speak the final name. Be careful here as there are two Heretical choices. You want the top option “Sameth” which will give you +20 to Heretical. Now, you’ll need to put your words into action. Up until now, you’ve talked the talk, but here, you’ll need to walk the walk. Uralon will demand a sacrifice, and the sacrifice just happens to be the Space Wolves who appear to look dead at the moment, but they are very much alive.
The next choice will give you the option to turn him down, but if you want him to join your retinue, you will have to prove to him that you’re serious. Select “Spill the blood of these weaklings….” and you’ll have a battle against the four Space Wolves. Once the battle is over, and the sacrifice is complete, your acquaintance won’t be happy with what Uralon promised, which will leave you with three different options to kill him. Select whichever choice tickles your fancy, and watch the scene play out. When the scene ends, select all the options other than the bottom one, and end it with you swearing fealty to them. For now, that is all you can do, so progress with the main story until you head to the Porta Septentum system in the northwest of the Koronus Expanse, and then head to the Inquisition Flotilla. Note this is the point of no return, so make a separate save if you want, and continue with the story.

(1 of 2) At the end of the dungeon, Uralon will ask you to speak the third name, which is “Sameth”.
At the end of the dungeon, Uralon will ask you to speak the third name, which is “Sameth”. (left), In the same dialogue, he’ll soon ask you to sacrifice the Space Wolves. (right)
When you reach the Flotilla, you’ll get a ship battle followed immediately by a regular battle in your ship against Aishara. Once you’ve defeated her, leave the ship, and you’ll get a scene. Jaris will tell you that someone wants to come aboard; welcome and usher them to the bridge. It’s the time you’ve been waiting for, Uralon will walk up and talk to you. Tell him you are pleased to see him (the top option), and he’ll offer you a gift, which is the [Daemon World Origin] Chaos Enforcer Carapace armor. Go through the dialogue, and eventually, Uralon will tell you that he’ll join you. Accept his offer if you want him or deny him if you don’t. Either way, that’ll be the last thing that happens in Chapter 4 as the next Chapter will begin after. Although Uralon is in your party, this hasn’t finished The Call of the Edge quest yet, and you’ll still have things to do regarding it in Chapter 5.


(1 of 2) As you approach the Flotilla, someone will want to board. Let them, and it’ll be Uralon.
As you approach the Flotilla, someone will want to board. Let them, and it’ll be Uralon. (left), After selecting the first option, accept him into the party. (right)
Is Uralon Worth It?
The short answer is no. At least, not for him alone, but it is for the story. Uralon is a Master Tactician/Officer but with a twist. He can summon daemons to the battlefield via his ![]() Infernal Call skill. This will summon one of the following: Plaguebearer, Daemonette, or a Bloodletter. Unfortunately, what one appears is random, but you can keep summoning them in the battle as much as you want. Aside from Infernal Call, Uralon also has access to the Warrior ability,
Infernal Call skill. This will summon one of the following: Plaguebearer, Daemonette, or a Bloodletter. Unfortunately, what one appears is random, but you can keep summoning them in the battle as much as you want. Aside from Infernal Call, Uralon also has access to the Warrior ability, ![]() Charge which allows you to cover ground more quickly.
Charge which allows you to cover ground more quickly.
He comes equipped with the Holy Power Armor which has 85% armor, 8 deflection, and a base armor property of ![]() Strength +25 which is one of the better armors in the game. For his weapons, he comes with the Inherent Blasphemy
Strength +25 which is one of the better armors in the game. For his weapons, he comes with the Inherent Blasphemy ![]() Bolt Pistol, and his own personal power staff, “
Bolt Pistol, and his own personal power staff, “![]() Uralon’s Accursed Crozius” which has a huge 40-50 damage that also buffs the party on hit. As you can see, Uralon is good, and you will most likely use him when you get him, but he’s not good enough to do what you have to do to get him, and he sure as hell isn’t worth losing Yrliet, Argenta, and Ulfar over him.
Uralon’s Accursed Crozius” which has a huge 40-50 damage that also buffs the party on hit. As you can see, Uralon is good, and you will most likely use him when you get him, but he’s not good enough to do what you have to do to get him, and he sure as hell isn’t worth losing Yrliet, Argenta, and Ulfar over him.
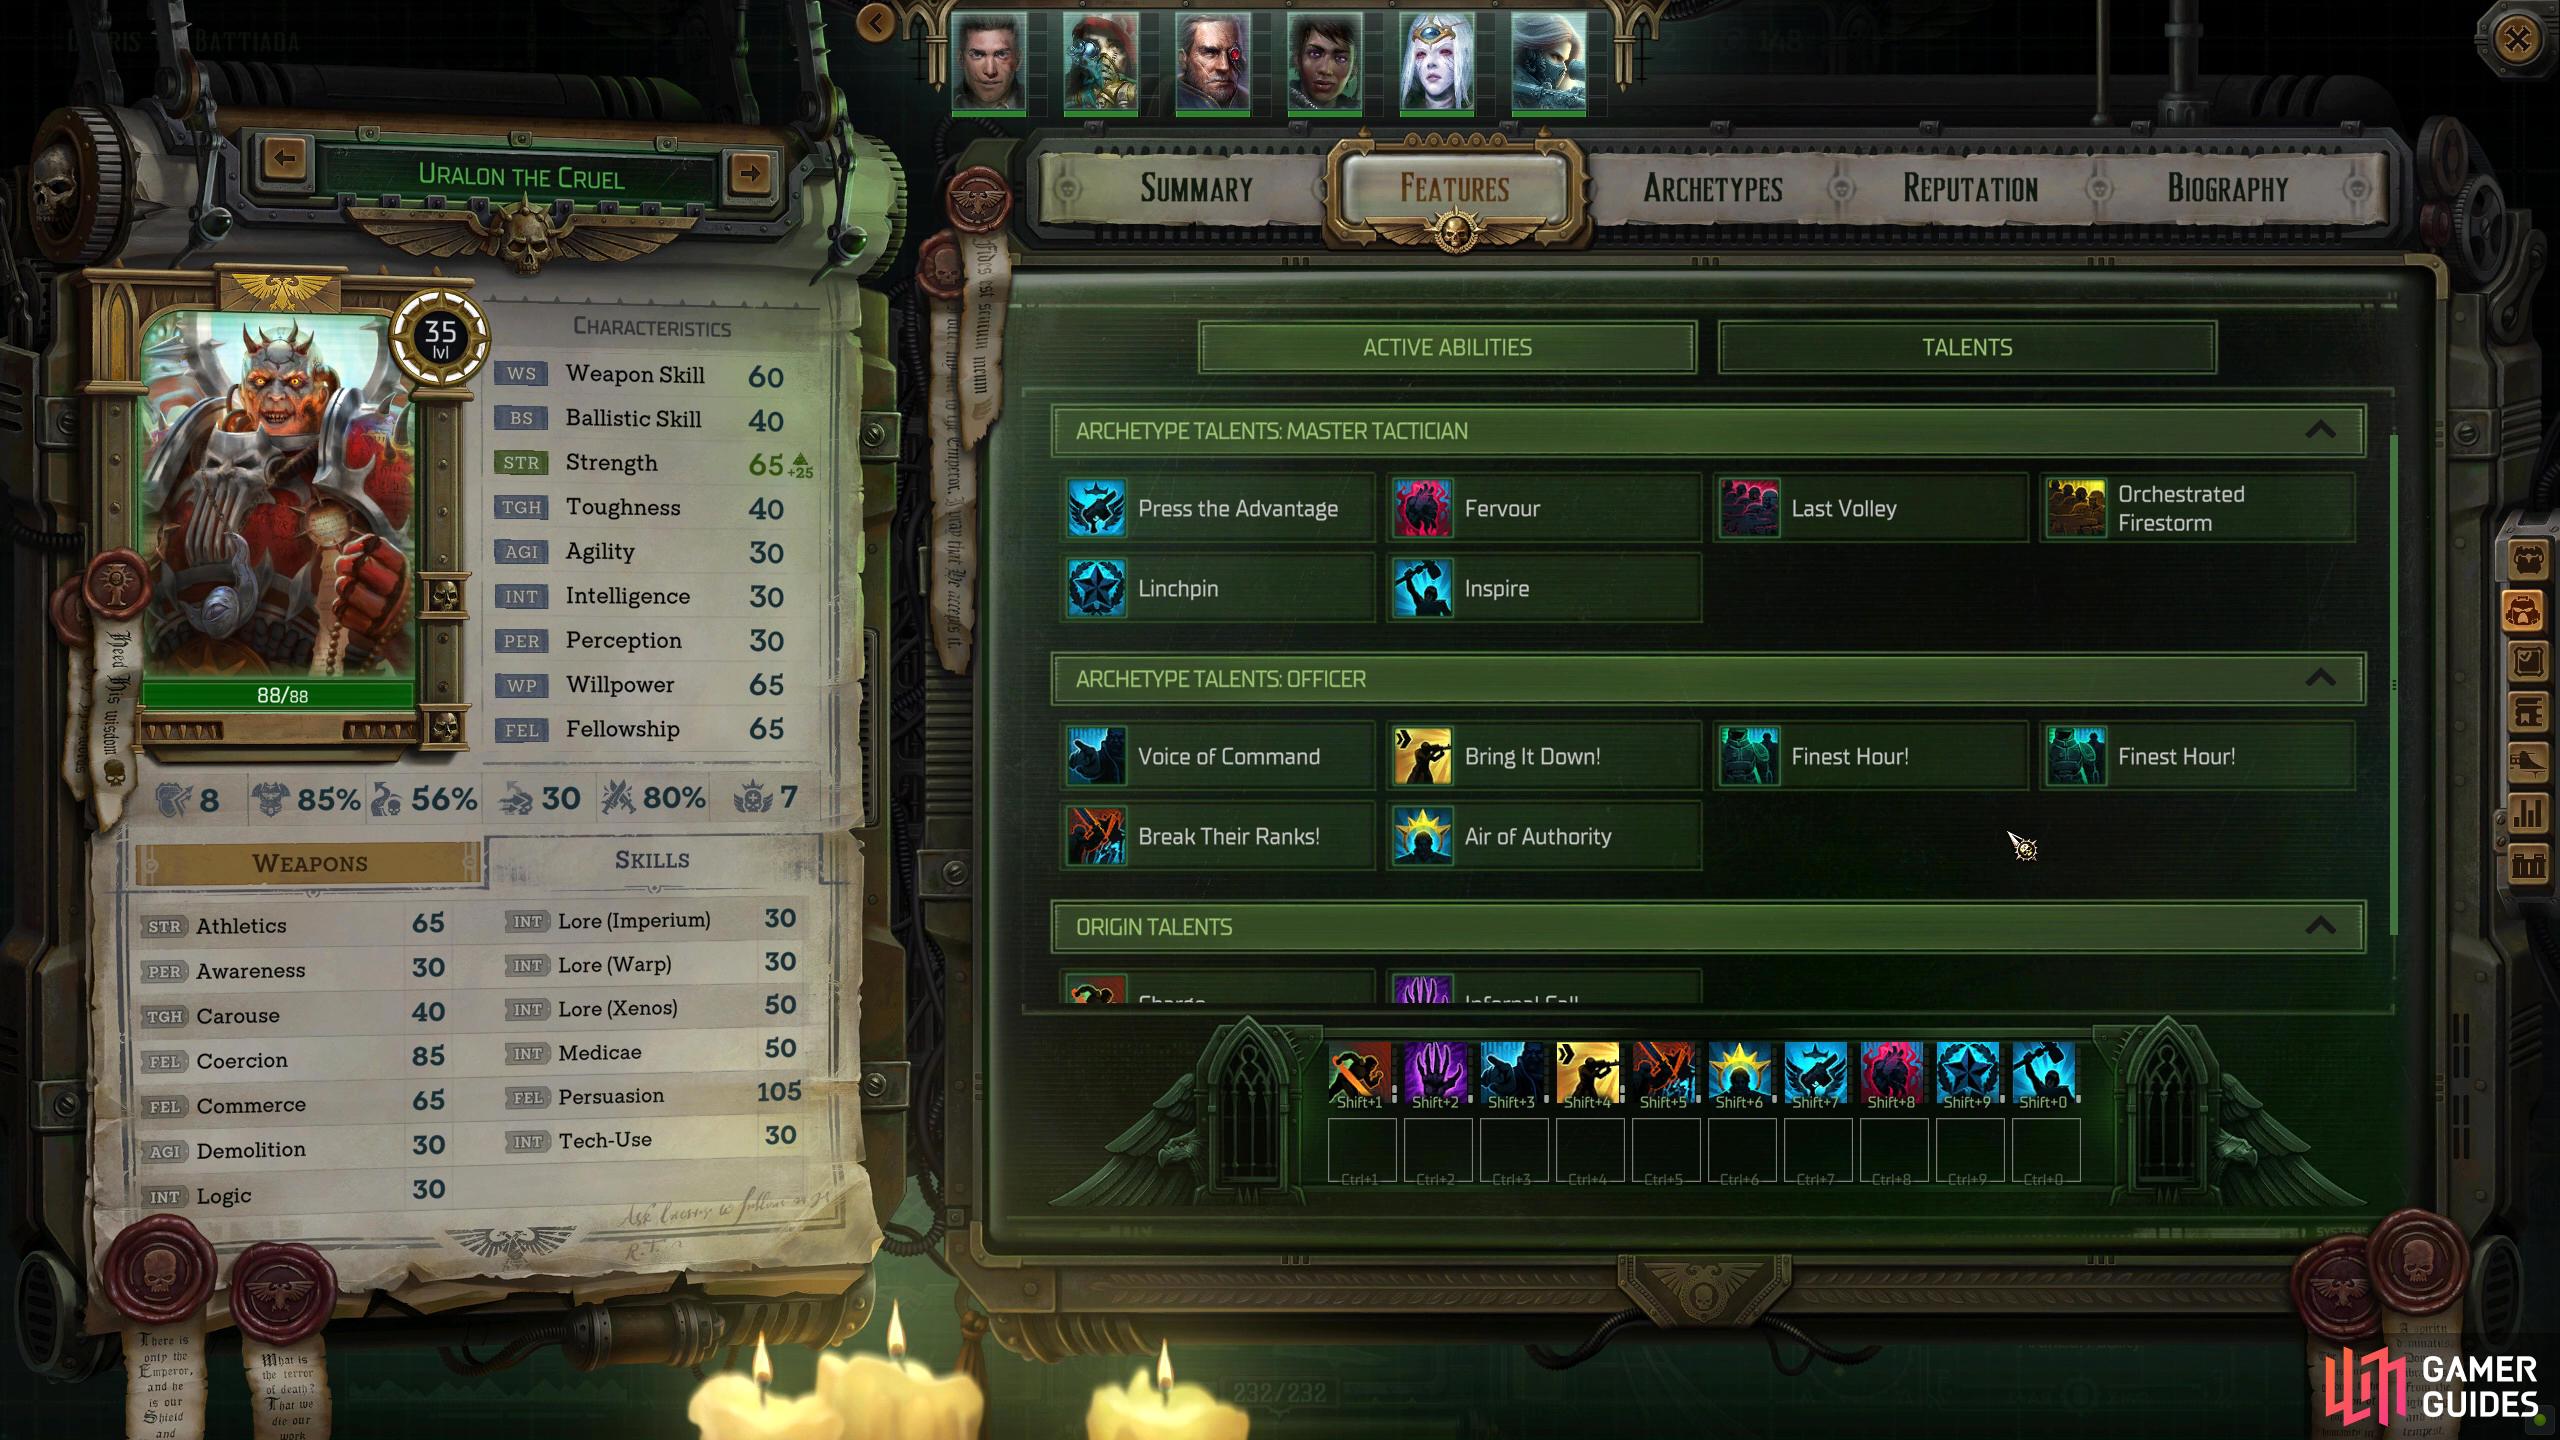

(1 of 2) Here’s a look at Uralon’s stats and talents.
Here’s a look at Uralon’s stats and talents. (left), No idea why he’s invisible here, but here you can see his Infernal Call talent. This can be used every turn. (right)
There you have it, when you regain access in Chapter 5, you’ll have Uralon in your party. Equip him with your favorite accessories, and then immediately find a battle to try him out. Uralon is sturdy thanks to his power armor, can buff the party thanks to his archetypes, and deals respectable damage at both close and mid-range. Finally, he can use his summons to give the enemies something else to shoot at besides your party members.
 Sign up
No Comments